Travel – Polynesian Cultural Center

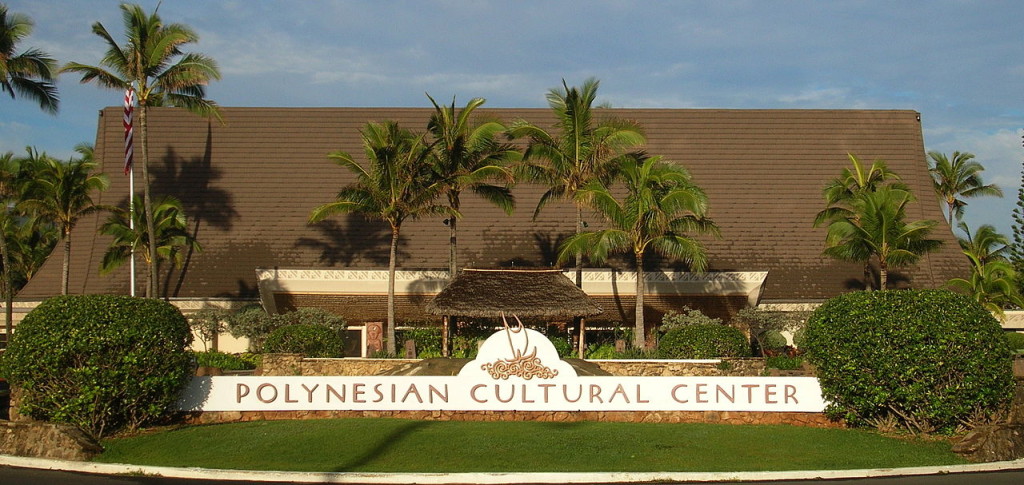
Polynesian Cultural Center entrance

A few years ago I did a Travel Post, Hawaii – the 50th State, which discussed the history of Hawaii and offered travel suggestions and points of interest to see when planning a trip.  One of those places to visit was the Polynesian Cultural Center located on the island of Oahu about 32 miles from Honolulu.  The Polynesian Cultural Center is a great place to experience the many cultures of the islands of the Pacific Ocean.  In this post I will discuss the origin of the Center as well as important tourist information pertaining to the various activities available for visitors.

A brief history of the Polynesian Cultural Center

The Polynesian Cultural Center is located in Laie on the island of Oahu.  The Center is operated by the Church of Jesus Christ of Latter Day Saints (known as the LDS or the Mormon Church) and it opened on October 12, 1963.  The Center occupies 42 acres located near the Brigham Young University – Hawaii and the LDS Laie Hawaii Temple and for this reason the Center is mostly staffed by BYU students.

Back in the 1940s and the 1950s, the local LDS Church would hold traditional luaus and hukilaus (a festive beach gathering with Hawaiian song and dance entertainment) as a way to earn money to rebuild the local church that was destroyed in a fire.  The gatherings proved to be very popular with the locals and the tourists, so in the 1960s the idea expanded into a permanent theme park/living history museum.  The original purpose of the Center was to provide employment for the BYU students and also to preserve the cultures of Polynesia.

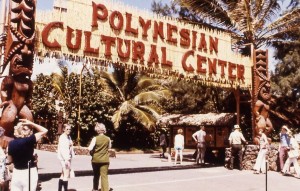
Polynesian Cultural Center - circa 1963

Polynesian Cultural Center Visitor information

When visiting the Polynesian Cultural Center there are several different admission packages.  General admission includes: access to explore the different island villages, the canoe pageant, tram tour of Historical Laie, and the IMAX film “Hawaiian Journey”.  Other packages include a variety of dining and entertainment experiences selections, such as Ali’i Luau dinner/show, the Island or Prime Rib buffets and the evening spectacular “HA: Breath of Life” evening show.  Visitors may also take a free shuttle tour of the BYU campus, the Laie Hawaii Temple ant the LDS visitor center.  For more information regarding the different types of package options and pricing, please see the Polynesian Cultural Center website – www.polynesia.com

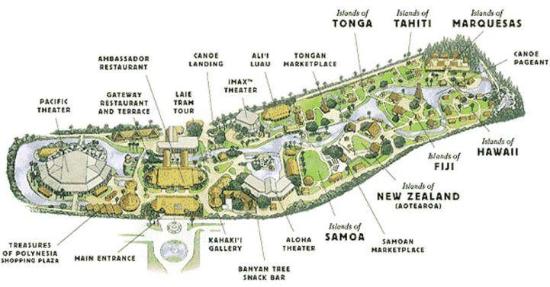
Polynesian Cultural Center map

“Hawaiian Journey” IMAX film –

A great place to start a visit at the Polynesian Cultural Center is by seeing the IMAX “Hawaiian Journey” film.  The 14-minute film offers spectacular scenes of Hawaii and features special effects that allow visitors to feel the ocean spray and the rumble of a volcano.  (Special Note:  There are “regular” seats available if visitors do not wish to experience the special effects)

“HA – Breath of Life” evening show – 

The “HA – Breath of Life” evening show is a shown once nightly in the 2,700 capacity Pacific Theatre, the amphitheater is beautifully landscaped with tropical plants and waterfalls.  The show, which premiered in 2011, is an extravagant special effects production with a cast of over 100 performers and tells the story of a Polynesian man named Mana and his journey through life experiencing love, tragedy and triumph.  The show features songs and dances from the different villages featured at the Polynesian Cultural Center.  Of course, one of the highlights of the show is the dramatic fireknives performers.  (Special Note: The amphitheater has terraced seating; according to the Center website they recommend seating in the Ambassador sections although any seat in the house will provide good viewing.  Also, Hawaiian evenings can sometimes get chilly and the theater is open-air, so I would recommend having a light sweater or jacket handy just in case)
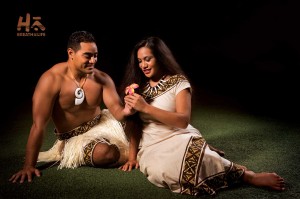
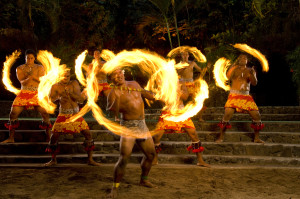
HA Breath of Life show    Fireknives

Canoe Pageant –

Meandering throughout the villages is a canal of water and lagoon where once daily there is a special performance featuring the different Polynesian regions.  On each double-hulled canoe, one from each of the different villages, there are performers dressed in colorful traditional costumes which dance and play the music of their region.  The current canoe pageant premiered in May 2010 and is called “Rainbows of Paradise”.  (Special Note: Be sure to check for the Canoe Pageant current show time when you first arrive at the Center and arrive early to the lagoon area before the show to get a good viewing spot)
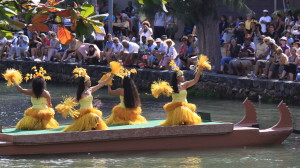
Canoe pageant 1    Canoe pageant 2

Polynesian Cultural Center Villages – 

As visitors enter the Polynesian Cultural Center, to the right of the visitor/orientation center there are several different Polynesian villages set around the main canal and lagoon.  Starting to the right of the main entrance and moving counter clockwise, the first village visitors will encounter is Samoa, then Aotearoa (islands of New Zealand), Fiji, Hawaii, the Marquesas Islands, Tahiti and Tonga.  Each village showcases their individual culture through entertainment performances and cultural learning experiences through demonstrations, exhibitions and crafts. There is also a special exhibit on Rapa Nui (Easter Island).

Listed below are the Polynesian Cultural Center villages and a brief description of each:

Samoa Village –

Samoa is comprised of two separate areas located about halfway between Hawaii and New Zealand, the independent nation of Samoa and the smaller American Samoa, the only U.S. territory located south of the equator.  Both nations speak the same language and share the same cultural traditions.  Samoans are generally known for their good nature and enjoyment of life.

DCF 1.0

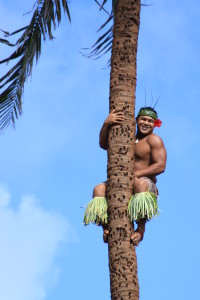
The Samoa village has several presentation times throughout the day and the demonstrations are interesting and very entertaining.  Some of the demonstrations are how to start a fire with two sticks, how to crack open a coconut and how to climb a coconut tree.
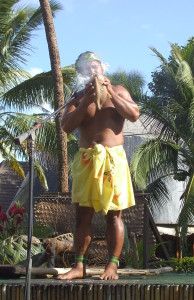
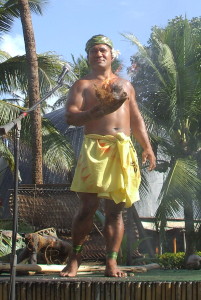
Samoa - fire 1  Samoa - fire 2  Samoa - tree climber

Aotearoa (New Zealand) Village –

Aotearoa signAotearoa is the Maori name given to the northern island of New Zealand, the most common translation is “the land of the long white cloud” which has been used by the Maori people for 1,000 years.  (Special note:  As visitors enter the Aotearoa village listen for the traditional Maori greeting “Kia Ora”, which means good health)

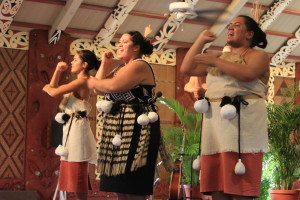
The Aotearoa village has a limited number of presentation times throughout the day.  After visitors enter the Maori meeting house, the guides will give a brief explanation of the intricate carving and the symbolic significance of the various architectural features.  The guides will also explain the unusual Maori facial tattoos and their ancient origins, they will also explain the meaning behind their iconic protruding tongue gesture.  Performances at the Aotearoa village include the haka (the Maori war dance) and a rhythmic dance using poi balls (originally made of dried moss wrapped with raupo or flax).  Demonstrations include the tititorea (a Maori stick game) which is used in training hand and eye coordination, the object of the game is not to drop the sticks as they are passed in various patterns and in rhythm to the music.  (Special note:  Before leaving the Aotearoa village, a fun idea for children or adults is to receive a temporary Maori tattoo)

poi ball dance

Fiji Village –

The independent nations of the Fiji Islands are located near the equator.  Historically, the people of Fiji have been known as seafarers that have traveled throughout the Pacific over several thousand years interacting with many of the other Polynesian people.  In 1874 Fiji became a British colony and laborers from India were brought in to work on the sugar plantations then, after almost one hundred years, the British government granted Fiji independence in 1970.

Fiji sign

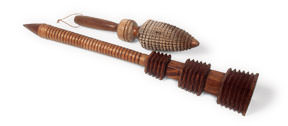
When visiting the Fiji village, be sure to see the cultural presentations and demonstrations which are given several times during the day.  Visitors will see a Lali (log drum) musical presentation and a poi ball dance.  While in the Fiji village be sure to see the various types of Fiji weapons made from tropical hardwoods, such as the I wau (a type of war club) and I ula (a throwing club with a short handle and bulbous head.

Fiji village - clubs

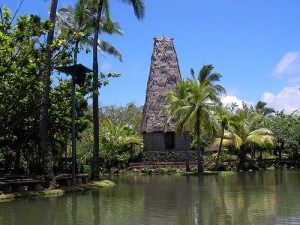
Also be sure explore the Fiji village temple (Bure Kalou or “spirit house”) and other village houses, such as the Vale Levu (Fijian chief’s house) which has specific doors for servants and visitors, another for the chief’s family and one exclusively for the use of the chief.  Tradition states that anyone entering the chief’s door can be put to death.

Fiji village - temple

Hawaii Village –

Hawaii became the 50th state on August 21, 1959 and is an archipelago (a group of islands stretched over a body of water).  The volcanically formed islands stretch over 1,500 miles in the Pacific Ocean and the eight main islands from northwest to southwest are: Nihau, Kauai, Oahu, Molokai, Lanai, Kahoolawe, Maui and the “Big Island” of Hawaii.  In 1778 James Cook, a British explorer, visited the area and named the islands “the Sandwich Islands” to honor the sponsor of the expedition John Montagu, the 4th Earl of Sandwich.  Throughout the centuries, with the increasing influence of European and Chrisitanity, much of the Hawaiian culture was lost or banned and later through the concerned efforts and encouragement of both King Kalakaua and Princess Liluokalani, there was a resurgence of Hawaiian traditions and customs.

Hawaii sign

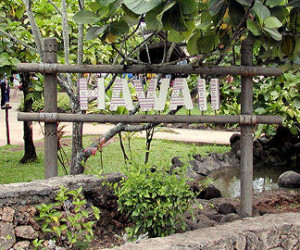
The Hawaii village features several different presentations and demonstrations shown several times throughout the day and many will seem very familiar to visitors.  Visitors will see a dance demonstration of the hula which is the iconic and beautiful dance set to music or a chant using the body, specifically the hands and hips to tell a story. Another interesting demonstration is how tropical leaves and flowers can be made into a Hawaiian lei (a floral garland which can be given as a traditional Hawaiian greeting or to show affection).  Visitors should also take the time to tour several of the hale (a Hawaiian house or building) which are traditionally made with pili grass thatched roofs, thus the Americanized nickname of “grass shack”.

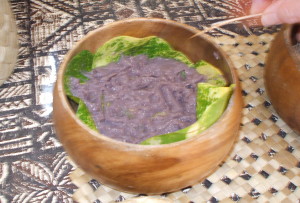
Before leaving the Hawaii village, visitors should see the taro (a root plant that is a staple in the Polynesian diet) presentation and demonstration of how it is prepared for eating.  The taro root is baked or steamed in water and then mashed to make poi which is slightly purple in color and the consistency can vary from very thick to thin depending on the preference of the cook or their guests.  (Special Note:  If you are interested in tasting poi, visitors are given the opportunity at the end of the presentation and I would recommend giving it a small taste!)

Hawii - poi

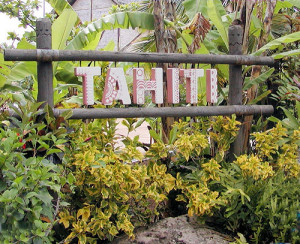
Tahiti Village –

Tahiti is a French Polynesian archipelago comprised of volcanic islands located in the southern portion of the Pacific Ocean.  Modern Tahiti is a wonderful blend of ancient Polynesian heritage with French sophistication and style.

Tahiti sign

The Tahiti Village has many presentations and demonstrations that are scheduled throughout the day.  Visitors will see a demonstration of the ote’a, a traditional Tahitian dance with fast hip-shaking to loud rhythmic to ‘ere drum beats.  The Tahiti Village also has demonstrations which show how the Tahitians make both flower and shell leis, visitors can also sample delicious Tahitian coconut bread or participate in a spear-throwing competition.

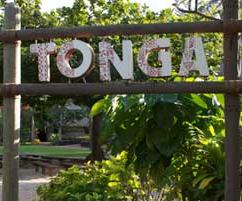
Tonga Village –

Tonga is a Polynesian sovereign state, has never been ruled by a foreign power and is an archipelago made up of 177 islands that are spread over 500 miles.  Fifty-two of the islands are populated and most have white sand beaches, coral reefs and tropical rain forests.

Tonga sign 1

Tonga is known as the “friendly islands” and as visitors walk around the village it is easy to see why.  Presentations and demonstrations include performances of both the lakalaka (considered the national dance of Tonga) and the mauluulu (a type of sitting dance).  Be sure to see one of the most popular presentations of the ta nafa (Tongan drum)  

Other Exhibits at the Polynesian Cultural Center-

Rapa Nui (Easter Island) Exhibit

As visitors move through the many Polynesian villages, there is an exhibit on Rapa Nui also known as the Easter Island.  Rapa Nui is a Chilean island in the southeast portion of the Pacific Ocean and, according to Polynesian ancient oral history and supported by linguistic specialist, a Marquesas Island chief that led his people to the island about 1,500 years ago.  The name Easter Island was given by the Dutch explorer, Jacob Roggeveen, when he visited it on Easter Sunday in 1722.
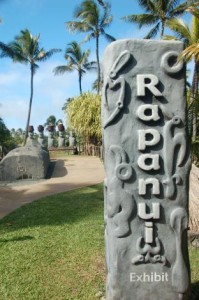
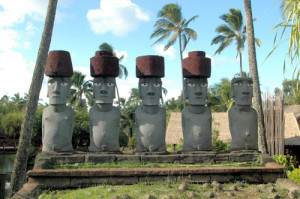
Rapanui sign 1    Rapa Nui

Rapa Nui is world famous for the several hundred mo’ai (monolithic human figures) which are scattered around the island, the god-like statues are ringa ora (living faces) of the Rapa Nui natives’ ancestors which are positioned on the island to look toward their original homeland.  The mo’ai built at the Polynesian Cultural Center were made from specially formulated cement to closely duplicate the scoria (a type of volcanic rock) found on Rapa Nui, natives from the island were also brought to the Center to carve the cement statues of the exhibit.

Iosepa “Voyage of Discovery” Exhibit –

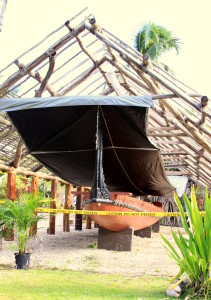
Tucked away among the villages of the Polynesian Cultural Center is a halau (a place of learning) which holds an almost 60 foot long double-hulled canoe made of Fijian dakua wood.  Twice a day there is a presentation about how the Iosepa is used by BYU – Hawaii as a sailing classroom where students learn about now the ancient Polynesians navigated across the Pacific Ocean, when the Iosepa is not being used during the spring and summer months it is stored at the Center.  Visitors to the exhibit will also learn about how a celestial navigation compass is used, how the canoe is prepared and the activities the “crew” will perform during an ocean voyage.

Iosepa exhibit

This concludes the Travel post on the Polynesian Cultural Center and for more specific visitor information, please check out their website- www.polynesia.com For more tourist information about planning a trip to Hawaii with suggestions on places to visit, please click on the Travel post link to Hawaii – the 50th State.

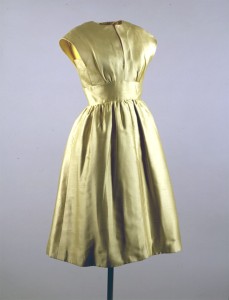
Jackie Kennedy – Her White House Dresses

Jacqueline Jackie” Bouvier Kennedy (born: July 28, 1929 died: May 19, 1994) was the wife of the 35th President of the United States, John F. Kennedy.  She was the First Lady from 1961 until her husband’s tragic assassination in 1963.  She was young and beautiful, only 31 years old at the start of her husband’s presidency, and during her years in the White House she set the fashion style for the nation in the early 1960s. The American public was fascinated by her simple but elegant clothing, her iconic pillbox hats and bouffant hairstyle.

Her chosen designer, Oleg Cassini, was selected shortly before the inauguration just as he was just emerging in the fashion industry.  The First Lady and Cassini worked together throughout her husband’s presidency, collaborating on her wardrobe for official engagements which would reflect Jackie’s personal sense of style, with a distinctive and subtle European fashion design while being manufactured in the United States.  The dresses had simple, clean lines featuring A-line skirts, three-quarter length sleeves or most often sleeveless sheaths matching coats or two piece suits consisting of a simple straight skirt and matching jacket for daytime events. Also for daytime wear shoes, gloves and hats were custom made or purchased to match each individual outfit.  Although Halston did not originally come up with the pillbox hat design, he did make several custom hats for the First Lady.  For nighttime engagements, such as State dinners or other more formal occasions, the dresses were either knee-length or floor-length, depending on the event, and similar in their design elements but made from elegant fabrics sometimes with chiffon, beading or silk embroidery accents.  Cassini produced over 300 dresses for Mrs. Kennedy during her time in the White House and all the dresses were made by a staff of skilled seamstresses specifically assigned for making the clothing for the First Lady using fabrics of the finest linen, wool, satin and shantung silk.  Cassini was not the only fashion designer of Mrs. Kennedy’s dresses during the White House years and occasionally she collaborated with other designers.

In 2002, while on a visit to Washington, D.C., I saw the “Jacqueline Kennedy – the White House Years” exhibit which featured several of her dresses worn during that time.  It was a great experience to see these dresses that inspired and set the style for a generation and upon see the displays, the dresses were beautifully made with wonderful detailing.

So, let’s start by looking at a few of Mrs. Kennedy’s iconic dresses which she worn as the nation’s First Lady.  The dresses are listed in chronological order dating from the beginning of her husband’s presidency with the Pre-Inauguration Gala through to the end with the assassination and funeral of President Kennedy.

Pre-Inauguration Gala Dress –

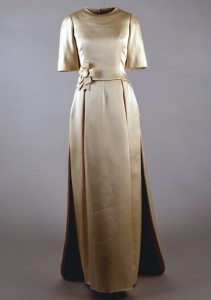
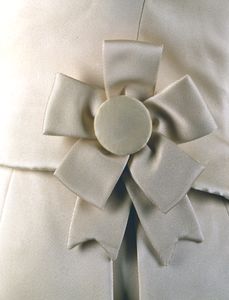
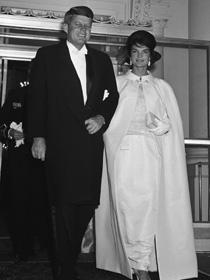
For the Pre-Inauguration Gala Dress held on January 19, 1961at the National Guard Armory in Washington, D.C.  The night before President Kennedy’s Inauguration Day the city was hit with a major snow storm that brought over eight inches of snow.  When Mrs. Kennedy left for the Gala from their Georgetown home, the snow was lightly falling but she was wearing no coat over her lovely dress.  Cassini designed a beautiful ivory silk sating evening gown with a fully lined A-line skirt and three-quarter length sleeves which Mrs. Kennedy worn with elbow length gloves.  The detail of the cockade (a knot of ribbon or fabric with a circular shape in the middle) which was attached at the waist was per Jackie’s request was a nod to her French Bouvier ancestry.  (Fashion Note:  Some fashion critiques think that this dress worn for the Pre-Inaugural Gala was the more beautiful than the gown that was worn for the Inaugural Ball the next day and I would have to agree with this assessment)

Pre-inaugural gala dress    Inauguaral gala dress - closeup

Inaugural ball dress 2a

Inauguration Ceremony Dress and Coat –

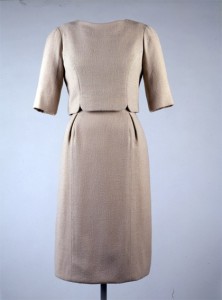
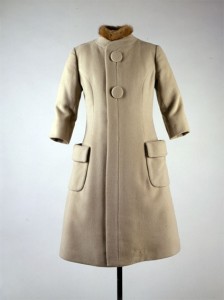
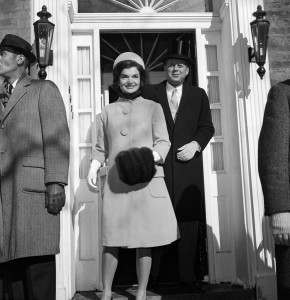
On President John Kennedy’s Inauguration Day, January 20, 1961, Cassini designed two separate pieces – a simple dress and coat both made of beige wool crepe.  Cassini selected the fabric for the coat specifically because he knew that the other political wives would be wearing their heavy fur coats “looking like overstuffed bears” and he wanted the new First Lady to look both youthful and fashionable.  The over-blouse dress featured a simple round neckline, three-quarter length sleeves and a notched detail at the waistline.  Worn over the dress was an equally simple knee-length coat which featured two large buttons at the front and two side pockets at the hip.  To complete her ensemble, Mrs. Kennedy wore a small sable circlet at her neck, a matching sable muff and a Halston pillbox hat which she chose to wear toward the back of her head.  (Fashion Note:  Numerous Halston pillbox hats were custom made for Mrs. Kennedy throughout her husband’s presidency and would later become a fashion accessory strongly associated with the First Lady)

Inaguruation ceremony - dress    Inaguruation ceremony - coat

Inaguration ceremony coat and dress

Inaugural Ball Gown and Cape –

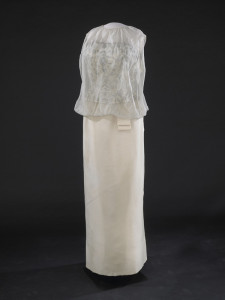
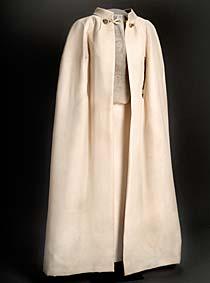
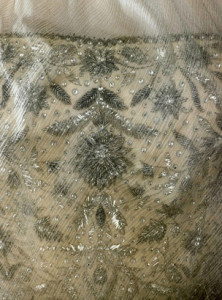
On the evening of Inauguration Day; after the swearing-in ceremony, congressional luncheon and parade, President Kennedy and Mrs. Kennedy formally dressed for the several Inauguration Balls planned for the night festivities.  Mrs. Kennedy wore an off-white sleeveless gown made of silk chiffon over peau d’ange (satin-weave fabric) featuring a strapless bodice embellished with silver colored silk embroidery thread and seed pearl beading, a matching cape  with toggle closure at the neck was worn over the dress.  The dress was designed in collaboration with Mrs. Kennedy, who drew the sketches of her dress ideas, and Ethel Frankau of Bergdorf Custom Salon located in New York City.

Inauguaral ball dress 1    Inaguruaral ball cape
 

Inauguaral ball dress - closeup Inaugural ball dress 2a

Ivory Embroidered Evening Gown –

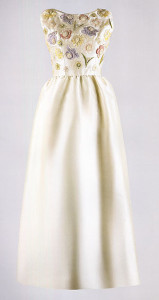
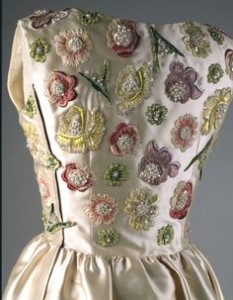
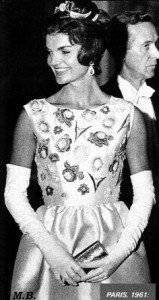
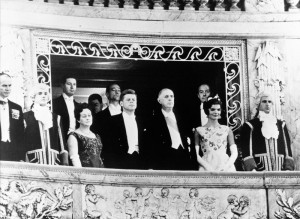
During the first year of President Kennedy’s administration, a State Visit was planned to France where the President would have several meeting with Charles de Gaulle the leader of the French Republic.  Mrs. Kennedy had been a longtime admirer of French Fashion Design but for the visit she had planned to wear American designs exclusively with the exception of a particular dress.  For the dinner at Versailles, France on June 1, 1961 she wore a stunning Givenchy evening gown of ivory ziberline (a heavy silk fabric with a twill weave) which featured an A-line skirt.  The bodice of the dress was heavily embroidered with roses and lilies of the valley created by Hurel with silk thread, ribbon and seed pearls.  (Historical Fashion Note:  The dress was worn again for a congressional reception held in the White House on April 10, 1962)

Ivory emroidered evening dress 1    Ivory embroidered evening dress closeup
 

Ivory embroidered evening dress 3    Ivory embroidered evening dress 2        

Blue Evening Gown –

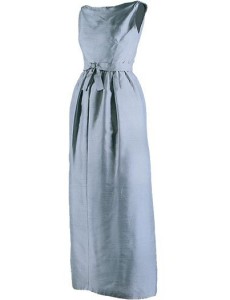
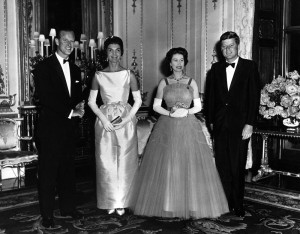
This lovely dress was worn by Mrs. Kennedy during a State Visit to England for a dinner hosted by Queen Elizabeth II at Buckingham Palace in London on June 5, 1961.  The designer was Chez Ninon and the light blue silk shantung evening dress featured a belt with a decorative bow at the waist that created soft pleats, the dress was an interpretation of a Givenchy dress.  (Historical Fashion Note:  The dress had been worn previously for a dinner with the Prime Minister of Japan, Hayato Ikeda, at the Japanese Embassy in Washington, D.C. on June 22, 1961)

Blue evening dress 1 PX 96-33:17

Red Dress –

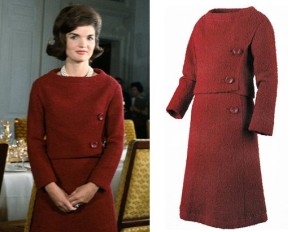
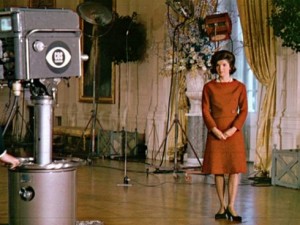
During the Kennedy administration, Mrs. Kennedy was responsible for an extensive White House restoration.  When the project neared completion, a special CBS pre-recorded televised tour of the White House was given by Mrs. Kennedy on February 14, 1962 and was watched by millions of Americans; incidentally she won an Emmy for the broadcast.  For the televised program, Mrs. Kennedy wore a two-piece day dress by Chez Ninon featuring long sleeves and a bateau neckline (a high wide neckline that follows the curve of the collarbone ending at the shoulder seams), the dress is said to be a copy of a Christian Dior original.  To complete her ensemble, Mrs. Kennedy wore a three strand pearl necklace and pearl earrings.

White House - television tour dress 1 White House - television tour dress 2

Black Dress –

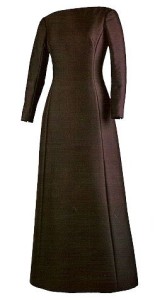
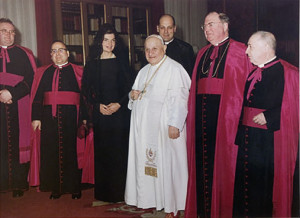
Before traveling to India for a diplomatic trip, Mrs. Kennedy stopped in Rome and had an audience with Pope John XXIII at the Vatican on March 11, 1962.  Per the strict rules of the Vatican regarding papal visits, Cassini designed a full-length long sleeve black dress made of black alaskine (a sturdy fabric that is a blend of wool and silk) worn with a stiff taffeta petticoat underneath.  To complete her ensemble, the First Lady wore a long black mantilla (a lace or silk veil or shawl worn over the head and shoulders).

Black Dress - Vatician visit    Vatican black dress 1

Apricot Dress –

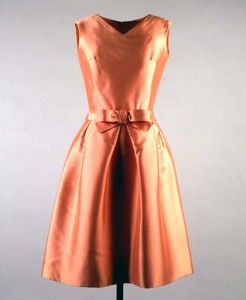
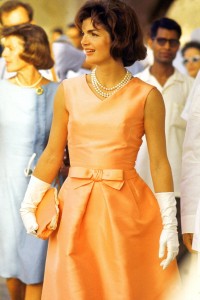
Mrs. Kennedy traveled to India and Pakistan with her sister, Lee Radziwill, on a diplomatic tour on March 12-26, 1962.  Taking inspiration from the countries she was to visit, her wardrobe for the trip was designed in more colorful colors.  A perfect example of this was the bright dress she wore on March 17, 1962 which she wore for a boat ride on Lake Pichola in Udaipur, India.  She wore a Cassini designed sleeveless apricot colored, knee length dress made in ziberline (with a v-neckline which was accented with a bow at the waist.

Apricot dress 1    Apricot dress 2

Pale Yellow Dress –

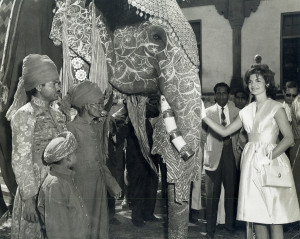
During the diplomatic trip to India and Pakistan, Mrs. Kennedy wore a dress designed by Gustave Tassell.  The dress was made of pale yellow silk shantung and featured a slit opening at the neckline, cap sleeves and a three-inch wide band around a fitted waist with a full skirt.  While in Jaipur, India, where the First Lady met with members of the Peace Corps, she was joined by her sister for an elephant ride at the Amber Palace.

Yellow dress 1 Yellow dress 2

Celadon Evening Dress –

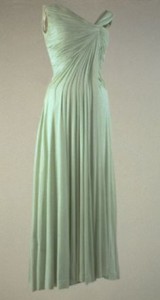
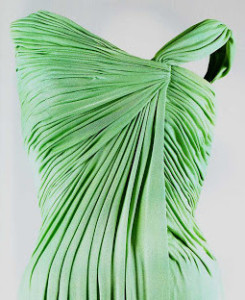
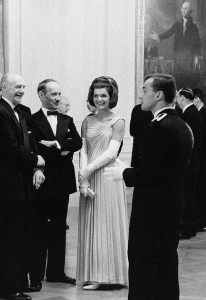
Mrs. Kennedy wore a lovely evening dress designed by Cassini in a beautiful shade called celadon (a light green color) made in a silk jersey.  The dress is very fluid in style and features a gently draped bodice and skirt forming soft pleats.  Mrs. Kennedy wore the dress to a dinner honoring the Nobel Prize winners which was held at the White House in Washington, D.C. on April 29, 1962.

Celedon evening dress 1    Celedon evening dress 1a

Celedon evening dress 2a

Pink Evening Dress –

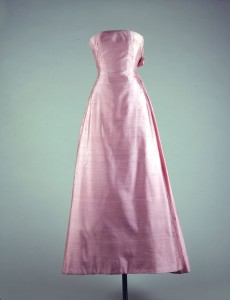
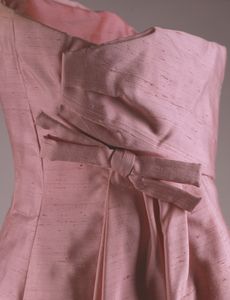
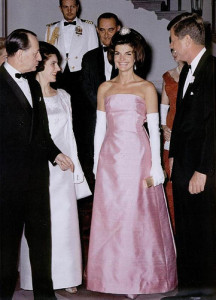
State Dinners at the White House were always formal events and the one honoring Andre Malraux, the French Minister of Culture.  Malraux was responsible for bringing the Mona Lisa portrait by Leonardo da Vinci to the United States and a dinner was held at the White House on May 11, 1962 to honor him.  Mrs. Kennedy wore an evening gown designed by Guy Douvier made in a soft pink silk shantung, the dress wraps together in the back and is tied with a stiff Kabuki-style bow.

Pink evening dress 1    Pink evening dress 1 - back closeup

Pink evening dress 2

Pink Chanel Suit –

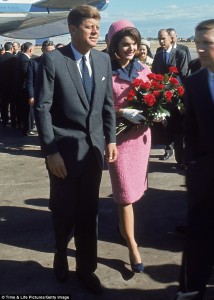
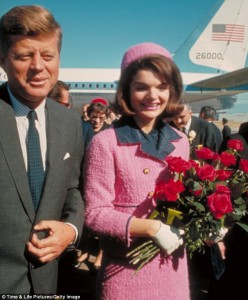
During a fateful political trip to Texas, Mrs. Kennedy accompanied President Kennedy scheduled for November 1963.   The trip started with their arrival in San Antonio on November 21 with additional stops in Houston and Forth Worth.  The next day, November 22 there were additional events in Fort Worth then onto Dallas and Austin followed by a weekend at Vice President Johnson’s Ranch for some relaxation.  On the second day Mrs. Kennedy wore a Chanel styled suit which was possibly purchased from the Chez Ninon ready-made collection, the outfit was a personal favorite of her husband.  The pink boucle wool suit featured two pieces, a double-breasted jacket with a navy blue collar and a straight skirt.  (Fashion Note:  It was later confirmed in a Coco Chanel’s 2010 biography that the suit was created with the approval of Chanel using fabric, button and trim supplied by the company but made in New York by Chez Ninon.  The reasoning was that for patriotic purposes the suit was made in the United States and not in France)

article-2510064-1983B6E000000578-858_634x888    article-2510064-1983B6EF00000578-245_634x765

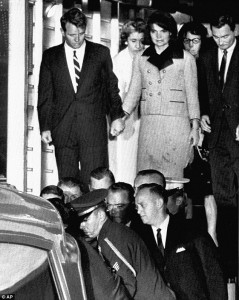
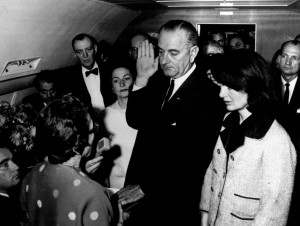
Tragically, while the motorcade was traveling through the streets of downtown Dallas on November 22, 1963 President Kennedy was shot and fatally wounded, and later died at Parkland Hospital.  In the aftermath, Mrs. Kennedy’s pink suit was stained with her husband’s blood and when asked if she wanted to change she responded, “No, I want them to see what they have done to Jack”.  When Air Force One was on route back to Washington, D.C., with the President’s body placed in a coffin at the back of the plane, the new President Lyndon Johnson was sworn in and he insisted that Mrs. Kennedy was present by his side.  Photos taken that day show a distraught Mrs. Kennedy, hair in disarray and her hat gone missing but still wearing the blood stained pink suit.  Mrs. Kennedy never regretted her decision regarding keeping the suit on until she arrived in Washington, D.C.

article-2510064-1984284100000578-699_634x794 JOHNSON SWORN

Historical Fashion Note:  When Mrs. Kennedy finally removed her pink suit, her maid folded it and placed it in a box that was later sent to Mrs. Kennedy’s mother’s house which she stored in her attic with the simple words, “November 22, 1963”, written on the top of the box.  Eventually, the suit was given to the National Archives, transferred into an acid-free container and stored in a climate-controlled room where it has remained there for several years. In 2003, after Mrs. Kennedy’s death in 1994, her daughter, Caroline (the last remaining member of President Kennedy’s immediate family), officially deeded the suit to the National Archives with the condition that prevents it from being seen by the public until at least 2103.  An interesting point is that Caroline has declined to comment on the reasons for this restriction; it is the only item in the Kennedy assassination collection with this specific limited access and other items, such as President Kennedy’s clothing he was wearing at the time of the assassination and be viewed by researchers that meet special criteria of the National Archives.

For more information about another important dress, her memorable wedding dress, please look for an upcoming post about the wedding of John F. Kennedy and Jacqueline Bouvier.

For more information about the Kennedy Presidential Library located in Boston, MA where many of Mrs. Kennedy’s dresses are displayed, please click on the link.

Craft – Tartan & Stag Decorative Crafts

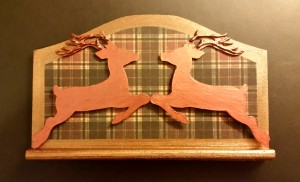
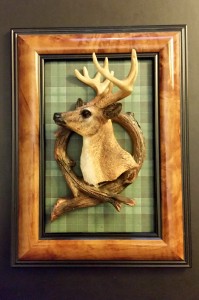
Tartan & Stag - version #2 finished 1

This month I did a Travel post on Balmoral Castle located in the Highlands of Scotland.  The British Royal Family for centuries has been spending the summer months at Balmoral annually since the time of Queen Victoria.  Balmoral has a certain style unlike any of the other Royal residences.  The interior of the house is decorated in the distinctive Highland style with plenty of tartan material and stags that were stalked and killed at Balmoral and featured throughout its many rooms.  So, inspired by this style of design I decided to make a few tartan and stag decorative items.  Listed below are the craft project supply lists and instructions for three different versions.

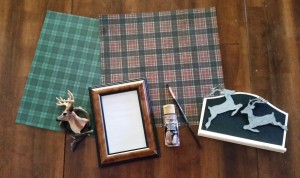
Tartan & Stag - supplies

Tartan & stag decorative craft item supply list

  • Tartan patterned scrapbook paper
  • Stag accessory – all three ornament pieces I used were found in the Christmas section of my local craft store.
  • Picture frame for version #1, size determined by ornament used
  • Wooden plaque for versions #2 & 3, size determined by ornament used
  • Sandpaper for versions #2 & 3
  • Paint / paint brush for versions #2 & 3, gold and bronze colors
  • Glue stick to attach scrapbook paper
  • Glue gun and glue stick to attach stag ornaments

Tartan & stag decorative craft item – version #1

  1. Disassemble the picture frame; remove frame backing, inserts and glass
  2. Cut the tartan scrapbook paper to fit the frame size
  3. Attach stag ornament to scrapbook paper used hot glue gun and glue stick.  For heavier ornaments use glue in multiple places to secure it properly.  Option: To provide additional support for a heavier ornament, scrapbook paper can be glued to a piece of cardboard.
  4. Reassemble the picture frame; first insert the ornament/scrapbook paper (optional cardboard attachment), then the glass and lastly the frame backing

Tartan & Stag - version #1 finished

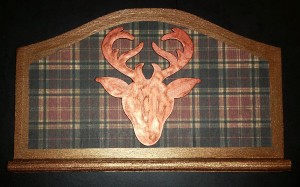
Tartan & stag decorative craft item – versions #2 and 3

  1. Sand the wooden plaque to provide a smooth surface and prepare it for painting
  2. Paint the wooden plaque with gold paint, let dry
  3. Cut the tartan scrapbook paper to fit the wooden plaque, allow space to show a small border.  Craft Tip: Be sure to level the pattern before cutting
  4. Attach the tartan scrapbook paper to the wooden plaque with glue stick, smooth if necessary allow paper to lay flat with no wrinkles
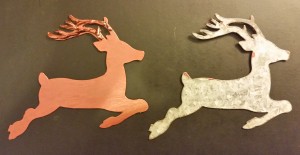
  5. Paint the stag ornament(s) with bronze paint, let dry

Tartan & Stag - version #2 painted stag

  1. Attach stag ornament(s) to the wooden plaque using hot glue gun and gun stick  Craft Tip: To add dimension to the piece and raise it off the wooden plaque, add a small piece of wood under the stag ornament(s)

Tartan & Stag - version #3 finished

Travel – Balmoral

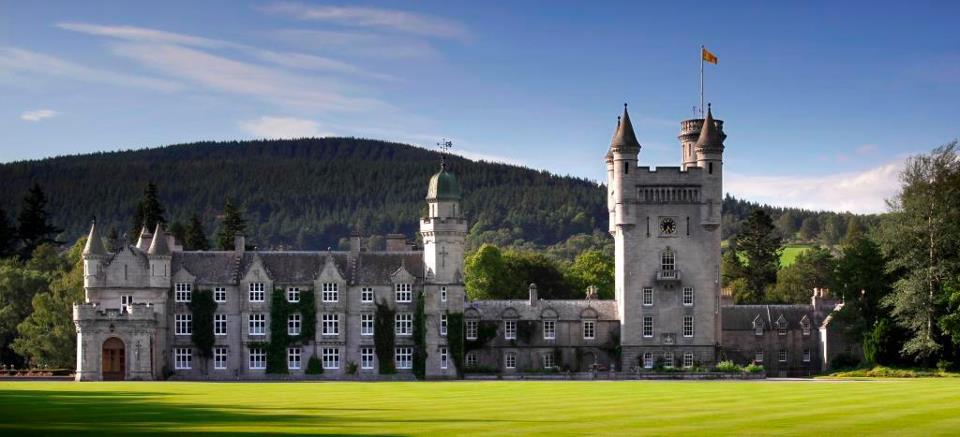
Balmoral - exterior

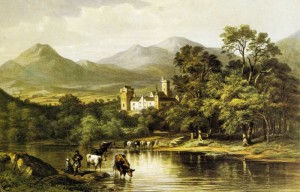
The British Royal Family lives by tradition and for centuries now they have been spending the summer months, August to October, at Balmoral in the Highlands of Scotland.  Balmoral has been a Royal private residence since the time of Queen Victoria when it was purchased by Prince Albert in 1852.  Initially, when the Royal couple visited Edinburgh as newlyweds, the Highlands reminded Prince Albert of his home back in Germany and they decided it would be a perfect place to bring their young family.

Balmoral has been enjoyed by several generations of the Royal family throughout the years and it was happily where Prince Charles and Princess Diana spent part of their honeymoon in 1981.  But sadly, after their divorce fifteen years later, it is where Prince Charles and his sons heard the tragic news of Diana’s death in a car crash in Paris in 1997.

The History of Balmoral

Prior to the mid-1600s, the first structure on site was a small hunting lodge used by King Robert II of Scotland and in 1451 a larger house with a tower was built by Alexander Gordon and the estate became known as “Bouchmorale”.  In 1662, the estate passed to Charles Farquharson and then in 1798 James Duff the 2nd Earl Fife purchased the property and several years later it was leased it to Sir Robert Gordon in 1830.

Balmoral 1853

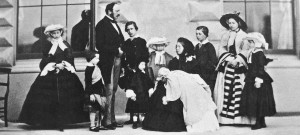
Then in 1842, Queen Victoria and Prince Albert visited the Highlands of Scotland and stayed in Edinburgh.  They loved the area so much that they returned again several times over the following years, Prince Albert in particular loved the region as it reminded him of his beloved German homeland.   For this reason the Royal Couple were considering a home in Highlands and decided it would be a perfect for their young family to escape London during part of the hot summer months every year.

Balmoral - Queen Victoria and family

Prince Albert purchased Balmoral in 1852 which meant that the property was held privately by the Royal Family and that it was not part of the Crown.  In addition to Balmoral, the adjacent property known as Birkhall was purchased at the same time to further afford the Royal Family more privacy.  But with their family growing quickly, the Balmoral house proved to be too small and the decision was made to build a larger house.  More room was also needed to accommodate visitors of the Royal Family and also Queen Victoria’s official cabinet members.  William Smith, an architect from Aberdeen, was commission for the building project and he worked closely with Prince Albert who has some very definite opinions on the new home’s designs.  In the summer of 1853, a site not far from the original building was chosen and Queen Victoria laid the corner stone that September.  By waiting to demolish the old building, the Royal Family was able to stay there while the new house was being built.  (Interesting Note:  Located on the expansive front lawn, opposite the tower and about 100 yards from the path, is a stone marker that was placed on the site of the original house at Balmoral that was demolished in 1856)

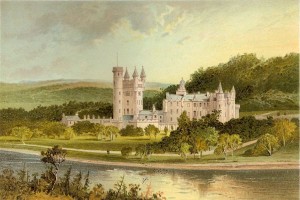
Balmoral 1897

The architectural design is known as Scottish Baronial style and Balmoral was built with granite found on the property. The home floor plan is symmetrical in design with two blocks of rooms arranged around a central courtyard with a tall 80 foot turret topped clock tower at one end of the block.  The interior of the house was decorated in the distinctive Highland style with plenty of tartan featured throughout the many rooms.  The construction of the main house was finally completed in 1856.

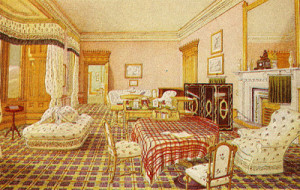
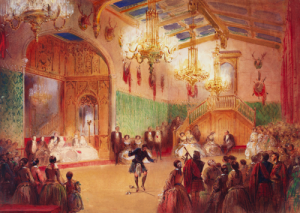
Balmoral - Queen's drawing room 1857

Upon spending increasing amounts of time at Balmoral, Queen Victoria and Prince Albert immersed themselves in the Highland culture.  The interior of the house was uniquely decorated with plenty of distinctive Highland tartan and taxidermy stag heads which were featured throughout the many rooms of Balmoral.  Queen Victoria enjoyed long hours spent walking on the moors and Prince Albert spent days hunting deer on the property.  The Royal Family also attended the Highland games at nearby Braemar and hosted the annual Ghille Ball held at Balmoral.

Balmoral 2

In addition to the new home at Balmoral, improvements were made on several cottages and outbuildings as well as the gardens and woodlands on the property.  Prince Albert supervised the planting of conifers on the grounds, the building of a new bridge and the establishment of a farm and dairy.

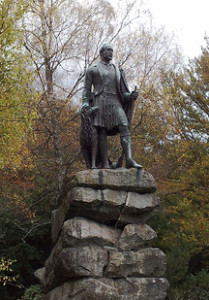
After Prince Albert’s death in 1861, Queen Victoria went into period of deep mourning and spent an increasing amount of time at Balmoral where she spent so many happy times with her beloved husband and far away from her Royal duties in London.  Several memorials were erected on the property; the pyramid- shaped cairn at the top of Craig Lurachain erected a year after his death and a statue of Prince Albert which was placed on the event of the twenty-eighth anniversary of the engagement of Queen Victoria and Prince Albert.

Balmoral - Prince Albert memorial cairn    Balmoral - Prince Albert statue

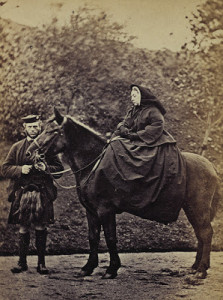
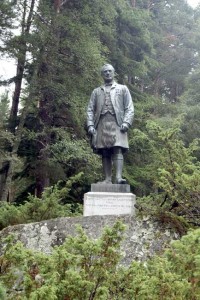
Since Queen Victoria was staying at Balmoral for a lengthy amount of time during the year, the perpetually mourning Queen came to depend on a local ghillie (a Highland gamekeeper and servant) named John Brown.  Brown was able to meet Queen Victoria’s dark moods and he ultimately encouraged her to move forward with her life.  His constant companionship with the Queen greatly comforted her, some say their relationship was intimate, but still their closeness caused hostility among her family members.  Much like she did when Prince Albert died, when John Brown in 1883 the Queen commissioned a statue of him which was placed on the estate.  After the death of Queen Victoria in 1901 her son, now known as King Edward VII, had many of the Brown memorials destroyed and the Brown statue was moved to a remote place on the property.  (Special Note:  If you are interested in more information about Queen Victoria and John Brown, I would recommend the 1997 film “Mrs. Brown” starring Judi Dench as the Queen and Billy Connolly as Brown)
Balmoral - Queen Victoria and John Brown 1868    Balmoral - John Brown statue

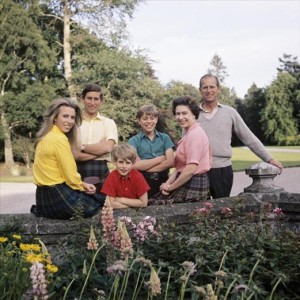
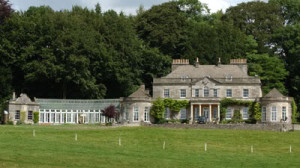
King Edward VII continued the tradition of the Royal Family annual trip to Balmoral during the autumn months.  His successor and son, King George V also enjoyed the annual trip to the Highlands.  After the death of King George V his son, known as King Edward VIII, acquired the ownership of Balmoral when it was passed to him in 1936.  Later that same year when he abdicated the throne to his brother, now known as King George VI, part of the negotiated settlement was the sale of both Balmoral and Sandringham (properties personally owned and not part of the Crown) to King George VI.  After the death of King George VI in 1952, his daughter, the current reigning Queen Elizabeth II inherited Balmoral and she continues the Royal Family tradition of annual trips to Balmoral during the months of August to October.

Balmoral - Queen Elizabeth and family 1972 a

Tourist Information Regarding Balmoral

Balmoral is open to the public daily from the end of March to the end of July, closed from August to October when the Queen is in residence and then opened again on a limited number of days during the months of November and December.  For more information on specific days, times and admission fees, please see the official website at www.balmoralcastle.com

Balmoral offers visitors a variety of activities for visitors and the price of admission includes parking, a one hour guided tour including the Castle’s Ballroom and access to the gardens, the exhibitions and also an audio tour.  There is also a small restaurant and gift store for visitors.  It is advised that a minimum of at least one and a half hours is reserved when planning a trip.

Points of Interest at Balmoral

The Balmoral Castle Ballroom –

Ballroom is the largest room at Balmoral and it is the only room is open to the public; there is no access to the other rooms of the Castle because they are considered the Queen’s private rooms.  Displayed in the Ballroom are several paintings by Edwin Landseer (an English painter who specialized in Highland landscapes and portraits) and Carl Haag (a Bavarian-born painter for the Duke of Saxe-Coburg and Gotha who later became a naturalized British citizen).  Also displayed in the Ballroom are silver statues by John Boehm and several pieces of Minton China (the famous bone china produced in Staffordshire, England)

The Ballroom is probably most famously known as the setting for the annual Ghillie Ball, Queen Victoria started the tradition in 1852 when she wanted to thank her servants and other members of her staff for their good service.  The ball is a much anticipated event for everyone at Balmoral because of opportunity for the servants to socialize and even dance with the Queen and her family.  Historical Note:  In 2014, the Ghillie Ball was postponed for one day by Queen Elizabeth to allow the vote on Scottish independence referendum.  The end result was a decisive 53% vote against independence.
Balmoral - Gillis Ball 1859

Garden Cottage –

Located not far from Balmoral is the Garden Cottage were visitors will be able to view a short film that shows how the 50,000 acre estate is managed.  The original Garden Cottage was built in 1863 but by 1894 it had fallen into disrepair and was demolished.  The current structure was built with stone and wood supplied by the materials on the property and it was completed in 1895.  In her later years, Queen Victoria often used the cottage in the morning to have breakfast or in the afternoon to work on State papers, correspondence and to write in her journals.

The gardens adjacent to the cottage were originally planted under the guidance direction of Prince Albert.  Several years later, during the reign King George VI, Queen Mary re-designed the garden with a fountain surrounded partially by a rock wall, the garden gate still bears the monograms of King George and Queen Mary (GR &MR).  More recently, the Duke of Edinburgh planted a large vegetable garden to supply the Royal Family during the summer months.    Balmoral - Garden Cottage

Birkhall –

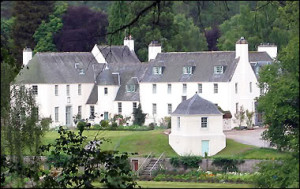
The Birkhall property was purchased by Prince Albert in 1849 in addition to the Balmoral estate, it was set aside for the exclusive use of his eldest son, Prince Edward (the Prince of Wales and later King Edward VII).  Later, in 1884 Queen Victoria bought the property back from her son and used it to provide housing for her staff.

When King George V inherited Balmoral after the death of his father, he lent Birkhall to his second son, the Duke and Duchess of York (the parents of the current Queen Elizabeth II).  The Royal couple enjoyed their time at Birkhall with their two daughters and during the time they occupied the house they redecorated the interior and replanted the gardens.  In 1936, when King George VI ascended to the throne, Birkhall was lent to Princess Elizabeth and during the summer months it was occupied by her, Prince Philip and their small children.

After the death of King George, his daughter, Queen Elizabeth moved to the main house at Balmoral during their summer visits and her mother, Queen Elizabeth the Queen Mother, returned once more to Birkhall and she continued using it until her death in March 2002.

After the Queen Mother’s death, Prince Charles (the Prince of Wales) inherited Birkhall.  When he married Camilla, the Duchess of Cornwall, in 2005 they spent their honeymoon at the Birkhall.

Balmoral - Birkhall

Craigowan Lodge –

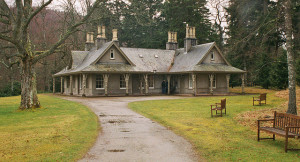
Craigowan Lodge is located on the Balmoral estate about one mile from the main house.  The seven bedroom stone house was frequently used by Prince Charles and Princess Diana when they would visit Balmoral during the summer months.  Now the lodge is used for the housing of very important guests or sometimes various Royal Family members and when the Queen arrives at the estate in mid-July, she uses the lodge while the main house is being prepared for her extended stay during the summer months.

Balmoral - Craigowan Lodge

For more information about another privately owned British Royal residence, please click on the link to Sandringham.

Craft – Framed Button Crafts

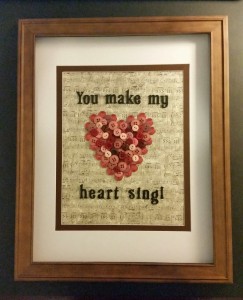
Buttun Craft - version 1 - finished

This post is about craft projects that take lots of buttons, lots and lots of buttons!!  Maybe you inherited a box of buttons from your mother or grandmother and are looking for something special to do with them.  Or maybe you are inspired by the button aisle in your favorite craft store and are looking for a craft project to use them.

When I decided to do this button craft project I searched on the internet for some ideas that I liked., the internet is a great source for ideas for all kinds of craft projects.  I usually find ones that I like and then give it my own personal style with the supplies that I select.  Walk the aisles of your favorite craft store to get inspiration for a variety of buttons, scrapbook paper and embellishments.  Be creative and use your imagination to design a personalized button craft project.

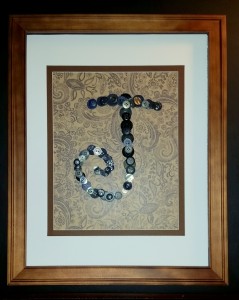
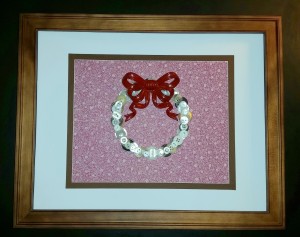
So, here are three different variations of craft projects using buttons.  The first used buttons to form a heart shape, the second is a wreath shape and the third uses buttons to form the initial of our last name.  Listed below are the supply list and instructions for all three versions.

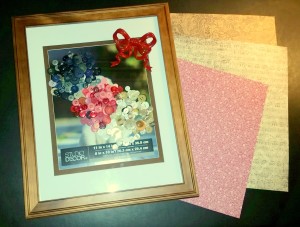
Button Craft - supplies

Button Craft – supply list

  • Buttons – you are definitely going to need a lot of buttons!
  • Frame
  • Scrapbook paper
  • Hot glue gun and glue sticks
  • Plastic self-adhesive letters – black – I used letters for version #1
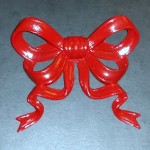
  • Embellishments – I used a plastic bow for the button wreath for version #3

Button Craft – instructions

  1. Disassemble the frame, remove the backing, picture mat and glass, set them aside
  2. Place the picture mat back into the frame
  3. Place the selected scrapbook paper into the frame
  4. Place the glass and the frame backing into the frame and secure it with the tabs provided.  By reassembling the items of the picture frame it will provide a solid surface to work on that will support the weight of the many layers of buttons
  5. Before adding the first layer of buttons I determined the position, this is important to make sure that the buttons are centered properly.  Also this first layer of buttons will help to form the desired shape, such as the heart, wreath or letter initial.  (Craft Tip: I used the dark colored buttons for the first layer to add depth to the finished project)Buttun Craft - version 1 - heart form
  6. Continue placing buttons, add several layers and overlap the buttons  (Craft Tip: I started with the larger buttons first and with each layer I added buttons decreasing in size until the last layer used the smallest buttons)
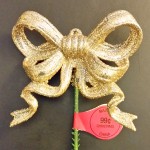
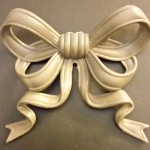
    Button Craft - bow - glitter  Button Craft - bow - plain  Button Craft - bow - red paint
  7. After the last layer of buttons is glued into place, add the embellishments.  For version #1 I used the black plastic self-adhesive letters to spell out a clever saying!  For version #3 I used a plastic bow that I found in the Christmas aisle but it had gold glitter paint, I removed the glitter and repainted it a deep red color that coordinated with the red floral pattern scrapbook paper I selected.

Buttun Craft - version 1 - finished  Buttun Craft - version 3 - finished
Buttun Craft - version 2 - finished