Craft – Garden in a Book Shadowbox

Garden in a Book - adding tree and mossRecently I was Inspired by the beautiful shadowboxes I had seen on the internet and decided to create a special craft project.  I had a hinged book box that I purchased on several months ago that I thought would be perfect to use for my Garden in a Book Shadowbox.  Most of the other supplies were from my craft closet – paper, a miniature tree, a miniature metal gate and fence set, small flowers and moss.  Once I had all my supplies gathered together, this was the creative part of the craft project.  My advice is to have fun arranging the various items you have collected to make a pleasant arrangement.  In general, I like my scenes to be symmetrical but maybe I would suggest trying to set the focal point (maybe a tree or a garden table and chairs set) off to one side.  This idea would definitely add more room for embellishments and currently the craft stores are expanding their miniatures collections so the selection is definitely larger!

Garden in a Book - supplies

Garden in a Book Shadowbox – supplies

  • Hinged Book Box
  • Durable paper to cover the box (I used a remnant from a wallpaper sample book)
  • Scrapbook paper for the background
  • Blue paint, paint brush (optional)
  • Miniature tree
  • Miniature set of a metal garden gate and fence
  • Small flowers Moss
  • Moss
  • Hot glue gun and glue sticks
  • Black Sharpie (optional)

Garden in a Book Shadowbox – instructions

  1. The first step is to cover the hinged book box with the durable paper.  To begin, place the paper on one corner of the box.  Then, smooth the paper while working across to the other side and glue into position, trim any access paper.  Craft Tip: To cover any slight caps between the paper and the edge of the box I used a black Sharpie marker.
    Book cover 1  Book cover 2
  2. Cut a piece of scrapbook paper to fit the inside of the box, this will be the background.  (I used a textured pale blue piece of paper and then painted it will a medium blue paint, this way I achieved the exact color I wanted to represented the blue sky background!)
  3. Using the metal garden gate and fence pieces, I attached the small flowers by intertwining them throughout the railings.  Craft Tip: Before attaching the flowers, determine the position inside the box behind the miniature tree.  This is recommended to assure that the pieces will fit because any adjustments needed afterwards would be more difficult with the flowers attached.
    Garden in a Book - floral fence
  4. Hot glue the floral gate and fence pieces to the back of the box. (I positioned the pieces about an inch from the bottom to allow space for the moss and with the side fencing at an angle to add some depth instead of all the pieces flat against the back of the box)
    Garden in a Book - adding background and fence
  5. Hot glue the miniature tree to the bottom of the box.  (I positioned the tree in the center because I always like a symmetrical arrangement, but it can also be set to one side to allow more room for embellishments)  Craft Note: As you may notice, the tree in the supply photo and the finished photo look very different.  I choose to add small leaves to the tree to create a more “realistic” appearance.Garden in a Book - adding tree and moss
  6. Add moss to the bottom portion of the box to complete the craft project.

Shown below are to different version of the Garden in a Book Shadowbox.  The photo on the right is the first version as explained in the instructions.  The photo on the left is the second version with fluffy cotton ball clouds added to the background (which should be positioned prior to gluing the miniature tree)  To make the clouds I used two cotton ball which I pulled and stretched apart until I create the perfect fluffy cloud!

Garden in a Book- finished 1st version  Garden in a Book- finished 2nd version

Garden in a Book - making clouds

British Royal Family Orders

British Royal Family Orders

While being interested in the British Royal Family over many years I always wondered about the ribbon “badges” worn with miniature portraits pinned to the evening gowns of the female members of the Royal Family.  So, I set about researching the history and tradition of the British Royal Family Orders.

The Royal Family Orders are customarily given by the British sovereign to the female members of the Royal Family and are considered a personal item rather than the state commemorative medals worn by the male members of the Royal Family.  The Order is decorated with a miniature portrait of the sovereign which is suspended from a ribbon bow and on the reverse side of the portrait frame there is an engraving of the sovereign’s monogram.  Throughout the years the color of the ribbon has been changed with each sovereign selecting their own distinctive color.

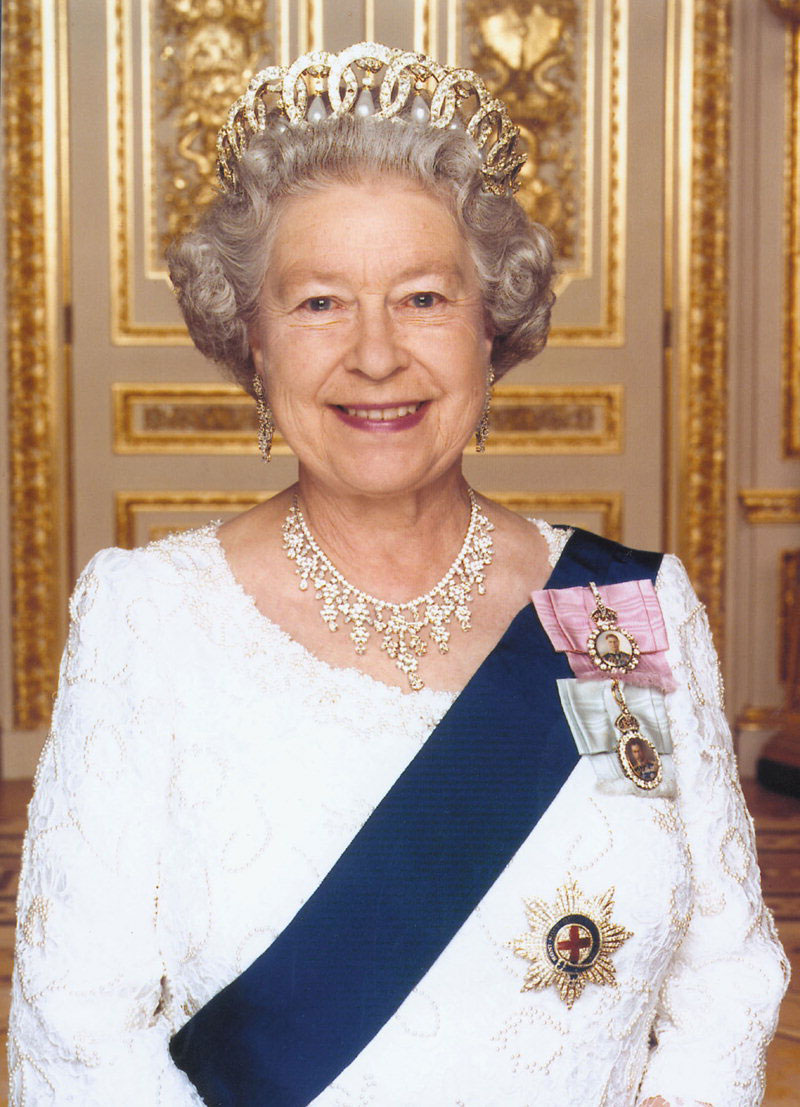
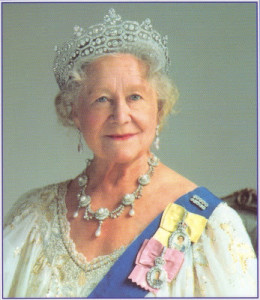
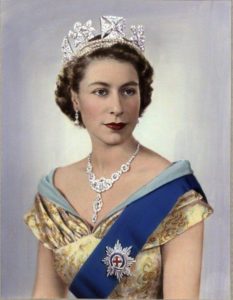
The Order is customarily worn on the left side of the lady’s evening gown but there has been the occasional exception to this rule.  If the lady has received more than one of the Royal Family Orders from various sovereigns the Orders are worn layered with the most recent one on the top.  In the photo below on the left shows the Queen Mother wearing the Order of her daughter, Queen Elizabeth II, on the top and the Order of her husband, King George VI, on bottom.  The photo on the right shows Queen Elizabeth wearing the Order of her father, King George VI, on the top and the Order of her grandfather, King George V, on the bottom.  (Special Note: A female sovereign, such as Queen Elizabeth, does not wear their own Royal Family Order)

Queen Mother wearing Royal Family Orders  Queen Elizabeth wearing Royal Family Orders

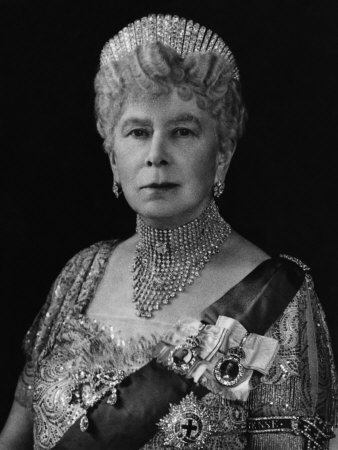
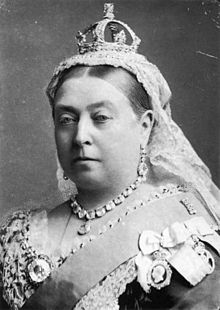
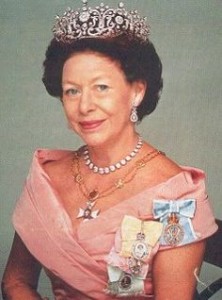
Historical Note:  It seems that Queen Mary was one of the most honored women of the Royal Family having receiving five Royal Family Orders.  The Orders were given by Queen Victoria, King Edward VII, King George V, King George VI and Queen Elizabeth II.  The last Order she received was to her given in December 1952 which was after her grand-daughter, Queen Elizabeth’s accession but before her coronation.  Sadly, Queen Mary did not live to see the coronation and died a few months before in March 1953.  In the photo below, Queen Mary is seeing wearing two of her Royal Family Orders.

Queen Mary

A History of the Royal Family Orders

Listed below are the Royal Family Orders starting with King George IV to the current Queen Elizabeth II.  There will be a brief description of each Royal Family Order issued by the sovereign and a partial list of recipients during their reign.  (Special Note: There was no Royal Family Order issued for King Edward VIII who abdicated in 1936 less than a year after his accession to the throne and prior to his coronation)

Royal Family Order of King George IV

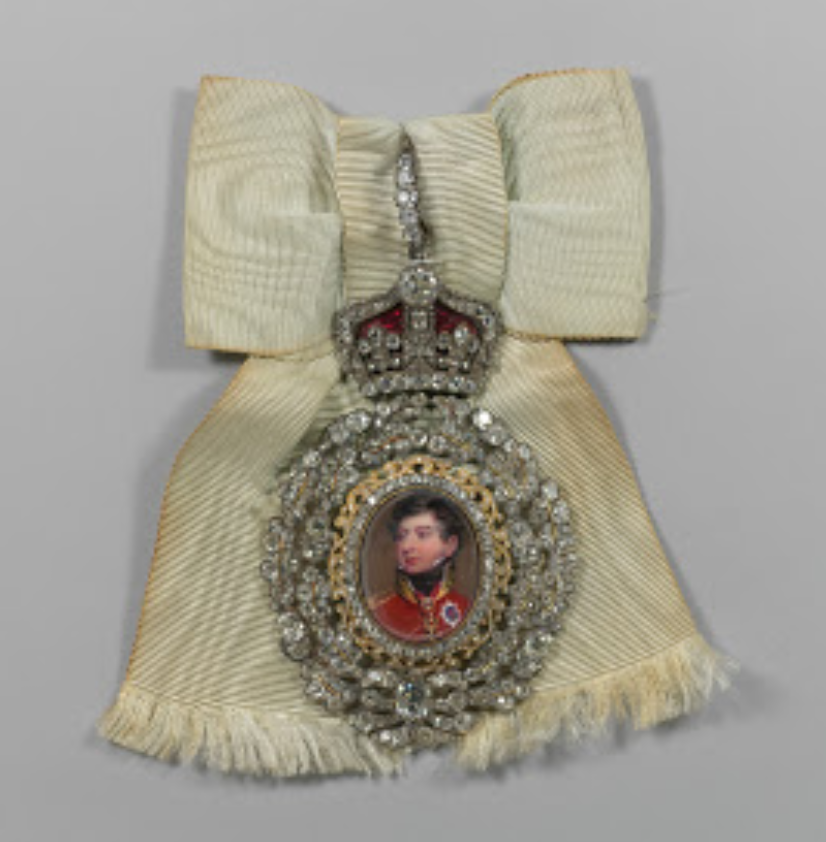
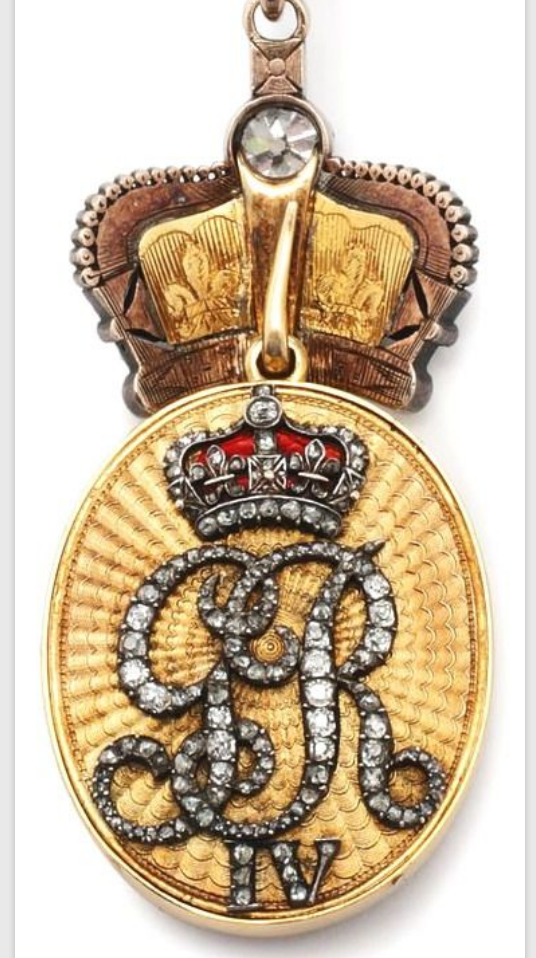
During Prince George’s regency as the result of the madness of his father King George III, the Prince is noted to on special occasions give his personal badge of honor as a memento to the gentlemen and ladies of the court.  After the death of his farther and his accession to the throne as King George IV he reserved the honor of the first official Royal Family Order to be given exclusively to female members of the Royal Family.  Attached to a white silk bow was a miniature portrait set in a gold and silver frame decorated with diamond oak leaves and acorns with a diamond embellished crown at the top of the frame (as shown in the photo below, the right photo shows the reverse side of the portrait frame).  Some of the recipients of the Royal Family Order of King George IV included his sister Queen Charlotte of Wurttemberg, his sister-in-law Princess Augusta the Duchess of Cambridge and his niece Princess Victoria of Kent who was later to become Queen Victoria.

King George IV Royal Family Order  King George IV - reverse side

King William IV

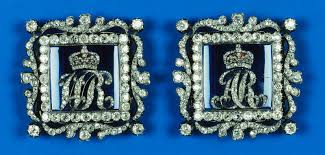
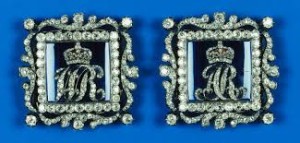
During the reign of King William IV he did not create a formal Royal Family Order but instead issued a set of square jeweled buckles featuring the crowned monograms of King William and Queen Adelaide, as shown in the photo below.

King William IV

Queen Victoria

During Queen Victoria reign, her Royal Badge was initially given as her personal honor to her eldest daughter Princess Victoria on the solemn occasion of her confirmation marking her religious commitment and most notably her status as a young adult.  In the following years Queen Victoria bestowed the badges on her other daughters also at the time of their confirmations.

Then after the death of her beloved husband Prince Albert, the Queen decided to formally create the Order of Victoria & Albert as another one of her numerous ways of honoring the Prince.  Unlike the other Royal Family Orders, the Order of Victoria & Albert was divided into four classes, the first being given her daughters and later her daughters-in-law and grand-daughters with subsequent classes issued to other members of the Royal Family and the Royal Household including honored servants and couriers.

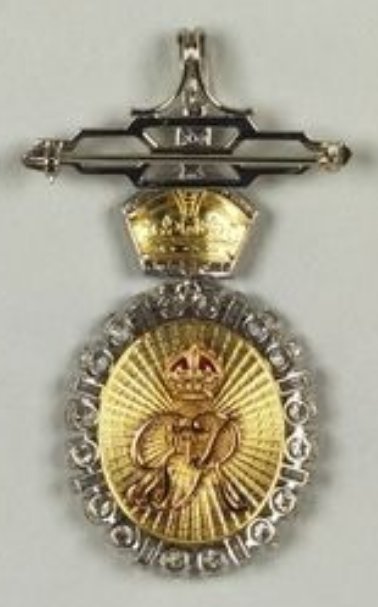
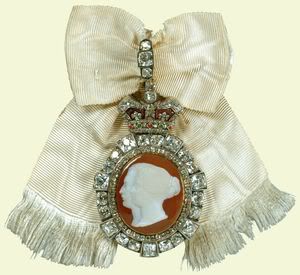
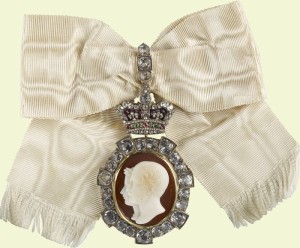
The Order of Victoria & Albert was established in 1862 and features an ivory colored cameo of Queen Victoria and Prince Albert set in brown onyx with a silver gilt frame accented with diamonds, rubies and emeralds with a diamond embellished crown at the top of the frame which was attached to a white silk bow , as shown in the photo below on the left.  Lesser class badges were decorated with pearls instead of diamonds.  (Special Note: The second and the third photos below show Queen Victoria’s personal badge with the profiles set in reverse order with Prince Albert in the front and the Queen behind)

Order of Victoria & Albert

1882 Queen Victoria photograph by Alexander Bassano  Order of Victoria and Albert - Queen Victoria's personal badge

Historical Note:  Both Princess Alexandra, Queen Victoria’s daughter-in-law (later to become Queen Alexandra in 1863) and Princess May of Teck (later to become Queen Mary in 1893) wore their Order of Victoria & Albert badges on their wedding days to the future Kings of England.   

King Edward VII

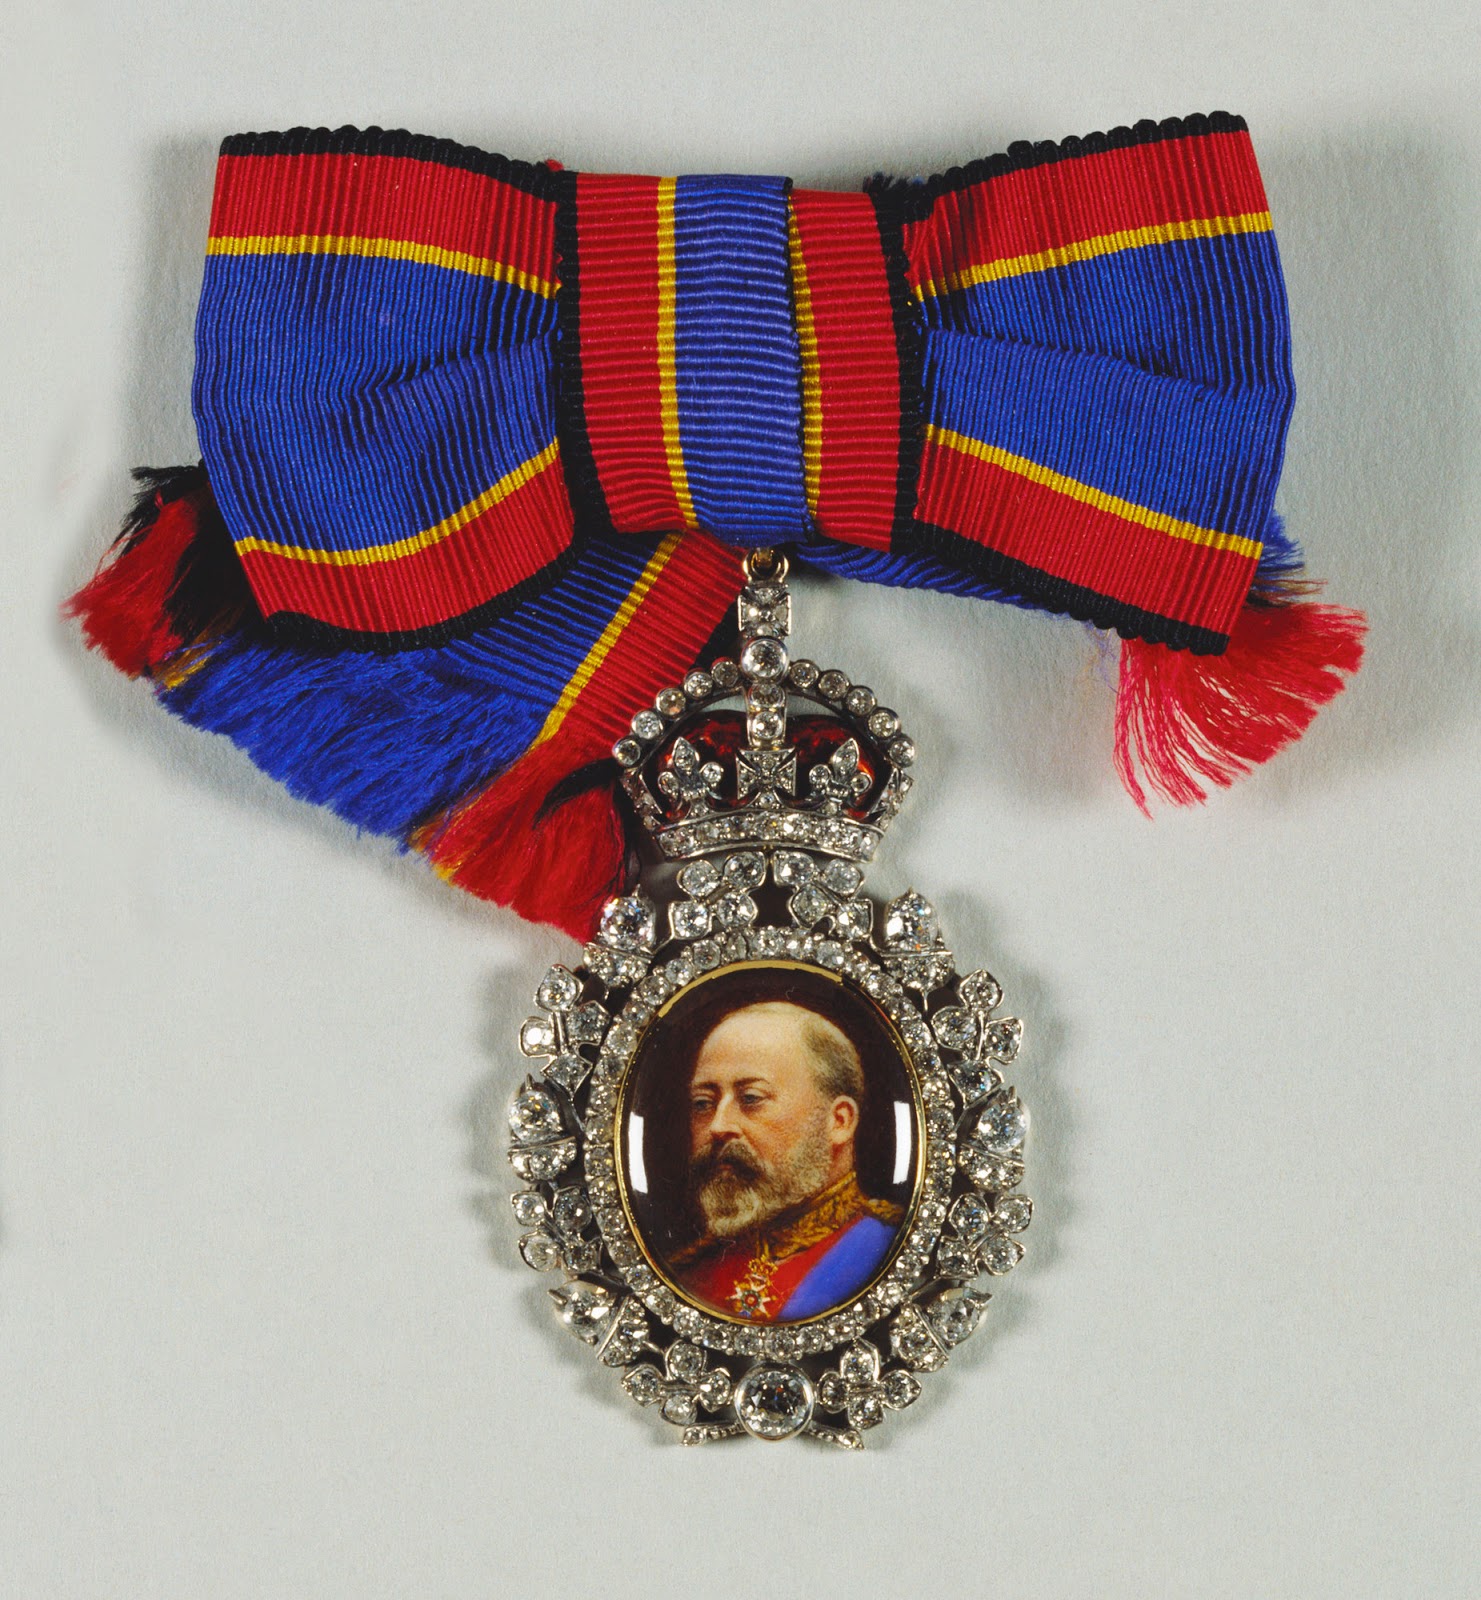
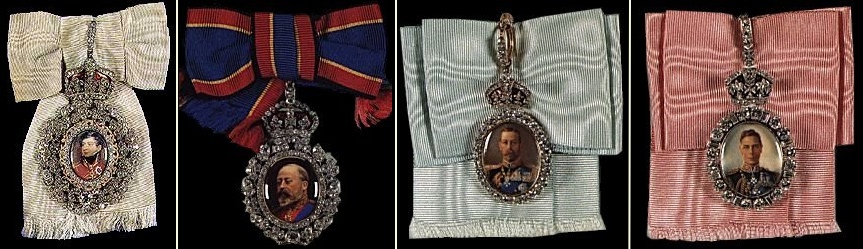
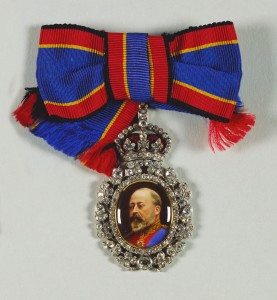
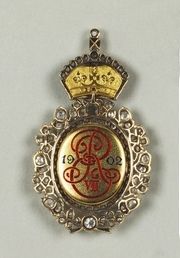
The Royal Family Order of King Edward VII was established in 1901 and features a diamond surrounded miniature portrait of King Edward painted on enamel with a diamond embellished crown at the top of the frame, this would set a precedence for future orders which would be created in this style with a single portrait of the sovereign painted on enamel. The King Edward portrait frame is attached to a bow in blue, yellow and red stripes which were coincidentally used as King Edward’s horse racing colors, the order is shown in the photo below.  The King’s wife Queen Alexandra, his sisters, daughters and daughter-in-law were recipients of King Edward’s Royal Family Orders.

King Edward VII Royal Family Order  King Edward VII Royal Family Order - reverse side

King George V  

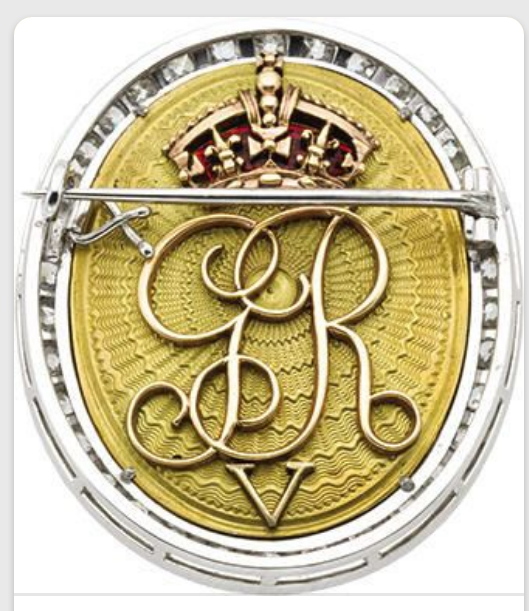
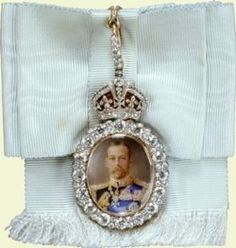
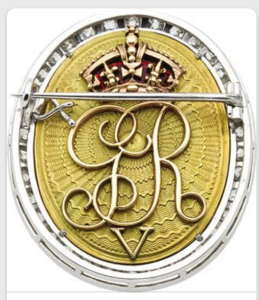
The Royal Family Order of King George V was established in 1910 and features a miniature portrait of the King painted on enamel surrounded by diamonds with a diamond embellished crown at the top of the frame which is attached to white silk bow.  The recipients of the Order include the King’s wife Queen Mary, his daughter-in-law Princess Alice the Duchess of Gloucester and his two grand-daughters, Princess Elizabeth (later to become Queen Elizabeth II) and Princess Margaret.

King George V Royal Family Order  King George V - reverse side

King George VI

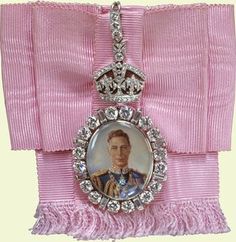
The Royal Family Order of King George VI was established in 1936 and features a miniature enameled portrait of the King surrounded by diamonds with a diamond embellished crown at the top of the frame which is attached to a rose pink bow.  The recipients of the Order include the King’s wife Queen Elizabeth (later known as the Queen Mother) and their eldest daughter Princess Elizabeth (later to become Queen Elizabeth II) and their youngest daughter Princess Margaret (later known as the Countess of Snowdon).

King George VI Royal Family Order  King George VI - reverse side1

Queen Elizabeth II

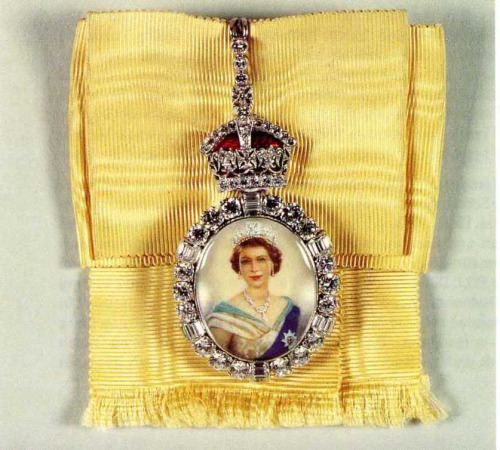
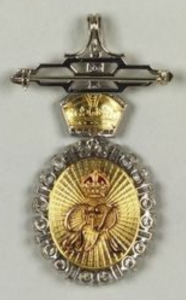
 The Royal Family Order of Queen Elizabeth II was established in 1952 features a miniature enameled portrait of the young queen surrounded by diamonds with a diamond embellished crown at the top of the frame which is attached to a chartreuse yellow bow.  The reverse side of the Order has the Queen Royal cipher and St. Edward’s Crown in gold and enamel.

Queen Elizabeth II Royal Family Order  Queen Elizabeth II - reverse side

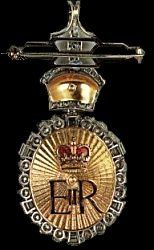
(Special Note: The portrait of Queen Elizabeth used for the Royal Family Order is the 1952 painting by Dorothy Wilding)

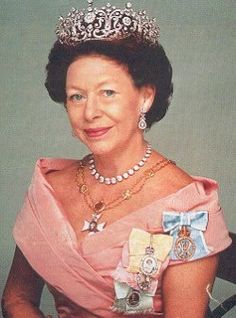
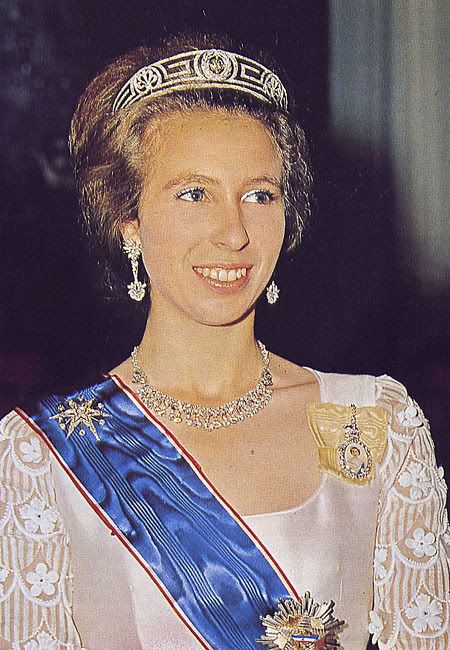
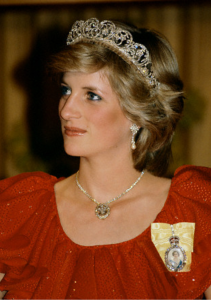
The Queen Elizabeth’s Royal Family Order recipients is the longest list and includes Queen Mary (her grandmother), Queen Elizabeth the Queen Mother, Princess Margaret (her sister) and Princess Diana (her daughter-in-law) who are all deceased. Shown in the photos below are Princess Margaret on the left wearing three of the Royal Family Orders (King George VI, King George VI and Queen Elizabeth) and Princess Diana on the right wearing the Queen’s Order.

Princess Margaret - wearing three family orders  Screenshot_2016-08-17-08-12-39-1

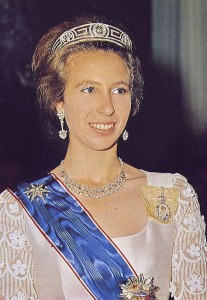
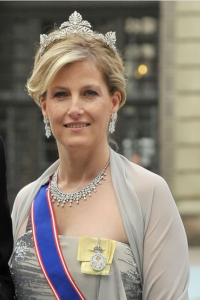
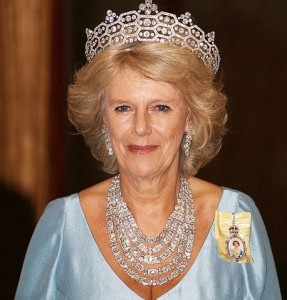
Current recipients include Princess Anne (her daughter) and her daughters-in-law Sophie the Duchess of Wessex and Camilla the Duchess of Cornwall.  Three Royals are shown wearing the Order in the photos below.

Princess Anne  Sophia the Duchess of Wessex
 

  Camilla the Duchess of Cornwall

To end this post, there has been long term speculation as to when Katherine, the Duchess of Cambridge, would receive Queen Elizabeth II Royal Family Order.  In past years most brides marrying into the Royal Family have received the Order within five years after the wedding, these times are all hearsay since the Order is a personal honor bestowed by the sovereign and there is no official press announcement.  The first indication is when the recipient wears the Order at a public function, such as a State Banquet.  So far this has not happened for the Duchess of Cambridge and we will continue to wait in anticipation.

UPDATE: The Duchess of Cambridge was reported to have received the Royal Family Order in December 2017 and wore it for the first time at a Diplomatic Corps Reception that year.  Shown below is a photo of the Duchess wearing the Royal Family Order in  September 2018 at the State Banquet for King Willem-Alexander and Queen Maxima of the Netherlands.  It is also interesting to note that the Duchess requested that her Royal Family Order be made of glass instead of ivory because her husband, Prince William, has is a Royal Patron of Tusk which is dedicated to the survival of African endangered wildlife.
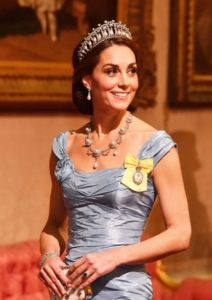
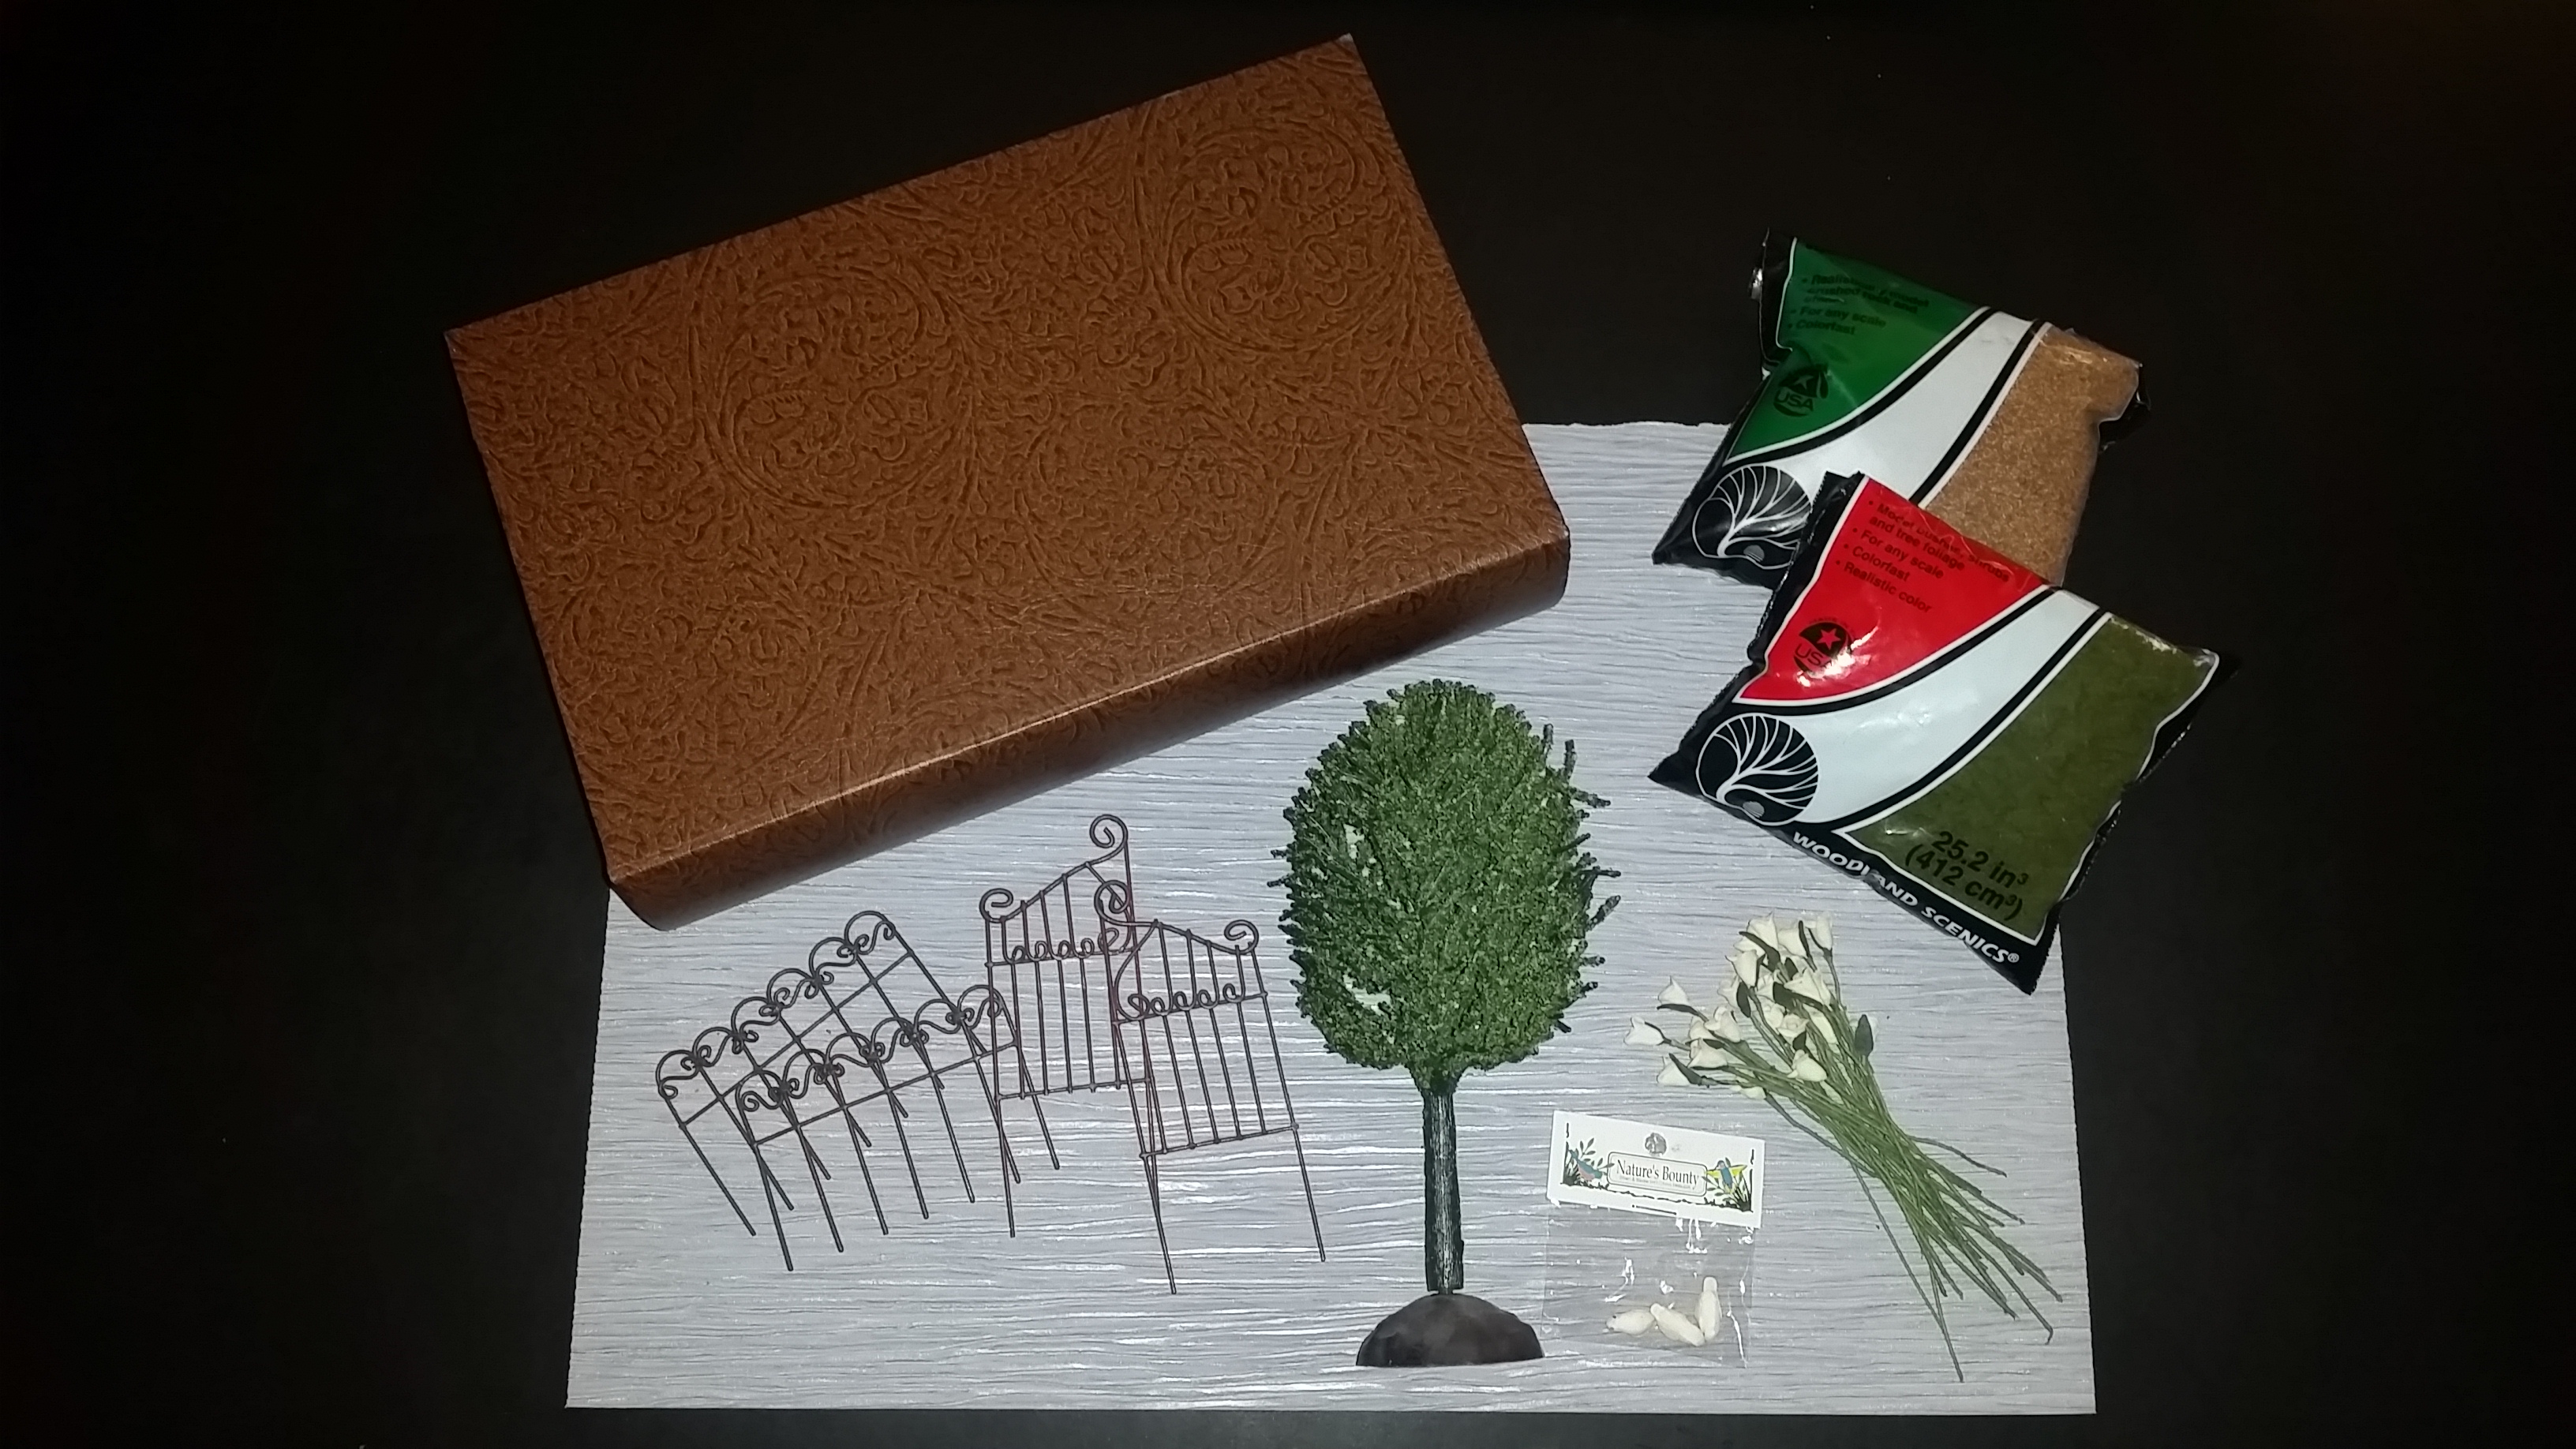
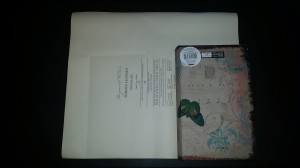
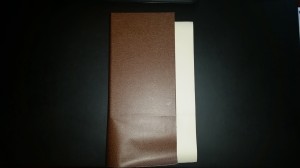
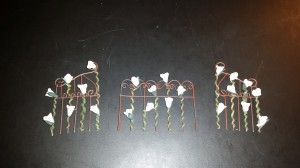
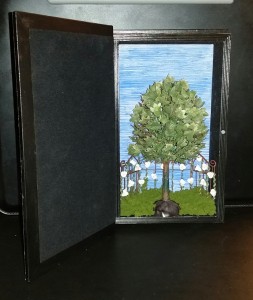
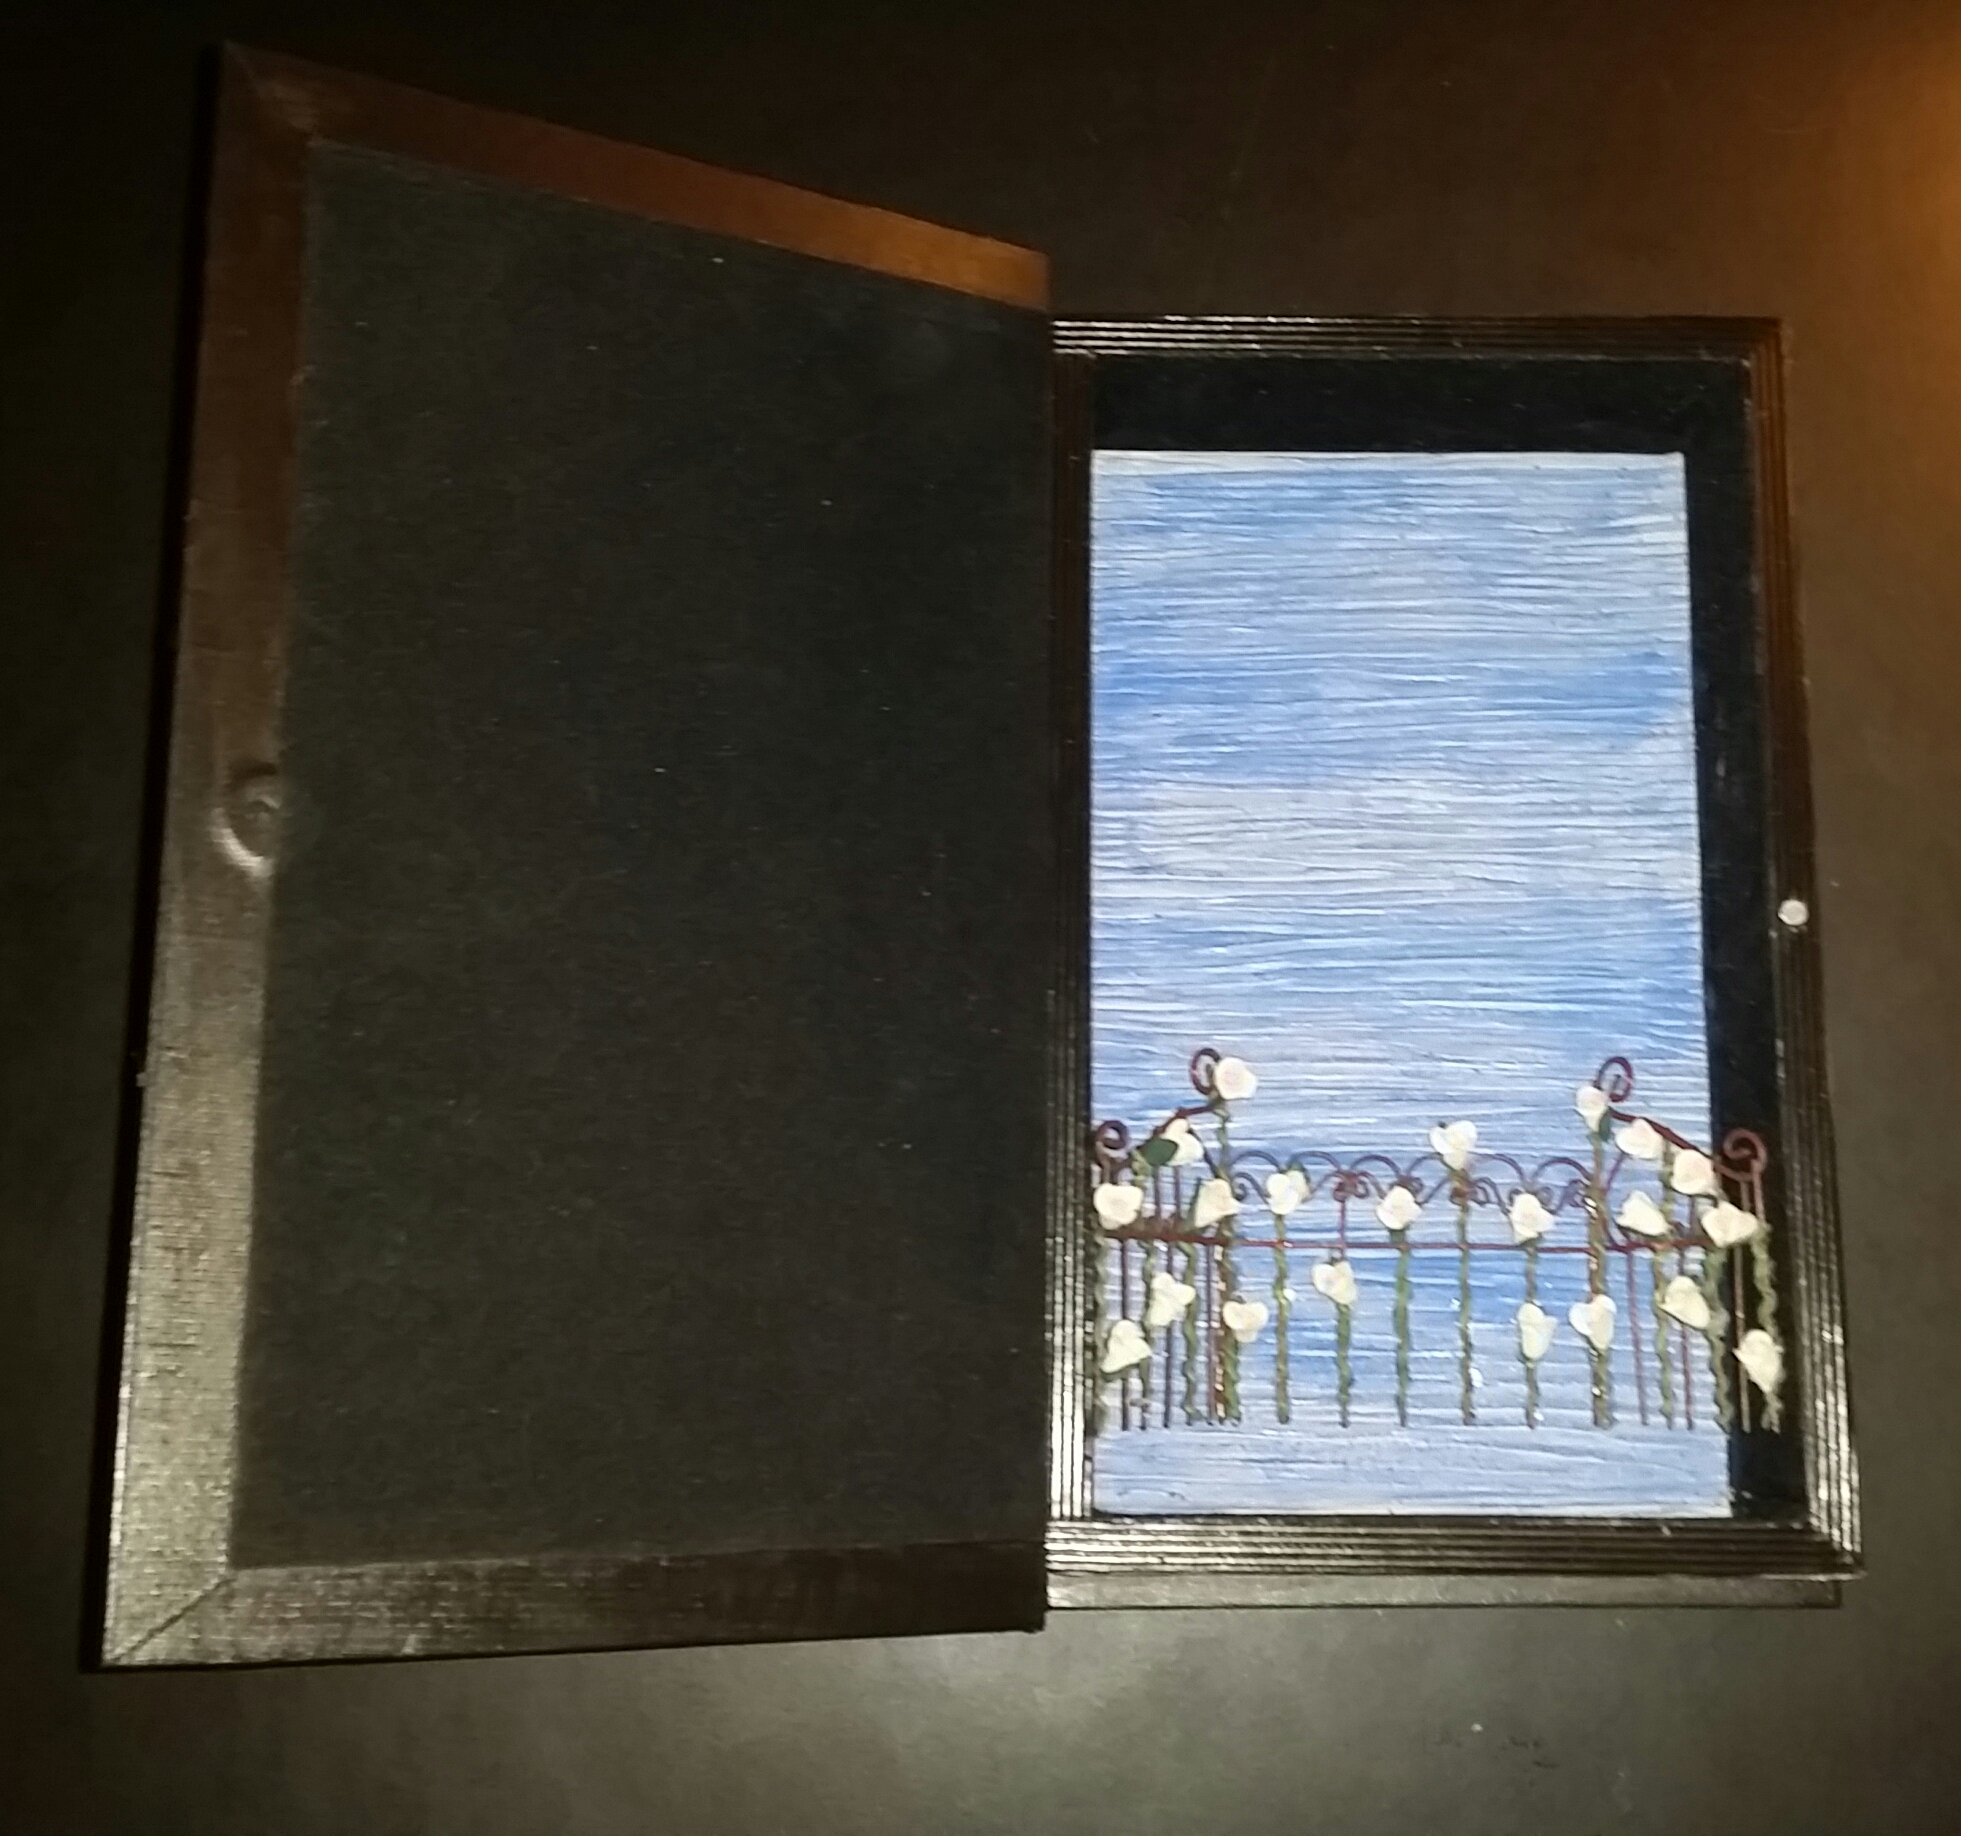
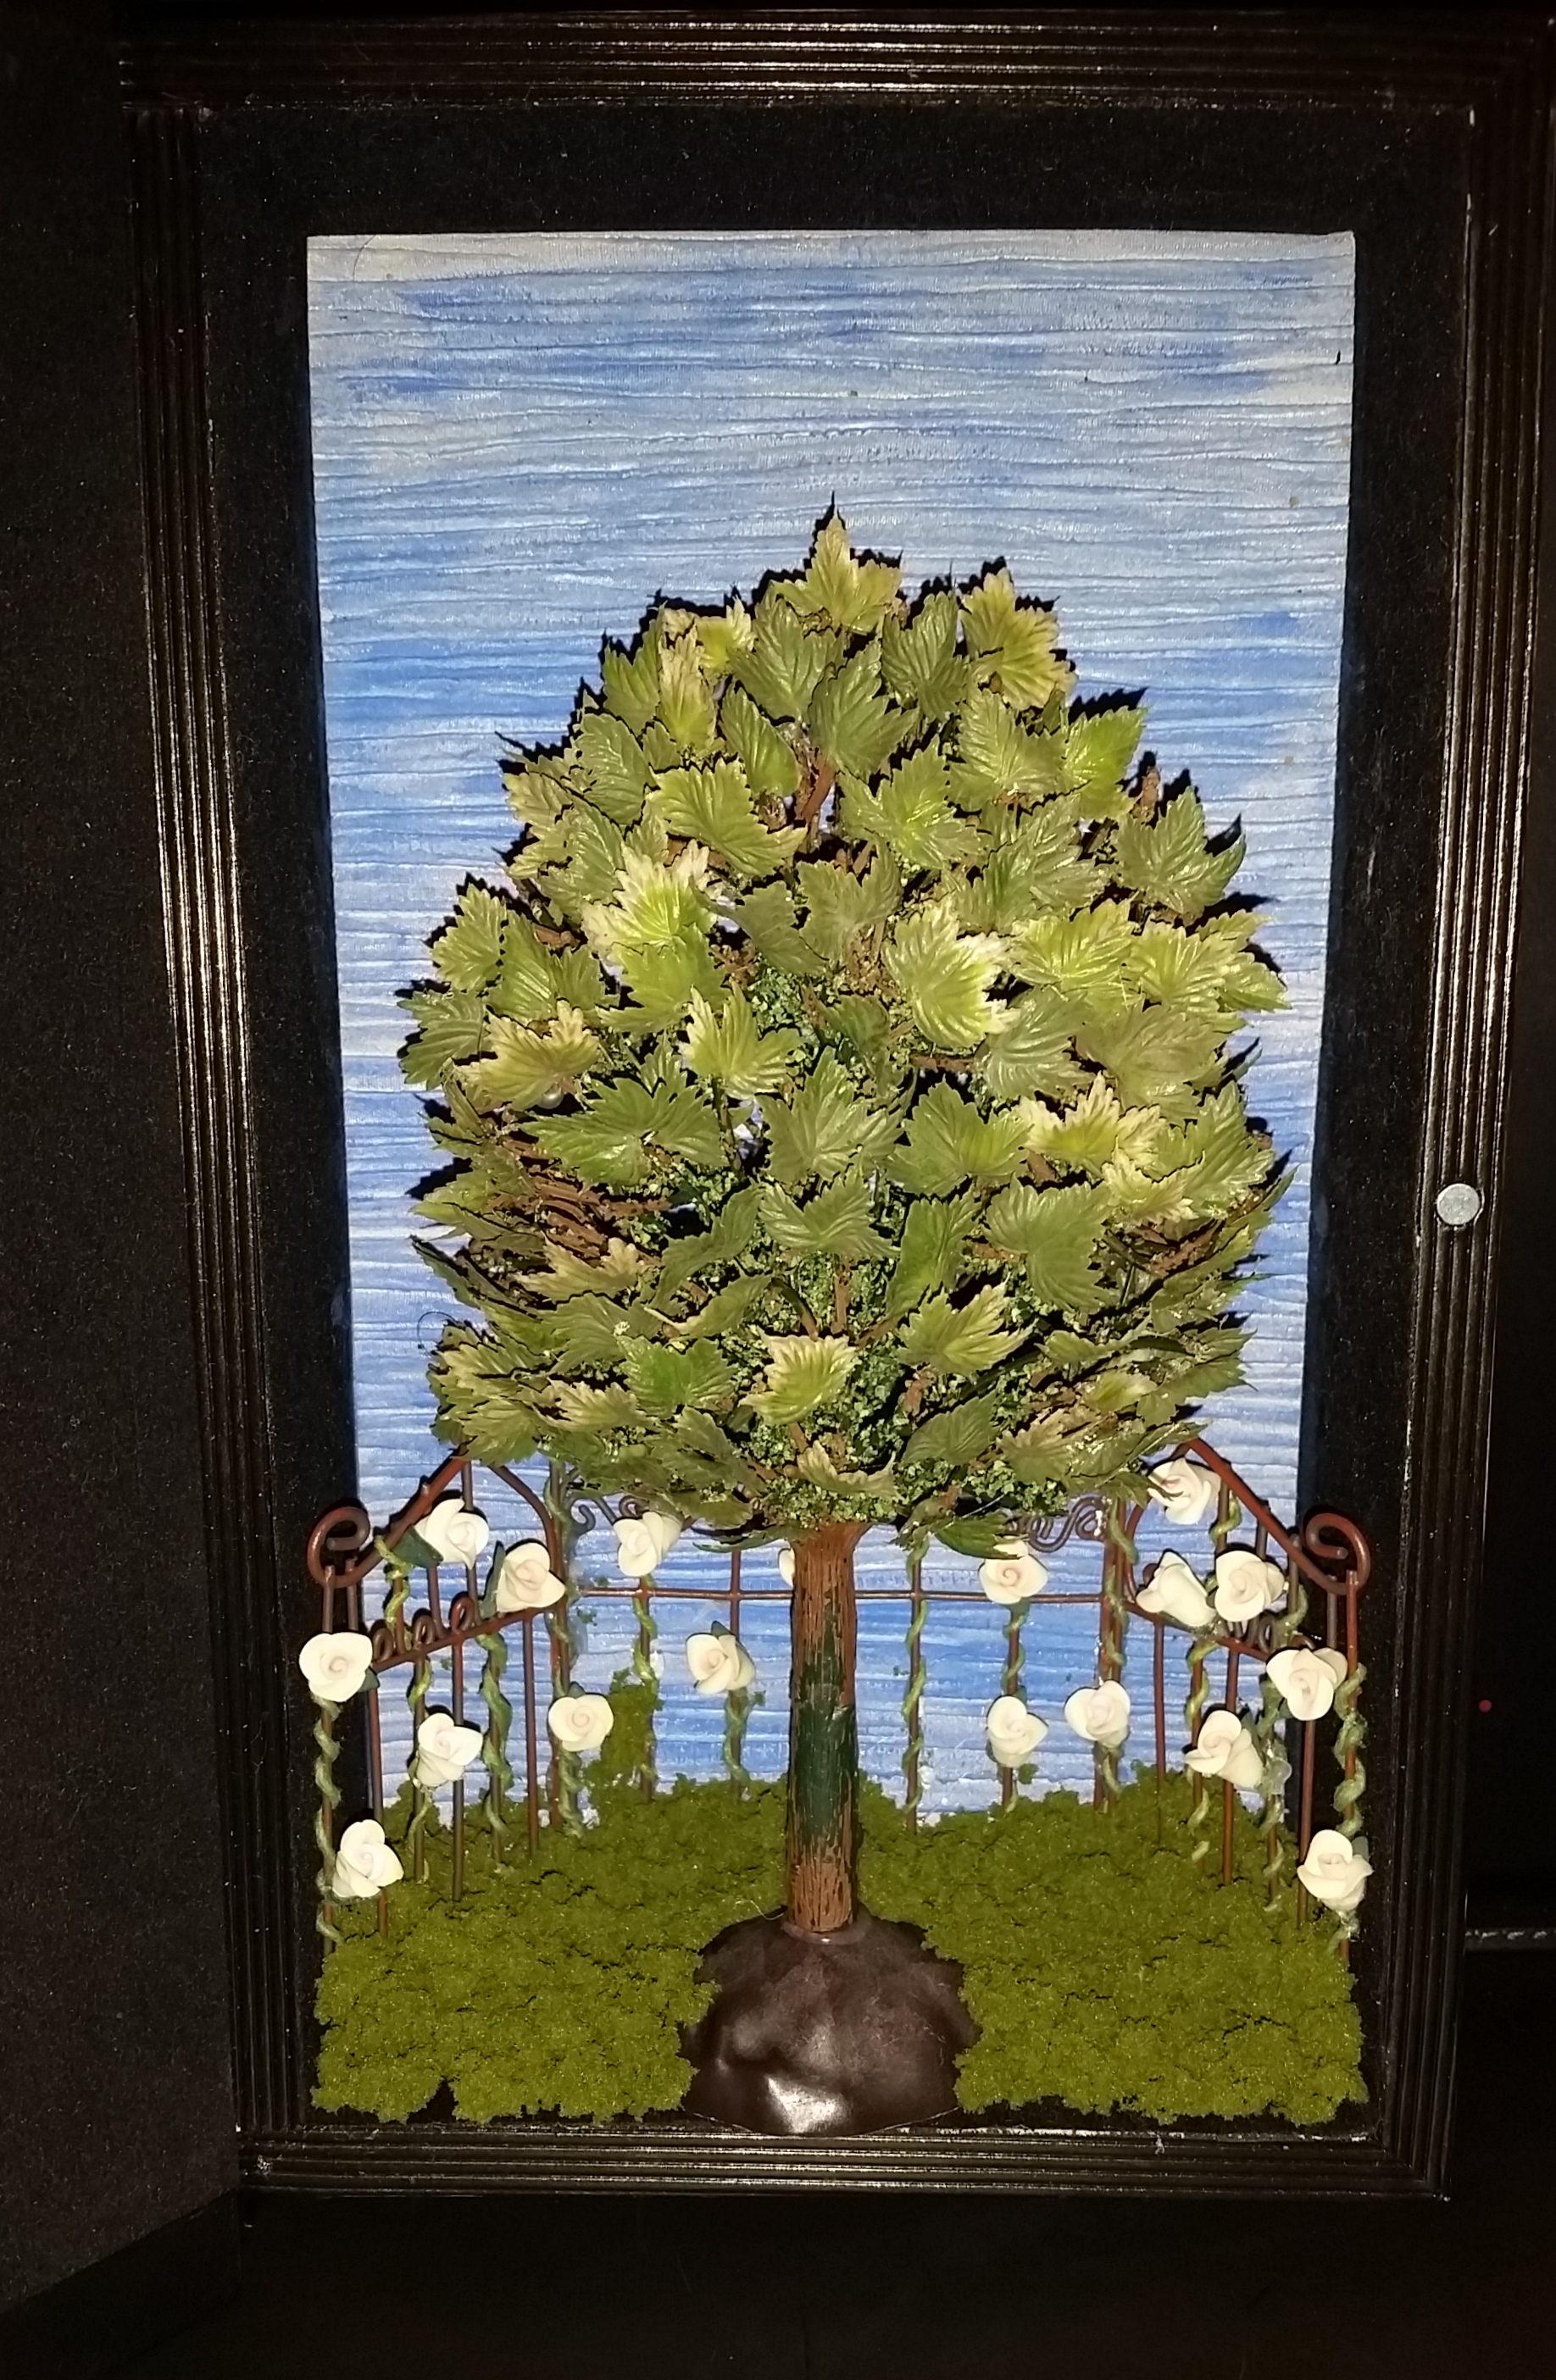
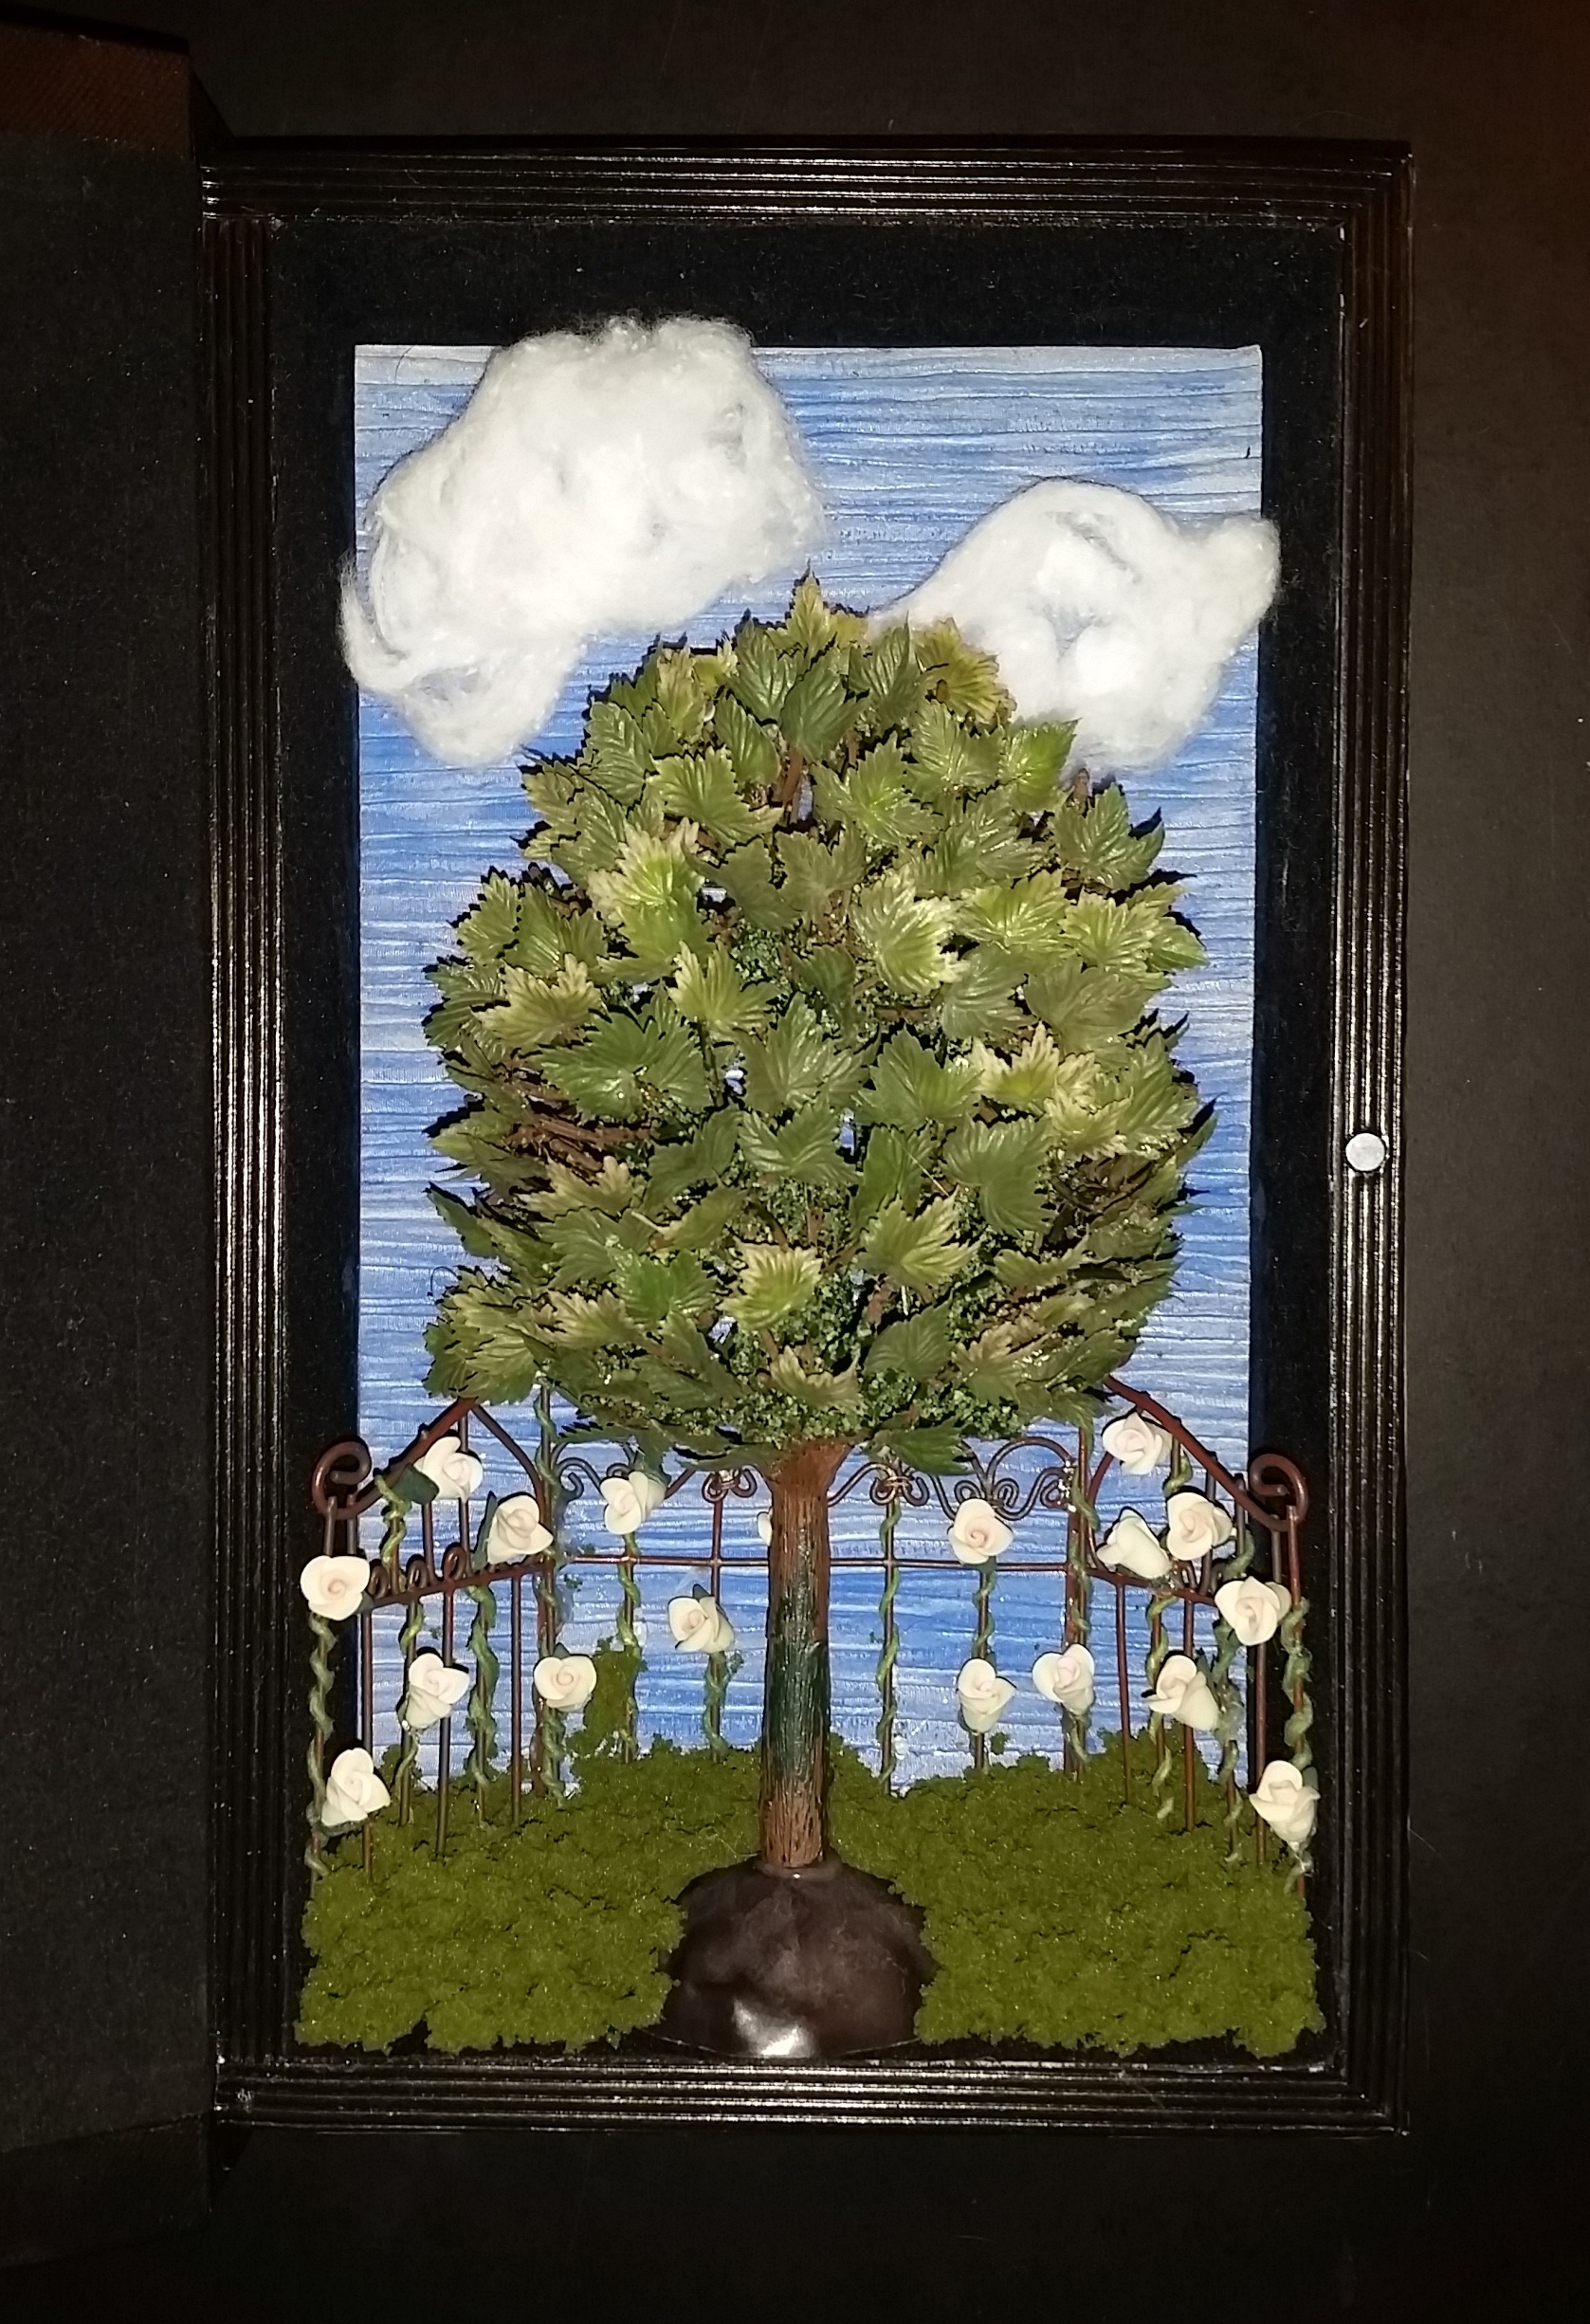
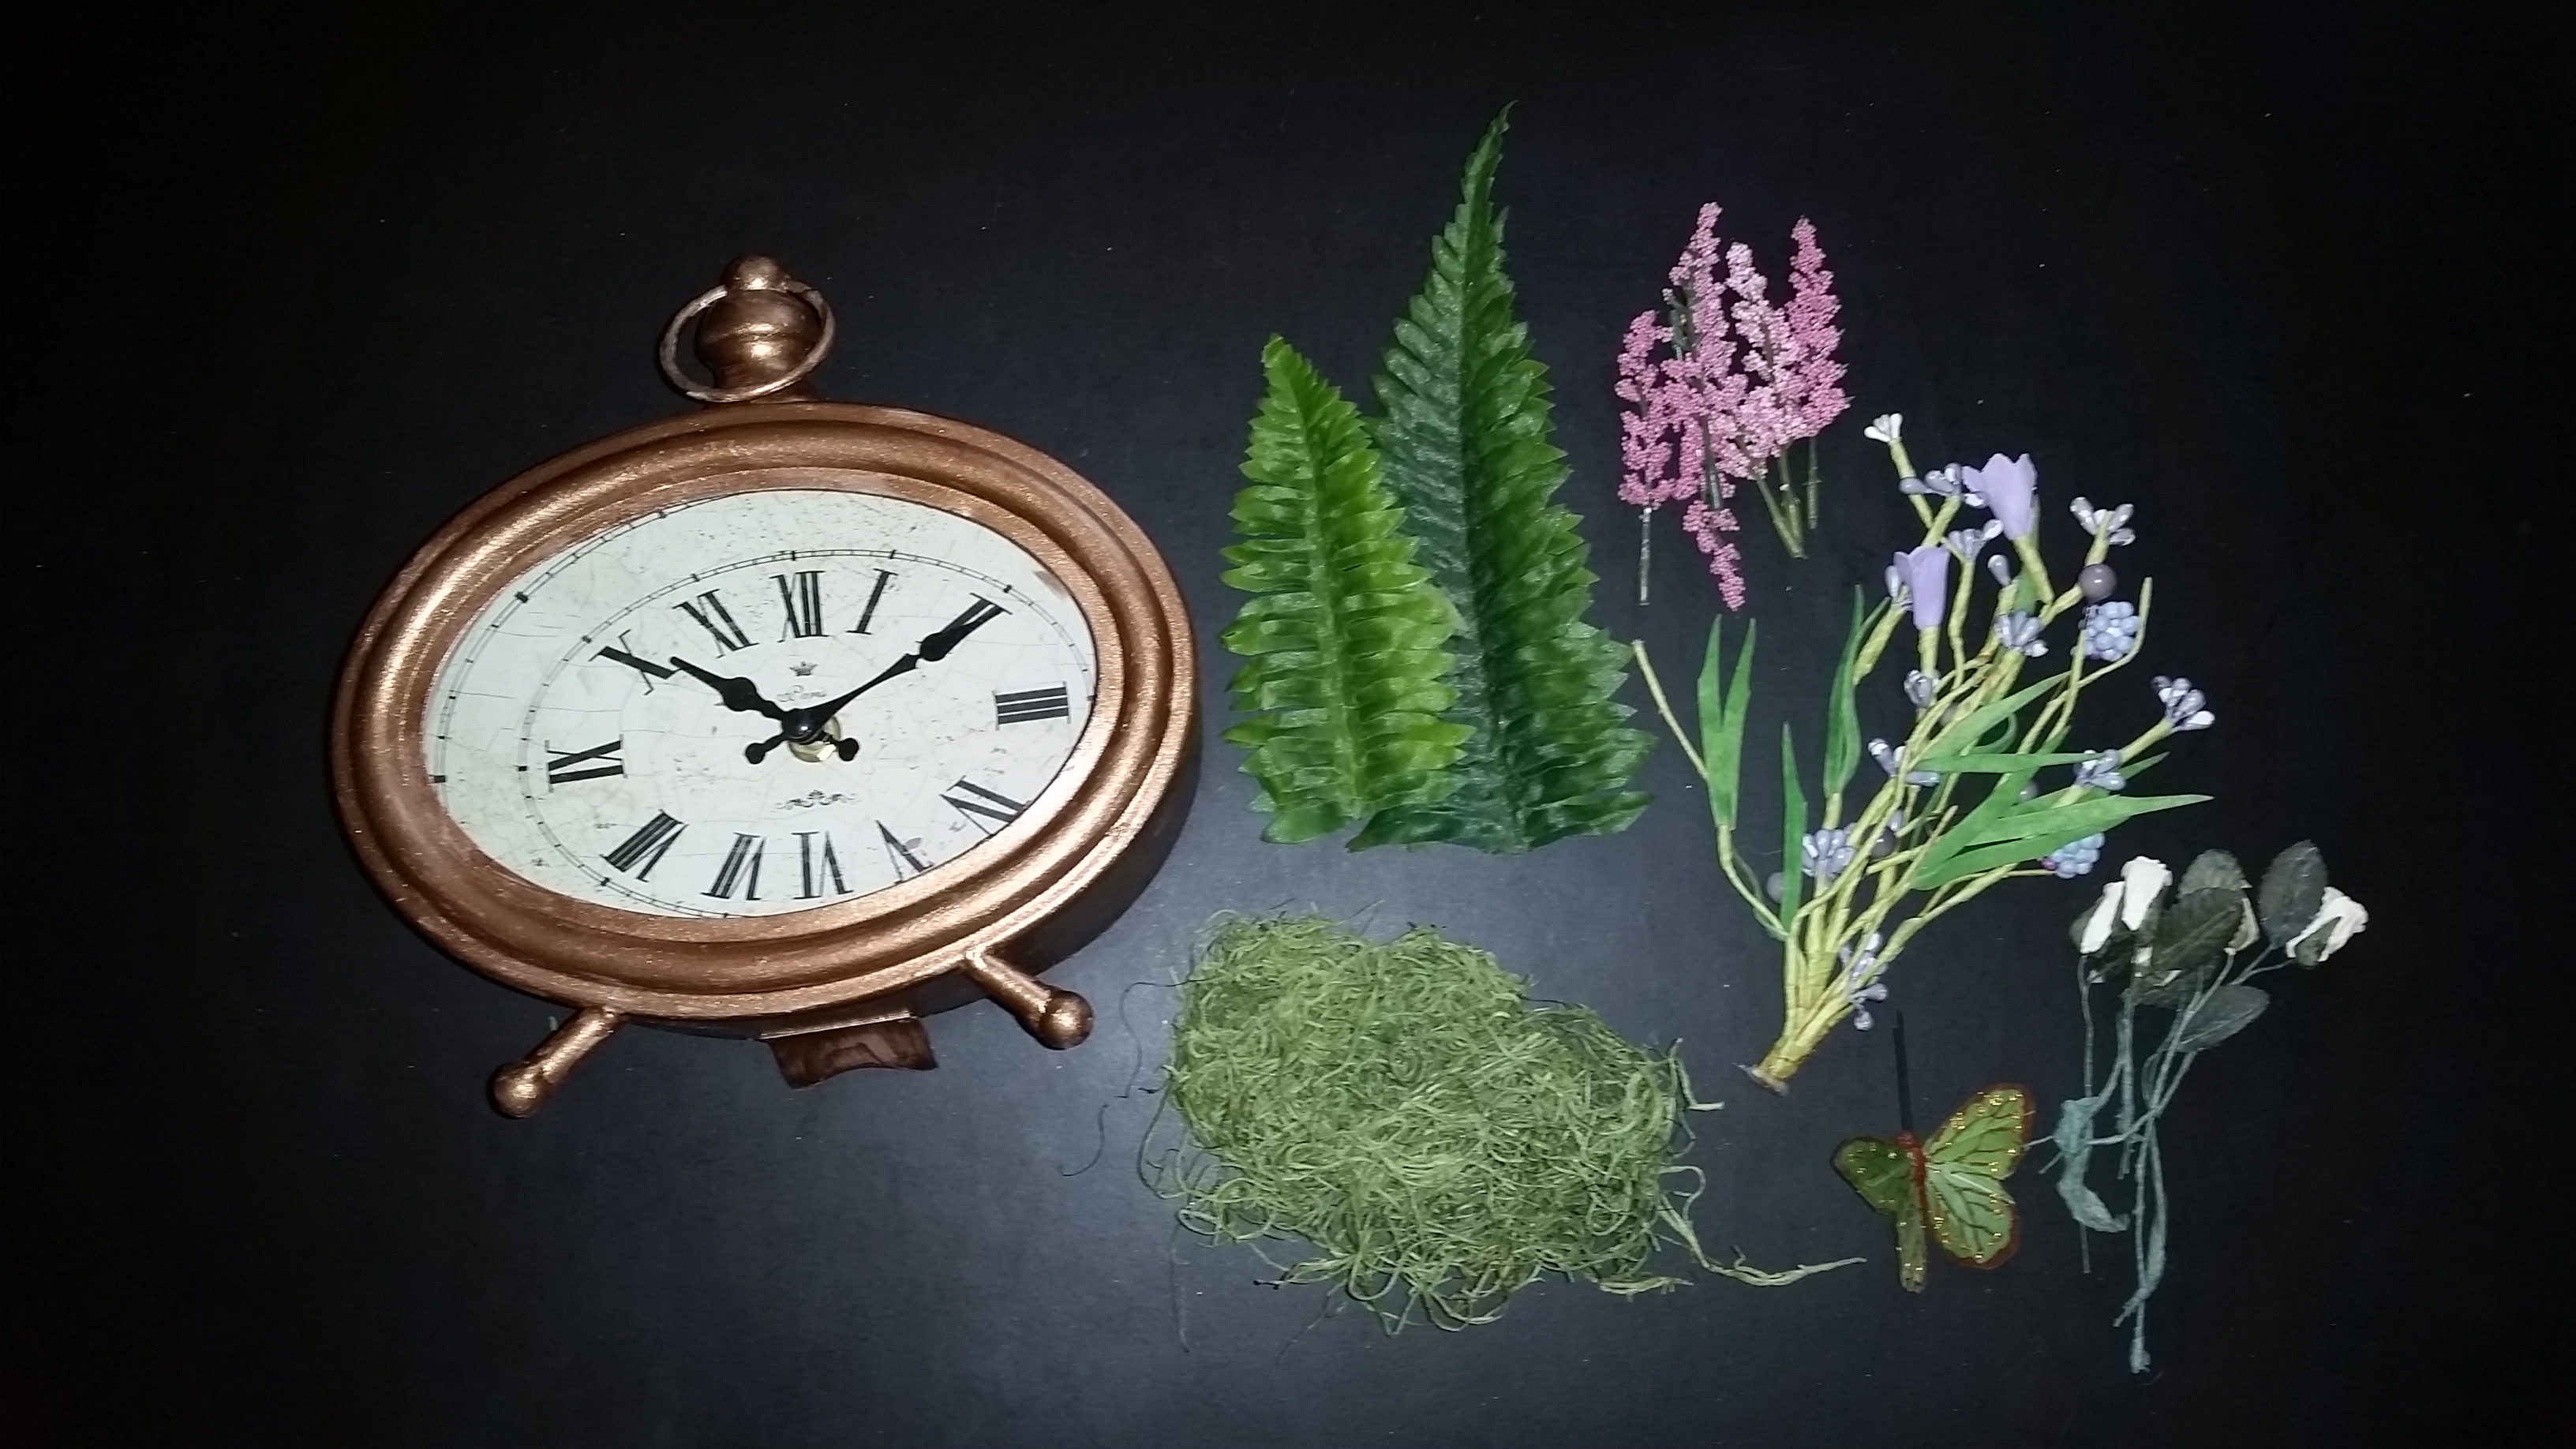
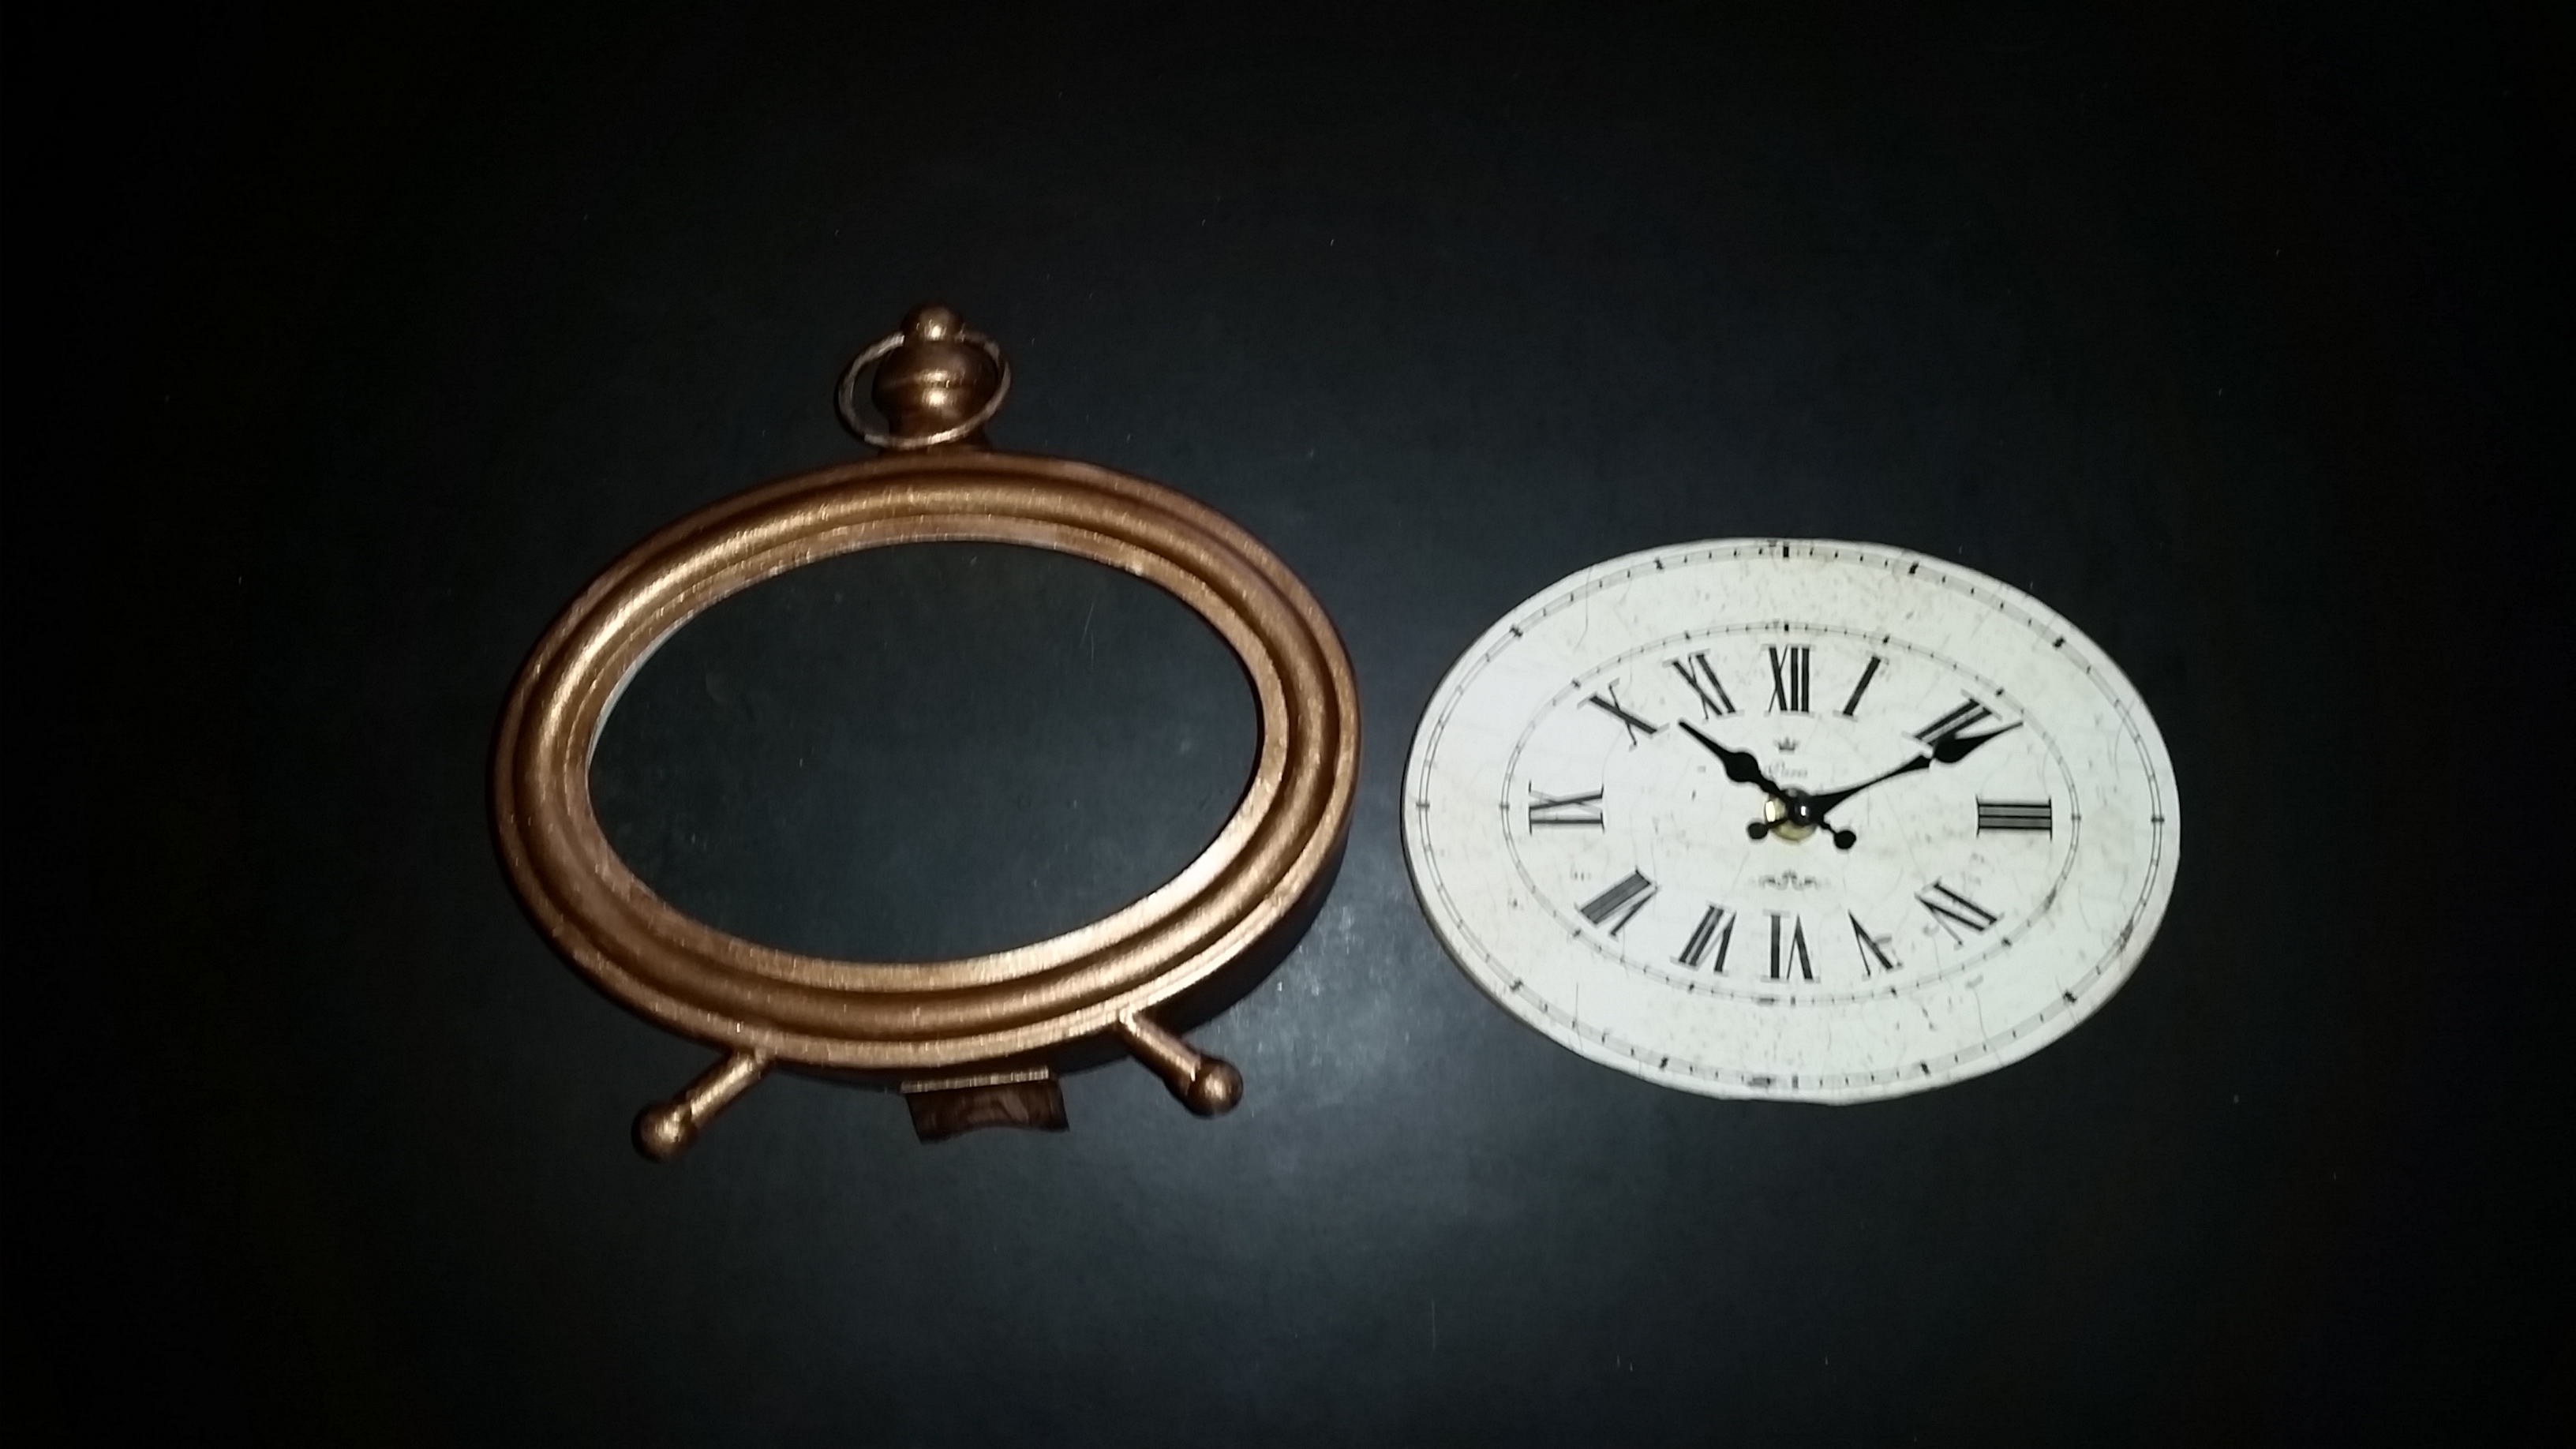
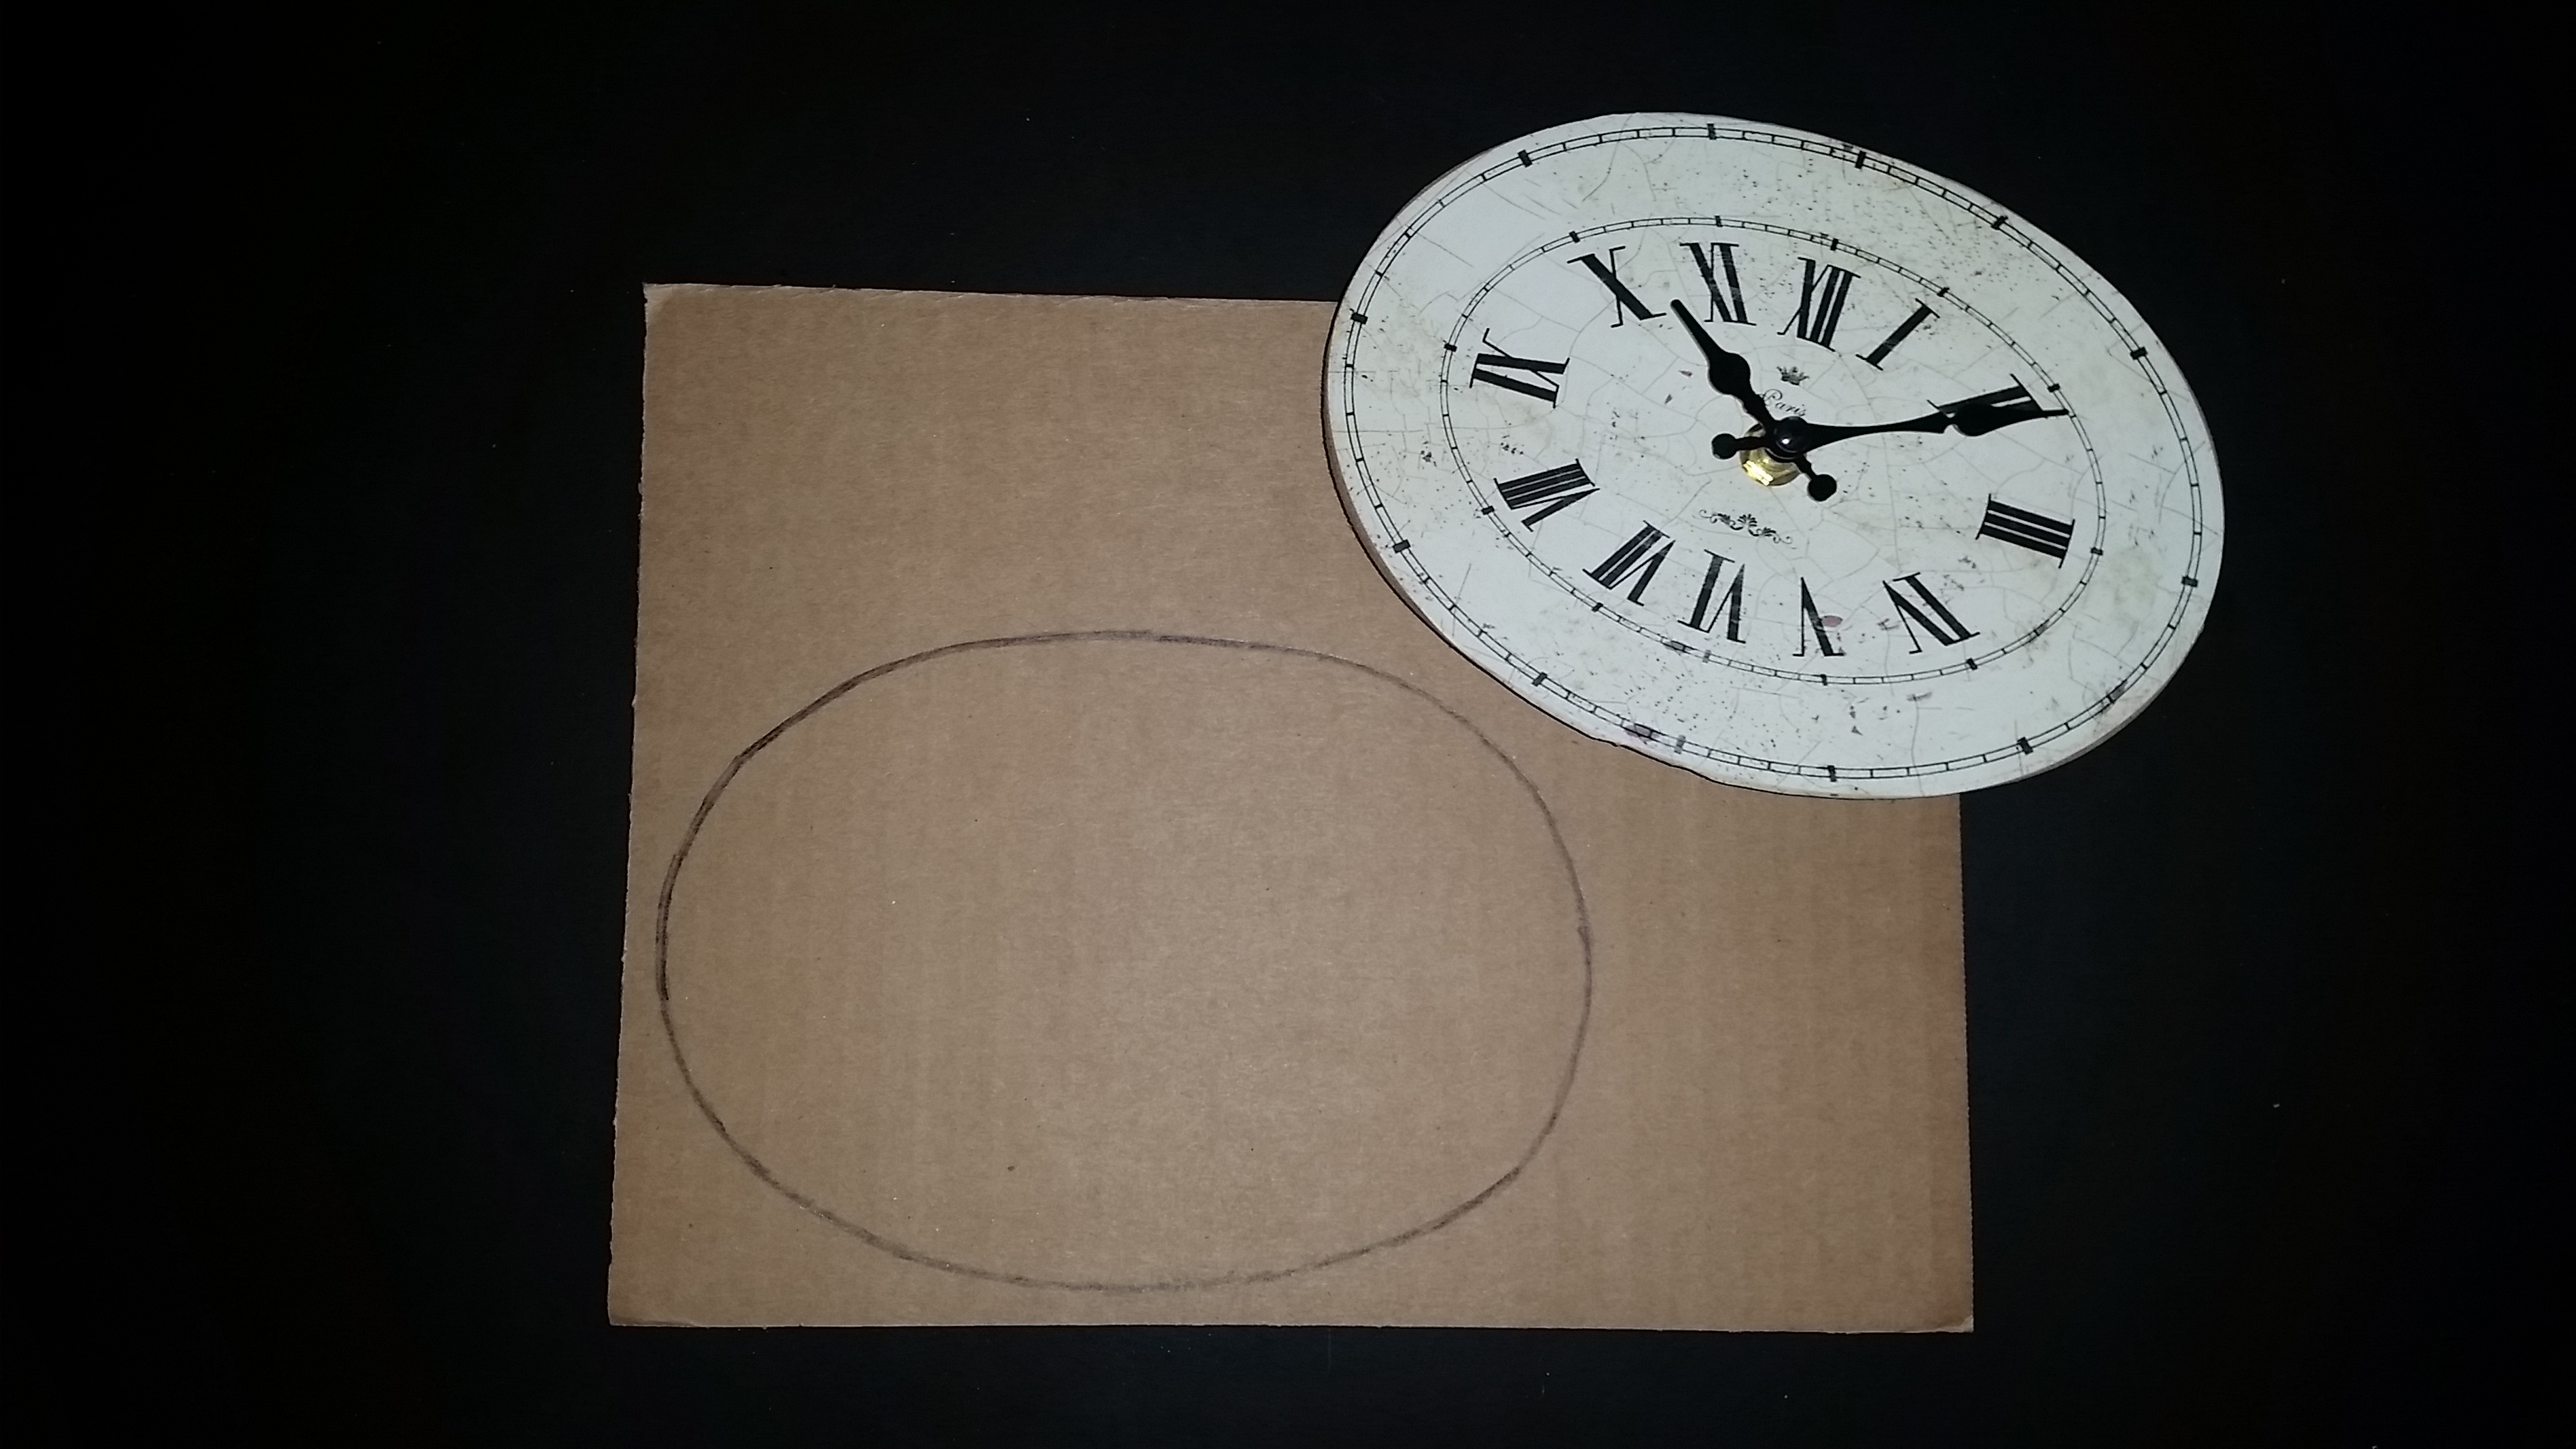
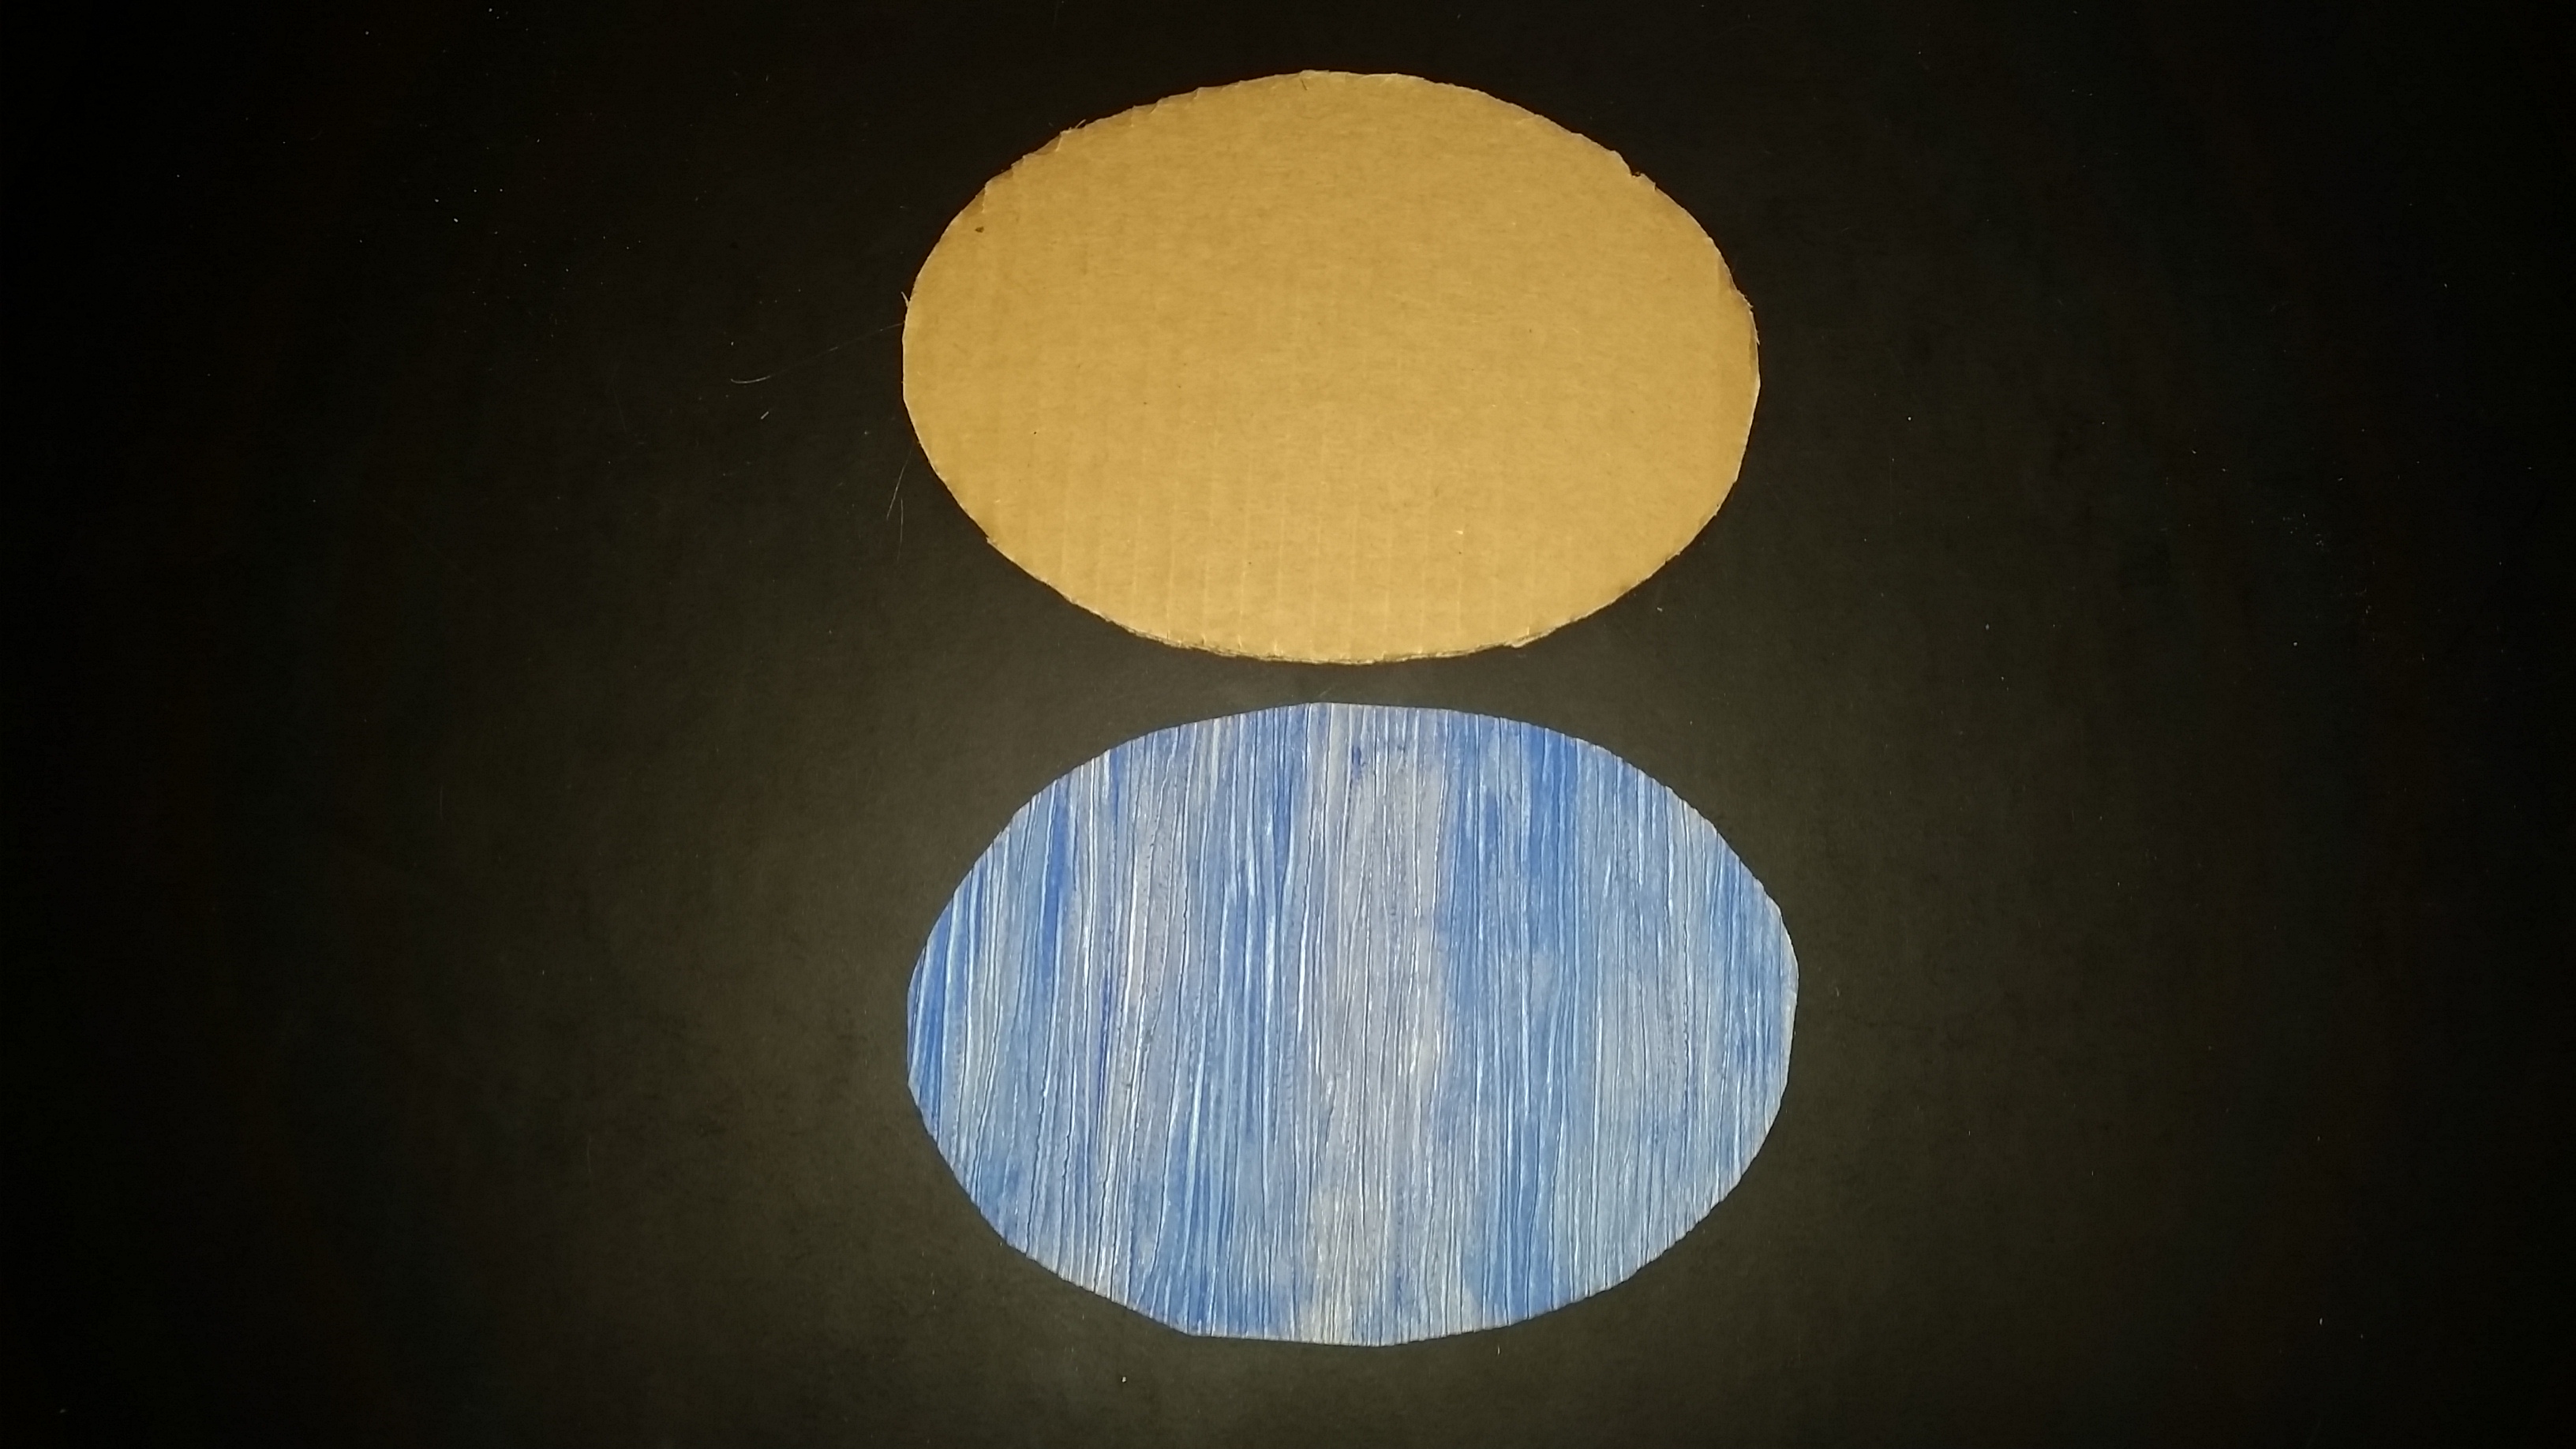
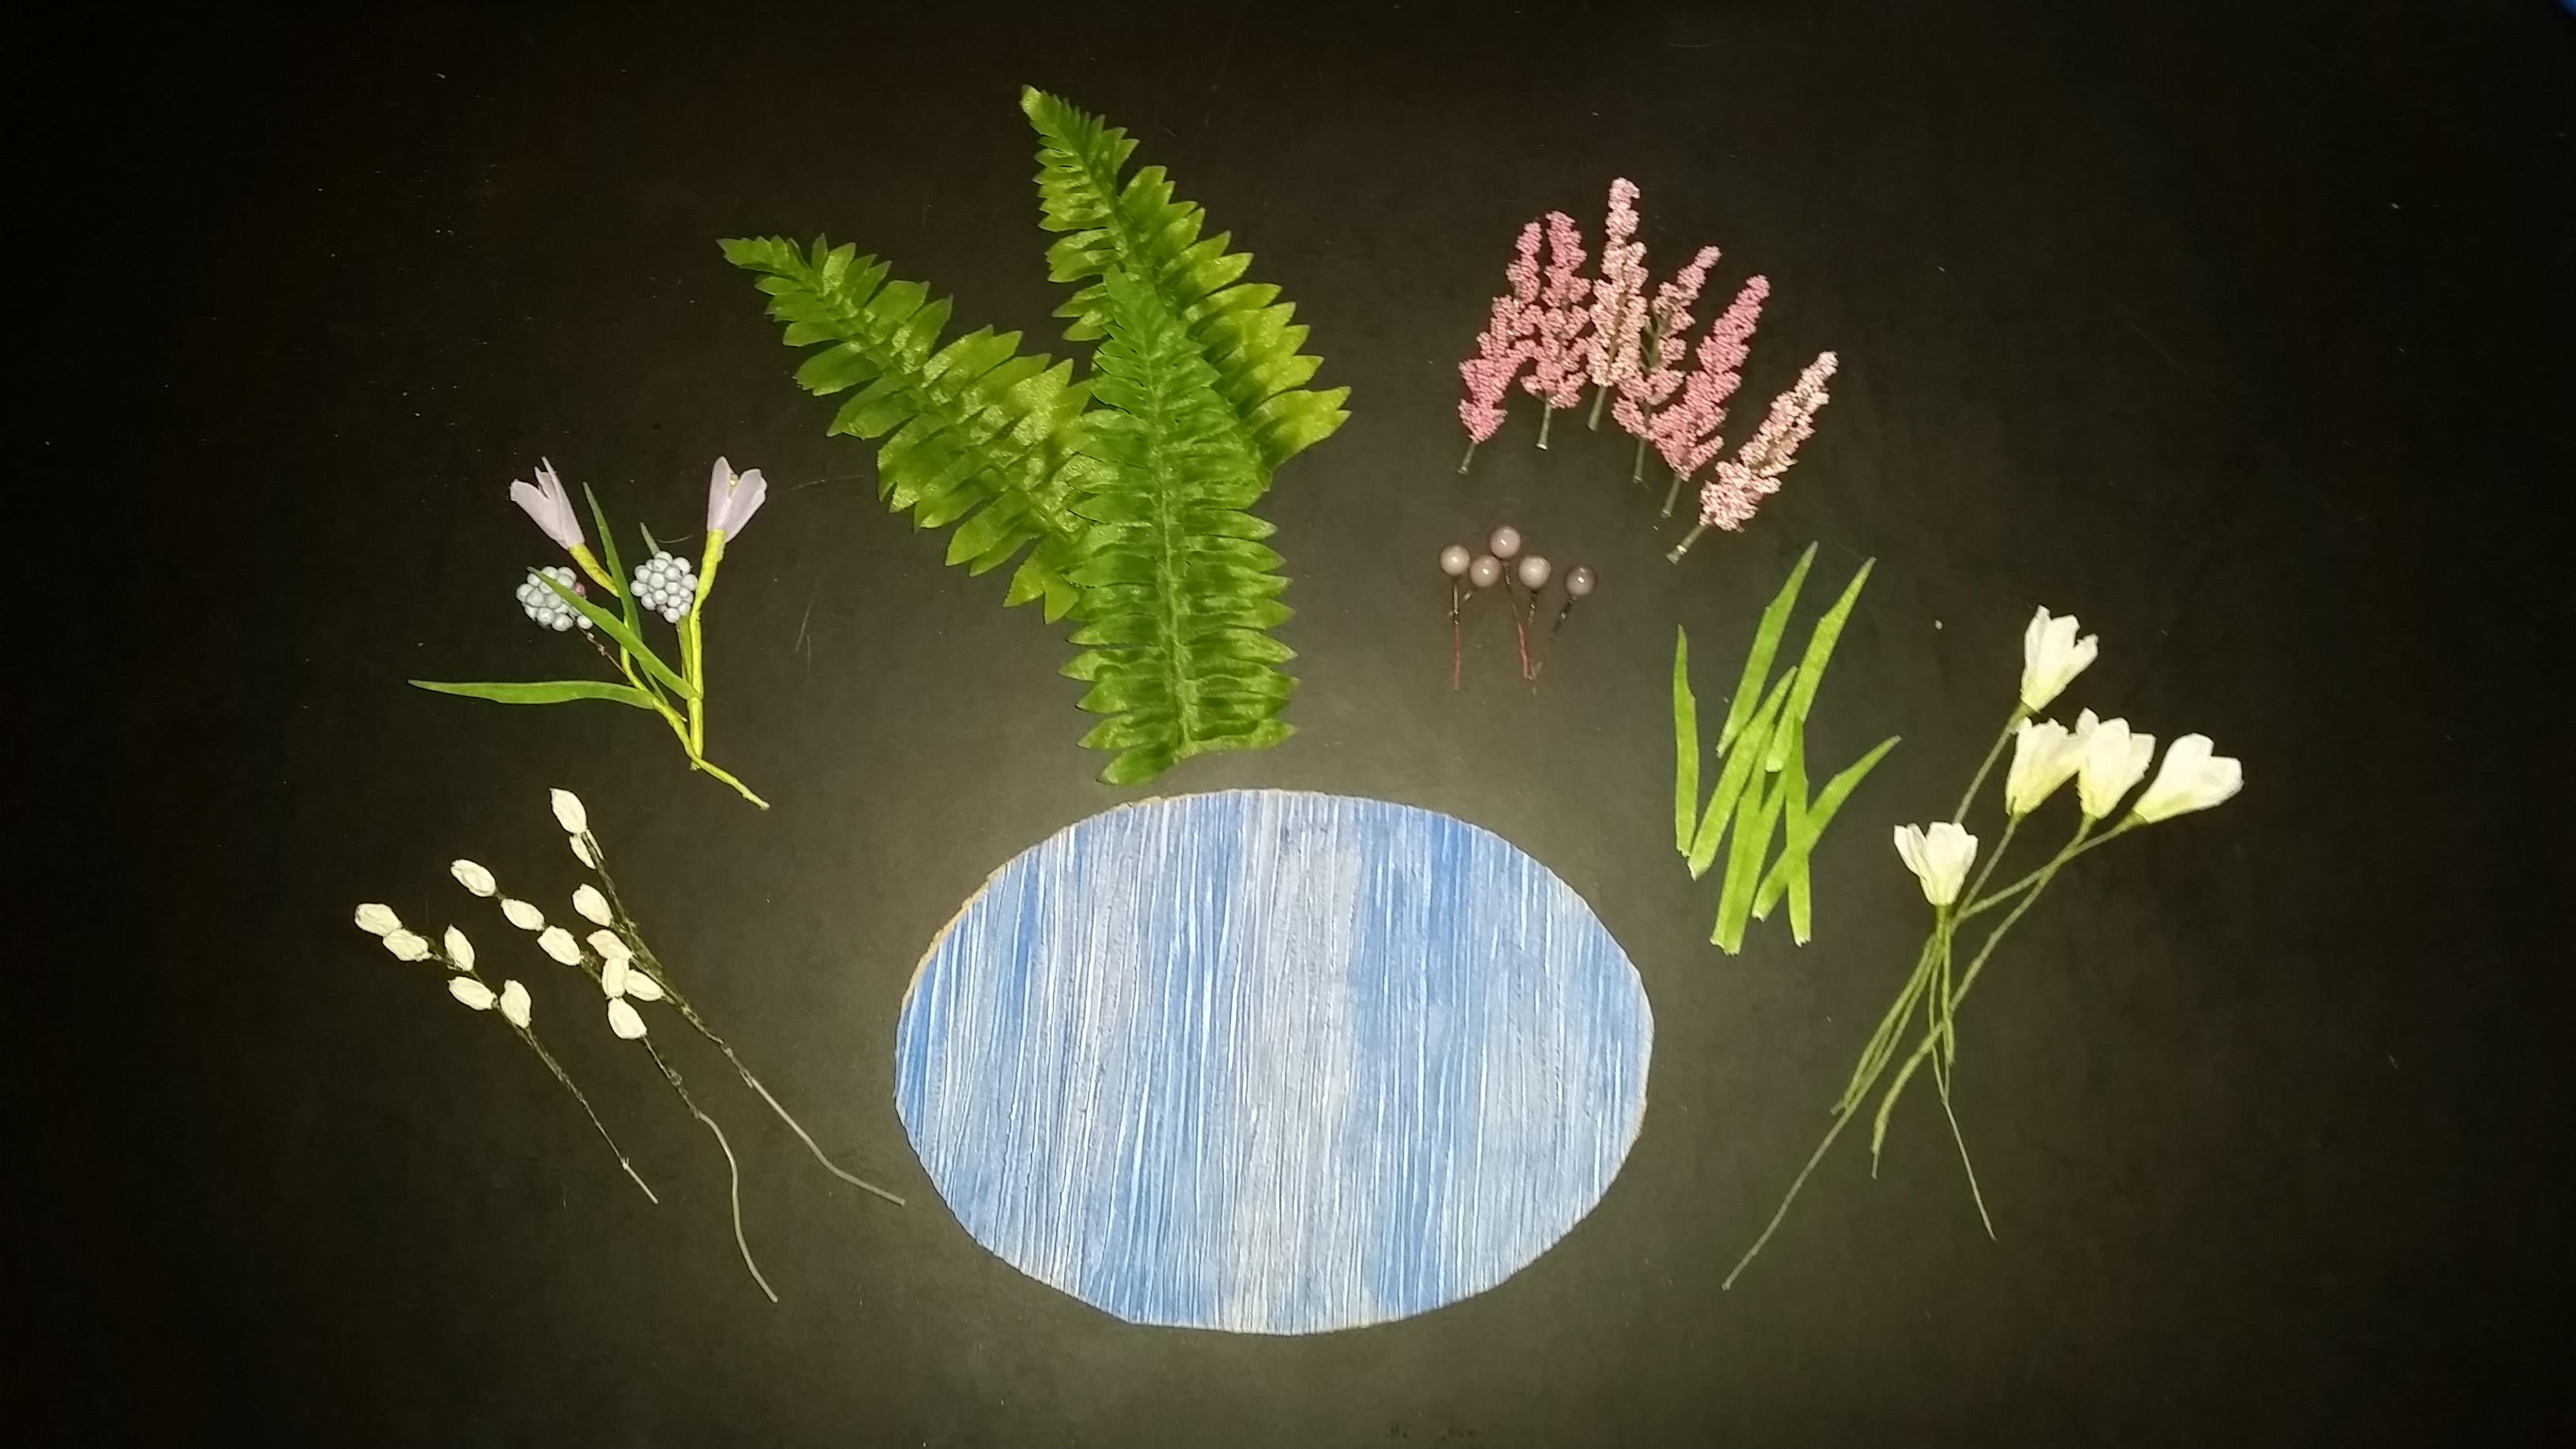
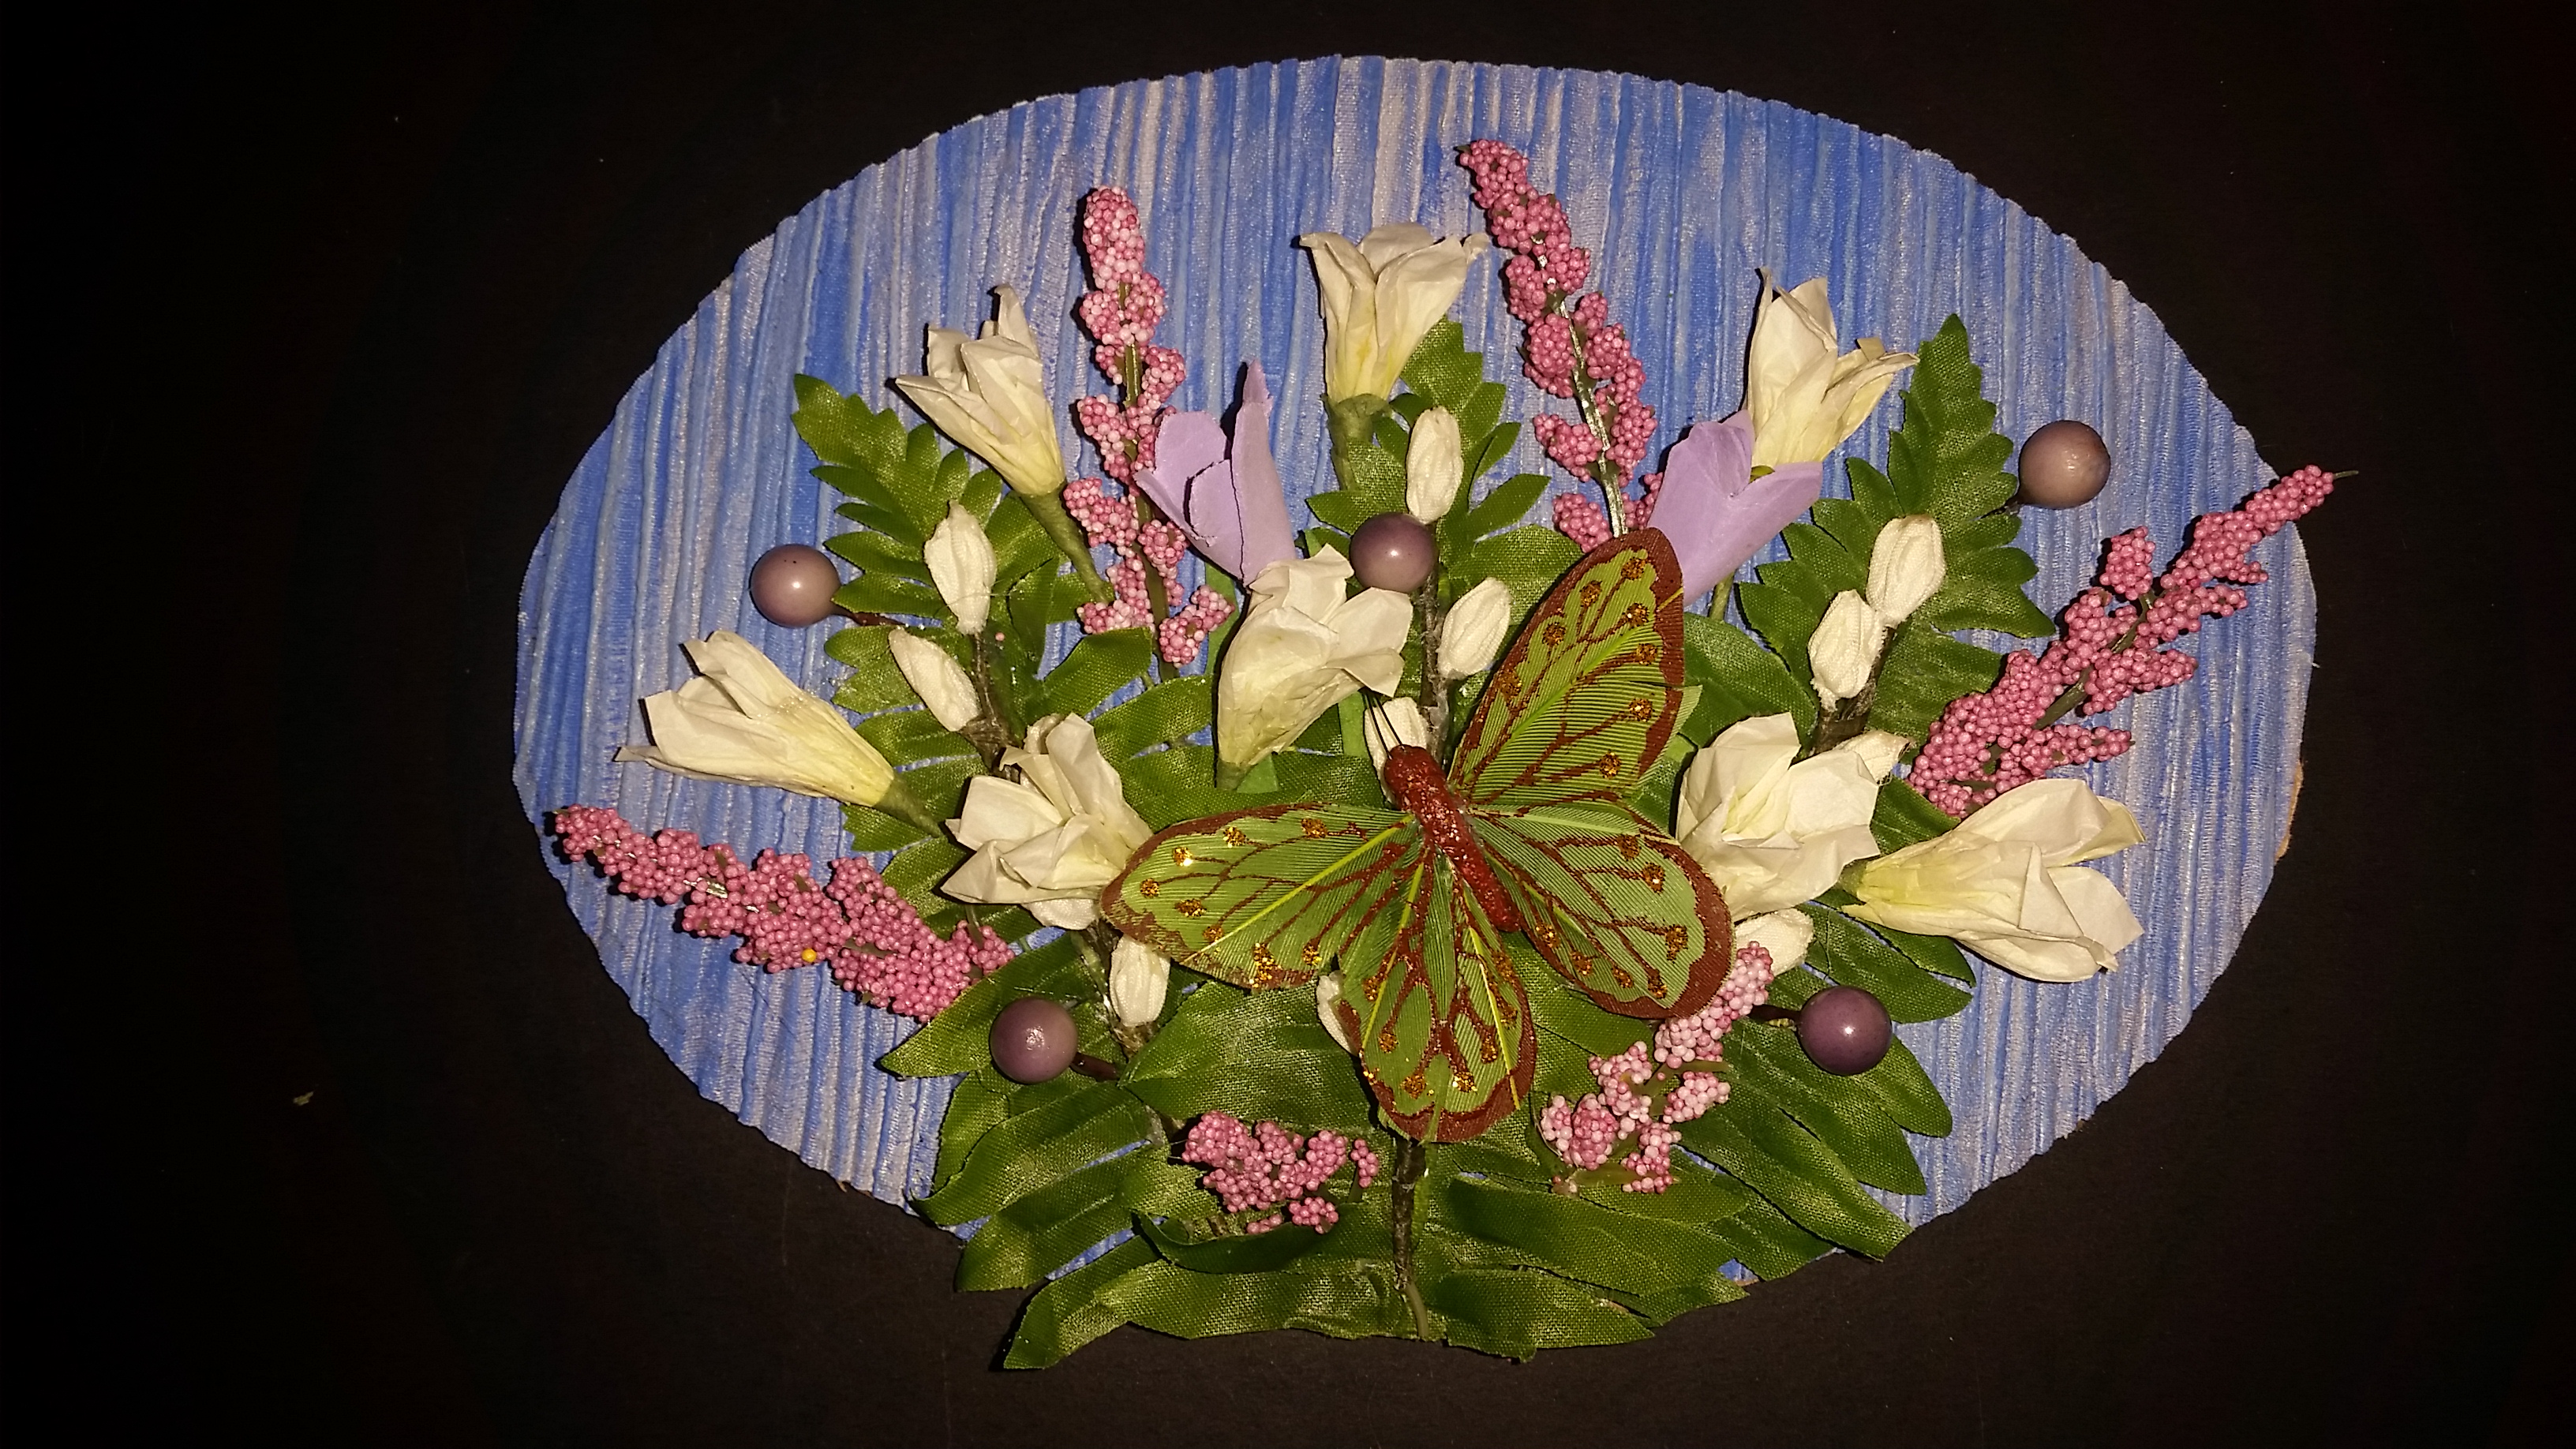
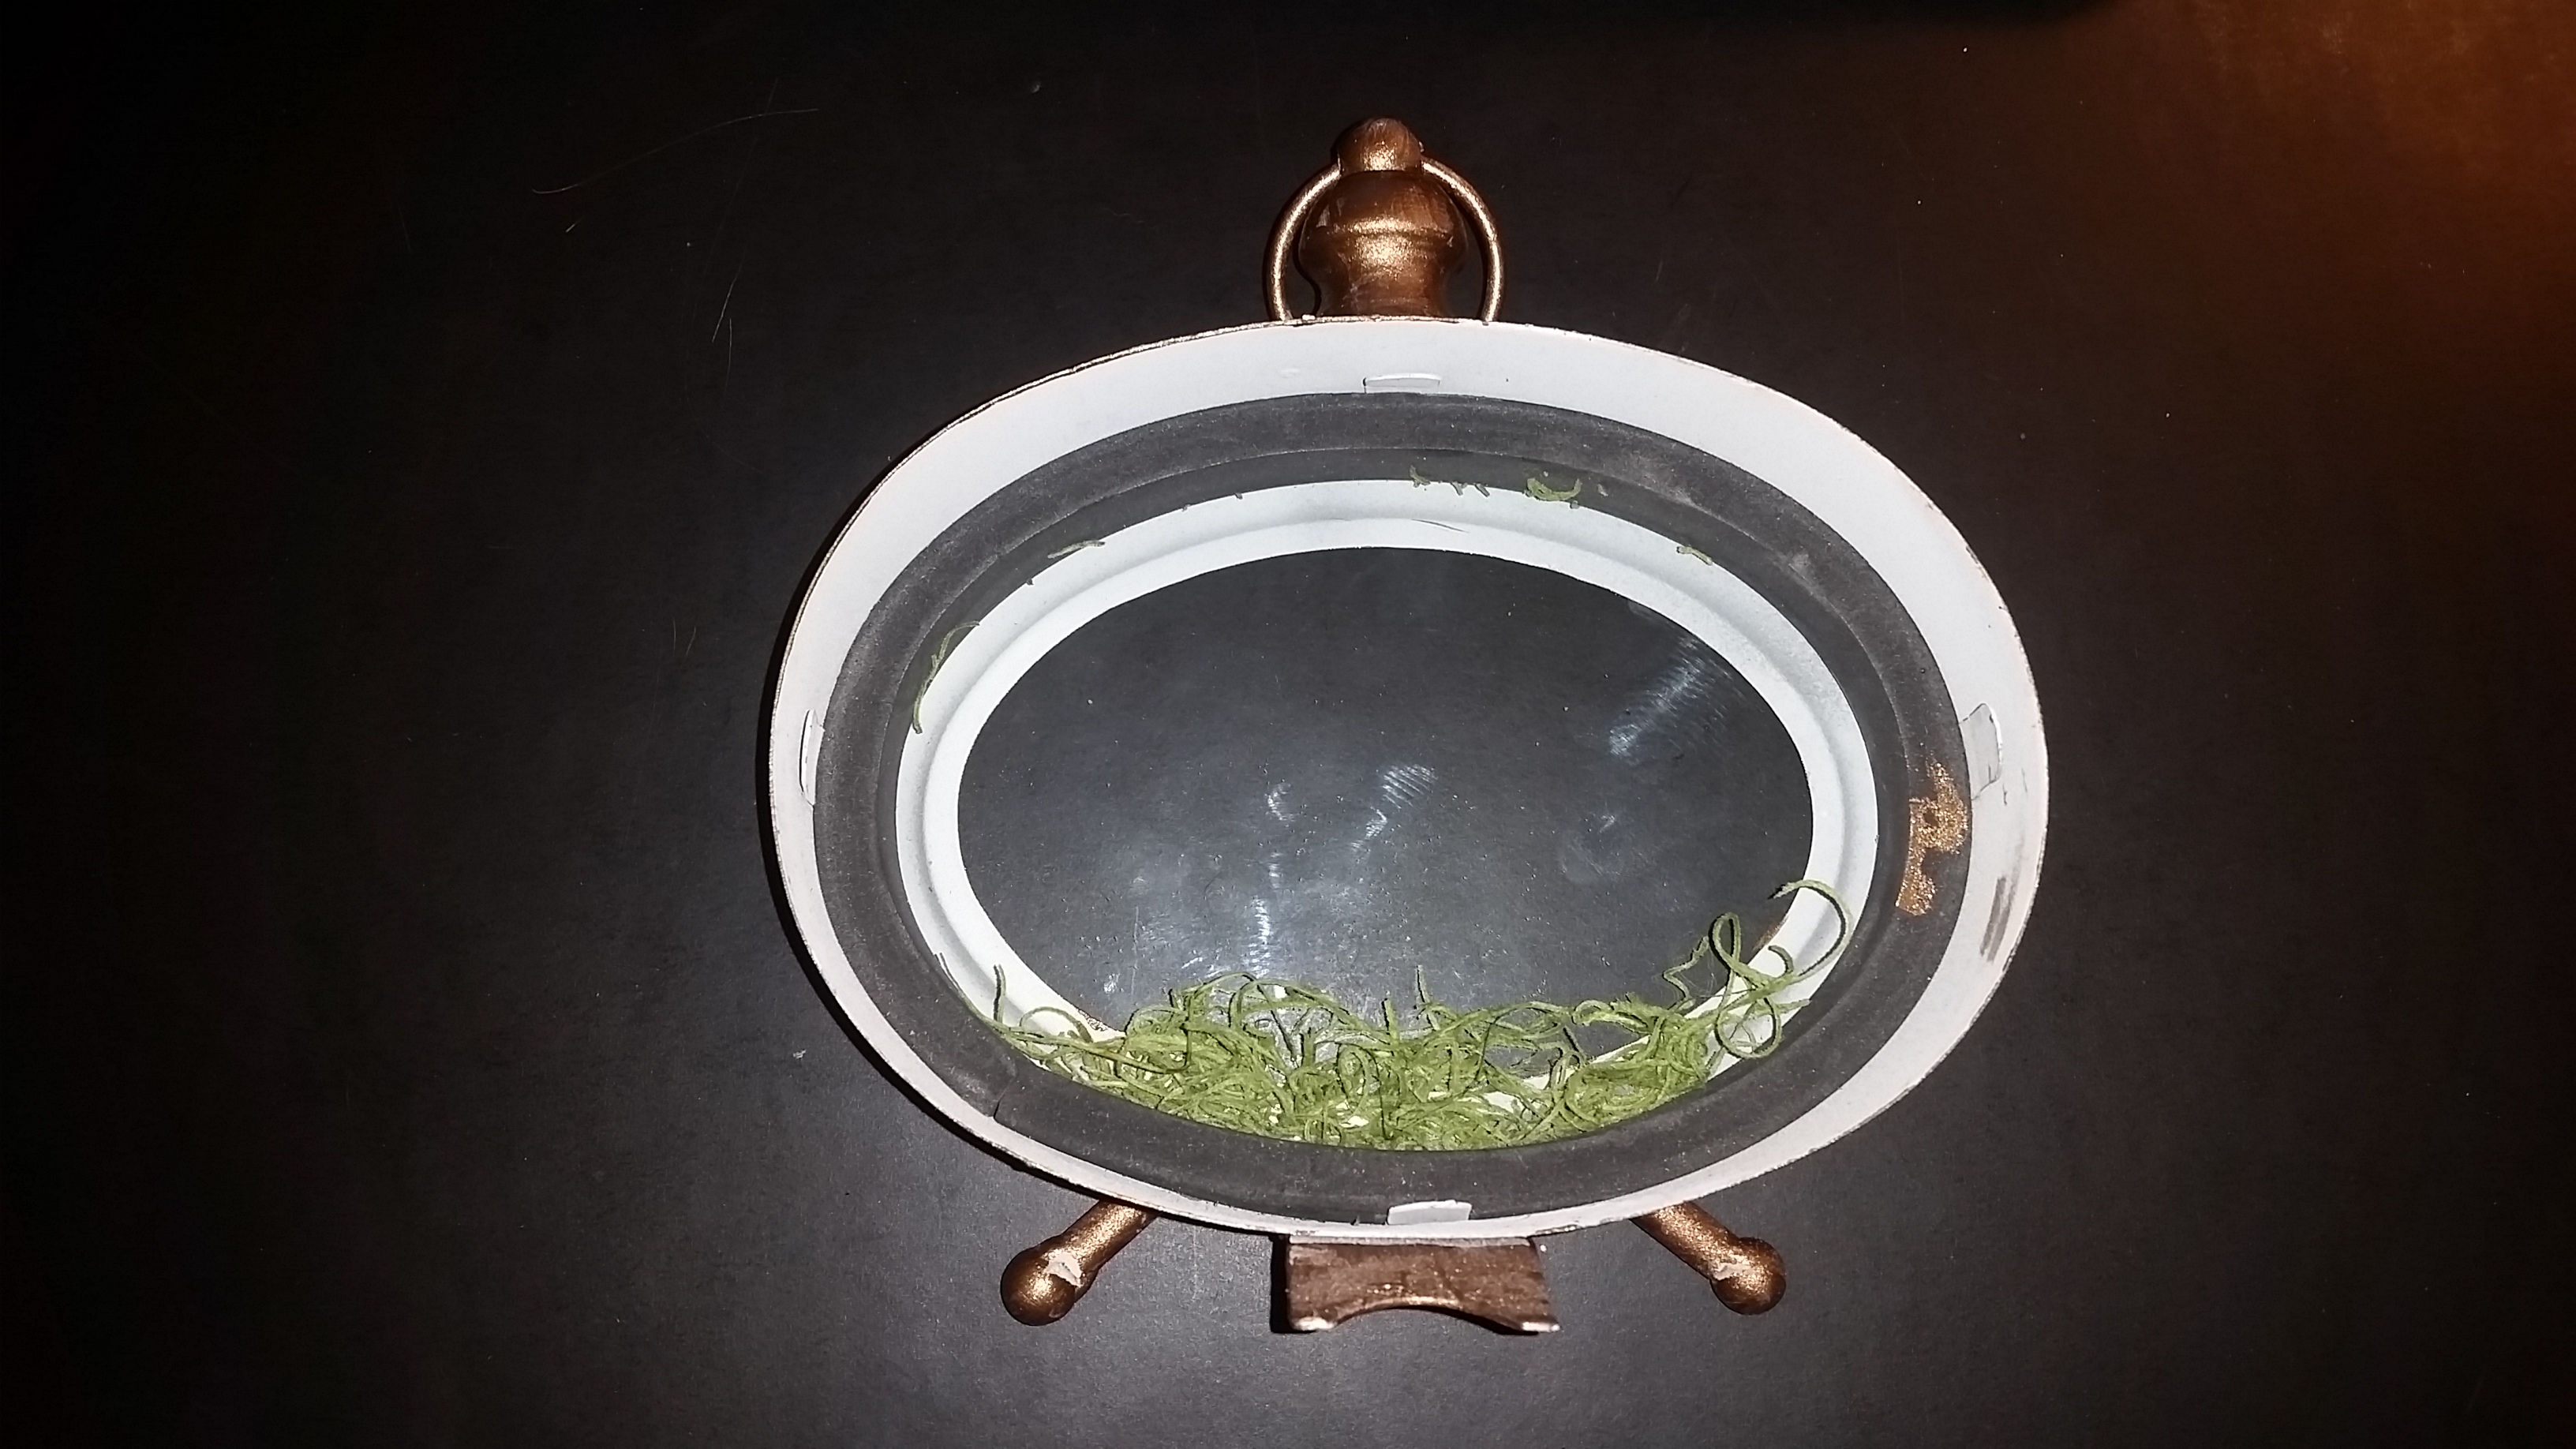
Craft – Altered Clock

Altered or repurposed artwork is very popular right now ranging from repurposed jewelry made into decorative frames and bridal bouquets to utensils made into jewelry to altered books and clocks made into decorative items. An altered item by definition is a form of mixed media artwork that changes an item from its original form giving it a new and decorative appearance.

Whenever I am looking for inspiration for craft projects I always search the internet and Pinterest is a great source for looking for inspiration on a variety of items.  In this post I will focus on one of the most popular repurposed items – the altered clock.  For this craft project I will take a simple table clock (which I purchased on sale at my local craft store) and make it into a lovely decorative item for my office bookshelf by using some inexpensive materials that I already had in my craft closet.

Altered Clock  – supplies

  • Table clock
  • Sturdy cardboard
  • Scrapbook paper for background
  • Small flowers, ferns and other floral items
  • Decorative item (I used an artificial butterfly)

Altered clock - supplies

Altered Clock – instructions

  1. Disassemble the table clock, separate the clock from the frame but leave the glass in place.Altered clock - disassembled
  2. Since a new frame backing was needed after the removal of the clock, I used the clock as a template and I cut a new backing using a sturdy piece of cardboard.Altered clock - cardboard insert
  3. Next, I cut a piece of scrapbook paper again using the clock backing as a template; I glued this to the cardboard piece.Altered clock - inserts
  4. Then, cutting the fern to fit the clock frame, I arrange three pieces and glued them to the scrapbook paper.
  5. I continued layering the small flowers and floral sprays, also gluing them to the scrapbook paper.
    Altered clock - floral supplies  Altered clock - floral insert
  6. To finish the arrangement, I glued a small butterfly in the center (as shown in the photo above)
  7. Next, before setting the floral arrangement and cardboard piece back into the clock frame, I added a small amount of Spanish moss to the bottom portion of the interior of the clock frame (as shown in the photo below)Altered clock - moss

(Special Note: The clock that I used had a foam piece in the back which created a space between the glass and backing that allowed room for the floral arrangement which is an important point to keep in mind when selecting a clock for the craft project)

Shown below is a photo of the altered clock before the alterations
and after as it sits on the bookshelf in my home office.

Original clock on shelf  20160909_064007-1

Coco Chanel (Part Two)

Last year in honor of Gabrielle “Coco” Chanel (born: August 19, 1883 died: January 10, 1971) I posted an article that discussed her personal and professional life.  Chanel was a French fashion designer that has effected what women have been wearing for a century.  Chanel started designing fashionable hats this lead to her starting her own fashion line which proved to be an enormous success.  Her understated and elegant designs set many of the fashion trends that women are still wearing today.  Chanel eventually expanded her fashion line to include accessories, such as jewelry, handbags and fragrance Chanel No. 5 which still remains one of the bestselling perfumes of all times.  In Part Two, I will discuss some of Chanel’s iconic contributions to the world of fashion.

The Chanel Suit

In 1921 Coco Chanel designed a women’s suit that would become a classic fashion item, it was the first suit made specifically for women.  The Chanel Suit was a collarless, buttoned wool jacket and a straight A-line skirt; the suit would sometimes be decorated with braid trim or metallic buttons.  The Chanel Suit was usually made in tweed material cut on the straight grain and the jacket was lined with jersey or silk crepe.  The jacket was designed without shoulder pads and there were no darts at the bust line, the neckline lacked a collar for comfort and useful pockets.  As most clothes that Chanel designed it came from her personal need to have something comfortable but yet fashionable with a sophisticated look.  As the Chanel Suit emerged as a fashion choice, the timing was after World War I and women were starting to enter into business.

Chanel suit sketch  Chanel suit 1

The Little Black Dress

The first Chanel designed little black dress appeared in the 1926 Vogue magazine in the United States, it was predicted the dress would “become a uniform for all women of taste”.  The simply-cut dress was initially available in silk crêpe de chine and had a straight neckline, long sleeves and calf-length skirt.   The “neutral” color of the dress was intended to be both versatile, affordable and meant to transcend several seasons, perhaps years and could be accessorized for daytime and evening.  Chanel later made the dress in wool or chenille for the day and silk, satin or velvet for the evening.   

Chanel Little Black Dress 1926   Chanel Little Black Dress 1926 Vogue

The Chanel Bag

The Chanel Bag was designed in 1929 and the original version was made in leather.  The bag’s exterior featured a hand-stitched quilted design and the interior was lined in a burgundy color (which was said to be used by Chanel and was reminiscent of the color of the uniforms at the Aubazine Abbey, the convent and orphanage in central France were she lived for six years).  The back of the bag has an outside compartment for storing money and on the inside of the front flap there is a zippered compartment, Chanel was known to keep her personal love letters there in her own purse.  At the front of the original bag there was a front lock, which was known as the “Mademoiselle Lock” referring to Chanel’s unmarried status.  Chanel also designed the original bag with double chain shoulder straps to allow women the freedom of not holding onto their bag which would free their hands for other activities.  The chains featured leather straps laced through them; this was a feature reminiscent of the chains that the nuns would have used at the Aubazine orphanage from Chanel’s childhood.   

Throughout the years the basic Chanel Bag has been updated and restyled.  The “2.55” bag was designed in February 1955, hence the name of this version.  The bag was made in a variety of leather and fabric color combinations and featured the Mademoiselle Lock or a special order lock shaped in the classic double CC Chanel logo.

Chanel purse

The Pearl Necklace

The history of pearls dates back several centuries to the time of the ancient Greeks when women wore them in their hair for weddings to symbolize purity and to ensure marital happiness.  During the Renaissance women would intertwine pearls into their hair also embellished their clothing with pearls. Noble women (such as Empress Maria Feodorovna of Russia, Queen Alexandria and Queen Mary of Britain) and women of the upper class often wore several layers of necklaces made of natural pearls.  In 1893, Kokichi Mickimoto perfected the process for creating beautiful and lustrous cultured pearls and a new jewelry industry was born which made pearl necklaces available for the women of the middle class.  

In the early 1920s, Coco Chanel set the fashion trend of wearing cultured pearls during the daytime; she would also combine the pearls with other pieces of fine jewelry and by doing this she made it acceptable for women to mix inexpensive and expensive jewelry to be worn at the same time.

Chanel pearls 1

Chanel No. 5 perfume

Throughout the years, Chanel was constantly looking for ways to expand her business.  In 1922 she was introduced to Pierre Wertheimer, the director of the Bourgeois Perfume and Cosmetics Company, and she worked with Ernest Beaux, a Russian-French perfumer, to create the chemical formula for a special fragrance.  Women of the upper class would wear traditional perfumes made from the pure essence of a single flower while ladies of the lower class wore more sensual perfumes made from animal musk.  Chanel No. 5, which was originally only sold exclusively in the Chanel stores, was a combination of the two different scents perfectly blended for the new modern women of the 1920s. 

After entering into the agreement with Wertheimer and Bader, a separate company was created called Parfums Chanel.  The arrangement was that Wertheimer would receive seventy percent, Bader would receive twenty percent and Chanel would have the remaining ten percent but she would have no involvement in the actual running of the business.  Years later, Chanel realized her error in being “tricked” into such a low percent of the company when the profits of the sale of the perfume reached nine million dollars annually.  She was also concerned that the original formula for Chanel No. 5 had been altered and was being produced inexpensively with inferior ingredients to meet the high consumer demands.  It would take twenty years of legal battles to finally reach a settlement and a new arrangement was agreed upon paying Chanel retroactive outstanding profits not paid to her and also increasing her percentage of the future profits, her earnings from Chanel No. 5 sales would be almost twenty-five million dollars annually.

There are several reasons for the selection of the name of Chanel No. 5, Chanel considered the number five to be her special number.  Chanel associated the number five with her childhood at the Aubazine convent and orphanage for several reasons, such as the five-petal roses which grew naturally on the hillsides surrounding the Abbey or the circular pattern repeated five times during daily prayers at the Abbey’s church.  Another reason could be traced back the fact that the scent that Chanel choose was the fifth sample.  (Chanel always showed her annual fashion collection on May fifth, the fifth month and fifth day of the year)

Chanel No. 5

Chanel was involved in all aspects of the selection and design process of the Chanel No. 5 perfume.  In regards to the perfume bottle’s design, she thought the Lalique and Baccarat crystal bottles used for the other women fragrances were too elaborate.  She wanted a simple bottle and it was thought that it inspired by the Charvet rectangular bottles in the traveling case used by her companion, Arthur “Boy” Capel or possibly the squared shape of his whiskey decanters.  

Decor – Nautical-themed Decorations

This month I wrote a Travel Post about the Royal Yacht Britannia.  The Britannia, which launched in 1953, has served the Queen as an official Royal residence for state visits and official receptions when traveling aboard.  The Britannia was also used for Royal family holidays and the honeymoons of several Royal couples throughout the years.  The Britannia was decommissioned in 1997 and is now a tourist attraction in Edinburg, Scotland.  Please click on the link for more detailed information about the history of the Royal Yacht Britannia.

So, inspired by the Britannia I decided to create two Nautical-themed Decorations which were easy craft projects, using just a few inexpensive and relatively easy to purchase items that could be made in just a short time.  The Nautical-themed Decorations would look wonderful in a beach or coastal home but could be used in any style of home.      

The first Nautical-themed Decoration used a wooden hook in the shape of an anchor, a black framed shadowbox and red, white and blue stripped scrapbook paper.  To start the craft project, I disassembled the shadowbox and set aside the backing and glass.  Using the backing as a guide to size, I cut the scrapbook paper to fit the interior of the shadowbox and then glued it to a piece of cardboard cut to the same dimensions.  This provided a hard, sturdy surface to hold the weight of the anchor hook.  I centered the anchor into place and then glued it to the scrapbook paper/cardboard.  Next, I replaced the glass and backing of the shadowbox and that completed the craft project.  (Décor Note: I choose to detach the metal hook from the wooden anchor but it could remain as a serviceable item for hanging)   

Anchor Hook  Framed Anchor

The second Nautical-themed Decoration took a little bit of research but was made in under an hour using a few inexpensive items.  The supplies included a simple wooden frame with a white mat, a burlap covered backing, several colors of scrapbook paper, cardboard letters painted black and small amount of jute rope.  To start the craft project, I used my home computer to find the nautical flag alphabet and with this information I used scrapbook paper to create the flags that would spell out our last name.  After making the small flags I attached these to a small length of jute rope which I strung from one side of the frame to the other.  With the painted black cardboard letter I spelled out “welcome” and glued these directly to the burlap backing.  (Décor Note: For this project I choose not to use the glass from the frame because of the thickness of the rope and paper flags.  By eliminating the glass it also omitted any glare to distract from the display)

Nautical flag final

Nautical flag alphabet

With these custom-made Nautical-themed Decorations I was able to create the perfect items for our home.