Decor – Changing Christmas Displays (Part One)

During the holiday season, as most readers to my blog will know, I like to change my Christmas displays from year to year.  Sometimes, I will change the location of the displays to different rooms of our house or I will add various accessories or embellishments to the displays from year to year.  In this two part series I will show my annual Christmas displays and how they have changed throughout the years.  In Part One I will feature my Fontanini Nativity display and in Part Two I will show my Department 56 North Pole village display.

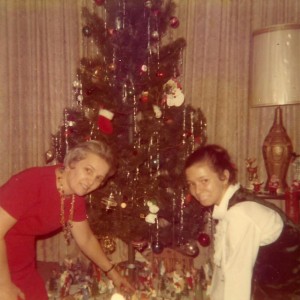
When I was growing up my mother had a beautiful nativity set with hundreds of pieces that she always set up under our Christmas tree every year.  One of favorite things to do during the holiday season was to lie on my stomach just looking at the display and the various figurines and sometimes, when my mother wasn’t looking, I would play with the pieces.  Unfortunately, after my mother passed away, I don’t know what happened to her nativity set.  It would have been nice to have one or two pieces for remembrance!  (below is a Christmas 1971 photo of my mother which shows just a small portion of my mother’s nativity set under the Christmas tree)

1971 Christmas - Mom and Barbara

When I first got married, I knew I wanted a nativity set to carry on the tradition for my own family.  There is a wonderful Christmas store in Solvang, California called the Jule Hus (solvangschristmasstore.com) and that is where I purchased my Fontanini Nativity set.  The small starter set came with a stable, Gloria the angel, Mary, Joseph and baby Jesus.  My nativity set will never be as big as my mother’s nativity set but it is just the right size to display anywhere in our house.

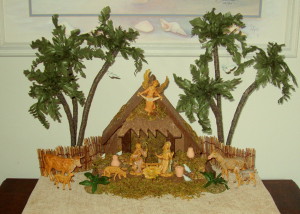
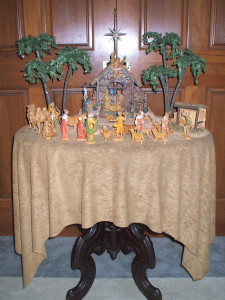
The first few years I traditionally displayed the nativity set under the Christmas tree but then as I bought more Fontanini pieces and accessories I wanted to get a little more creative.  One year I displayed them in our entrance hall on an antique sewing machine table.  I raised the nativity stable on a box covered with a piece of sand colored suede material (this material would be re-used again in a variety of different ways for my other nativity displays over the following years).  By that time I had added a few more Fontanini pieces to my collection, which included a donkey, cow, goat, two sheep and a couple of white doves, and set these additional pieces into the display.  To complete the display I added a set of palm trees and ferns, a wooden fence and a couple of miniature clay pots that I had purchased that year. 

OLYMPUS DIGITAL CAMERA

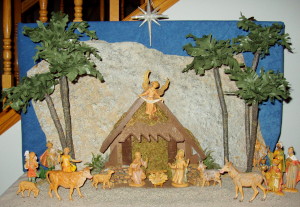
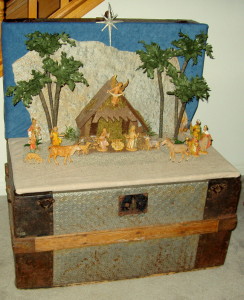
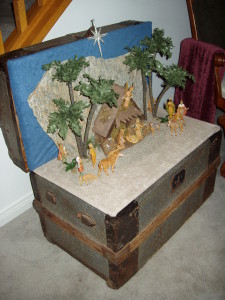
The following year I decided to display the nativity set inside an antique trunk in our living room.  I had my husband cut a piece of wood to fit the dimensions of the trunk to be used as the base and then covered it with the suede material and placed the nativity stable on top.  Next, I cut a large piece of Styrofoam board and covered it with variegated blue cotton fabric to use as a background and then I placed a large flat rock in front (the foam board with blue material would be used again in another year’s nativity display and also in another year for my Department 56 North Pole display).  Then, I set out my original Fontanini pieces and added the ones that I had purchased that year which included the three wise men, shepherds and villagers and a few more sheep and a dog.  To complete the display I had found a lovely white ornament which I hung over the nativity stable as the evening star. 

OLYMPUS DIGITAL CAMERAOLYMPUS DIGITAL CAMERA

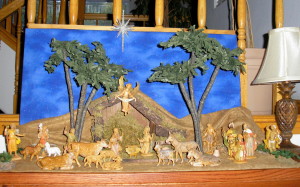
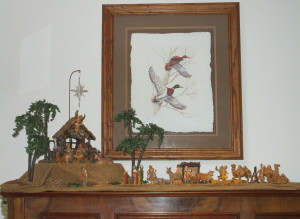
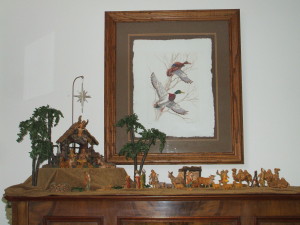
The following year, we had recently purchased a large oak cabinet for our living room and I set up the nativity set on top displayed in a way similar to the previous year.  Because I could not safely support the weight, I decided not to use the large flat rock and instead draped the suede material to resemble small hills which added an extra dimension to the display.

OLYMPUS DIGITAL CAMERA

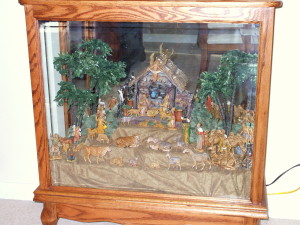
The next year I decided to move the nativity set into our dining room in an oak cabinet that we had recently purchased.  I removed one of the extra shelves and covered the remaining shelf with the suede material and tucked a box under the material and placed the nativity stable on top.  Then, then I added a new sheep shelter which I placed to the left of the stable and two campfire sets.  That year I had purchased several additional Fontanini animal figurines, which included several more sheep, goats, an extra donkey & cow and three camels and herder from the wise men’s caravan.
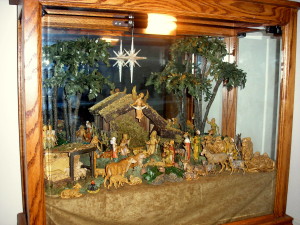
OLYMPUS DIGITAL CAMERAThe following year, I displayed the nativity set in the same oak cabinet in the dining room but I decided to add more layers to the display.  By separating the Fontanini pieces into the additional layers allowed more room to display the collection and provided a better view of the individual pieces.  As an example of my ever changing nativity display, I had purchased at an after Christmas sale the previous year another nativity stable made of resin with more detailed features which I set out in the center as the focal point of the display (I kept the original wooden stable for possible use in the future for another craft project).

2007 Christmas 2

The next Christmas we had moved from California to our current home in the Midwest.  That year I decided to display the nativity set on top of an antique piano in our library room at the new house, it was a sentimental piece of furniture that had previously been in my husband childhood home in Berlin when his family had lived there for a few years.  Once again, I used the suede material with a small box placed underneath and to the left side to provide some height in the display.  The nativity stable was set on top and because of the size of the surface of the piano top I decided that I would edited down the Fontanini nativity display and only used a portion of my collection (this is another example of changing a display from year to year)

2009 Christmas

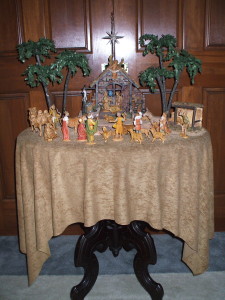
By the next Christmas, my husband’s grandmother had passed away and we had inherited an antique table that had been in her family for several years.  I thought that it would be a wonderful idea to honor her memory and incorporate this sentimental piece of furniture into the nativity display.  The table was placed in our library and I covered it with the suede material.  Next, I placed in the center a small piece of Styrofoam which I had painted in several colors of tan and brow to match the material and placed the stable on top.  Once again I edited down the collection to fit the dimensions of the surface of the table and used only selected a small portion of my Fontanini collection.  To add some additional interest, I scattered some sand around the display to create the illusion of the desert location of Bethlehem.

2011 Christmas  22011 Christmas 1

The following year, in keeping with my ever changing Christmas decorating from year to year, I decided to display the nativity set on a larger table which was placed in front of the windows in our library.  Once again, the suede material was used and I positioned the nativity stable on top of pervious Styrofoam base used last year.  Next, I placed the nativity stable on top of the Styrofoam base and set out only a small portion of my Fontanini collection.
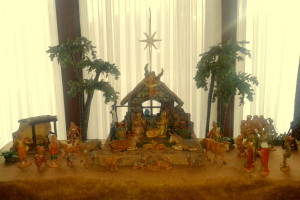
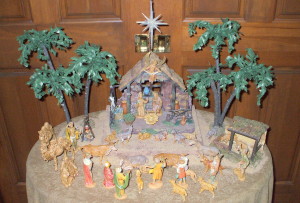
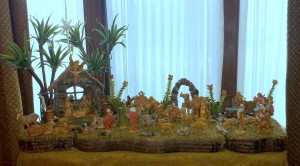
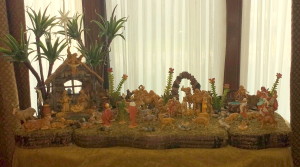
2012 Christmas The next year I decided to create a more elaborate nativity display on the same table in our library.  I used a new moss covered base set with two “rock” fences and a “rock” arch piece placed to the back of the display.  Next, the palm trees that I had been using for years were starting to show some wear so I decided to repair them instead of purchasing new ones, I also redesigned a resin water well that I had used in previous displays (these are great examples of keeping the cost down by refurbishing existing items).  Next, I set out some recently purchased display accessories, such as clay ports of grain, basket of fish and another one of olives.  I also added to my Fontanini collection and had purchased four additional figures of a shepherd and several villagers.  (This display was featured in a previous post from my blog and for more detailed information on how it was created please click on the link to Setting up a Fontanini Display)

2013 Christmas

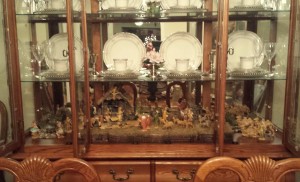
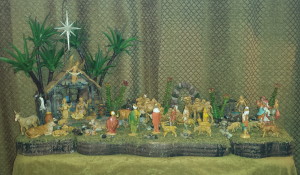
The following year I decided to move my nativity display into the dining room in our home, this was one area of the house that I hadn’t used yet for the nativity set.  I emptied everything out the bottom shelf of the oak china cabinet to make room for the display.  I used the three piece moss-covered base and set the nativity stable in the center and then arranged all the other Fontanini figures and accessories, although I didn’t use the palm trees because height size was too tall it fit in the china cabinet.

2014 Christmas

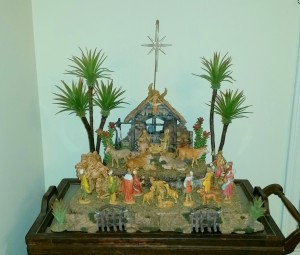
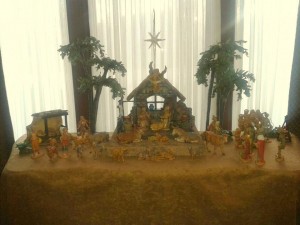
For this year’s nativity display, I kept it in the dining room but moved it to an antique tea table.  I used only two sections of the moss-covered base stacked on top of each other.  I also changed the palm trees because the weight of the heavy cactus top caused them to be unbalanced.  I replace them with lighter cactus tops and gave some weight to the base of the palm tree by hot-gluing on some metal discs underneath, this worked great and solved the problem of the toppling trees!  Once again, I edited down my Fontanini collection using only a few pieces that would fit the dimensions of the tea table.

2015 Christmas 1

As this post has shown in detail, a nativity display can be frequently changed from year to year by moving it to different rooms or areas of your home and also by adding accessories or other decorations to the display.  I hope this will inspire my readers to think about the options for displaying a nativity set in several different ways!

One last special note:  As you might have noticed in some of the photos shown in this post, the figure of baby Jesus is missing from the manger.  The reason for this is because our family tradition every year during the holiday season is that the manger in the nativity display stays empty until Christmas Eve.  On that evening we read from a beautifully illustrated book that tells the story of the birth of Jesus.  After we are done reading, my daughter will put baby Jesus in the manger and we say a prayer.  It is a lovely moment to remind us of the true meaning of Christmas.

Decor – Setting up a Fontanini Nativity Display

2013 Fontanini Nativity 6

As I mentioned in a previous Décor post last December, Fontanini Nativity Display, one of the highlights of our home decoration during the holiday season is our nativity set.  Over the years, in both our California home and in our Midwest home, I added more figurines and accessories.    Months before Christmas, I search the internet for ideas for my nativity display but most of the websites only show finished displays and never go into much detail or have instructions on how to make those displays.     For this post, I thought it would be interesting to show step by step how I set up this year’s Fontanini Nativity Display.

The nativity display base

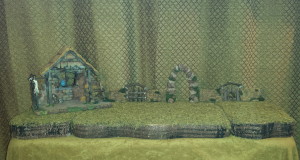
The first step is laying down a base or foundation for the display.  This particular base that I am using for this year’s nativity display was recently bought at a local craft store after Halloween on a clearance sale for very little money.  I think the three part sections with a moss surface work wonderfully for the nativity set display; the three sections interlink for one flat surface or can be stacked in a variety of positions.  I like the flexibility because every year I’m always thinking of different ways to display or change my Christmas decorations and I can also use the bases for different holidays, such as my Haunted Mansion display for Halloween.

This year, the place I choose to display the nativity set was on a table in front of the window in the library of our home.  First, I start by covering the table with a large piece of brown fabric.  Next, I positioned the three sections of the base to lay flat across the entire top surface of the table.

2013 Fontanini Nativity 1The nativity display main pieces – the stable and the background accessories
 
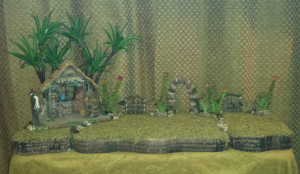
For this year’s nativity display, I set the nativity stable in the left corner of the base at a slight angle.  Then, across the back of the display, I positioned two resin sections of a “rock” fence and in the middle a “rock” resin piece in the shape of an arch.  I have a catalog which lists all the figurines and display pieces available but the Fontanini pieces are very expensive to purchase.  The three display accessories that I am using for my nativity display background are an example of using non-Fontanini pieces that coordinate beautifully but are available at a much lower price.  During the year I always keep my eye out for accessories that would work with our Nativity set and these three pieces were bought at a minimal piece during a summer clearance sale at a local craft store.  This is a great example of buying smart and keeping the cost down!

2013 Fontanini Nativity 2

The nativity display landscape – the trees and plants
 
The next step when creating a nativity display is adding trees and plants for a more natural setting or scenery.  For this year’s display, I used two sets of palm trees and you may notice in the nativity photos from the previous years that the palm trees look very different.  After last Christmas, I decided the palm trees were starting to show some wear and need repairs since I had been using these same trees for over 30+ years.
 
To the start the repair process for the palm trees; I purchased artificial cactus plants from a local craft store that resembled a more realistic palm tree shape.  I removed the leaves and wrapped the palm tree trunks with brown floral tape.  I choose this method to repair the palm tree trunks because, even though paint would have worked to repair the damage, the floral tape added more support to hold the slightly heavier cactus plants which weighed more than the previous plastic palm leaves.    After using the floral tape, I hot glued the cactus plant to the top of the tree trunk.    The refurbished palm trees were positioned behind the nativity stable and I think the finished look is more realistic then the previous version!
 
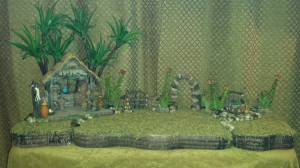
Next, I wanted to add more plants to the nativity scene because in previous years the display was a little too sparse.  Once again, in the floral section of a local craft store, I found artificial cactus plants and these were placed along the back of the display along the “rock” wall.  Then, to finish the landscape of the display, I had purchased a small bag of rocks and these were added to the base of the back wall and in front of the stable; I also used several rocks to cover the seam of the display base.

2013 Fontanini Nativity 3

The nativity display accessories

Over the years, I keep adding to the nativity display and have purchased several accessories pieces during after Christmas clearance sales or from ebay at discounted prices during the off season.  I added these items to the display to create a more realistic look to the nativity scene.  Several of those pieces included food item figurines, such as clay pots filled with grain or baskets filled with olives or fish.  I also added a campfire for the three wise men and a well for the villagers.  To add more substance to the well created a base.  I used a piece of Styrofoam which was cut and then given a rounded contour to resemble a rock foundation or platform for the well. To further the illusion, I carved grooves into the Styrofoam to simulate the individual rocks and then painted it with several different colors and adding green paint to appear as if moss was growing along the base of the well.
 
One of the most important nativity display accessories is the star above the stable that announces to the world that Jesus has been born in the little town of Bethlehem to his mother Mary and her husband Joseph.  The star is attached to a long wired holder that gives the illusion that the star is suspended over the humble stable and is calling the villagers, shepherds and three wise men to come and see the newborn child of God.  (The Star of Bethlehem can be seen in the photo in step 6)         
2013 Fontanini Nativity 4

The nativity display animals

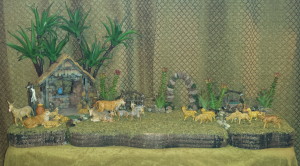
During the 30+ years that we have had our Fontanini Nativity on display during the Christmas season, I have added several new animal figurines.  I have purchased some at regular price but most of the pieces have been bought during after Christmas clearance sales or from ebay at discounted prices throughout the year.  These animals included several ox and donkeys, a couple of goats, almost a dozen sheep, a shepherd’s dog and three camels for the wise men to travel to Bethlehem to see the baby Jesus.  All these animal figurines are scattered across the display creating a sense of movement and activity that adds life to the scene.
2013 Fontanini Nativity 5The nativity display people
 
As stated in an earlier Décor post, Fontanini Nativity Display from December 2012, after years of searching I finally found my perfect nativity set that I wanted at Jule Hus in Solvang, CA.  I bought a beautiful Fontanini “starter” set that included a stable, Gloria the angel, Mary, Joseph and baby Jesus in a manger.  So, this initial purchase included the most important main pieces to my nativity display.
 
Since that time, and over the next 30+ years, I have added several figurines.  Some of those early purchases included several shepherds to tend the herd of sheep.  Other figurines were added to the display, including several villagers of various occupations.  Another important group of figurines are the three wise men who have traveled from far to honor the newly born Jesus and bring him gifts of frankincense, myrrh and gold.  All these nativity characters are scattered across the display telling the story of the birth of Jesus.

Every year I try and keep our family’s interest by display the nativity set in different rooms or creating different displays from year to year, it is constantly changing location of new figurine or accessories are added each year.  At our house in California, I have had the nativity set displayed in the hallway on an antique sewing machine and on top of a chest of drawers in our living room.  One year, I displayed the nativity set inside an antique trunk with a large flat rock as the background for the scene.  In our house in the Midwest, I have displayed it on the top of an old piano and a few years ago the nativity set was displayed on an antique table that my husband’s Grandmother kindly gave to us before she passed away last year.  This heirloom table is very special because it has been in her family for a very long time.  For the last two years the nativity set has been displayed on a table in the library of our home … who knows where the Fontanini Nativity Display will be shown next year!     

OLYMPUS DIGITAL CAMERA    2011 Fontanini Nativity 2

2010 Fontanni Nativity

One last special note:

One of our family traditions every year during the holiday season is that the manger in the nativity display stays empty until Christmas Eve.  On that evening we read from a beautifully illustrated book that tells the story of the birth of Jesus.  After we are done reading, my daughter will put baby Jesus in the manger and we say a prayer.  It is a lovely moment to remind us of the true meaning of Christmas.
Decor – Christmas Home Decorations

CHRISTMAS… the weather has turned a little frosty and there might even be snow on the ground. (if you are lucky!)  If you live in a warmer climate, don’t worry about it because as soon as you put on some Christmas music to set the mood and start to unpack those Christmas decoration boxes you will definitely get into the holiday spirit!

After Thanksgiving, I pack up all the fall decorations and the boxes are stored down in the basement. Then, my husband brings up the Christmas decorations and it can take awhile because I have several boxes!  The process of decorating our house for Christmas can take several days but I enjoy every minute of it!  The interior house Christmas decorations I have collected over the years are not specific to a certain room and I can be creative with the different accessories, so I’m not limited to the same decorations in the same place every year and this keeps things interesting and fun!  I have fewer exterior house decorations and generally they are the same every year.  For the last couple of years we have decided not to decorate the outside of the house with lights to save both time and money – please don’t call us Scrooge!!

Like most holidays when I start the decorating process for the holiday season, I begin with setting up the Christmas decorations outside on the front porch.  Living in the Midwest the weather conditions can get very harsh and I usually keep all my exterior decorations under the roof of the porch to keep everything safe from the elements.  I start with a couple of pre-lite artificial Christmas trees and for the last couple of years I have added a pre-lite snowman bought at a Target after holiday sale.  I liked the size of the snowman but embellished him a little by gluing on larger black buttons, topped it off with an old black winter hat and this year I’m going to change the wire nose and add a large artificial carrot instead!  To complete the front porch, I hang a Christmas wreath on the front door.  I have three different wreaths that I rotate from year to year. One is a large pine wreath decorated with pinecones and red berry sprays, another is a wreath covered completely in velvet holly leaves and the third one is a pine cone wreath accented with holly leaves and red berries.

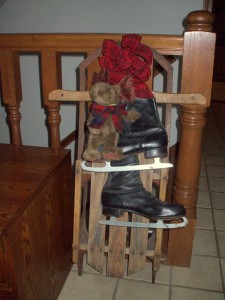
With the outside of the house done I can now start decorating the inside of the house.  In the entry hall I set up a whimsical 24” Santa displayed with two elves hanging onto the branches of a small Christmas tree.  Nearby I have a pair of black ice skates hanging from an antique sled with a Boyd’s moose named Mortimer.  Whenever I am shopping in the antique stores, I always look for holiday items – on my wish list is a set of old skis and poles and hopefully I will be able to find it before next year.  This year I have added a Christmas Kissing Ball and I think it will be fun for our guests’ arrival and departures this holiday season!  (Please look for the December Craft post for instructions on how to make your own Christmas Kissing Ball)


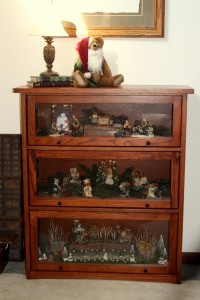
The next room of the house is our library; this is the room where all our books and vacation memorabilia are in bookshelves that fill up an entire wall.  On the other side of the room, I keep my Boyd’s Bear collection year-round in a small lawyer’s bookcase.  I add my Boyd’s Christmas figurines and I decorate the two shelves with pine branches to give it a festive Christmas look.  The bottom shelf holds the Boyd’s Bear Village and I decorate the display with winter trees and tiny snowflakes.  I also add a Boyd’s Bear Santa to one of the ivory chairs in the library.  On another side of the room, I have displayed for the last a couple of years our Fontanini Nativity set on an antique table that my husband’s Grandmother kindly gave us.  This heirloom table is very special to us because it has been in the family for a very long time. (Please see a previous December Décor post for more detailed information on the Fontanini Nativity Display)

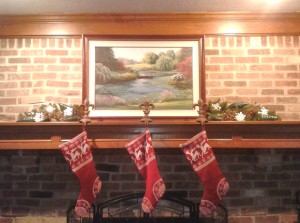
The next room to decorate is the family room.  One wall of the room has a fireplace and mantel flanked by two bookcases/cabinets.  For the past few years I have displayed our Department 56 North Pole Village in the bookshelf but this year I will be doing something new and it will be displayed across the fireplace mantel.  The fireplace mantel is also the place where we traditionally hang our Christmas stockings.  Next, to complete the family room, I will set-up a display on the fireplace hearth with a traditional 29” Santa, his two reindeers and a small Christmas tree. (Please check out my previous December Décor posts for more detailed information on the Department 56 North Pole Village display and the Christmas stockings and Fireplace Mantel decorations

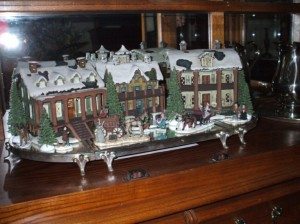
In the dining room, the Memory Tree set out for Thanksgiving will be moved to the family room.  (Please refer to last month’s Craft post for ideas and tips on how to create your own family Memory Tree)  In November I had displayed in the china cabinet three Currier and Ives porcelain houses I purchased at a local craft store a few years ago.  Our china cabinet has a mirrored back so you are able to see both the back and the front of the display of the houses.  I add a few small pine trees and additional figurines and these are set-up on a beautiful elongated mirror and silver stand.    This display is an example of a decoration that works for both Thanksgiving and Christmas seasons – I love when that happens!  This year I have added two new Craft projects to our dining room decorations – a Victorian inspired fruit arrangement that I made last month for our Thanksgiving table and a Cranberry topiary inspired by one I had seen in a past HGTV White House Christmas shows.  I think they are great additions to our traditional dining room design.  (Please look for full instructions on making both projects – the Fall Victorian Centerpiece is a November Craft post and the Cranberry Topiary is a December Craft post)

The last room on the main floor of the house to decorate for the holidays is the kitchen.  Now, this can get a little tricky because the room needs to function as a full service kitchen, so the counters need to stay clear of decorations because food and meals are being prepared and eaten at the table on a daily basis.  We have a fairly large kitchen that is open to the family room and these two rooms of the house are where we spend most of our time.

Several years ago I found the perfect Christmas theme for the holiday decorations in the kitchen – gingerbread and candy canes!!  Since there are several areas in the kitchen that I decorate for Christmas, I start with an area that has a long chair height counter with upper and lower cabinets.  This is the area my daughter does her homework and the counter needs to stay free of clutter.  So, in the space above the upper cabinets I usually set-up a Department 56 gingerbread train that is displayed with pine boughs, red berry sprays and this year I have added “white icing” snowflakes to give it a different look.  I also hang two holly wreaths with red berries and gingerbread snowflakes on the cabinet doors.


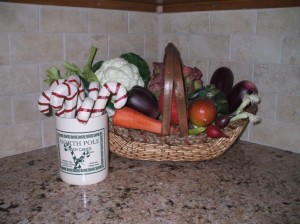
The last area that needs some Christmas attention is the area by the stove and oven.  Please be careful with the holiday decorations in this area because with the extreme heat from cooking you don’t want anything that is flammable or a fire hazard.  I have a basket of artificial vegetables on the counter and I add a cute “North Pole Candy Canes” container that holds some wooden candy canes and pine sprays.  I also hang some Santa towels from the oven bar handle.

I hope you enjoyed the tour of our house decorated for the holiday season and I try to create decorations that are classic and traditional but fun and interesting.  Please let me know your comments or suggestions; I would love to hear what you think.

Decor – Fontanini Nativity Display

When decorating our home at Christmas it is never complete until we set up the nativity set.  When I was a child my mother had a beautiful nativity set with hundreds of pieces that she always set up under our Christmas tree every year.  I remember lying on the floor just looking at that display and sometimes when my mother wasn’t looking, I played with the pieces. Unfortunately, after my mother passed away this year, I don’t know what happened to her nativity set.  It would have been nice to have one or two pieces for remembrance!

1971 Christmas - Mom and Barbara

When I first got married and started decorating my own home, I knew I wanted a nativity set and I took my time looking for the right one.  There is a wonderful Christmas store in Solvang, California that has been there since 1967 called Jule Hus. (solvangschristmasstore.com)  They sell beautiful Old European glass ornaments, German Nutcrackers, Christmas Angels, and Fontanini Nativity sets.  We loved going to the store whenever we visited Solvang and it didn’t matter what time of year because as soon as we walked through the doors it was always Christmas!

After years of searching I finally found the perfect nativity set that I wanted at Jule Hus.  I bought a beautiful Fontanini set that included a stable, Gloria the angel, Mary, Joseph and baby Jesus in a manger.  Over the years I added more pieces; the three wise Men and their camels, shepherds and their flock of sheep, also a set of ox, donkeys and goats, palm trees and a star that hangs suspended over the nativity set.  It will never be as big as my mother’s nativity set, but it is small enough to display anywhere in the house.  We have display it in an oak cabinet in our California house.  Now that we have moved to the Midwest, I have displayed the nativity set in several different places, such as: in the library on top of an old piano from Germany and last year I had displayed the nativity set on a lovely heirloom table that we received from my husband’s Grandmother.

One thing remains the same no matter wherever it is displayed, traditionally the manger stays empty until Christmas Eve.  On that evening we read from a beautifully illustrated book that tells the story of the birth of Jesus.  After we are done reading, my daughter will put baby Jesus in the manger and we say a prayer.  It is a lovely moment to remind us of the true meaning of Christmas and a family tradition that we love to celebrate every year.


Tradition of the Nativity scene or crèche

A nativity scene or crèche depicts the birth of Jesus.  The main figures are the infant Jesus, Mary, and Joseph.  Other figures include angels, shepherds and the three wise men known as the Magi.  Usually the scene takes place in a barn or stable with Mary and Joseph and a manger for Jesus.  Usually displayed with nativity are various animals such as a donkey, ox and the camels belonging to the three wise men.  Sometimes, more elaborate nativities will display different scenes from the village, such as: the Inn and the Innkeeper and the other village merchants and craftsmen.

During the Christmas season, the tradition of the nativity scene is created all around the world.  There are many different types of nativities that represent the various countries and the cultures of the native people.  Known as the Szopka, the traditional Polish nativity dates back to the 13th century and was originally carried from door to door by performance groups that told the story of the birth of Jesus. There is a famous annual competition held in Krakow’s main square and prizes are awarded for the most elaborately decorated nativity scenes. The construction of these modern nativity scenes often use the design elements found in Krakow’s historic architecture and include Gothic spires, Renaissance facades and Baroque domes.

Mass produced nativity sets are now available worldwide in all different types of materials and every price range.  One of the most successful companies is Fontanini.  The House of Fontanini was founded in 1908 in Bagni di Lucca, Italy.  They produce and hand paint cast resin figures in several different sizes that range from 2.5″ to 50″ tall.  The most popular sizes are the 5″ and 7″ figurines and are currently distributed by the Roman Inc. since 1973.  They are usually sold by Christmas ornament suppliers such as Bronner’s. (www.bronners.com)  These treasured nativity pieces are very collectible and would make a great family heirloom to pass onto future generations.

If you also display a Nativity Set, I would love to see your photos!

Decor – Fall to Christmas Change Over

The week after Thanksgiving is a very busy time for me!  That’s when the Fall decorations are put away and the Christmas decoration boxes are brought up from the basement.   I really enjoy taking my time to unpack each box and deciding how I want to do this year’s displays.  Even when I’m using the same pieces year after year I try to set my displays in different ways or in different rooms of the house.  Sometimes the Fontanini Nativity set will be in the dining room and the next year it will be in the our library or the Department 56 North Pole Village will be in the family room bookshelf and the next year is will on the mantel over the fireplace.  This keeps everything interesting and it is fun to use different ideas or techniques to set up the displays.

In upcoming December posts, I will take you through all my preparations of the different Christmas displays I create in our home, such as: Fontanini Nativity Display and Department 56 North Pole Village.  Some other December posts detail my other Christmas decorations, such as: Themed Christmas trees and Christmas wreaths.  All of these Christmas decorations are created to make the holiday season a special one for my family.

Now, I wanted to discuss how to use some of the same materials for both Fall and Christmas.  When this is done in a creative way it can save time and expense when changing over the decorations from one holiday to next.  (Who doesn’t want to have extra time and save money at this time of year!!)
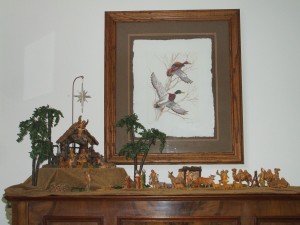
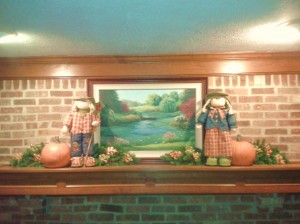
Pine garlands are a very versatile material for this purpose and I will show how with some simple changes it can be used for both Fall and Christmas decorations.  One of the most traditional ways to use pine garlands are on a mantel over the fireplace.  Below are two photos showing the same garland decorated for both holidays.  Keeping the same pine garland on the mantel, I switched out the fall decorations and replaced them with the Christmas decorations.  For Fall, the pine garland is decorated with colorful ceramic fall leaves and red berry sprays scattered throughout.    For Christmas, I used several ceramic snowflakes, large green glass pinecones ornaments and red berry sprays.


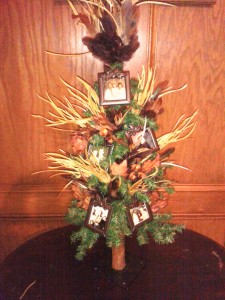
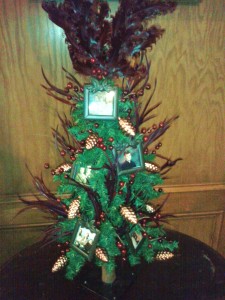
Small tabletop Christmas trees can be used in the same versatile way.  In my dining room I create a “Memory Tree” and placed it on a tea table.  This special tree is decorated with family photos in small bronze photo frame ornaments.  (Please see this week’s Craft post for more information on the Memory Tree or Wreath)  Below are two photos showing the “Memory Tree” decorated in two different ways for Fall and Christmas.  For Thanksgiving, the tree is decorated with golden feathers and oak leaves with acorns.  For Christmas, I replace the golden feathers with burgundy feathers and small glass pinecone ornaments.
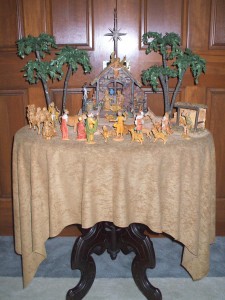
    

As you can see, all it takes is a little creativity and by simply using different decorations to accent a pine garland or a tabletop Christmas tree the look can reflect the different holidays.

I would love to hear from you so, please write me to share your own ideas or comments.