Decor – Special Ornament Wreaths

Christmas wreaths are a wonderful way to add character and personality to holiday decorating.  In this post I will show three Christmas wreaths that use special Hallmark ornaments.  Sometimes special themed ornaments can get lost on a Christmas tree filled with the numerous ornaments and by using them on a Christmas wreath it allows them to be showcased in a creative way.

Claus and Co. Railroad Christmas Wreath

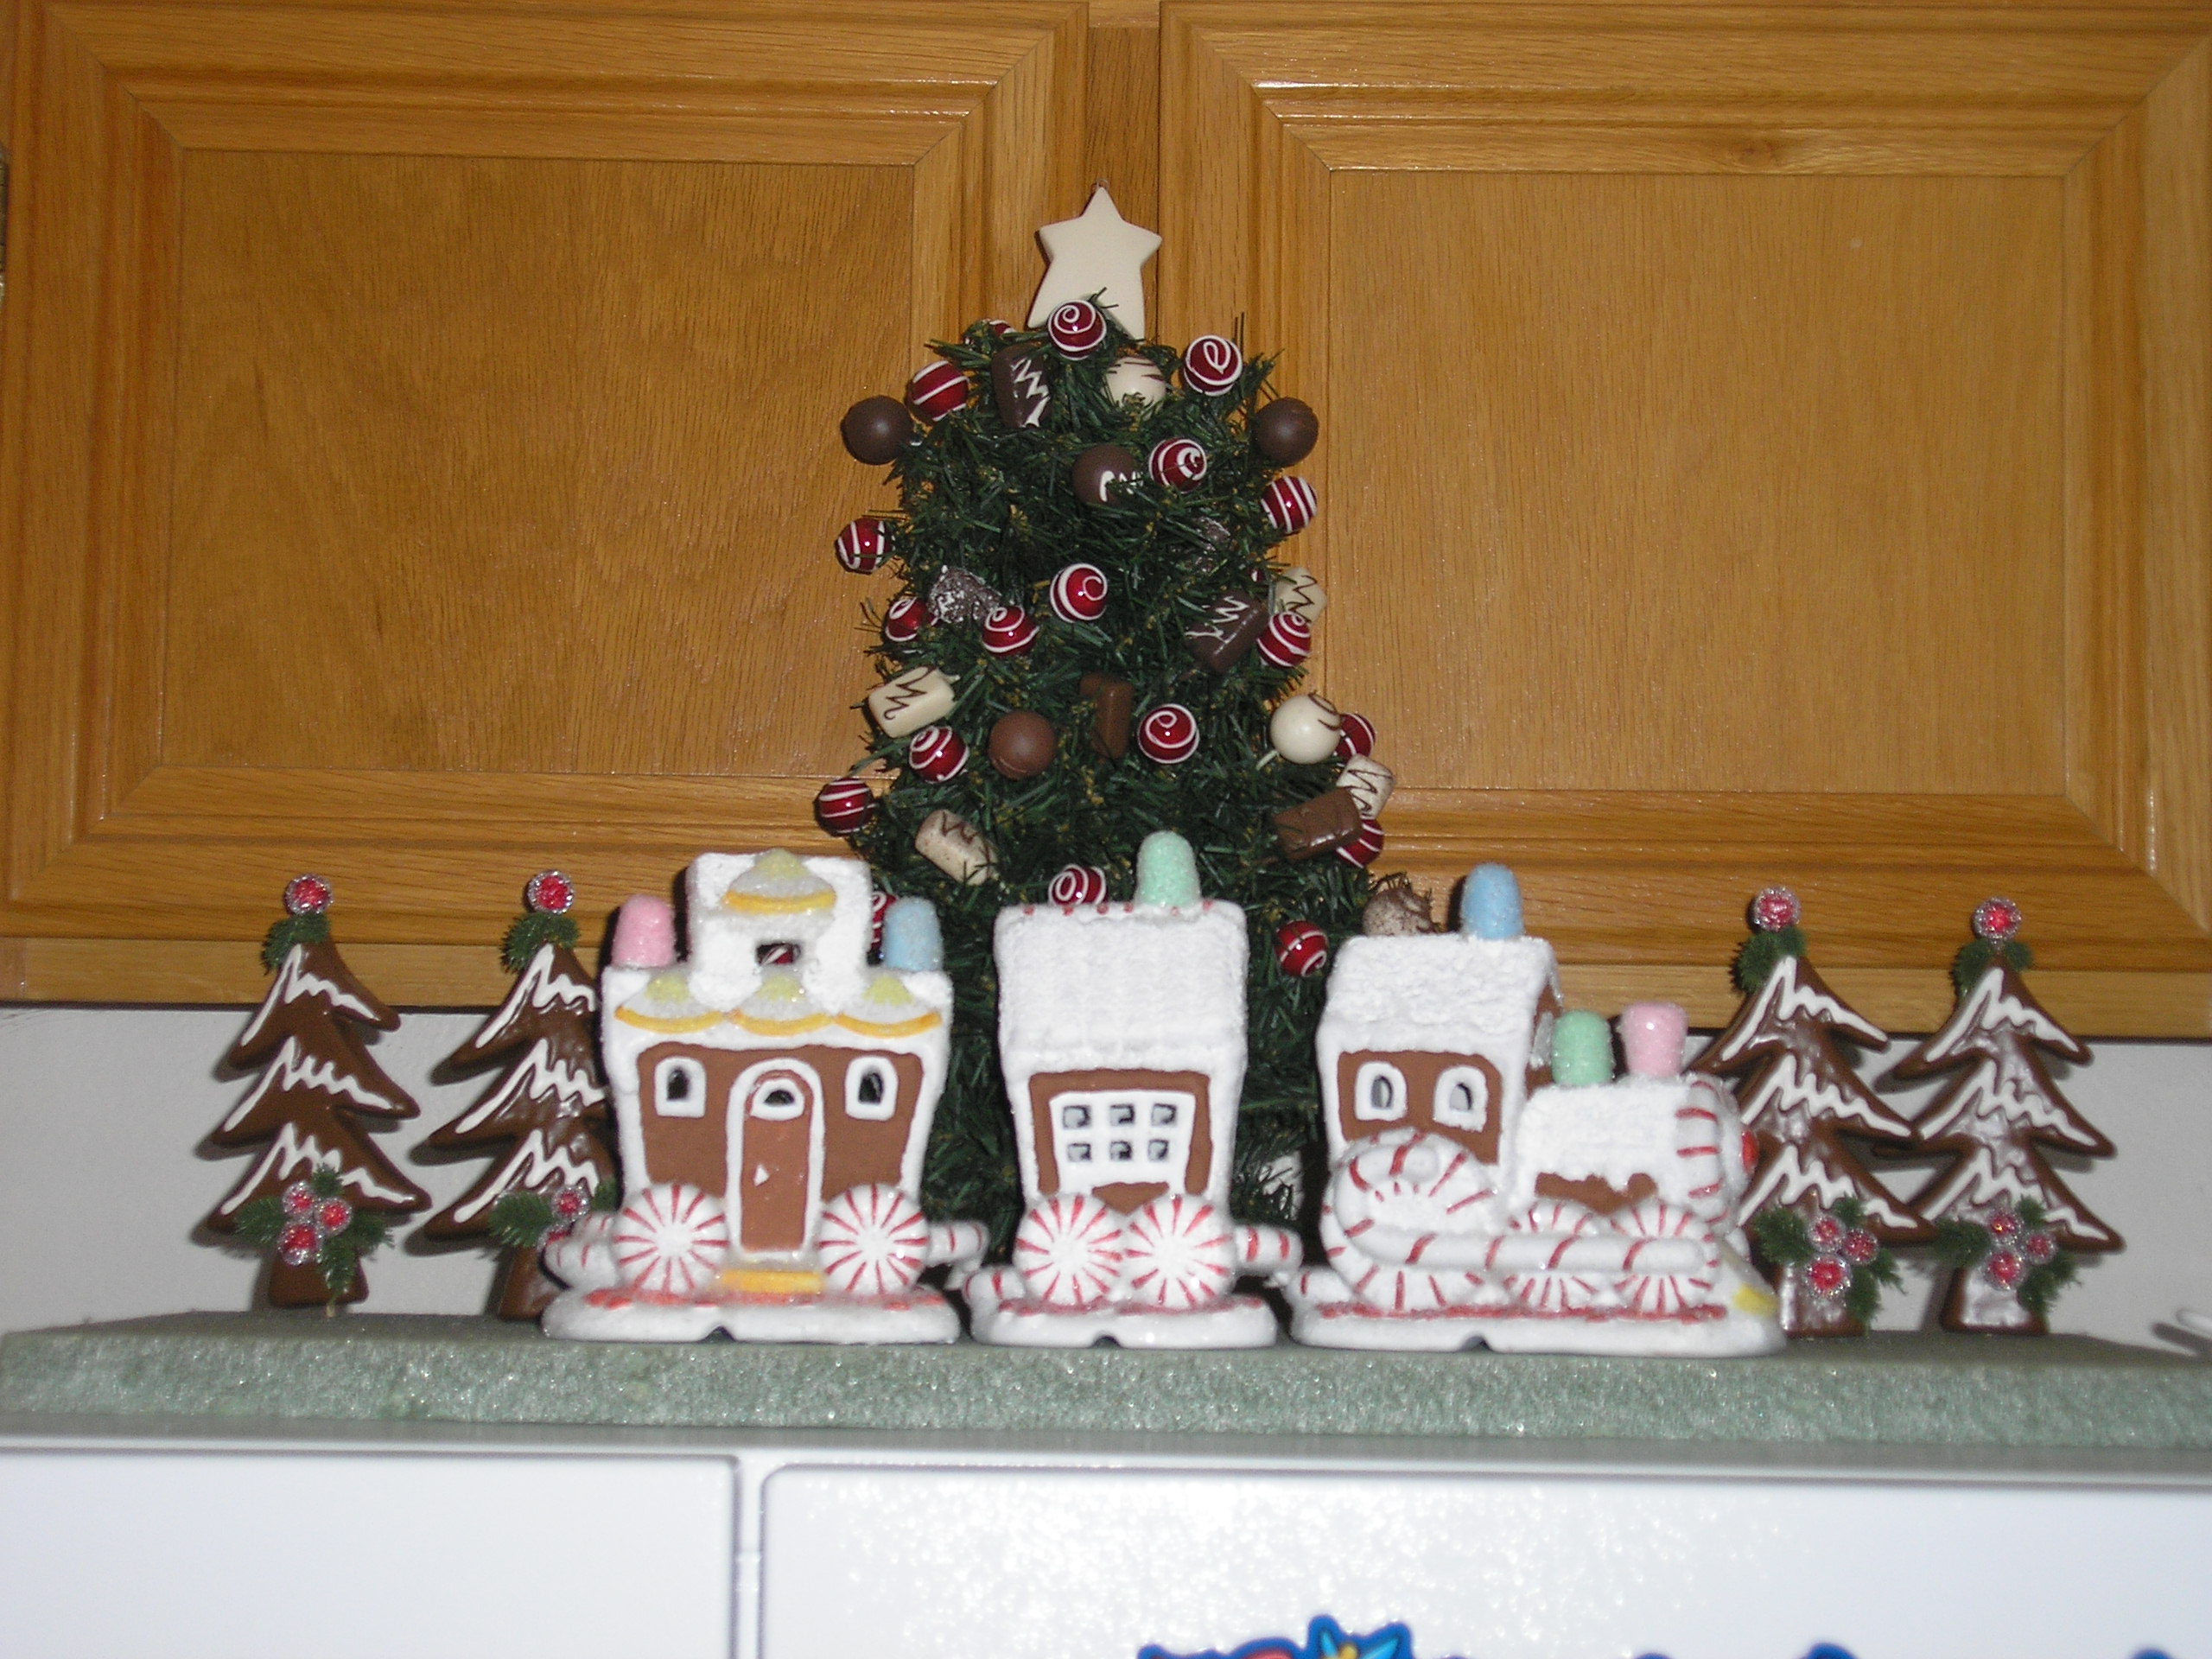
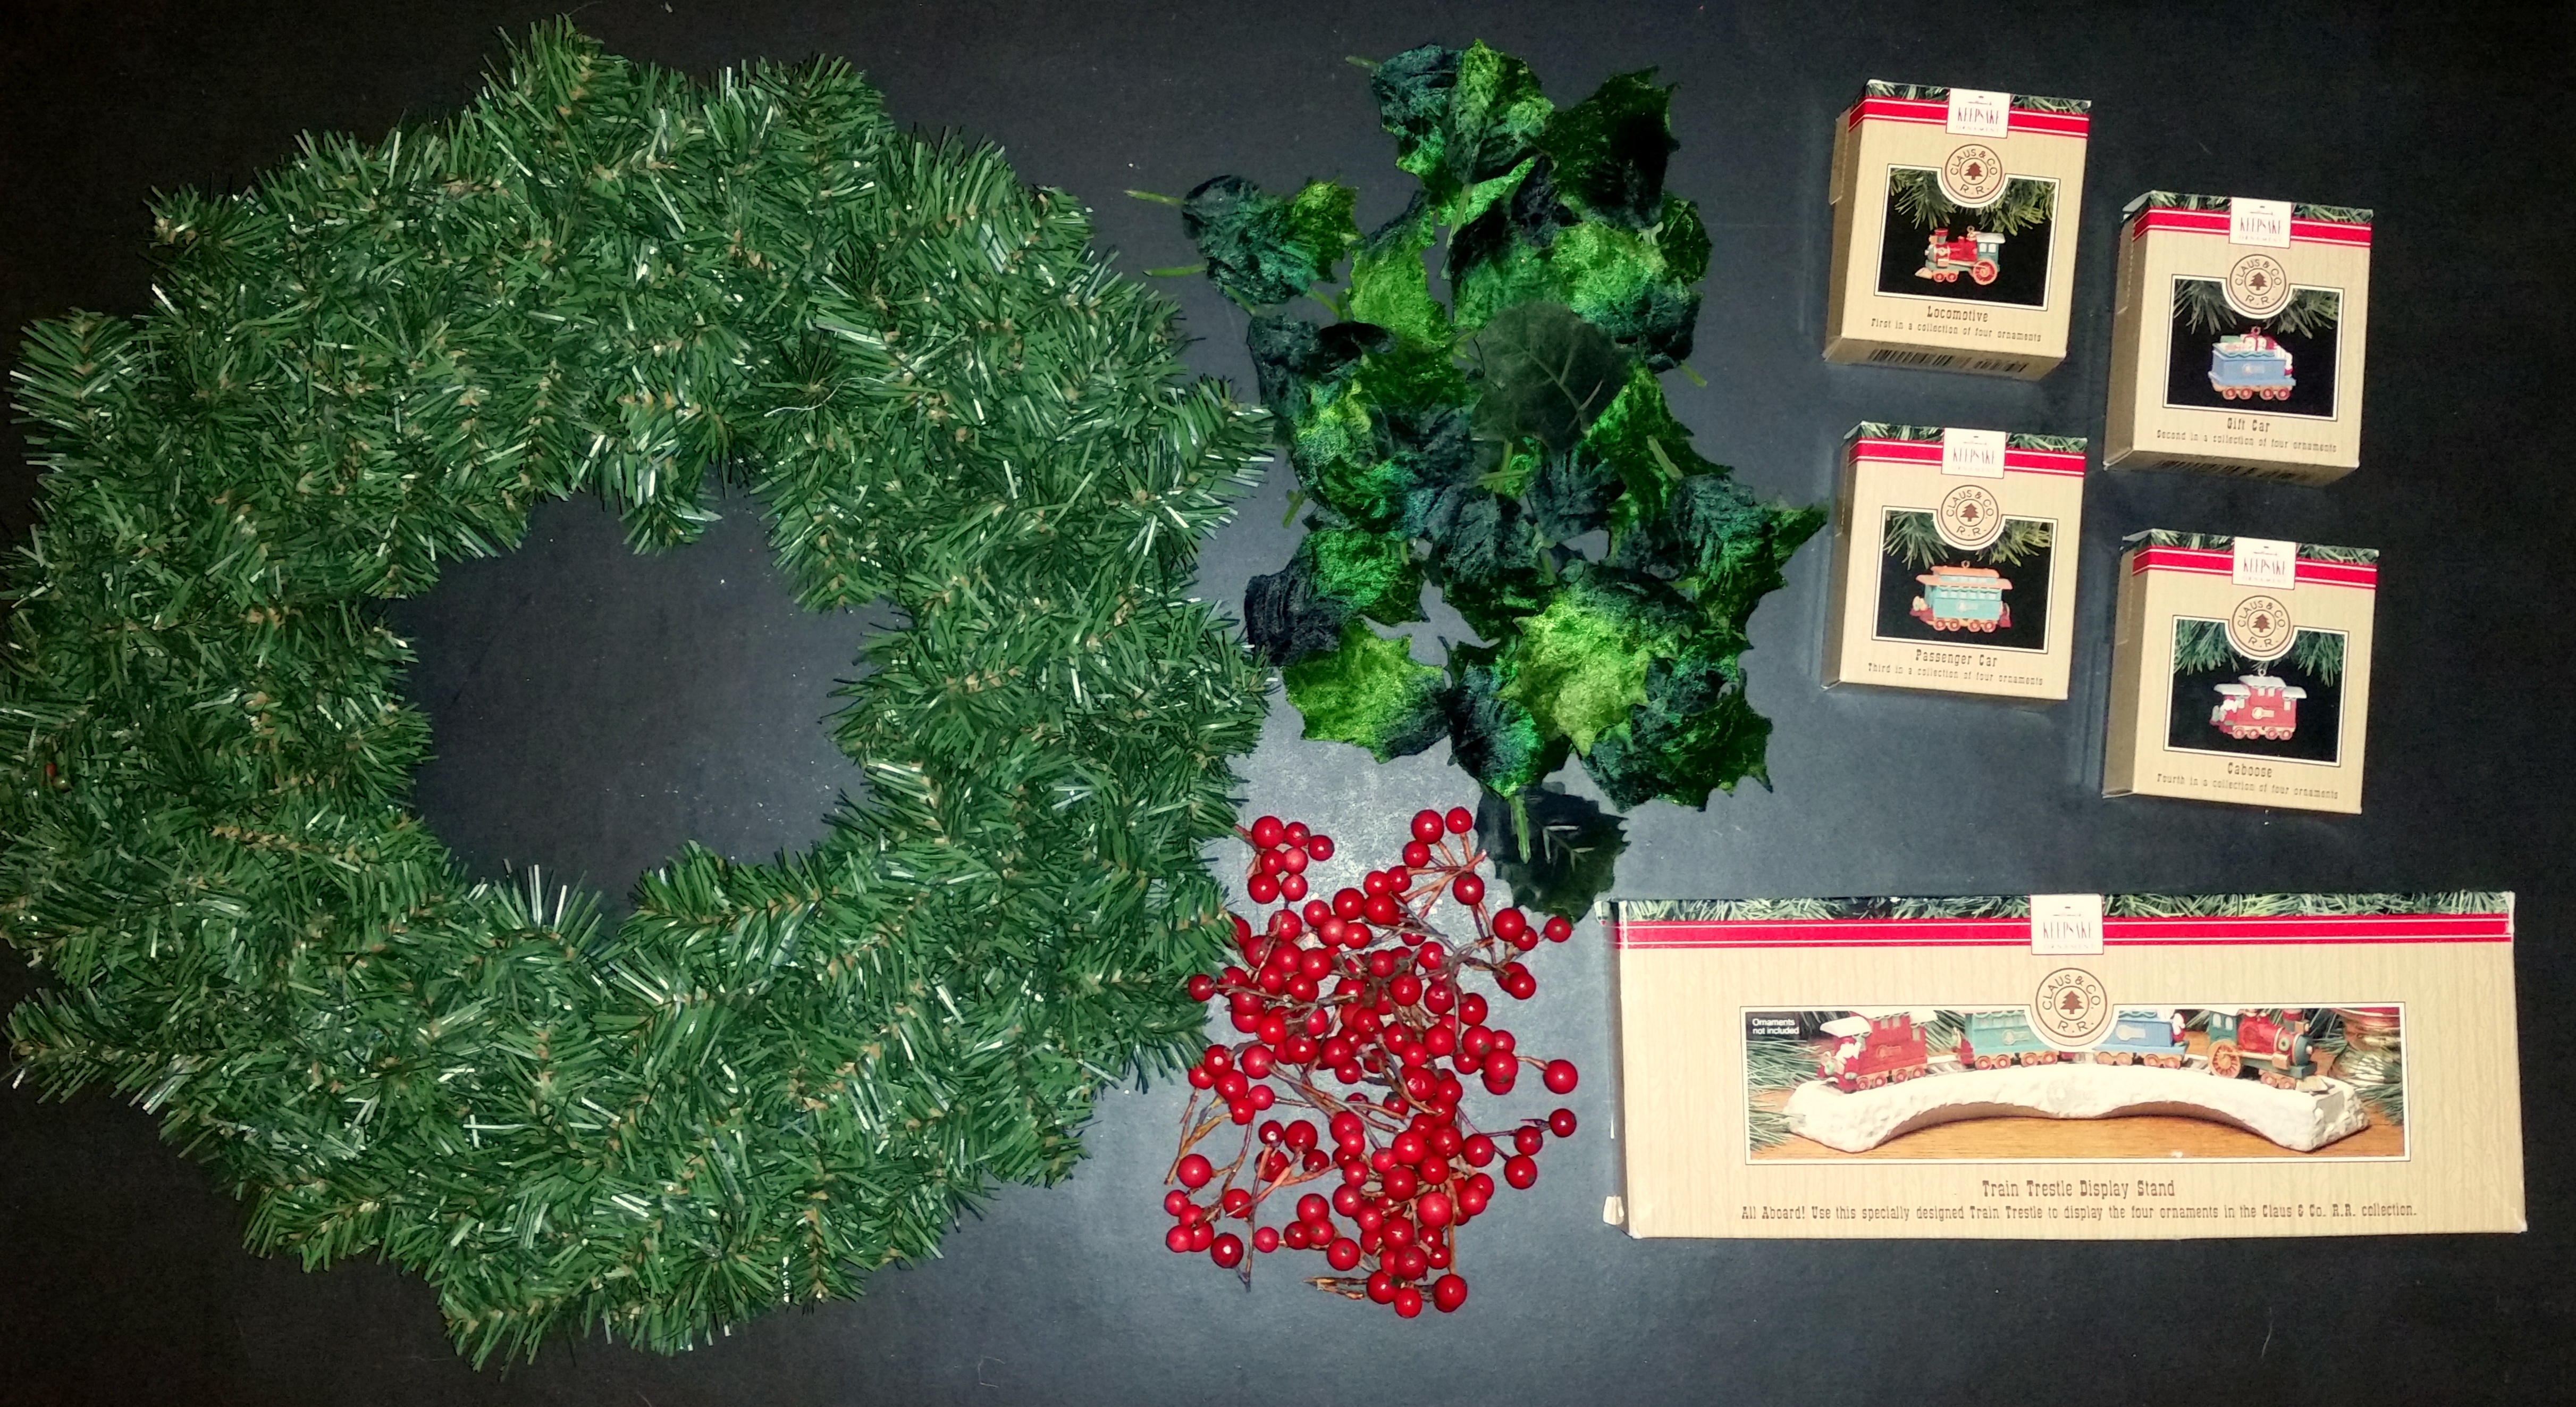
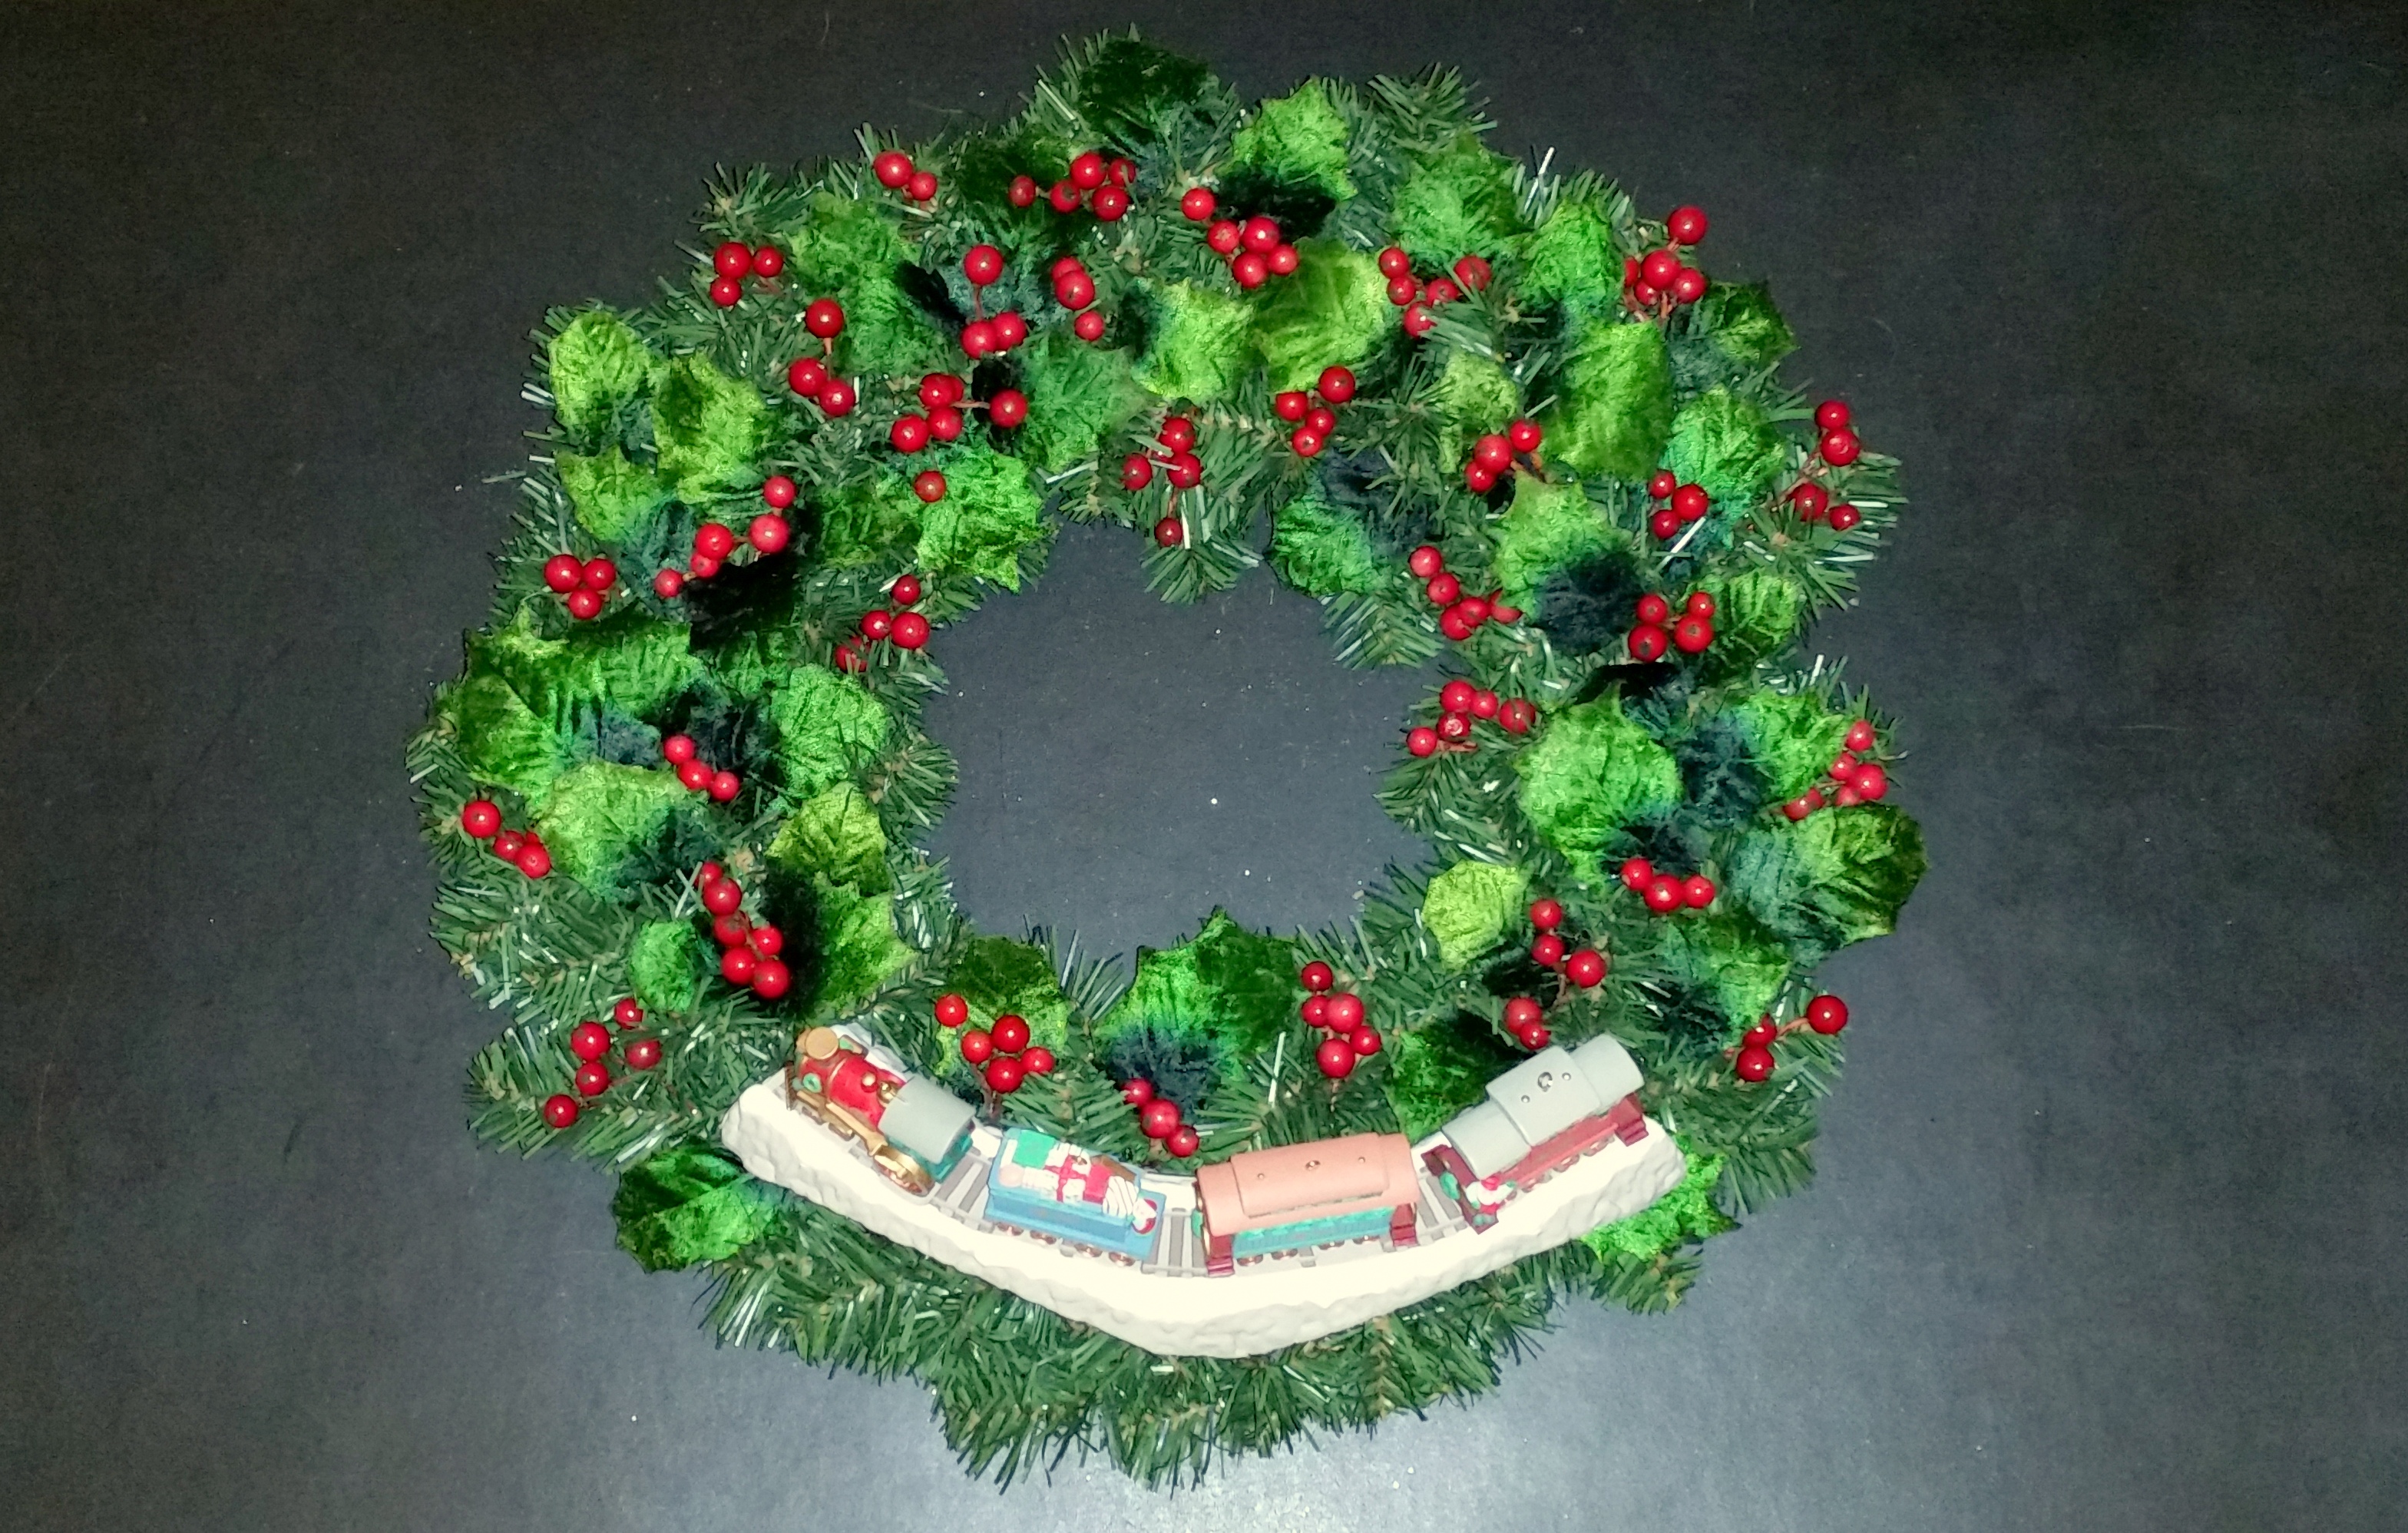
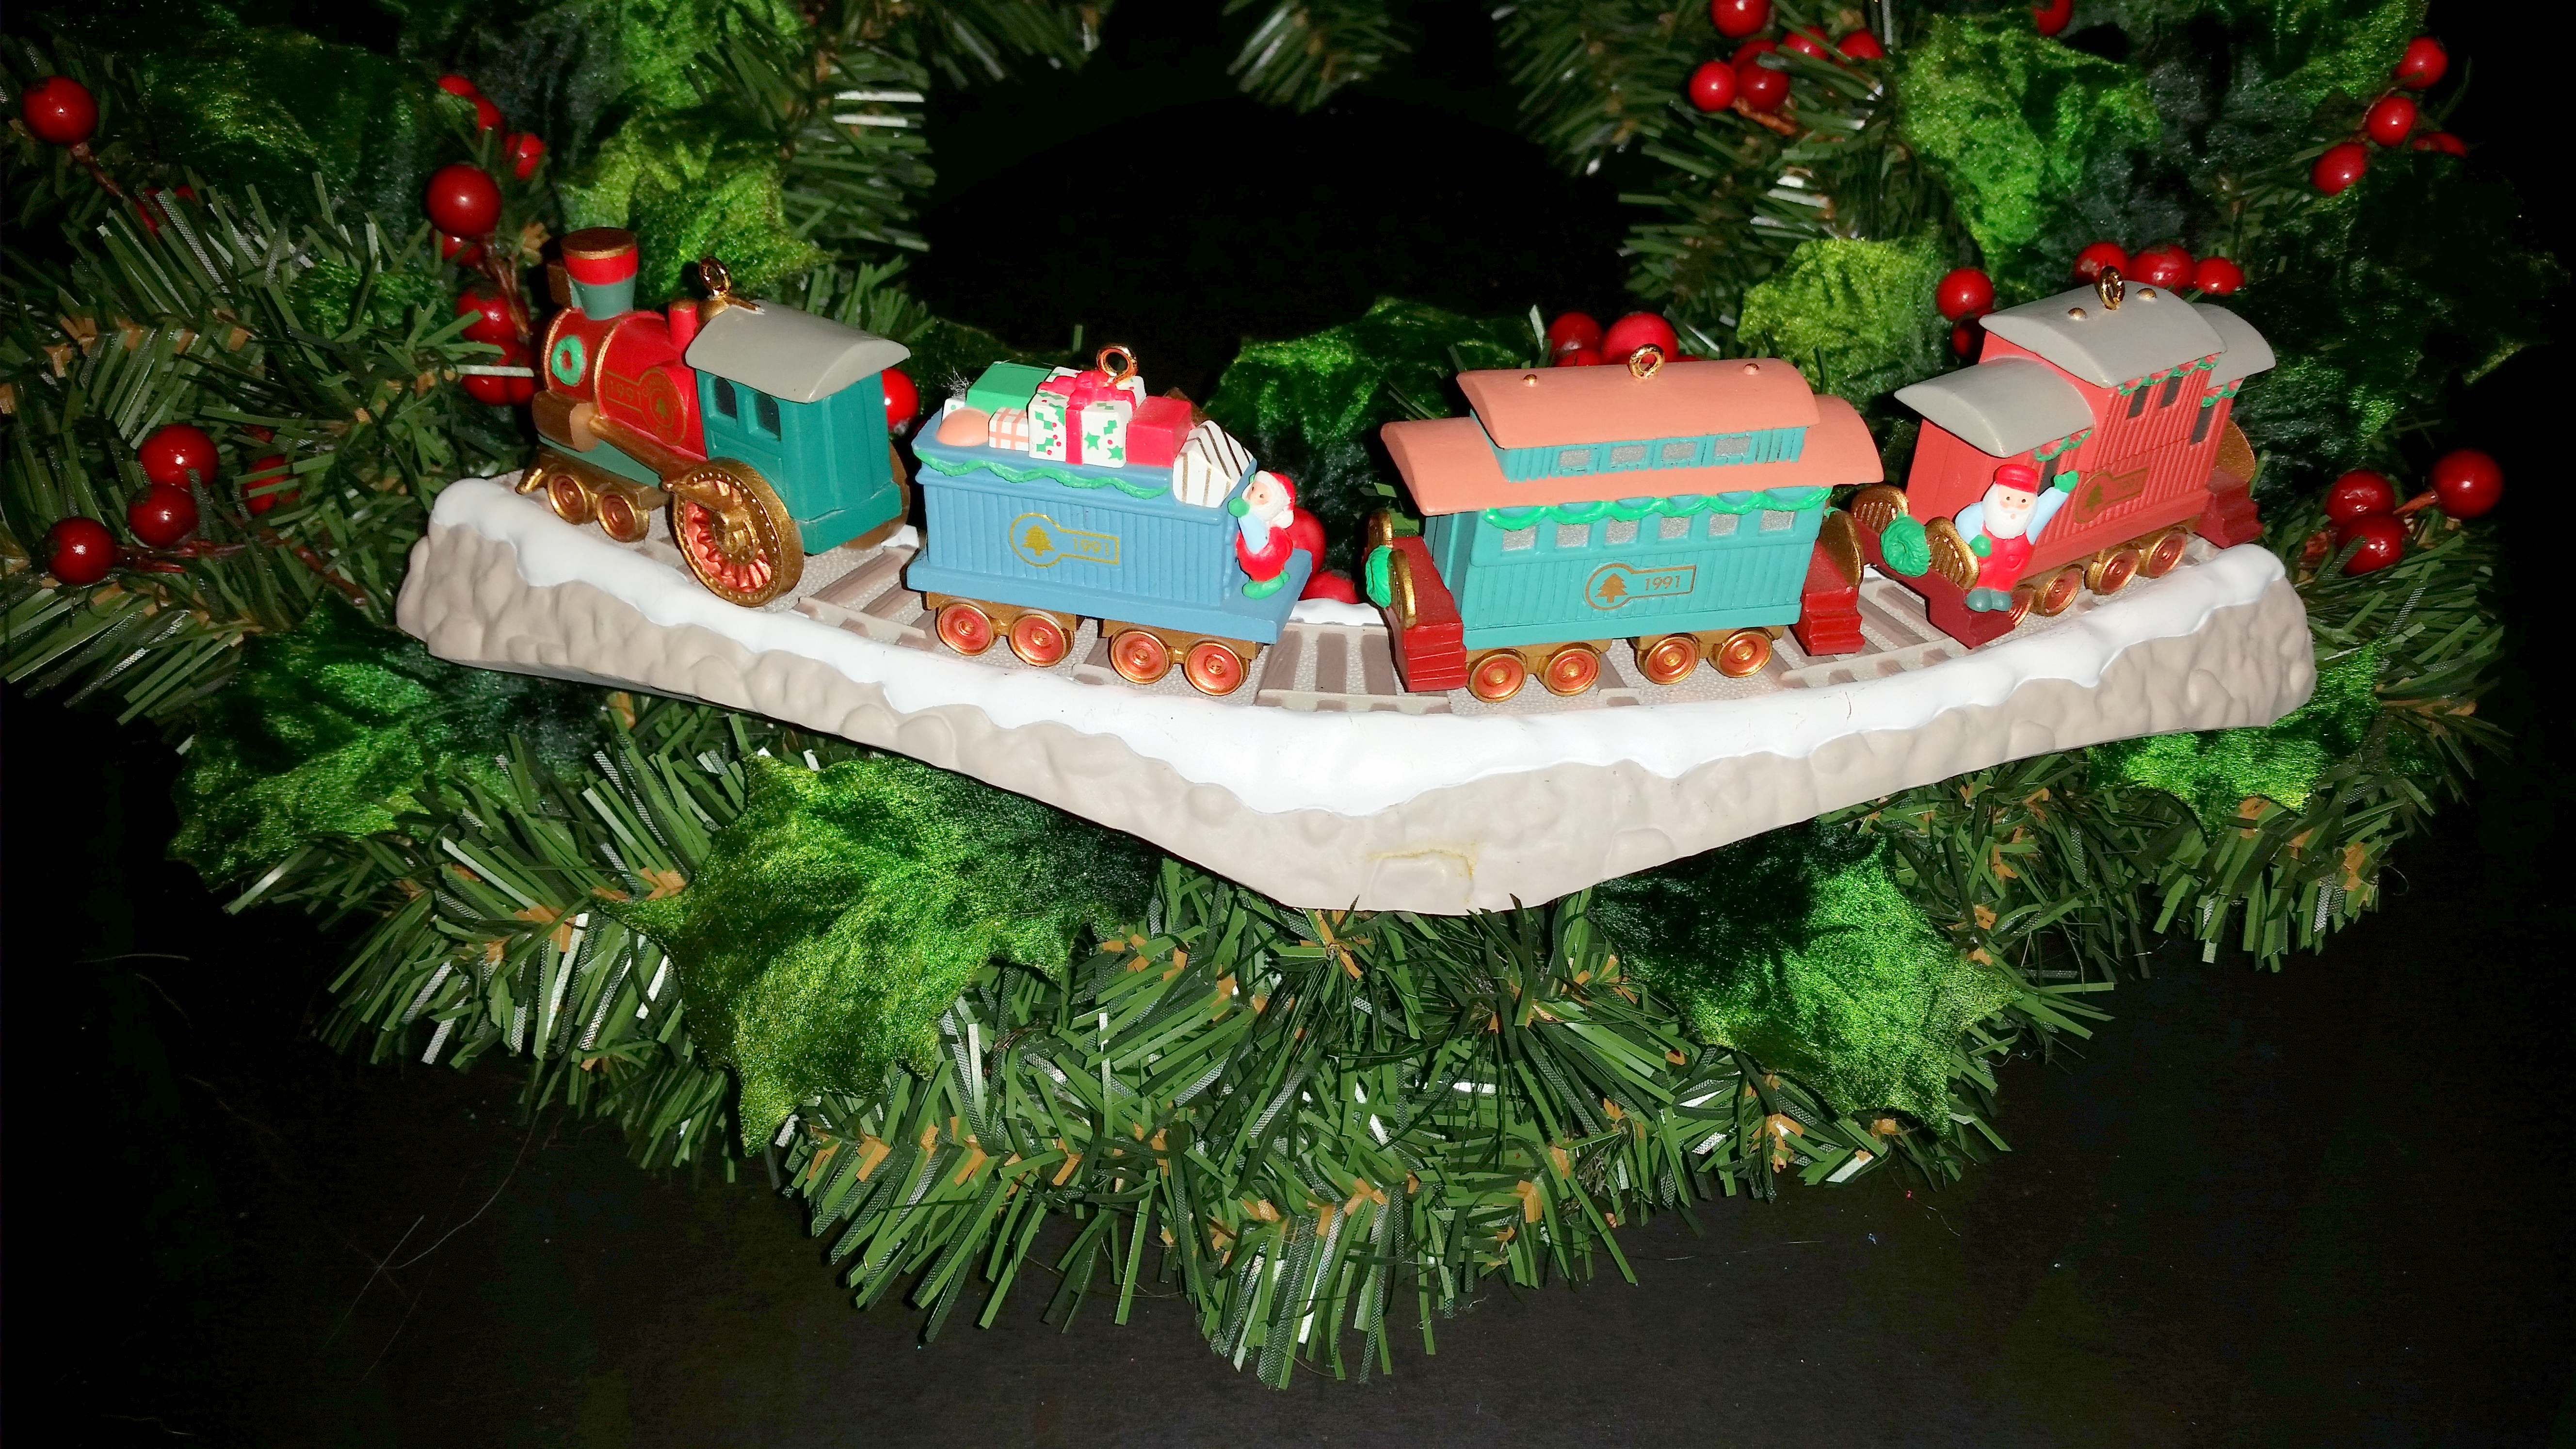
The first Christmas wreath used a set of 5 Hallmark ornaments called Claus and Co. Railroad that were originally issued in 1991.  The set had four train cars (the locomotive, the gift car, the passenger car and the caboose) and a trestle base.  I attached the trestle with wire to an artificial pine wreath and then I hot glued the separate train cars to the trestle.  Next, I completed the wreath by adding velvet holly leaves and red berries.

Hallmark Claus Railroad Co ornament - suppliesHallmark Claus Railroad Co ornamentHallmark Claus Railroad Co ornament - 1a closeup

Santa and Reindeer Christmas Wreath

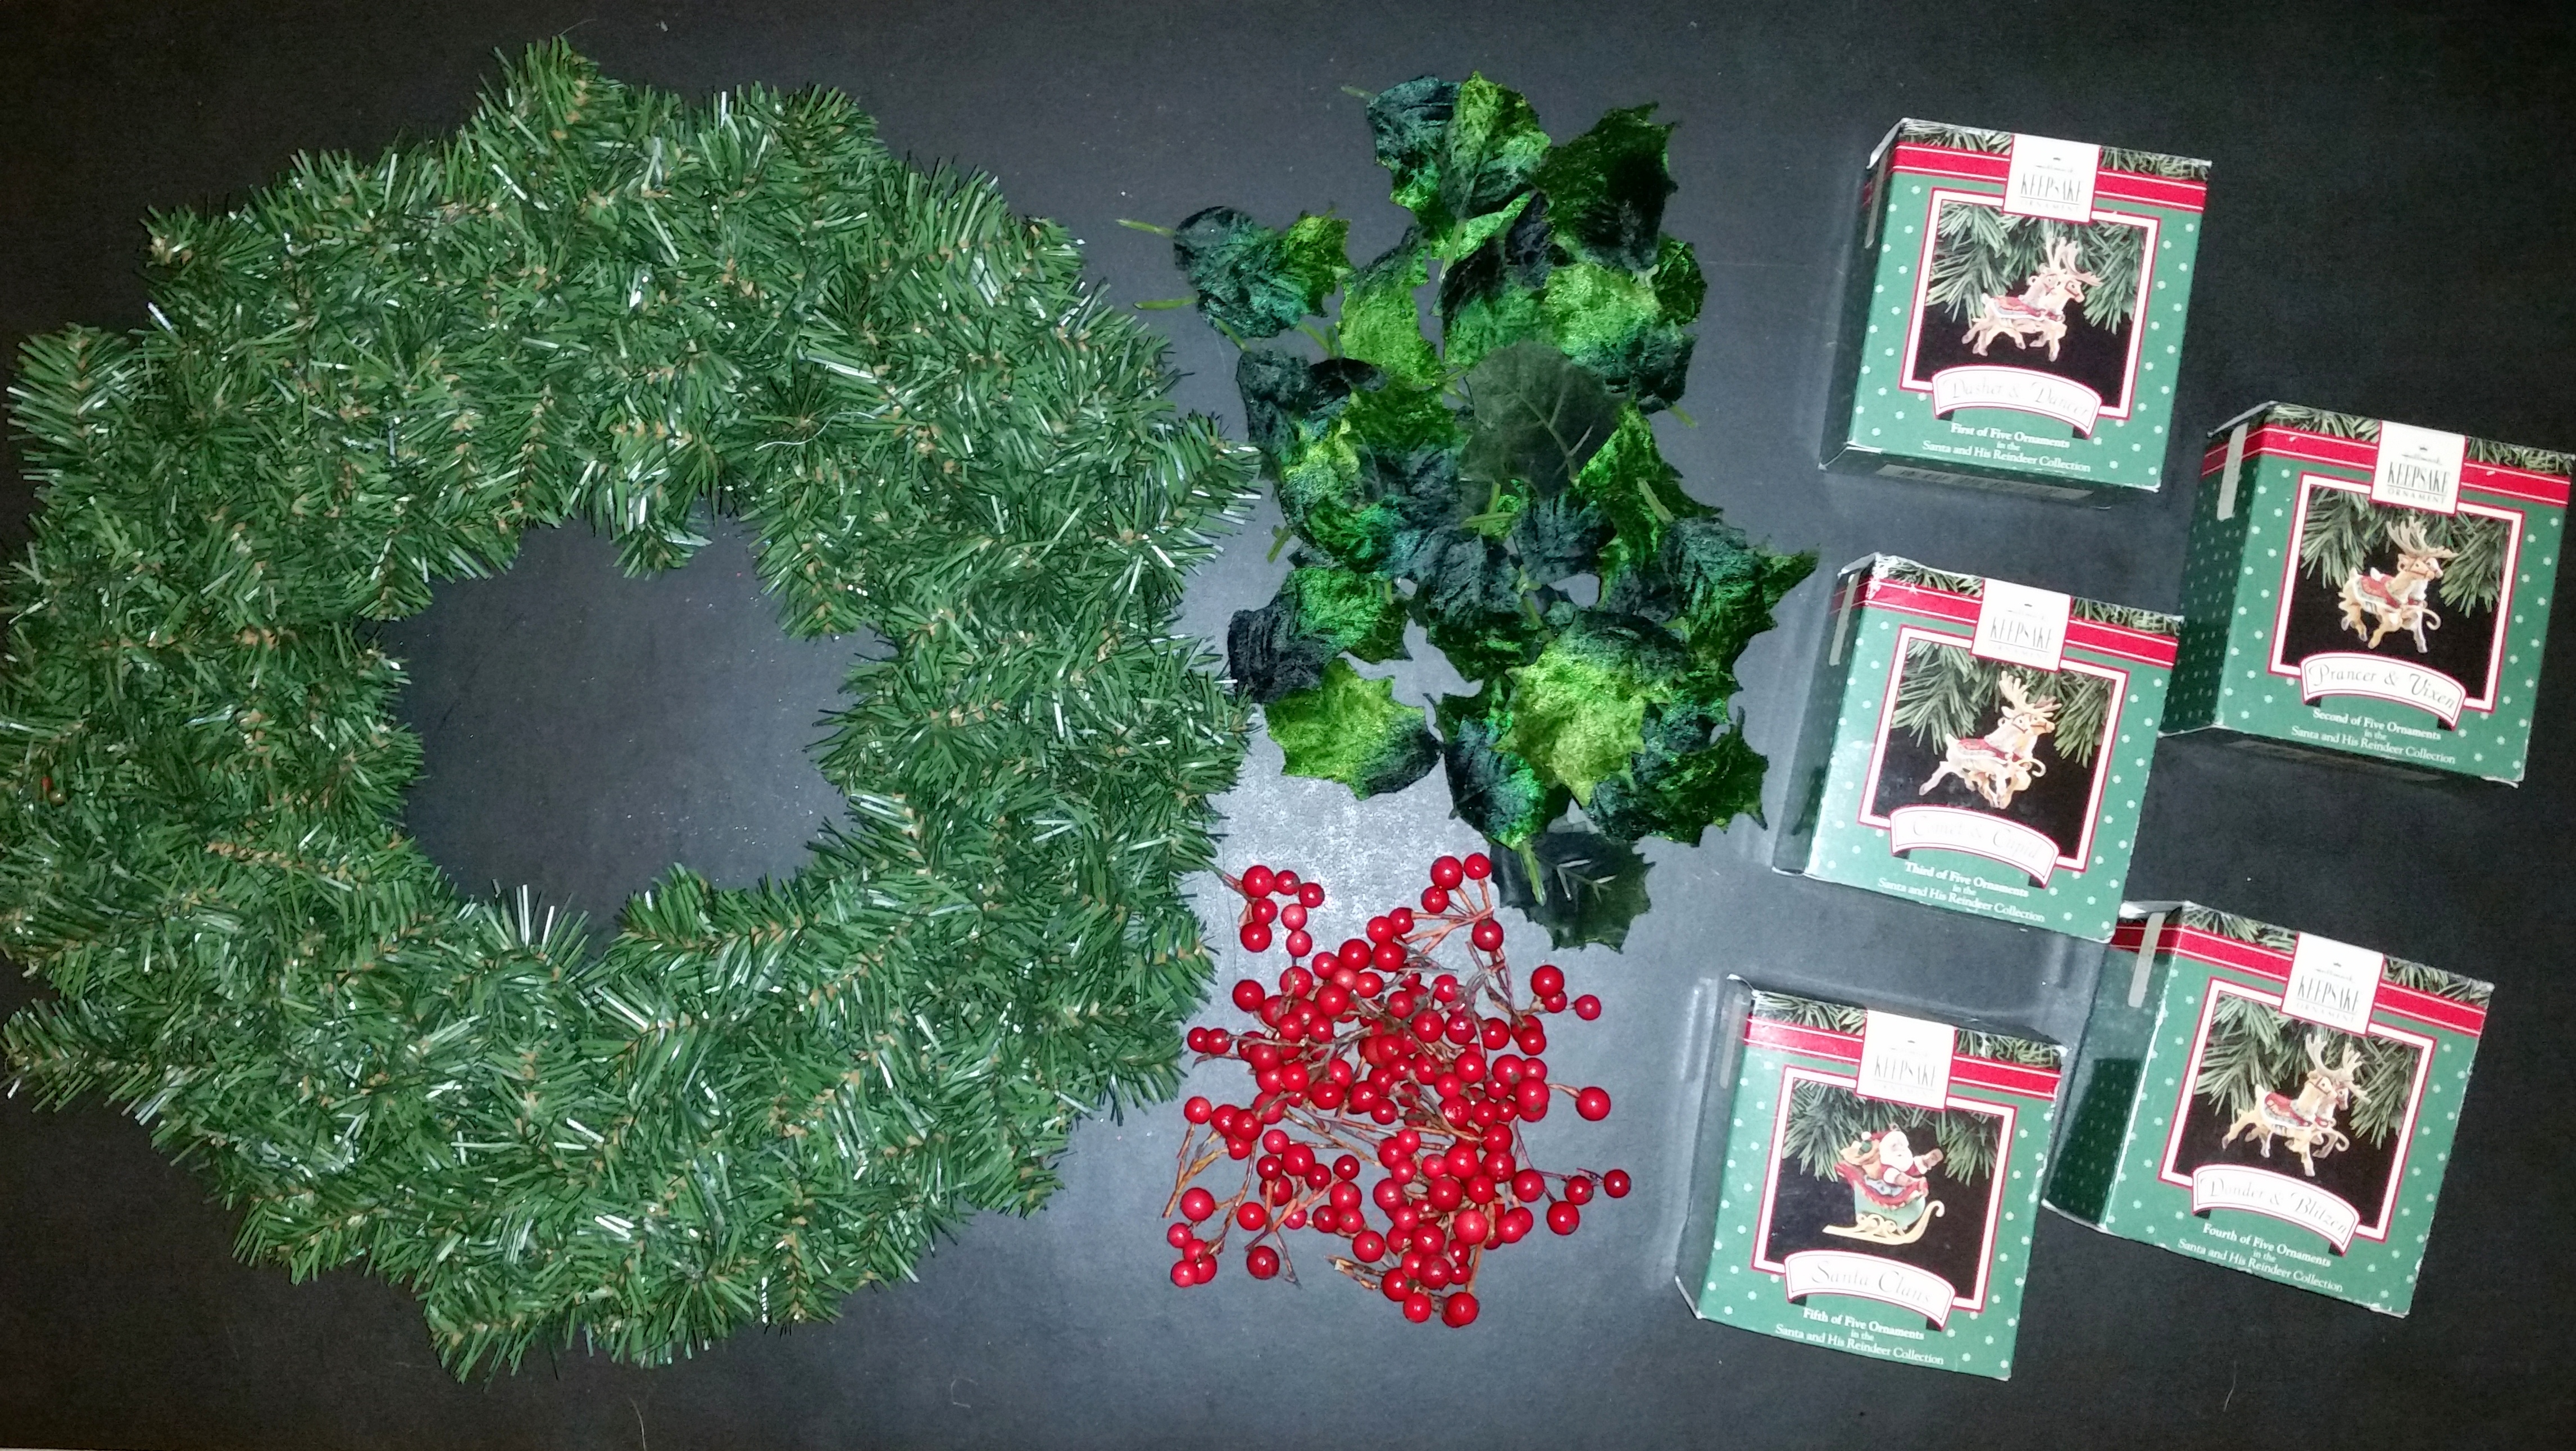
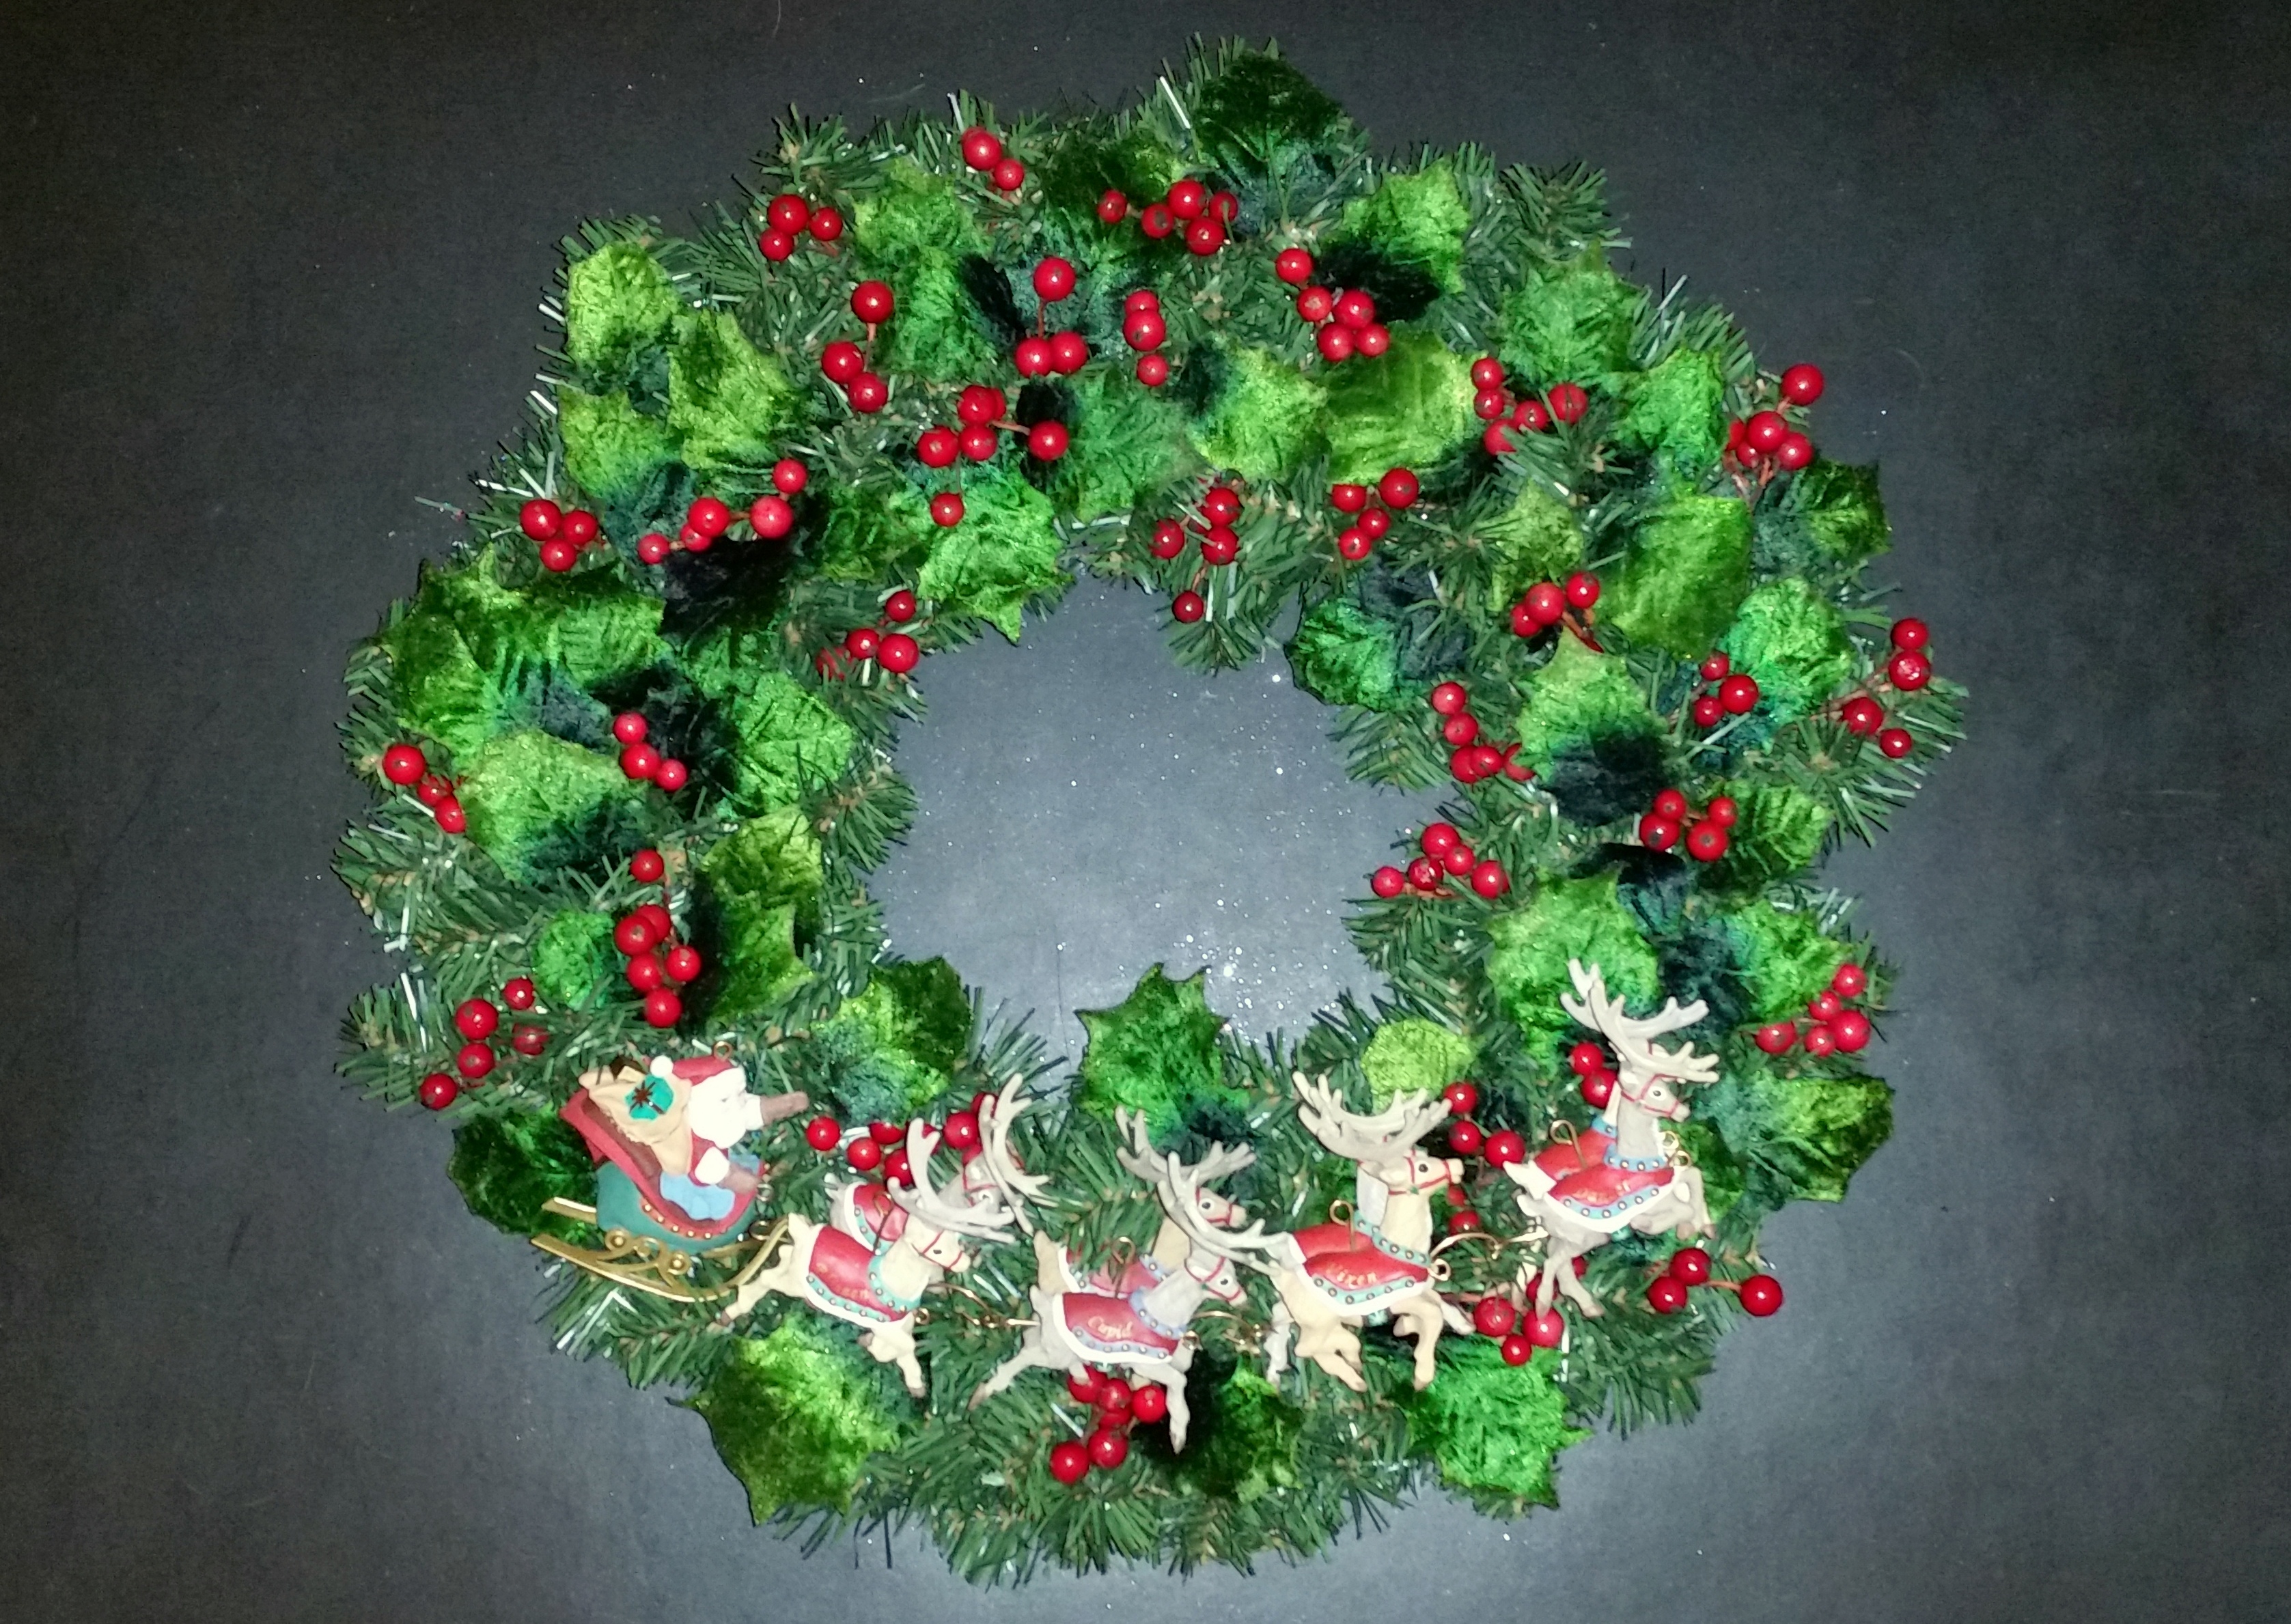
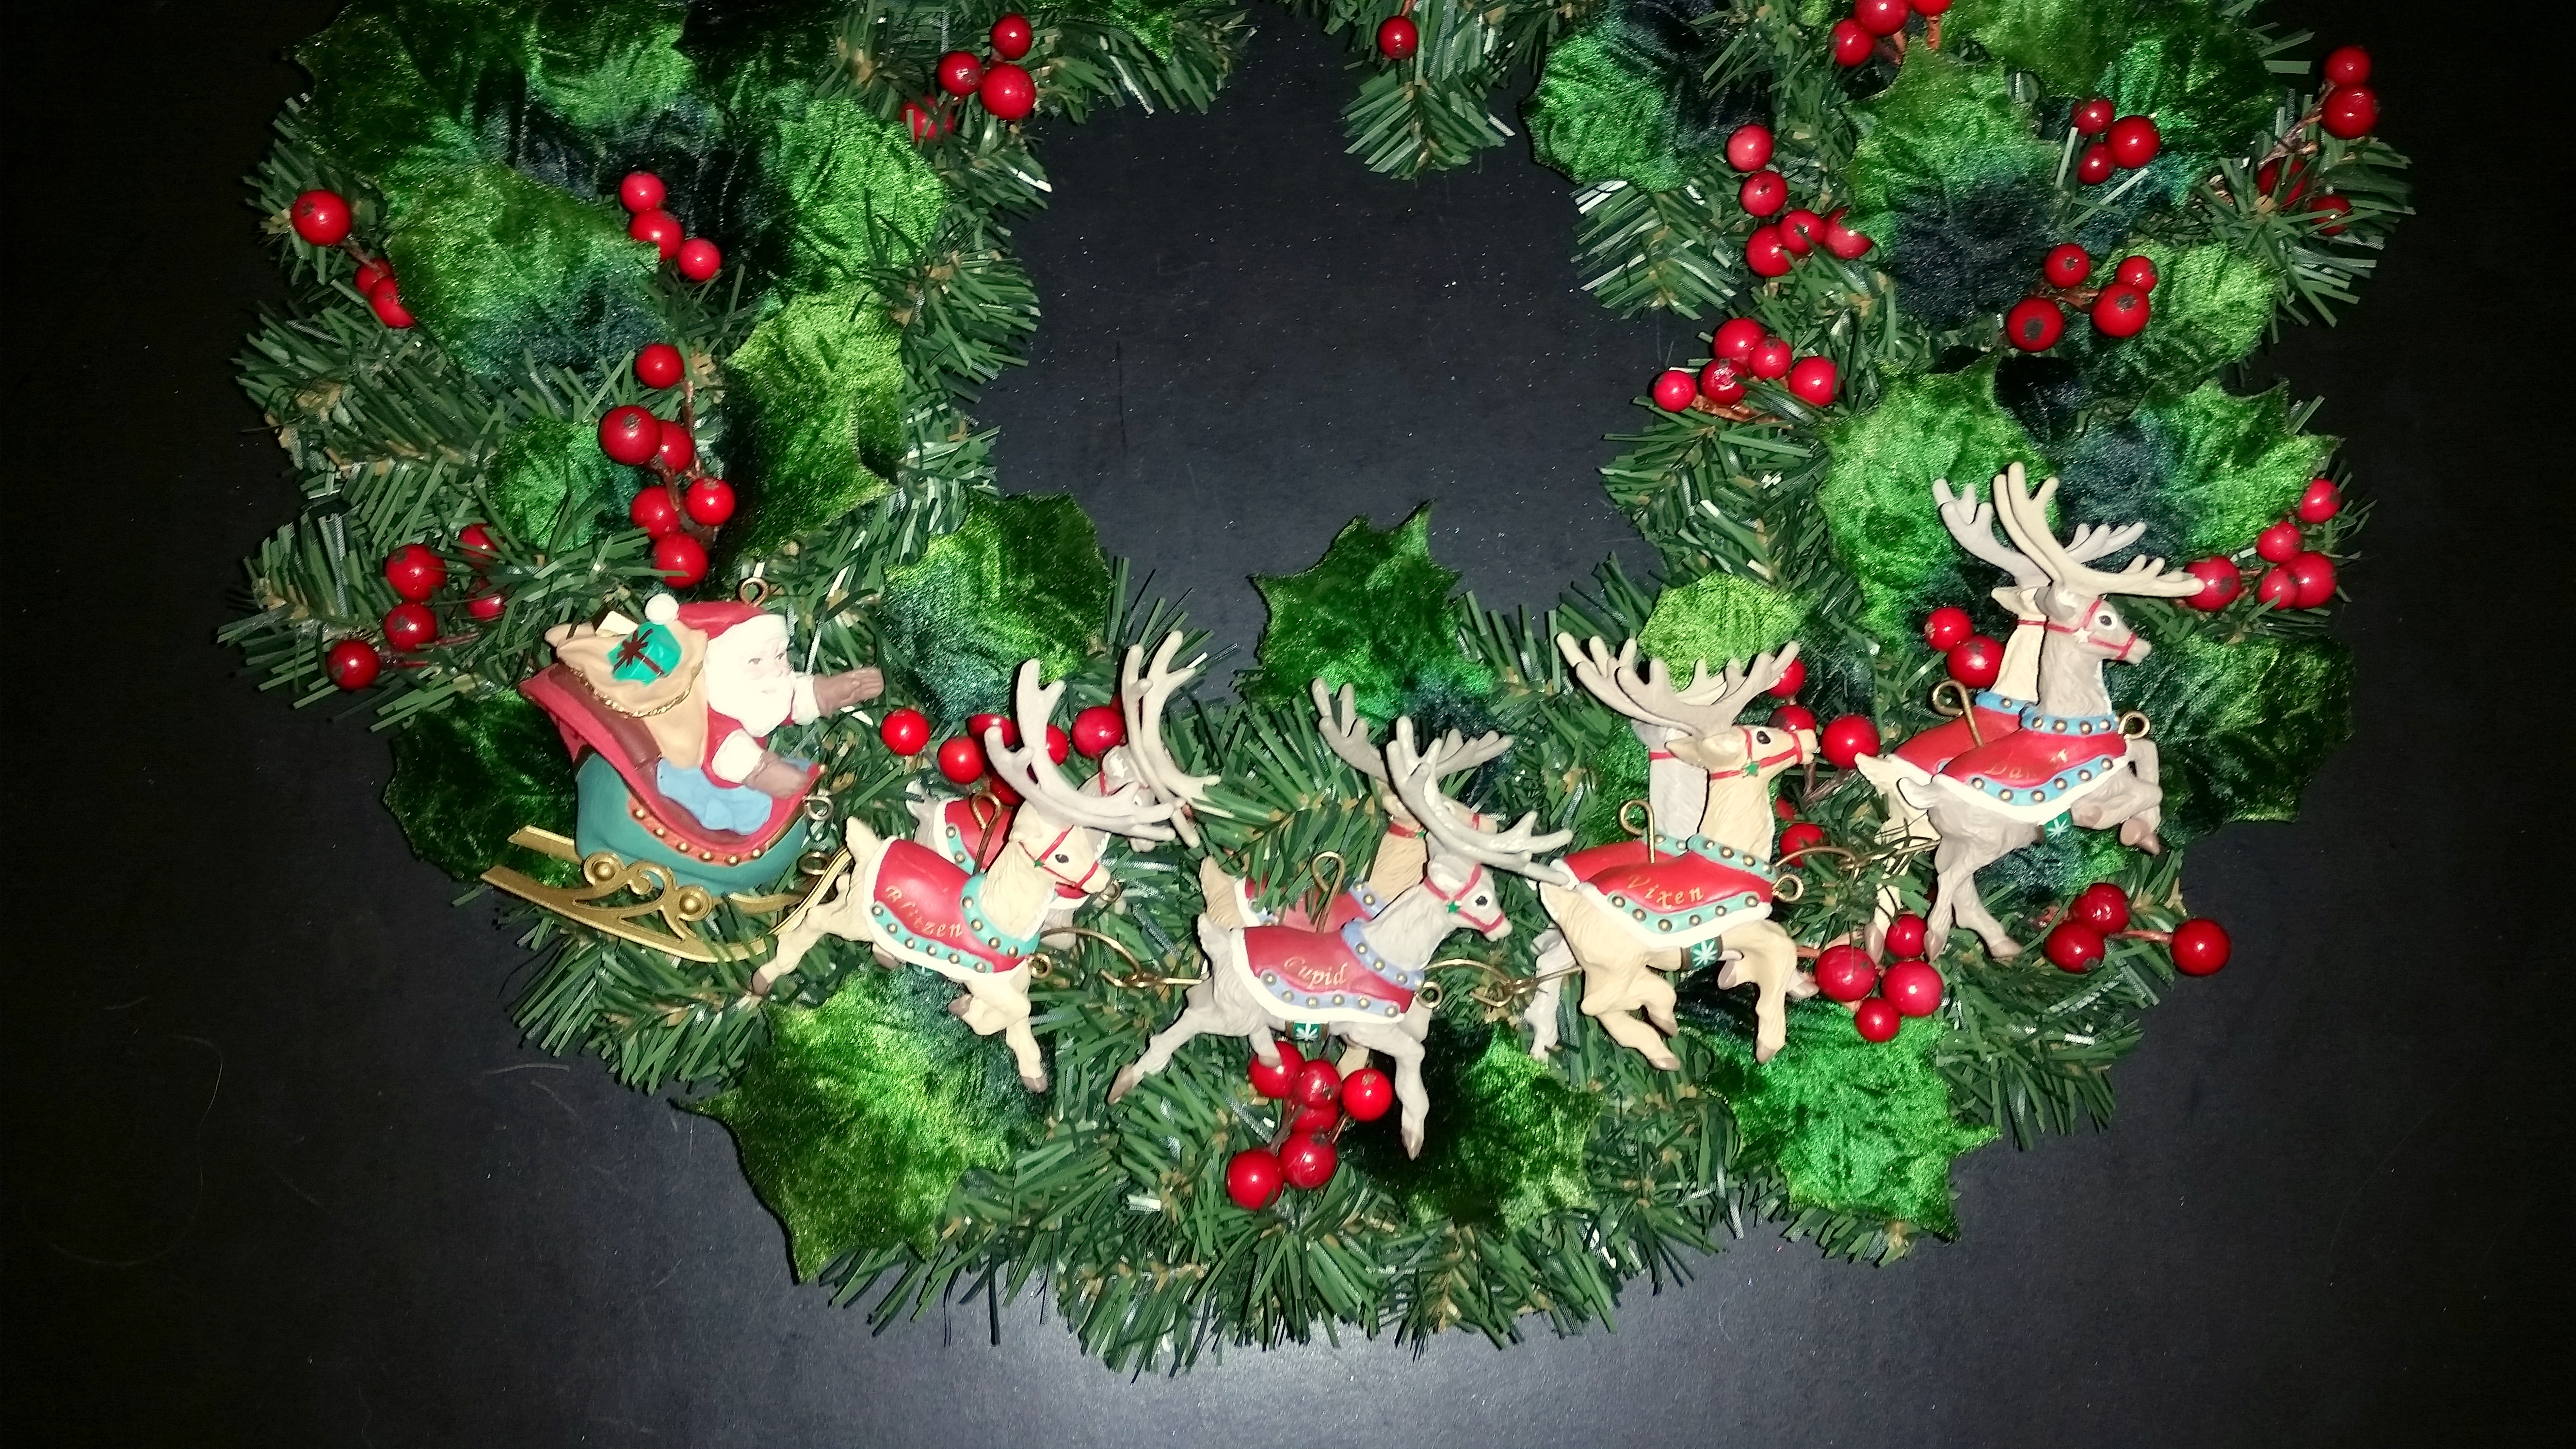
The next Christmas wreath used a set of 5 Hallmark ornaments called Santa and Reindeer that were originally issued in 1992.  The set of five featured Santa on his sled and four pairs of reindeers – Dasher, Dancer, Prancer, Vixen, Comet, Cupid, Donder and Blitzen.  Each of the ornaments was attached with wire to an artificial wreath and then a thin ribbon was laced through the reindeer harnesses.  Then, I embellished the wreath with velvet holly leaves and red berries.

Hallmark Santa sleigh and reindeer ornaments - suppliesHallmark Santa sleigh and reindeer ornamentsHallmark Santa sleigh and reindeer ornaments 1

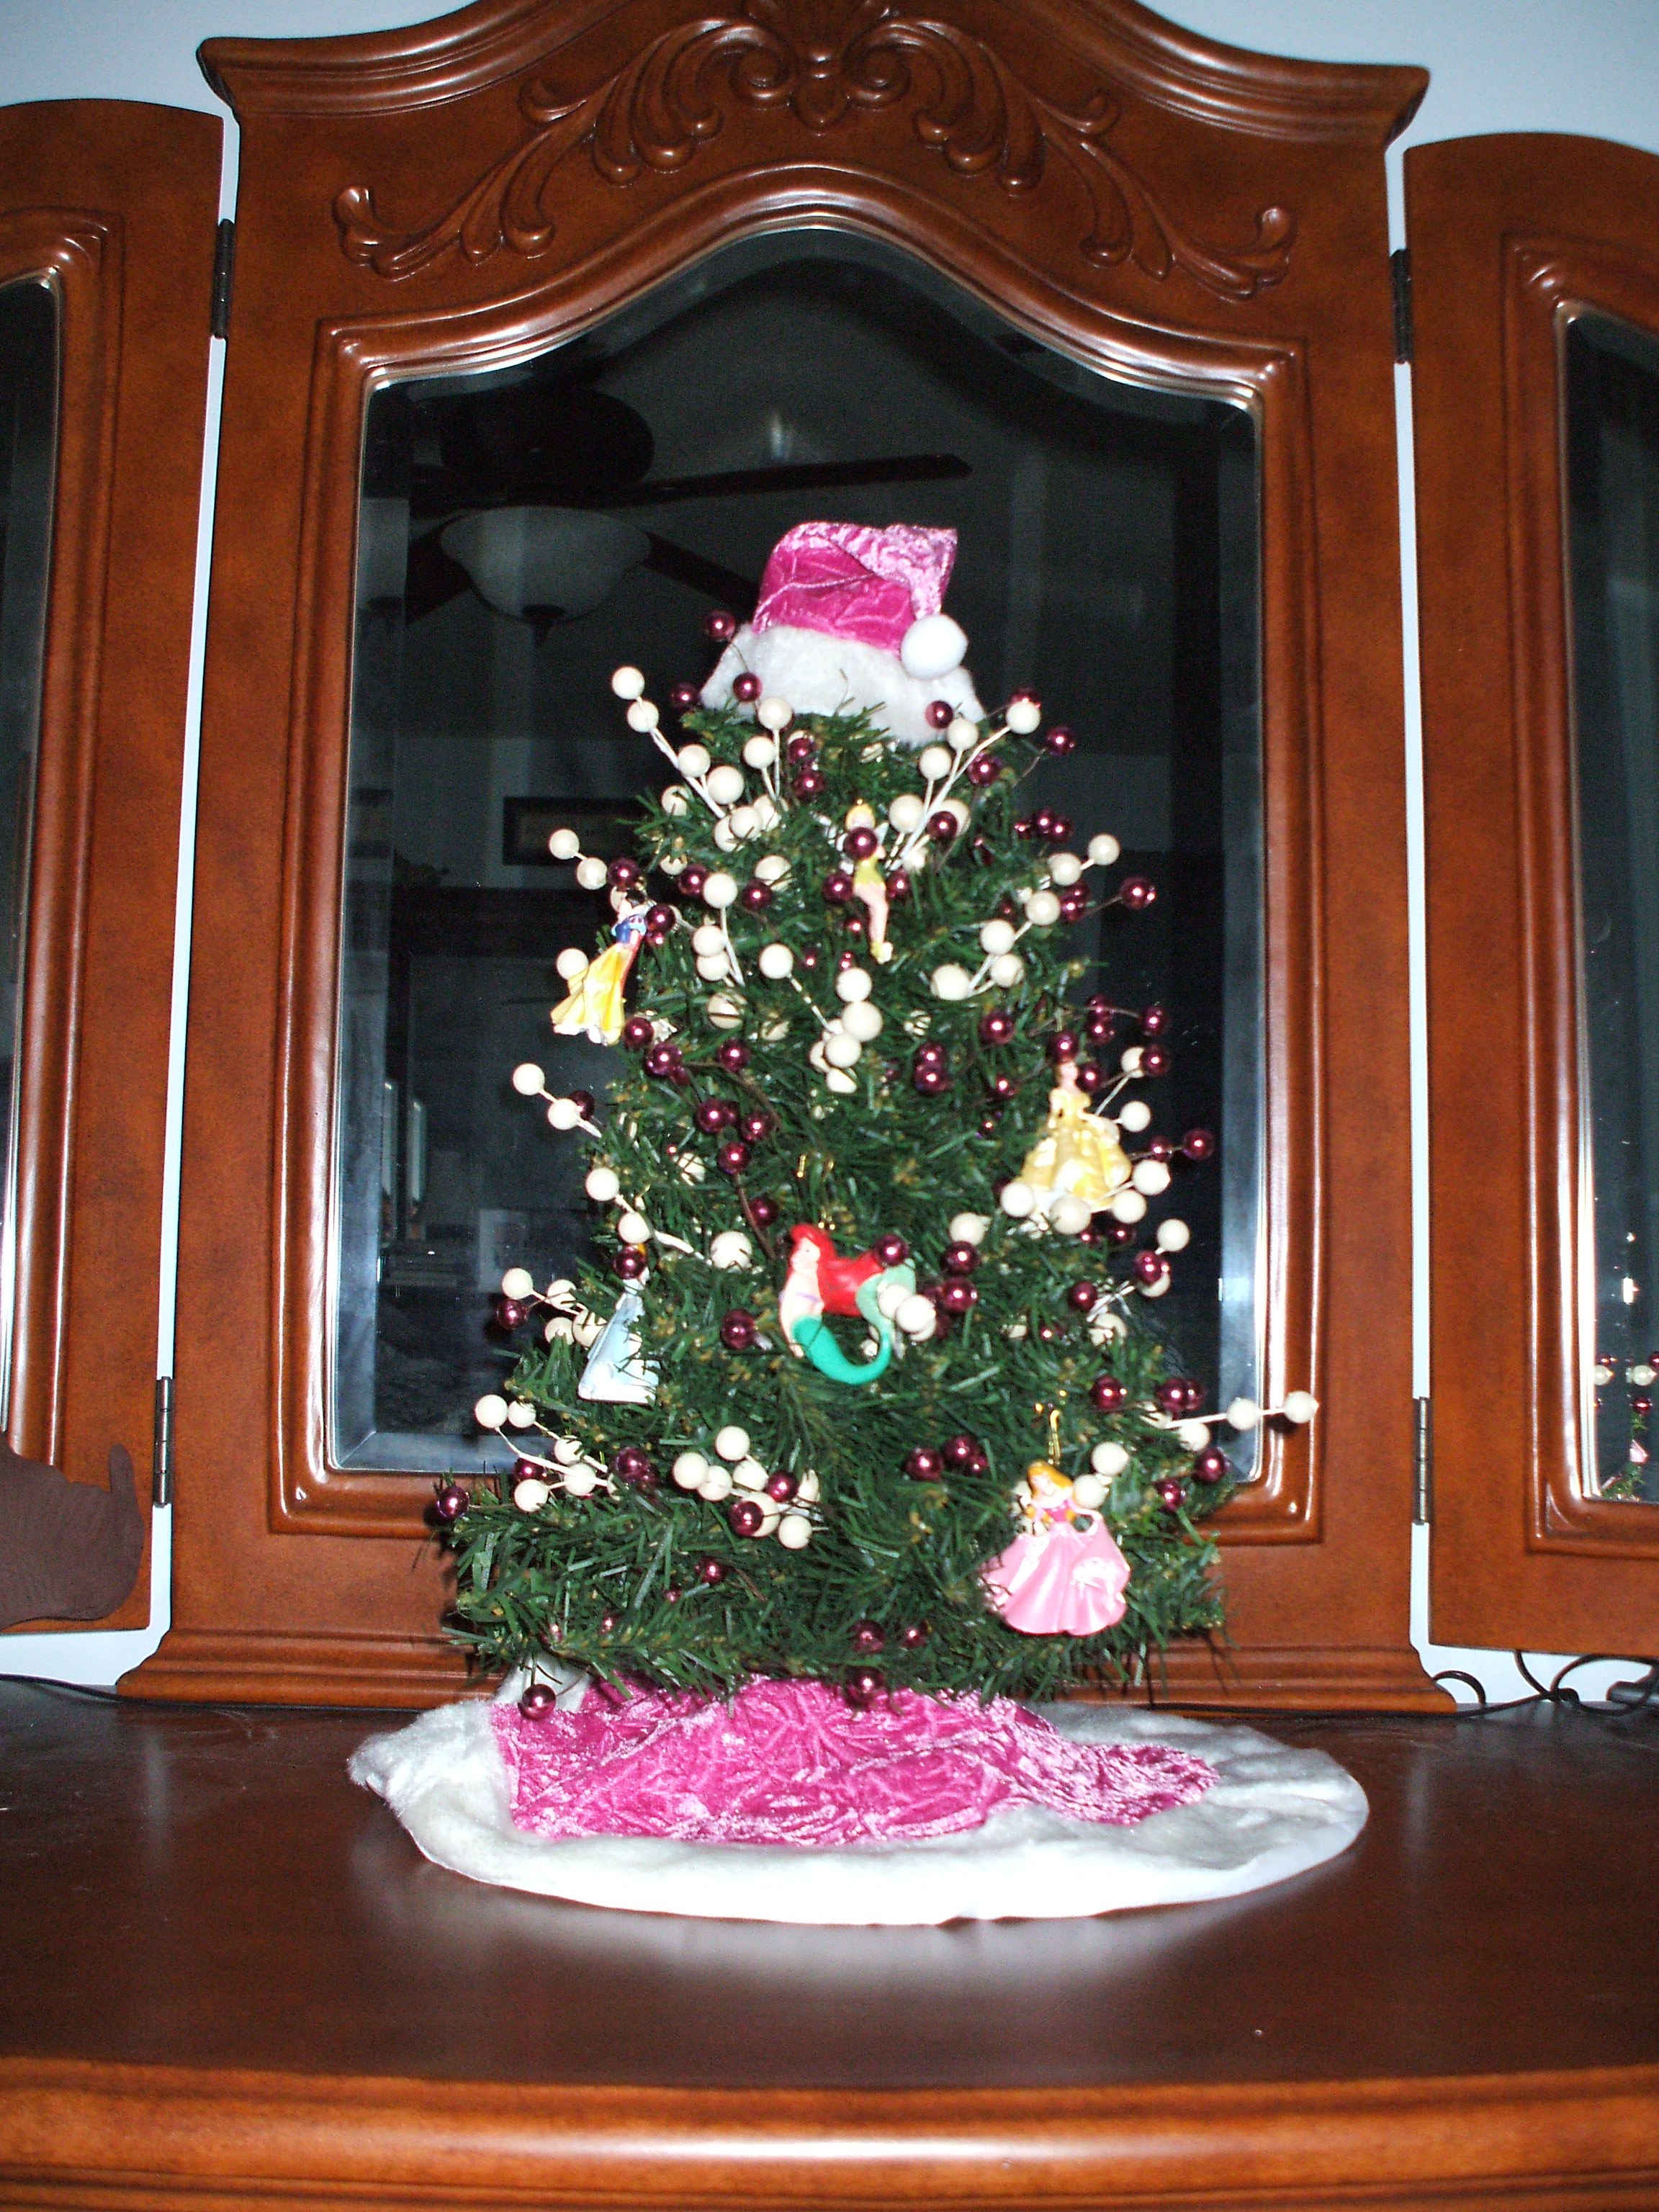
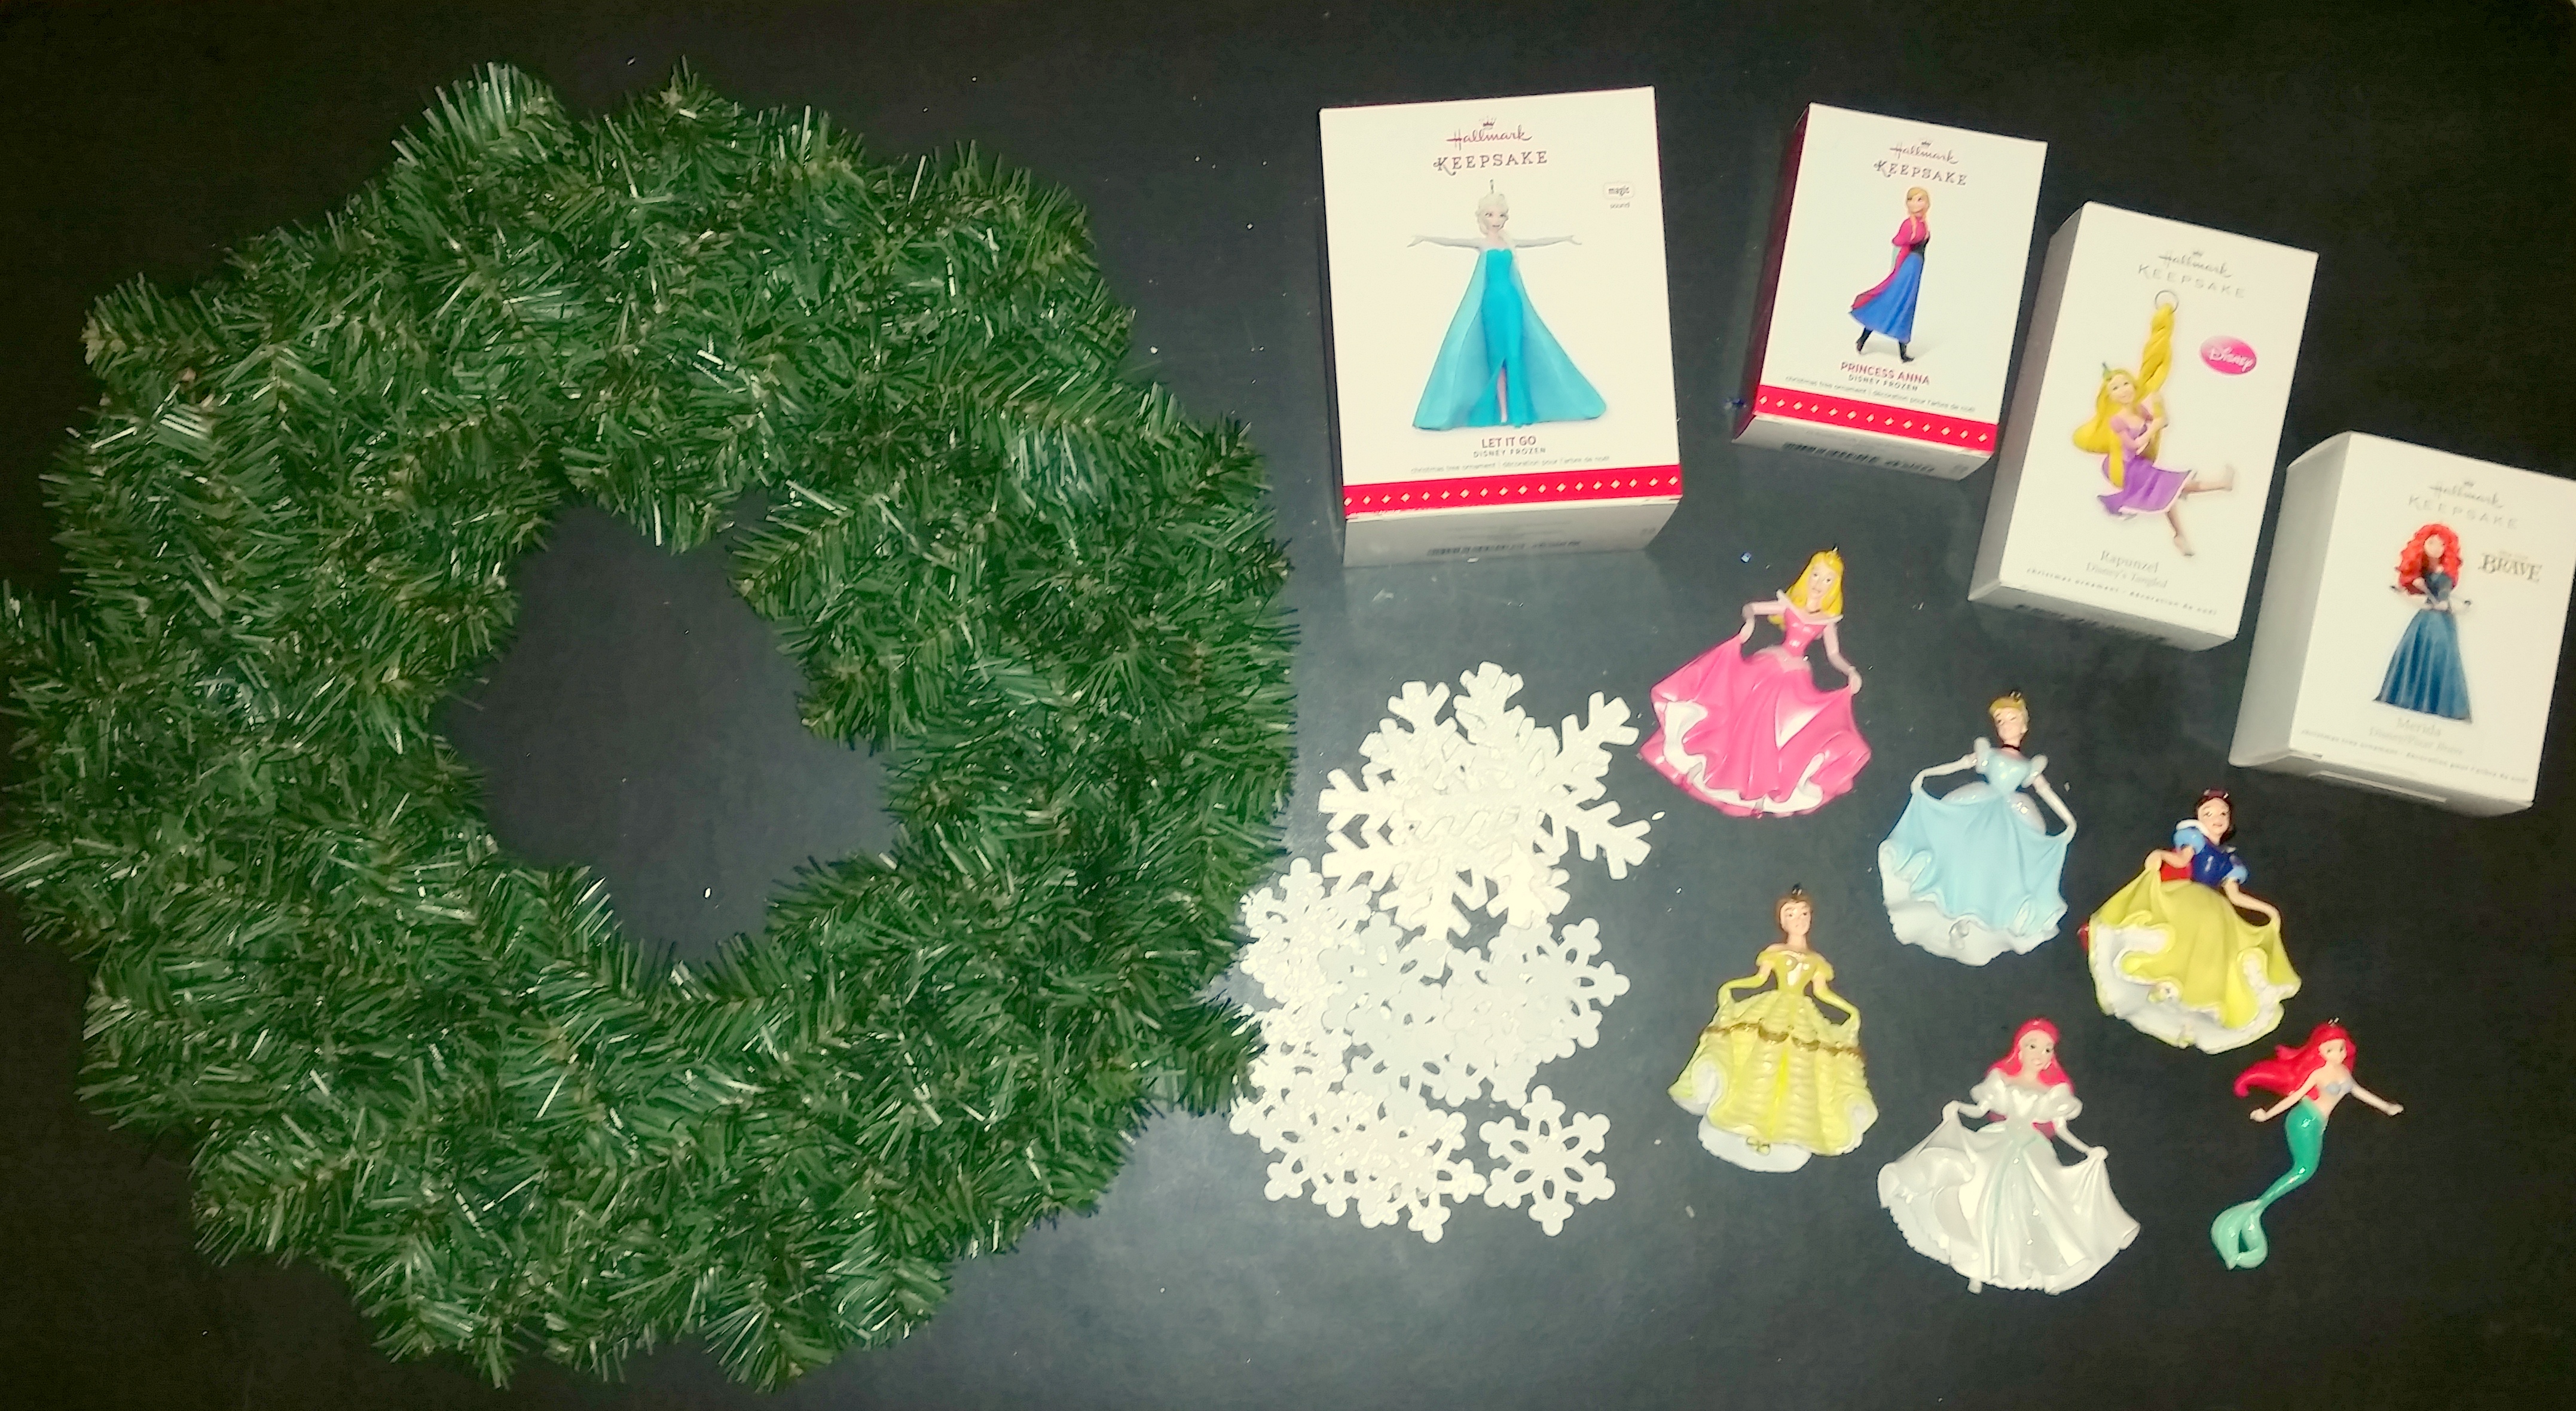
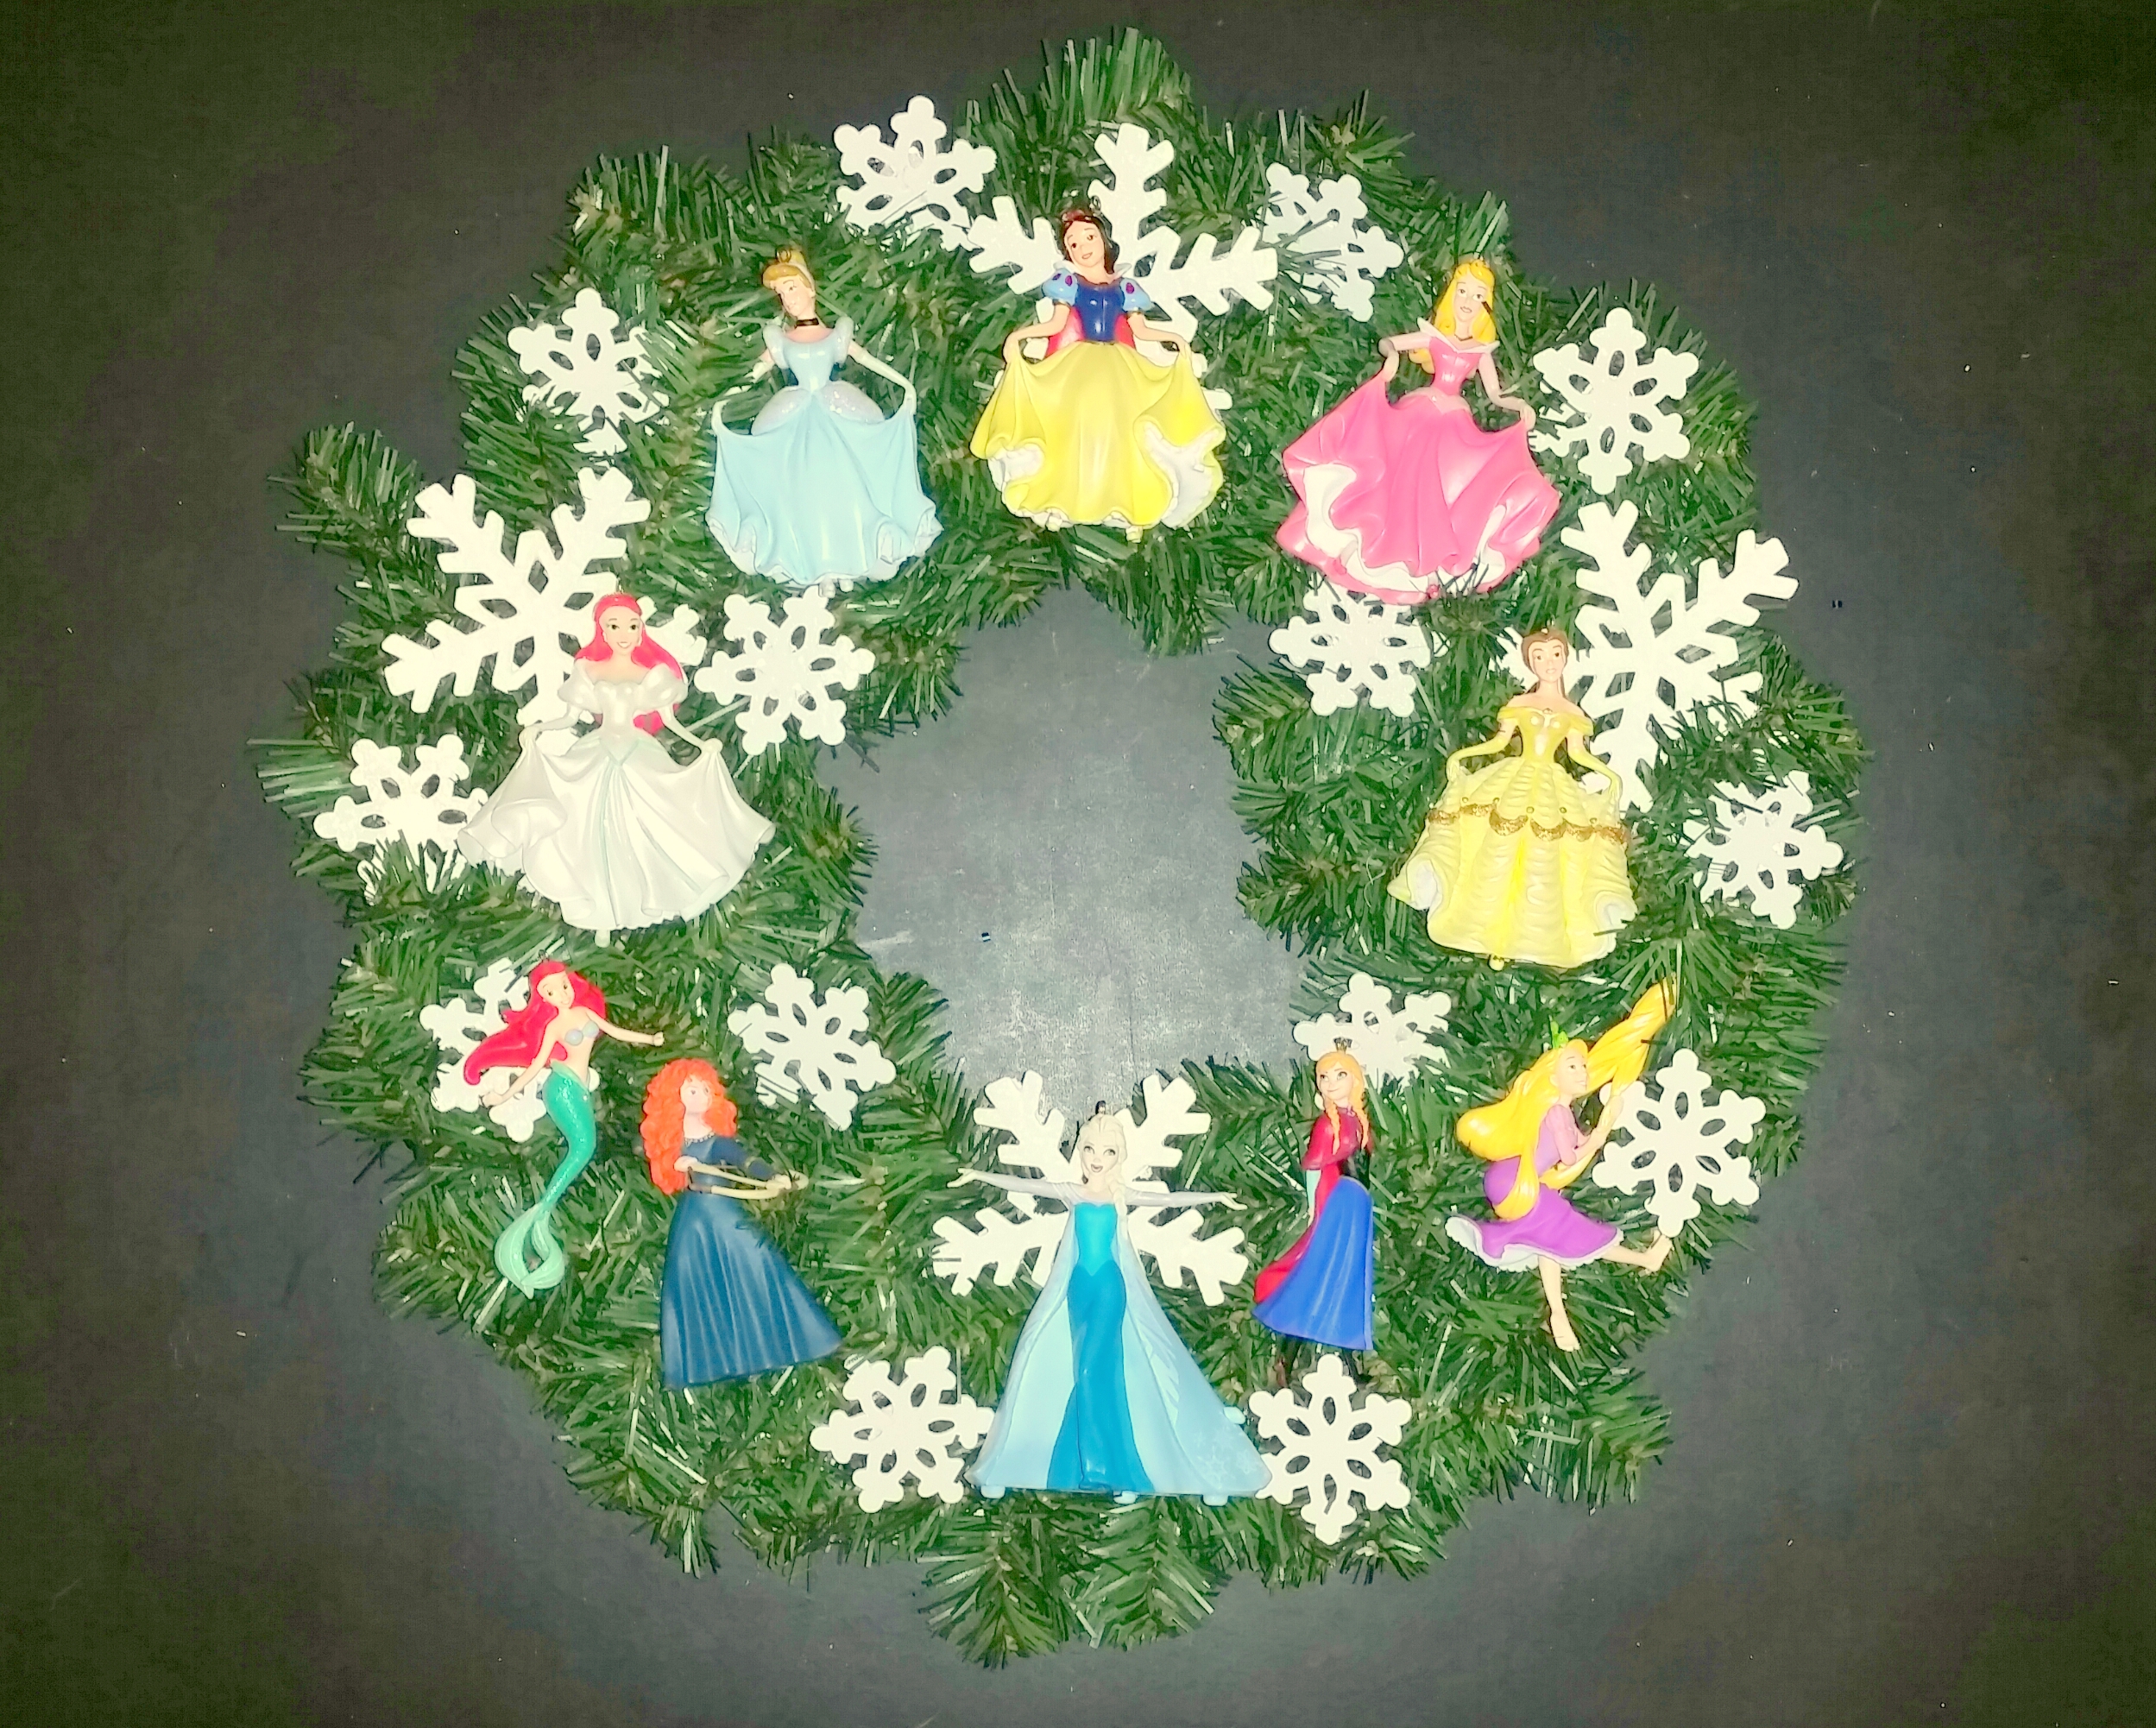
Disney Princesses Christmas Wreath

The final Christmas wreath used several Hallmark Princess ornaments and several more additional Princess ornaments that were purchased at the Disneyland Park in Anaheim.  Listed clockwise in the photo below are Snow White, Aurora from “Sleeping Beauty”, Belle from “Beauty and the Beast”, Rapunzel, Anna and Elsa from “Frozen”, Merida from “Brave”, 2 different Ariels from “The Little Mermaid” and Cinderella.  To create the Christmas wreath I attached white wooden snowflakes with wire, evenly spacing them around the wreath.  Then, to complete the craft project, I attached the Princesses with wired around the wreath. 

Disney Princess Christmas wreath - suppliesDisney Princess Christmas wreath

Last month, I posted another wreath that could be used for the Christmas season.  The Mickey Mouse wreath was made to honor the Disney character’s birthday in November.  For more information about this wreath with a list of supplies and instructions, please click on the link.

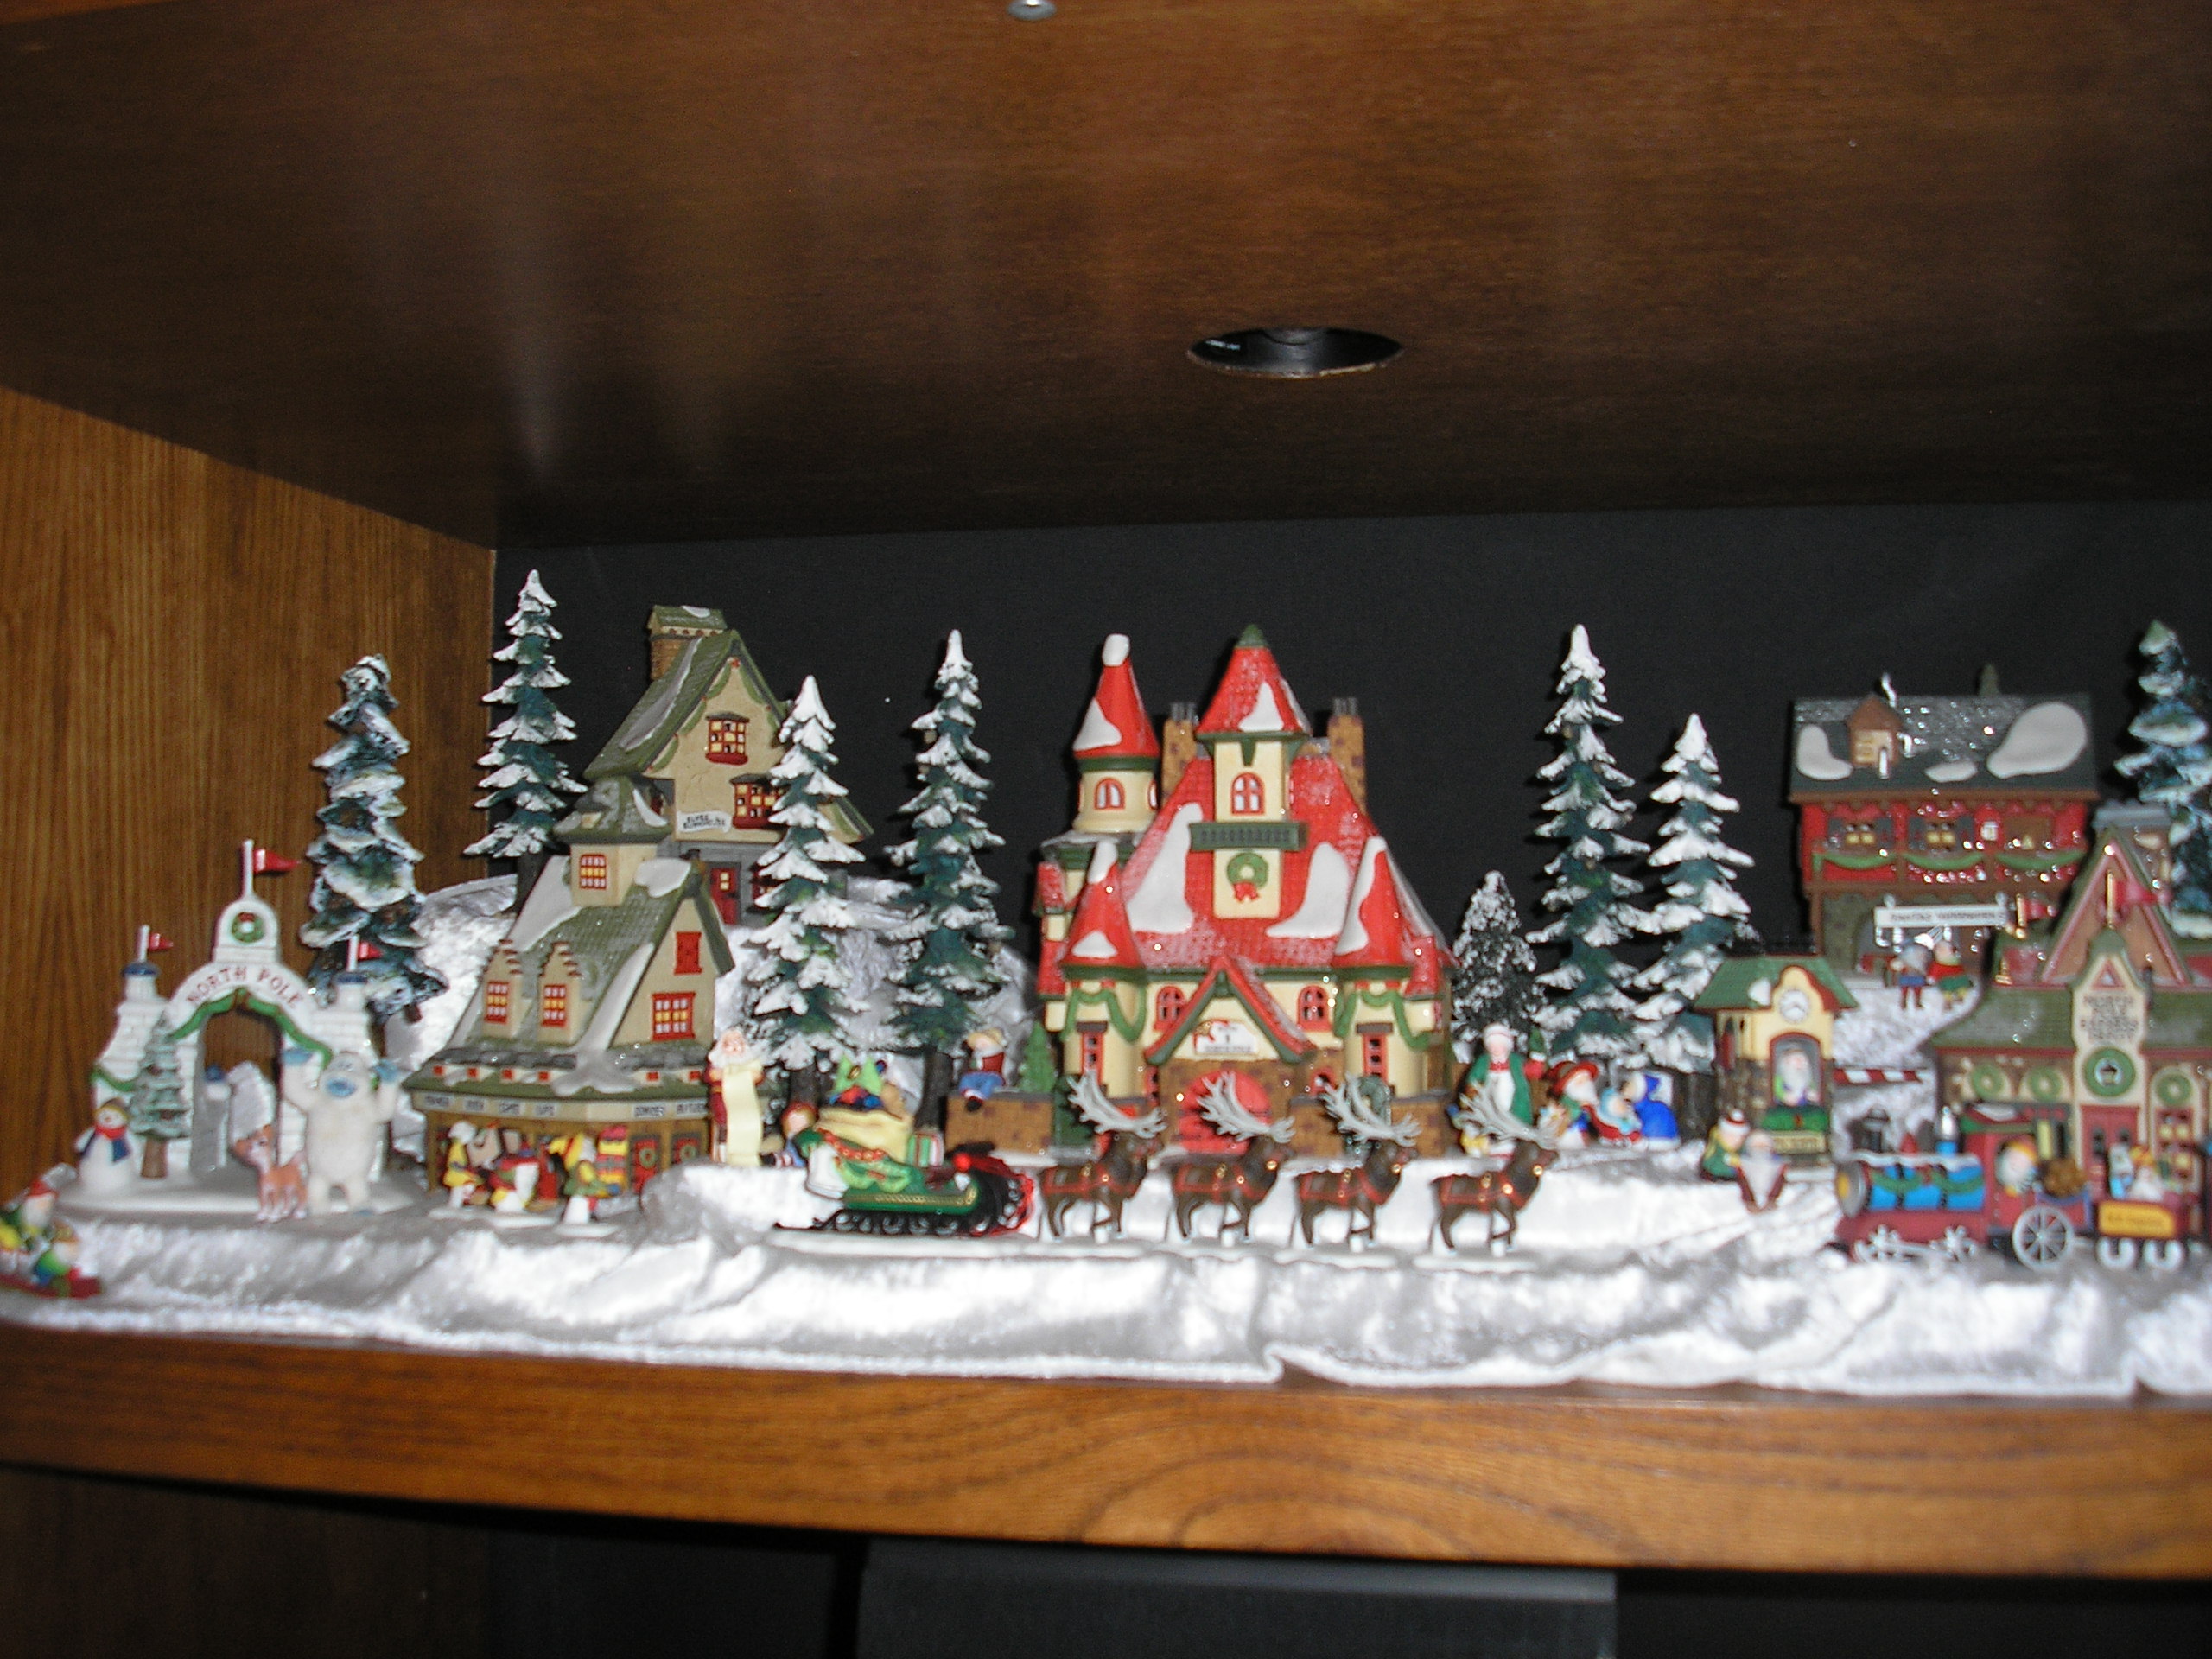
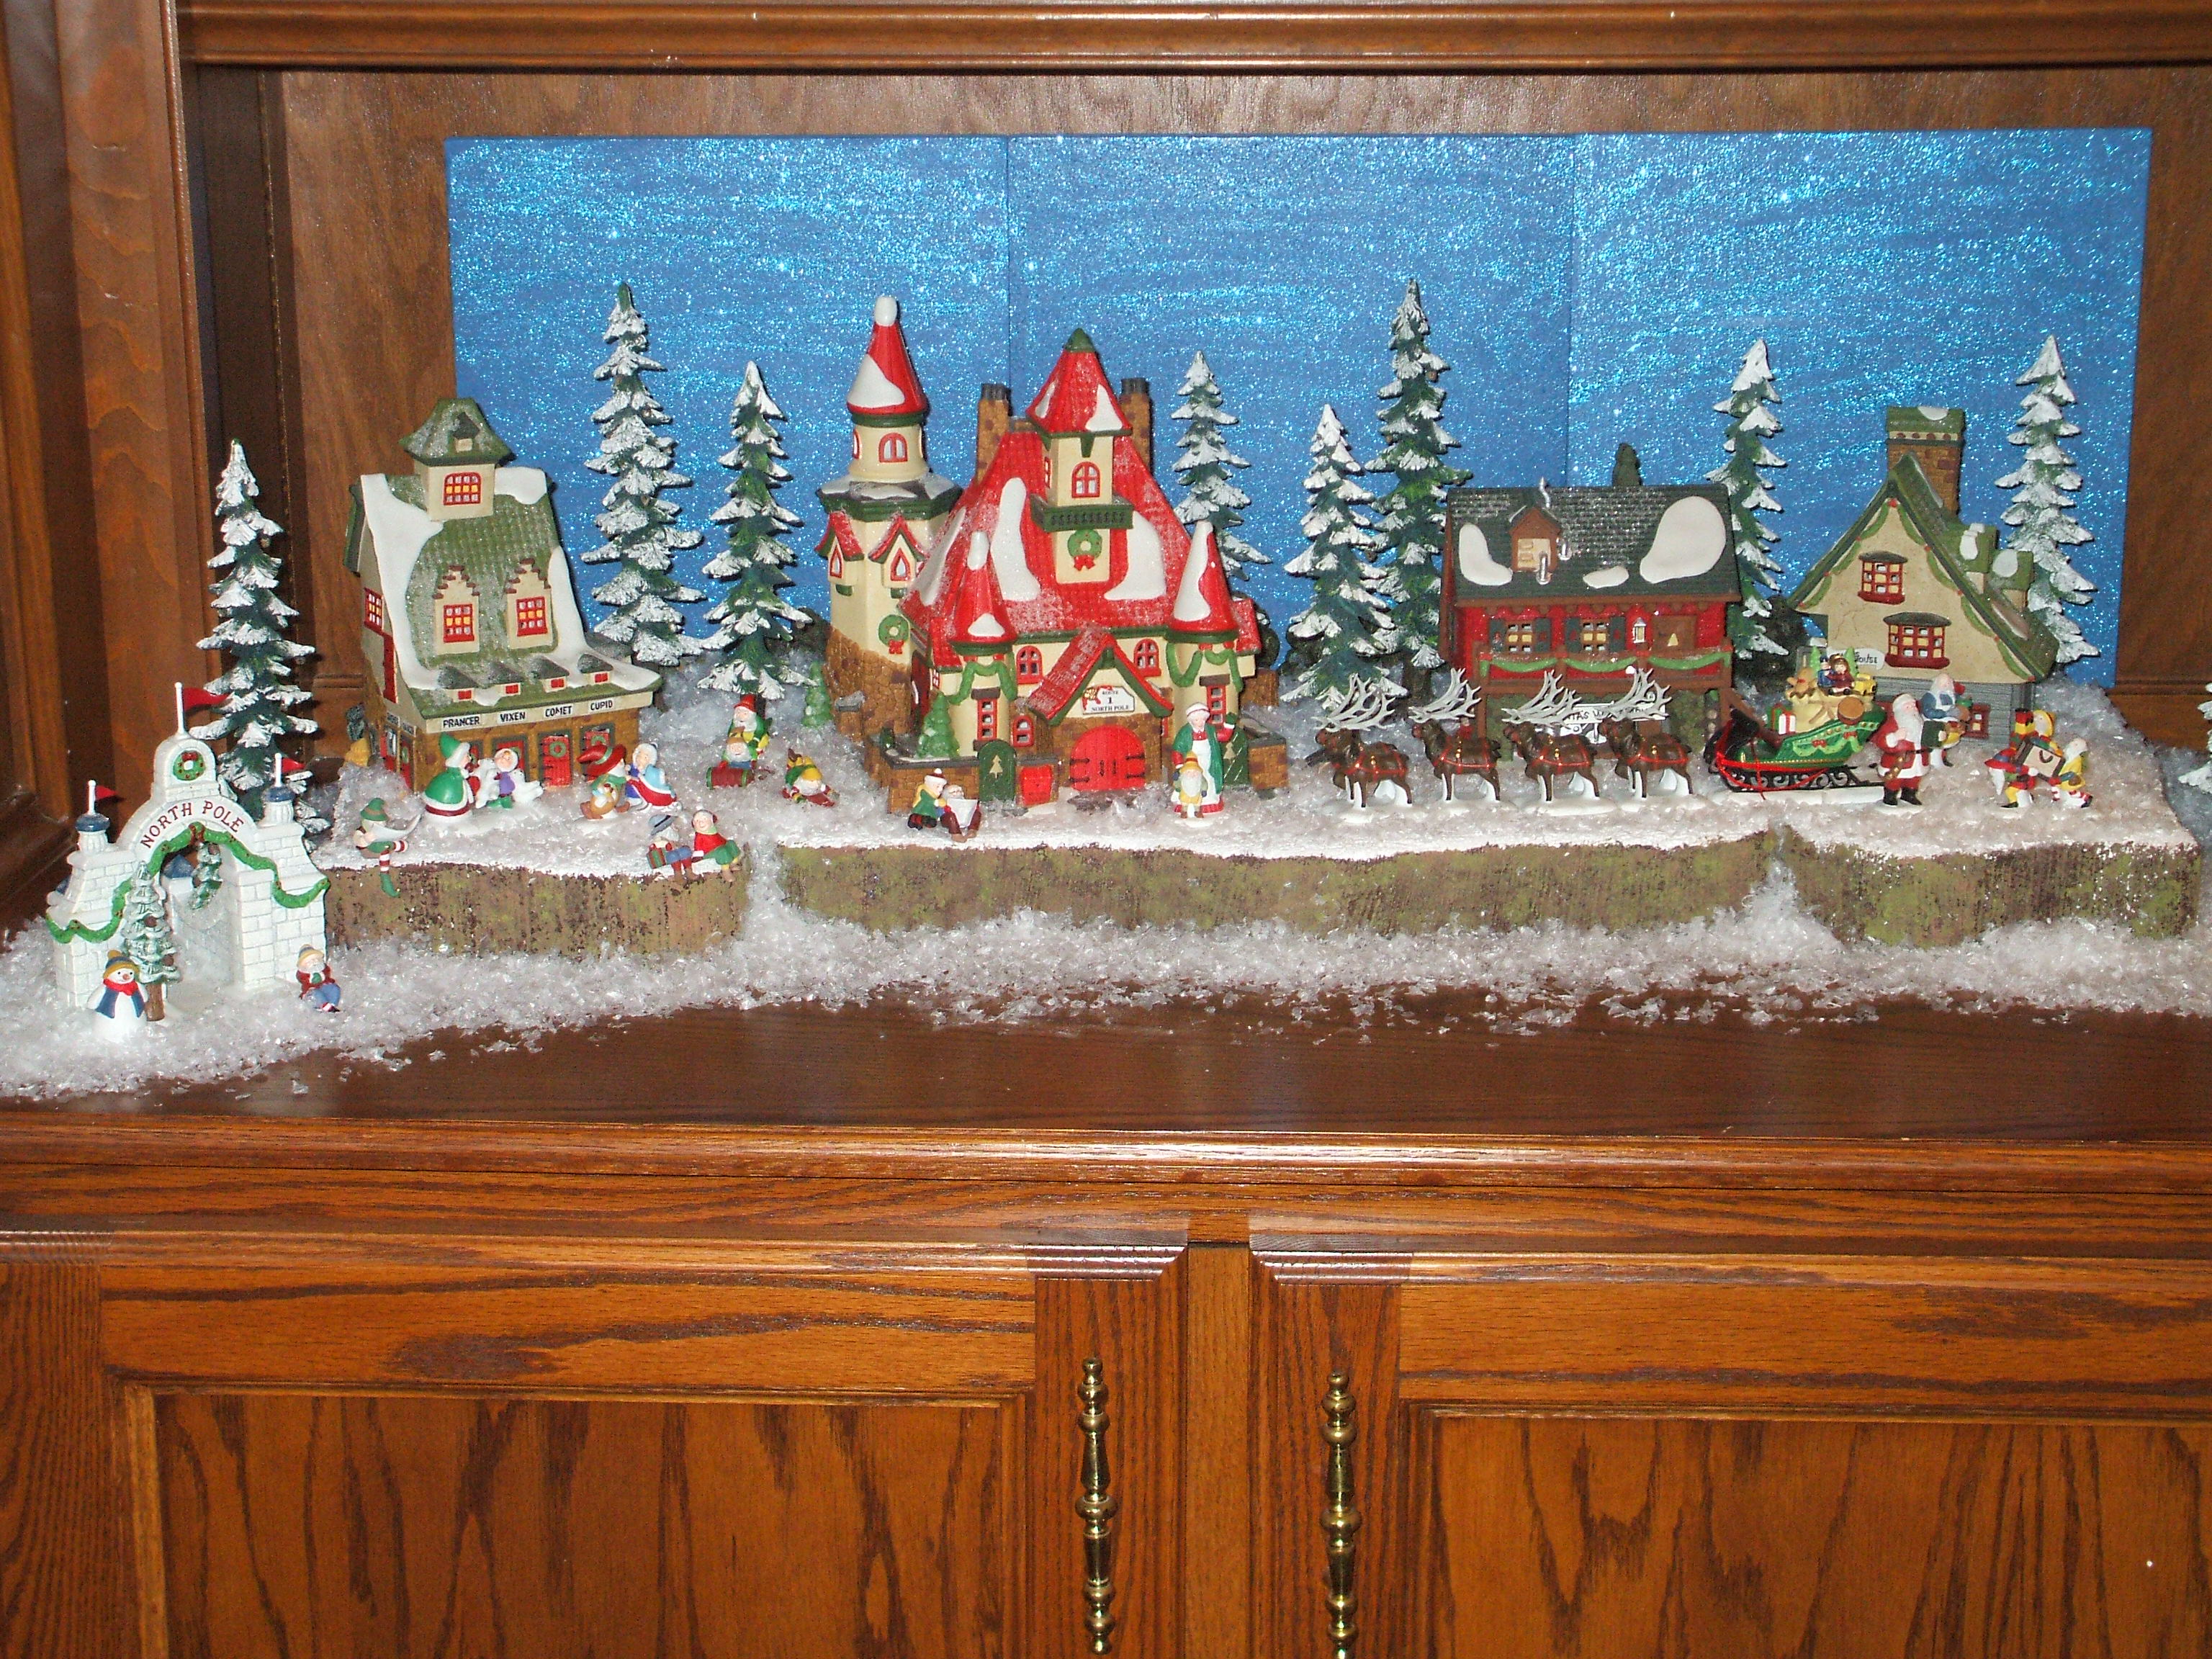
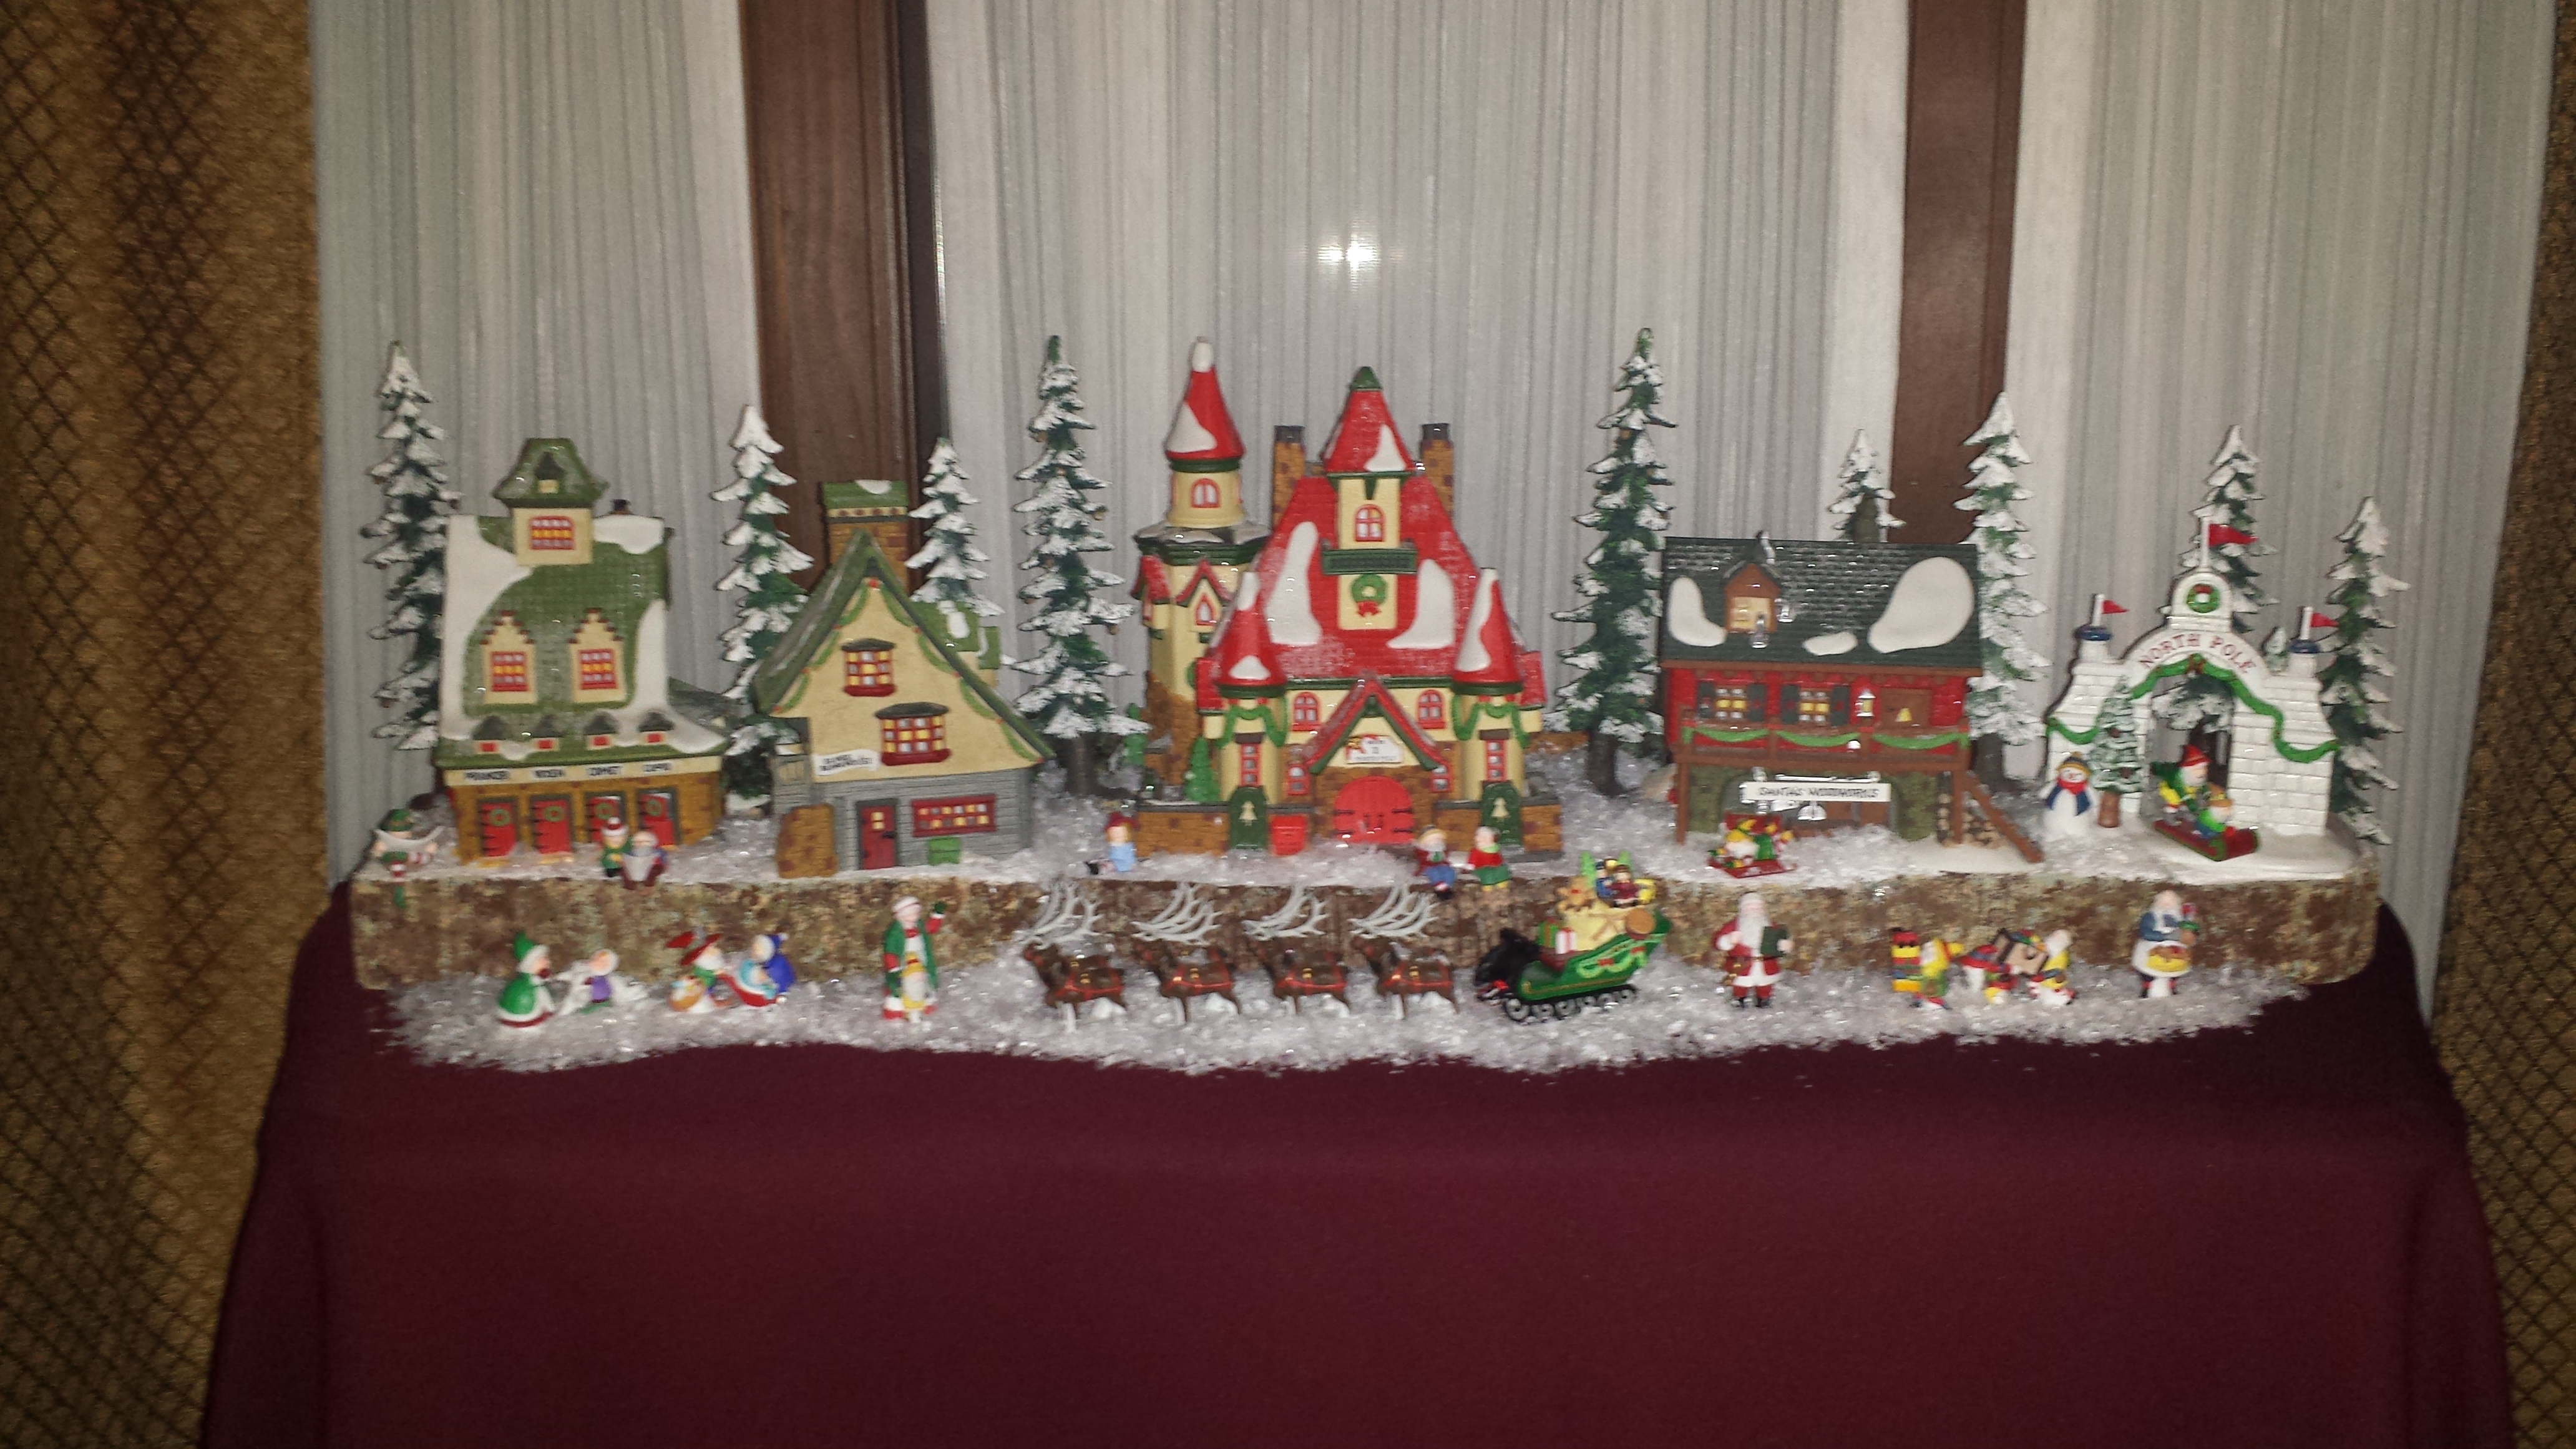
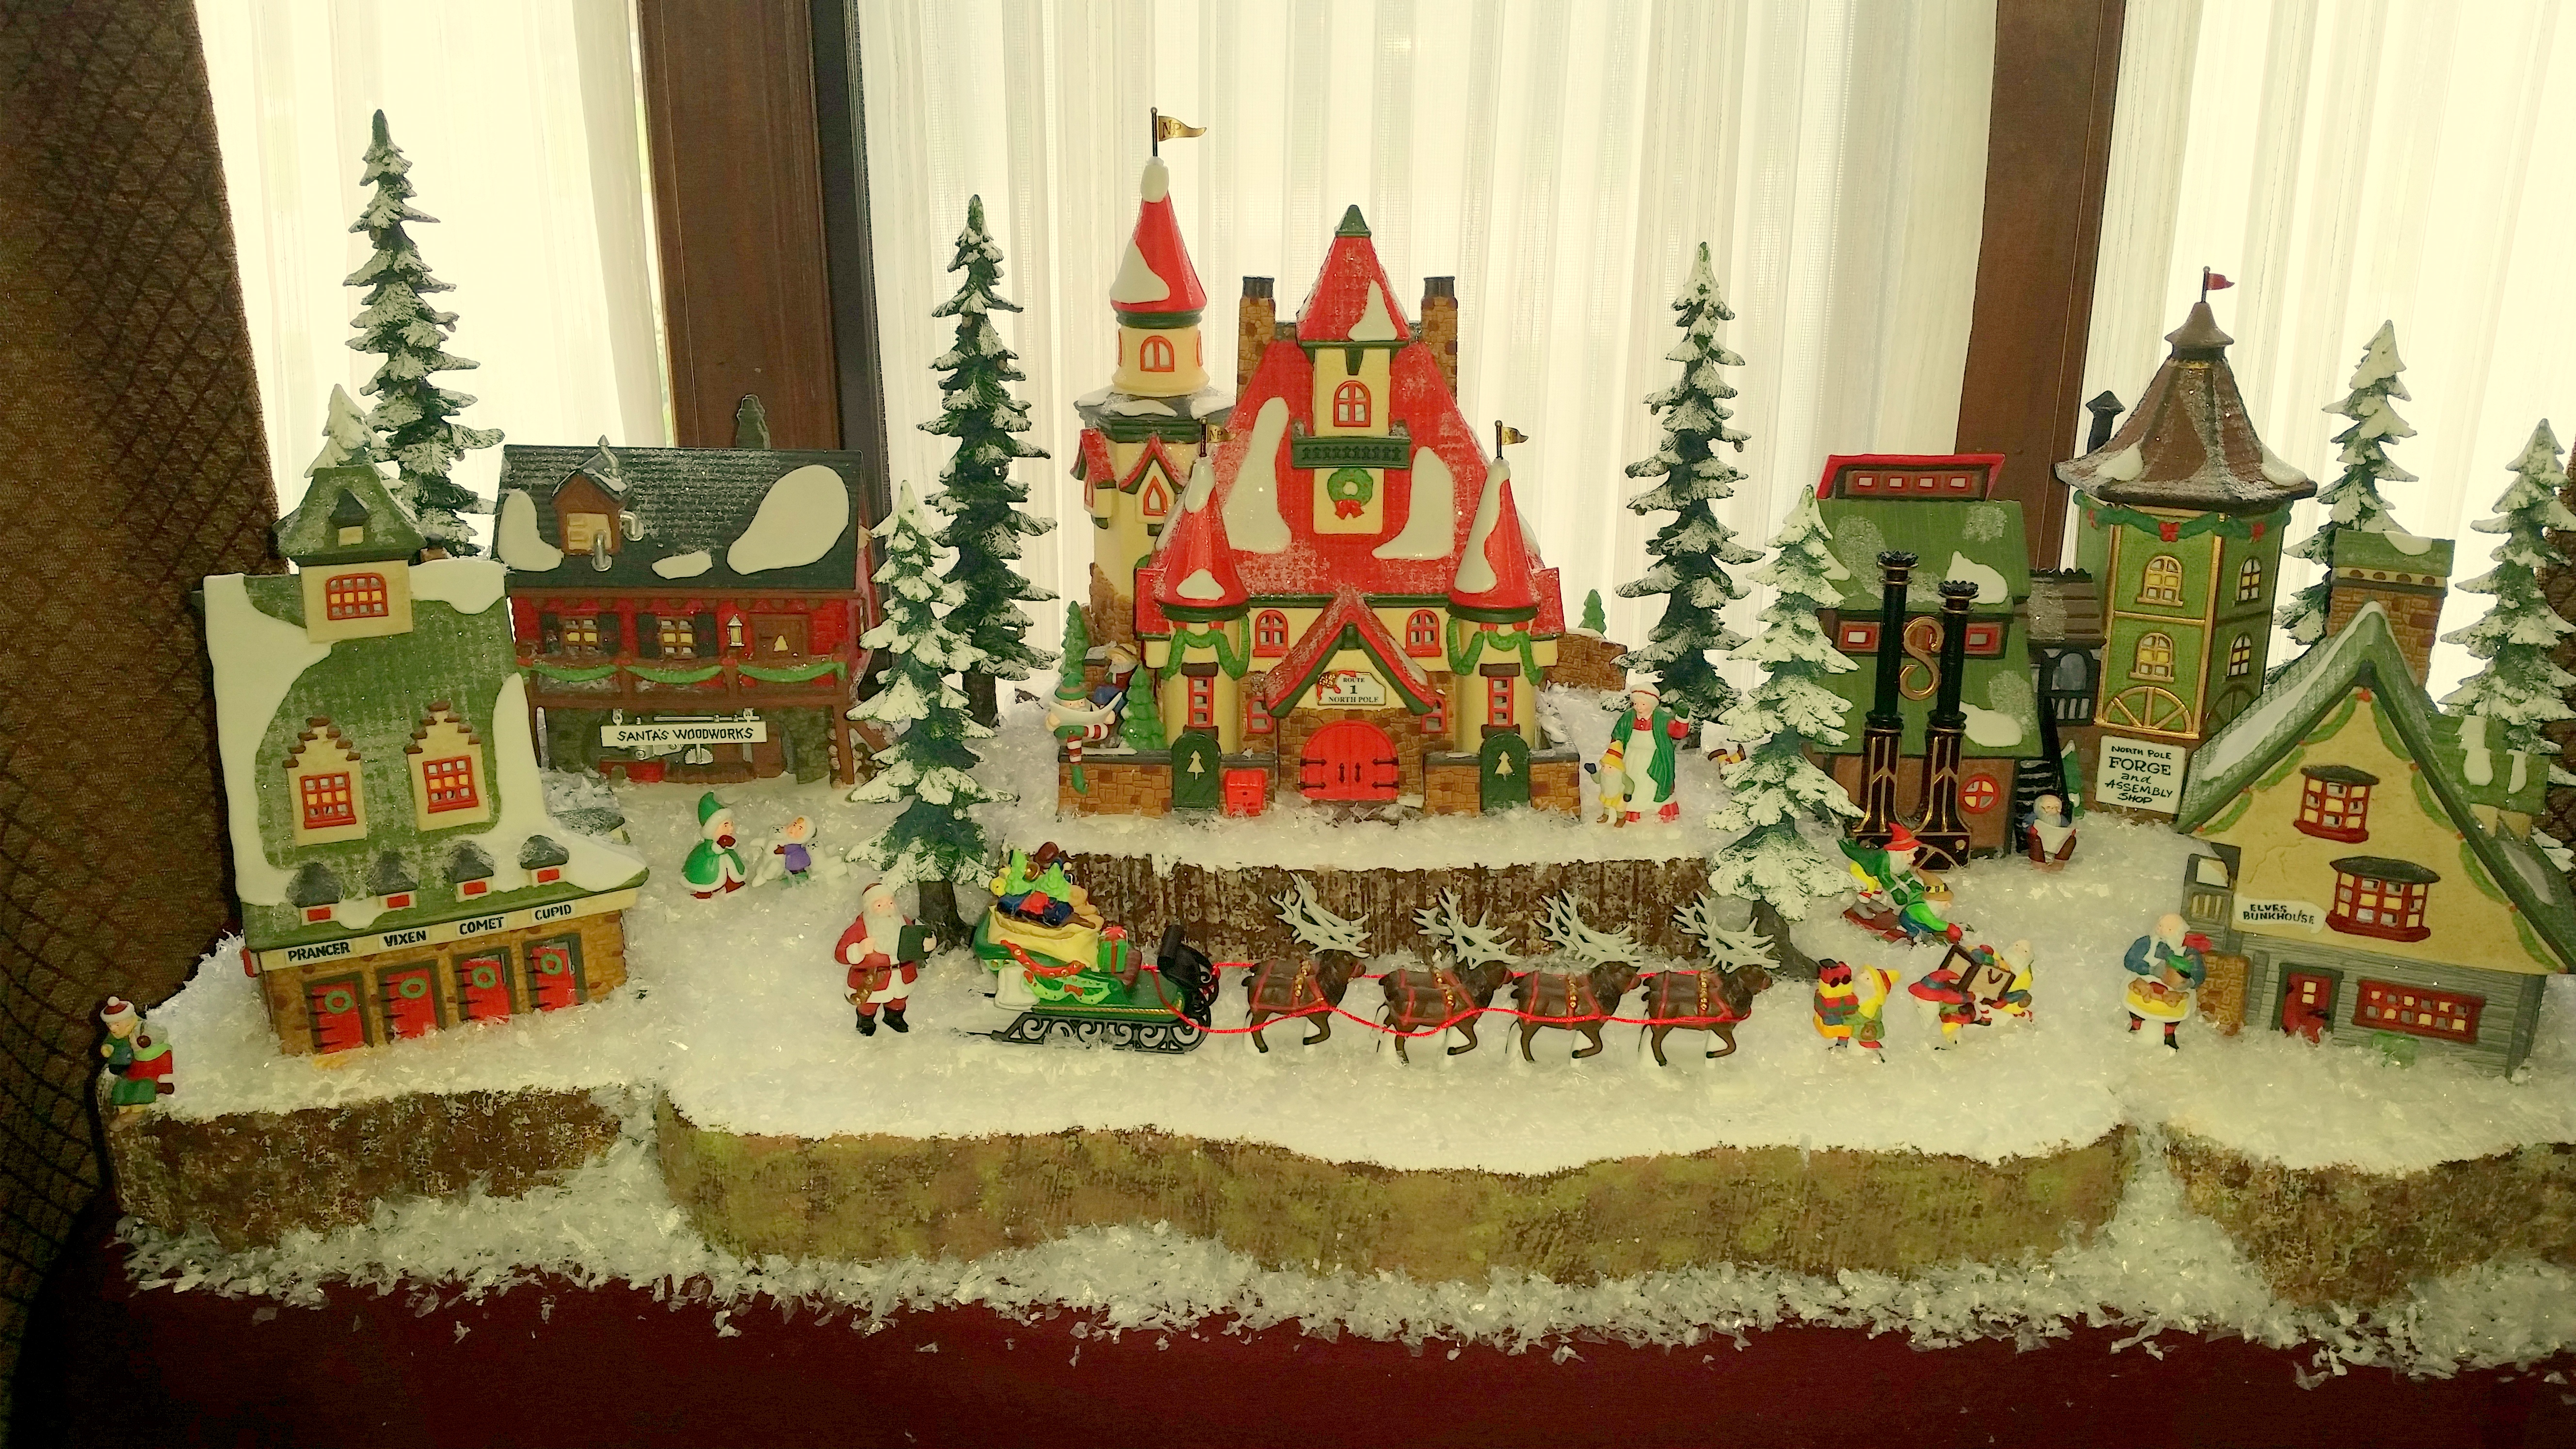
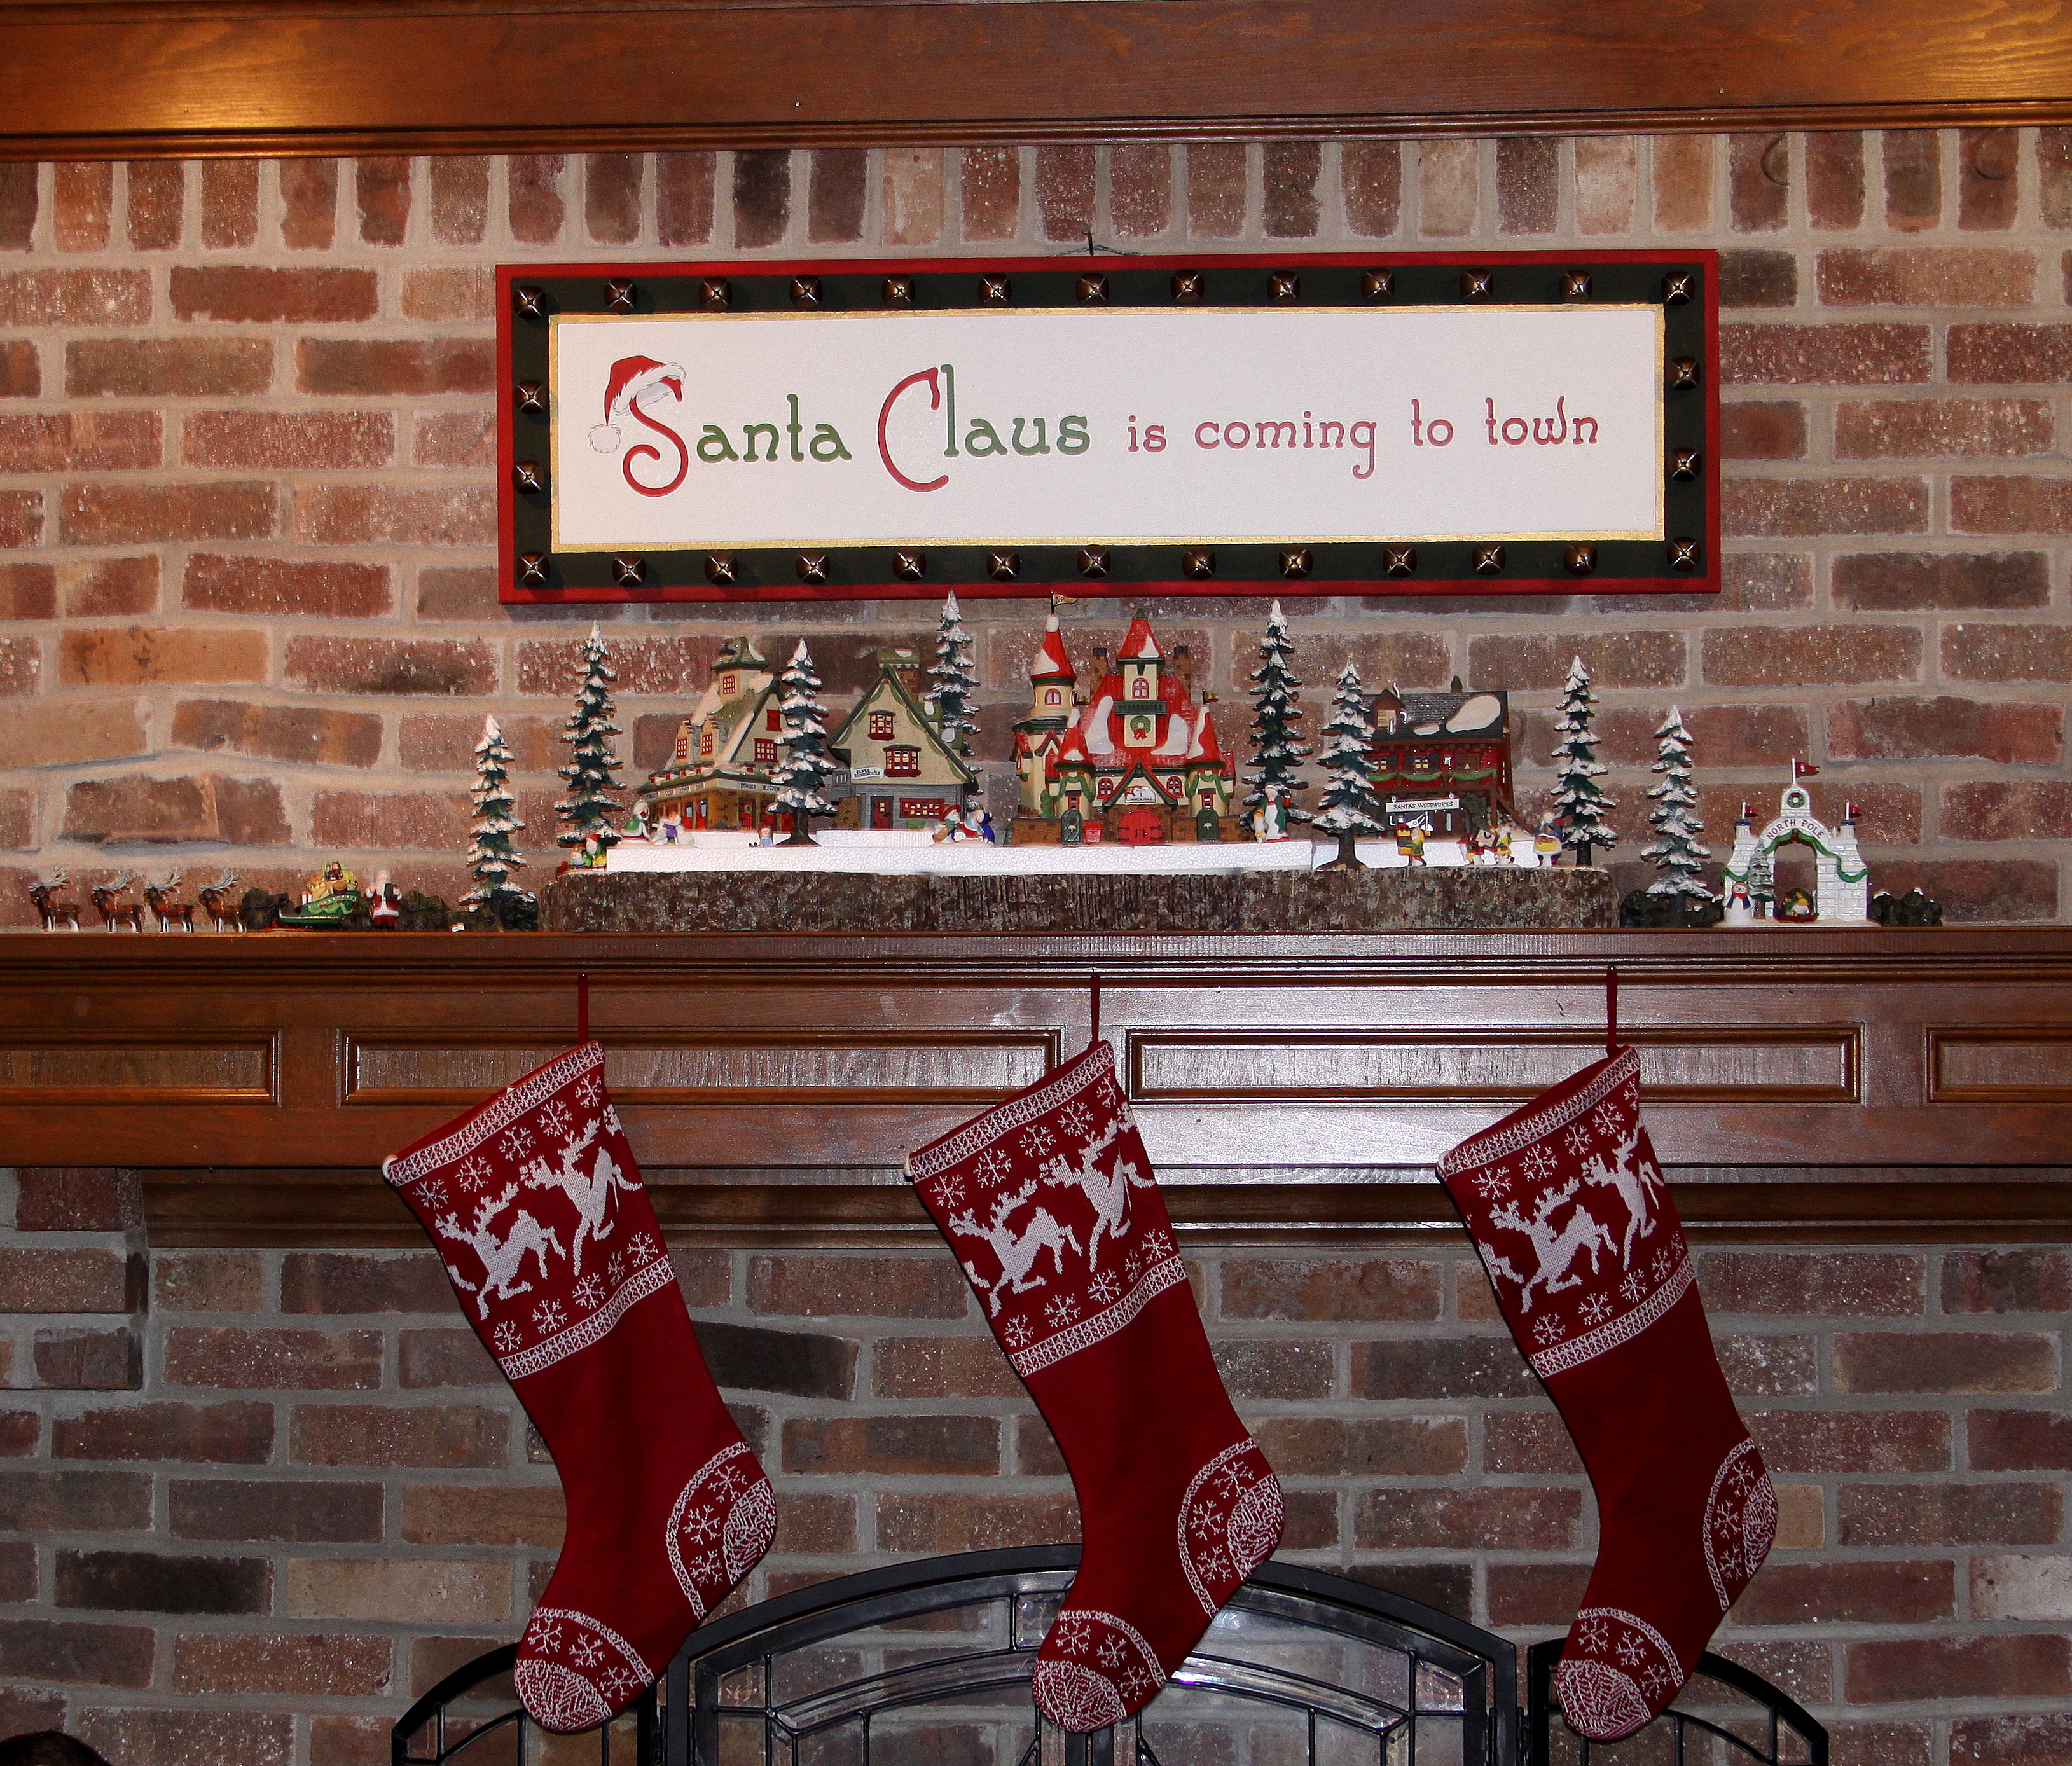
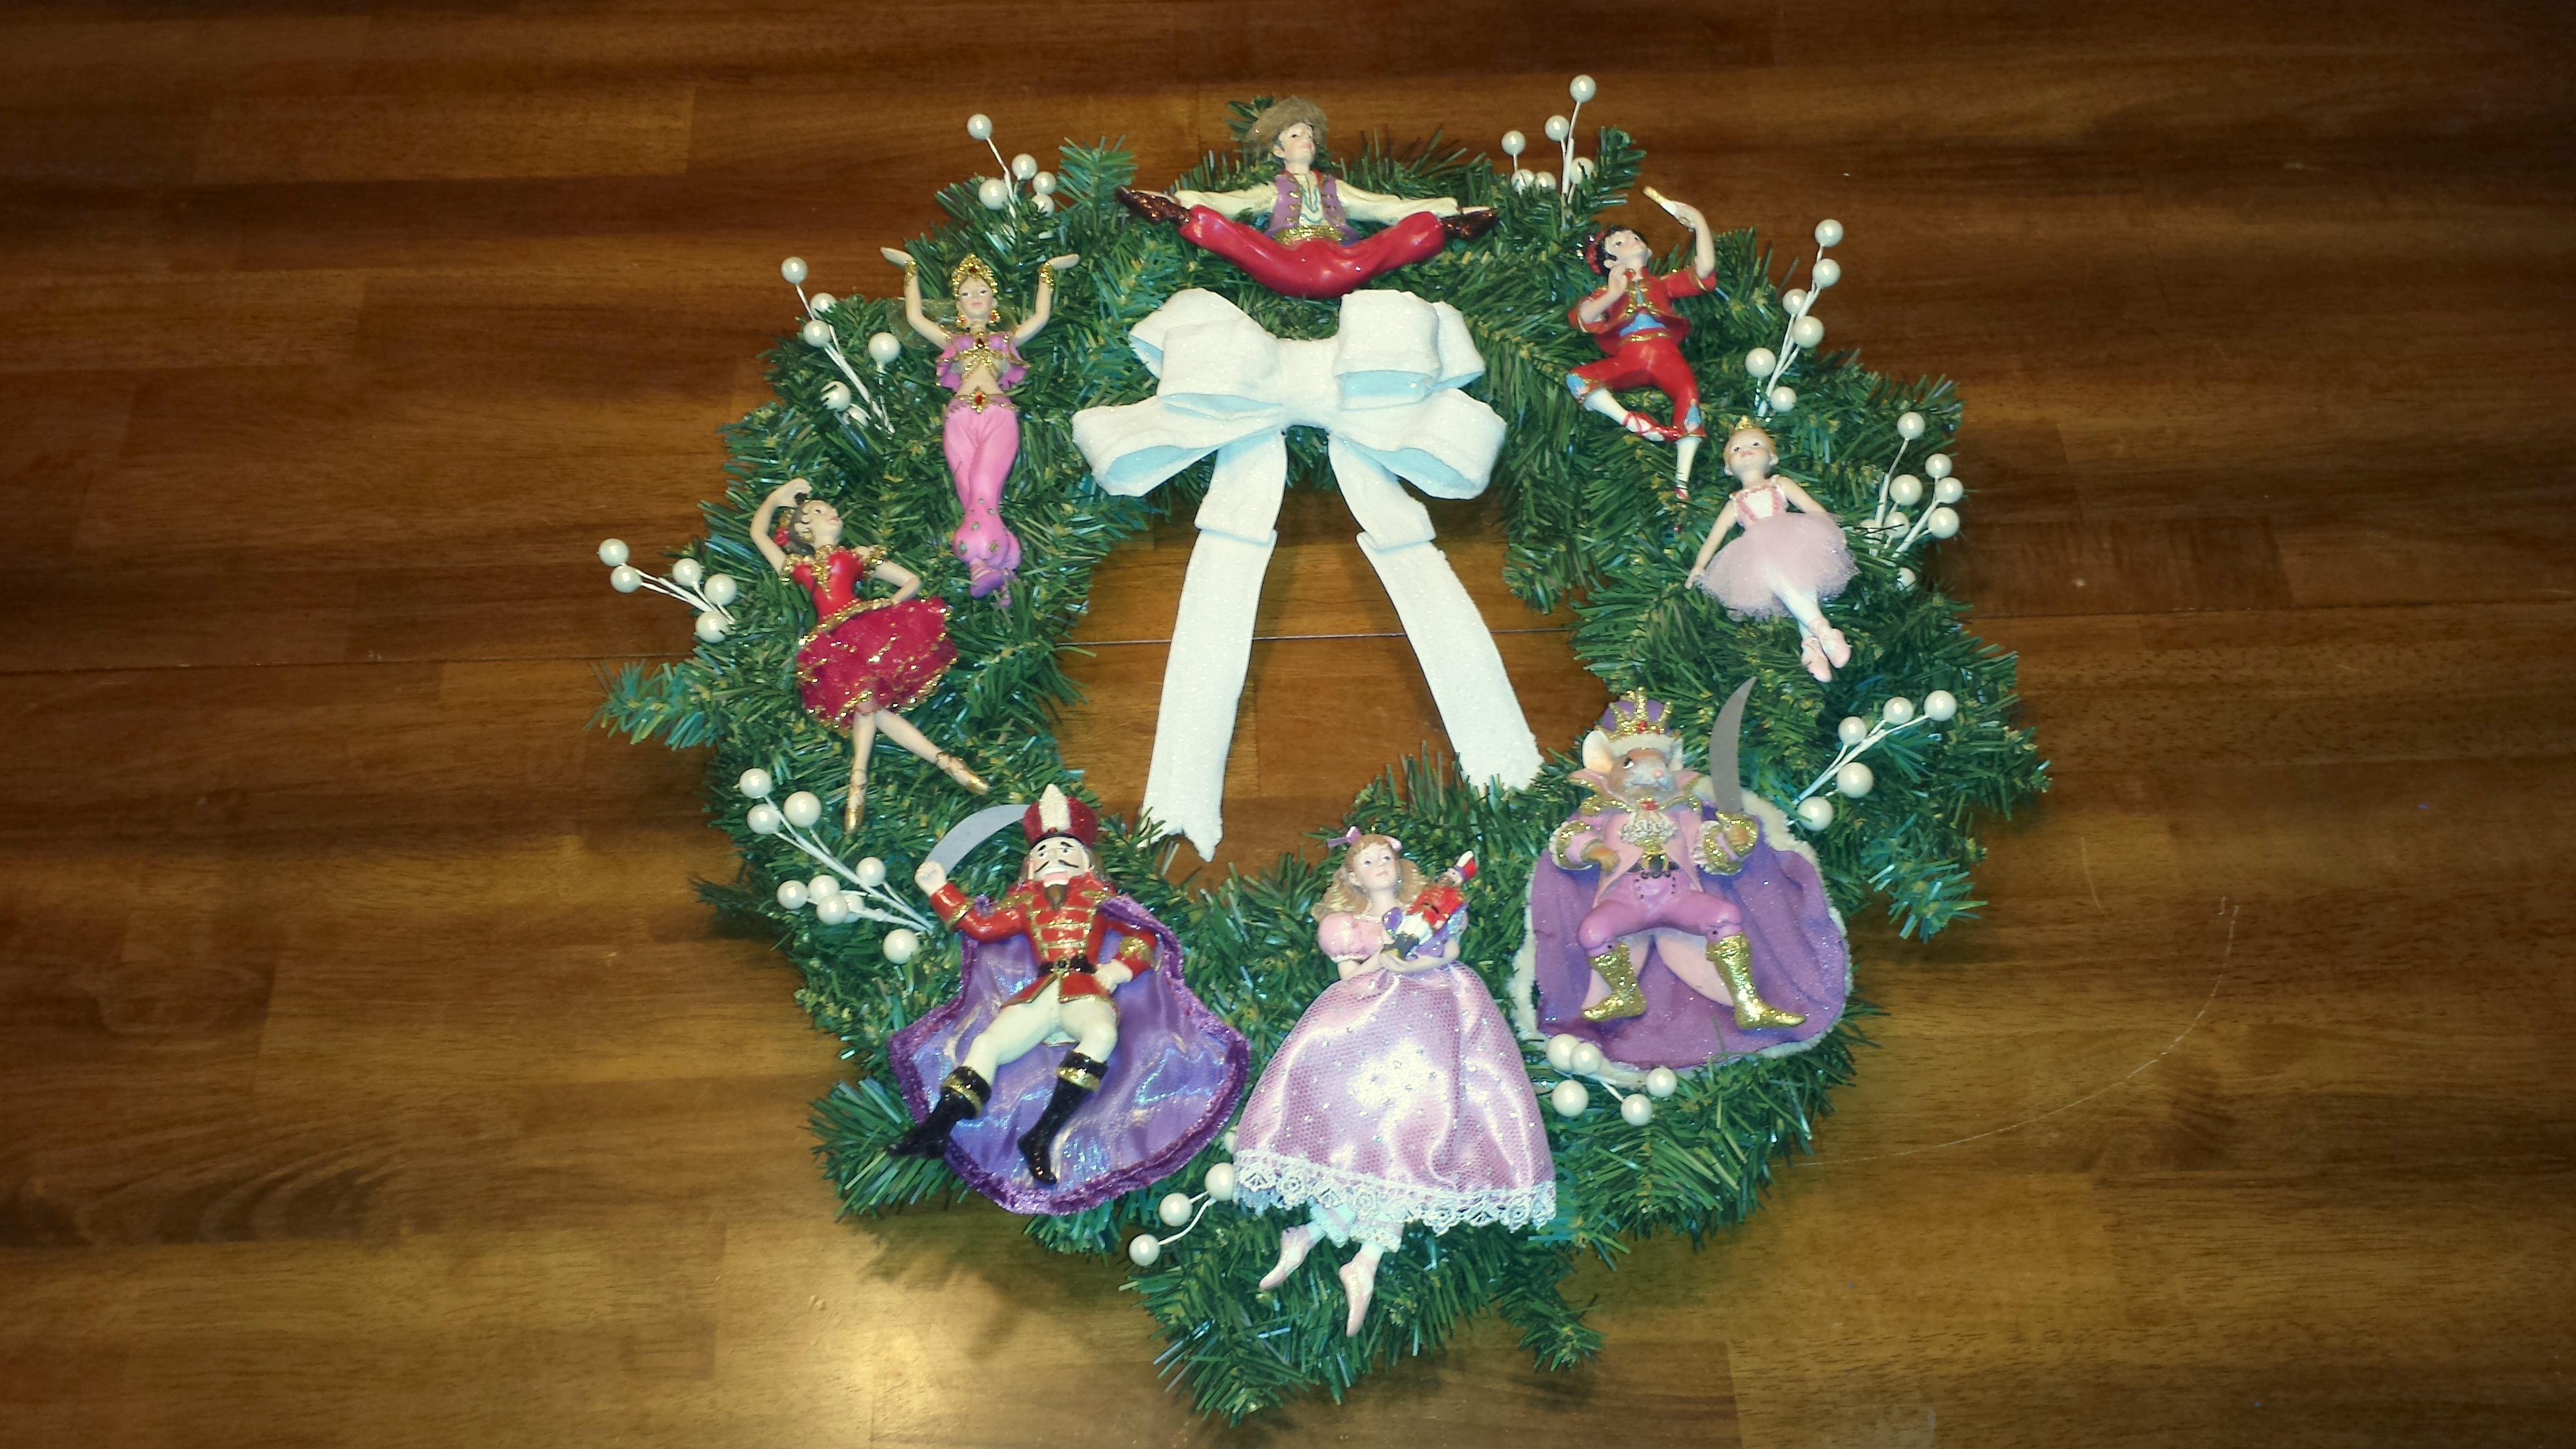
Two more interesting posts regarding decorating with a variety of Christmas wreaths have been posted a few years ago on this blog.  The first, Christmas Wreaths, featured a Gingerbread Men wreath inspired by a White House Christmas decoration, a Nutcracker Ballet wreath, a Boyd’s Bear wreath using several collectible ornaments and a Teddy Bear wreath using miniature plush teddy bears.  The second, More Christmas Wreaths, features using Department 56 miniature building ornaments from the Dickens Village and the North Pole series.  For more information about this wreath with a list of supplies and instructions, please click on the link.

Decor – Changing Christmas Displays (Part Two)

In the Changing Christmas Displays – Part One post, I discussed how I changed my Fontanini Nativity display from year to year.  I frequently change my seasonal displays by moving them into various rooms of our house or adding different accessories.  In Part Two, I will feature my Department 56 North Pole village display.

One of my favorite Christmas decorations is our Department 56 North Pole Village.  Almost twenty years ago I purchased four of these whimsical buildings; they were the Home of Santa & Mrs. Claus’ home, Santa’s Workshop, Elves’ Bunkhouse and Reindeer Barn.  I also purchased two other important pieces – Santa & Mrs. Claus and the sleigh and eight reindeer set (can’t have a North Pole without Santa!). Over the years, I have added other buildings and accessories, such as the North Pole Gate, the North Pole Train Station and North Pole Forge & Assembly Shop, Candy Cane Lamp Posts, a variety of elves figurines and other accessories.  When I unpack my Christmas boxes from storage every year, I always try to arrange the various North Pole buildings and accessories in different ways and sometimes I will also change the room where I set up the display. 

Shown below are photos from past North Pole Village displays: 

The first year I displayed the North Pole Village in our kitchen bookshelf.  It was very simple and small display with four buildings (Santa & Mrs. Claus’ home, Santa’s Workshop, Elves’ Bunkhouse and Reindeer Barn) and the North Pole Gate.  I used Styrofoam pieces used as platforms for each building and then I covered each shelf with white velvet material to create the illusion of snow (the white material was very inexpensive and it would be used repeatedly over the following years).  At the time, I only had a few accessory pieces which were Santa & Mrs. Claus, the sleigh and eight reindeer and two North Pole pine trees which were placed in the display. 

OLYMPUS DIGITAL CAMERA

The next year I displayed the North Pole Village in the same kitchen bookshelf but arranged the buildings and accessories differently.  I also added several more accessories; such as elves and a few more Christmas trees.  As you can see from the photo above and the photo below, even though I was using the same buildings of my North Pole Village the display looks different from one year to the next.

OLYMPUS DIGITAL CAMERA

The following year, I decided to move the North Pole Village into our living room.  The oak entertainment center had a shelf above the TV that was a perfect place for setting up the display.  I used the same buildings and accessories which I arranged on several different sized boxes to create some interest with a variety of levels and then covered everything with the white velvet material.  Next, I placed the four North Pole buildings and the North Pole Gate onto the shelf.  That year I added a few new pieces; the North Pole Train Station, the North Pole Express Train and the Ticket Booth which were placed on the far right side of the shelf.  Of course, I bought several more elves to add to the display … you could never have too many elves at the North Pole!  I also purchased three sets of three resin Christmas trees for a total of nine trees and I placed these around the display (these trees are an example of using non Department 56 pieces in a display and they were less expensive).

OLYMPUS DIGITAL CAMERAOLYMPUS DIGITAL CAMERA

The next Christmas, we had recently moved from California to the Midwest and our new living room had wonderful built-in wooden bookcases on either side of the fireplace and this is where I set up the North Pole Village.  I arranged the five North Pole Village and North Pole Gate on two shelves and once again I used several different boxes to create a variety of levels covered with the white material.  I had bought a new Department 56 North Pole piece called “Untangling the Christmas Lights” and it was added to the display.  When shopping that year I found a set of miniature “Rudolph the Red-nosed Reindeer” ornaments and also a set of resin rock wall which I thought would be great additions to the display (these ornaments and the rock wall would be another example of using non Department 56 pieces).

2007 Christmas 1

For Christmas the following year I had added a three piece Styrofoam base which I had purchased the previous year at an after-Christmas clearance sale.   The base would prove to be very versatile because it could be placed linked together for one long piece or separated and stacked to create two levels (this is a great example of shopping and taking advantage of sale items after the holidays)  To conceal the three separate pieces and create a unified look, I sprinkled artificial snow.  I also added a background using a tri-fold display foam boards usually used for school projects or presentations, I painted the board with blue metallic paint and clear sparkle paint.  As you can see from the two photos below, the one on the left shows an electrical outlet that I wanted to hide and the one on the right shows the background board which cleverly covers the outlet while enhancing the overall look to the display (this is an example of solving the problem of unsightly outlets, cords, etc.).

2011 Christmas North Pole Village  2011 Christmas North Pole Village with background

The next year I decided to move the North Pole displayto the fireplace mantel in our living room.  Throughout the year a beautiful English landscape painting normally hangs over the fireplace and I replaced it with a special Christmas sign that I made using a Christmas window/wall decal that said “Santa Claus is coming to town” which I knew would look great with my North Pole Village displayed underneath it on the fireplace mantel.  The sign is accented with bronze jingle bells that were the perfect decorative touch!  Next, I used two of the base sections but I had to make a third section because the original middle one was too wide to fit the narrow fireplace mantel.  Then I set out four North Pole buildings, the North Pole Gate and the various accessories.  (This display was featured in a previous post from my blog and for more detailed information on how it was created please click on the link to Setting up a Department 56 Village)

2012 Christmas  Family room fireplace mantel

The following year I decided to move the North Pole display to the library in our home.  I set the display on the same long table that I had previously put my Fontanini Nativity display.  I started by covering the table with burgundy material (this fabric has been used over several Christmas seasons and has been repurposed from year to year)  Then, I used the same three base section from the previous year as well as the four North Pole buildings, the North Pole Gate and accessories.

2014 Christmas 3

The next year I set-up the North Pole display in the same place in our library.  The only difference this time was the addition of a new North Pole building, the North Pole Forge & Assembly Shop.

2015 Christmas

As this post has shown in detail, a Department 56 display can be frequently changed from year to year by moving it to different rooms or areas of your home and also by adding accessories or other decorations to the display.  I hope this will inspire my readers to think about the options for displaying a nativity set in several different ways!

Decor – My Christmas Decorations from Past Years (Part Two)

As previously mentioned in Part One of My Christmas Decorations From Past Years series, I like to challenge myself every holiday season by using my Christmas decorations in different ways and sometimes in different rooms of our house every year.  Shown in the photos below are a variety of decorations from several years of Christmas past.

Pine Garlands

Some of my favorite Christmas decorations start with simple artificial pine garlands and at our home in California I frequently used them to decorate the entertainment center in the living room, the china cabinet in the dining room, the fireplace mantel in the family room and even above the bay window in the kitchen.  Every year I used different Christmas items to decorate the garlands, such as a variety of glass ornaments, artificial poinsettias, holly leaves with red berries in the living room and dining room, and one year I used artificial “sugared” fruit in the dining and wonderful artificial candy decorations for the kitchen for a fun and whimsical look.  (For more information about these decorated pine garlands, please click on the link to Part One of the “My Christmas Decorations From Past Years” series)

Besides using pine garlands in the interior rooms of the house, I also used them to decorate the front door of our home in California.  To start the display, I hammered in several nails above the front door which I used to hang an artificial pine garland which I decorated with several artificial red poinsettias and sprays of red berries.  I also hung a large artificial pine garland decorated with more red poinsettias, sprays of red berries and real pine cones.

OLYMPUS DIGITAL CAMERA

Pine Sprays

Artificial pine sprays are also a versatile Christmas decorating accessory that can be used to create wonderful displays in a home.  During the holiday season I use several pine sprays that I place behind the picture frames of several pictures in the family room, library and dining room throughout the years in both our former California and our new home in the Midwest.  Some of these pine sprays that I have used are plain and others have pine cones attached to them, I have also added red berry sprays for additional decorations.

I have also used artificial pine sprays to decorate the tops of tables, curio cabinets, fireplace mantels and even kitchen cabinets.  One year I decorated the pine sprays on the top of the tall cabinet in the dining room with the artificial “sugared” fruits that matched the pine garland I used above the china cabinet, the photo above shows the display.

OLYMPUS DIGITAL CAMERA

When we moved to the Midwest, I decided to use the gingerbread and candy decorations from the previous year’s pine garland in a different way than I had previously used above the bay window in the kitchen of our California home.  In our new home there was a space above the kitchen cabinets that was the perfect spot to create a new holiday display that used several pine sprays decorated with the gingerbread and candy decorations and finished with the gingerbread train from a previous year’s display.   (Please click on the link, Christmas Home Decorations, to see a photo of this display)

Also on the fireplace mantel in our Midwest family room, I decided to use several artificial pine sprays instead of a pine garland.  Below are two photos that show how I decorated the pine sprays in three different years.  The first year, I used two sets of pine sprays place on either side of the picture above the mantel.  I decorated them with red berries, real pine cones and I also placed two sets of candles on the mantel.  The next year, I placed the four pine sprays across the mantel below the picture which I decorated with red berries.  I also set several family Christmas photos on either side to complete the display.  (Please click on the link, Christmas Stockings/Fireplace, to see photos of these displays in another Décor post)

Finally, the following year I decided to do something a little more elaborate to include a special Christmas sign that I had recently made.  In previous years I had usually displayed my Dept. 56 North Pole Village in the built-in bookshelf to the side of the fireplace but this time I set up the North Pole display on the mantel.

2012 Christmas  Family room fireplace mantel

Tabletop Christmas Trees

Small tabletop Christmas trees are also a very versatile accessory that I use frequently in my holiday decorating throughout our house.  As previously mentioned in another Décor post entitled Christmas Trees, during the season every year I set-up several special and unique trees for family members.  My husband has a Star Trek tree placed on the deck in his home office and my son has a Star Trek for his room.  My daughter has another small tabletop Christmas tree for her room that I have decorated with Barbie ornaments one year, Disney princess ornaments for another year and Snowbabies miniature figurines for a different year.  (For more information about decorating with Department 56 Snowbabies, please click on the link)

2007 Christmas Cassie's Christmas Tree

Even more tabletop Christmas trees have decorated the various rooms of our house throughout the years.  In the entry way on a wooden bench I have displayed a Santa in a beautiful white embroidered cloak with two elves.  In another room is another tree placed on the fireplace hearth with an old fashioned Santa dressed in lovely red velvet cloak with two reindeer.  In the dining room on the chest of drawers is a porcelain dark-haired doll dressed in a red wool coat, hat and black fur muff and displayed with a reindeer and a wooden sled.  Even in the bathroom there is woodland small Santa dressed in a green corduroy coat with a fishing creel with a small Christmas decorated with red berries and a gold star on top.

I have also repurposed my holiday decorations from other displays from previous years to use as decorations for several more tabletop trees.  Above the refrigerator in our California home I decorated a small Christmas tree with chocolate candy ornaments that I had used the year before in the pine garland over the kitchen window and finished the display bay placing a gingerbread train in front of the tree.

OLYMPUS DIGITAL CAMERA

Another tabletop Christmas tree is decorated with the Boyd’s Bears ornaments that I had previously used on the fireplace mantel in our California home.  In keeping with the bear theme, the next year I decorated another Christmas tree with small stuffed teddy bears.

2009 Christmas Library - Boyds Bears

Craft – Christmas Ornament Displays

As I mentioned in this month’s Décor post, Ornaments Used in Unusual Ways, ornaments are not just for the Christmas tree and they can be used in many different ways throughout the house during the holiday season.  In this post I will show three examples on how ornaments can be displayed in some fun and creative ways.

Ornament Snowglobe

The idea for the Ornament Snowglobe is to use an ornament that can create a winter scene and then be able to turn the jar upside down for the artificial snow to create a falling snow effect.  The gingerbread house is a great example to use for this craft project, other ornament suggestions are: a Santa Claus ornament, a Snowman ornament or a single Christmas tree.

For this display I used a small glass container with a lid, a gingerbread house ornament, some artificial snow, and a glue gun/glue sticks.  Craft NoteWhen purchasing an ornament for this craft project, be sure that the ornament is small enough to fit inside the jar with the lid closed, also check the width of the ornament so it can fit through the jar’s opening.

Snowglobe ornament display - supplies

To start, be sure the inside of the jar is clean and remove any price tags or metal display loop from the top of the ornament.  To remove the display loop, grab hold of the loop with a plier and then twist with an upward movement.

Secure the gingerbread house ornament to the bottom of the jar with glue.  Optional step: For a permanent “snow base”, lay some cotton balls or batting onto the bottom of the jar after attaching the ornament OR paint the bottom of the jar with white paint and let it completely dry before attaching the ornament.

Next, add a small layer of artificial snow to the bottom of the jar.  Then, to finish the ornament snowglobe, securely glue the lid onto the top of the jar so that the jar can be turned for the “snow effect”.

Snowglobe ornament display - final

Framed ornament

For this display it is important to use ornaments with flat backs, such as the deer or gingerbread ornaments seen below.  I used a wallpaper remnant (but scrapbook paper can also be used) for the background, a frame that matches the ornament and a hot glue gun/glue sticks.

Framed deer ornament - supplies

Disassemble the picture frame, separating the glass and back from the frame.  Cut the wallpaper remnant (or scrapbook paper) to fit the size of the frame.  Then, glue the paper to the glass.  Re-assemble the glass and the frame backing inside the frame.  To finish the display, center and attach the ornament to the paper.

Framed deer ornament - final

Craft Note: The theme of this Framed Ornament is not specific to any holiday and would look wonderful on a side table or bookcase and can be displayed year-round.

Ornaments Under Glass

This project is similar to the ornament snowglobe but the difference is that this larger display can only remain stationary and uses multiple ornaments or accessories.

For this ornament display I used a large glass container with a lid, a boy and girl skater ornaments, four small artificial pine trees, artificial snow and a glue gun/glue sticks.  The idea for this craft project is to have one or two ornaments and use accessories like trees and artificial snow to set a winter scene in soft pastels or whimsical with primary colors.

Ornaments under glass - supplies

To start, be sure the inside of the glass container  is clean and remove any price tags or metal display loop from the top of the ornament.

Next, position the accessories, such as the pine trees, and secure into place at the bottom of the glass container with the hot glue gun/glue.  Be sure to leave room for the ornaments by positioning the accessories to the sides of the container and leave the area in the front clear to view the scene inside.

Then, secure the ornaments into place at the bottom of the glass container.  To finish the Ornaments Under Glass display, add a small layer of artificial snow to the bottom of the container to look like fresh fallen snow.

Ornaments under glass - final

So, next time you are shopping in the local retail or craft stores during the holiday season check out the Christmas ornaments and think about a different way of displaying them in fun and creative ways!

Decor – Ornaments Used In Unusual Ways

When decorating the home for the holidays consider using Christmas ornaments in unusual ways.  Christmas ornaments are not just for the Christmas tree, there are so many different ways to incorporate them into holiday decorations.  Listed below are several suggestions –

(Please check out this month’s Craft post, Christmas Ornament Displays, for additional ideas on how to display Christmas ornaments with supply lists and instructions to create one of a kind Christmas decorations for your home)

Chandelier Decorations

Several years ago I was trying to think of a creative idea to decorate the chandelier in our dining room.  It was a beautiful bronze multiple light fixture with lovely curved arms.  Inspired by seeing other chandeliers with hanging crystals, I thought for the holiday season I would hang small ornaments to add a festive look.  I found some small glass pinecones and acorns at a local retail store and I thought they would be perfect. I hung them from the chandelier’s arms with small ornament hooks.  Another way to hang them would be to use ribbons or silk cord.  So, during the holiday season look for smaller ornaments that fit your holiday decorating theme – maybe candy or gingerbread ornaments, small porcelain or glass snowflakes, small ball ornaments in red and green or silver and gold.  The retail and craft stores have a wide selection of ornaments – shop the sales to keep the cost down – be creative with style and color!!

OLYMPUS DIGITAL CAMERA

Window Decorations

I had purchased several beautiful ivory porcelain ornaments for an unbelievable price at an “After Christmas” sale one year but I didn’t know exactly how I was going to use them.  I had them in my Christmas storage box for a couple of years, just waiting for the perfect idea.  Finally, I was trying to find a way to decorate our windows and I thought the ornaments would add just the right festive touch.  With the curtain pulled slightly back and creating a beautiful frame for the windows, I hung the ornaments from the curtain rods at various lengths with thin ribbon in a matching ivory color.  It was the perfect holiday decoration for the windows!

Ornament Shadowbox

Years ago my Mother gave me several old ornaments from our family Christmas tree.  I never knew what to do with these ornaments because they were very old, made of vintage glass and I didn’t want them to break.  Since my Mother passed away this year, I decided I wanted to do something very special with them.  An ornament shadow box seemed like the perfect way to showcase and keep them protected.  If you have a family heirloom ornament or an ornament too fragile or valuable to hang on the Christmas tree, or a unique hand-painted, one of a kind ornament – consider displaying it in a shadow box.

Some ornaments are so beautiful or have such special meaning – why only display them for such a short time at Christmas when you could enjoy them throughout the entire year!  Sentimental ornaments would also be wonderful in a shadow box.  Consider these ways to display them year-round.  – a baby’s first Christmas ornament could be hung in the nursery – a baby blanket could be used as the background and cut to fit the size of the frame.

A special shadow box ornament would also make a wonderful gift to celebrate life’s special occasions, like a first Christmas ornament for the newlyweds, or to celebrate a new home, or a special milestone anniversary.  There is usually such a nice selection of ornaments available for the holidays, so when you are out doing your Christmas shopping look for unique one of a kind ornaments to give as a special gift.

Tabletop ornament hanger

Another alternative to showcase a special ornament is with a tabletop ornament hanger.  These are usually sold during the holiday season and feature a long curved hook to hand the ornament from and come in a variety of finishes – metal, glass, etc.  I use something a little out of the ordinary, pocket watch display domes – a glass dome with hook at the top and a wood base.  They work perfectly as an ornament hanger.

Wreath decorations

Hallmark and Enesco creates wonderful ornaments every year.  Some of those ornaments are very collectible and available in different themed series.  Every year another ornament in the series is available and soon you can have a collection of several wonderful themed ornaments.  If you display the collection on the Christmas tree separately, they could get lost with all the other ornaments.  Consider highlighting the collection and displaying them together on a themed Christmas wreath.

Nutcracker wreath - final    Boyds Bears wreath - final

(Please see the Craft post, Christmas Wreaths and More Christmas Wreaths, for ideas and instructions on creating unique wreaths using a collection of themed ornaments – two different Department 56 wreaths using small ornament houses from the Dickens and North Pole collections and also a Disney character wreath.  In addition, there is a lovely Nutcracker Ballet wreath using ornaments found in a local craft store and also a collection of Boyd’s Bears ornaments used in another themed wreath)

OTHER USES FOR ORNAMENTS

  • Tied to a luncheon or dinner napkin, use as a party favor for guests to take home.
  • Use as a gift wrap accessory and tie to a present for the perfect finishing touch.
  • Hang from the under a kitchen cabinet as simple holiday decorations.

      NOTE: don’t hang too low to interfere with working on the kitchen counters.

  • Hang from a pine garland to add an extra festive touch to a fire place mantel.
  • Hang ornaments from garlands draped on top of the bathroom mirrors.

There are so many different ideas for using Christmas ornaments in unexpected ways and you are only limited by your imagination and creativity!!  Please send your comments and suggestions; I would love to hear your ideas of other uses for Christmas Ornaments.