Craft – Cranberry Topiary

Depending on the current First Lady’s Christmas theme and decorative style for the White House, some variation of a cranberry covered decoration is always in the Red Room. Some years it can be a cranberry wreath or another variation but I have long admired the cranberry topiary.  I always thought that it was one of those perfect decorations for Christmas with the red color of the cranberries and the green color of the pine.

For years now I’ve always keep a silver bowl of artificial cranberries in our dining room during the holiday season.  This year I wanted to do something different and decided that I was finally going to use those cranberries to make a topiary for our dining room.

Listed below are the materials and instructions to make a cranberry topiary.

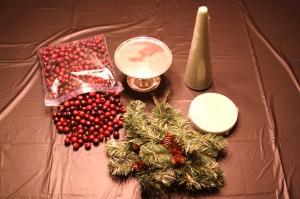
Cranberry Topiary – supplies

  • 1     Styrofoam come
  • 1     Styrofoam circle, a couple of inches wider than the base of the Styrofoam cone
  • 1     Container, as wide as the bottom of the Styrofoam cone
  • Cranberries, artificial
  • Pine boughs or other type of greenery for base
  • Small Pinecones, several
  • Hot glue gun/ glue sticks
  • Sheet moss, to cover the Styrofoam cone (optional)
  • Foam adhesive spray, to attach the sheet moss to the Styrofoam cone (optional)
  • Hot glue gun /glue sticks

Cranberry Topiary – instructions

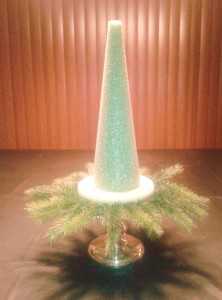
Center the Styrofoam cone on the Styrofoam circle; attach the cone securely to the circle with hot glue. This will create one piece that you can set a silver bowl or I used a silver pedestal base.

Option #1 – Use spray adhesive to attach sheet moss onto the Styrofoam, this covers any empty spaces left between the cranberries and gives a finished look.

Option #2 – Paint the Styrofoam cone a burgundy shade to match the cranberries so the empty spaces between are not noticeable.  (Even though it is not pictured, this is the option I used for my cranberry topiary)

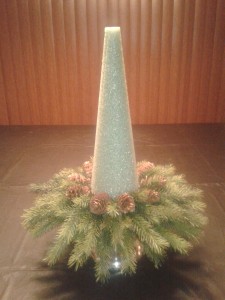
  1. Insert the pine boughs or greenery into the Styrofoam circle at the base of the Styrofoam cone.
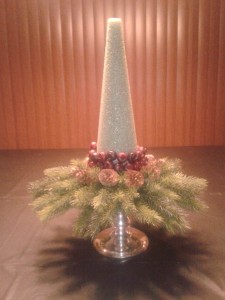
  2. Hot glue small pinecones at the base of the Styrofoam circle.  Be sure to save one for the top of the Styrofoam cone
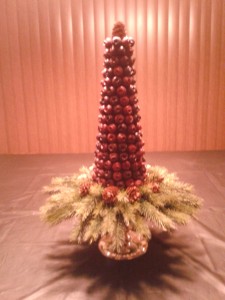
  3. Using a small amount of hot glue, attach each individual cranberry to the cone.  Starting at the bottom, work in rows until the cone is completely filled to the top.  Try to leave as little space as possible between cranberries.
  4. Hot glue a small pinecone to the top of the Styrofoam cone to complete the topiary.


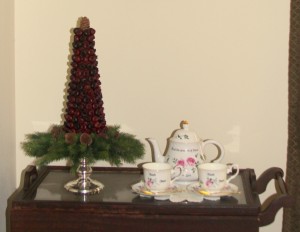
As you can see from the photo at the top of the post, the cranberry topiary looks wonderful on the tea cart in our dining room.  Additional ideas for places for a topiary: on a side table in the family room, placed into the corner of the kitchen counter or two topiaries on a buffet table for a Christmas luncheon.

Celebration – The White House Christmas

Decorating the White House can be a very challenging project.  It has 132 rooms, 28 fireplace mantels, 412 doors and 147 windows which all need to be decorated.  For example, in 2000 the White House was decorated with 1,120 feet of garland, 50,000 lights, 220 poinsettias and 34 Christmas trees.  This is the reason that planning for the White House Christmas decorations can start as early as July.  At that time, the First Lady will pick the theme for the upcoming Christmas.

Jackie Kennedy is considered to be the first person to decide on a specific theme to decorate the White House for the holiday season.  That theme was the “Nutcracker” and it has been used two additional times over the last 30 years – in 1990 by Nancy Reagan and 1996 by Hilary Clinton. For more details of the White House Christmas themes from 1961 to present, visit the White House Historical Association website at www.whitehousehistory.org

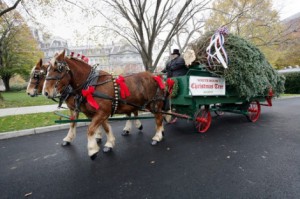
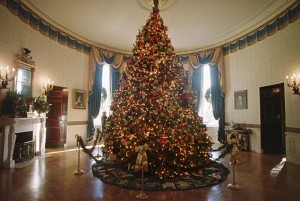
The main focus of the decorations is the official White House Christmas tree and it holds a prominent place in the center of the Blue Room.  The tree usually stands nearly 20 feet tall and the crystal chandelier has to be removed.  The Chief Usher usually selects the tree and it is donated every year since 1966 by the National Christmas Tree Association.  Once the tree is delivered to the White House, the National Park service members will bring the tree into the Blue Room.  The White House Floral Department staff and season volunteers decorate the tree and the various rooms on the first floor of the White House.


Those other rooms include:  The East Colonnade which has a distinctive set of windows that are usually decorated with several wreaths or poinsettias.  The Grand Foyer and adjacent the Cross Hall are such a large space that it can be sometimes difficult to decorate because this area needs to remain open to accommodate the many holiday festivities.  This area usually has several Christmas trees and garlands decorated in the style to fit the theme for the year.  The Green Room’s color scheme is perfect for the holiday season.  It is usually decorated with topiaries, floral arrangements and pine garlands draped across the mantel and fall all the way to the floor.  The Red Room’s bold color makes it one of the easiest rooms to decorate for the holidays.  Traditionally this room will have a cranberry topiary.  The State Dining Room is used for various holiday special events such as elaborate luncheons and dinner parties.  It can hold any number of tables beautifully decorated with floral centerpieces, place cards and menu cards for the honored guests.

One of the things I like to do every year is watch the HGTV White House Christmas Special.  I love to see how the staff and volunteers decorate the various rooms.  There are always great ideas which inspire me to create something on a much smaller scale for my home.  This year I finally made the cranberry topiary for our dining room.  (Please see this week’s Craft post for photos and directions on how I made my own cranberry topiary – it’s so easy!)

Watch for the White House Christmas Special on HGTV –
check the HGTV website for your local television listing for the channel, date and time it will be on in your area. www.HGTV.com

Celebration – Hallmark Ornaments

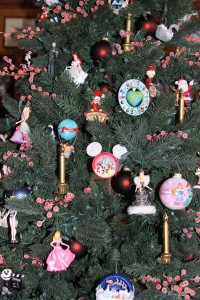
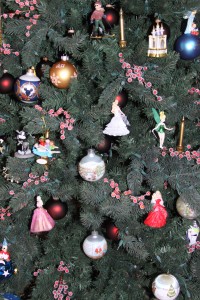
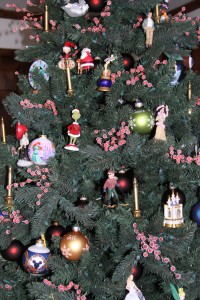
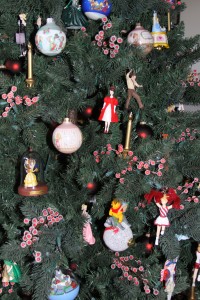
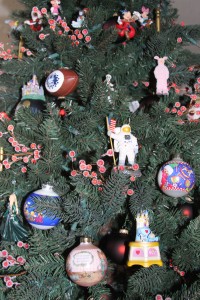
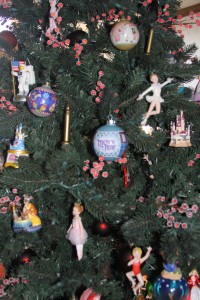
I have been collecting Hallmark Keepsake Ornaments every year for over thirty years.  I buy at least one for the family and one for each of my children.  I’ve also collected different series like: Betsey Clark, Disney, Unicef and Star Trek ornaments for my husband.  My son’s collection includes: Peanuts, Looney Tunes and Star Wars.  My daughter’s collection includes Disney Princesses and Barbie.  Our total ornament count is easily over two hundred.

It takes a couple of hours to unpacked all the ornaments and it is something that my daughter and I enjoying doing every Christmas.  Eventually, when my children get married and establish their own homes, for their first married Christmas they will receive a large storage box filled with their Hallmark ornaments to decorate their own Christmas tree.  My wish is that when they open the boxes it will bring them happy memories of their childhood.


HISTORY OF THE HALLMARK KEEPSAKE ORNAMENTS  

In 1973, the Hallmark Greeting Card Company introduced six glass ball ornaments and 12 yarn ornaments as the first Hallmark Keepsake Ornaments.  This started a new tradition of Christmas decorating and created a new collectible industry.  Since that first year of production, Hallmark has manufactured more than 3,000 different Keepsake Ornaments and over 100 different ornament series with specific themes.

Since the first year Hallmark produced the first Keepsake ornaments, many different styles, materials and technologies have gone into creating these wonderful collectibles.  Ornaments are made with a wide variety of materials that includes glass, acrylic, bone china and porcelain.  The technology includes ornaments that light up, motion and voice recordings in recent years.

Each ornament is dated with the year of production and this makes them highly collectible.  A new Hallmark Keepsake Ornament Collection appears every year in July and a “Dream Book” is released prior to that time and shows all the ornaments for the upcoming year.  For additional information on Hallmark Ornaments  please see their website at www.hallmark.com/keepsake-ornaments.

Not only are Hallmark Ornaments used for decorating the Christmas tree, but they make wonderful gifts for family and friends.  There is such a variety of choices that it is easy to find that perfect ornament for the newlyweds, new homeowner, parents-to-be, baby’s first Christmas, teacher or even a special friend.

Hallmark Ornaments can also be used to decorate a home.  Some ideas include:

  • add a ribbon to an ornament and tie it around a napkin at each place setting
  • incorporate ornaments into the centerpiece of the table
  • with ribbon, hang special ornaments in a shadow box
  • use several themed ornaments to decorate a pine wreath
  • tied with a ribbon special ornaments can add to a presents gift wrapping
  • use several themed ornaments to decorate a pine garland on a fireplace mantel

The high quality and superior craftsmanship ensure that Hallmark Keepsake Ornaments will become family heirlooms and cherished collectibles for years to come.

Craft – Memory Tree or Wreath

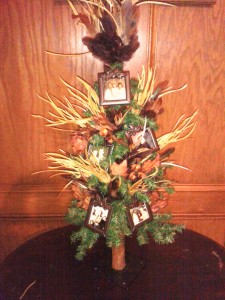
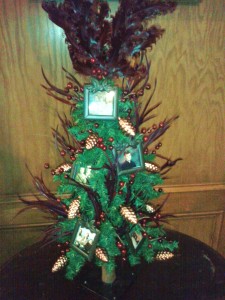
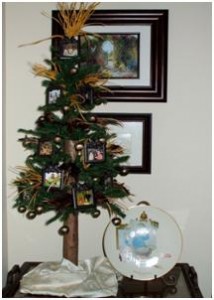
Since the holiday season is a time of celebration and remembrance, I have created a “Memory Tree” to decorate a small antique table in our family room for Thanksgiving.  I used a small tabletop pine tree which is I decorated with family photo frame ornaments, golden feathers and oak leaves with acorns.  Since we now live in the Midwest and most of our families are still on the West Coast, it is a wonderful way to honor them.

        
The following instructions are a guide to creating your own “Memory Tree” –

  1. Start with a tabletop pine tree, size does not matter but should be determined by the table it will be displayed on.  It can be a full traditional tree or a more open spaced feather tree.
  2. Find small photo frame ornaments for the number of family members you wish to display.  The frames do not necessarily need to match.  The photos of an individual or group can be used and the size can be reduced on the computer and printed to fit the frames used.  (Try to purchase the photo frame ornaments during the holiday season when they should be available at your local craft store)
  3. Display the photo frame ornaments evenly around the front and sides of the tree when the tree is set in a corner or against the wall.  If the tree will be displayed with a full view of all sides, make sure to space the photo frame ornaments around the entire tree.  If desired, attach the photo frame ornaments with ribbon for added decoration or wire for a more secure hold.
  4. Add embellishments, I used golden feathers and oak leaves with acorns evenly spaced throughout the tree for Thanksgiving.  For Christmas I remove the golden feathers and oak leaves and change the decorations to burgundy feathers and small glass pinecones.  To add even more memories to the “Memory Tree” in years past I’ve used bronze jingle bells with our favorite vacation destinations and dates written with gold pen.  This is a great way to remember fun family trips!
    (Additional suggestions would be to add small pinecone or acorn glass ornaments for Thanksgiving and holly leaves, red berry sprays or small ball ornaments for Christmas)
  5. The final step would be to add some sort of tree topper.  For the tree pictured, I gathered several feather sprays and secured to the top with wire.

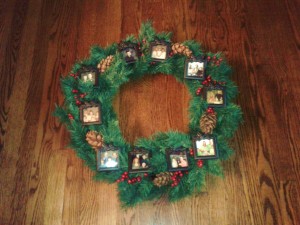
A “Memory Tree” would be a perfect decoration for both Thanksgiving and Christmas.  Another option is to create a “Memory Wreath” using the same family photo frame ornaments and decorations.  This is a great idea when there is no space for a tabletop tree.  NOTE: I would recommend only hanging the wreath inside the house since the decorations would not be weather-proof for displaying on an exterior door.

Decor – Fall to Christmas Change Over

The week after Thanksgiving is a very busy time for me!  That’s when the Fall decorations are put away and the Christmas decoration boxes are brought up from the basement.   I really enjoy taking my time to unpack each box and deciding how I want to do this year’s displays.  Even when I’m using the same pieces year after year I try to set my displays in different ways or in different rooms of the house.  Sometimes the Fontanini Nativity set will be in the dining room and the next year it will be in the our library or the Department 56 North Pole Village will be in the family room bookshelf and the next year is will on the mantel over the fireplace.  This keeps everything interesting and it is fun to use different ideas or techniques to set up the displays.

In upcoming December posts, I will take you through all my preparations of the different Christmas displays I create in our home, such as: Fontanini Nativity Display and Department 56 North Pole Village.  Some other December posts detail my other Christmas decorations, such as: Themed Christmas trees and Christmas wreaths.  All of these Christmas decorations are created to make the holiday season a special one for my family.

Now, I wanted to discuss how to use some of the same materials for both Fall and Christmas.  When this is done in a creative way it can save time and expense when changing over the decorations from one holiday to next.  (Who doesn’t want to have extra time and save money at this time of year!!)

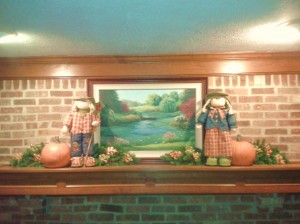
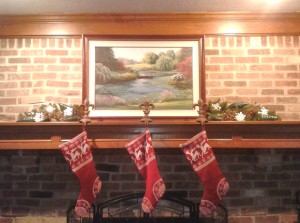
Pine garlands are a very versatile material for this purpose and I will show how with some simple changes it can be used for both Fall and Christmas decorations.  One of the most traditional ways to use pine garlands are on a mantel over the fireplace.  Below are two photos showing the same garland decorated for both holidays.  Keeping the same pine garland on the mantel, I switched out the fall decorations and replaced them with the Christmas decorations.  For Fall, the pine garland is decorated with colorful ceramic fall leaves and red berry sprays scattered throughout.    For Christmas, I used several ceramic snowflakes, large green glass pinecones ornaments and red berry sprays.


Small tabletop Christmas trees can be used in the same versatile way.  In my dining room I create a “Memory Tree” and placed it on a tea table.  This special tree is decorated with family photos in small bronze photo frame ornaments.  (Please see this week’s Craft post for more information on the Memory Tree or Wreath)  Below are two photos showing the “Memory Tree” decorated in two different ways for Fall and Christmas.  For Thanksgiving, the tree is decorated with golden feathers and oak leaves with acorns.  For Christmas, I replace the golden feathers with burgundy feathers and small glass pinecone ornaments.


As you can see, all it takes is a little creativity and by simply using different decorations to accent a pine garland or a tabletop Christmas tree the look can reflect the different holidays.

I would love to hear from you so, please write me to share your own ideas or comments.