The week of April 22 to April 26, 2013 is National Parks week; I bet you didn’t know that! Our family always enjoys visiting the national parks and whenever we are planning a road trip across the United States we always pull out the map to see which national parks will be in the area as we travel to our destination. Some of our greatest vacations have been spent visiting our national parks and we have many wonderful family memories.
When I was about 10 years old our family took a road trip to Chicago and we stopped at Yellowstone National Park. That was back when the bears in the park would stop traffic on the roads and we saw several bears during our visit. It reminded me of that old cartoon with Yogi Bear and Boo-Boo, I absolutely loved it! That was my start of my love affair with nature. Years later I started taking my son to national parks when he was very small and the first one we visited was Yosemite National Park in California. Then, as my son got older we started camping and he enjoyed the experience of building a fire, cooking meals over an open fire and roasting marshmallows when it got dark. We had purchased all the camping equipment needed, stayed for a couple of days and it was a very affordable summer vacation for a single Mom and her son. Later with my daughter and husband, we still visited the national parks on our road trips but we choose to stay in hotels nearby. (Please don’t call us wimps – we were older parents then and wanted the comfort of a warm bed!)
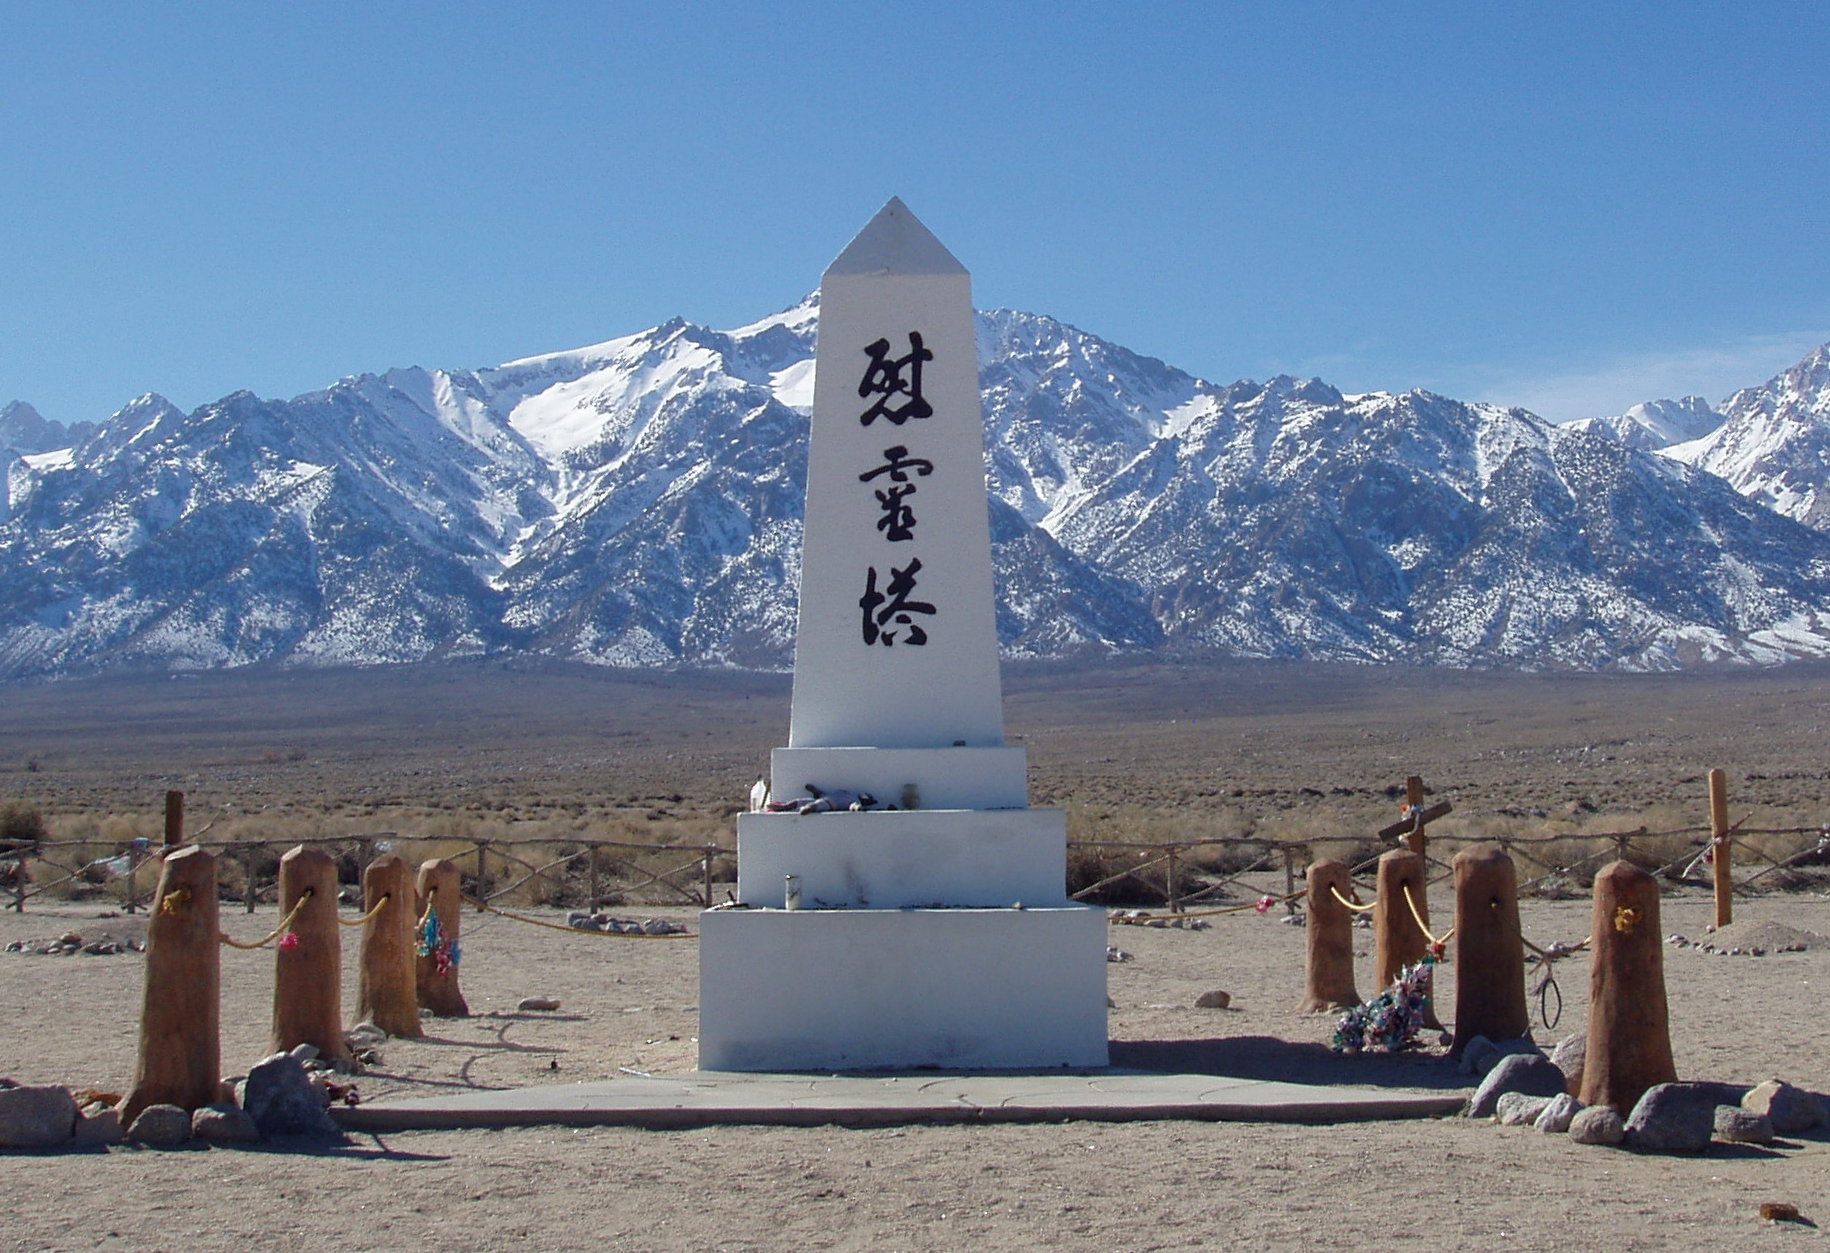
In 1872 Yellowstone was the first national park signed into law by President Grant, followed by Sequoia and Yosemite in 1890. In 1916 President Wilson signed legislation creating the National Park Service with a purpose to conserve the country’s scenic lands, wildlife, natural and historic sites while providing recreation opportunities but more importantly to preserve and protect these areas for the enjoyment of future generations. Currently there are 450 natural, historical, recreational and cultural areas throughout the United States and their territories. These diverse areas are designated as National Parks, National Monuments, National Memorials, National Military Battlefields and Parks, National Recreation Areas, National Seashores, National Scenic Rivers and National Parkways and National Scenic Trails.
![]() The National Park Service official emblem was authorized by the Secretary of the Interior in 1951. The arrowhead was chosen to represent the National Park Service’s efforts to preserve and protect the historical and archaeological sites found within the United States. Several symbols on the emblem represent the various functions of the national park system. The Sequoia tree represents the vegetation which grows within the parks and the bison represents the wildlife. The mountains represent the scenic and natural beauty of the parks while the water represents the recreational opportunities.
The National Park Service official emblem was authorized by the Secretary of the Interior in 1951. The arrowhead was chosen to represent the National Park Service’s efforts to preserve and protect the historical and archaeological sites found within the United States. Several symbols on the emblem represent the various functions of the national park system. The Sequoia tree represents the vegetation which grows within the parks and the bison represents the wildlife. The mountains represent the scenic and natural beauty of the parks while the water represents the recreational opportunities.
An example of a historical site administrated under the National Park Services is the Independence National Historical Park in Philadelphia. Considered the most important historical area in the United States, there are several buildings and sites associated with our country’s independence such as: Independence Hall, Liberty Hall and Declaration House. Everybody can learn about our country by reading the history books but to actually visit the places where we declared our independence and formed our government is even better! We visited in 2009 and spent a couple of days touring Philadelphia and the surrounding area. I would definitely plan a minimum of two days in the city of Philadelphia because there are so many historic sites to see. I would also recommend a trip out to Valley Forge National Historical Park which is within a quick hour drive from Philadelphia.

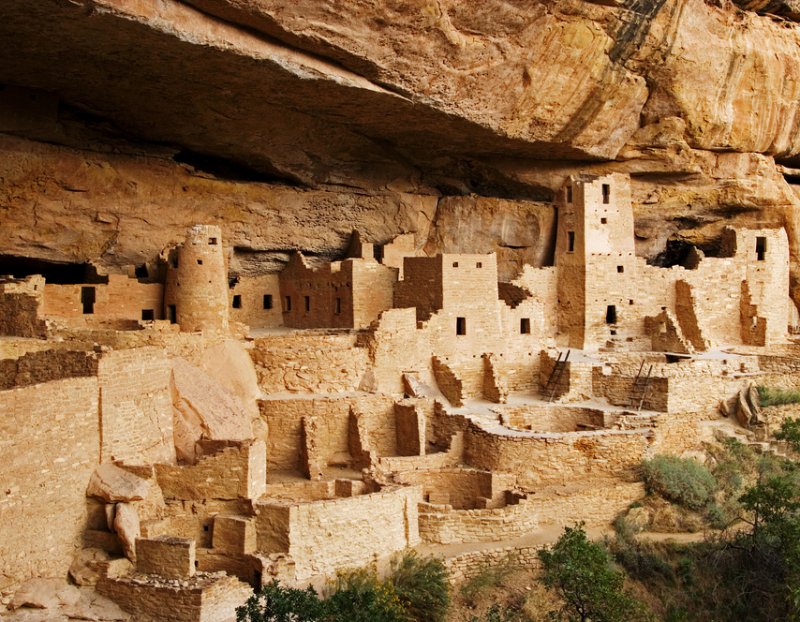
In the early days of the National parks system there was a movement that sought to preserve the cliff dwellings and pueblo ruins throughout the southwest and protect these sites from vandalism. An example of an archaeology site administrated under the National Park Service is the Mesa Verde National Park located in Colorado. In 1906, President Theodore Roosevelt established Mesa Verde to “preserve the works of man” and was the first national park of this kind created for this specific purpose. Mesa Verde has over 4,000 archaeological sites and over 600 cliff dwellings of the ancestral Pueblo people, the Anasazi, who occupied this area of Colorado before disappearing in the 15th century. I have visited Mesa Verde several times with my family over the years and the history of the Anasazi is fascinating. I would highly recommend the guided tours of Cliff Palace and Balcony House. The Cliff Palace tour is an easy hike to the site but the Balcony House tour involves climbing ladders and is a little more strenuous, I would not advise if you have a fear heights.
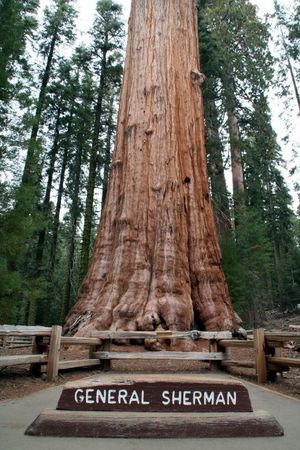
The National Park Service also functions to preserve and protect the animals and vegetation found within each site. In regards to vegetation, some of the world’s largest trees can be found in Sequoia National Park. Sequoia is located in the Sierra Nevada Mountains of California and our family has spent many vacations enjoying this wonderful national park. The General Sherman Tree can be found in the Giant Forest area of the park. It is considered the largest tree on earth and is 275 feet high with a base circumference of over 100 feet. To really appreciate the size of this massive sequoia tree you need to stand at the base, the tree is huge!
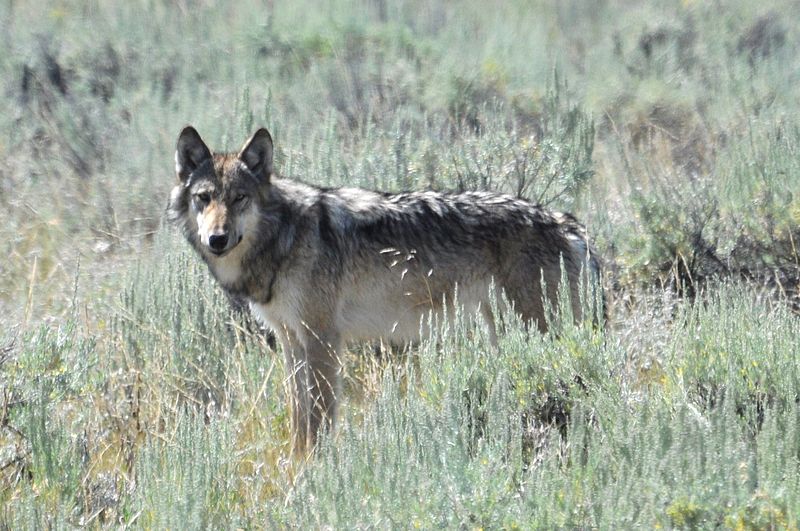
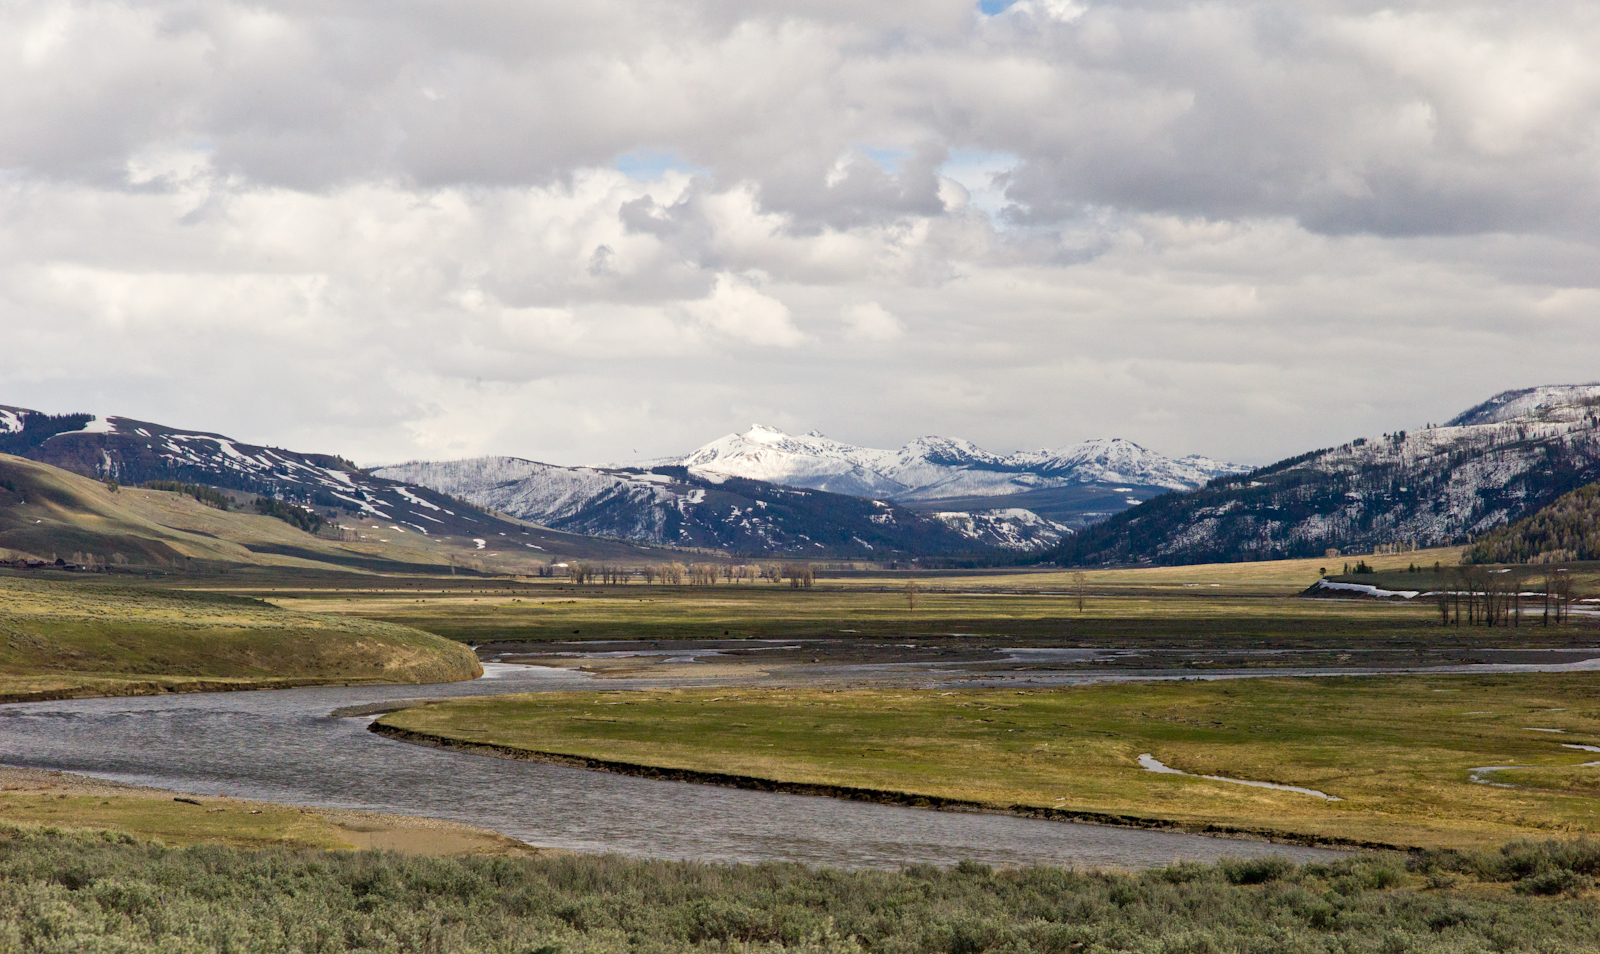
In regards to the animals found in the National Parks, one of the most controversial decisions was the return of the wolves to Yellowstone National Park. When the park was created in 1871 the gray wolf population was already on the decline and at the time the park did not provide protection of the wolves. The government predator control programs of the 1900s essentially helped to eliminate them and the last gray wolves were killed in Yellowstone in 1926. Then starting in the 1940s, the national park administration along with biologists, conservationists and environmentalists began to assess the impact of the loss of the gray wolves on the area. By the time the Endangered Species Act passed in 1973, it had been determined that the absence of the wolves lead to an imbalance to the ecosystem of Yellowstone. As an example of this imbalance, with no immediate animal predators, the elk population increased dramatically and the environment suffered greatly from the over grazing of these larger herds of elk. With the new endangered species legislation passed the wolves could legally be reintroduced to the area. In 1995, 14 gray wolves were captured by U.S. and Canadian wildlife officials and released back into the Lamar Valley of Yellowstone. My son and I visited Yellowstone in 1995 and it was recommended by a park ranger to see this beautiful valley. We enjoyed our nightly drives through Lamar Valley and returned frequently to view the abundance of wildlife in this area of the park such as: bison & elk herds, river otters to name a few of the animals we saw, it was an amazing experience! We didn’t see any wolves during that trip but it was comforting to know that the balance of life had been restored to this spectacular national park!
BOOK SUGGESTION: “Wolf Wars” by Hank Fischer – The remarkable inside story of the restoration of wolves to Yellowstone.
Finally, to describe the scenic and recreational opportunities found in our national parks would be an enormous list. Growing up in California, we have spent many vacations at Yosemite, Sequoia and the Redwood National Parks. The beautiful scenery of these parks are some of the best in the national park system. In the southwest region of the United States there are also an abundance of national parks, such as the Grand Canyon, Petrified Forest and Saguaro National Parks. Having seen the Grand Canyon several times, it is true what they say that to see it in person is so much better than any photograph! Another area that we enjoy is in southern Utah which has several national parks such as Zion and Bryce. Having moved to the Midwest has opened up the possibility of visiting the national parks of the eastern portion of the United States and our family is very excited to explore those parks!!
So, take the time with your family this summer and enjoy one of our national parks. You can visit a nearby national park in your state or take a road trip across the United States and visit several along the way. Accommodations can range from luxurious lodges to rustic campgrounds, just take your pick! The experience of getting out in nature is amazing and there is so much to see and do. Activities can be as simple as a day hike to more adventurous sports like rock climbing or river rafting. Family vacations at a national park are wonderful opportunities to build fond memories for you and your children.
Please check out the Travel post, National Parks Tips (Part One) and (Part Two), for ideas and suggestions on how to prepare and what to do when visiting our national parks.
National Park Trivia
- There are 59 National Parks in the United States and its territories. California has the most national parks with a total of nine and Delaware is the only state with no national parks.
- You would expect the most visited national park to be out west, like Yosemite or Yellowstone, but it is the Great Smoky Mountain National Park. It is located between North Carolina and Tennessee and in 2010 the park had over 9.4 million visitors. This large number is due to the fact that 50% of the United States population lives within an easy one day drive from the park. The second most visited national park is the Grand Canyon with 4.4 million visitors, followed by Yosemite with 3.9 million and Yellowstone with 3.6 million.
- The highest elevation in a national park is Mount McKinley with a height of 20,320 ft. located in Denali National Park. The lowest elevation is in Death Valley National Park at 282 feet below sea level. Temperatures can exceed 120 degrees in the summer months and the area only receives 1.5 inches of annual rainfall.
- Ten different parks are touched by the Colorado River and its tributaries. One of those is the Grand Canyon National Park which was carved by the Colorado River exposing nearly two billion years of the Earth’s geological history as it cut through layer after layer of rock as the Colorado Plateau was uplifted. The Grand Canyon is 277 miles long, ranges from 4 to 18 miles wide at different points and is approximately 6,000 ft deep from the rim to the river at the bottom of the canyon.
- The longest cave system is located in Mammoth Caves National Park in Kentucky. The Mammoth Cave passageways total approximately 390 miles. The second longest is Jewel Cave National Monument located in South Dakota is 160 miles.
- The deepest lake in the United States is located in Crater Lake National Park in Oregon. Formed around 7,700 years ago by the collapse of the ancient volcano Mount Mazama, Crater Lake partially fills a nearly 2,148 foot deep caldera. The lake is 5 miles by 6 miles across with an average depth of 1,148 feet which fluctuates slightly given weather changes and has measured a maximum depth of 1,949 feet.