Ideas and Tips for a Great School Year

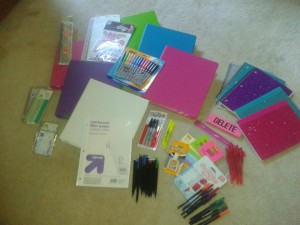
School supplies 1

August … in our home it means that summer break is almost over and a new school year is about to start!  Of course, it also means that it is time to shop for new school clothes (kids grow so fast!) and new school supplies.    When our daughter was in elementary school I was able to do most of the shopping quickly by myself but now that she is an “official” teenage for the last couple of years she has been very particular about everything from clothes, backpack, binder, etc.

Preparing for a new school year can be very time consuming and a stressful process.  Establishing some family back-to-school traditions is a wonderful way for children, preschool to high school age, to get excited about the start of a new school year but more importantly it builds wonderful memories and makes them feel loved. So, to help prepare for the upcoming new school year here are some tips and ideas:

End of summer traditions

  • Plan one last weekend trip to a favorite destination; maybe it is spending a day at the beach, lake or local pool, maybe it is going to the amusement park, miniature golf course or a water park.  The idea is to have a fun time at one of the family’s favorite summer locations.
  • Who says you have to go somewhere to have a good time, you can go camping in your own backyard!  Just set-up a tent with a few sleeping bags, be sure to have a couple of flashlights and the family can spend a wonderful night under the stars at your own home!  Plan a special family meal cooked on the outdoor grill and don’t forget the fixings for s’mores.
  • Before school starts, plan a great movie night; it can be at the local theatre in your town or in the comfort of your own home.  If the family is going out to the movie theatre, make it an event by first having a quick dinner at a favorite restaurant or after the movie go from some ice cream or frozen yogurt.  If the family is staying movie home to watch a movie; make a special dinner and a great dessert and don’t forget to make some popcorn to eat during the movie.
  • Another idea is to have a family game night.  Bring out the old favorite family games such as monopoly, scrabble, trivial pursuit, etc.  The important thing is to spend some quality time together as a family and have some fun!

Preparing for the new school year

  • Shopping for school supplies – usually the school will have a supply list available.  The key to shopping for school supplies is to shop early when the items are first available in the stores, then there is more of a selection and items are not sold out.  Since our daughter started middle school, I found that this is especially true for locker equipment and accessories which for some reason are usually in the stores in limited quantities.  In middle school decorating their locker is a big thing and items like locker shelves quickly sell out, so shop early to get the items that are needed.

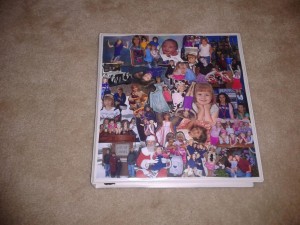
CRAFT IDEA #1 – Last year, we decorated a white binder with a collage of pictures, it was a simple and easy project and my daughter loved it!  To make one of your own, just be sure to buy a binder with a plastic sleeve on the front.  Select a variety of photos and glue them to a sheet of white scrapbook paper pre-cut to fit the size of the binder.  Allow the glue is dry completely; then simply slip the paper with the photos into the front sleeve of the binder.

Decorated binders 1

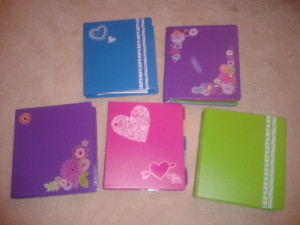
CRAFT IDEA #2 – Add scrapbook stickers to plain binders for a one-of-a-kind look!

Decorated binders 2

  • Shopping for school clothes – For many families, especially those with young girls, shopping for school clothes can be a very stressful time.  I would advise first to set a budget; this should be discussed with your child prior to shopping.  Make a list of the items needed for the school year, leaving here in the Midwest our family will shop twice a year for school clothes, fall/winter clothes and spring clothes. Next, if you have a young daughter, buy some age appropriate fashion magazines and look through them together.  Discuss the school dress code and what the limitations are before shopping.  Hopefully with these suggestions a trip to the store to shop for school clothes will be a better experience.  I went to a private school and had to wear a uniform for all 12 years of school, if your child is wearing a uniform think about the importance of accessories; maybe a nice watch or some great jewelry so they can add their own personality into their daily outfit.  (Always check first to see what the school dress code allows)
  • Plan a visit to the school prior to the first day – this is a great idea if your child is transitioning from preschool to elementary school, elementary to middle school or middle to high school.    This is very helpful especially if your child is nervous and anxious about a change from one school to another.  When we moved from California to the Midwest, we took our daughter to her new school to check it out prior to the first day, she was able to see her new classroom, meet the teacher and take a tour of the school.
  • After summer mornings sleeping in, prepare your child by getting them up earlier each day for a week before the first day of school.  Check that their alarm clock is working correctly and if they don’t have one for their bedroom be sure to buy them one.

The night before the first day of school

  • Pick out the clothes the night before, this will help to hopefully avoid some of the madness and make getting dressed in the morning a little easier and faster.
  • Make sure they have everything they need in the bathroom, including toothbrush and toothpaste, etc.
  • Be sure that their backpack is ready to go and they have all their supplies so they can just grab it and leave in the morning and not forget anything.
  • Have a great quiet family dinner, it would be a great opportunity to talk about the first day and answer any questions.
  • Pack their lunch the night before, make sure that first day lunch has their favorite sandwich, a healthy snack and drink and a yummy treat for dessert.  Maybe tuck in a special note telling them how much you love them and wish them a great first day!
  • Go to bed a little earlier the night before the first day of school and get a good night’s rest.  Be sure to have your child set the alarm clock in their bedroom and also set the alarm clock in your bedroom, too.  The trick is to set your alarm for a few minutes earlier to make sure your child wakes up with plenty of time to eat a good breakfast and to get dressed.

The first day of school

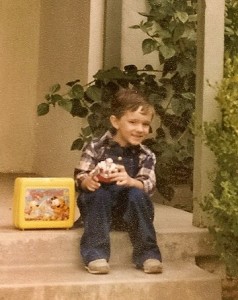
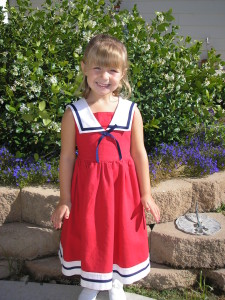
  • One of the special traditions in our family is on the first day of school I always take a picture of my children with their backpacks and lunch boxes.  It is a wonderful way to look back and see how much they have grown and how fashion has changed over the years.  Be sure to allow at least an extra 10 minutes to take some quick photos.  (Another idea is to take a picture on the last day of school every year – this is something I didn’t do but now I wished I had!)

Chris first day of Kindergarten OLYMPUS DIGITAL CAMERA

  • Consider giving your child a small gift on the first day of school.  It can be something practical that they can use for school or maybe have a special toy for when they get home.
  • When your child gets home from school on the first day, have a festive banner welcoming them home.  Bake a special treat for your child to enjoy when they get home, maybe their favorite cake, cookies or cupcakes.  This is a great opportunity for your child to share their first day experience.

I hope everyone has a great start to the school year!!

Celebration – A Royal Birth and Christening

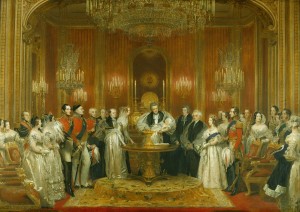
Princess Victoria's chritening

Since the news that the royal couple, the Duke and Duchess of Cambridge, were expecting their first child was announced in December 2012, shortly followed by the Duchess’ hospitalization early in her pregnancy with hyperemesis gravidarum and then the seemingly endless wait for the child to be born, there had been much anticipation and worldwide attention for the joyous event.

Finally on July 22, 2013, Royal Highness Prince George of Cambridge, the first child of Prince William and the former Kate Middleton, was born and he will be third in line of succession to the British throne.  The royal baby will be the third great-grandchild of Queen Elizabeth II (her eldest grandson and Princess Anne’s son, Peter Philips has two daughters) and the first grandchild of Prince Charles.  The last time a serving monarch had a great-grandchild born in a direct line of succession to the throne was over 120 years ago, in 1894 when Queen Victoria was sovereign and the future Edward VIII was born.

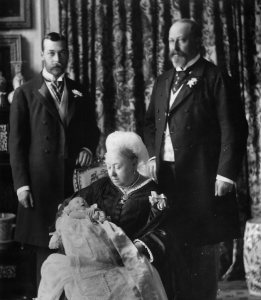
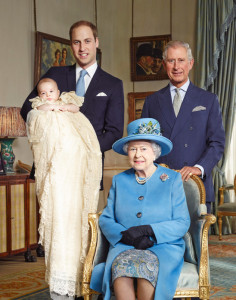
Queen Victoria - four generations  Queen Elizabeth - four generations

Interesting Facts and Traditions of the Birth of a Royal

  • Royal Highness Prince George was born in the Lindo Wing of St. Mary’s Hospital in London, England.  It is the same hospital where 31 years earlier, Prince William was born to Prince Charles and the late Princess Diana.  This was not always the case of a heir to the British throne being born in a hospital, Prince Charles was born at Buckingham Palace and the Queen was born at the home belonging to her mother’s parents at 17 Burton Street in Mayfair, England.
  • Prior to 1948, the Home Secretary was required to attend the birth of a royal baby to ensure that the child born was a legitimate heir to the throne.  Since that time it was determined that there was no constitutional requirement needed for his presence. This number of birth witnesses is very small in comparison to the 42 witnesses that were present to verify the birth of the son of King James III in 1688 when the legitimacy of the pregnancy was called into question and the true heir to the British throne was in doubt.
  • An official public proclamation with information on the baby’s gender, time of birth and weight and it is signed by the royal doctors and this framed announcement is traditionally placed near the gates of Buckingham Palace after the Queen and the immediate families of the Duke and Duchess of Cambridge have been informed of the birth of the royal baby.  This old-fashioned custom is still observed even in the modern age of worldwide mass media coverage.  For the birth of Prince George an announcement was also made on the royal website.
  • Royal births are traditionally celebrated with gun salutes, 41 rounds fired in Green Park by the King’s Troop Royal Horse Artillery and 62 rounds fired at the Tower of London by the Honourable Artillery Company.  The British flag will also be flown from all of England’s government buildings, Royal Navy ships and military installations.
  • The names given to royal babies are not usually revealed to the public for several days.  When Prince William was born in 1982, the name was not made public and announced until seven days later.  When Prince Charles was born in 1948 it took even longer and it was a month before his name was revealed just prior to his christening.  Normally royal babies often have several forenames; the Duke of Cambridge was christened Prince William Arthur Philip Louis.  Royal babies with the title of Royal Highness (HRH) normally do not need surnames, but if one is used there are three possible choices: Mountbatten-Windsor, Wales or Cambridge.

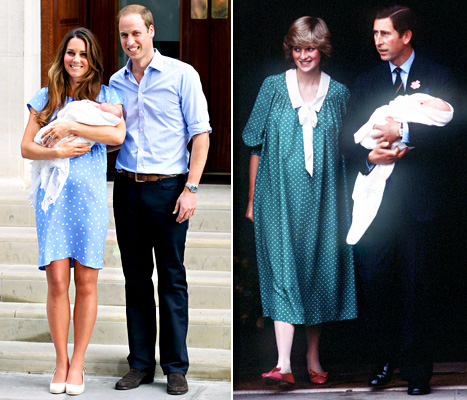
After the royal birth, there is always the customary photo of the newborn baby with their royal parents on the steps just outside the hospital for the hundreds of worldwide press that is waiting.  Shown below are the photos in 2013 of Prince George with his parents the Duke and Duchess of Cambridge and in 1982 of Prince William with his parents, the Prince and Princess of Wales.

Left - Prince George  Right - Prince William

Details of a Royal Christening

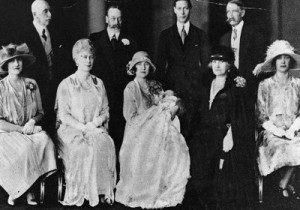
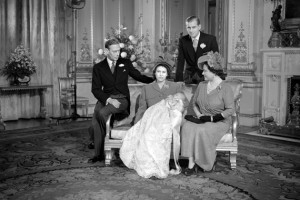
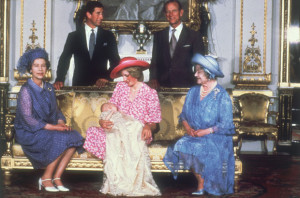
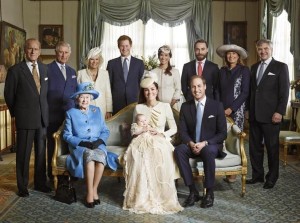
  • Traditionally, royal christenings are generally private affairs usually held at Buckingham Palace in the Music Room.  For Prince George, his christening will take place at  the small chapel at St. Jame’s Palace on October 23, 2013.  The royal baby will be a three months old and the Archbishop of Canterbury will perform the ceremony.  Besides the royal baby and his parents, there will be a small group of family, close friends and the child’s godparents.  After the ceremony the group will sit for formal portraits that will be released to the media.  On the occasion of Prince William’s christening, it was the Queen Mother’s 82nd birthday.  Shown below are the christening photos from 1982 of Prince William, from 1948 of Prince Charles and from 1926 of Princess Elizabeth.
    Princess Elizabeth - christening  Prince Charles -  christening

    Prince William -  christening  Prince George's christening 2013
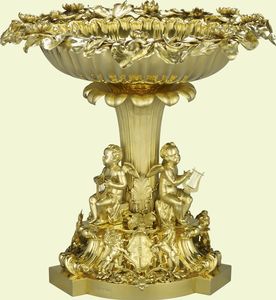
  • In 1840, Queen Victoria commissioned a special silver baptismal font when she was expecting her first child with husband, Prince Albert.  The font was made by Barnard & Co. and the symbol of the lily was used to represent purity and new life.  The christening ceremony of Princess Victoria took place in February 1841 in the Throne Room at Buckingham Palace.  According to a painting by C.R. Leslie, the font was placed on a circular table and the Archbishop of Canterbury used water from the River Jordon.  For the new royal baby, the same silver font and water from the River Jordan will be used for his christening in the chapel at St. Jame’s Palace.

Lily font

  • For the birth of her first child, Queen Victoria also commissioned a lovely christening “robe” made with Honiton lace and lined in white satin, it has a very long skirt with an elaborate collar and bow.  Since 1841 over 60 royal children have worn it for their christening including four Kings, King Edward VII, King George V, King Edward VIII and King George VI.  Queen Elizabeth II wore it for her christening, as well as all her children and every grandchild except one.  The last to wear it was Lady Louise Windsor, the daughter of the Earl and Countess of Wessex in 2004.  The original robe was very old and fragile by that time and to preserve the historical outfit an exact handmade replica was made by the Queen’s dresser, Angela Kelly.  Viscount Severn, the son of the Earl and Countess of Wessex, was the first to wear it at his christening in 2008.
  • Royal babies usually have five or six godparents, although Prince William had eight.  Possible godparents for William and Kate’s new son will more than likely include Prince Harry, Pippa and James Middleton.  In addition royal experts expect at least two more godparents which would have to be someone from William and Kate intimate circle of friends.
  • At the reception following the royal baby’s christening, it is traditional to serve the top tier of the parent’s wedding cake.  This is a tradition that Prince William wanted to keep and after their wedding in 2011 the cake was specially preserved in the freezer awaiting the birth of their first child.

For more information the Music Room in Buckingham Palace where several royal christenings have taken place throughout the centuries, please check out yesterday’s Travel Post, “Buckingham Palace“.

Royal Update: On May 2, 2015 Princess Charlotte of Cambridge, the second child of Prince William and the former Kate Middleton, was born in the Lindo Wing of St. Mary’s Hospital in London, England which was the same hospital where her brother, Prince George, was born in 2013.  Princess Charlotte’s christening will take place on July 5, 2015 in St. Mary Magdalene Church on the Sandringham Estate in Norfolk, England.  For more information on Sandringham, please click on the link.

Travel – Buckingham Palace

Buckingham Palace

My family and I were fortunate to visit London, England back in 1998.  There are so many wonderful places to see when you visit London, such as the Tower of London with the Crown Jewels, the Victoria and Albert Museum with their fascinating exhibits, the Parliament building with Big Ben or Kensington Palace where Princess Diana lived and where William and Kate are now making their London residence.  Of course, no trip to London would be complete without a visit to Harrods Department Store for lunch in the famous food court or afternoon tea upstairs in the elegant Georgian Restaurant.  In this Travel post I will be sharing our visit to Buckingham Palace and the most iconic building in England.

A Brief History of Buckingham Palace

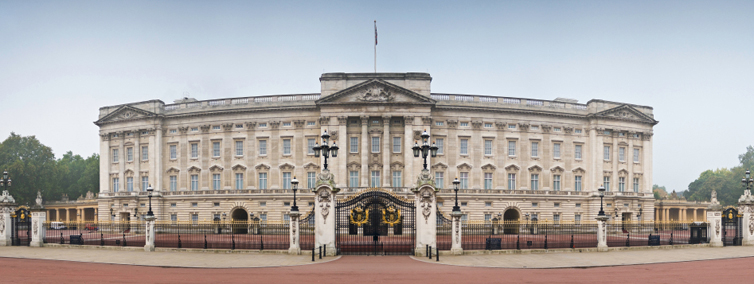
Buckingham Palace is actually located in the City of Westminster and it is the official London residence and administrative offices of the current British monarch.  Originally known as Buckingham House, a large townhouse was built on the site for the first Duke of Buckingham in 1705.  In 1761, King George III acquired it as a private retreat for Queen Charlotte and during that time it was known as the Queen’s House.  In 1820, King George IV, quickly decided that Buckingham House, as it was now known as, would be the perfect location for his new London home.   John Nash, the famous architect, was chosen to design and he built two new wing additions to the building which was now being referred to as Buckingham Palace.  The renovations were still far from completion when George IV died and his brother became King William IV.  The new king had no interest in moving from Clarence House into the unfinished palace.  Nash was fired due to his massive overspending and Edward Blore was brought in as the new architect to complete the project.  Finally in 1837, on the accession of Queen Victoria to the British throne, she moved from Kensington Palace into Buckingham Palace and it became the official royal palace of the British monarch since that time.

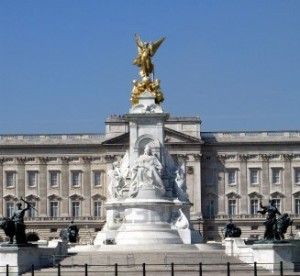
After the marriage of Queen Victoria to Prince Albert and with the birth of their nine children, Buckingham Palace went through further expansion to accommodate the large British Royal family.  Blore was brought in again as the architect to design the fourth wing which added the east façade to the front of palace.  After the death of her husband, Queen Victoria rarely occupied her London residence and preferred the seclusion of their other homes of Balmoral, Osborne House and Windsor Castle.  Upon her death in 1901, King Edward VII moved in and extensively redecorated Buckingham Palace with a classic white and gold theme which still remains in many areas of the palace, such as the Grand Entrance and Staircase and the Grand Ballroom.  During this time to honor his mother and the beloved British Monarch, the Victoria Memorial was erected in front of the palace.

Queen Victoria statue

Until the Second World War, there were very few changes made to Buckingham Palace.  Then, during the German bombing of London Queen Victoria’s private chapel At Buckingham Palace received a direct hit and was destroyed.  Years after the war ended, the chapel was rebuilt and Queen Elizabeth decided that the space would be used for royal exhibits and this area of the palace was opened to the public.  The funding received was used to construct the Queen’s Gallery which now houses art pieces from the Royal Collection.  Then in 1993, while the Queen was in Balmoral and not in residence at Buckingham Palace during the summer months, the State Rooms were open for public tours.  This was initially done to raise funds for the rebuilding and repair of Windsor Castle which had undergone serious damage after a fire in 1992.  Since then Buckingham Palace and several other royal palaces have been opened during specific times of the year and the funds now continue to maintain the Royal Collection, including the buildings, art and other objects of historical importance which are held in trust by the Monarch for Britain.

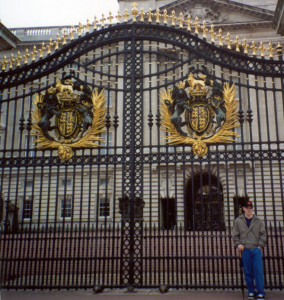
1998 buckingham palace chris

1998 – My son, Chris, at the gates to Buckingham Palace

A Tour of Buckingham Palace

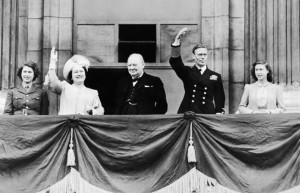
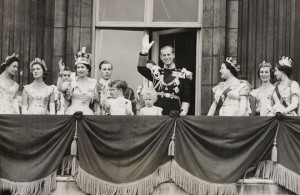
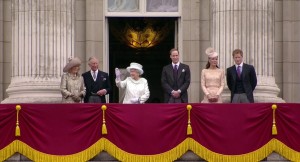
Buckingham Palace has 775 rooms, which include 19 State rooms, 52 Royal and guest bedrooms, 188 staff bedrooms, 92 offices and 78 bathrooms.  The building is just over 118 yards long across the front, over 131 yards deep including the central quadrangle and over 26 yards high.  Buckingham Palace has been the setting for many royal ceremonies, State visits from foreign leaders, Investitures and even the Queen’s Garden party.  This is the place in London were the British people come to celebrate joyous occasions such as the end of World War II on VE day in 1945, the Queen’s coronation in 1953, and most recently the Diamond Jubilee in 2013.

Buckingham Palace VE day - 1945 a Queen Elizabeth's coronation day - 1953

Queen Elizabeth Diamond Jubilee - 2013

Visitors with pre-arranged tour tickets will enter through a Buckingham Palace side entrance after passing through a security check.  The first area after entering the State Room wing of the palace is the Grand Hall with the lovely Grand Staircase.  Designed by the architect John Nash at the request of King George IV, the Grand Staircase has a balustrade with intricate patterns of acanthus, oak and laurel leaves.  As visitors ascend the curved marble staircase the upper walls are lined with portraits of Queen Victoria and her family.

As visitors pass into the Guard Room there are white marble statues of Queen Victoria and Prince Albert.  The next room is the Green Drawing Room which serves as a huge reception area before entering the Throne Room.  The Green Drawing Room is decorated with a patterned red carpet and the walls are lined in green and gold silk.

Green drawing room

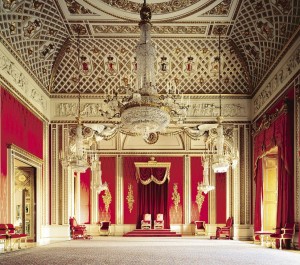
As you walk through the Green Drawing Room, visitor will then enter the Throne Room.  This beautiful State Room was designed for ceremonial receptions and at one end of the room there is a raised platform with two red thrones embroidered with the initials of Queen Elizabeth II and Prince Philip and overhead is a red canopy trimmed in gold.  The upper portions of the walls and the ceiling are lined with the heraldic shields representing England, Scotland, Ireland and Hanover.

Throne room 1

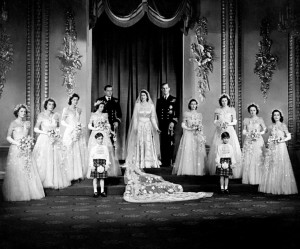
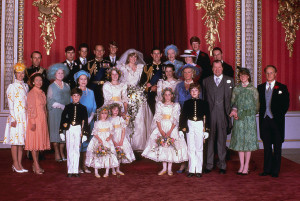
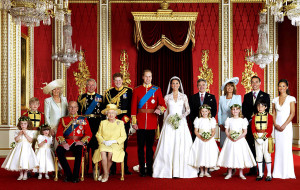
Customarily formal wedding portraits are taken in the Throne Room after a Royal Wedding ceremony.  Shown below are the wedding portrait of the then Princess Elizabeth to Prince Phillip in 1947, the wedding portrait of Prince Charles and Princess Diana in 1981 and most recently the wedding portrait of Prince William to Kate Middleton in 2011.

Royal wedding 1947

Royal wedding 1981 The royal wedding

After the Throne Room, visitors will exit into the Picture Gallery which displays an ever changing exhibit of paintings from the Royal Collection.  The four marble chimneypieces in this room have female figures holding paint brushes and artist palettes; in the center of the room is a ceiling medallion of four famous painters: Titian, Leonardo de Vinci, Durer and Van Dyck.  This room is used for the investiture recipients who assemble here before entering the Ballroom to receive their awards for achievement.

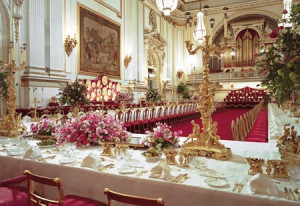
The next room on the tour is the Ballroom, which is one of the largest rooms in Buckingham Palace.  The Ballroom was originally decorated by King Edward VII in 1906 in white and gold with a large organ at one end and six beautiful crystal chandeliers overhead.   The Ballroom is used for State Dinners such as the one held in May 2011 for President Barack Obama.  It is also frequently used for investitures that are held throughout the year performed by Queen Elizabeth and the recipients are awarded British honors and sometimes knighthoods.

Grand Ballroom 1

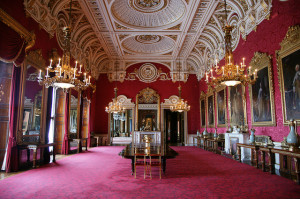
Exiting the Ballroom, visitors will walk through the West Gallery before entering the State Dining Room.  The State Dining Room is decorated with red damask walls and a matching red with white and gold plasterwork on the ceiling.  Many dignitaries from presidents to prime ministers have attended smaller dinner parties in this lovely room in the palace.

State Dining Room

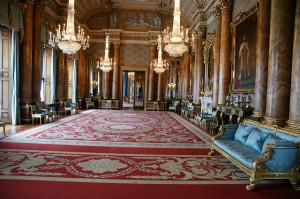
The next room on the tour is the Blue Drawing Room which is decorated with blue flock wallpaper and portraits of King Georg V and Queen Mary which hang on either side of the fireplace.  This was John Nash’s original Ballroom and the first State Ball was held here on May 1838 as part of the celebrations leading up to Queen Victoria’s Coronation.

Blue Drawing Room

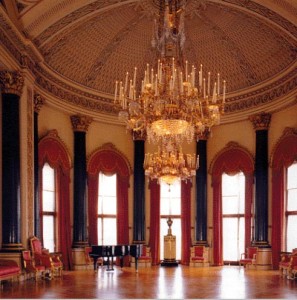
Exiting the Blue Drawing Room, visitors enter the large doomed Music Room.  The room is decorated with white and gold frieze, two large chandeliers hang overhead and along the edge of the room there are sixteen blue columns.  This is the room where the British Royal families’ babies are christened by the Archbishop of Canterbury.  (Please check out tomorrow’s Celebration post, A Royal Christening, for details about these special British Royal ceremonies)

Music Room

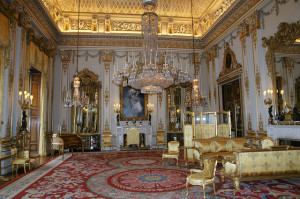
The final State room on the tour is the White Drawing Room, which is decorated in white and gold with four smaller chandeliers and one large chandelier in the center of the room.  Along a wall are mirrors and cabinets that conceal secret doors that allow members of the Royal family to enter the room.  This room serves as a Royal reception room for the Queen and members of the Royal family gather in before State and official occasions.

White Drawing Room

From here visitors exit down to the next floor and into the Marble Hall which opens into the Grand Hall.  From there visitors enter the Bow Room, which is the last room on the tour before exiting through the palace gardens.

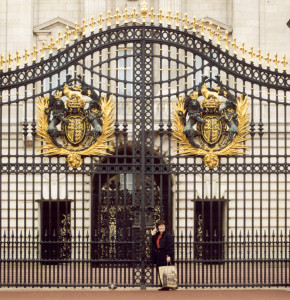
1998 buckinham place barbara

1998 – Me at the gates to Buckingham Palace

Craft – Framed Floral Decoration for Autumn

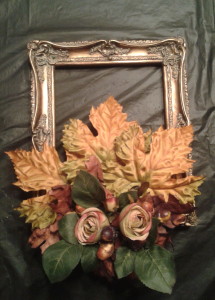
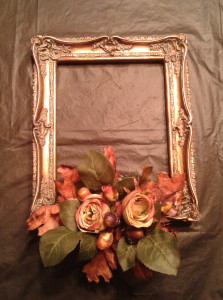
Framed floral 6While out shopping in one of my local craft stores I saw these great framed floral decorations but I was shocked by the retail price, it was $29.99 (are they crazy?).  So, I thought I can make a nicer one at a fraction of the price!  (The photo above is the one I made!)  I went back home to search in my floral supply box and I found some extra flowers from a previous fall project.  I also found two wonderful frames that were perfect to use, I had picked them up in the clearance aisle of my local craft last year for $4 each, they were a little more ornate than the store-bought inspiration piece but I actually like them better.  The only thing I needed to get started on this project was a small floral foam, I found one for $2.50 and was able to cut it in half to make two framed floral decorations.

So, if you are keeping track of my cost for this project, it totals out to $10.50.  Divided by the two framed floral decorations it was $5.25 for each one.  Now, that is much better price than the original ones I saw at the craft store!!  To make your own framed floral decorations, please see the supply list and easy instructions found below.
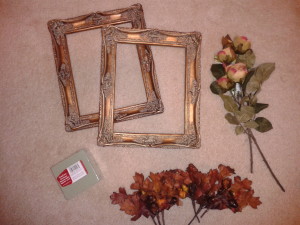
Framed Floral Decoration – supplies for one

  • 1 frame, any size (the frame’s glass and backing are not used for this project)
  • 1 floral foam, size it determined by the size of the frame
  • Floral tape
  • Flowers, number of flowers needed is determined by the size of the frame
  • Hot glue gun and hot glue sticks

2013-08-06 09.40.40

Framed Floral Decoration – instructions for one

1.  Select a frame to use, remove the frame’s glass or picture backing, you will not need them for this craft project.  Frames can be any size with an opening from a smaller size of 5 X 7” to a larger 10 X 13”.  (I am using frames with a 5 X 7” opening)

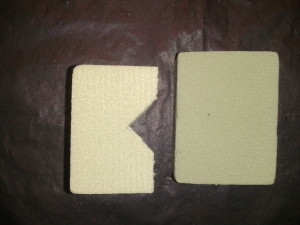
2.  Use a piece of floral foam and cut a notch to fit on the frame.

Framed floral 1

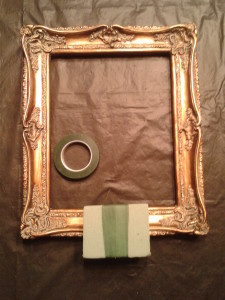
3.  Then using floral tape, secure the foam to the frame.  (Originally I was going to hot glue the foam directly to the frame, but I decided to use floral tape instead because I didn’t want to harm the frame in case I wanted to recycle it for another project!)

Framed floral 2

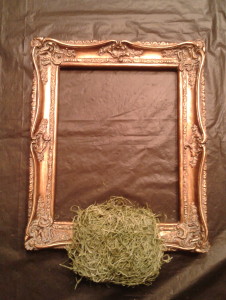
4.  Hot glue Spanish moss or shredded grass to cover the foam.

Framed floral 3

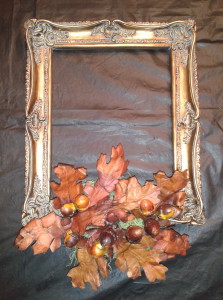
5.  Insert flowers and other decorations into the floral foam.  Be sure that the back of the arrangement is relatively flat because this side will be going against the wall when it is hung.

Framed floral 4 Framed floral 5 Framed floral 6

The final photo shows the framed floral decorations that I created for the upcoming Fall season  and I think they look great!  As you can see from the difference of the second photo and the final photo, I decided to add some large fall leaves that I had in my floral box. I think it gives the framed floral decoration a little more “presence” and the pair look wonderful hanging on our dining room wall.  This craft idea can be used for any season throughout the year, just use flowers or decorations that are appropriate for the particular holiday.
Decor – Preparing a Guest Bedroom

Summer … it is a time when we hit the road or take the plane for a vacation … but sometimes that means that guests could be coming to visit your home!  Living in the Midwest, hundreds of miles from our family out west, we have frequent visitors.  We absolutely love when our family comes to visit whether it is grandparents, parents, aunts, or cousins, but I especially love when my son comes to visit!!

Right now, the room that we use for our out-of-town guests is actually my daughter’s old bedroom.  When we moved to the Midwest, we suddenly had a five bedroom house and there were only three of us and we had lots of space!  We gave our daughter two rooms, one was the “bedroom” where she sleeps at night and across the hall was her “playroom”.  Eventually as she got older, she thought her bedroom was too girly and she wanted more bold colors and something a little trendier.  She moved permanently into the playroom and we redecorated the room as her “new bedroom” and it was now more appropriate for a teenager – she loved it!

Her “old bedroom” now became the guest room.  There was no really no need to redecorate the room, the beautiful sleigh bed with a matching dress/mirror and side table were perfect.  The lovely pale green paisley bedspread, the storage bench at the foot of the bed and the chair in the corner also stayed.  Just a basic cleaning and the room was ready and waiting for our guests!

Let’s breakdown what is considered a comfortable room for guests:

  1. The perfect combination for a guest bedroom is a room with an adjoining bathroom; this will give guests the most privacy.  But don’t despair if your house cannot accommodate this type of arrangement.
  2. Don’t overwhelm guests with an overly feminine room, try to keep the decorating style to simple and traditional but the most important element is comfort.
  3. Be sure the bed has a clean and beautiful bedspread and sheets.  Provide several comfortable pillows for sleeping, also have extra blankets available.
  4. A comfortable chair is a great idea for guests to use for reading or sitting in to put on their shoes.  Be sure to provide good lighting and a lovely soft throw for chilly nights.  A thoughtful thing to do is place some interesting books nearby, local history or the latest best seller, and a couple of magazines.
  5. Speaking of lighting, if there is a side table with a lamp; make sure the guests can reach it easily from the bed.  Overhead lighting is also a good idea and if the budget allows a ceiling fan is great for the summer months.  (or a table fan can be a good alternative choice)
  6. Make sure to provide guests with a table or luggage rack to keep their suitcases off the floor.  Provide some drawers and closet space for their clothing; add some extra hangers and a nice touch is to have a full-length mirror for the guests to use when dressing.  A small iron and ironing board are also great idea to store in the closet for the guests to use if needed and a small sewing kit would also be helpful.
  7. Make sure that the bathroom the guests will be using is clean.  Provide several clean towels – bath towels, hand towels and washcloths.  Stock up on a couple of new toothbrushes, toothpaste, soap, shampoo and conditioner just in case the guests forgot to bring something. (Check out the pocket towel idea shown below for storing those bathroom basics)

Pocket Towel

This clever idea is used to not only make your guests feel welcome, but also to provide them with those convenient bathroom essentials.  You will need: 1 bath towel, 1 hand towel, 1 washcloth, a toothbrush and tube of toothpaste.  Follow the steps to create a pocket towel.

  1. Lay out a hand towel, front side facing down.
  2. Fold up the bottom about a quarter of the way.
  3. Turn the towel over and fold in the sides so they overlap completely.
  4. Turn the towel over again and lay it over a bath towel already hanging on a towel rod.
  5. Fill the pocket with a washcloth and tuck in a toothbrush and toothpaste.

More special touches to add to a guest room:

  • Tourist information – local maps, brochures of nearby attractions, a list of favorite restaurants or shopping areas.
  • A beautiful notepad and pens or pencils for jotting down information, etc.
  • An alarm clock or portable music system.
  • Plug in nightlights for bedroom and bathroom
  • A small flashlight

The idea is to make your guests feel comfortable during their visit to your home and the main thing to remember is to enjoy this special time with them.