Craft – More Christmas Wreaths

As I mentioned in a previous Décor post, Christmas Wreaths, I decorate our home during the Christmas season with several different wreaths hung throughout the house, some of these are traditional in style and other are more whimsical in design.  This Craft post will feature four wreaths with complete supply lists and instructions.

Gingerbread Men wreath

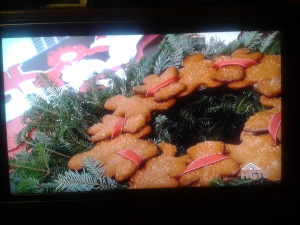
This Christmas wreath was inspired by one that I had seen on the 2012 HGTV White House Christmas television special.  The wreath featured was very simple in design and made from a pine wreath with several freshly baked gingerbread men placed side by side in a circular pattern to match the round shape of the wreath and interlaced with a red ribbon to secure the gingerbread men in place.

2012 White House gingerbread wreath

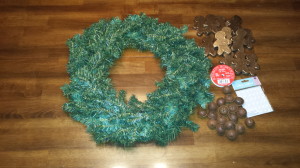
For the Gingerbread Men wreath, I used an 18”artificial pine wreath, a dozen paper-mâché gingerbread men, bronze metallic paint and paint, 18 bronze jingle bells and red ribbon in two widths (one roll of ¼”inch wide  to lace through the gingerbread men and one roll 2” wide to hang wreath).

Gingerbread Men wreath - supplies

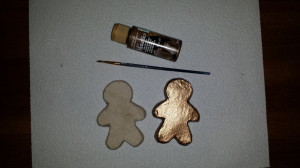
First, the paper-mâché gingerbread men were painted in a beautiful bronze metallic paint to resemble the color of real gingerbread.

Gingerbread Men wreath - paint

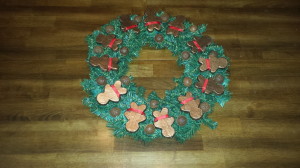
After the paint has dried, position the gingerbread men around the wreath and interlaced the red ¼” wide ribbon between each of them to secure to the wreath.  Next, I add the bronze jingle bells throughout to complete the wreath.  The Gingerbread Men wreath will be displayed on the cabinet in our kitchen this holiday season, this room is usually decorated for Christmas with a candy cane and gingerbread theme.  To hang the wreath I used the 2”wide ribbon tied in a loop and finished with a bow.

Gingerbread Men wreath - final 1

Nutcracker wreath

Each Christmas, since our daughter was a small girl, our family tradition has been to a performance of the Nutcracker Ballet during the holiday season.  Over the years sometimes the show is a professional production or a cast of ballerinas from the local college or amateur dance company.  We always look forward the story, music and the dancing of the Nutcracker Ballet.

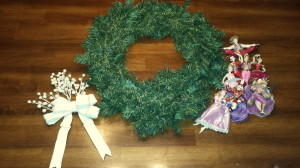
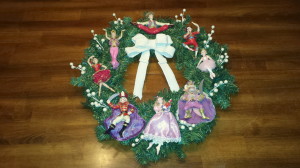
For the Nutcracker wreath, I started with an 18” artificial pine wreath.  At my local craft store I found a collection of eight Nutcracker ornaments that depicted the main characters of the ballet.  I placed these evenly spaced around the wreath, and then I added small white berries and completed the wreath with a “frosty” white bow.  The Nutcracker wreath will be displayed on the door to my daughter’s bedroom during this holiday season.

Nutcracker wreath - supplies    Nutcracker wreath - final

Boyd’s Bear wreath

I have a collection of Boyd’s Bear ornaments, in the past I have displayed them scattered among a pine garland on the fireplace mantel in our California home.  (For a photo of the fireplace garland please check out the Décor post, Displaying a Boyd’s Bears Collection – Part Two)  Since we moved to the Midwest a few years ago I have not displayed the ornaments and this year I decided to use the ornaments in a different way by displaying them on a Christmas wreath.

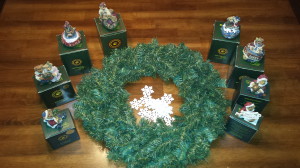
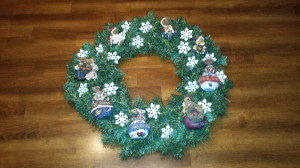
For the Boyd’s Bear wreath, I started with an 18” artificial pine wreath.  I arranged eight of my Boyd’s Bear ornaments evenly around the wreath and secured them with wire.  Next, I added small wooden snowflakes scattered in between the ornaments.

Boyds Bears wreath - supplies    Boyds Bears wreath - final

Teddy Bear wreath

Over the years I have collected some small teddy bears, last year I displayed them on a tabletop Christmas tree which I set on the top of the roll-top desk in out master bedroom.  (For a look at a photo, please check out the Décor post, Displaying a Boyd’s Bear collection – Part Two) and this year I decided to display the collection on a Christmas wreath.

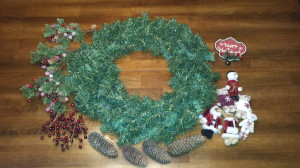
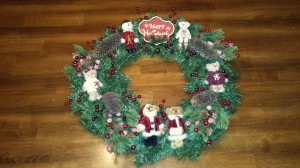
For the Teddy Bear wreath, I started with an 18” artificial pine wreath.  I evenly spaced the small teddy bears around the wreath with the Santa and Mrs. Claus teddy bears at the bottom.  At the top, I left a space for a small “Happy Holidays” sign.  Next, I added four pine sprays with berries and added four large pinecones to the wreath.  Finally, to complete the wreath I added several red berries scattered around.

Teddy bear wreath - supplies    Teddy bear wreath - final

These four Christmas wreaths are a great way to use a specific theme and ornaments and hopefully inspire you to take a trip to your local craft or retail store.  There are some additional examples of themed wreaths in a December 2012 Craft post, Christmas Wreaths, with complete supply lists and instructions.  The three wreaths are a Dickens Village Wreath and a North Pole Wreath using miniature Department 56 building ornaments and a Disney Wreath, using Hallmark ornaments of Disney characters.

Decor – Setting up a Department 56 Village

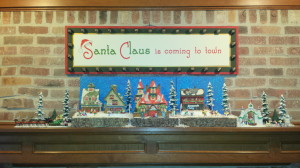
North Pole display 4

Just like this month’s other Décor post, Setting up a Fontanini Nativity, another one of the highlights of our Christmas home decorations is our Department 56 North Pole Village.  When I worked in a retail store during the 1990s, we carried the collection of Department 56 villages and the North Pole one was my favorite … and of course, I began collecting pieces for our home.  Soon after, my husband and I were blessed with a beautiful daughter.  I enjoyed setting up the North Pole Village every year for her to imagine Santa and his elves getting ready for Christmas Eve when Santa would get into his sleigh pulled by eight tiny reindeer to deliver presents to the good little boys and girls.  (somehow, my husband always seems to end up with a lump of coal in his Christmas stocking!)

Usually, months before Christmas, I search the internet for ideas for my Department 56 display but most of the websites only show finished displays and never go into much detail and only have very limited instructions on how to make those displays.  For this post, I thought it would be interesting to show step by step how I set up this year’s North Pole Village Display.

The North Pole display base

The first step to setting up the North Pole Village is always the base or foundation for the display.  As you can see in the photos at the end of this post, over the years in our different houses in California and the Midwest, the display location and layout of the North Pole Village has changed several times.

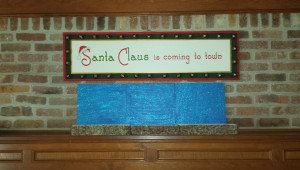
For this year’s display, I used a base with three interlocking sections that can be used as one long flat surface or can be stacked in a variety of positions to achieve different looks for the display.  I like the flexibility of the sections because I’m always changing the location of the display into different rooms of our home or adding more accessories.  A few years ago, I had purchased the base at a local craft store at an after Christmas clearance sale for a greatly reduced price.  (This one is very similar to the other one that I used for this year’s Fontanini Nativity Display)

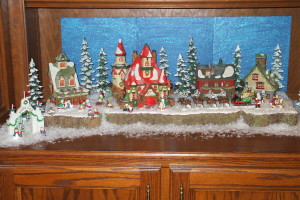
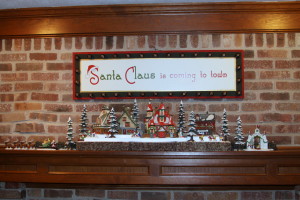
The display base that I am using has a white top surface so it is great for the North Pole Village; it gives the illusion of snow.  I set all three of the sections flat on the fireplace mantel and it fits perfectly with the depth of the space.  Next, I position three “sky panels behind the base, I used three sections of Styrofoam painted a beautiful blue with an overcoat of clear sparkle paint to add a wonderful twinkle when the overhead lights shine on the display.  Later I will attach our Christmas Stockings on hidden hooks under the fireplace mantel.  As I mentioned before, I sometimes change my home seasonal decorations from year to year, and as an example, if I were to display the North Pole Village in our family room bookshelves instead of the fireplace mantel I would stack one section on top of the other to fit the narrower space of the shelf.
North Pole display 1

A SPECIAL CRAFT NOTE:  One of the reason’s that I displayed the North Pole Village on the fireplace mantel was because I had made a special Christmas sign last year to hang over the fireplace instead of the English landscape painting that is normally hung there during most of the year.  The seasonal sign uses a Christmas window/wall decal and the wording, “Santa Claus is coming to town”, is perfect to hang above the North Pole Village.  The sign is made from a painted wood board cut specifically to fit the space requirements of the decal with a margin of a couple of inches for me to add about 30 bronze jingle bells for just the right decorative touch, I was very happy with the results of this Craft project!  (The sign was very easy to make, please see the instructions for similar seasonal signs in the Craft post – Halloween signs.  The steps are almost the same as the ones I used to create the Christmas sign but with different window/wall decals and accessories)

The North Pole main display pieces – the buildings

25 years ago I purchased three Department 56 North Pole Village buildings; they were the “Route 1 North Pole” the home of Santa & Mrs. Claus, the “Elf Bunkhouse” and the “Reindeer Barn”.  Later I added “Santa’s Woodworks” and the “North Pole Gate”.  These are the only buildings in my collection so, compared with other Department 45 collectors, my display is very small.  I like the idea of a smaller display for several reasons, the first is that there is relatively less money spent and the second reason is that the display has more flexibility to set up in any room or location in our house.  I appreciate the idea of the more elaborate displays but I prefer my set up time to be only a few hours as opposed to a process of long hours sometimes over a period of several days.

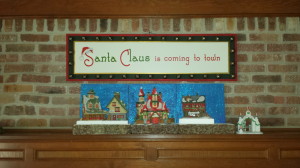
Almost every time I set up the North Pole Village, I always position “Route 1” near the center of the display because it is the largest piece and also because I think it should be the focal point.  To the left, I placed the “Elf Bunkhouse” and the “Reindeer Barn”.  To the right, I placed the “Santa’s Woodworks” building and further to the right, off the display base, I place the “North Pole Gate”.  (These building positions are almost identical to the previous year’s display)

When I am placing the buildings in the display, I will sometimes position them at different angles because I think it adds more interest to the display instead of having everything perfectly lined up in a straight row.  I will also raise the height of the different buildings to also create levels that will give additional interest to the display.  I use white Styrofoam about one inch thick and cut it to fit the dimension of the buildings with an extra one or two inches around the base allowing space to set the display’s figurines or accessories, if I want a higher platform I will stack two pieces of Styrofoam.  The white color of the Styrofoam matches the white surface of the base for an uninterrupted look that doesn’t break the illusion of a snow covered ground.
North Pole display 2

The North Pole display landscape

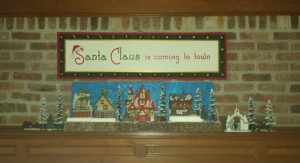
The next items that I add to the North Pole display are three sets of 7”, 8” and 9” pine trees for a total of nine trees that I scatter across the display.  I usually position the taller trees to the back and the shorter trees to the front of the display.  These trees were purchased at Walmart several years ago for a great price, they were less expensive than the Department 56 trees and I was able to purchase almost twice as many trees for about half the price of the name brand ones.  Buying from other sources assures I am not limited to the selection only available through Department 56 and my display accessories will be unique.

On either side of the display base I set up several sections of rock wall, this is another example of buying from another source.  If you keep your eyes open while shopping in the stores right after the Christmas items go on sale it is a great opportunity to add to the items for your display.  By positioning the rock walls off the base and onto the fireplace mantel it helps to continue the display with additional items that did not fit onto the base.  One example is the North Pole Gate is positioned off to the right of the base but becomes an extension of the scene with the rock wall behind.

Also added to the North Pole display are several Department 56 “Candy Cane Lamposts” that are positioned between the buildings.  To complete the landscape, and even though the top of the base is white to give the illusion of snow, I add more artificial snow to the display to make it even more of a winter wonderland!   
North Pole display 3

The North Pole display accessories – people and animals

The last items that I add to the North Pole display are Santa and Mrs. Claus, the elves and set of reindeer with the sleigh loaded with presents.  Santa is positioned near the sleigh checking his list of naughty or nice boys and girls.  It is set to the left of the base and on the fireplace mantel in front of the rock wall.  Mrs. Claus is standing in front of the Claus home waving to goodbye to Santa.  Scattered throughout the display are several elves, some are carrying packages of toys, having fun on sleds, sitting around the North Pole and some are training the reindeer.  One special group of elves, “Proud Papa and Mamma”, represents our little family.

Finally, as previously mentioned, I don’t have any problem incorporating non- Department 56 items to our North Pole display.  Sometimes these pieces and unusual elements can add interest to a display.  An example of non-Department 56 figurines are several miniature ornaments that I found in a local retail store of the characters from the classic animated 1964 Christmas special, “Rudolph the Rednosed Reindeer”.  Of course, there are Rudolph and Clarice the reindeers, Hermey the elf that would rather be a dentist than make toys, Yukon Cornelius the boisterous prospector and the gigantic Abominable Snow Monster.  The scale of these miniature ornaments is perfect and using them is a wonderful way to incorporate the characters from one of my favorite childhood Christmas specials into our North Pole display!

North Pole display 4

Shown below are photos from past Christmas North Pole displays, as you can see items have been added or changed over the years and the display has been set up in various rooms of our home.
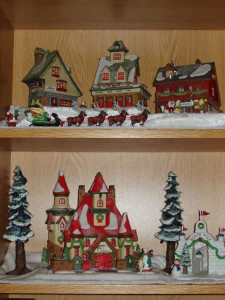
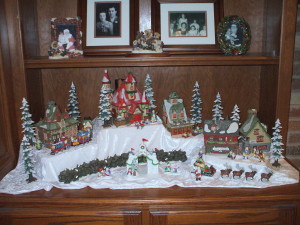
OLYMPUS DIGITAL CAMERA

North Pole Village 2010    North Pole Village 2011

North Pole Village 2012


Decor – Setting up a Fontanini Nativity Display

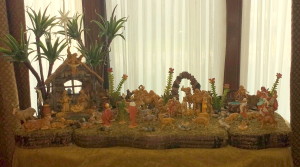
2013 Fontanini Nativity 6

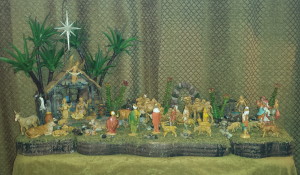
As I mentioned in a previous Décor post last December, Fontanini Nativity Display, one of the highlights of our home decoration during the holiday season is our nativity set.  Over the years, in both our California home and in our Midwest home, I added more figurines and accessories.    Months before Christmas, I search the internet for ideas for my nativity display but most of the websites only show finished displays and never go into much detail or have instructions on how to make those displays.     For this post, I thought it would be interesting to show step by step how I set up this year’s Fontanini Nativity Display.
The nativity display base

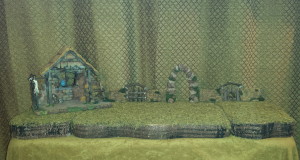
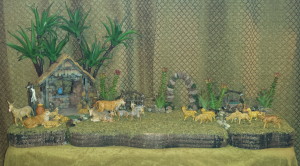
The first step is laying down a base or foundation for the display.  This particular base that I am using for this year’s nativity display was recently bought at a local craft store after Halloween on a clearance sale for very little money.  I think the three part sections with a moss surface work wonderfully for the nativity set display; the three sections interlink for one flat surface or can be stacked in a variety of positions.  I like the flexibility because every year I’m always thinking of different ways to display or change my Christmas decorations and I can also use the bases for different holidays, such as my Haunted Mansion display for Halloween.

This year, the place I choose to display the nativity set was on a table in front of the window in the library of our home.  First, I start by covering the table with a large piece of brown fabric.  Next, I positioned the three sections of the base to lay flat across the entire top surface of the table.

2013 Fontanini Nativity 1The nativity display main pieces – the stable and the background accessories
 
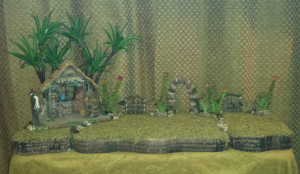
For this year’s nativity display, I set the nativity stable in the left corner of the base at a slight angle.  Then, across the back of the display, I positioned two resin sections of a “rock” fence and in the middle a “rock” resin piece in the shape of an arch.  I have a catalog which lists all the figurines and display pieces available but the Fontanini pieces are very expensive to purchase.  The three display accessories that I am using for my nativity display background are an example of using non-Fontanini pieces that coordinate beautifully but are available at a much lower price.  During the year I always keep my eye out for accessories that would work with our Nativity set and these three pieces were bought at a minimal piece during a summer clearance sale at a local craft store.  This is a great example of buying smart and keeping the cost down!

2013 Fontanini Nativity 2

The nativity display landscape – the trees and plants
 
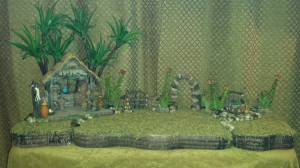
The next step when creating a nativity display is adding trees and plants for a more natural setting or scenery.  For this year’s display, I used two sets of palm trees and you may notice in the nativity photos from the previous years that the palm trees look very different.  After last Christmas, I decided the palm trees were starting to show some wear and need repairs since I had been using these same trees for over 30+ years.
 
To the start the repair process for the palm trees; I purchased artificial cactus plants from a local craft store that resembled a more realistic palm tree shape.  I removed the leaves and wrapped the palm tree trunks with brown floral tape.  I choose this method to repair the palm tree trunks because, even though paint would have worked to repair the damage, the floral tape added more support to hold the slightly heavier cactus plants which weighed more than the previous plastic palm leaves.    After using the floral tape, I hot glued the cactus plant to the top of the tree trunk.    The refurbished palm trees were positioned behind the nativity stable and I think the finished look is more realistic then the previous version!
 
Next, I wanted to add more plants to the nativity scene because in previous years the display was a little too sparse.  Once again, in the floral section of a local craft store, I found artificial cactus plants and these were placed along the back of the display along the “rock” wall.  Then, to finish the landscape of the display, I had purchased a small bag of rocks and these were added to the base of the back wall and in front of the stable; I also used several rocks to cover the seam of the display base.

2013 Fontanini Nativity 3

The nativity display accessories

Over the years, I keep adding to the nativity display and have purchased several accessories pieces during after Christmas clearance sales or from ebay at discounted prices during the off season.  I added these items to the display to create a more realistic look to the nativity scene.  Several of those pieces included food item figurines, such as clay pots filled with grain or baskets filled with olives or fish.  I also added a campfire for the three wise men and a well for the villagers.  To add more substance to the well created a base.  I used a piece of Styrofoam which was cut and then given a rounded contour to resemble a rock foundation or platform for the well. To further the illusion, I carved grooves into the Styrofoam to simulate the individual rocks and then painted it with several different colors and adding green paint to appear as if moss was growing along the base of the well.
 
One of the most important nativity display accessories is the star above the stable that announces to the world that Jesus has been born in the little town of Bethlehem to his mother Mary and her husband Joseph.  The star is attached to a long wired holder that gives the illusion that the star is suspended over the humble stable and is calling the villagers, shepherds and three wise men to come and see the newborn child of God.  (The Star of Bethlehem can be seen in the photo in step 6)         
2013 Fontanini Nativity 4

The nativity display animals

During the 30+ years that we have had our Fontanini Nativity on display during the Christmas season, I have added several new animal figurines.  I have purchased some at regular price but most of the pieces have been bought during after Christmas clearance sales or from ebay at discounted prices throughout the year.  These animals included several ox and donkeys, a couple of goats, almost a dozen sheep, a shepherd’s dog and three camels for the wise men to travel to Bethlehem to see the baby Jesus.  All these animal figurines are scattered across the display creating a sense of movement and activity that adds life to the scene.
2013 Fontanini Nativity 5The nativity display people
 
As stated in an earlier Décor post, Fontanini Nativity Display from December 2012, after years of searching I finally found my perfect nativity set that I wanted at Jule Hus in Solvang, CA.  I bought a beautiful Fontanini “starter” set that included a stable, Gloria the angel, Mary, Joseph and baby Jesus in a manger.  So, this initial purchase included the most important main pieces to my nativity display.
 
Since that time, and over the next 30+ years, I have added several figurines.  Some of those early purchases included several shepherds to tend the herd of sheep.  Other figurines were added to the display, including several villagers of various occupations.  Another important group of figurines are the three wise men who have traveled from far to honor the newly born Jesus and bring him gifts of frankincense, myrrh and gold.  All these nativity characters are scattered across the display telling the story of the birth of Jesus.

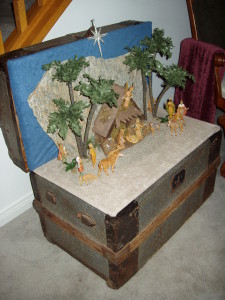
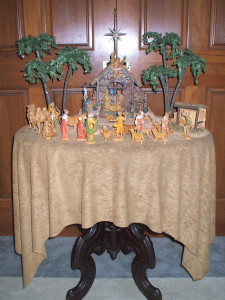
Every year I try and keep our family’s interest by display the nativity set in different rooms or creating different displays from year to year, it is constantly changing location of new figurine or accessories are added each year.  At our house in California, I have had the nativity set displayed in the hallway on an antique sewing machine and on top of a chest of drawers in our living room.  One year, I displayed the nativity set inside an antique trunk with a large flat rock as the background for the scene.  In our house in the Midwest, I have displayed it on the top of an old piano and a few years ago the nativity set was displayed on an antique table that my husband’s Grandmother kindly gave to us before she passed away last year.  This heirloom table is very special because it has been in her family for a very long time.  For the last two years the nativity set has been displayed on a table in the library of our home … who knows where the Fontanini Nativity Display will be shown next year!     

OLYMPUS DIGITAL CAMERA    2011 Fontanini Nativity 2

2010 Fontanni Nativity

One last special note:

One of our family traditions every year during the holiday season is that the manger in the nativity display stays empty until Christmas Eve.  On that evening we read from a beautifully illustrated book that tells the story of the birth of Jesus.  After we are done reading, my daughter will put baby Jesus in the manger and we say a prayer.  It is a lovely moment to remind us of the true meaning of Christmas.

Travel – Blenheim Palace

Since today is Winston Churchill’s birthday, I would like to share a travel report on Blenheim Palace where he was born and the ancestral home of the Churchill family.  My son and I visited this grand country house located in the beautiful English countryside near the village of Woodstock in 1998 while we were visiting relatives in nearby Oxford. Blenheim Palace has the distinction of being the only non-royal house in England to hold the title of palace and it has been designated a UNESCO World Heritage Site.

A Brief History of Blenheim Palace

Blenheim Palace was originally a gift from Queen Anne to the 1st Duke of Marlborough, John Churchill, for his military victory in 1704 against the French at the Battle of Blenheim. When the Duke returned to England after the battle he had become a national hero.  The Duke was given a site to build his new palace near the village of Woodstock and Parliament voted to a substantial amount of money from its construction.  Previously the site was had a house called the Manor of Woodstock and the estate was owned by the British Crown.  King Henry I used it as a deer park and King Henry II had kept his mistress there.  Before her succession, Queen Elizabeth I was imprisoned there by her half-sister Queen Mary I.  Later, Cromwell’s troop bombarded the estate and the ruins remained until 1705 when the land was cleared in preparation for the building of Blenheim Palace.

During the construction of Blenheim Palace (1705-1722) the process was delayed several times due to personal and political problems between the Crown and the Marlboroughs.  One of the problems was the Duchess, the former Sarah Jennings.  Years before, she had become a friend to the young Princess Anne who later became the Queen.  Upon becoming Queen, the Duchess was made the Mistress of the Robes, one of the highest honors for a lady.  Later the relationship between the Queen and the Duchess became very strained with constant disagreements and finally by 1711 the Queen cut off all funding for the construction of Blenheim.  By this time, the Duke had also fallen out of favor with the Queen over political issues.  The Marlboroughs were banished from the Queen’s Court and forced into exile, they did not return to England until after Queen Anne died in 1714.

The Duchess had wanted the famed architect Sir Christopher Wren to design and build Blenheim Palace but the Duke choose to commission Sir John Vanbrugh.  There were constant arguments between the Queen, Parliament and the Duke over the funding for the construction.  When the contract was drawn, despite the wish of the Queen to honor the Duke for his service to the Crown, there was no mention as to who was responsible for payment to the architect and building costs.  Delays over conflicts in style and design persisted between the Duchess and Vanbrugh.  Then, accusations of extravagance made by Parliament caused budget restrictions and later when the Duke and Duchess fell out of favor with the Queen construction stopped during the time the Marlboroughs were living out of the country.  Upon their return, construction resumed at the expense of the Duke but further disagreements caused the replacement of Vanbrugh with his partner, Nicholas Hawksmoor.  In the end it had taken almost seventeen years to complete the construction of Blenheim Palace.

During almost 300 years of history, Blenheim Palace has been an ancestral home, mausoleum and monument to the Churchill family. Over the years, various members have made minor changes to the interior of the house as well as the gardens and parklands surrounding the estate.  At the end of the 19th century when the wealth of the family had been depleted due to social and economic changes in England, the estate was saved from ruin when the 9th Earl of Marlborough married the wealthy American railroad heiress Consuelo Vanderbilt.  Blenheim Palace is most notably the birthplace of Sir Winston Churchill, the former Prime Minister of England.

Blenheim Palace

A Tour of Blenheim Palace

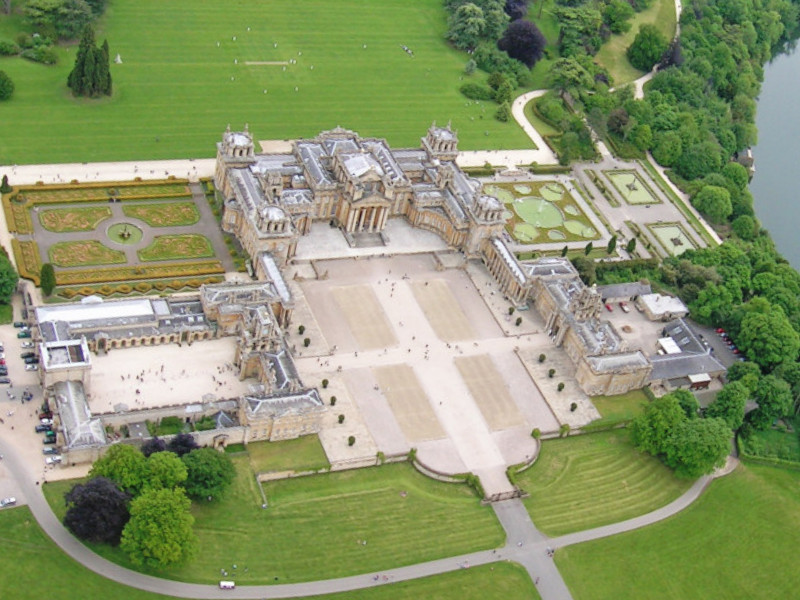
When visiting Blenheim Palace, guests enter through the East Gate with an inscription plaque that was added at the end of the 19th century by the 9th Duke stating the generous gift of Queen Anne to the 1st Duke of Marlborough.  After passing through the entrance, visitors enter the Kitchen Court area of the Palace.  To the right is the Palace gift store and to the left is the Orangery, or the greenhouse area, where currently most of the special events at the Palace are held.  Located in the Kitchen Court area are the Palace’s kitchen, bakehouse, laundry and storage areas.

Blenheim Palace  - Visitor Entrance    Blenheim Palace  - Visitor Entrance plaque

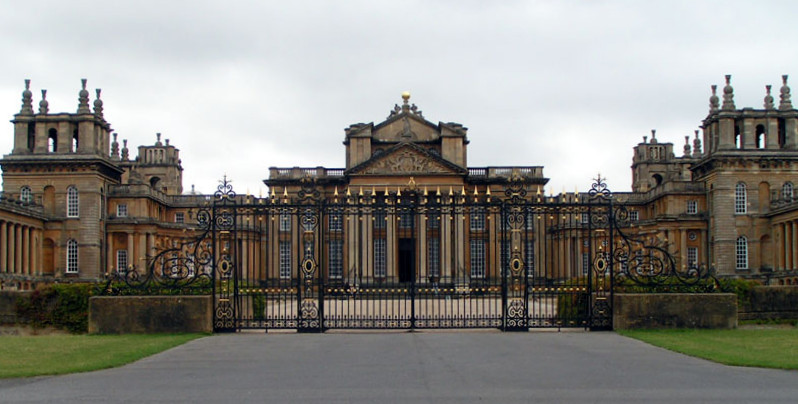
Guests will continue on through this area and pass under a grand archway with the Townsend’s Clock Tower overhead and emerge into the Great Court area of the Palace.  Be sure to look back and above either side of the archway for a view of the two stone “English” lions which are savagely devouring the “French” cocks, these statues symbolically reference the 1st Duke of Marlborough’s military victory in 1704 against the French at the Battle of Blenheim. If guests were to proceed directly straight across the Great Court there is another service area, the Stable Court, which was never fully completed and this area is where the several stables and storage areas.  To the right of the Clock Tower is the main gate of the Palace, known as the Ditchley Gate, and to the left is the entrance into the main building of the Palace.  In the original plans, Vanburgh had designed an impressive stone entrance in the center with colonnades on either side to completely enclose the Great Court but unfortunately these were never built.  The wrought iron gate was added later by the 9th Duke during extensive renovation and repairs of the Palace in the late 19th century.

From the Great Court, guests enter the main building of the Blenheim Palace passing through massive doors which features a complicated lock system fashioned in brass and copied from the gates of Warsaw, the door is opened with a huge coronet key.  The first room in the Palace is the Great Hall which has a 67 feet high ceiling painted in 1716 by Sir James Thornbill; the scene depicts Marlborough presenting to the Sovereign the plan for the Battle of Blenheim.  Standing just inside the front door, seen directly ahead is the Saloon, the original plan of the Palace’s first floor had two suites of state apartment rooms located to the left and right of the Saloon which were initially intended for visiting important guests and dignitaries such as the Queen or King.  The interconnected rooms of each suite were designed as follows: an audience room, then a private “withdrawing” room and lastly the bedroom of the suite with a small dressing room off to the side.  As you will see later in the tour, the rooms now serve different purposes.

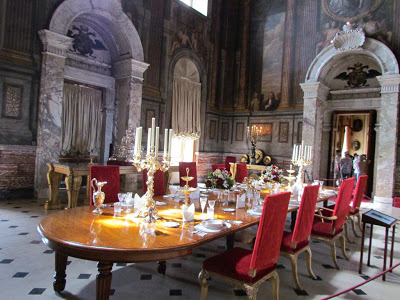
The Saloon is entered into directly from the Great Hall; guest will pass under a large stone archway with the coat of arms of Queen Anne carved in stone by Grinling Gibbons to honor the sovereign who made Blenheim Palace possible.  The Saloon is the state dining room and now only used once a year by the current Marlborough family on Christmas Day.  The table is set with a Minton service and silver gilt with a silver centerpiece located on a side table depicting Marlborough on his horse after the Battle of Blenheim writing the famous dispatch to the Duchess of his victory over the French.  The other feature of note in the Saloon is the beautiful dome ceiling painted by Louis Laguerre representing Peace.  Laguerre also painted the murals on the walls around the perimeter of the room showing people (including his self-portrait) from all the nations of the world coming together in Peace, interestingly he included French spies.

Blenheim Palace  - the Saloon

To the left of the Saloon is the Green Writing Room with the most famous tapestry of Blenheim Palace depicting Marlborough in triumph accepting the French Marshall Tallard’s surrender at the Battle of Blenheim.  The next state room is the Red Drawing with two large painting of note, one by Sir Joshua Reynolds showing the 4th Duke and his family and facing it on the opposite wall is the John Singer Sargent portrait of the 9th Duke and his family.  Beyond this room is the Green Drawing Room.

30021 26-27A.TIF Blenheim Palace - Red Drawing Room

To the right of the Great Hall, entered down a corridor, is the Long Library.  This room is 180 feet long with very high ceilings that feature a series of domes and has several additional distinct features to note.  One is the large full length statue of Queen Anne by John Michael Rysbrack with an inscription noting the close ties between her and the 1st Duke and Duchess of Marlborough, the statue stands in the bow window area of the library.  The other is located at the north end of the room and it is a large organ that was commissioned by Henry Willis& Sons.  Later installed by the 9th Duke in 1891, it is the largest pipe organ in a private home in Europe.  The organ is still currently in use and played at the Palace on Friday and Sunday afternoons.

Blenheim Palace  - Queen Anne statue in the Library    Blenheim Palace  - the Palace Organ

From the Long Library, there is access down a colonnade to the Palace Chapel.  The Chapel was completed in 1732 and contains the tomb of the 1st Duke of Marlborough, the Duchess and their two sons; sadly their four daughters are not mentioned on the memorial and were buried elsewhere.  When the Duke died in 1722 he was buried in Westminster Abbey and when the Duchess died in 1744 his remains were re-interred at Blenheim Palace.  Successive Dukes and their wives are also interred in the vault beneath the chapel.  Most other members of Churchill family are interred in St. Martin’s parish churchyard at Bladon, a short distance from the palace.

Finally, located in a small room to the right of the Great Hall is the famous room that Winston Churchill was born in 1874 while his parents were visiting their relatives at Blenheim Palace.  Churchill’s mother, Lady Randolph, was taken by surprise when she gave birth to her son prematurely several weeks before he was expected.  It is fitting that Churchill was born at the Palace, since later in life he had a strong sense of family and came to greatly admire the 1st Duke of Marlborough.  Many years later, he proposed to his future wife, Clementine Ogilvy, at the Temple to Diana located beside the lake on the estate.  Churchill is also buried nearby Bladon; there is a direct line of axis from Blenheim Palace past the Column of Victory located on the estate to the cemetery in Bladon thereby symbolically linking both his birth and his death.

Blenheim Palace  - bedroom where Winston Churchill was born

C. S. Lewis’ Birthday

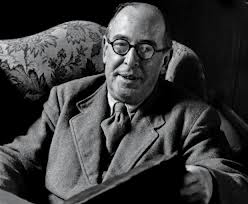
cs lewis

Hello, it’s Jeff again here to talk about one of my favorite authors, C.S. Lewis (or Jack as he was known by family and friends). He was born on November 29th, 1898 and died November 22, 1963.  I’m not sure how I stumbled across his books, but I remember reading “The Lion, the Witch and the Wardrobe” and then the rest of the series when I lived in California in 1976. I remember checking them out of the library repeatedly during that year.  Fortunately, I purchased them at a book sale because the library burned down in 1982, and unfortunately I only have one or two of those volumes now.  Before I move off the topic of the Narnia series, if you are going to read them, be sure to read them in the original order, starting with The Lion, the Witch and the Wardrobe.  Later versions of the series put “The Magician’s Nephew” first, which while chronologically correct is not how they were published.  (The Magician’s Nephew is my least favorite of the series)

Before delving into his works, let’s take a brief look at CS Lewis’ biography (a more complete biography can be found here or here).  He was born in Belfast, Ireland to a lawyer and the daughter of a priest.  When he was four, his dog Jacksie was killed by a car and he took on the name, later shortened to Jack, which he kept for the rest of his life. (Sorry I digress a little, but during the research for this post I came across some interesting information – Dublin  only had 38 cars in 1900, so there could not have been many cars around at the time!)   Anyway,Lewis attended a number of schools and had a number of different private tutors until he received a scholarship to Oxford in 1916.  In 1917 he joined the military and was commissioned in the 3rd Battalion of the Somerset Light Infantry.  In 1918 he was wounded in the legs, arms and chest by a friendly fire incident when a British shell fell short.

After the war he returned to Oxford to continue his studies.  The story goes that Lewis made a pact with his roommate “Paddy” Moore that if either were killed in the war the other would take care of their friend’s family.  Since his friend had died, once back at Oxford Lewis arranged to have Jane Moore, Paddy’s mother, and her daughter move in with him. Historians question the nature of their relationship (she was 17 years his senior) but all agree he cared for her until her death in 1951 and called her Mother (his own mother had died when he was 10).

Lewis completed his studies in 1924 and was made a Fellow at  Magdalen College where he taught philosophy, English and literature for the next 29 years.  During this time he met J. R. R. Tolkien and started a lifelong friendship.  Long discussions on religion with Tolkien eventually led Lewis back to Christianity, a faith he had abandoned when he was 15.  Their association eventually led to the creation of the Inklings, an informal,  jovial group of writers that met regularly to discuss fantasy literature and Christianity.  This group included such notables as:  Charles Williams, Hugo Dyson, Owen Barfield, Dr. Robert Havard, Weville Coghill, Lewis’s brother Warnie and Christopher Tolkien.  In 1955 Lewis accepted the newly formed Department of Mediaeval and Renaissance Literature at Cambridge University where he worked until he died in 1963.

Lewis was a very prolific writer.  While the Narnia series is one of Lewis’ best known series, with over 85 million copies sold and many movies about the series, he wrote many books in many genres over his lifetime.   They include children’s books, science fiction, non-fiction and christian apologetic.  His most notable works are:  The Chronicles of Narnia, Mere Christianity, The Allegory of Love, The Screwtape Letters, The Space Trilogy, Till We Have Faces, Surprised by Joy: The Shape of My Early Life.

As I previously stated, C.S. Lewis is one of my favorite authors.  In addition to the Narnia series I also like The Screwtape Letters.  This is a story about a low level demon trying to corrupt a soul.  It is told in a series of letters between  the senior Demon Screwtape and his nephew Wormwood, a junior tempter.  I also enjoyed the Space Trilogy, starting with That Hideous Strengh, followed by Perelandra and Out of the Silent Planet, although the final volume wasn’t really to my taste.

Many of Lewis’ works have been made into movies and radio dramatizations.  I particularly like the Family Radio Theater version of the stories.  There are also several live action movies and radio dramatizations created by the BBC of Narnia that are quite good.  Of course there are the Disney movies that started coming out a couple of years ago that are also very good.  My only complaint is that they changed the plot in my mind unnecessarily, particularly in The Dawn Treader.  Others have different complaints such as can be found in this article about the opening of “The Lion, the Witch and the Wardrobe” movie.  This being said, the movies are very entertaining and well worth watching.

I hope this post has been interesting and informative.  Please send me a comment, I would love to know your favorite CS Lewis book or movie … and it would be nice to know someone read all the way to the bottom of this post!

Jeff Jones