Craft – Christmas Ornament Displays

As I mentioned in this month’s Décor post, Ornaments Used in Unusual Ways, ornaments are not just for the Christmas tree and they can be used in many different ways throughout the house during the holiday season.  In this post I will show three examples on how ornaments can be displayed in some fun and creative ways.

Ornament Snowglobe

The idea for the Ornament Snowglobe is to use an ornament that can create a winter scene and then be able to turn the jar upside down for the artificial snow to create a falling snow effect.  The gingerbread house is a great example to use for this craft project, other ornament suggestions are: a Santa Claus ornament, a Snowman ornament or a single Christmas tree.

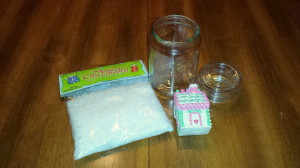
For this display I used a small glass container with a lid, a gingerbread house ornament, some artificial snow, and a glue gun/glue sticks.  Craft NoteWhen purchasing an ornament for this craft project, be sure that the ornament is small enough to fit inside the jar with the lid closed, also check the width of the ornament so it can fit through the jar’s opening.

Snowglobe ornament display - supplies

To start, be sure the inside of the jar is clean and remove any price tags or metal display loop from the top of the ornament.  To remove the display loop, grab hold of the loop with a plier and then twist with an upward movement.

Secure the gingerbread house ornament to the bottom of the jar with glue.  Optional step: For a permanent “snow base”, lay some cotton balls or batting onto the bottom of the jar after attaching the ornament OR paint the bottom of the jar with white paint and let it completely dry before attaching the ornament.

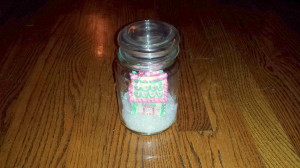
Next, add a small layer of artificial snow to the bottom of the jar.  Then, to finish the ornament snowglobe, securely glue the lid onto the top of the jar so that the jar can be turned for the “snow effect”.

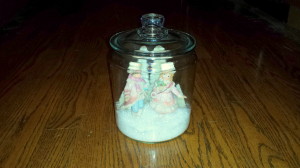
Snowglobe ornament display - final

Framed ornament

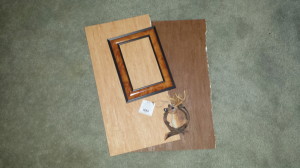
For this display it is important to use ornaments with flat backs, such as the deer or gingerbread ornaments seen below.  I used a wallpaper remnant (but scrapbook paper can also be used) for the background, a frame that matches the ornament and a hot glue gun/glue sticks.

Framed deer ornament - supplies

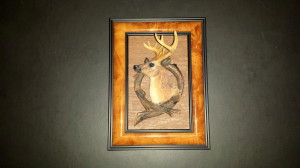
Disassemble the picture frame, separating the glass and back from the frame.  Cut the wallpaper remnant (or scrapbook paper) to fit the size of the frame.  Then, glue the paper to the glass.  Re-assemble the glass and the frame backing inside the frame.  To finish the display, center and attach the ornament to the paper.

Framed deer ornament - final

Craft Note: The theme of this Framed Ornament is not specific to any holiday and would look wonderful on a side table or bookcase and can be displayed year-round.

Ornaments Under Glass

This project is similar to the ornament snowglobe but the difference is that this larger display can only remain stationary and uses multiple ornaments or accessories.

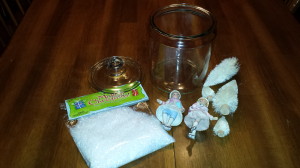
For this ornament display I used a large glass container with a lid, a boy and girl skater ornaments, four small artificial pine trees, artificial snow and a glue gun/glue sticks.  The idea for this craft project is to have one or two ornaments and use accessories like trees and artificial snow to set a winter scene in soft pastels or whimsical with primary colors.

Ornaments under glass - supplies

To start, be sure the inside of the glass container  is clean and remove any price tags or metal display loop from the top of the ornament.

Next, position the accessories, such as the pine trees, and secure into place at the bottom of the glass container with the hot glue gun/glue.  Be sure to leave room for the ornaments by positioning the accessories to the sides of the container and leave the area in the front clear to view the scene inside.

Then, secure the ornaments into place at the bottom of the glass container.  To finish the Ornaments Under Glass display, add a small layer of artificial snow to the bottom of the container to look like fresh fallen snow.

Ornaments under glass - final

So, next time you are shopping in the local retail or craft stores during the holiday season check out the Christmas ornaments and think about a different way of displaying them in fun and creative ways!

Craft – More Christmas Wreaths

As I mentioned in a previous Décor post, Christmas Wreaths, I decorate our home during the Christmas season with several different wreaths hung throughout the house, some of these are traditional in style and other are more whimsical in design.  This Craft post will feature four wreaths with complete supply lists and instructions.

Gingerbread Men wreath

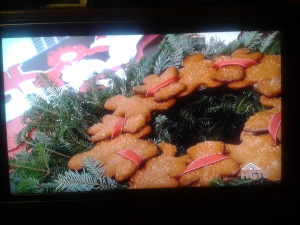
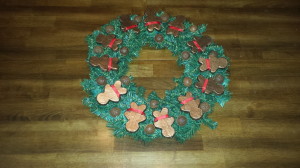
This Christmas wreath was inspired by one that I had seen on the 2012 HGTV White House Christmas television special.  The wreath featured was very simple in design and made from a pine wreath with several freshly baked gingerbread men placed side by side in a circular pattern to match the round shape of the wreath and interlaced with a red ribbon to secure the gingerbread men in place.

2012 White House gingerbread wreath

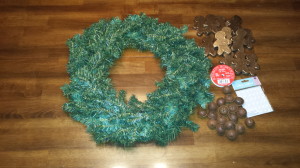
For the Gingerbread Men wreath, I used an 18”artificial pine wreath, a dozen paper-mâché gingerbread men, bronze metallic paint and paint, 18 bronze jingle bells and red ribbon in two widths (one roll of ¼”inch wide  to lace through the gingerbread men and one roll 2” wide to hang wreath).

Gingerbread Men wreath - supplies

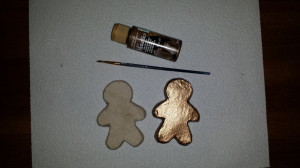
First, the paper-mâché gingerbread men were painted in a beautiful bronze metallic paint to resemble the color of real gingerbread.

Gingerbread Men wreath - paint

After the paint has dried, position the gingerbread men around the wreath and interlaced the red ¼” wide ribbon between each of them to secure to the wreath.  Next, I add the bronze jingle bells throughout to complete the wreath.  The Gingerbread Men wreath will be displayed on the cabinet in our kitchen this holiday season, this room is usually decorated for Christmas with a candy cane and gingerbread theme.  To hang the wreath I used the 2”wide ribbon tied in a loop and finished with a bow.

Gingerbread Men wreath - final 1

Nutcracker wreath

Each Christmas, since our daughter was a small girl, our family tradition has been to a performance of the Nutcracker Ballet during the holiday season.  Over the years sometimes the show is a professional production or a cast of ballerinas from the local college or amateur dance company.  We always look forward the story, music and the dancing of the Nutcracker Ballet.

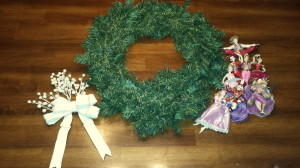
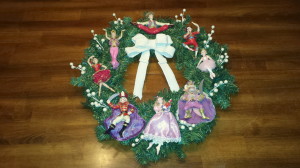
For the Nutcracker wreath, I started with an 18” artificial pine wreath.  At my local craft store I found a collection of eight Nutcracker ornaments that depicted the main characters of the ballet.  I placed these evenly spaced around the wreath, and then I added small white berries and completed the wreath with a “frosty” white bow.  The Nutcracker wreath will be displayed on the door to my daughter’s bedroom during this holiday season.

Nutcracker wreath - supplies    Nutcracker wreath - final

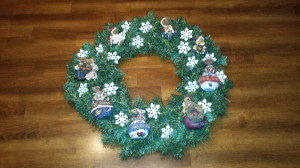
Boyd’s Bear wreath

I have a collection of Boyd’s Bear ornaments, in the past I have displayed them scattered among a pine garland on the fireplace mantel in our California home.  (For a photo of the fireplace garland please check out the Décor post, Displaying a Boyd’s Bears Collection – Part Two)  Since we moved to the Midwest a few years ago I have not displayed the ornaments and this year I decided to use the ornaments in a different way by displaying them on a Christmas wreath.

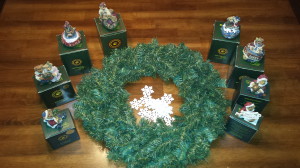
For the Boyd’s Bear wreath, I started with an 18” artificial pine wreath.  I arranged eight of my Boyd’s Bear ornaments evenly around the wreath and secured them with wire.  Next, I added small wooden snowflakes scattered in between the ornaments.

Boyds Bears wreath - supplies    Boyds Bears wreath - final

Teddy Bear wreath

Over the years I have collected some small teddy bears, last year I displayed them on a tabletop Christmas tree which I set on the top of the roll-top desk in out master bedroom.  (For a look at a photo, please check out the Décor post, Displaying a Boyd’s Bear collection – Part Two) and this year I decided to display the collection on a Christmas wreath.

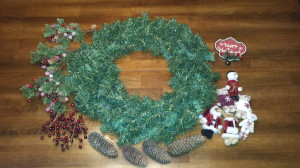
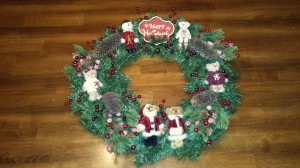
For the Teddy Bear wreath, I started with an 18” artificial pine wreath.  I evenly spaced the small teddy bears around the wreath with the Santa and Mrs. Claus teddy bears at the bottom.  At the top, I left a space for a small “Happy Holidays” sign.  Next, I added four pine sprays with berries and added four large pinecones to the wreath.  Finally, to complete the wreath I added several red berries scattered around.

Teddy bear wreath - supplies    Teddy bear wreath - final

These four Christmas wreaths are a great way to use a specific theme and ornaments and hopefully inspire you to take a trip to your local craft or retail store.  There are some additional examples of themed wreaths in a December 2012 Craft post, Christmas Wreaths, with complete supply lists and instructions.  The three wreaths are a Dickens Village Wreath and a North Pole Wreath using miniature Department 56 building ornaments and a Disney Wreath, using Hallmark ornaments of Disney characters.

Craft – Floral Pineapple Decoration

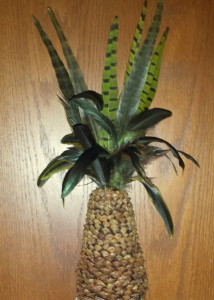
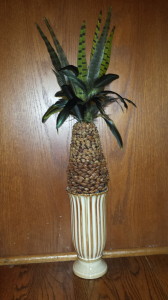
Pineapple decoration -finished closeup
Sitting on a table in our library is this floral pineapple decoration that I recently made, I had seen one in a magazine several years ago and I thought it would make a lovely arrangement for our home.  The original arrangement was larger and used artificial apples but I altered the craft project to a smaller size and used pieces from pinecones because I thought the seed scales would resemble the “texture” of a real pineapple and the finished piece would have a more realistic style.  The project is a little time consuming, it took a couple of hours to complete, but I think it turned out wonderful!

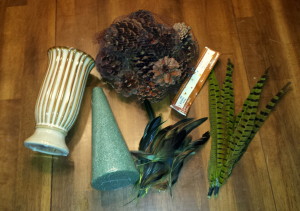
Pineapple decoration - supplies

Pineapple decoration supplies

  • Several pinecones
  • Several pheasant feathers and some additional feathers in a coordinating color
  • 1 Styrofoam cone
  • 1 urn, vase or other container
  • Hot glue gun and glue sticks
  • Scissors and tapered pliers
  • Craft gloves (optional)

 Pineapple decoration instructions

  1. Using the tapered pliers, deconstruct a pinecone by removing each individual seed scale. If you wish to protect your hands from the sharp edges of the pinecone, craft gloves can be used during this process.  Using the scissors, trim the bottom of each individual seed scale leaving a straight edge to help it lay flat on the Styrofoam cone during the gluing process. Sort the pinecone seed scales into three different sizes – small, medium and large.  (Craft note: This step was the part of the craft project that took the most time)
  2. Cut off the top and “carve” the bottom section of the Styrofoam cone.  The shape of the cone should be altered to resemble a pineapple form – narrow and tapered top, wide and fuller middle section and slightly tapered, rounded bottom.   (Craft note: My completed floral decoration is more elongated then a real pineapple, if a shorter and wider style is desired  I would suggest using a Styrofoam block instead of the cone)
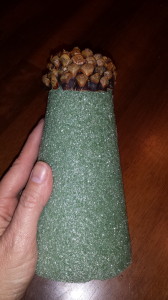
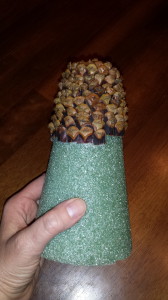
  3. Starting at the top of the Styrofoam cone, glue the individual pinecone seed scales in rows, overlap each additional row until the entire surface of the Styrofoam cone is covered.  Use the small pinecone seed scale for the top portion, the medium for the middle and the large for the bottom portion of the Styrofoam cone.
    Pineapple decoration 1    Pineapple decoration 2    Pineapple decoration 3
  4. Insert the pheasant feathers and additional feathers to the top of the Styrofoam cone.
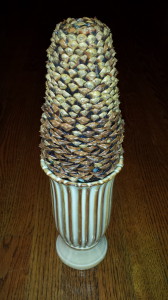
  5. Place the completed pineapple decoration onto a urn or other container, secure with glue if you wish to attach it permanently.

Pineapple decoration - finished


Craft – Rustic Table Centerpiece

20131110_171134

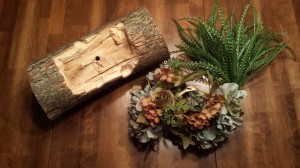
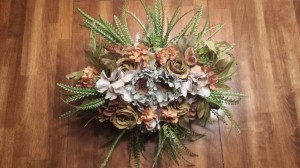
I had mentioned in a previous post, Thanksgiving dinner I used very rustic table decorations for our dining room table.  During the spring my husband and father-in-law were clearing some of the trees in the forest boarding our house.  I noticed they were several logs stacked ready to use in the fireplace this winter.  I decided one of the logs would be perfect to use as a base for a floral centerpiece.  I had also purchased some flowers from a clearance sale at the local craft store and the color would coordinate with my rustic Thanksgiving table decorations perfectly!

20131031_075444

Rustic Table Centerpiece – supplies

A tree log
An assortment of artificial flowers
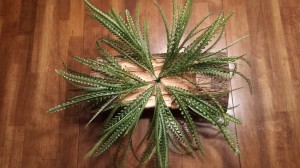
Artificial greenery
Saw and drill
Hot glue gun and glue sticks

Rustic Thanksgiving Table Centerpiece – instructions

Warning: Please use caution when using a saw and a drill for this craft project and wear protective glasses and work gloves

  1. Select a log and cut to the desired length (when selecting a log be sure that it will sit balanced on the table and not tip over)
  2. Cut a space a few inches deep into the of the log, this will be the area used for the floral arrangement
  3. Drill a hole for the greenery stem  (this is an optional step and can be omitted)
  4. Cut the greenery stem to the required length and using the hot glue gun secure the greenery into place.  (Another option is to separate the greenery and glue the individual stems directly onto the log)
  5. Cut the individual stems of the artificial flowers to the desired lengths.  Determine the placement of the flowers.  When you are pleased with the arrangement, glue the individual flowers directly onto the log.

20131031_075653    20131031_091627

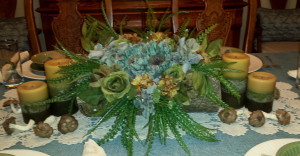
I was very pleased with the floral arrangement I had created and I think it looks very nice as the centerpiece for our rustic Thanksgiving table!

Craft – Jeweled Pumpkins

Classic Jeweled Pumpkin final 1  Halloween Jeweled Pumpkin final

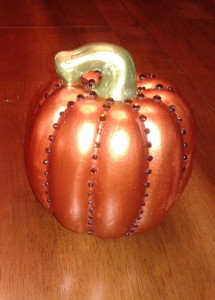
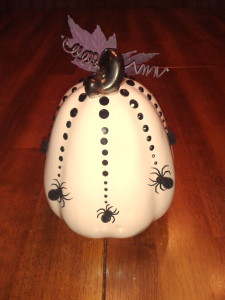
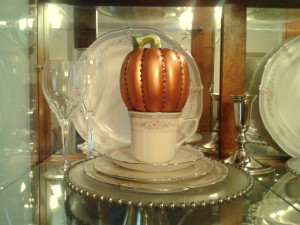
For the past several years I have seen jeweled pumpkins in retail stores and this year I decided to make two different styles.  The first style is a Classic Jeweled Pumpkin which is an elegant ceramic pumpkin painted a beautiful metallic bronze color with individually glued topaz crystals.  I created two of these pumpkins to display in the china cabinet in our dining room for the upcoming fall season.  The other style is a Halloween Jeweled Pumpkin which is a lovely ivory porcelain pumpkin with individually glued black crystals and spiders.  This pumpkin is also displayed in our dining room on top of a tall chest of drawers.

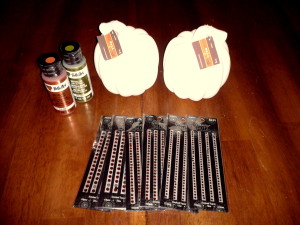
Classic Jeweled Pumpkin supplies

Classic Jeweled Pumpkin – supplies

A small pumpkin
Metallic bronze paint
Metallic green paint
Paint brushes
Topaz crystals, flat back
Glue stick
Tweezers and toothpicks (optional)


Classic Jeweled Pumpkin – instructions

  1. Paint the pumpkin using the metallic bronze; paint the pumpkin stem using the metallic green paint.  Allow the pumpkin to dry completely.  (Craft Note: I used two unpainted ceramic pumpkins for this craft project, but wooden or papier-mâché pumpkins can also be used. I also selected traditional paint and matching crystal colors)
  2. When the paint is completely dried, hot glue individual crystals onto the pumpkins.  Follow the natural “stems” of the pumpkin.  (Craft Note: I used a toothpick to apply the glue to the back of the crystal and then tweezers for placing the crystals, this allowed for greater control when positioning them)

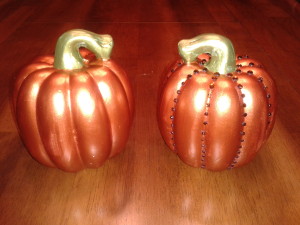
In the photo below  – the painted pumpkin is on the left and the pumpkin on the right shows the pumpkin with the crystals added.

Classic Jeweled Pumpkin final  Classic Jeweled Pumpkin on display in china cabinet

The Classic Jeweled Pumpkin instructions are very simple but the craft project can be very time consuming because of the painting process and, depending on the amount of crystals used, the application process can also take some time to complete.  The end result is a very elegant home accessory that would look wonderful displayed in any room of the house.

I used very traditional colors for the two Classic Jeweled Pumpkins but any color combinations of paint and crystals can be used.  One suggested color combination is ivory pearlized paint with “diamond” crystals or white pearls.  The color combinations can be endless and the idea is to create a custom look would match your room decor.

Halloween Jeweled Pumpkin supplies

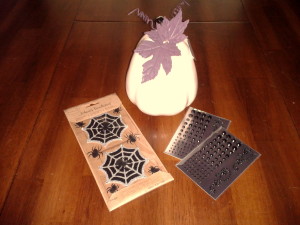
Halloween Jeweled Pumpkin  – supplies

Ivory porcelain pumpkin
Black crystals in a variety of different sizes, flat back
Black spiders
Glue stick
Tweezers and toothpicks (optional)

Halloween Jeweled Pumpkin instructions

  1. I used an ivory porcelain pumpkin that I purchased from a local craft store, but if you cannot find one use an unpainted ceramic, wooden or papier-mâché pumpkin.  Paint the pumpkin an ivory color, white can be too harsh of a color, and allow it to dry completely.
  2. Starting with the largest sized black crystal to the smallest, place the crystals in a straight line in each of the “seams” of the pumpkin.  For visual interest vary the length of each line of black crystals.  (Craft Note: I used a toothpick to apply the glue to the back of the crystal and then tweezers for placing the crystals, this allowed for greater control when positioning the crystal)
  3. Add a spider to the end of each line of black crystals; this will look like the spiders are creating a web!  (Craft Note: I used 3-dimensional spiders that had self-adhesive backs, I found them in the scrapbook section of a local craft store)

Halloween Jeweled Pumpkin final