Craft – Fragrant Floral Sachets

Floral sachets

Here is an easy craft project that can be made for the upcoming spring season.  After a very harsh winter with heavy snowfall and freezing temperatures here in the Midwest and other parts of the country, I know that I am looking forward to more mild weather and the beauty of the spring flowers.  These floral sachets are a perfect way to get in the mood and can be made in an endless variety of colors to match any décor, just select a sachet bag and decorate it with matching or contrasting colors of flowers and ribbons.

Floral Sachets – supplies

  • Sachet bags (I used bags that measured 5 inches by 6½  inches)
  • Loose lavender buds (other fragrant dried flowers can also be used)
  • Full bloom small flowers, several stems
  • Bud flowers, several stems
  • Ribbon (I used one inch wide variegated green ribbon)
  • Hot glue gun and glue sticks

Floral sachet 1 - supplies    Floral sachet 2 - supplies

Floral sachets – instructions

  1. Fill the sachet bags with lavender; leave some room at the top of the bag so it can close with the drawstring.
  2. Arrange small full flowers and buds together and tie the bunch together with ribbon, trim the excess flower and bud stems, cut the ribbon to a shorter length and angle the ends for a finished look.
  3. Hot glue the ribbon to the sachet.

Floral sachet 1 - finished    Floral sachet 2 - finished

There are so many uses for these floral sachets and listed below are a few ideas:

  • The floral sachets are a wonderful way to add a subtle fragrance when they are placed in the linen closet with the sheets and towels.
  • Tuck a sachet into a lingerie drawer to add a lovely scent to your “unmentionables”!
  • The sachets also make wonderful gifts to give as presents to family or friends (just a reminder that Mother’s Day is coming up in May!)
  • Add one of the floral sachets to the inside of a gift box when wrapping a gift of clothing.  First lay the tissue in the box, set the item of clothing on top and fold the tissue over.  Then, lay the sachet on top of the tissue and close the box to finish gift wrapping the present.
  • The sachet can also be used as a decorative element on the outside of a gift box and you can coordinate the colors of the sachet to match any gift wrapping paper.
  • Add a floral sachet to a car interior, place one under a seat or, since the sachets are so pretty, place one where it can be seen.

Special Warning:  Please be careful when using the floral sachets for display and keep them out of reach of small children and animals that can eat or destroy the contents.

Craft – Mardi Gras Masks

This craft project is inspired by the annual Mardi Gras celebration in New Orleans, which is a popular cultural event that seems to be increasing in attendance every year.  These masks can be worn at a Mardi Gras themed party or would the perfect accessory for a Halloween costume party.  In this post, I will show two different masks craft projects which include a list of supplies and instructions.

(Special Note:  “Fat Tuesday” will be March 4, 2014.  For information about the origins and traditions of the Mardi Gras celebration, please check out the history of Mardi Gras section at the end of this post)

Mask #1

Supplies –

  • paper mask
  • brown felt
  • glue stick
  • glue gun and glue sticks
  • scissors
  • feathers
  • brads

Mask 1 - supplies

 Instructions –

  1. Apply the felt to the front of the mask.  Start by covering a small area on one side of the mask with glue, lay the felt flat on of the mask, moving from one side to the other, smoothing any bumps along the way.  Craft note: Be sure to leave a section at the top of the mask unglued in order to add the feathers.
  2. Trim the excess felt, cutting as close to the edge of the mask as possible.  Next, cut the eye openings.  Craft Note: The trick for cutting the felt is to use very sharp scissors.
  3. Then, working slowly around the mask, carefully hot glue the brads to the edge of the mask.
  4. At the top center of the mask, using a small amount of glue attach several feathers between the layer of the mask and the felt.  Once the feathers are arranged be sure to seal the area closed by gluing the felt over the feathers.

Mask 1 - finished

Mask #2

Supplies –

  • paper mask
  • blue felt
  • glue stick
  • scissors
  • blue sequins
  • self-adhesive flat-back blue crystals

Mask 3 - supplies

Instructions –

  1. Apply the felt to the front of the mask.  Start by covering a small area on one side of the mask with glue, lay the felt flat on of the mask, moving from one side to the other while smoothing any bumps along the way.  Craft note: Be sure to leave a section at the top of the mask unglued.
  2. Trim the excess felt, cutting as close to the edge of the mask as possible.  Next, cut the eye openings.  Craft Note: The trick for cutting the felt is to use very sharp scissors.
  3. Then, working slowly around the mask, carefully glue the blue sequins to edge of the mask, slightly overlapping them.
  4. At the top center of the mask, using a small amount of glue attach two butterfly antennas made from blue sequins between the layer of the mask and the felt.  Be sure to seal the area closed by gluing the felt over the antennas.

Mask 3 - finished

A brief history of the Mardi Gras

The celebration of Mardi Gras dates back centuries with origins in the pagan spring and fertility rites.  During ancient Roman times the Christians incorporated many of those pagan traditions into their own celebration preceding the season of Lent.  Lent is the 40 days between Ash Wednesday and Easter Sunday and it is a time of religious penance and fasting.  Traditionally, the week before Lent is spent indulging in food and drink with the culmination being the day before Ash Wednesday which became known as “Fat Tuesday”.  Over following centuries, the celebration spread to other parts of Europe in predominately Catholic countries.

Some historians believe the first American celebration of Mardi Gras (the French word for “Fat Tuesday”) took place in 1699 when two French explorers named Iberville and Bienville arrived in the New World.  The French settlement of New Orleans began celebrating the holiday of Mardi Gras with masked balls, lavish dinners and street parties.  For a brief period of time when the Spanish took control of New Orleans the celebrations were prohibited and strictly enforced until Louisiana came under the control of the United States and eventually this part of the country became a state in 1812.

The first officially documented New Orleans Mardi Gras celebration took place in 1837.  Then, in 1857 a secret society of prominent businessman called the Mistick Krewe of Comus organized a Mardi Gras torch-lit procession through the streets with marching bands and decorated floats which was followed by a grand ball for the krewe members and their guests and this set the tradition for all the future Mardi Gras celebrations in the city of New Orleans.

Almost from the start of the Mardi Gras celebrations in New Orleans during the late 1800s, different secret social organizations or krewes were responsible for planning their own parades and balls.  Originally, the krewes had restrictive membership policies but currently in order to get a parade permit all New Orleans krewes must sign affidavits agreeing not to discriminate against new members.  Unfortunately, some of the older more established krewes continue to allow new members by “invitiation only”.  Each krewe takes their names from mythological characters and there are dozens of krewes with names such as Rex, Bacchus, Knights of Babylon, Knights of King Arthur, Corps de Napoleon and the Zulu Social Aid.

In 1872, the Russian Grand Duke Alexis Romanoff visited New Orleans and he inspired the colors now traditionally associated with the Mardi Gras celebration.  The members of the Rex Krewe choose the colors for their symbolic meaning: purple for justice, green for faith and gold for power.  During the Mardi Gras season these colors can be seen in a variety of decorations such as the traditional Mardi Gras “throws”.  Throws are items that krewe members riding the parade floats will toss into the crowds.  The most common throws are strings of colorful beads or doubloons which are aluminum or wood coins usually imprinted with the krewe logo.


Craft – Wooden Initials

For this Craft post I am going to show several different projects that were made with items currently available at Michael’s Craft Stores nationwide.  Recently simple wooden initials, laser cut plaques and frames so I spent a pleasant hour selecting various items for two separate craft projects and list below are the list of supplies and instructions needed.

Michaels 1    Michaels 2

Initial door or wall plaque #1

Supplies –

  • Large wood initial (I used the initial of our last name)
  • 1 oval wood frame
  • 1 laser-cut wood frame with oval opening (it is much thinner than the oval frame)
  • Small piece of material or paper (to use as backing for the initial)
  • Small can of wood stain (I used a deep mahogany stain)
  • Bronze metallic paint
  • Paint brushes
  • Hot glue gun and hot glue sticks

Initial 1 - supplies

 Instructions –

  1. Stain the wood frame and the laser-cut wood frame, let the paint dry completely.
  2. Since both the frame and the thinner laser-cut frame the same dark color I wanted to add some interest.  So, using the bronze paint, I painted an oval shape around the laser-cut frame opening.  Using a gold paint pen, I drew a continuous line accenting the curves of the laser-cut frame.
  3. Attach the two pieces, the wood frame and the thinner laser-cut wood frame, together using hot glue.
  4. Next, I painted the large initial with the bronze paint, let the paint dry completely.
  5. Then, I cut a piece of scrapbook paper that looks like leather into the size and shape of the frame opening.  Then, attach the painted large initial to the paper using the hot glue.  Before gluing the initial, be sure that the placement is centered to show within the rectangular frame opening.
  6. Finally, assemble all the pieces together to complete the craft project.

Initial 1 - finished

Initial door or wall plaque #2

Supplies –

  • Small wood initial (I used the initial of my daughter’s first name)
  • 1 rectangular wood frame
  • 1 laser-cut wood frame with rectangular opening (thinner than the oval frame)
  • Small piece of material or paper (to use as backing for the initial)
  • Pink paint
  • White paint and clear sparkle paint
  • Paint brushes
  • Pink crystals, self adhesive
  • Hot glue gun and hot glue sticks

Initial 2 - supplies

 Instructions –

  1. Paint the wood frame with the pink paint, let the paint dry completely.
  2. Using the white paint as a base color, I painted the laser-cut frame and the small wood initial, let the paint dry completely.
  3. Then, using the clear sparkle paint as a clear top color, I applied two layers of paint to the laser-cut frame and the small wood initial, let the paint dry completely between the two coats.
  4. Attached the two pieces, the wood frame and the thinner laser-cut wood frame, together using hot glue.
  5. I cut a piece of scrapbook paper in glitter purple into the size and shape of the frame opening.  Then, attach the painted small initial to the paper using hot glue.  Before gluing the initial, be sure that the placement is centered to show within the rectangular frame opening.
  6. Individually attached the pink crystals to the border of the fame to add a little more sparkle.
  7. Finally, assemble all the pieces together to complete the craft project.

Initial 2 - finished

So, next time you are looking for a personalized gift for a special occasion, such as a new baby, wedding or new home celebrations, please consider one of these wooden initial craft projects because they would make a great gift!!

Craft – Miniature Bottle Necklaces

I have seen a variety of miniature bottle necklaces on many different craft websites. These miniature bottle necklaces would make great gifts for children or adults and they could also make wonderful paper favors for a little girl’s birthday celebration.  For this post I will go into detail on the supplies needed for several themed miniature bottle necklaces with ideas for several more.

Supplies for miniature bottle necklaces

In general, the supplies need to make a miniature bottle necklace are very minimal but the important thing to remember is that the shape of the bottle, the content used inside the bottle, the selection of chain or ribbon used to wear the bottle and any additional charms attached to the bottle.  All these elements will create the unique style for each individual miniature bottle necklace.

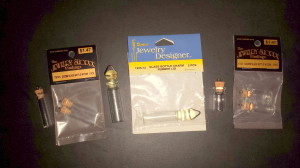
Miniature bottles – Miniature bottles come in a variety of sizes.  The content of the bottle or personal preference should be taken into consideration when selecting a miniature bottle.  The bottles can be found in the jewelry section of most major craft stores and they range in size from very small to large.

CRAFT NOTE:  For the craft projects shown in this post I used miniature bottle sizes ranging in size from one inch to over two inches in length.

miniature bottles

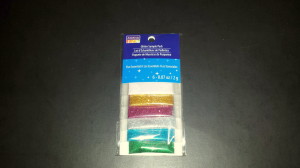
Content for the miniature bottle necklaces – The content of each bottle is defined as the filling used inside the bottle necklace, some suggested contents can be glitter, sand, or maybe a liquid such as honey or colored water.  Here is another filling suggestion … who remembers those mustard seed necklaces from their childhood?  Others content ideas are small watermelon seeds, tiny seashells or pine cones or acorns.  The content selection is only limited by the imagination and the size of the bottle.

CRAFT NOTE:  The important thing to remember is that no matter what the content is used for the miniature bottle necklace, the lid needs to be securely attached to prevent the contents from leaking or spilling.
miniature bottle glitter

Necklace used to hang or wear the miniature bottle – The miniature bottle will be hung on a necklace to wear as a piece of jewelry.  The necklaces can variety in style, such as chains, thin ribbon or silk cords.  The length of the necklace is determined by personal preference.

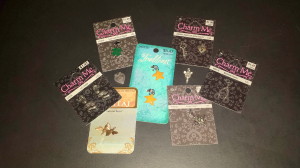
Optional charms – A variety of charms can be attached to the bottle and the charm is usually suggested by the content of the bottle, such as a bottle filled with snow-like glitter has a snowflake charm or a bottle filled with sand has a starfish charm or a bottle filled with honey has a bee charm.  CRAFT NOTE:  The use of a charm attached to the miniature bottle necklace will add personality and interest to the jewelry’s appearance.

minature bottle charms

The following are few ideas for miniature bottle necklaces:

 Wish or Fairy-dust miniature bottle necklace

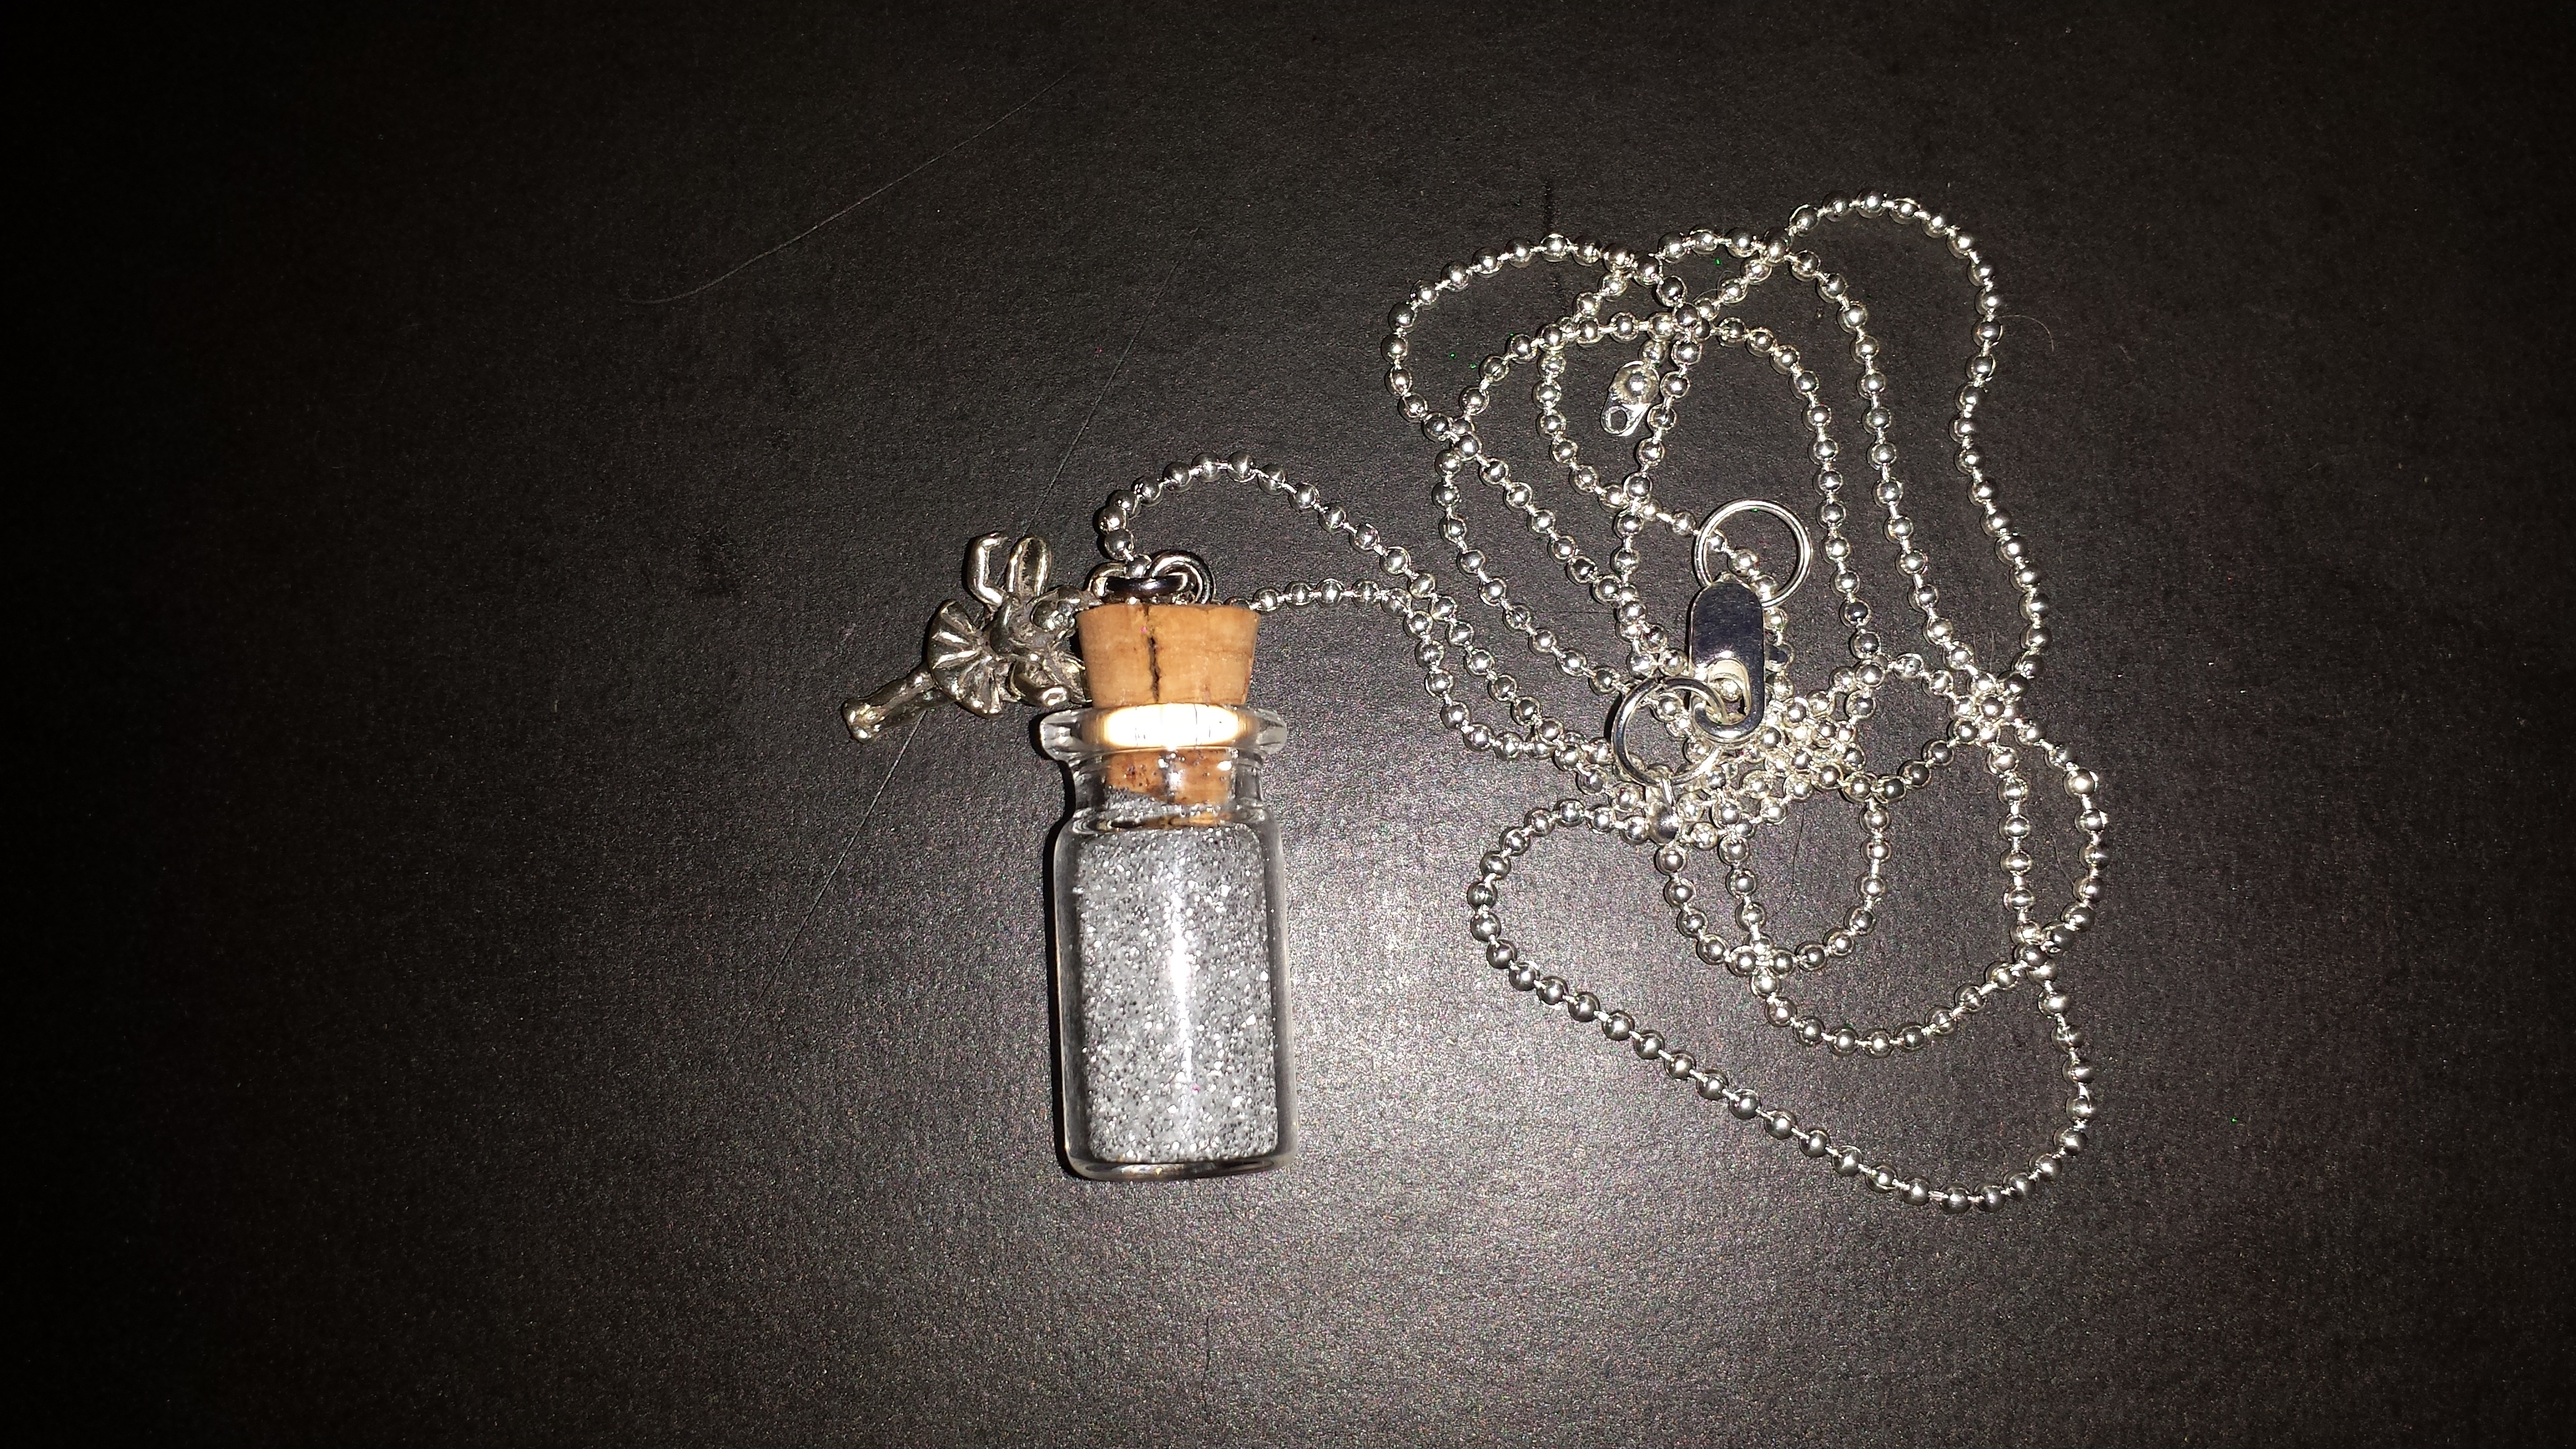
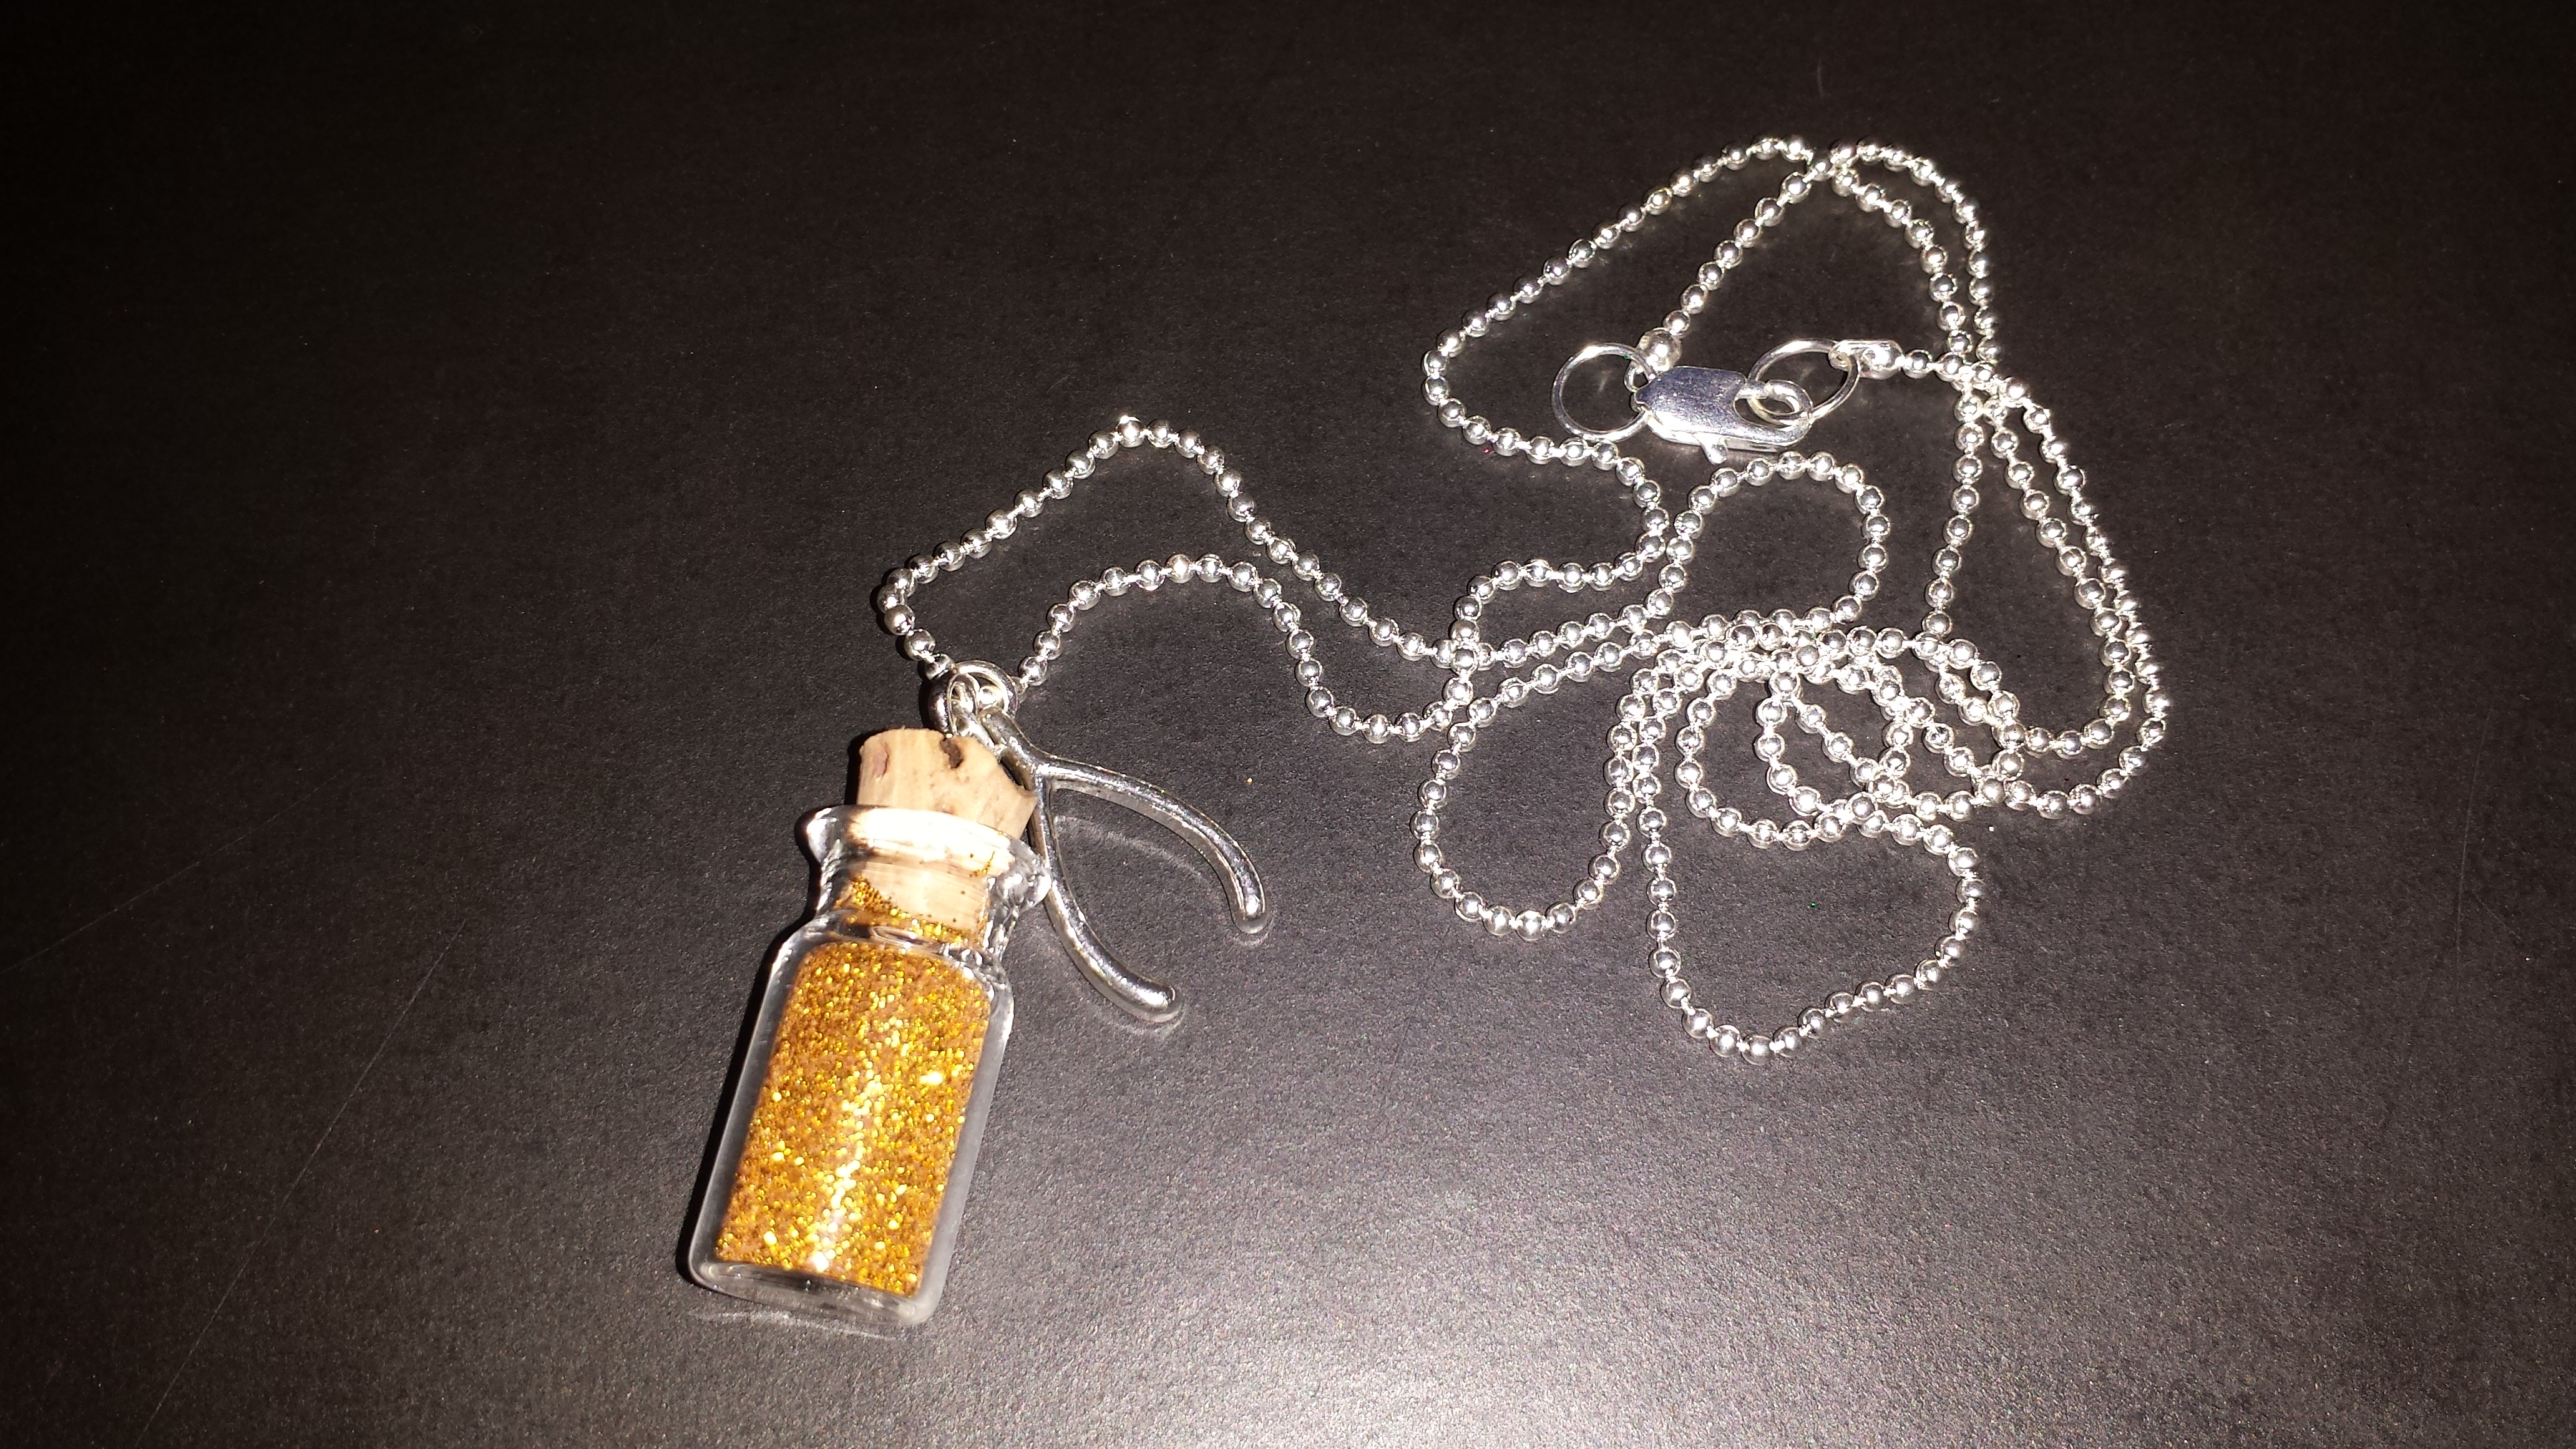
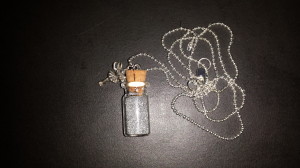
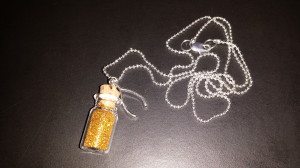
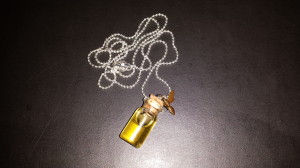
This is one of the most common of styles for a miniature bottle necklace.  Shown below are two wish miniature bottle necklaces.  The bottles are filled glitter (one silver glitter and the other gold glitter), worn on a silver chain necklace and with a special “wish” charm attached (one has a silver fairy charm and the other a silver wishbone charm)

Fairy-dust bottle necklace    Wish bottle necklace

Seasonal -themed miniature bottle necklace

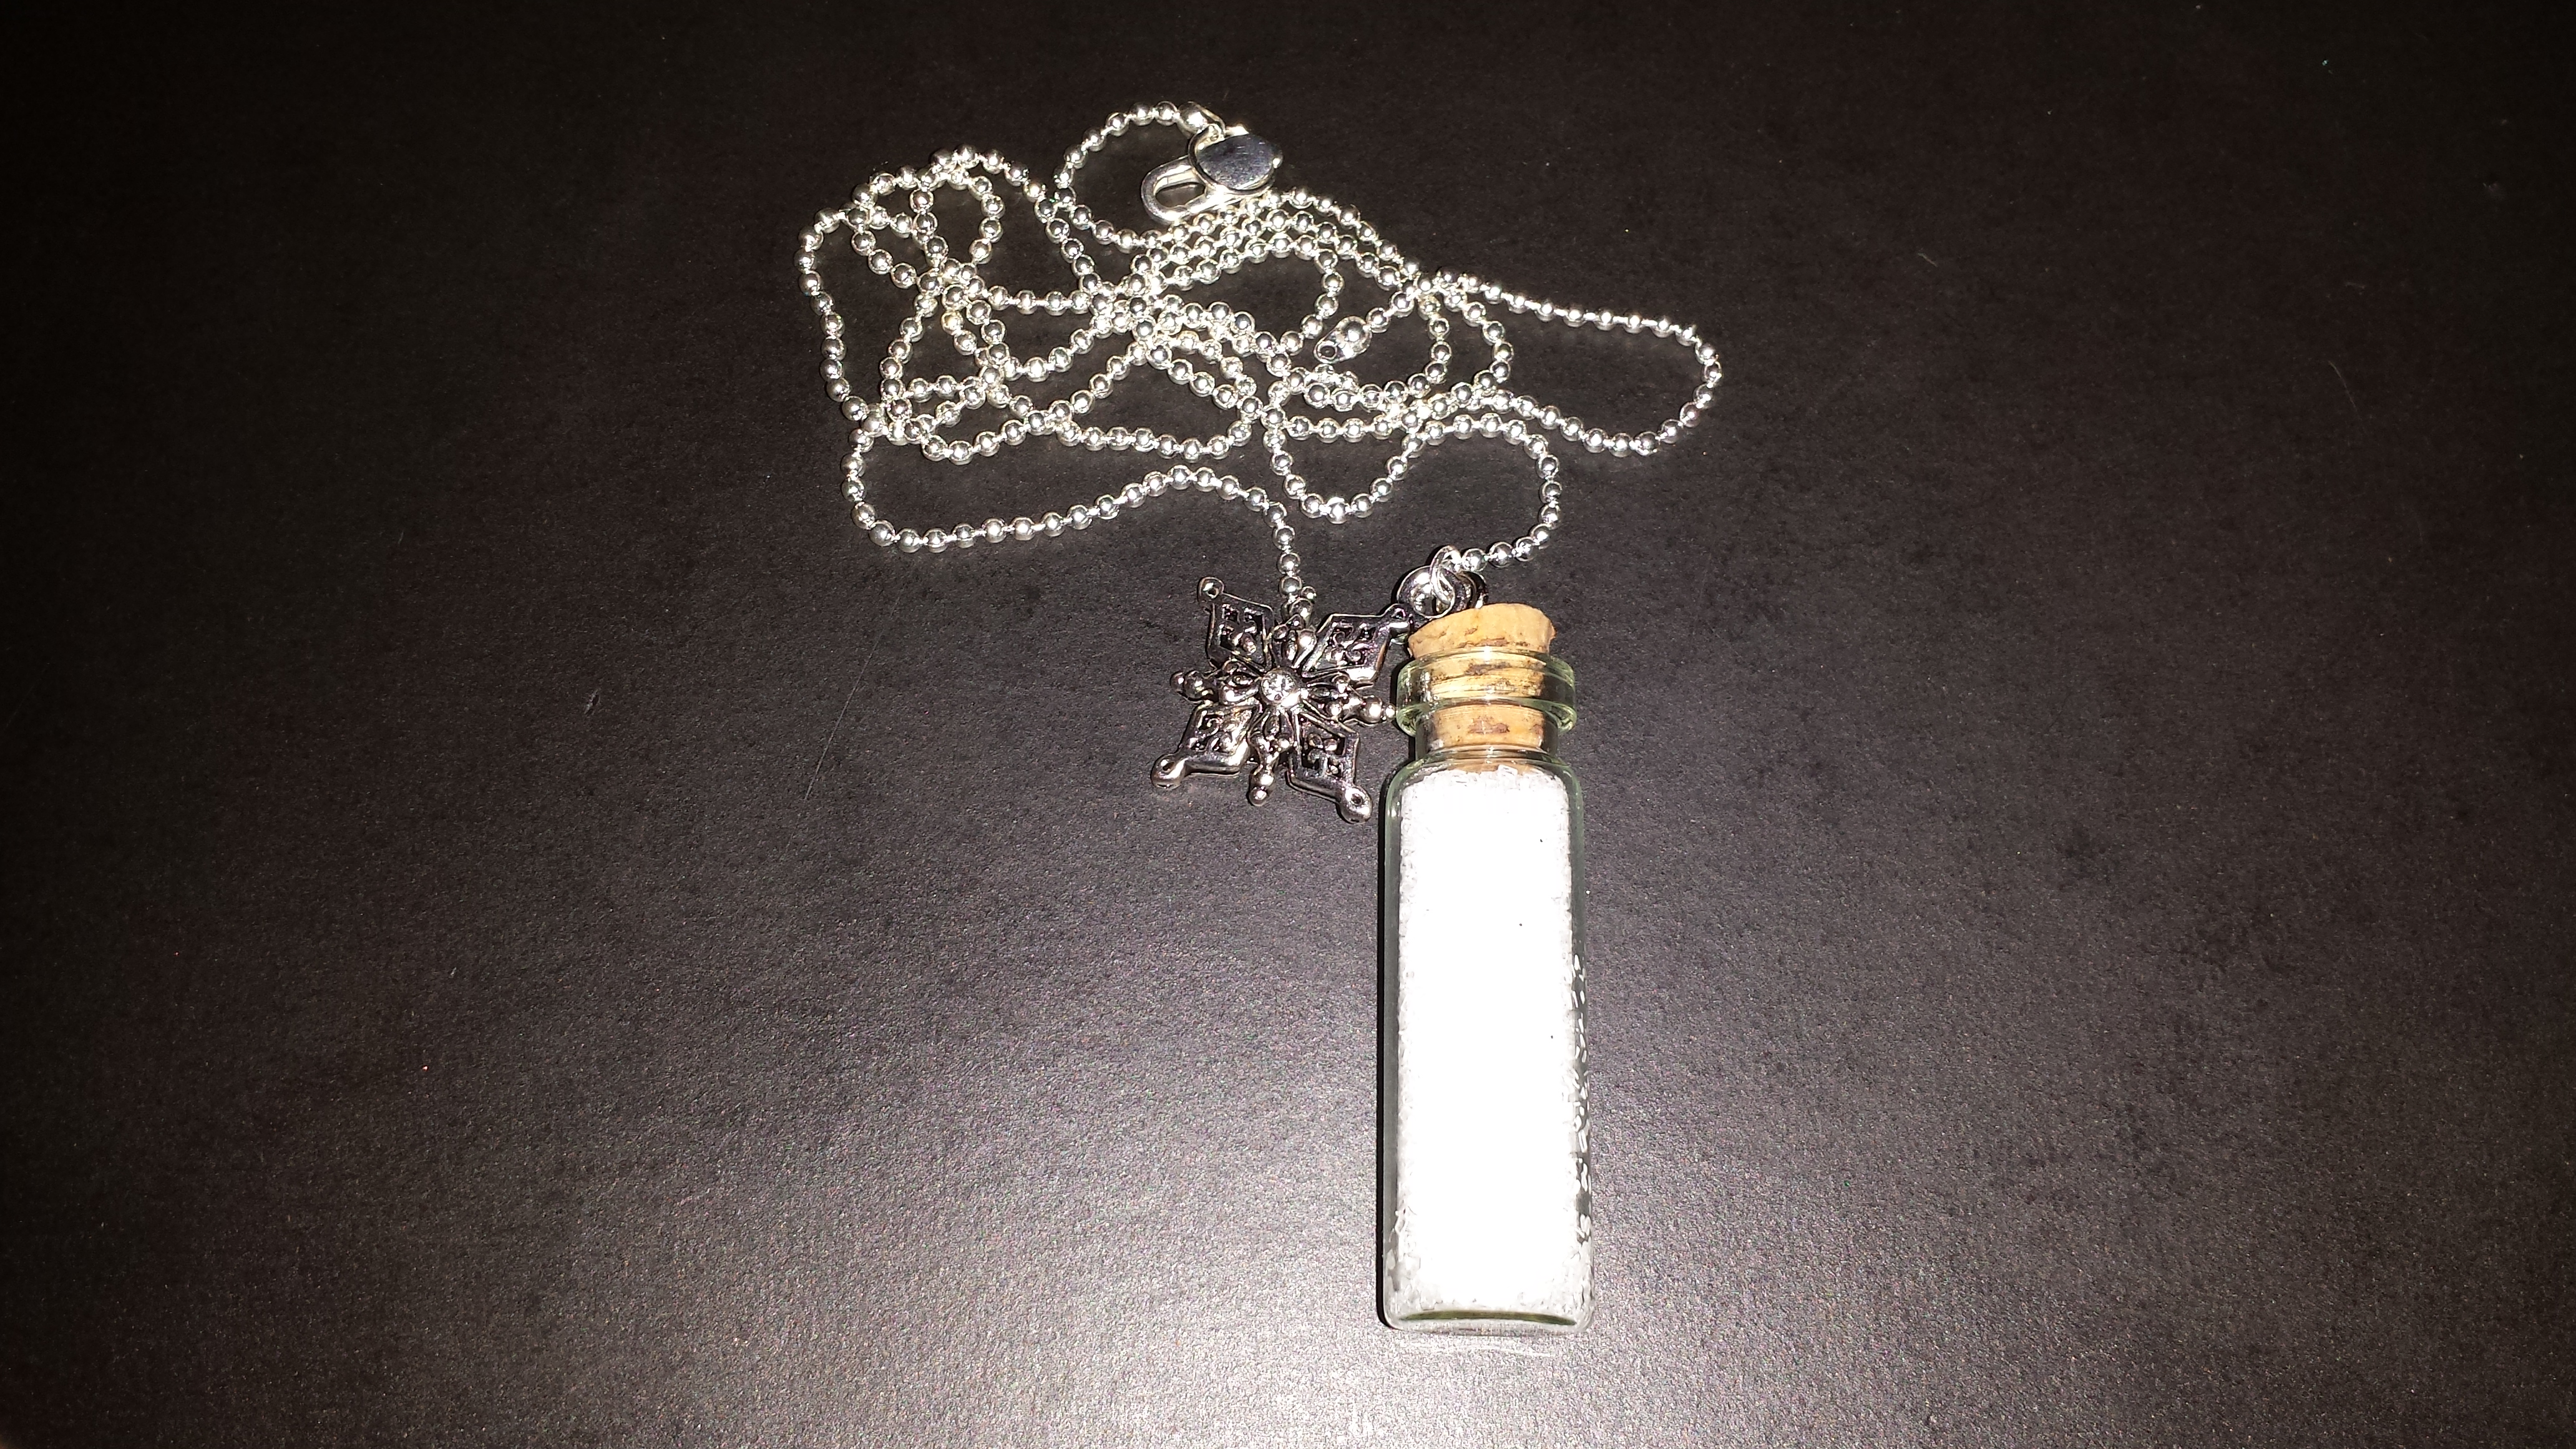
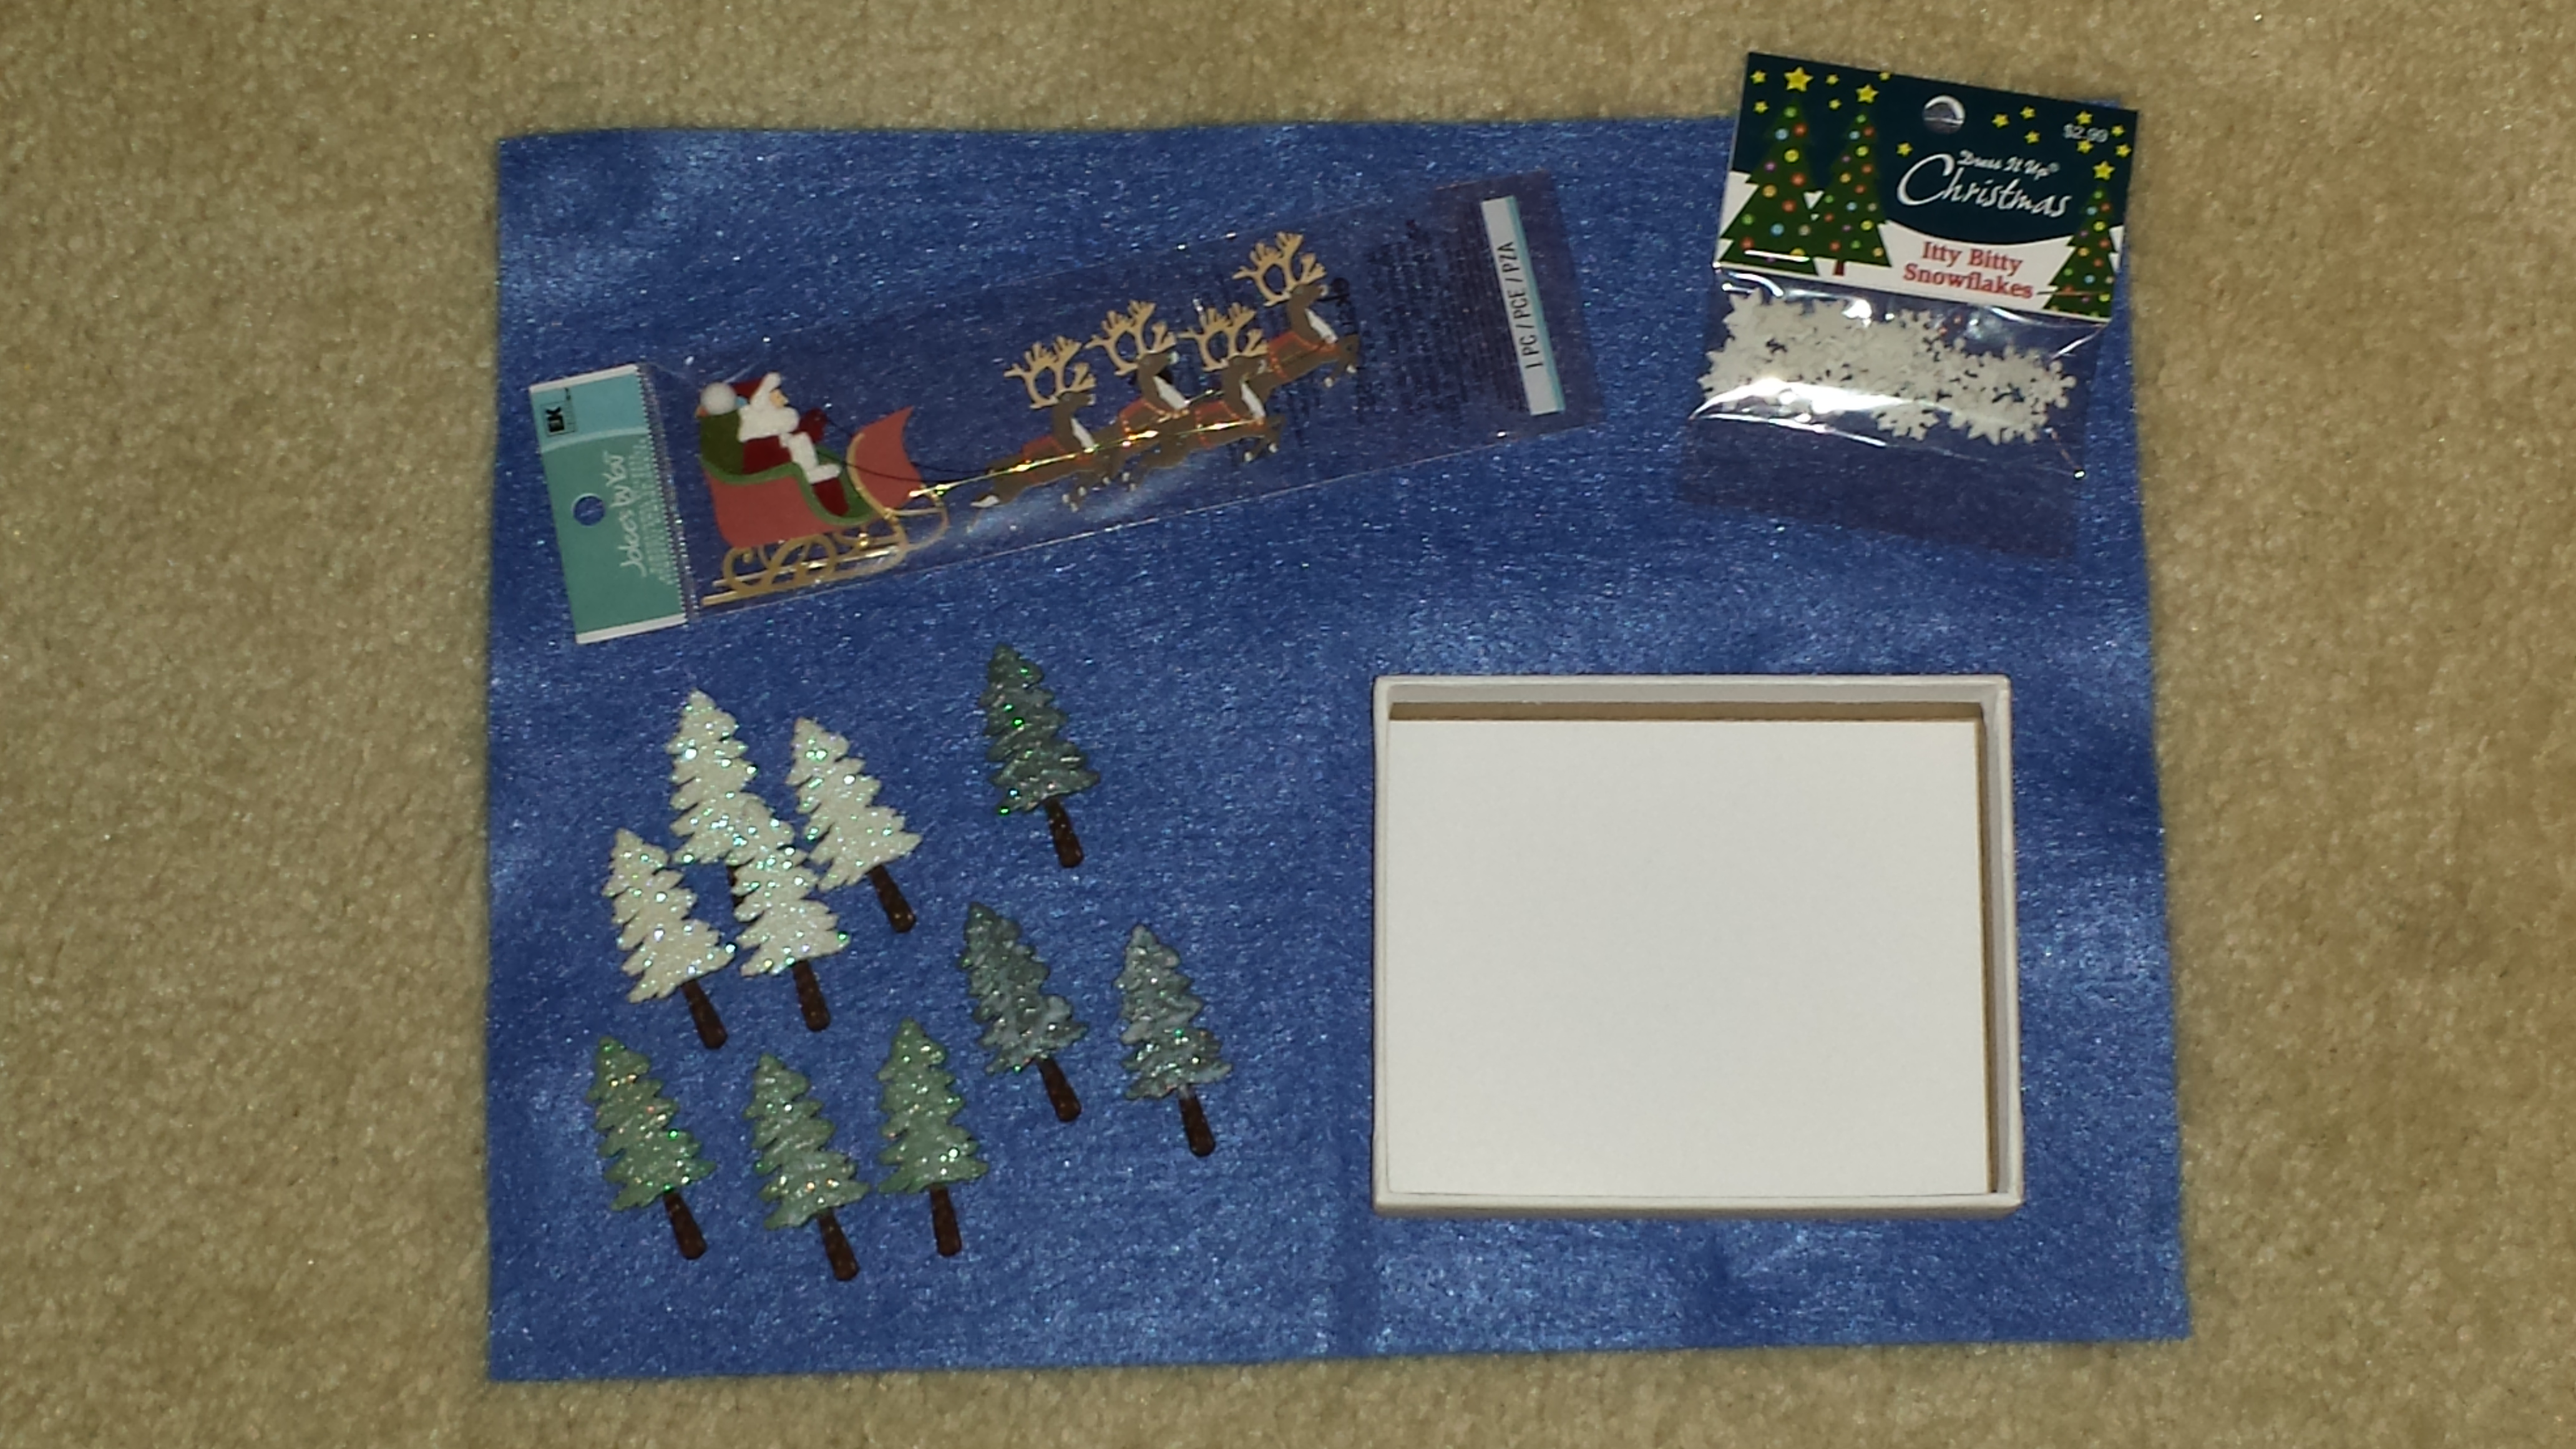
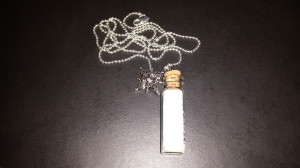
This first seasonal miniature bottle necklace is filled with white glitter that is meant to resemble snow.  The bottle is accessorized on a silver chain necklace with a silver snowflake charm attached.

Snow-filled bottle necklace

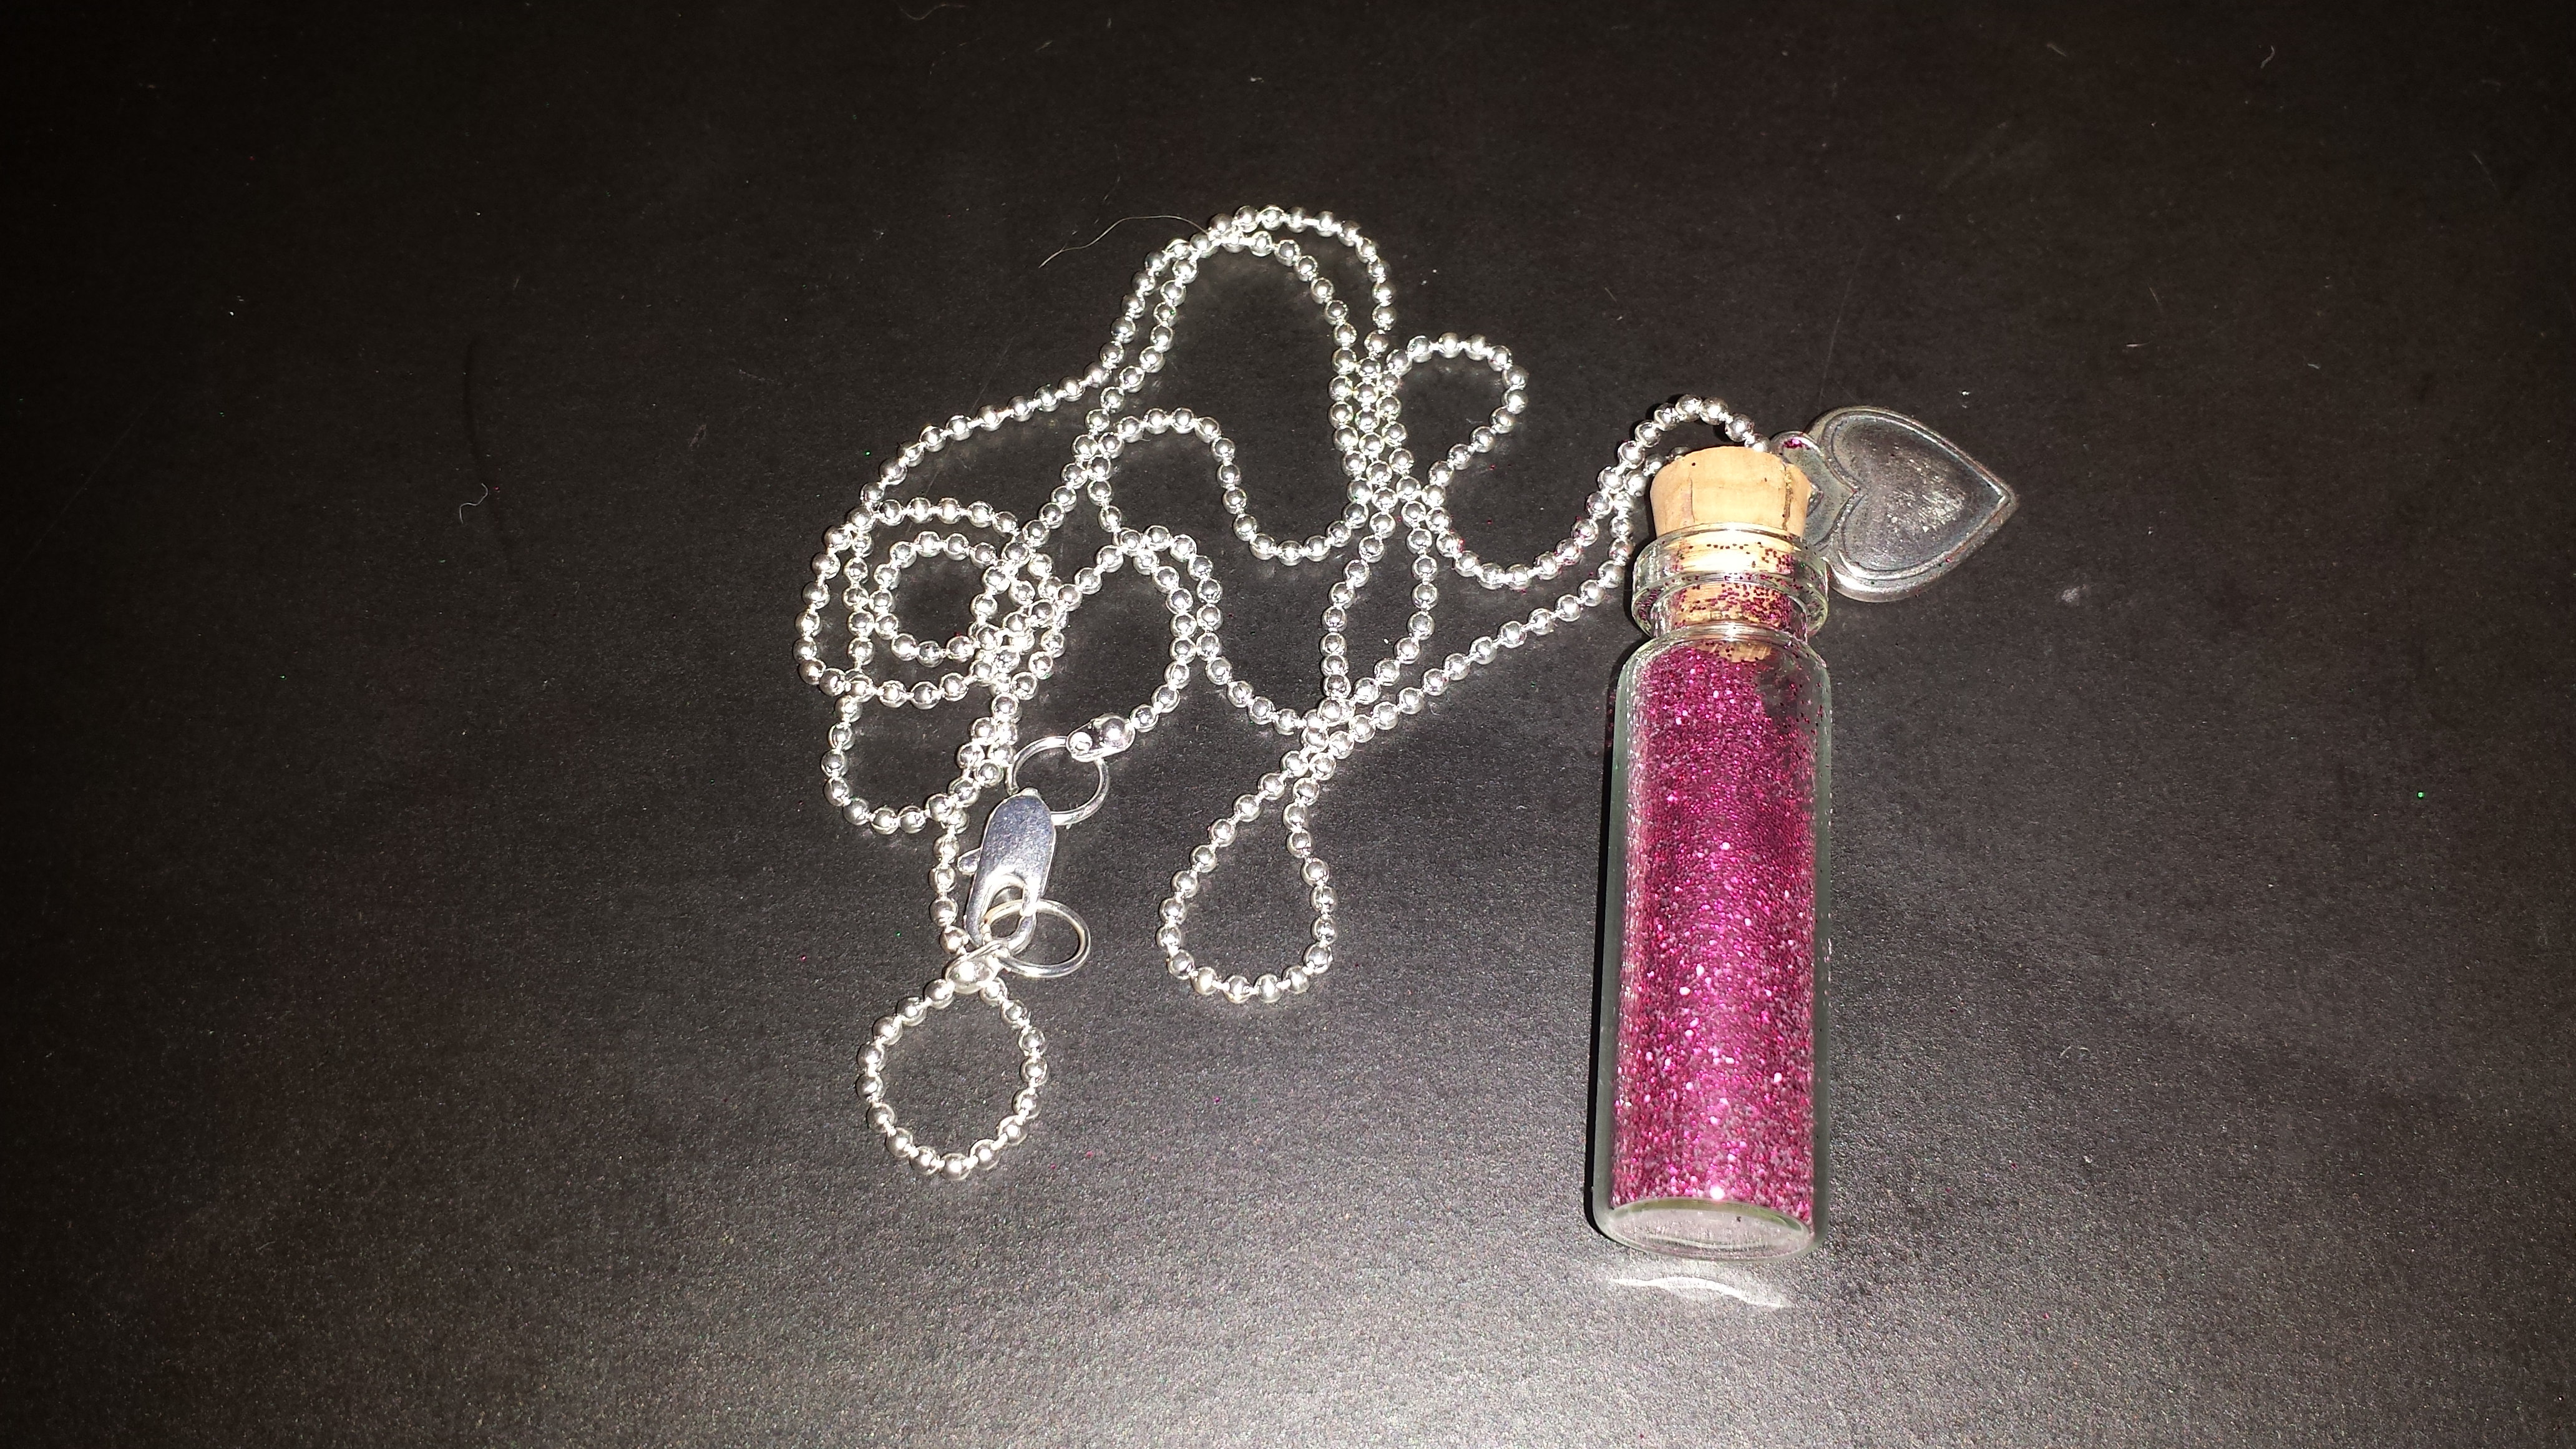
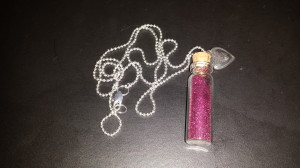
This Valentine-themed miniature bottle necklace is a lovely idea for a present to give to a loved one or perhaps a gift for a child’s special teacher.  The bottle is filled with red glitter accessorized on a silver chain necklace with a silver heart charm attached.

St, Valentine's Day bottle necklace

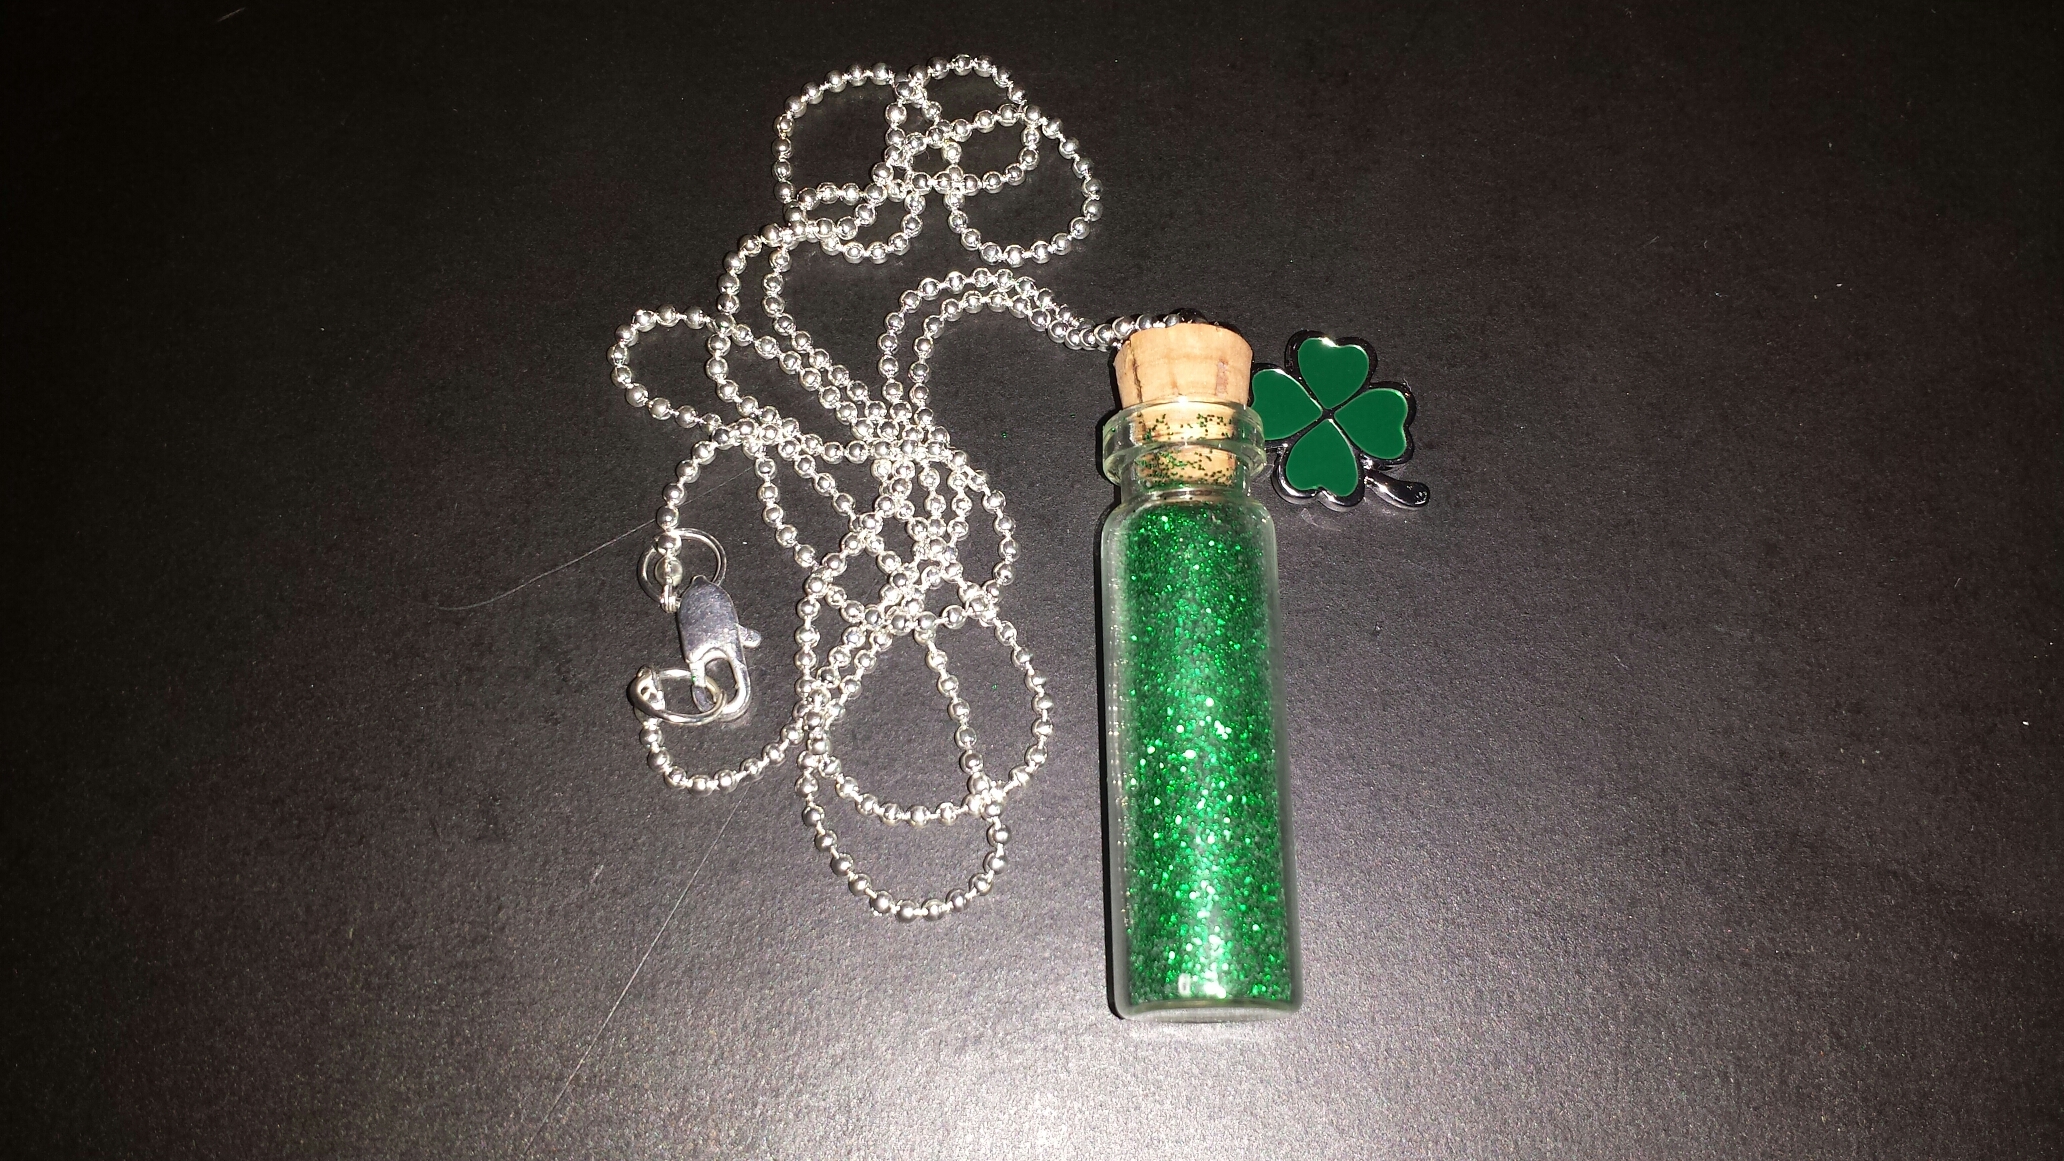
Here is a cute idea to wear green on this Irish special holiday; it is a bottle filled with green glitter, worn on a silver chain necklace with a silver green enameled four-leaf clover charm attached.  Another idea for a St. Patrick Day themed miniature bottle necklace is a bottle filled with gold glitter with a small leprechaun charm attached.

St. Patrick Day bottle necklace

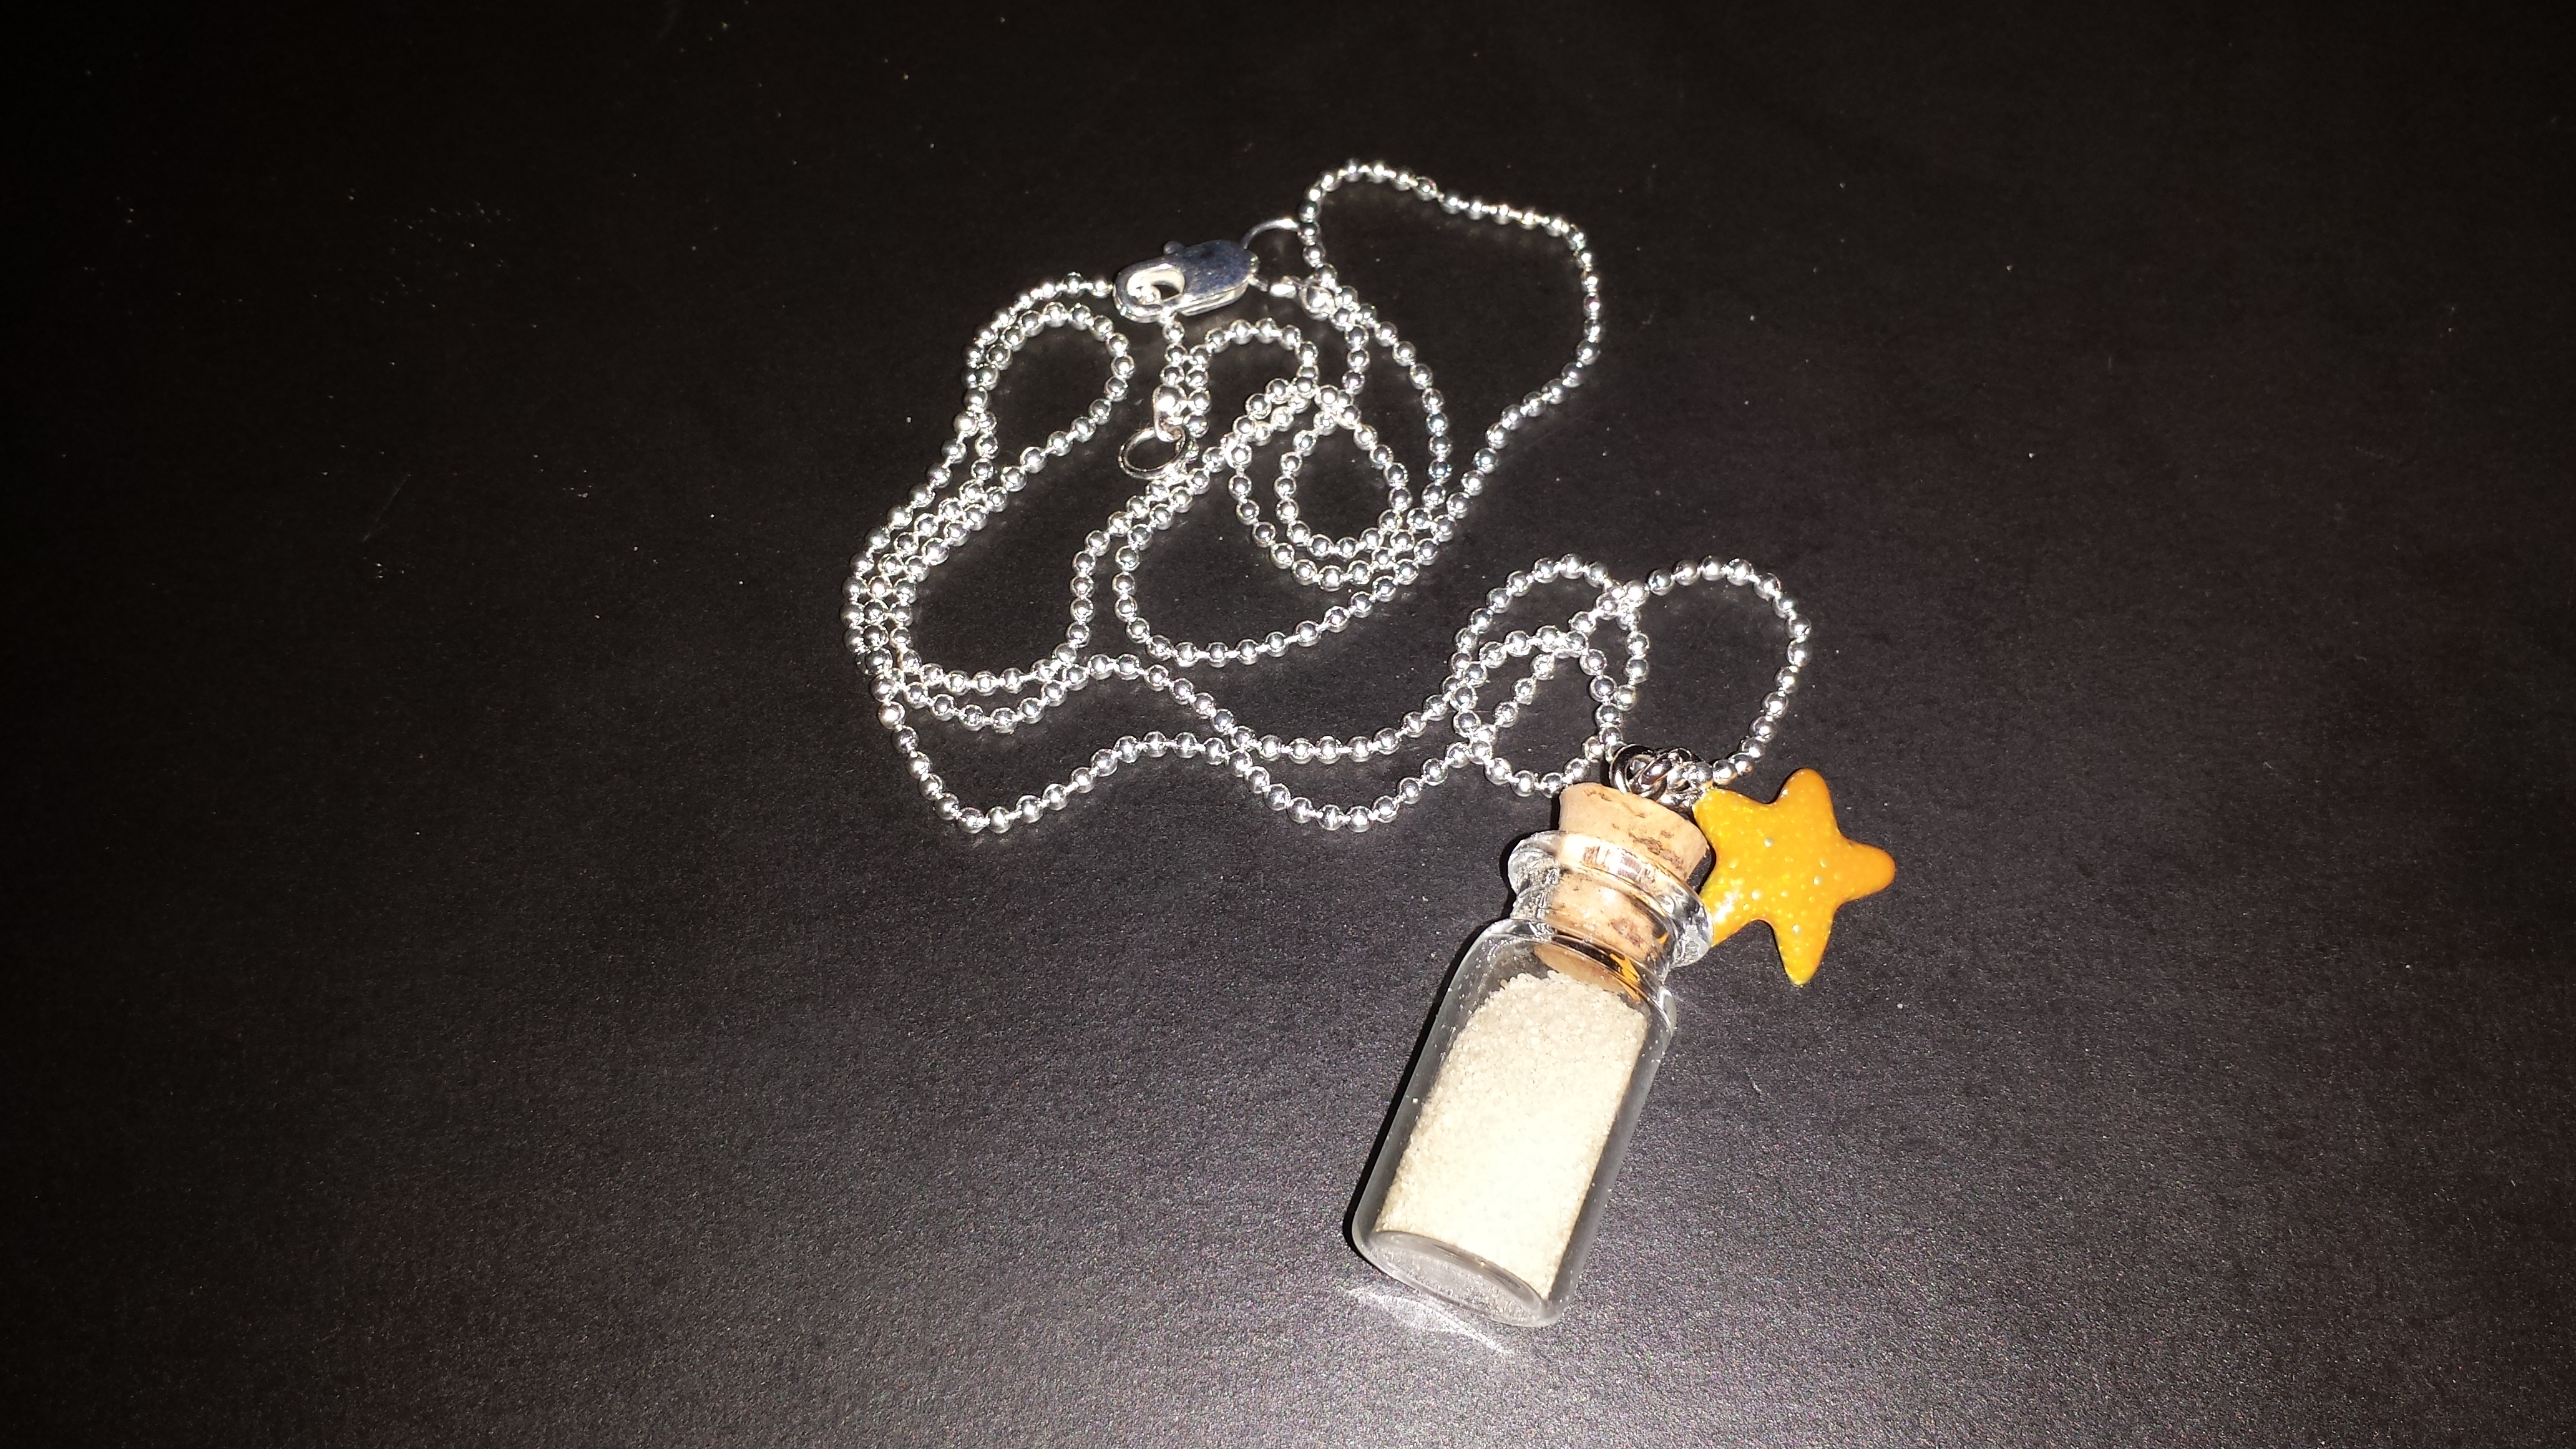
This miniature bottle necklace is a wonderful way to remember the beach or a special summer vacation.  The bottle is filled with sand, worn on a silver chain necklace with a silver enameled starfish charm attached.  Another idea for a beach-themed miniature bottle necklace is to add small seashells inside the bottle with just a little amount of sand.

Beach-themed bottle necklace

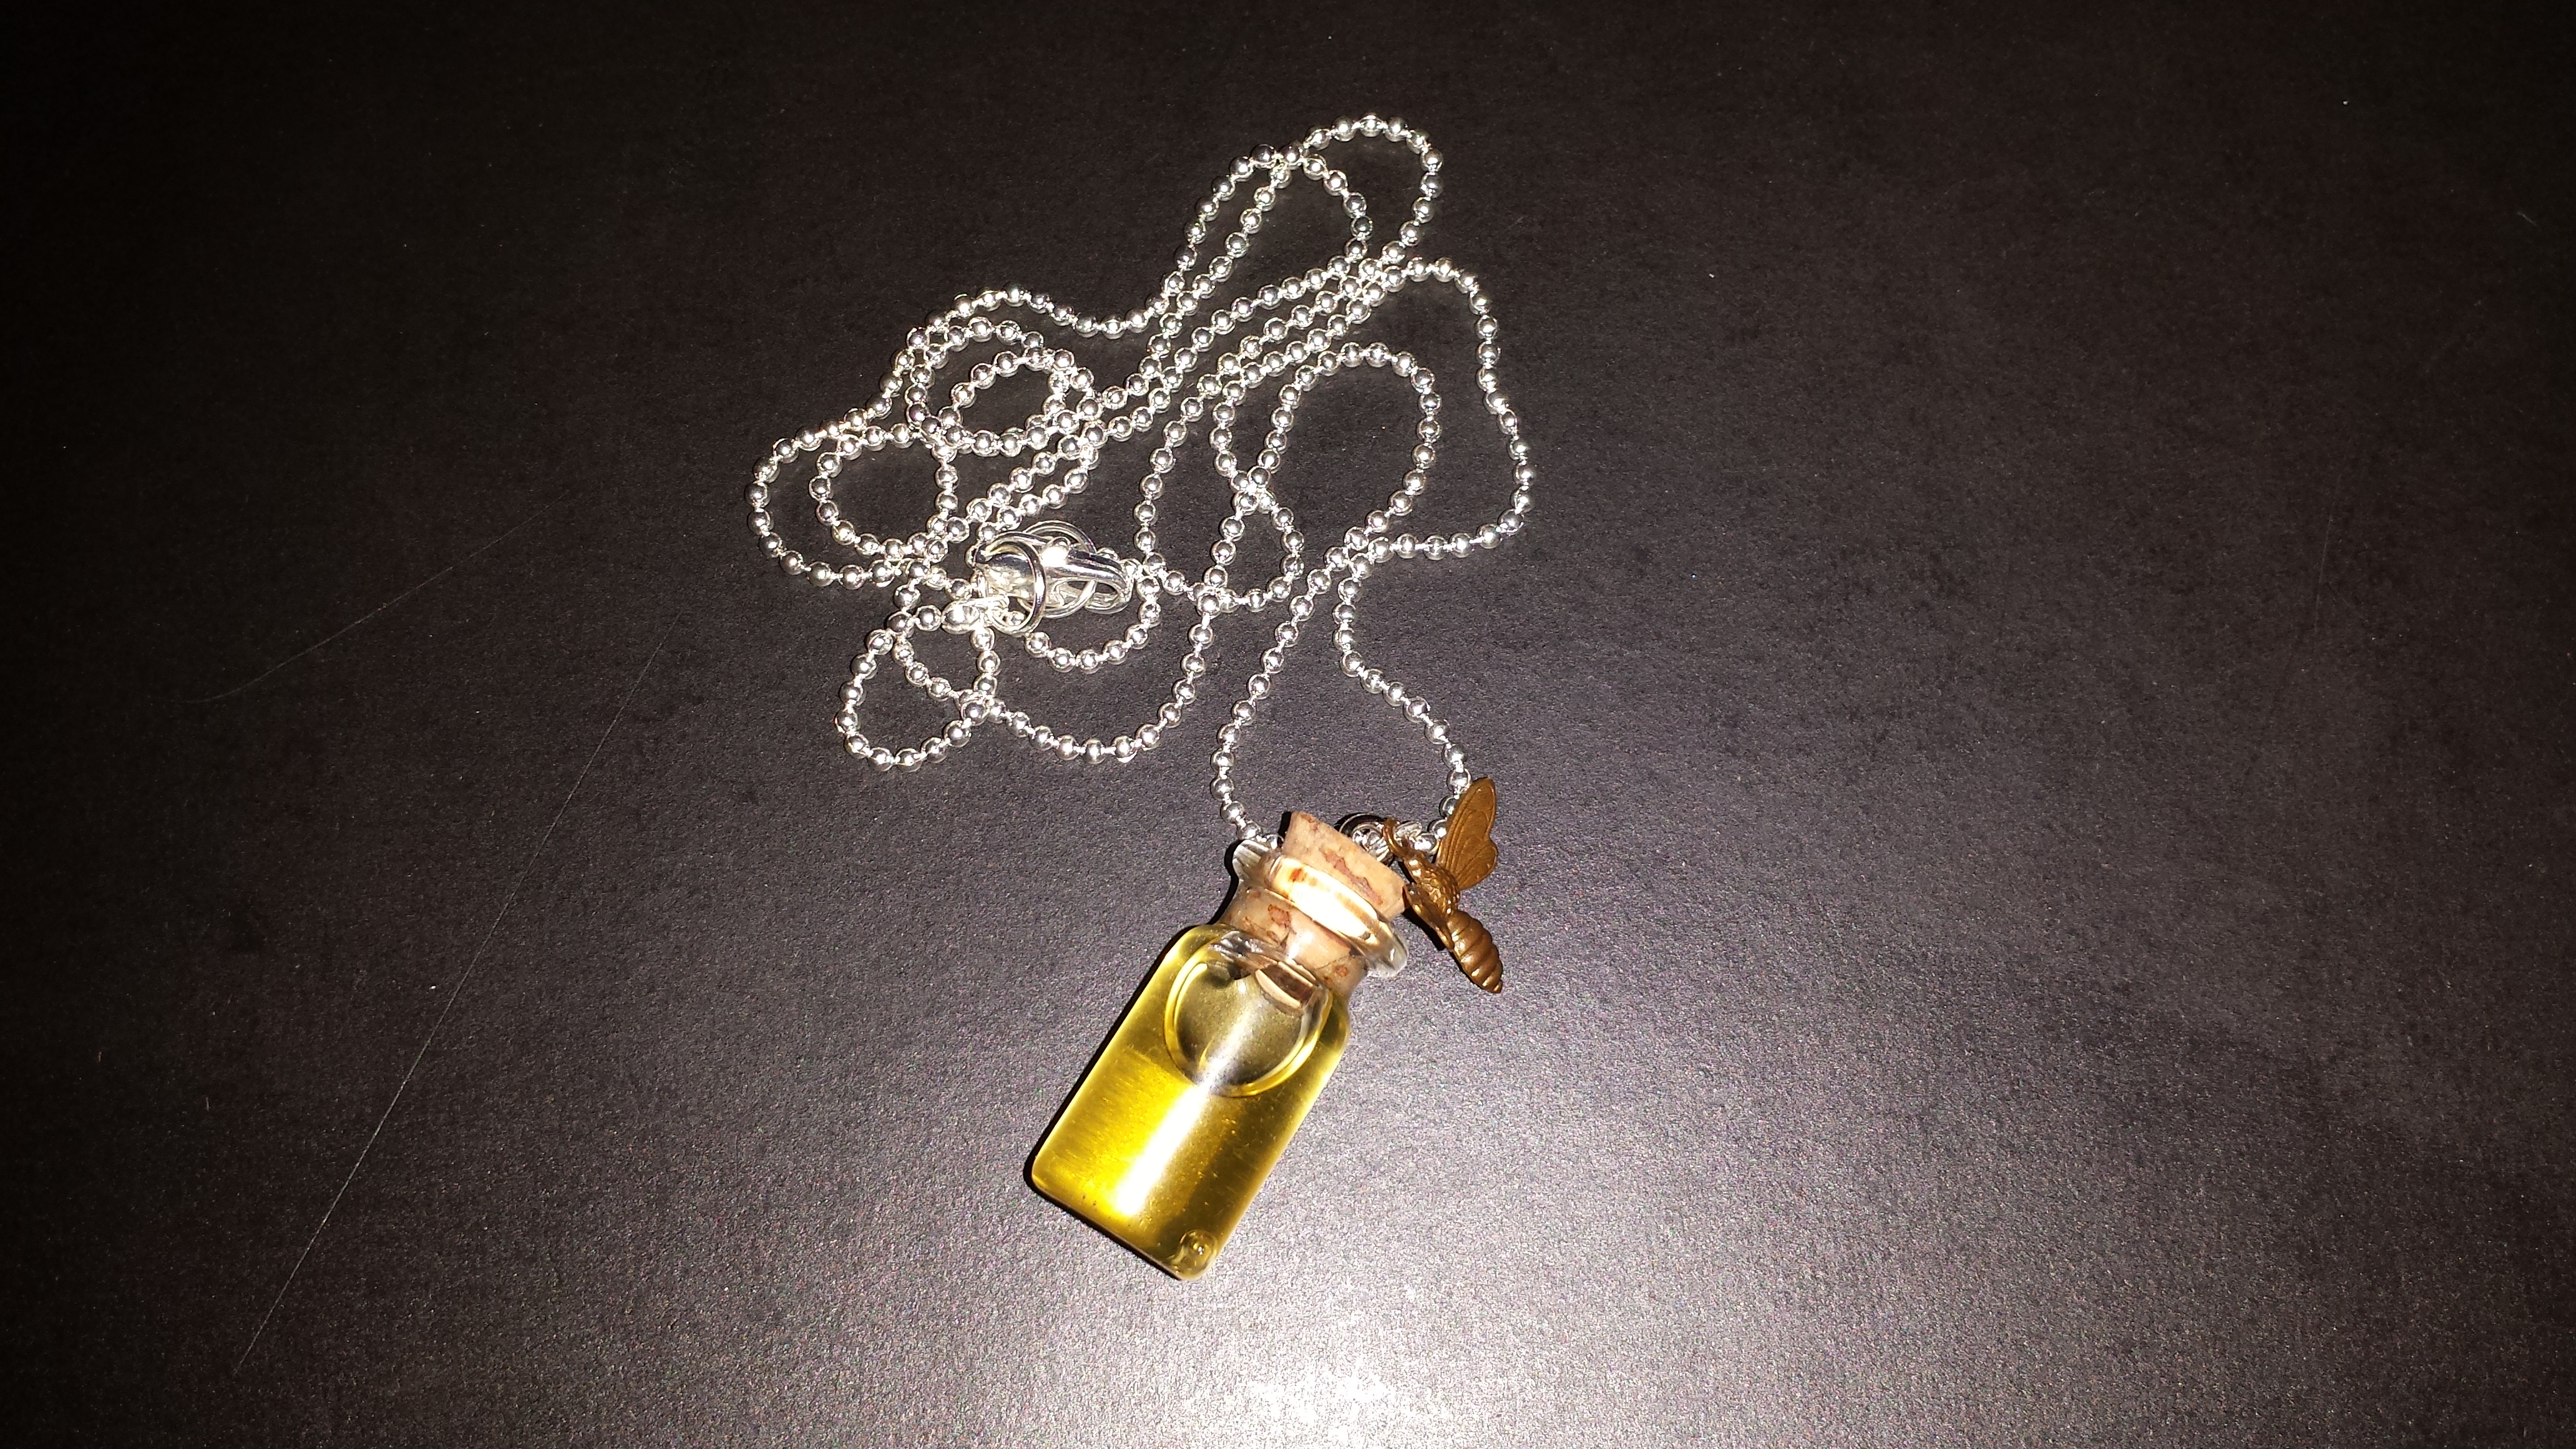
“Honey-pot” miniature bottle necklace

This sweet idea for a miniature bottle necklace, it is a bottle filled with honey, worn on a silver chain necklace with a bronze-colored metal bee charm attached.  When wrapping the bottle necklace as a present here is a special idea – put it in a small gift box and include a note referring to the “sweetness of life”.

Honey-pot bottle necklace

As you can see from the ideas above, there are endless combinations for making these simple and inexpensive miniature bottle necklaces for any occasion and holiday.

Craft – Christmas Gift Card Box

If you are looking for a special way to give a Christmas gift card here is a unique idea. The Christmas Gift Card Box needs just a few supplies and easy, simple instructions to make a wonderful presentation.  Craft Note: The stickers and other items that I used for this project might not be available but don’t be discouraged, instead visit your local craft store and be inspired by the stickers and other items in the scrapbook section.

Christmas Gift Card Box – supplies

  • Small box
  • Felt, color is determined by the “scene” in the shadowbox
  • A variety of scrapbook 3-dimentional stickers and/or small plastic Christmas-themed items
  • White glue, it will work better than a glue stick on the felt and accessories

Christmas Shadowbox - supplies

Christmas Gift Card Box – instructions

  1. Take the measurements of the inside dimensions of the bottom of the box.  Use these measurements to cut the felt into five pieces, one for the bottom and the four sides of the box.

Christmas Shadowbox - bottom of box 1Christmas Shadowbox - bottom of box 22.  Glue these five pieces to the inside of the box to fully line the interior.  By lining the box it will give the shadow box a wonderful background for the stickers or other accessories.Chirstmas Shadowbox - bottom of box 3

3.  The next step is where the look of the “scene” if determined by the stickers and other items available in your local craft store.  Using 3-dimensional stickers helps to create depth to the shadowbox and avoids the flatness of regular stickers.  Also check out the other sections of the craft store for small plastic Christmas items that could inspire a “scene” for the shadowbox.

Christmas Shadowbox - final

The Christmas Shadowbox gift Box is a beautiful way to present a gift card.  After the shadow box is completed, attach the gift card to the inside of the top of the box.