Decor – Setting up a Department 56 Village

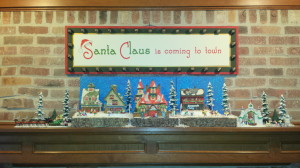
North Pole display 4

Just like this month’s other Décor post, Setting up a Fontanini Nativity, another one of the highlights of our Christmas home decorations is our Department 56 North Pole Village.  When I worked in a retail store during the 1990s, we carried the collection of Department 56 villages and the North Pole one was my favorite … and of course, I began collecting pieces for our home.  Soon after, my husband and I were blessed with a beautiful daughter.  I enjoyed setting up the North Pole Village every year for her to imagine Santa and his elves getting ready for Christmas Eve when Santa would get into his sleigh pulled by eight tiny reindeer to deliver presents to the good little boys and girls.  (somehow, my husband always seems to end up with a lump of coal in his Christmas stocking!)

Usually, months before Christmas, I search the internet for ideas for my Department 56 display but most of the websites only show finished displays and never go into much detail and only have very limited instructions on how to make those displays.  For this post, I thought it would be interesting to show step by step how I set up this year’s North Pole Village Display.

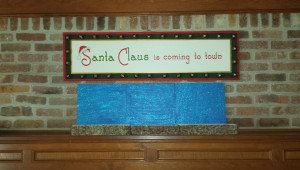
The North Pole display base

The first step to setting up the North Pole Village is always the base or foundation for the display.  As you can see in the photos at the end of this post, over the years in our different houses in California and the Midwest, the display location and layout of the North Pole Village has changed several times.

For this year’s display, I used a base with three interlocking sections that can be used as one long flat surface or can be stacked in a variety of positions to achieve different looks for the display.  I like the flexibility of the sections because I’m always changing the location of the display into different rooms of our home or adding more accessories.  A few years ago, I had purchased the base at a local craft store at an after Christmas clearance sale for a greatly reduced price.  (This one is very similar to the other one that I used for this year’s Fontanini Nativity Display)

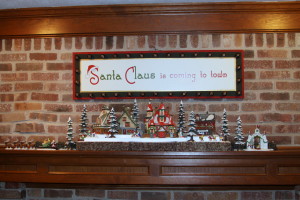
The display base that I am using has a white top surface so it is great for the North Pole Village; it gives the illusion of snow.  I set all three of the sections flat on the fireplace mantel and it fits perfectly with the depth of the space.  Next, I position three “sky panels behind the base, I used three sections of Styrofoam painted a beautiful blue with an overcoat of clear sparkle paint to add a wonderful twinkle when the overhead lights shine on the display.  Later I will attach our Christmas Stockings on hidden hooks under the fireplace mantel.  As I mentioned before, I sometimes change my home seasonal decorations from year to year, and as an example, if I were to display the North Pole Village in our family room bookshelves instead of the fireplace mantel I would stack one section on top of the other to fit the narrower space of the shelf.

North Pole display 1

A SPECIAL CRAFT NOTE:  One of the reason’s that I displayed the North Pole Village on the fireplace mantel was because I had made a special Christmas sign last year to hang over the fireplace instead of the English landscape painting that is normally hung there during most of the year.  The seasonal sign uses a Christmas window/wall decal and the wording, “Santa Claus is coming to town”, is perfect to hang above the North Pole Village.  The sign is made from a painted wood board cut specifically to fit the space requirements of the decal with a margin of a couple of inches for me to add about 30 bronze jingle bells for just the right decorative touch, I was very happy with the results of this Craft project!  (The sign was very easy to make, please see the instructions for similar seasonal signs in the Craft post – Halloween signs.  The steps are almost the same as the ones I used to create the Christmas sign but with different window/wall decals and accessories)

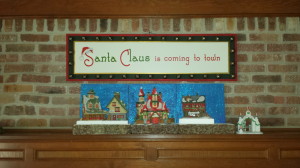
The North Pole main display pieces – the buildings

25 years ago I purchased three Department 56 North Pole Village buildings; they were the “Route 1 North Pole” the home of Santa & Mrs. Claus, the “Elf Bunkhouse” and the “Reindeer Barn”.  Later I added “Santa’s Woodworks” and the “North Pole Gate”.  These are the only buildings in my collection so, compared with other Department 45 collectors, my display is very small.  I like the idea of a smaller display for several reasons, the first is that there is relatively less money spent and the second reason is that the display has more flexibility to set up in any room or location in our house.  I appreciate the idea of the more elaborate displays but I prefer my set up time to be only a few hours as opposed to a process of long hours sometimes over a period of several days.

Almost every time I set up the North Pole Village, I always position “Route 1” near the center of the display because it is the largest piece and also because I think it should be the focal point.  To the left, I placed the “Elf Bunkhouse” and the “Reindeer Barn”.  To the right, I placed the “Santa’s Woodworks” building and further to the right, off the display base, I place the “North Pole Gate”.  (These building positions are almost identical to the previous year’s display)

When I am placing the buildings in the display, I will sometimes position them at different angles because I think it adds more interest to the display instead of having everything perfectly lined up in a straight row.  I will also raise the height of the different buildings to also create levels that will give additional interest to the display.  I use white Styrofoam about one inch thick and cut it to fit the dimension of the buildings with an extra one or two inches around the base allowing space to set the display’s figurines or accessories, if I want a higher platform I will stack two pieces of Styrofoam.  The white color of the Styrofoam matches the white surface of the base for an uninterrupted look that doesn’t break the illusion of a snow covered ground.

North Pole display 2

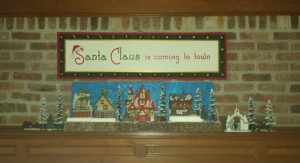
The North Pole display landscape

The next items that I add to the North Pole display are three sets of 7”, 8” and 9” pine trees for a total of nine trees that I scatter across the display.  I usually position the taller trees to the back and the shorter trees to the front of the display.  These trees were purchased at Walmart several years ago for a great price, they were less expensive than the Department 56 trees and I was able to purchase almost twice as many trees for about half the price of the name brand ones.  Buying from other sources assures I am not limited to the selection only available through Department 56 and my display accessories will be unique.

On either side of the display base I set up several sections of rock wall, this is another example of buying from another source.  If you keep your eyes open while shopping in the stores right after the Christmas items go on sale it is a great opportunity to add to the items for your display.  By positioning the rock walls off the base and onto the fireplace mantel it helps to continue the display with additional items that did not fit onto the base.  One example is the North Pole Gate is positioned off to the right of the base but becomes an extension of the scene with the rock wall behind.

Also added to the North Pole display are several Department 56 “Candy Cane Lamposts” that are positioned between the buildings.  To complete the landscape, and even though the top of the base is white to give the illusion of snow, I add more artificial snow to the display to make it even more of a winter wonderland!   

North Pole display 3

The North Pole display accessories – people and animals

The last items that I add to the North Pole display are Santa and Mrs. Claus, the elves and set of reindeer with the sleigh loaded with presents.  Santa is positioned near the sleigh checking his list of naughty or nice boys and girls.  It is set to the left of the base and on the fireplace mantel in front of the rock wall.  Mrs. Claus is standing in front of the Claus home waving to goodbye to Santa.  Scattered throughout the display are several elves, some are carrying packages of toys, having fun on sleds, sitting around the North Pole and some are training the reindeer.  One special group of elves, “Proud Papa and Mamma”, represents our little family.

Finally, as previously mentioned, I don’t have any problem incorporating non- Department 56 items to our North Pole display.  Sometimes these pieces and unusual elements can add interest to a display.  An example of non-Department 56 figurines are several miniature ornaments that I found in a local retail store of the characters from the classic animated 1964 Christmas special, “Rudolph the Rednosed Reindeer”.  Of course, there are Rudolph and Clarice the reindeers, Hermey the elf that would rather be a dentist than make toys, Yukon Cornelius the boisterous prospector and the gigantic Abominable Snow Monster.  The scale of these miniature ornaments is perfect and using them is a wonderful way to incorporate the characters from one of my favorite childhood Christmas specials into our North Pole display!

North Pole display 4

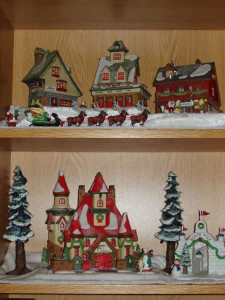
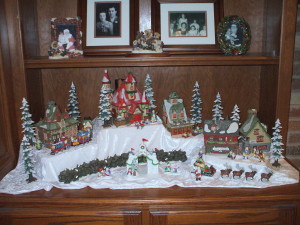
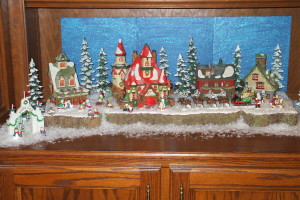
Shown below are photos from past Christmas North Pole displays, as you can see items have been added or changed over the years and the display has been set up in various rooms of our home.
OLYMPUS DIGITAL CAMERA

North Pole Village 2010    North Pole Village 2011

North Pole Village 2012


Decor – Setting up a Fontanini Nativity Display

2013 Fontanini Nativity 6

As I mentioned in a previous Décor post last December, Fontanini Nativity Display, one of the highlights of our home decoration during the holiday season is our nativity set.  Over the years, in both our California home and in our Midwest home, I added more figurines and accessories.    Months before Christmas, I search the internet for ideas for my nativity display but most of the websites only show finished displays and never go into much detail or have instructions on how to make those displays.     For this post, I thought it would be interesting to show step by step how I set up this year’s Fontanini Nativity Display.

The nativity display base

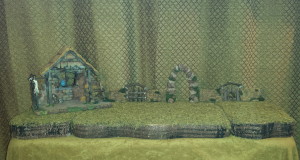
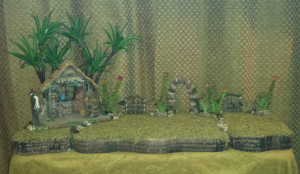
The first step is laying down a base or foundation for the display.  This particular base that I am using for this year’s nativity display was recently bought at a local craft store after Halloween on a clearance sale for very little money.  I think the three part sections with a moss surface work wonderfully for the nativity set display; the three sections interlink for one flat surface or can be stacked in a variety of positions.  I like the flexibility because every year I’m always thinking of different ways to display or change my Christmas decorations and I can also use the bases for different holidays, such as my Haunted Mansion display for Halloween.

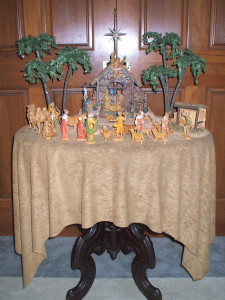
This year, the place I choose to display the nativity set was on a table in front of the window in the library of our home.  First, I start by covering the table with a large piece of brown fabric.  Next, I positioned the three sections of the base to lay flat across the entire top surface of the table.
2013 Fontanini Nativity 1The nativity display main pieces – the stable and the background accessories
 
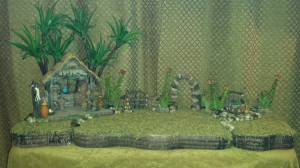
For this year’s nativity display, I set the nativity stable in the left corner of the base at a slight angle.  Then, across the back of the display, I positioned two resin sections of a “rock” fence and in the middle a “rock” resin piece in the shape of an arch.  I have a catalog which lists all the figurines and display pieces available but the Fontanini pieces are very expensive to purchase.  The three display accessories that I am using for my nativity display background are an example of using non-Fontanini pieces that coordinate beautifully but are available at a much lower price.  During the year I always keep my eye out for accessories that would work with our Nativity set and these three pieces were bought at a minimal piece during a summer clearance sale at a local craft store.  This is a great example of buying smart and keeping the cost down!

2013 Fontanini Nativity 2

The nativity display landscape – the trees and plants
 
The next step when creating a nativity display is adding trees and plants for a more natural setting or scenery.  For this year’s display, I used two sets of palm trees and you may notice in the nativity photos from the previous years that the palm trees look very different.  After last Christmas, I decided the palm trees were starting to show some wear and need repairs since I had been using these same trees for over 30+ years.
 
To the start the repair process for the palm trees; I purchased artificial cactus plants from a local craft store that resembled a more realistic palm tree shape.  I removed the leaves and wrapped the palm tree trunks with brown floral tape.  I choose this method to repair the palm tree trunks because, even though paint would have worked to repair the damage, the floral tape added more support to hold the slightly heavier cactus plants which weighed more than the previous plastic palm leaves.    After using the floral tape, I hot glued the cactus plant to the top of the tree trunk.    The refurbished palm trees were positioned behind the nativity stable and I think the finished look is more realistic then the previous version!
 
Next, I wanted to add more plants to the nativity scene because in previous years the display was a little too sparse.  Once again, in the floral section of a local craft store, I found artificial cactus plants and these were placed along the back of the display along the “rock” wall.  Then, to finish the landscape of the display, I had purchased a small bag of rocks and these were added to the base of the back wall and in front of the stable; I also used several rocks to cover the seam of the display base.

2013 Fontanini Nativity 3

The nativity display accessories

Over the years, I keep adding to the nativity display and have purchased several accessories pieces during after Christmas clearance sales or from ebay at discounted prices during the off season.  I added these items to the display to create a more realistic look to the nativity scene.  Several of those pieces included food item figurines, such as clay pots filled with grain or baskets filled with olives or fish.  I also added a campfire for the three wise men and a well for the villagers.  To add more substance to the well created a base.  I used a piece of Styrofoam which was cut and then given a rounded contour to resemble a rock foundation or platform for the well. To further the illusion, I carved grooves into the Styrofoam to simulate the individual rocks and then painted it with several different colors and adding green paint to appear as if moss was growing along the base of the well.
 
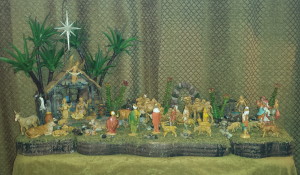
One of the most important nativity display accessories is the star above the stable that announces to the world that Jesus has been born in the little town of Bethlehem to his mother Mary and her husband Joseph.  The star is attached to a long wired holder that gives the illusion that the star is suspended over the humble stable and is calling the villagers, shepherds and three wise men to come and see the newborn child of God.  (The Star of Bethlehem can be seen in the photo in step 6)         
2013 Fontanini Nativity 4

The nativity display animals

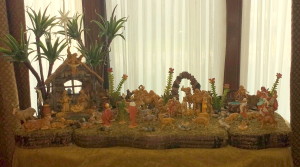
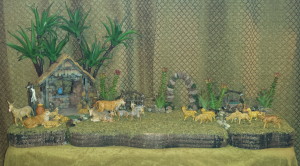
During the 30+ years that we have had our Fontanini Nativity on display during the Christmas season, I have added several new animal figurines.  I have purchased some at regular price but most of the pieces have been bought during after Christmas clearance sales or from ebay at discounted prices throughout the year.  These animals included several ox and donkeys, a couple of goats, almost a dozen sheep, a shepherd’s dog and three camels for the wise men to travel to Bethlehem to see the baby Jesus.  All these animal figurines are scattered across the display creating a sense of movement and activity that adds life to the scene.
2013 Fontanini Nativity 5The nativity display people
 
As stated in an earlier Décor post, Fontanini Nativity Display from December 2012, after years of searching I finally found my perfect nativity set that I wanted at Jule Hus in Solvang, CA.  I bought a beautiful Fontanini “starter” set that included a stable, Gloria the angel, Mary, Joseph and baby Jesus in a manger.  So, this initial purchase included the most important main pieces to my nativity display.
 
Since that time, and over the next 30+ years, I have added several figurines.  Some of those early purchases included several shepherds to tend the herd of sheep.  Other figurines were added to the display, including several villagers of various occupations.  Another important group of figurines are the three wise men who have traveled from far to honor the newly born Jesus and bring him gifts of frankincense, myrrh and gold.  All these nativity characters are scattered across the display telling the story of the birth of Jesus.

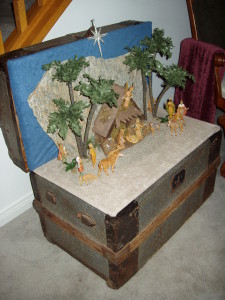
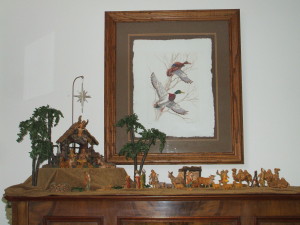
Every year I try and keep our family’s interest by display the nativity set in different rooms or creating different displays from year to year, it is constantly changing location of new figurine or accessories are added each year.  At our house in California, I have had the nativity set displayed in the hallway on an antique sewing machine and on top of a chest of drawers in our living room.  One year, I displayed the nativity set inside an antique trunk with a large flat rock as the background for the scene.  In our house in the Midwest, I have displayed it on the top of an old piano and a few years ago the nativity set was displayed on an antique table that my husband’s Grandmother kindly gave to us before she passed away last year.  This heirloom table is very special because it has been in her family for a very long time.  For the last two years the nativity set has been displayed on a table in the library of our home … who knows where the Fontanini Nativity Display will be shown next year!     

OLYMPUS DIGITAL CAMERA    2011 Fontanini Nativity 2

2010 Fontanni Nativity

One last special note:

One of our family traditions every year during the holiday season is that the manger in the nativity display stays empty until Christmas Eve.  On that evening we read from a beautifully illustrated book that tells the story of the birth of Jesus.  After we are done reading, my daughter will put baby Jesus in the manger and we say a prayer.  It is a lovely moment to remind us of the true meaning of Christmas.

Decor – Christmas Home Decorations

CHRISTMAS… the weather has turned a little frosty and there might even be snow on the ground. (if you are lucky!)  If you live in a warmer climate, don’t worry about it because as soon as you put on some Christmas music to set the mood and start to unpack those Christmas decoration boxes you will definitely get into the holiday spirit!

After Thanksgiving, I pack up all the fall decorations and the boxes are stored down in the basement. Then, my husband brings up the Christmas decorations and it can take awhile because I have several boxes!  The process of decorating our house for Christmas can take several days but I enjoy every minute of it!  The interior house Christmas decorations I have collected over the years are not specific to a certain room and I can be creative with the different accessories, so I’m not limited to the same decorations in the same place every year and this keeps things interesting and fun!  I have fewer exterior house decorations and generally they are the same every year.  For the last couple of years we have decided not to decorate the outside of the house with lights to save both time and money – please don’t call us Scrooge!!

Like most holidays when I start the decorating process for the holiday season, I begin with setting up the Christmas decorations outside on the front porch.  Living in the Midwest the weather conditions can get very harsh and I usually keep all my exterior decorations under the roof of the porch to keep everything safe from the elements.  I start with a couple of pre-lite artificial Christmas trees and for the last couple of years I have added a pre-lite snowman bought at a Target after holiday sale.  I liked the size of the snowman but embellished him a little by gluing on larger black buttons, topped it off with an old black winter hat and this year I’m going to change the wire nose and add a large artificial carrot instead!  To complete the front porch, I hang a Christmas wreath on the front door.  I have three different wreaths that I rotate from year to year. One is a large pine wreath decorated with pinecones and red berry sprays, another is a wreath covered completely in velvet holly leaves and the third one is a pine cone wreath accented with holly leaves and red berries.

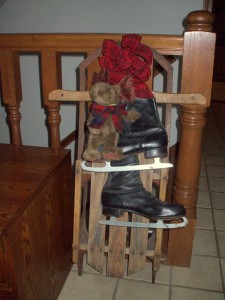
With the outside of the house done I can now start decorating the inside of the house.  In the entry hall I set up a whimsical 24” Santa displayed with two elves hanging onto the branches of a small Christmas tree.  Nearby I have a pair of black ice skates hanging from an antique sled with a Boyd’s moose named Mortimer.  Whenever I am shopping in the antique stores, I always look for holiday items – on my wish list is a set of old skis and poles and hopefully I will be able to find it before next year.  This year I have added a Christmas Kissing Ball and I think it will be fun for our guests’ arrival and departures this holiday season!  (Please look for the December Craft post for instructions on how to make your own Christmas Kissing Ball)


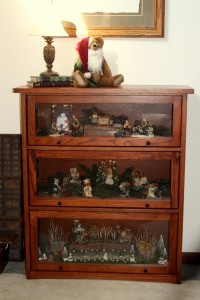
The next room of the house is our library; this is the room where all our books and vacation memorabilia are in bookshelves that fill up an entire wall.  On the other side of the room, I keep my Boyd’s Bear collection year-round in a small lawyer’s bookcase.  I add my Boyd’s Christmas figurines and I decorate the two shelves with pine branches to give it a festive Christmas look.  The bottom shelf holds the Boyd’s Bear Village and I decorate the display with winter trees and tiny snowflakes.  I also add a Boyd’s Bear Santa to one of the ivory chairs in the library.  On another side of the room, I have displayed for the last a couple of years our Fontanini Nativity set on an antique table that my husband’s Grandmother kindly gave us.  This heirloom table is very special to us because it has been in the family for a very long time. (Please see a previous December Décor post for more detailed information on the Fontanini Nativity Display)

The next room to decorate is the family room.  One wall of the room has a fireplace and mantel flanked by two bookcases/cabinets.  For the past few years I have displayed our Department 56 North Pole Village in the bookshelf but this year I will be doing something new and it will be displayed across the fireplace mantel.  The fireplace mantel is also the place where we traditionally hang our Christmas stockings.  Next, to complete the family room, I will set-up a display on the fireplace hearth with a traditional 29” Santa, his two reindeers and a small Christmas tree. (Please check out my previous December Décor posts for more detailed information on the Department 56 North Pole Village display and the Christmas stockings and Fireplace Mantel decorations

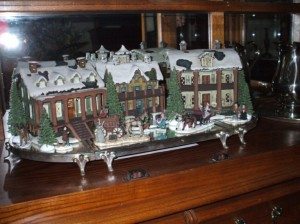
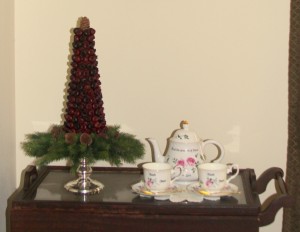
In the dining room, the Memory Tree set out for Thanksgiving will be moved to the family room.  (Please refer to last month’s Craft post for ideas and tips on how to create your own family Memory Tree)  In November I had displayed in the china cabinet three Currier and Ives porcelain houses I purchased at a local craft store a few years ago.  Our china cabinet has a mirrored back so you are able to see both the back and the front of the display of the houses.  I add a few small pine trees and additional figurines and these are set-up on a beautiful elongated mirror and silver stand.    This display is an example of a decoration that works for both Thanksgiving and Christmas seasons – I love when that happens!  This year I have added two new Craft projects to our dining room decorations – a Victorian inspired fruit arrangement that I made last month for our Thanksgiving table and a Cranberry topiary inspired by one I had seen in a past HGTV White House Christmas shows.  I think they are great additions to our traditional dining room design.  (Please look for full instructions on making both projects – the Fall Victorian Centerpiece is a November Craft post and the Cranberry Topiary is a December Craft post)

The last room on the main floor of the house to decorate for the holidays is the kitchen.  Now, this can get a little tricky because the room needs to function as a full service kitchen, so the counters need to stay clear of decorations because food and meals are being prepared and eaten at the table on a daily basis.  We have a fairly large kitchen that is open to the family room and these two rooms of the house are where we spend most of our time.

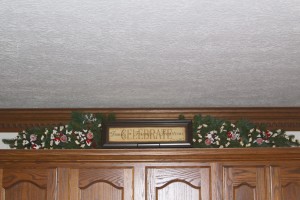
Several years ago I found the perfect Christmas theme for the holiday decorations in the kitchen – gingerbread and candy canes!!  Since there are several areas in the kitchen that I decorate for Christmas, I start with an area that has a long chair height counter with upper and lower cabinets.  This is the area my daughter does her homework and the counter needs to stay free of clutter.  So, in the space above the upper cabinets I usually set-up a Department 56 gingerbread train that is displayed with pine boughs, red berry sprays and this year I have added “white icing” snowflakes to give it a different look.  I also hang two holly wreaths with red berries and gingerbread snowflakes on the cabinet doors.


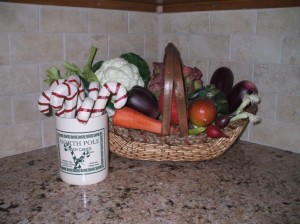
The last area that needs some Christmas attention is the area by the stove and oven.  Please be careful with the holiday decorations in this area because with the extreme heat from cooking you don’t want anything that is flammable or a fire hazard.  I have a basket of artificial vegetables on the counter and I add a cute “North Pole Candy Canes” container that holds some wooden candy canes and pine sprays.  I also hang some Santa towels from the oven bar handle.

I hope you enjoyed the tour of our house decorated for the holiday season and I try to create decorations that are classic and traditional but fun and interesting.  Please let me know your comments or suggestions; I would love to hear what you think.

Craft – Cranberry Topiary

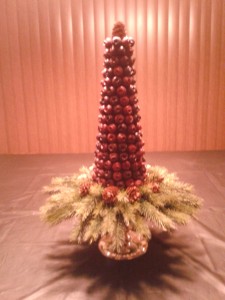
Depending on the current First Lady’s Christmas theme and decorative style for the White House, some variation of a cranberry covered decoration is always in the Red Room. Some years it can be a cranberry wreath or another variation but I have long admired the cranberry topiary.  I always thought that it was one of those perfect decorations for Christmas with the red color of the cranberries and the green color of the pine.

For years now I’ve always keep a silver bowl of artificial cranberries in our dining room during the holiday season.  This year I wanted to do something different and decided that I was finally going to use those cranberries to make a topiary for our dining room.

Listed below are the materials and instructions to make a cranberry topiary.

Cranberry Topiary – supplies

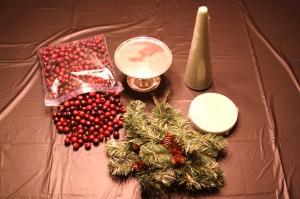
  • 1     Styrofoam come
  • 1     Styrofoam circle, a couple of inches wider than the base of the Styrofoam cone
  • 1     Container, as wide as the bottom of the Styrofoam cone
  • Cranberries, artificial
  • Pine boughs or other type of greenery for base
  • Small Pinecones, several
  • Hot glue gun/ glue sticks
  • Sheet moss, to cover the Styrofoam cone (optional)
  • Foam adhesive spray, to attach the sheet moss to the Styrofoam cone (optional)
  • Hot glue gun /glue sticks

Cranberry Topiary – instructions

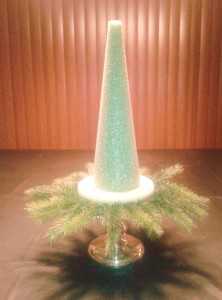
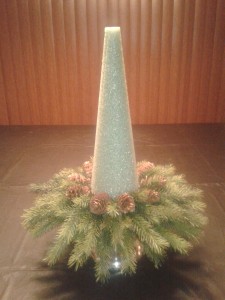
Center the Styrofoam cone on the Styrofoam circle; attach the cone securely to the circle with hot glue. This will create one piece that you can set a silver bowl or I used a silver pedestal base.

Option #1 – Use spray adhesive to attach sheet moss onto the Styrofoam, this covers any empty spaces left between the cranberries and gives a finished look.

Option #2 – Paint the Styrofoam cone a burgundy shade to match the cranberries so the empty spaces between are not noticeable.  (Even though it is not pictured, this is the option I used for my cranberry topiary)

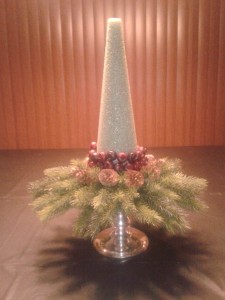
  1. Insert the pine boughs or greenery into the Styrofoam circle at the base of the Styrofoam cone.
  2. Hot glue small pinecones at the base of the Styrofoam circle.  Be sure to save one for the top of the Styrofoam cone
  3. Using a small amount of hot glue, attach each individual cranberry to the cone.  Starting at the bottom, work in rows until the cone is completely filled to the top.  Try to leave as little space as possible between cranberries.
  4. Hot glue a small pinecone to the top of the Styrofoam cone to complete the topiary.


As you can see from the photo at the top of the post, the cranberry topiary looks wonderful on the tea cart in our dining room.  Additional ideas for places for a topiary: on a side table in the family room, placed into the corner of the kitchen counter or two topiaries on a buffet table for a Christmas luncheon.

Decor – Christmas Stockings / Fireplace

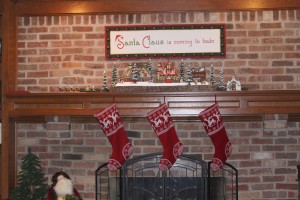
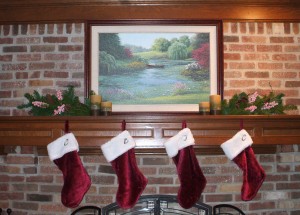
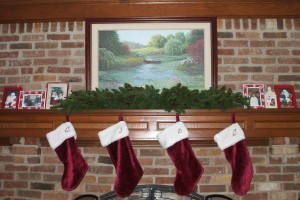
Every year decorating the mantel is one of my favorite things to do during the Christmas season.  I actually have three sets of stockings that I’ve used over the years.  When my son moved back in with us a few years ago, I bought new matching burgundy velvet stockings, trimmed with white fur and accented with silver and crystal initial pins.  Since my son has moved back to California, this year we will pull out of storage the three red and white knitted stockings from previous years.  They usually hang from beautiful bronze stocking holders and sit on the mantel over the fireplace.  This is the stocking that was used when my daughter was younger and it will be saved for her when she gets older.  I plan to give it back to her as a special present the first Christmas after she gets married.  My son will also get his childhood stocking when he gets married and it is packed away in his box of childhood things.  I got this idea from my mother.  She had saved our Christmas stockings and gave them to us when we were older. I thought that was a wonderful thing to do and I wanted to do the same for my children. There is a third set of stockings packed away and they are made of a lovely burgundy brocade fabric.  These were used the first year that my husband and I were married.   I’m sure years from now on our “first empty nesters Christmas” we will bring them out of storage and use them again!

As you might know from reading my previous posts, I like to use my holiday decorations in different ways every year.  It challenges my creative skills and saves on the cost of purchasing new decorations every holiday season.  This year I am going to try something new and instead of displaying my Department 56 North Pole Village in the family room bookshelf I am going to place the porcelain houses and their accessories on the fireplace mantel.

Usually all year-round I have a lovely painting of Sandringham, the Queen of England’s Norfolk estate hanging above the fireplace This year because I will be displaying the North Pole Village I felt the painting did not fit the theme of Christmas.  I looked around several retail stores hoping to find a Santa Claus or a winter scene picture but I couldn’t find anything I liked within my budget.  I know Thomas Kincaid has several paintings of lovely Christmas cottages but they are a little pricey.  So, I decided to create a custom sign to get the look I really wanted.

Last year I used a Christmas decal on the back of our car and I used this for inspiration; it reads “Santa Claus is coming to town”.  I thought it would be perfect to use for the sign but I needed to give it a much more substantial look.  My husband cut a piece of MDF board to my desired length and painted it white.  Then using painter’s tape for a straight line, I painted three boarders of three different colors.  The first was a Christmas Red color, then a Pine Tree Green color and finally I painted a thinner border of an Antique Gold color.  It still looked a little plain so I added some bronze jingle bells to give it some dimension and I think it turned out very nice.  Most of the materials we already had at the house so the cost was very minimal and I created a wonderful custom look to go with the Department 56 North Pole display and we love it!!

In years past I have decorated the fireplace mantel several different ways using a pine garland, red berry sprays and holly leaves  This always make a great base for creating different looks from one Christmas to the next.  One year I used special Christmas fames with photos of our children’s visits to Santa or family photos from past Christmas.  Then, another year I scattered porcelain snowflakes throughout the pine garland and it had a very festive winter theme.  When I displayed my Boyd’s Bear ornament collection I used two strands of ball lights, one in red and the other in green and I scattered the ornaments on the mantel amongst the garland.

As you can see no two displays looked the same!!  Let me know what you think.


STOCKING HANGING TIPS:

  • To secure stockings on the underside of a wooden mantel, use heavy-duty cup hooks or C-hooks.  (The hooks I use are so well hidden that I leave them there all year)
  • When purchasing decorative stocking hangers, I recommend the heavy metal kind with a lot of “weight” to them so they don’t tip over after the stockings have filled on Christmas Eve.
  • If you are leaving the stockings out before Christmas as decoration during the holiday season, be sure to stuff them with tissue paper for a fuller look.  You can remove the tissue paper on Christmas Eve before the stockings are filled by Santa!
  • It doesn’t matter the style or material used for Christmas stockings, just make sure they have ample room for Christmas goodies – your family will be glad you did!!  NOTE: When using knitted stockings make sure they are lined for easier filling!
  • Don’t forget stockings for the animals – our pets have their own stocking we fill with treats and toys!

So, have fun trying new ideas by using your holiday decorations in different ways … you might be pleasantly surprised!!