Decor – Setting up a Fontanini Nativity Display

2013 Fontanini Nativity 6

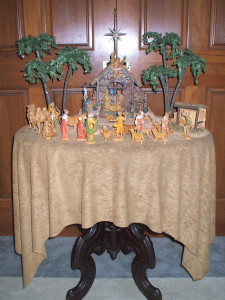
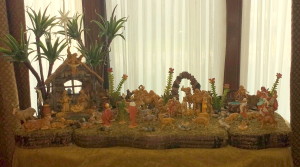
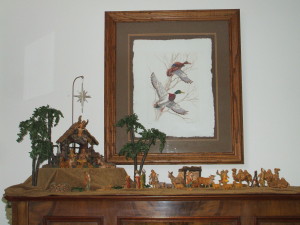
As I mentioned in a previous Décor post last December, Fontanini Nativity Display, one of the highlights of our home decoration during the holiday season is our nativity set.  Over the years, in both our California home and in our Midwest home, I added more figurines and accessories.    Months before Christmas, I search the internet for ideas for my nativity display but most of the websites only show finished displays and never go into much detail or have instructions on how to make those displays.     For this post, I thought it would be interesting to show step by step how I set up this year’s Fontanini Nativity Display.

The nativity display base

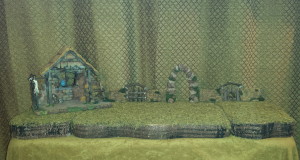
The first step is laying down a base or foundation for the display.  This particular base that I am using for this year’s nativity display was recently bought at a local craft store after Halloween on a clearance sale for very little money.  I think the three part sections with a moss surface work wonderfully for the nativity set display; the three sections interlink for one flat surface or can be stacked in a variety of positions.  I like the flexibility because every year I’m always thinking of different ways to display or change my Christmas decorations and I can also use the bases for different holidays, such as my Haunted Mansion display for Halloween.

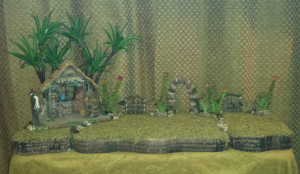
This year, the place I choose to display the nativity set was on a table in front of the window in the library of our home.  First, I start by covering the table with a large piece of brown fabric.  Next, I positioned the three sections of the base to lay flat across the entire top surface of the table.
2013 Fontanini Nativity 1The nativity display main pieces – the stable and the background accessories
 
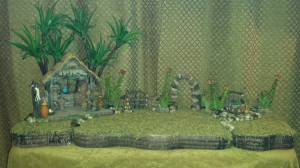
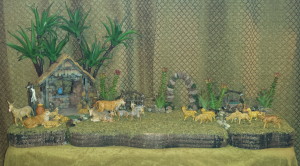
For this year’s nativity display, I set the nativity stable in the left corner of the base at a slight angle.  Then, across the back of the display, I positioned two resin sections of a “rock” fence and in the middle a “rock” resin piece in the shape of an arch.  I have a catalog which lists all the figurines and display pieces available but the Fontanini pieces are very expensive to purchase.  The three display accessories that I am using for my nativity display background are an example of using non-Fontanini pieces that coordinate beautifully but are available at a much lower price.  During the year I always keep my eye out for accessories that would work with our Nativity set and these three pieces were bought at a minimal piece during a summer clearance sale at a local craft store.  This is a great example of buying smart and keeping the cost down!

2013 Fontanini Nativity 2

The nativity display landscape – the trees and plants
 
The next step when creating a nativity display is adding trees and plants for a more natural setting or scenery.  For this year’s display, I used two sets of palm trees and you may notice in the nativity photos from the previous years that the palm trees look very different.  After last Christmas, I decided the palm trees were starting to show some wear and need repairs since I had been using these same trees for over 30+ years.
 
To the start the repair process for the palm trees; I purchased artificial cactus plants from a local craft store that resembled a more realistic palm tree shape.  I removed the leaves and wrapped the palm tree trunks with brown floral tape.  I choose this method to repair the palm tree trunks because, even though paint would have worked to repair the damage, the floral tape added more support to hold the slightly heavier cactus plants which weighed more than the previous plastic palm leaves.    After using the floral tape, I hot glued the cactus plant to the top of the tree trunk.    The refurbished palm trees were positioned behind the nativity stable and I think the finished look is more realistic then the previous version!
 
Next, I wanted to add more plants to the nativity scene because in previous years the display was a little too sparse.  Once again, in the floral section of a local craft store, I found artificial cactus plants and these were placed along the back of the display along the “rock” wall.  Then, to finish the landscape of the display, I had purchased a small bag of rocks and these were added to the base of the back wall and in front of the stable; I also used several rocks to cover the seam of the display base.

2013 Fontanini Nativity 3

The nativity display accessories

Over the years, I keep adding to the nativity display and have purchased several accessories pieces during after Christmas clearance sales or from ebay at discounted prices during the off season.  I added these items to the display to create a more realistic look to the nativity scene.  Several of those pieces included food item figurines, such as clay pots filled with grain or baskets filled with olives or fish.  I also added a campfire for the three wise men and a well for the villagers.  To add more substance to the well created a base.  I used a piece of Styrofoam which was cut and then given a rounded contour to resemble a rock foundation or platform for the well. To further the illusion, I carved grooves into the Styrofoam to simulate the individual rocks and then painted it with several different colors and adding green paint to appear as if moss was growing along the base of the well.
 
One of the most important nativity display accessories is the star above the stable that announces to the world that Jesus has been born in the little town of Bethlehem to his mother Mary and her husband Joseph.  The star is attached to a long wired holder that gives the illusion that the star is suspended over the humble stable and is calling the villagers, shepherds and three wise men to come and see the newborn child of God.  (The Star of Bethlehem can be seen in the photo in step 6)         
2013 Fontanini Nativity 4

The nativity display animals

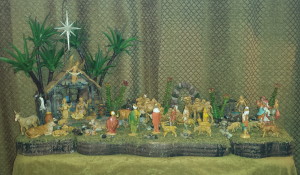
During the 30+ years that we have had our Fontanini Nativity on display during the Christmas season, I have added several new animal figurines.  I have purchased some at regular price but most of the pieces have been bought during after Christmas clearance sales or from ebay at discounted prices throughout the year.  These animals included several ox and donkeys, a couple of goats, almost a dozen sheep, a shepherd’s dog and three camels for the wise men to travel to Bethlehem to see the baby Jesus.  All these animal figurines are scattered across the display creating a sense of movement and activity that adds life to the scene.
2013 Fontanini Nativity 5The nativity display people
 
As stated in an earlier Décor post, Fontanini Nativity Display from December 2012, after years of searching I finally found my perfect nativity set that I wanted at Jule Hus in Solvang, CA.  I bought a beautiful Fontanini “starter” set that included a stable, Gloria the angel, Mary, Joseph and baby Jesus in a manger.  So, this initial purchase included the most important main pieces to my nativity display.
 
Since that time, and over the next 30+ years, I have added several figurines.  Some of those early purchases included several shepherds to tend the herd of sheep.  Other figurines were added to the display, including several villagers of various occupations.  Another important group of figurines are the three wise men who have traveled from far to honor the newly born Jesus and bring him gifts of frankincense, myrrh and gold.  All these nativity characters are scattered across the display telling the story of the birth of Jesus.

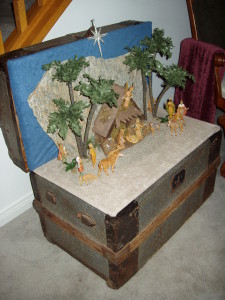
Every year I try and keep our family’s interest by display the nativity set in different rooms or creating different displays from year to year, it is constantly changing location of new figurine or accessories are added each year.  At our house in California, I have had the nativity set displayed in the hallway on an antique sewing machine and on top of a chest of drawers in our living room.  One year, I displayed the nativity set inside an antique trunk with a large flat rock as the background for the scene.  In our house in the Midwest, I have displayed it on the top of an old piano and a few years ago the nativity set was displayed on an antique table that my husband’s Grandmother kindly gave to us before she passed away last year.  This heirloom table is very special because it has been in her family for a very long time.  For the last two years the nativity set has been displayed on a table in the library of our home … who knows where the Fontanini Nativity Display will be shown next year!     
OLYMPUS DIGITAL CAMERA    2011 Fontanini Nativity 2

2010 Fontanni Nativity

One last special note:

One of our family traditions every year during the holiday season is that the manger in the nativity display stays empty until Christmas Eve.  On that evening we read from a beautifully illustrated book that tells the story of the birth of Jesus.  After we are done reading, my daughter will put baby Jesus in the manger and we say a prayer.  It is a lovely moment to remind us of the true meaning of Christmas.

Decor – Thanksgiving Table Decorations

20131110_171108

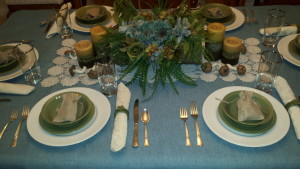
This season while shopping at the local craft stores I noticed that many home decorations featured different uses of burlap material.  So, this year I decided on a very different style of table for our Thanksgiving dinner.  Normally, I would set the table in a very formal style with our beautiful china, silver, crystal and lovely linens.  This year the table will be set in a more casual way with rustic decorations incorporating burlap materials  and softer colors, such as pale blue, sage green, ivory and brown.

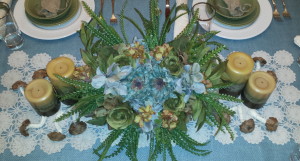
The first of several layers of table linens was  an inexpensive ivory tablecloth.  Next, I added an overlay of burlap material in a lovely pale blue.  This unexpected color for the fall season goes beautifully with the chair pillows and other decorations in our dining room.  I was also creating a table centerpiece with artificial hydrangeas in a similar blue color which coordinated with the color of the burlap.  To finish the table linens, and too add a touch of softness, I added a vintage crocheted doily in ecru color.

The main decoration of our Thanksgiving table will be one of this month’s craft posts.  During the spring my husband/father-in-law were clearing out some of the trees in the forest next to our home and I had them save one of the logs for me.  I wanted to use the log as a base for a floral decoration and I thought Thanksgiving would be a great opportunity.  I used blue, gold hydrangeas and greenery to create the floral decoration and I found some inexpensive artificial mushrooms at the local craft store and scattered them among several candles placed on either side of the centerpiece.  I think the colors I used complement the table linens beautifully!  (Please check out the Craft Post, Rustic Table Centerpiece, for a supply list and instructions for the floral decoration)

20131110_171340

Next, I set each place setting with an ivory dinner plate, another smaller green plate, green salad bowl, silverware and glassware.  I used an ivory napkin with a green leaf napkin ring and placed a small burlap bag filled with candy into the salad bowl for a party favor.  It is always a good idea to have something special for your guests to take home after a luncheon or dinner party … of course for Thanksgiving our guests will also be taking home containers filled with leftover turkey, etc.!

To finish the table decorations I tied two colors of burlap “ribbon” to the dining room table chair backs.  I used the traditional brown color of burlap and a sage green color of burlap “ribbon” tied with green string.  This was the perfect way to finish the table decorations while adding another rustic element and also another way to incorporate burlap material into the table design.

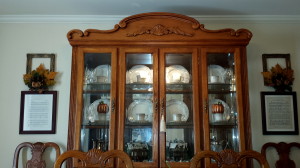
The other decorations in the room included several glass acorn ornaments hanging from the chandelier on brown ribbons and the gold floral arrangement that is usually displayed on the dining room table throughout most of the year was place on the tea table across the room.  In the china cabinet, is a display of three Currier and Ives porcelain houses, small artificial pine trees and figurines set on a silver mirrored tray.

20131110_132516

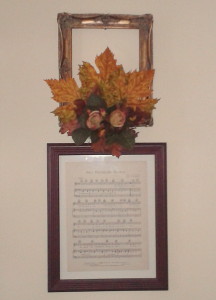
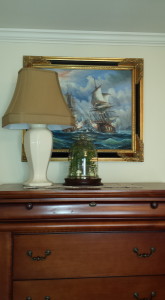
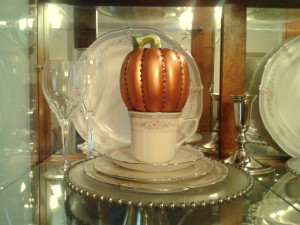
Finally, I would like to mention three craft projects – the first two craft posts are Framed Floral Decorations and Glass Dome Arrangement which were posted in the month of August and one October craft post Jeweled Pumpkins.  The Framed Floral Decorations are hung above the side chairs on either side of the china cabinet, the gold roses and autumn leaves are the perfect decorative accent for the holiday.  The Glass Dome Arrangement now sits on the tall cabinet across the room and the rustic elements coordinate with the dining room table decorations.  The Jeweled Pumpkins are on display in the china cabinet.

Framed floral final    20131110_132455
 

Classic Jeweled Pumpkin on display in china cabinet

Decor – Fall decorations

OLYMPUS DIGITAL CAMERA

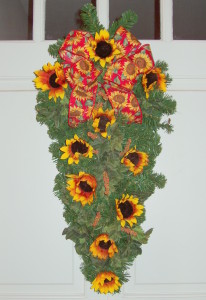
For this post I am going to give everyone a glimpse of the fall decorations that we had used in our house in California several years ago.  When I start my seasonal decorations, I always begin with a door wreath to set the mood for the decorations that our guests will find in the interior of the home.  Our California house was no exception and for the front door I used a very unusual wreath, instead of a circular one it was an artificial pine teardrop shape wreath with several sunflowers and a festive matching ribbon.  Although this door decoration is very traditional sometimes going with the unexpected form or style can spark some creative ideas.

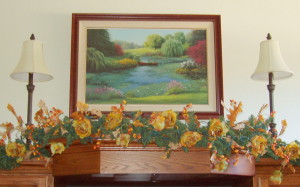
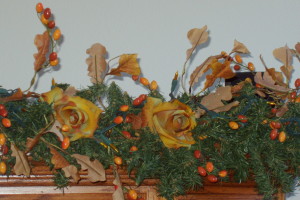
In the living room of our California home there was a large oak entertainment center that is now in the basement of our Midwest home.  On the top of the entertainment center I used a long pine garland intertwined with lights that would remain for both the Fall and Christmas seasons.  I had planned on keeping the pine garland in place on the entertainment center and switching out the Fall decorations for Christmas decorations after Thanksgiving, so that is the reason the lights were pre-strung onto the pine garland. For the Fall season, I decorated the garland with autumn leaves, berries and golden roses.

OLYMPUS DIGITAL CAMERA  OLYMPUS DIGITAL CAMERA

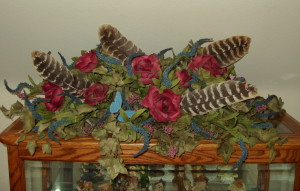
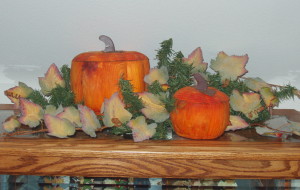
Adjacent to our living room in California was the dining room, which was separated by the staircase leading to the upper floor and beneath the staircase was a space with an oak curio cabinet.  In keeping with my design concept of changing my seasonal decorations from year to year, the floral decoration on the curio cabinet in our California house changed from year to year.  One year, I used a floral decoration which started with a layer of greenery and I added red roses, blue flowers and turkey feathers.  The next year, I used two wooden pumpkins and autumn leaves.  (If you look at last month’s Décor post, Halloween decorations, you will see the same pumpkins used in the family room bookshelves of our Midwest home … just another example of re-purposing holiday decorations!)

OLYMPUS DIGITAL CAMERA  OLYMPUS DIGITAL CAMERA

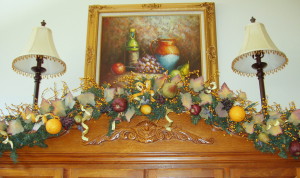
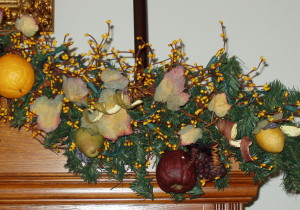
In the dining room is a lovely oak china cabinet with a beautiful still life painting hanging above.  On the top of the china cabinet, I used a long pine garland intertwined with lights the same way that I did in the living room.  I layered autumn leaves and gold berries onto the garland and added artificial fruits such as red apples, green pears, oranges and lemons.  I think the fruit garland compliments the still life painting beautifully!

OLYMPUS DIGITAL CAMERA  OLYMPUS DIGITAL CAMERA

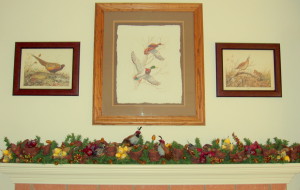
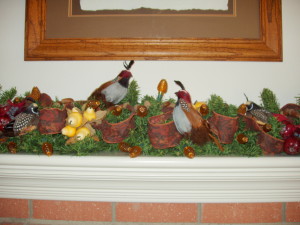
The final room I had decorated in our California house was the family room which adjoins the kitchen.  Above the fireplace are three wildlife prints, the large one is of mallard ducks and the other smaller ones are a pheasant and quail.  On the fireplace mantel, I used another long pine garland intertwined with a string of amber pinecone lights.  Next, I layered an autumn ribbon throughout the garland and added small artificial pears and apples clusters.  For a finishing touch, I added several artificial quails to keep with the wildlife theme used in the framed prints.

OLYMPUS DIGITAL CAMERA  OLYMPUS DIGITAL CAMERA

Decor – Halloween Decorations

Front door autumn wreath

Like most seasons throughout the year I enjoy decorating our home for each of the different holidays and Halloween is no exception!  I try to keep the decorations fun with just a touch of elegance.

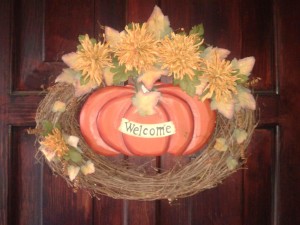
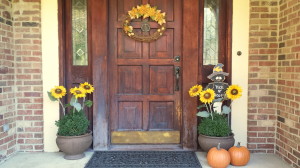
Let’s start on the front porch … every year I place two artificial pumpkins outside near the potted plants.  Usually I will add several more real pumpkins that we will later use to make roasted pumpkin seeds and my husband’s delicious pumpkin pies for Thanksgiving dinner.  Next, I placed a wooden “Trick or Treat” black cat into the potted plant for a whimsical Halloween touch and I also added several long-stemmed sunflowers.  Just under the front porch overhang I hung a quirky “Enter If You Dare” wooden sign and on the front door I hung an oval fall wreath decorated with golden chrysanthemums and autumn leaves.  After Halloween I will attach a resin oval pumpkin that has a small metal “Welcome” sign to the Autumn wreath.

Front porch

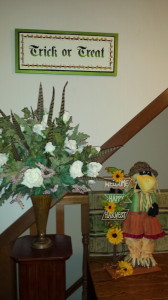
In our entry foyer is a low wooden bench and I placed a three foot high scarecrow which holds a wooden sign that says, “Welcome Happy Harvest”, that is decorated with sunflowers and berry sprays.  Next to the bench is a wooden pedestal with a floral arrangement of white rose and during the fall season I add several peasant feathers to the arrangement for a festive touch.  This year I change the picture on the wall with a new Halloween “Trick or Treat” sign that I recently made.  (For more information and instructions on how to create this one of these for your home, please check out this month’s Craft post, Halloween signs)

Front entry

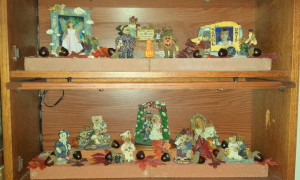
To the right of the entry is our library and in this room is an oak wooden lawyer’s bookcase which holds my Boyd’s Bear collection.  As discussed in a previous post, Displaying a Boyds Bear Collection Part One, I usually decorate the bookcase for each of the different seasons and holidays throughout the year.  For Autumn I added several acorns and oak leaves to the Boyds figurines to the top two shelves.  On the bottom shelf of the bookcase my Boyds Bear Village is displayed and this will also get a seasonal change.  This year I added several cornstalks and sunflower plants, I had searched in the local craft stores and couldn’t find any that I liked or were the size that I needed.  Finally, I found plastic cornstalks and small sunflower buttons.  I added small berry seeds to the cornstalks that would resemble ears of corn and for the small sunflower buttons I added twigs to resemble stems.  To finish the display I add a group of Halloween trick or treaters.

Boyds Bears Bookcase - fall decorations

Boyds Bears Bookcase - Boyds Village fall decorations

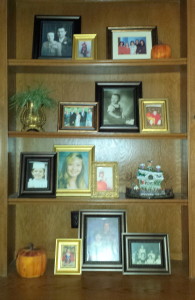
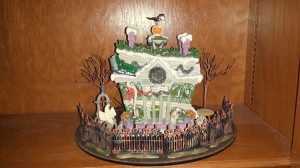
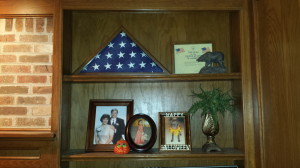
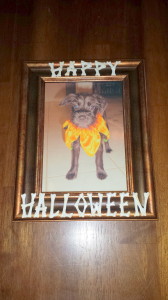
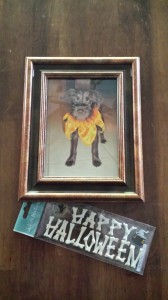
Moving on to the family room, I decorated the fireplace mantel with artificial pine boughs and layered on sprays of berries, grapes and burgundy colored magnolias to create a festive autumn floral arrangement and on either side I finished the display by adding two scarecrows.  To the left of the fireplace is a bookcase that has a display of family photos that are displayed year-round.  For Halloween I removed some of the photos in a few of the gold frames and exchanged them for other photos of my children wearing some of my favorite Halloween costumes.  To the right bookcase I replaced a photo with a cute photo of my dog when she was wearing her Halloween costume.  To give the photo a festive look I add simple scrapbook letters in the shape of bones that spell out “Happy Halloween”.  These simple changes are a wonderful way to add some seasonal style in an easy way.  To the bookcase I also added a few wooden pumpkins and a special ceramic pumpkin that my daughter made years ago.  Also displayed in the bookshelf is a display of the Disneyland Haunted Mansion decorated as Tim Burton’s Nightmare Before Christmas.  (For more information about this entertaining 1993 Disney movie, please see this month’s post, the Nightmare Before Christmas movie)
Family room bookshelves

Family room bookshelves  - Haunted Mansion Holiday   Family room bookcase 2
Halloween picture frame supplies  Halloween picture frame

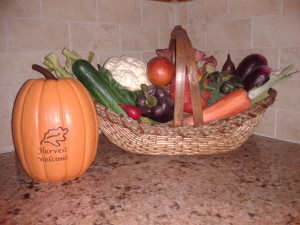
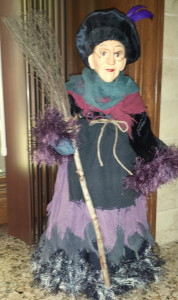
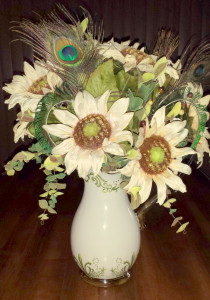
The next room to be decorated is the kitchen.  On one side of the kitchen sink is a next to a basket of artificial vegetables where I placed a small resin pumpkin and on the other side of the sink I placed a Halloween witch.  On the granite top kitchen island is a lovely ceramic pitcher filled with ivory sunflowers and for an unexpected touch I’ve added several peacock feathers.

2012-11-15 07.59.06

Kitchen witch  Kitchen autumn floral arrangement

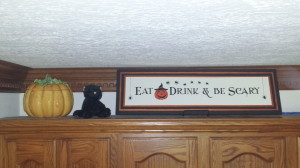
Across the room there is counter desk area with cabinets overhead.  In the space above the cabinet I removed the sign that is usually there year-round and replaced it with a Halloween sign I made recently that says “Eat drink & be scary” that is decorated with spiders.  Next to the sign I placed a large ceramic pumpkin and a black cat stuffed toy to complete the display.  (For more information and instructions on how to create a seasonal sign your home, please check out this month’s Craft post, Halloween signs)

Kitchen 1

The room to be decorated is the dining room.  Currently there is a lovely floral arrangement of gold roses that usually is displayed with an antique doily on the dining room table.  The color of the roses is still appropriate for the autumn season and will remain there until I set the dining room table for our thanksgiving dinner in November when I have some wonderful plans for some festive decorations.  (Please check next month for a Décor Post, Thanksgiving table Decorations, for more information and photos)

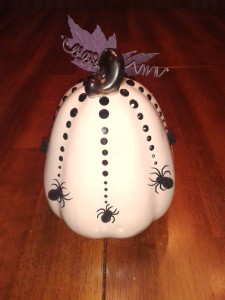
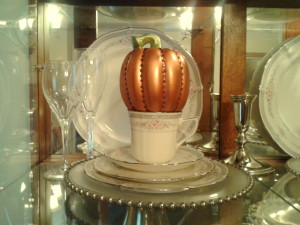
The finishing touches to the dining room are two different jeweled pumpkins that I made this year.  The first one was very easy; it is a plain ivory ceramic pumpkin that I bought from a local craft store which I decorated with black crystals and spiders. for an elegant Halloween Pumpkin.  This elegant Halloween pumpkin sits on top of the tall cabinet near the dining room table.  The other two pumpkins are also very easy to make, they are small bisque pumpkins that I bought from the craft store and painted in a beautiful bronze metallic color with the stem painted a pale green metallic color.  Then to add a little sparkle I glued individually placed beautiful dark topaz crystals.  The pumpkins are placed into two Nortiake Rothschild teacups and displayed in the china cabinet.  (For more information about creating these elegant pumpkins, please check out this month’s Craft Post, Jeweled Pumpkins)

Jeweled Pumpkin 2 final  Jeweled Pumpkin on display in china cabinet

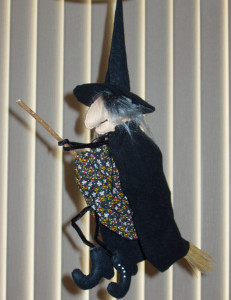
The last few items that I want to share when I’m decorating for the Halloween season are handmade decorations that my Mom made several years ago.  Now that she passed away, these decorations have become very sentimental to me and eventually they will be passed onto my children so that they will have something to cherish from their grandmother.  The first is a fabric witch with pipe cleaner arms and legs riding on a broom that my mother crafted almost 35 years ago and it has hung in all the houses that I have lived in since my mother made it for me.  The second is a fabric bat that my mother made around the same time and it has been a part of my annual decorations for years.  The third item is a large fabric cat that my mother made and I use as a pillow decoration of our sofa or recliner chair.  Bringing these decorations that my Mom created and displaying them every Halloween just puts a smile on my face!

Halloween 2003 - Witch


Decor – Preparing a Guest Bedroom

Summer … it is a time when we hit the road or take the plane for a vacation … but sometimes that means that guests could be coming to visit your home!  Living in the Midwest, hundreds of miles from our family out west, we have frequent visitors.  We absolutely love when our family comes to visit whether it is grandparents, parents, aunts, or cousins, but I especially love when my son comes to visit!!

Right now, the room that we use for our out-of-town guests is actually my daughter’s old bedroom.  When we moved to the Midwest, we suddenly had a five bedroom house and there were only three of us and we had lots of space!  We gave our daughter two rooms, one was the “bedroom” where she sleeps at night and across the hall was her “playroom”.  Eventually as she got older, she thought her bedroom was too girly and she wanted more bold colors and something a little trendier.  She moved permanently into the playroom and we redecorated the room as her “new bedroom” and it was now more appropriate for a teenager – she loved it!

Her “old bedroom” now became the guest room.  There was no really no need to redecorate the room, the beautiful sleigh bed with a matching dress/mirror and side table were perfect.  The lovely pale green paisley bedspread, the storage bench at the foot of the bed and the chair in the corner also stayed.  Just a basic cleaning and the room was ready and waiting for our guests!

Let’s breakdown what is considered a comfortable room for guests:

  1. The perfect combination for a guest bedroom is a room with an adjoining bathroom; this will give guests the most privacy.  But don’t despair if your house cannot accommodate this type of arrangement.
  2. Don’t overwhelm guests with an overly feminine room, try to keep the decorating style to simple and traditional but the most important element is comfort.
  3. Be sure the bed has a clean and beautiful bedspread and sheets.  Provide several comfortable pillows for sleeping, also have extra blankets available.
  4. A comfortable chair is a great idea for guests to use for reading or sitting in to put on their shoes.  Be sure to provide good lighting and a lovely soft throw for chilly nights.  A thoughtful thing to do is place some interesting books nearby, local history or the latest best seller, and a couple of magazines.
  5. Speaking of lighting, if there is a side table with a lamp; make sure the guests can reach it easily from the bed.  Overhead lighting is also a good idea and if the budget allows a ceiling fan is great for the summer months.  (or a table fan can be a good alternative choice)
  6. Make sure to provide guests with a table or luggage rack to keep their suitcases off the floor.  Provide some drawers and closet space for their clothing; add some extra hangers and a nice touch is to have a full-length mirror for the guests to use when dressing.  A small iron and ironing board are also great idea to store in the closet for the guests to use if needed and a small sewing kit would also be helpful.
  7. Make sure that the bathroom the guests will be using is clean.  Provide several clean towels – bath towels, hand towels and washcloths.  Stock up on a couple of new toothbrushes, toothpaste, soap, shampoo and conditioner just in case the guests forgot to bring something. (Check out the pocket towel idea shown below for storing those bathroom basics)

Pocket Towel

This clever idea is used to not only make your guests feel welcome, but also to provide them with those convenient bathroom essentials.  You will need: 1 bath towel, 1 hand towel, 1 washcloth, a toothbrush and tube of toothpaste.  Follow the steps to create a pocket towel.

  1. Lay out a hand towel, front side facing down.
  2. Fold up the bottom about a quarter of the way.
  3. Turn the towel over and fold in the sides so they overlap completely.
  4. Turn the towel over again and lay it over a bath towel already hanging on a towel rod.
  5. Fill the pocket with a washcloth and tuck in a toothbrush and toothpaste.

More special touches to add to a guest room:

  • Tourist information – local maps, brochures of nearby attractions, a list of favorite restaurants or shopping areas.
  • A beautiful notepad and pens or pencils for jotting down information, etc.
  • An alarm clock or portable music system.
  • Plug in nightlights for bedroom and bathroom
  • A small flashlight

The idea is to make your guests feel comfortable during their visit to your home and the main thing to remember is to enjoy this special time with them.