Decor – Framed Jewelry

Have you ever thought of displaying a special piece of jewelry?  Maybe you have a favorite brooch, a beautiful cameo, a lovely vintage pin or a sentimental vintage piece of jewelry from a loved one.  Take a look inside your jewelry box and I am sure you could find something that would look wonderful displayed on a side table in the bedroom or living room bookshelf.  Small inexpensive frames can be purchased at craft stores and the jewelry can be attached to pieces of velvet, leather of felt material or the frame itself.  When selecting a frame and material to display a piece of jewelry keep in mind the color, shape and style of item.  Shown below are a few of the jewelry pieces that I have framed and displayed in our home.

This first item of jewelry is a mother of pearl pin that I had during my childhood.  When I was a young girl living in Southern California as a special treat my mother would sometimes take us to the Farmer’s Market shopping center for the afternoon.  We would drive over “the hill” on Mulholland Drive from the San Fernando Valley to Los Angeles.  There was a food court and various booths selling delicious things to eat and we would enjoy lunch there watching all the interesting people.  Farmer’s Market also had several small stores selling all kinds of merchandise and one of those stores sold personalize wired jewelry such as pins and bracelets.  The pin that you see below is over fifty years old (can it really be that long ago!) and it is displayed attached to a small gold frame with a picture of me taken back in the 1960s.

Framed name pin

I enjoy shopping in antique stores and on EBay and I have purchased many vintage jewelry items over the years.  Vintage jewelry pieces look beautiful displayed in small frames and would add an elegant touch to any décor, such as side table in a bedroom.  Shown below is a piece of vintage jewelry that I purchased on EBay; it is a beautiful crystal fur clip.  (before it became “politically incorrect” to wear fur, sophisticated ladies would attach jeweled clips to their fur stoles or jackets)  The sparkling fur clip is attached to a piece of white velvet and displayed in a small gold frame.

Framed Fur clip

Traditionally, cameos are hand-carved three dimensional portraits or scenes on conch shells or semi-precious stones and look especially lovely in small frames displayed in a home.  The two framed cameos shown below are made of resin and they were purchased for a very inexpensive price from a source on EBay.  The first one is a large blue and white cameo that I attached to a piece of dark grey velvet and displayed in a small oval silver frame with stand that could be displayed on a table or bookshelf.  The second one is a smaller black and ivory cameo also attached to dark grey velvet and displayed in a small black oval frame trimmed in gold with black ribbon that could be used for hanging on a wall; this one is hung above a light switch as a decorative accent.

Framed cameos

Another EBay item which I purchase from a source England can be seen below, it is a silver dragon pin that I bought shortly after our daughter was born in 2000 which was the Chinese Year of the Dragon.  It should make a great remembrance to mark the occasion and I hope when she is older she will display it in her home.  I found a round frame in a rustic brown color and I attached the dragon pin to a piece of leather to give it a distinct “medieval” style when it is displayed.

Framed Dragon pin

The next two pieces of jewelry are contemporary items purchased recently in a retail store.  The first one is a lovely blue enameled butterfly that it simply attached to a blue frame which holds a picture of my daughter taken on a recent road trip to Rocky Mountain National Park in Colorado.  I think the bright color of the frame and butterfly pin look great with the outdoor photo.

Framed Butterfly pin

The next item is a black crystal spider pin that is perfect for displaying with a Halloween photo.  The pin is attached to a simple gold frame which holds a picture of my son taken when he was a vampire for Halloween.

Framed Halloween spider pin

One thing to keep in mind when shopping for jewelry to display is that you are not limited to pins.  Here are some other suggestions:

  • Earrings – buy two sets and attach to each corner of the frame
  • Necklaces – drape a necklace from one corner of the frame to the other or you can buy several and attach around the frame opening

Next time you are in the jewelry section of your favorite retail store look for seasonal jewelry that would look great attached to a photo frame or if you are shopping at an antique store or on EBay look for great antique jewelry that you can frame and display.

Don’t forget those sentimental pieces of jewelry, here are some suggestions:

  • A mother’s or grandmother’s brooch, earrings or necklace
  • A father’s or grandfather’s cuff links
  • A special cross or medal received for a first communion
  • A sport, dance or cheer medal attached to a frame
  • A soldier’s dog tags or service medals

Decor – Adding Personality to a Home

Many years ago I envisioned my home as a place filled with family photographs, travel mementos, a collection of interesting books and other various decorative items that would bring a smile to my face … and that is exactly how I would describe the home that I live in today with my family.

My approach to adding personality to a room is displaying interesting pieces and decorative items throughout a home that have special meaning to our family so that when guests visit these items will tell a story of our life or convey our personal interests and this can be a wonderful starting point for conversations.  Decorating a home with family photos and memorabilia are wonderful ways to remember the people and important events that hold special memories in our lives and they are an important way to surround ourselves with family love and heritage.  Displaying decorative items gathered throughout the years, such as travel souvenirs or themed collectibles also convey our interests and hobbies.  So, let me get started with some ideas and suggestions for adding personality to your home!

Family photos

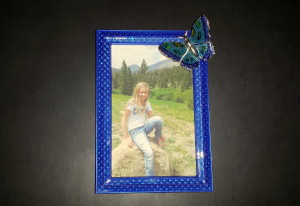
Decorating with family photos is a perfect opportunity to add our family’s character and personality into a room.  Every year, just before my children’s birthday, I always schedule an appointment at the portrait studio at our local department store.  These formal portraits are displayed throughout our house; some are in the bookshelf in our family room, the upstairs hallway and in our daughter’s bedroom.  It is a wonderful way to show how our children have grown and changed over the years!

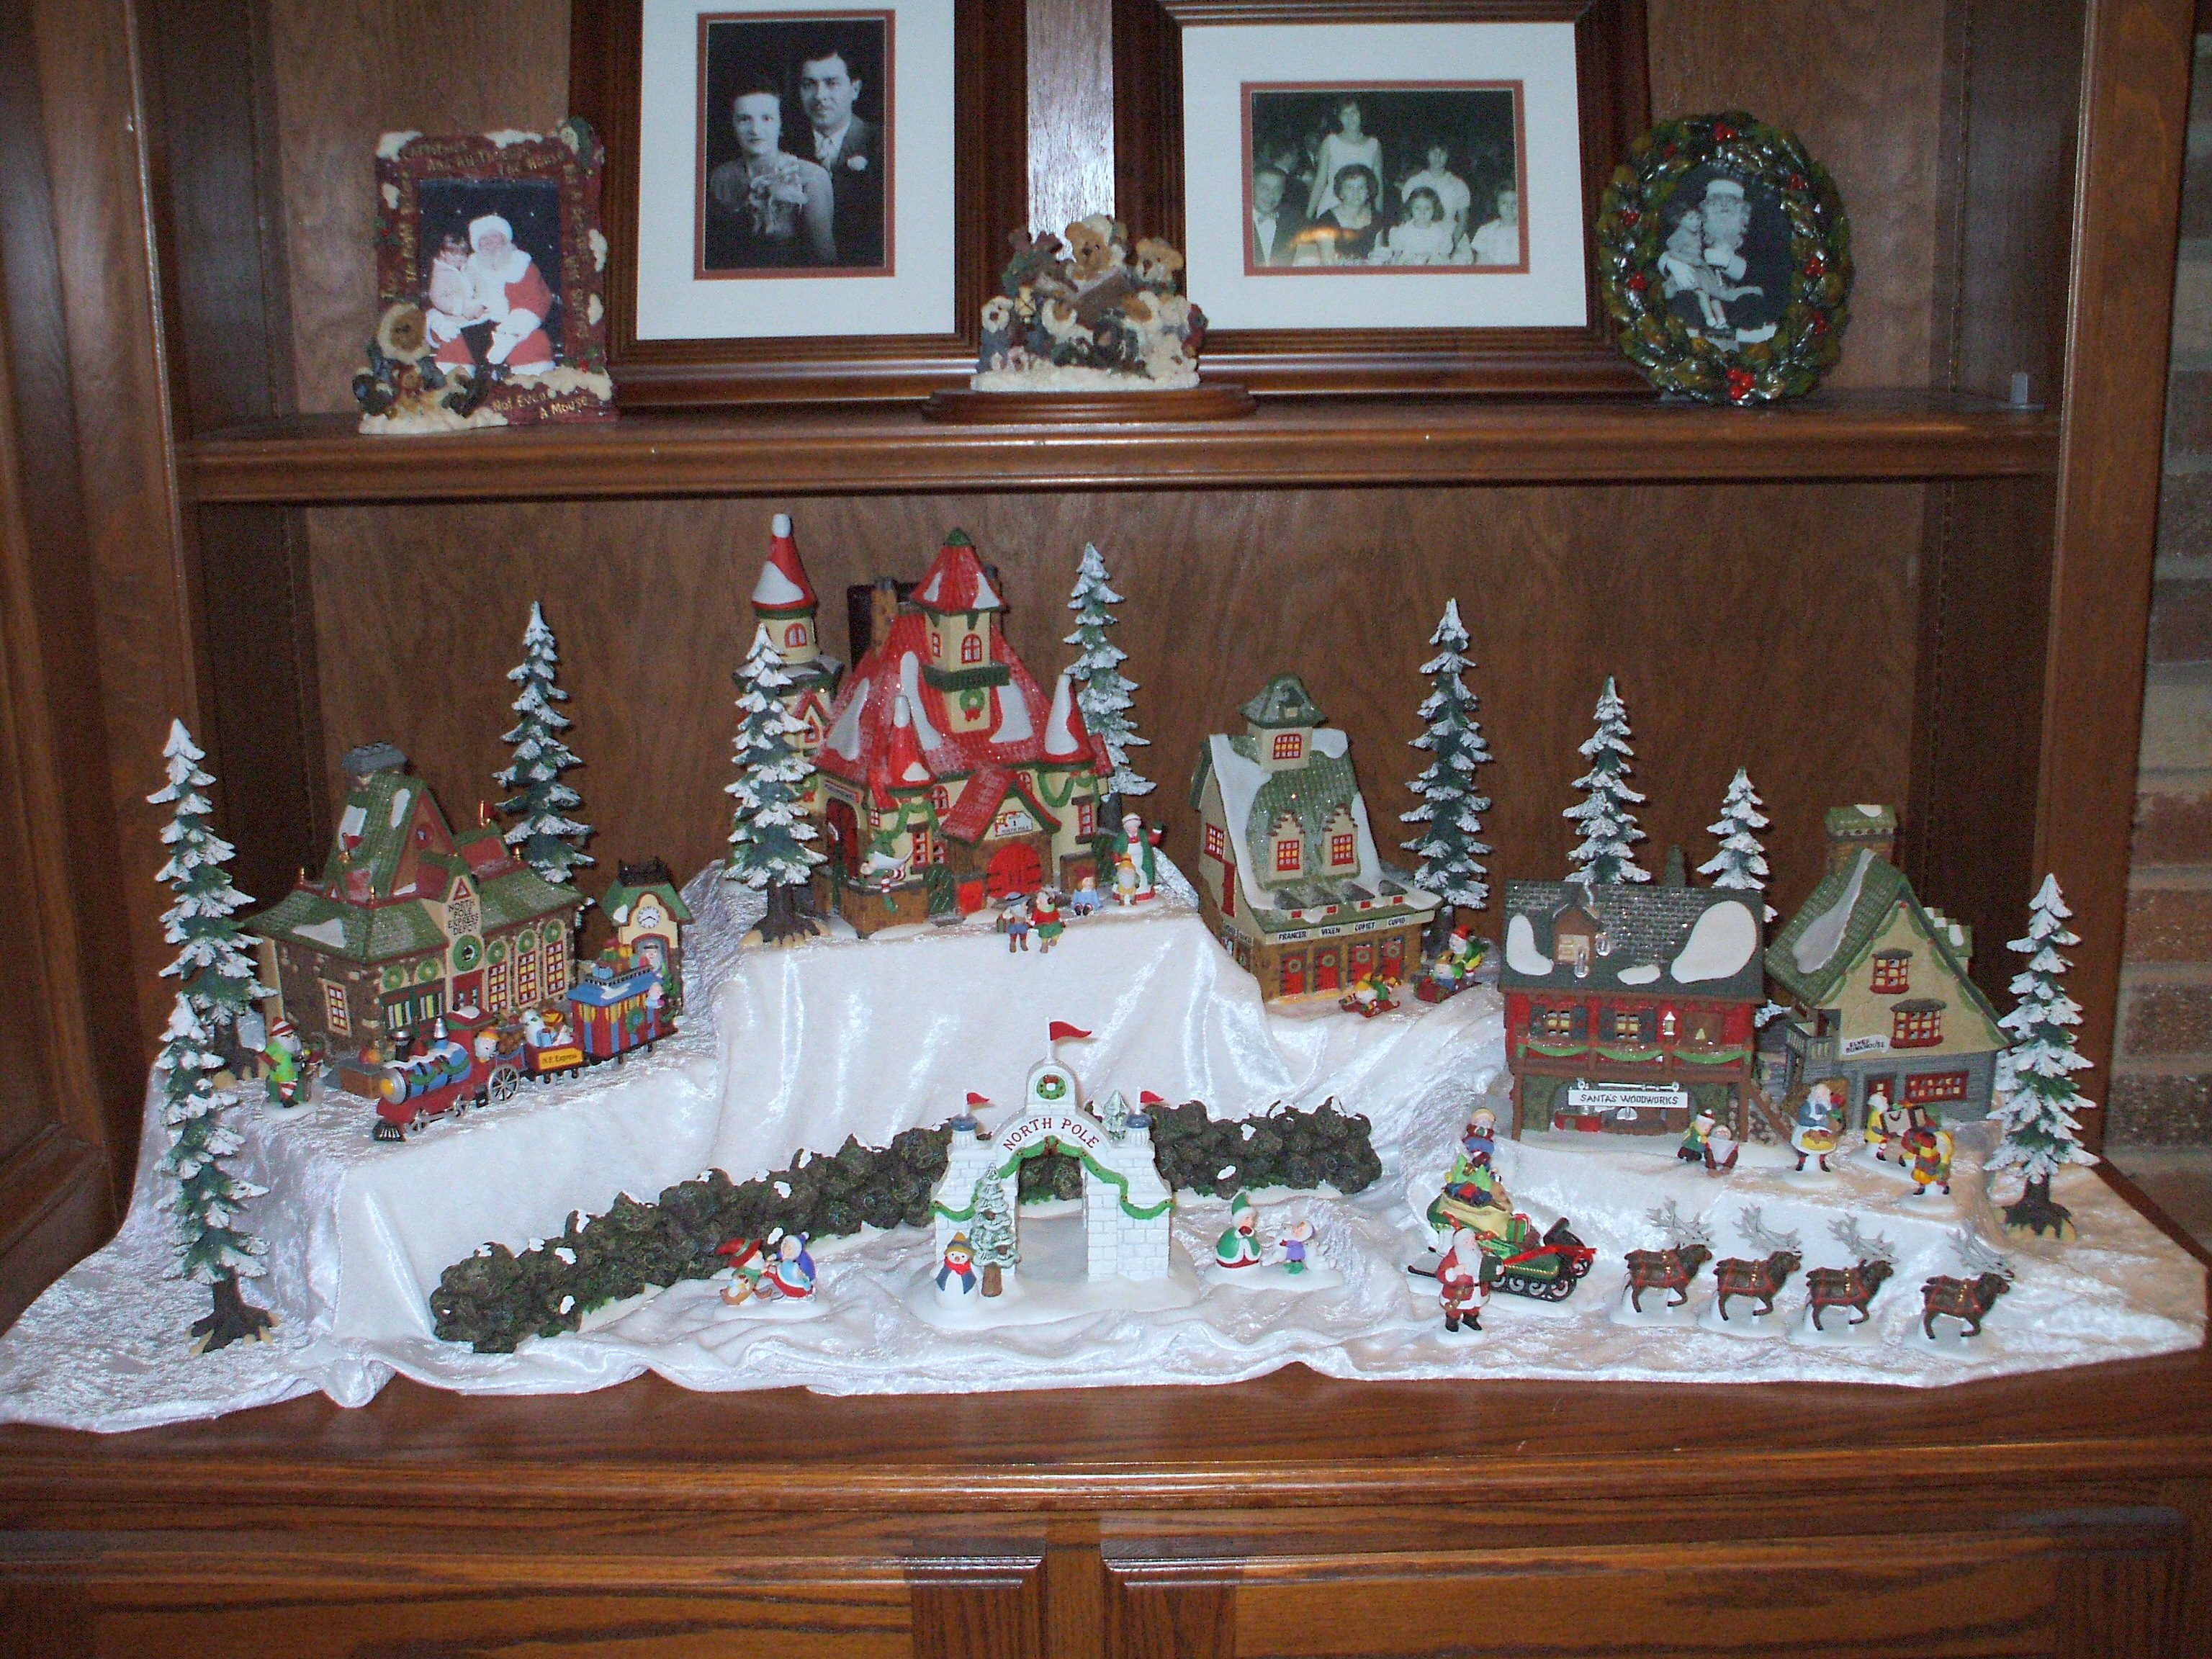
In a bookshelf to the left of our family room fireplace are a collection of family photos.  As mention, some of the photos are our children’s formal portraits but others include old family photos such as childhood photos of me and my husband and also my parent’s wedding portrait.  Other family photos are more informal and were taken at family events over the years.  I love the fact that when guests come to visit they are able to see in one place in our home photos of all of our family members taken at various times in our lives.

Displayed in another room of our house, in our master bedroom are formal wedding portraits of my husband and I and these are displayed on the dresser along with childhood photos of the both of us.  I really like the idea of displaying the childhood photos and our wedding photos together because there is such a lovely contrast of the past and it is fun to see how we looked when we were younger!

As you can see, I like to surround ourselves with photos taken over the years but not all of them need to be formal portraits.  Examples of this are the informal photos taken on family vacations and trips that are displayed in the bookshelves of our home library.  Our family loves to travel to places such as national parks or historic sites but we also enjoy getting out into nature by hiking or fishing. Looking at these photos always brings back wonderful memories of fun times and interesting places spent together as a family.

For more information about displaying family photos, please check out the following post, Not Your Normal Wall Art!

Family memorabilia

Over the years I have collected several items that can be classified as family memorabilia.  The idea for displaying these pieces throughout our home is to remember special events or important times in our lives.  Here are a few examples:

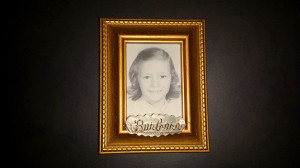
Displayed in the upstairs hallway of our home is a large wedding portrait with the date of our marriage inscribed on a small gold plaque and on the mat surrounding the portrait are the signatures of our wedding guests.  To the left of this piece is another series of four photos taken on our wedding day with our families.  These two sentimental pieces commemorate that special day at the start of our lives together as husband and wife.

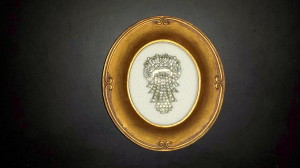
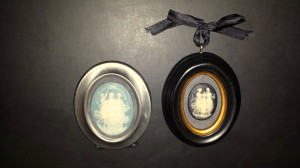
Two more family memorabilia pieces displayed in our home are hung on the wall above the bed in my daughter’s room.  The two framed pieces commemorate her baptism and her first birthday, two important events in her childhood.  Using an uncut mat board and some special scrapbook paper that was signed by the guests that were in attendance at those two events and then later framed in matching golden frames I created these two pieces that will hopefully be something my daughter will treasure forever as a unique childhood heirloom.

Sometimes other important influences in our lives are the places we have lived.  In the dining room of our home I have displayed two framed pieces of sheet music.  The first one is “My Kind of Town” as sung by Frank Sinatra which is often referred to as the “Chicago” song.  Chicago is a special place in my family history because my mother was born there and my parents met, married and lived there before moving to California.  The other framed sheet music is of the song “San Fernando Valley” as sung by Bing Crosby.  This is another important place to me because that is where I was born and raised and I have very fond memories of living there as a child.

For more information about displaying family memorabilia commemorating special events, please check out the following post, Not Your Normal Wall Art!

Travel Souvenirs

Our family enjoys traveling across the United States and we also have traveled to different parts of Europe to see family and friends and my husband has visited parts of Asia while he was getting his master’s degree.  All of these travel experiences have provided us with interesting opportunities to learn about our country and the world and we have thoroughly enjoyed our time together as a family visiting these places.

During these travels we have collected various items and these are displayed in the library of our home.  The bookcases are filled with interesting souvenirs, such as a weapon made from sharks teeth purchased at the Polynesian Culture Center in Hawaii, Polish dolls and a city certificate commemorating our visit to Krakow in Poland, a piece of the Berlin Wall and framed Edelweiss from a trip to Germany, two jade lions displayed with a photo from my husband’s visit to Asia and a photo of our family taken at the Kennedy Space Center displayed with a model of the Space Shuttle.  All these unusual items are displayed as reminders of wonderful trip that we have taken over the years and are also great way to start interesting conversations with guests visiting our home.

The other parts of the bookshelves are also filled with rocks, minerals and fossils that my husband has collected over the years.  This interesting hobby is highlighted in a post that he wrote recently called “The Rock Guy”.  Please click on the link to check out how he started his collection and information about the different items.

On the opposite wall in the library is another bookshelf filled with beach memorabilia that I have collected throughout the years.  Living in California our family has spent many wonderful hours at the beach walking along the shore, playing in the sand and watching the waves and some very beautiful sunsets over the Pacific Ocean.  We have collected many seashells from the beaches of Southern California and on our visits to the east coast in North Carolina and Florida.  These seashells are also displayed with family photos from those trips and decorative pieces that tell the story of our love for the beach and the oceans.

For more information and suggestions on how to display these items, please check out the following posts:  Displaying Travel Souvenirs and Beach Memorabilia

Themed Collectibles

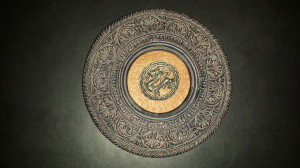
Over the years I have collected several themed items that are displayed throughout our home and reflect my interests and hobbies.  I have several different series of collectible plates that displayed in various rooms, such as Danbury Mint National Park plates that hang above the bookshelves in our library and within the bookshelves are several plates displayed on easels, two collectible nature plates of ducks and wolves and a Native American decorative plate we bought during our southwest travels.  These collectible plates are another reminder of our family travels and our love and respect for nature and animals.  For more information about the other collectible plates displayed in our home, please check out the post Decorating with Plates.

Living in California our family has been going to Disneyland since it opened in 1955 and we have spent many wonderful times together as a family enjoying the “happiest place on earth”.  Over the years I have started a collection of Disney memorabilia including Disneyland items, Mickey Mouse, Pinocchio and Disney princess figurines and these items are displayed in a trio of glass door bookshelves in the basement of our home and reflect our family’s love for all things Disney!  For more information, please check out Disney Memorabilia Collection.

Another special collection displayed in our home is my Boyd’s Bear figurines and stuffed animals.  In the library of our home is an oak bookcase which displays some of my favorite Boyd’s Bear figurines, some of these items are changed seasonally.  Additional holiday Boyd’s Bear items are displayed in other rooms of our home.  My collection of the whimsical Boyd’s Bears items never fails to put a smile on my face and brings joy to my heart!  For more information, please check out the following posts: Displaying a Boyd’s Bear Collection Part One and Part Two.

In conclusion, decorating a home with family photographs, travel mementos, a collection of interesting books and other various decorative items is a wonderful way to reflect a family’s interests and hobbies.  For additional examples about adding decorative pieces that will add personality to a room, please check out the following Décor posts, Framing Small Items and Home Office.  In addition, please check out the Craft Section of this blog for some wonderful projects, such as Embellished Photo Frames.

Decor – My Christmas Decorations from Past Years (Part One)

When we lived in California, I decorated our house for Christmas in a very different way from our Midwest home.  I used artificial pine garland in several of the rooms, including the living room, family room, dining room and kitchen.  Pine garland is a wonderful Christmas decorating accessory to use and it can be very versatile with the use of different items added from one room to another to get a wonderful variety of looks.

As I discussed in last month’s Décor post, Fall decorations, in our previous home in California I used several lengths of pine garland set up in both the living room and dining room decorations with golden roses, berries and oak leaves with pre-strung with lights because the intent was to leave the garland in place until Christmas.  This was meant to save time during the holiday decorating process and the accessories in the garland would be changed from the Fall to the Christmas seasons.  In both rooms there were large oak pieces of furniture, an oak entertainment center in the living room and an oak china cabinet in the dining room, and the garland was secured into place at the top of each.

For the 2002 Christmas season, I removed the Fall decorations and added red poinsettias with red berries and holly leaves.  The inspiration for this was a trip had recently made down to Encinitas, California to the Ecke farm that grows poinsettias which are marketed and shipped throughout the United States during the holiday season.  I started the arrangement by inserting several artificial poinsettias into the existing garland and in between the flowers I added holly leaves and red berries.  The contrast of the green pine garland and the red poinsettias was very festive for Christmas.  Both arrangements in the living room and the dining room used the same decorations.

OLYMPUS DIGITAL CAMERA

For the 2003 holiday season, I decided to do a different arrangement in the dining room.  I thought it would be appropriate to incorporate artificial fruit into the garland for a food themed arrangement that was reflected in the still life painting over the china cabinet.  I started by lacing red burgundy colored ribbon throughout the artificial pine garland. Next, I secured artificial “sugared” fruit onto the garland; I used grapes, apples and pears.  I think it made a wonderful display and looked very elegant in the dining room and the arrangement was used for both the Fall and Christmas seasons.  (Please check out the craft post, Victorian centerpiece, to see how I repurposed the “sugared” fruit into a lovey arrangement that I used last year in our Midwest home for the holiday season)

OLYMPUS DIGITAL CAMERA

In our California home, I always decorated our kitchen with a gingerbread and candy theme for the Christmas season.  To start the 2002 decorations, I hung an artificial pine garland over the window.  I had found various candy themed items in the local craft stores, such as artificial chocolate candies, white chocolate covered strawberries and white “Icing” snowflakes.  These items were secured to the garland and the decorations looked perfect for the kitchen.

In keeping with my decorating style of constantly changing my holiday displays, for the 2003 Christmas I again used an artificial pine garland and laced a cute “Ho,Ho,Ho” red and white ribbon through the garland.  I still used the artificial chocolate candies but that year I added artificial gumdops, peppermint candies and red and white lollipops.  All these items were secured to the garland and once again the contrast of red and green colors looked great for the Christmas season.  As you can see for the photos of the kitchen garland for one year to the next, the same candy theme was used but with different accessories the garlands had to distinct and different looks.

OLYMPUS DIGITAL CAMERA    OLYMPUS DIGITAL CAMERA

For the last garland arrangement in our California house, I used another artificial pine garland for the fireplace mantel, this Christmas decoration was featured in the Décor post, Displaying a Boyd’s Bear Collection – Part Two.  I had found a string of amber pinecone lights in a local store and strung them through the garland.  Next, I evenly spaced my collection of Boyd’s Bear ornament nestled among the pine boughs.  To finish the display I added several real pinecones and red berries scattered throughout the garland.

As you can see by moving from one house to another I adapted by Christmas decorations and used the items in new and different ways.  I hope this inspires you to take a look as your Christmas decorations as you unpack them from their storage boxes and think about displaying those items in fun and different ways in the rooms of your home.

Decor – Ornaments Used In Unusual Ways

When decorating the home for the holidays consider using Christmas ornaments in unusual ways.  Christmas ornaments are not just for the Christmas tree, there are so many different ways to incorporate them into holiday decorations.  Listed below are several suggestions –

(Please check out this month’s Craft post, Christmas Ornament Displays, for additional ideas on how to display Christmas ornaments with supply lists and instructions to create one of a kind Christmas decorations for your home)

Chandelier Decorations

Several years ago I was trying to think of a creative idea to decorate the chandelier in our dining room.  It was a beautiful bronze multiple light fixture with lovely curved arms.  Inspired by seeing other chandeliers with hanging crystals, I thought for the holiday season I would hang small ornaments to add a festive look.  I found some small glass pinecones and acorns at a local retail store and I thought they would be perfect. I hung them from the chandelier’s arms with small ornament hooks.  Another way to hang them would be to use ribbons or silk cord.  So, during the holiday season look for smaller ornaments that fit your holiday decorating theme – maybe candy or gingerbread ornaments, small porcelain or glass snowflakes, small ball ornaments in red and green or silver and gold.  The retail and craft stores have a wide selection of ornaments – shop the sales to keep the cost down – be creative with style and color!!

OLYMPUS DIGITAL CAMERA

Window Decorations

I had purchased several beautiful ivory porcelain ornaments for an unbelievable price at an “After Christmas” sale one year but I didn’t know exactly how I was going to use them.  I had them in my Christmas storage box for a couple of years, just waiting for the perfect idea.  Finally, I was trying to find a way to decorate our windows and I thought the ornaments would add just the right festive touch.  With the curtain pulled slightly back and creating a beautiful frame for the windows, I hung the ornaments from the curtain rods at various lengths with thin ribbon in a matching ivory color.  It was the perfect holiday decoration for the windows!

Ornament Shadowbox

Years ago my Mother gave me several old ornaments from our family Christmas tree.  I never knew what to do with these ornaments because they were very old, made of vintage glass and I didn’t want them to break.  Since my Mother passed away this year, I decided I wanted to do something very special with them.  An ornament shadow box seemed like the perfect way to showcase and keep them protected.  If you have a family heirloom ornament or an ornament too fragile or valuable to hang on the Christmas tree, or a unique hand-painted, one of a kind ornament – consider displaying it in a shadow box.

Some ornaments are so beautiful or have such special meaning – why only display them for such a short time at Christmas when you could enjoy them throughout the entire year!  Sentimental ornaments would also be wonderful in a shadow box.  Consider these ways to display them year-round.  – a baby’s first Christmas ornament could be hung in the nursery – a baby blanket could be used as the background and cut to fit the size of the frame.

A special shadow box ornament would also make a wonderful gift to celebrate life’s special occasions, like a first Christmas ornament for the newlyweds, or to celebrate a new home, or a special milestone anniversary.  There is usually such a nice selection of ornaments available for the holidays, so when you are out doing your Christmas shopping look for unique one of a kind ornaments to give as a special gift.

Tabletop ornament hanger

Another alternative to showcase a special ornament is with a tabletop ornament hanger.  These are usually sold during the holiday season and feature a long curved hook to hand the ornament from and come in a variety of finishes – metal, glass, etc.  I use something a little out of the ordinary, pocket watch display domes – a glass dome with hook at the top and a wood base.  They work perfectly as an ornament hanger.

Wreath decorations

Hallmark and Enesco creates wonderful ornaments every year.  Some of those ornaments are very collectible and available in different themed series.  Every year another ornament in the series is available and soon you can have a collection of several wonderful themed ornaments.  If you display the collection on the Christmas tree separately, they could get lost with all the other ornaments.  Consider highlighting the collection and displaying them together on a themed Christmas wreath.

Nutcracker wreath - final    Boyds Bears wreath - final

(Please see the Craft post, Christmas Wreaths and More Christmas Wreaths, for ideas and instructions on creating unique wreaths using a collection of themed ornaments – two different Department 56 wreaths using small ornament houses from the Dickens and North Pole collections and also a Disney character wreath.  In addition, there is a lovely Nutcracker Ballet wreath using ornaments found in a local craft store and also a collection of Boyd’s Bears ornaments used in another themed wreath)

OTHER USES FOR ORNAMENTS

  • Tied to a luncheon or dinner napkin, use as a party favor for guests to take home.
  • Use as a gift wrap accessory and tie to a present for the perfect finishing touch.
  • Hang from the under a kitchen cabinet as simple holiday decorations.

      NOTE: don’t hang too low to interfere with working on the kitchen counters.

  • Hang from a pine garland to add an extra festive touch to a fire place mantel.
  • Hang ornaments from garlands draped on top of the bathroom mirrors.

There are so many different ideas for using Christmas ornaments in unexpected ways and you are only limited by your imagination and creativity!!  Please send your comments and suggestions; I would love to hear your ideas of other uses for Christmas Ornaments.

Decor – Setting up a Department 56 Village

North Pole display 4

Just like this month’s other Décor post, Setting up a Fontanini Nativity, another one of the highlights of our Christmas home decorations is our Department 56 North Pole Village.  When I worked in a retail store during the 1990s, we carried the collection of Department 56 villages and the North Pole one was my favorite … and of course, I began collecting pieces for our home.  Soon after, my husband and I were blessed with a beautiful daughter.  I enjoyed setting up the North Pole Village every year for her to imagine Santa and his elves getting ready for Christmas Eve when Santa would get into his sleigh pulled by eight tiny reindeer to deliver presents to the good little boys and girls.  (somehow, my husband always seems to end up with a lump of coal in his Christmas stocking!)

Usually, months before Christmas, I search the internet for ideas for my Department 56 display but most of the websites only show finished displays and never go into much detail and only have very limited instructions on how to make those displays.  For this post, I thought it would be interesting to show step by step how I set up this year’s North Pole Village Display.

The North Pole display base

The first step to setting up the North Pole Village is always the base or foundation for the display.  As you can see in the photos at the end of this post, over the years in our different houses in California and the Midwest, the display location and layout of the North Pole Village has changed several times.

For this year’s display, I used a base with three interlocking sections that can be used as one long flat surface or can be stacked in a variety of positions to achieve different looks for the display.  I like the flexibility of the sections because I’m always changing the location of the display into different rooms of our home or adding more accessories.  A few years ago, I had purchased the base at a local craft store at an after Christmas clearance sale for a greatly reduced price.  (This one is very similar to the other one that I used for this year’s Fontanini Nativity Display)

The display base that I am using has a white top surface so it is great for the North Pole Village; it gives the illusion of snow.  I set all three of the sections flat on the fireplace mantel and it fits perfectly with the depth of the space.  Next, I position three “sky panels behind the base, I used three sections of Styrofoam painted a beautiful blue with an overcoat of clear sparkle paint to add a wonderful twinkle when the overhead lights shine on the display.  Later I will attach our Christmas Stockings on hidden hooks under the fireplace mantel.  As I mentioned before, I sometimes change my home seasonal decorations from year to year, and as an example, if I were to display the North Pole Village in our family room bookshelves instead of the fireplace mantel I would stack one section on top of the other to fit the narrower space of the shelf.

North Pole display 1

A SPECIAL CRAFT NOTE:  One of the reason’s that I displayed the North Pole Village on the fireplace mantel was because I had made a special Christmas sign last year to hang over the fireplace instead of the English landscape painting that is normally hung there during most of the year.  The seasonal sign uses a Christmas window/wall decal and the wording, “Santa Claus is coming to town”, is perfect to hang above the North Pole Village.  The sign is made from a painted wood board cut specifically to fit the space requirements of the decal with a margin of a couple of inches for me to add about 30 bronze jingle bells for just the right decorative touch, I was very happy with the results of this Craft project!  (The sign was very easy to make, please see the instructions for similar seasonal signs in the Craft post – Halloween signs.  The steps are almost the same as the ones I used to create the Christmas sign but with different window/wall decals and accessories)

The North Pole main display pieces – the buildings

25 years ago I purchased three Department 56 North Pole Village buildings; they were the “Route 1 North Pole” the home of Santa & Mrs. Claus, the “Elf Bunkhouse” and the “Reindeer Barn”.  Later I added “Santa’s Woodworks” and the “North Pole Gate”.  These are the only buildings in my collection so, compared with other Department 45 collectors, my display is very small.  I like the idea of a smaller display for several reasons, the first is that there is relatively less money spent and the second reason is that the display has more flexibility to set up in any room or location in our house.  I appreciate the idea of the more elaborate displays but I prefer my set up time to be only a few hours as opposed to a process of long hours sometimes over a period of several days.

Almost every time I set up the North Pole Village, I always position “Route 1” near the center of the display because it is the largest piece and also because I think it should be the focal point.  To the left, I placed the “Elf Bunkhouse” and the “Reindeer Barn”.  To the right, I placed the “Santa’s Woodworks” building and further to the right, off the display base, I place the “North Pole Gate”.  (These building positions are almost identical to the previous year’s display)

When I am placing the buildings in the display, I will sometimes position them at different angles because I think it adds more interest to the display instead of having everything perfectly lined up in a straight row.  I will also raise the height of the different buildings to also create levels that will give additional interest to the display.  I use white Styrofoam about one inch thick and cut it to fit the dimension of the buildings with an extra one or two inches around the base allowing space to set the display’s figurines or accessories, if I want a higher platform I will stack two pieces of Styrofoam.  The white color of the Styrofoam matches the white surface of the base for an uninterrupted look that doesn’t break the illusion of a snow covered ground.

North Pole display 2

The North Pole display landscape

The next items that I add to the North Pole display are three sets of 7”, 8” and 9” pine trees for a total of nine trees that I scatter across the display.  I usually position the taller trees to the back and the shorter trees to the front of the display.  These trees were purchased at Walmart several years ago for a great price, they were less expensive than the Department 56 trees and I was able to purchase almost twice as many trees for about half the price of the name brand ones.  Buying from other sources assures I am not limited to the selection only available through Department 56 and my display accessories will be unique.

On either side of the display base I set up several sections of rock wall, this is another example of buying from another source.  If you keep your eyes open while shopping in the stores right after the Christmas items go on sale it is a great opportunity to add to the items for your display.  By positioning the rock walls off the base and onto the fireplace mantel it helps to continue the display with additional items that did not fit onto the base.  One example is the North Pole Gate is positioned off to the right of the base but becomes an extension of the scene with the rock wall behind.

Also added to the North Pole display are several Department 56 “Candy Cane Lamposts” that are positioned between the buildings.  To complete the landscape, and even though the top of the base is white to give the illusion of snow, I add more artificial snow to the display to make it even more of a winter wonderland!   

North Pole display 3

The North Pole display accessories – people and animals

The last items that I add to the North Pole display are Santa and Mrs. Claus, the elves and set of reindeer with the sleigh loaded with presents.  Santa is positioned near the sleigh checking his list of naughty or nice boys and girls.  It is set to the left of the base and on the fireplace mantel in front of the rock wall.  Mrs. Claus is standing in front of the Claus home waving to goodbye to Santa.  Scattered throughout the display are several elves, some are carrying packages of toys, having fun on sleds, sitting around the North Pole and some are training the reindeer.  One special group of elves, “Proud Papa and Mamma”, represents our little family.

Finally, as previously mentioned, I don’t have any problem incorporating non- Department 56 items to our North Pole display.  Sometimes these pieces and unusual elements can add interest to a display.  An example of non-Department 56 figurines are several miniature ornaments that I found in a local retail store of the characters from the classic animated 1964 Christmas special, “Rudolph the Rednosed Reindeer”.  Of course, there are Rudolph and Clarice the reindeers, Hermey the elf that would rather be a dentist than make toys, Yukon Cornelius the boisterous prospector and the gigantic Abominable Snow Monster.  The scale of these miniature ornaments is perfect and using them is a wonderful way to incorporate the characters from one of my favorite childhood Christmas specials into our North Pole display!

North Pole display 4

Shown below are photos from past Christmas North Pole displays, as you can see items have been added or changed over the years and the display has been set up in various rooms of our home.

OLYMPUS DIGITAL CAMERA

North Pole Village 2010    North Pole Village 2011

North Pole Village 2012