Decor – Setting up a Boyds Bear Village display

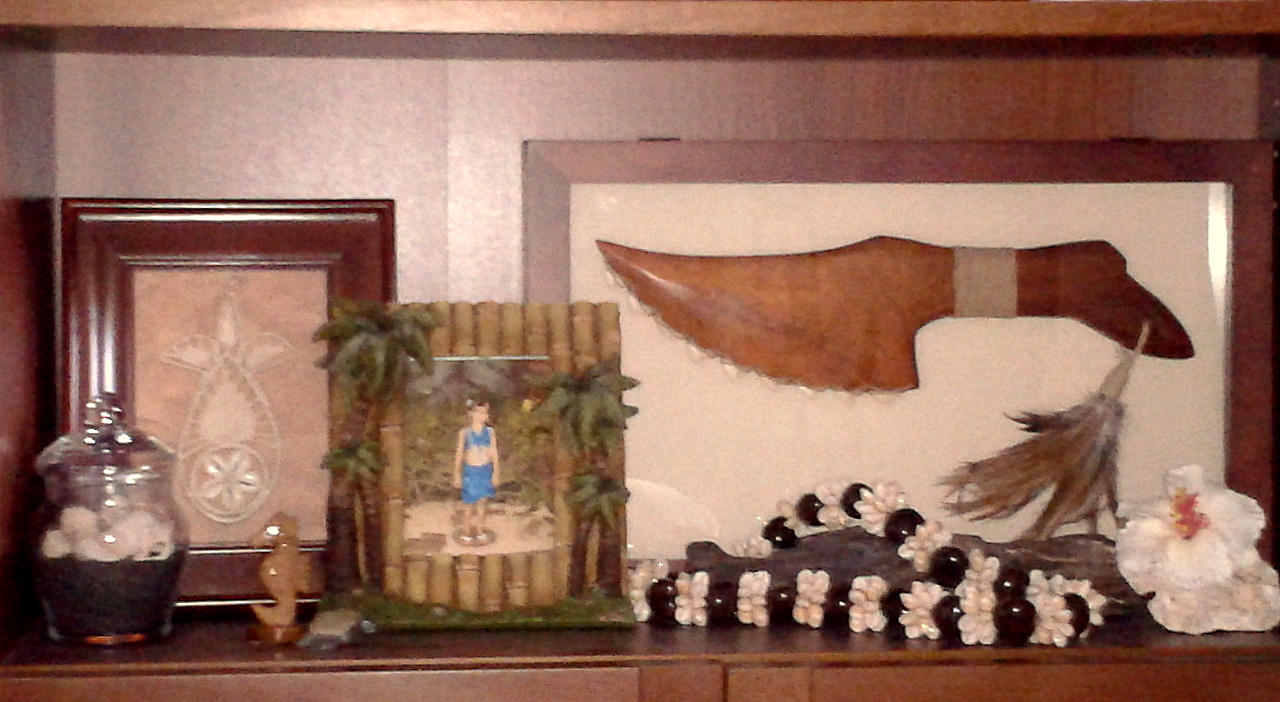
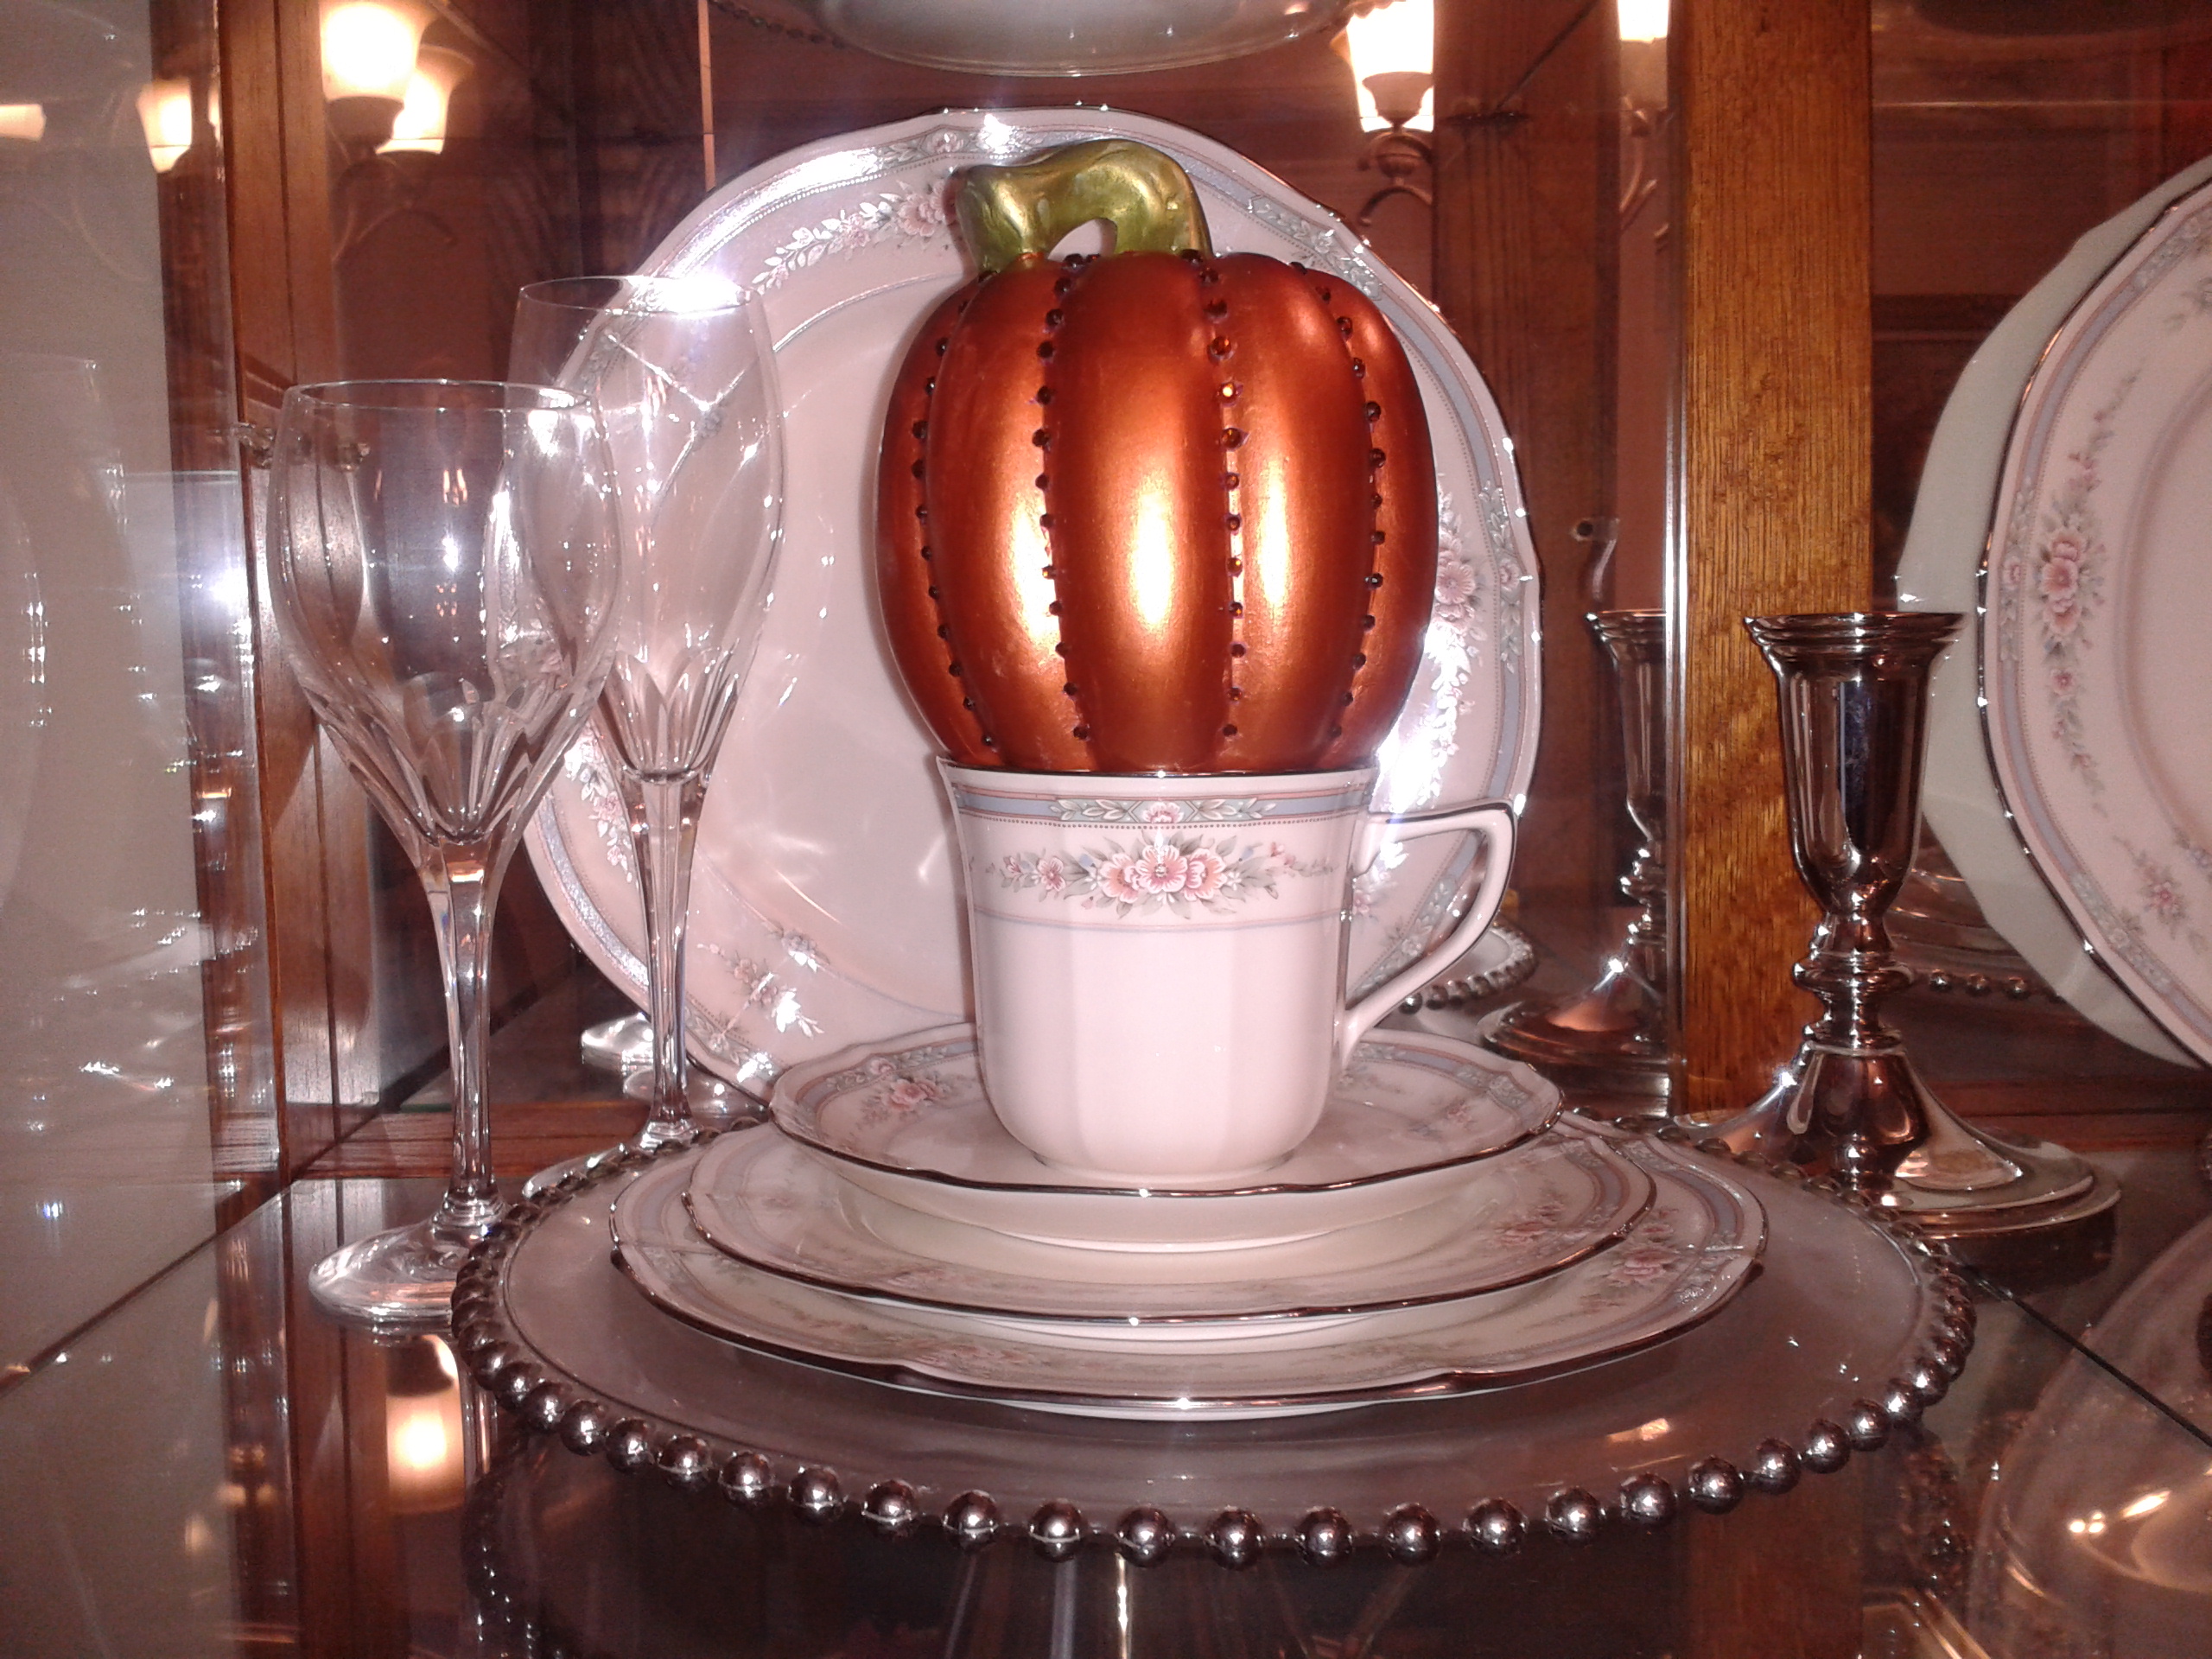
In two previous posts I discussed the many wonderful pieces of my Boyds Bear collection that I started in the 1980s.  Throughout the years I have collected Boyds stuffed animals, whimsical figurines and picture frames.  The main portion of my Boyds Bear collection is displayed in the library of our home in a lovely oak glass-front lawyer cabinet.  These items are displayed year-round in the cabinet and I also add additional seasonal holiday themed figurines.  (If you would like to see more of this collection, please click on the following links:  Displaying a Boyds Bear Collection Part One and Two)

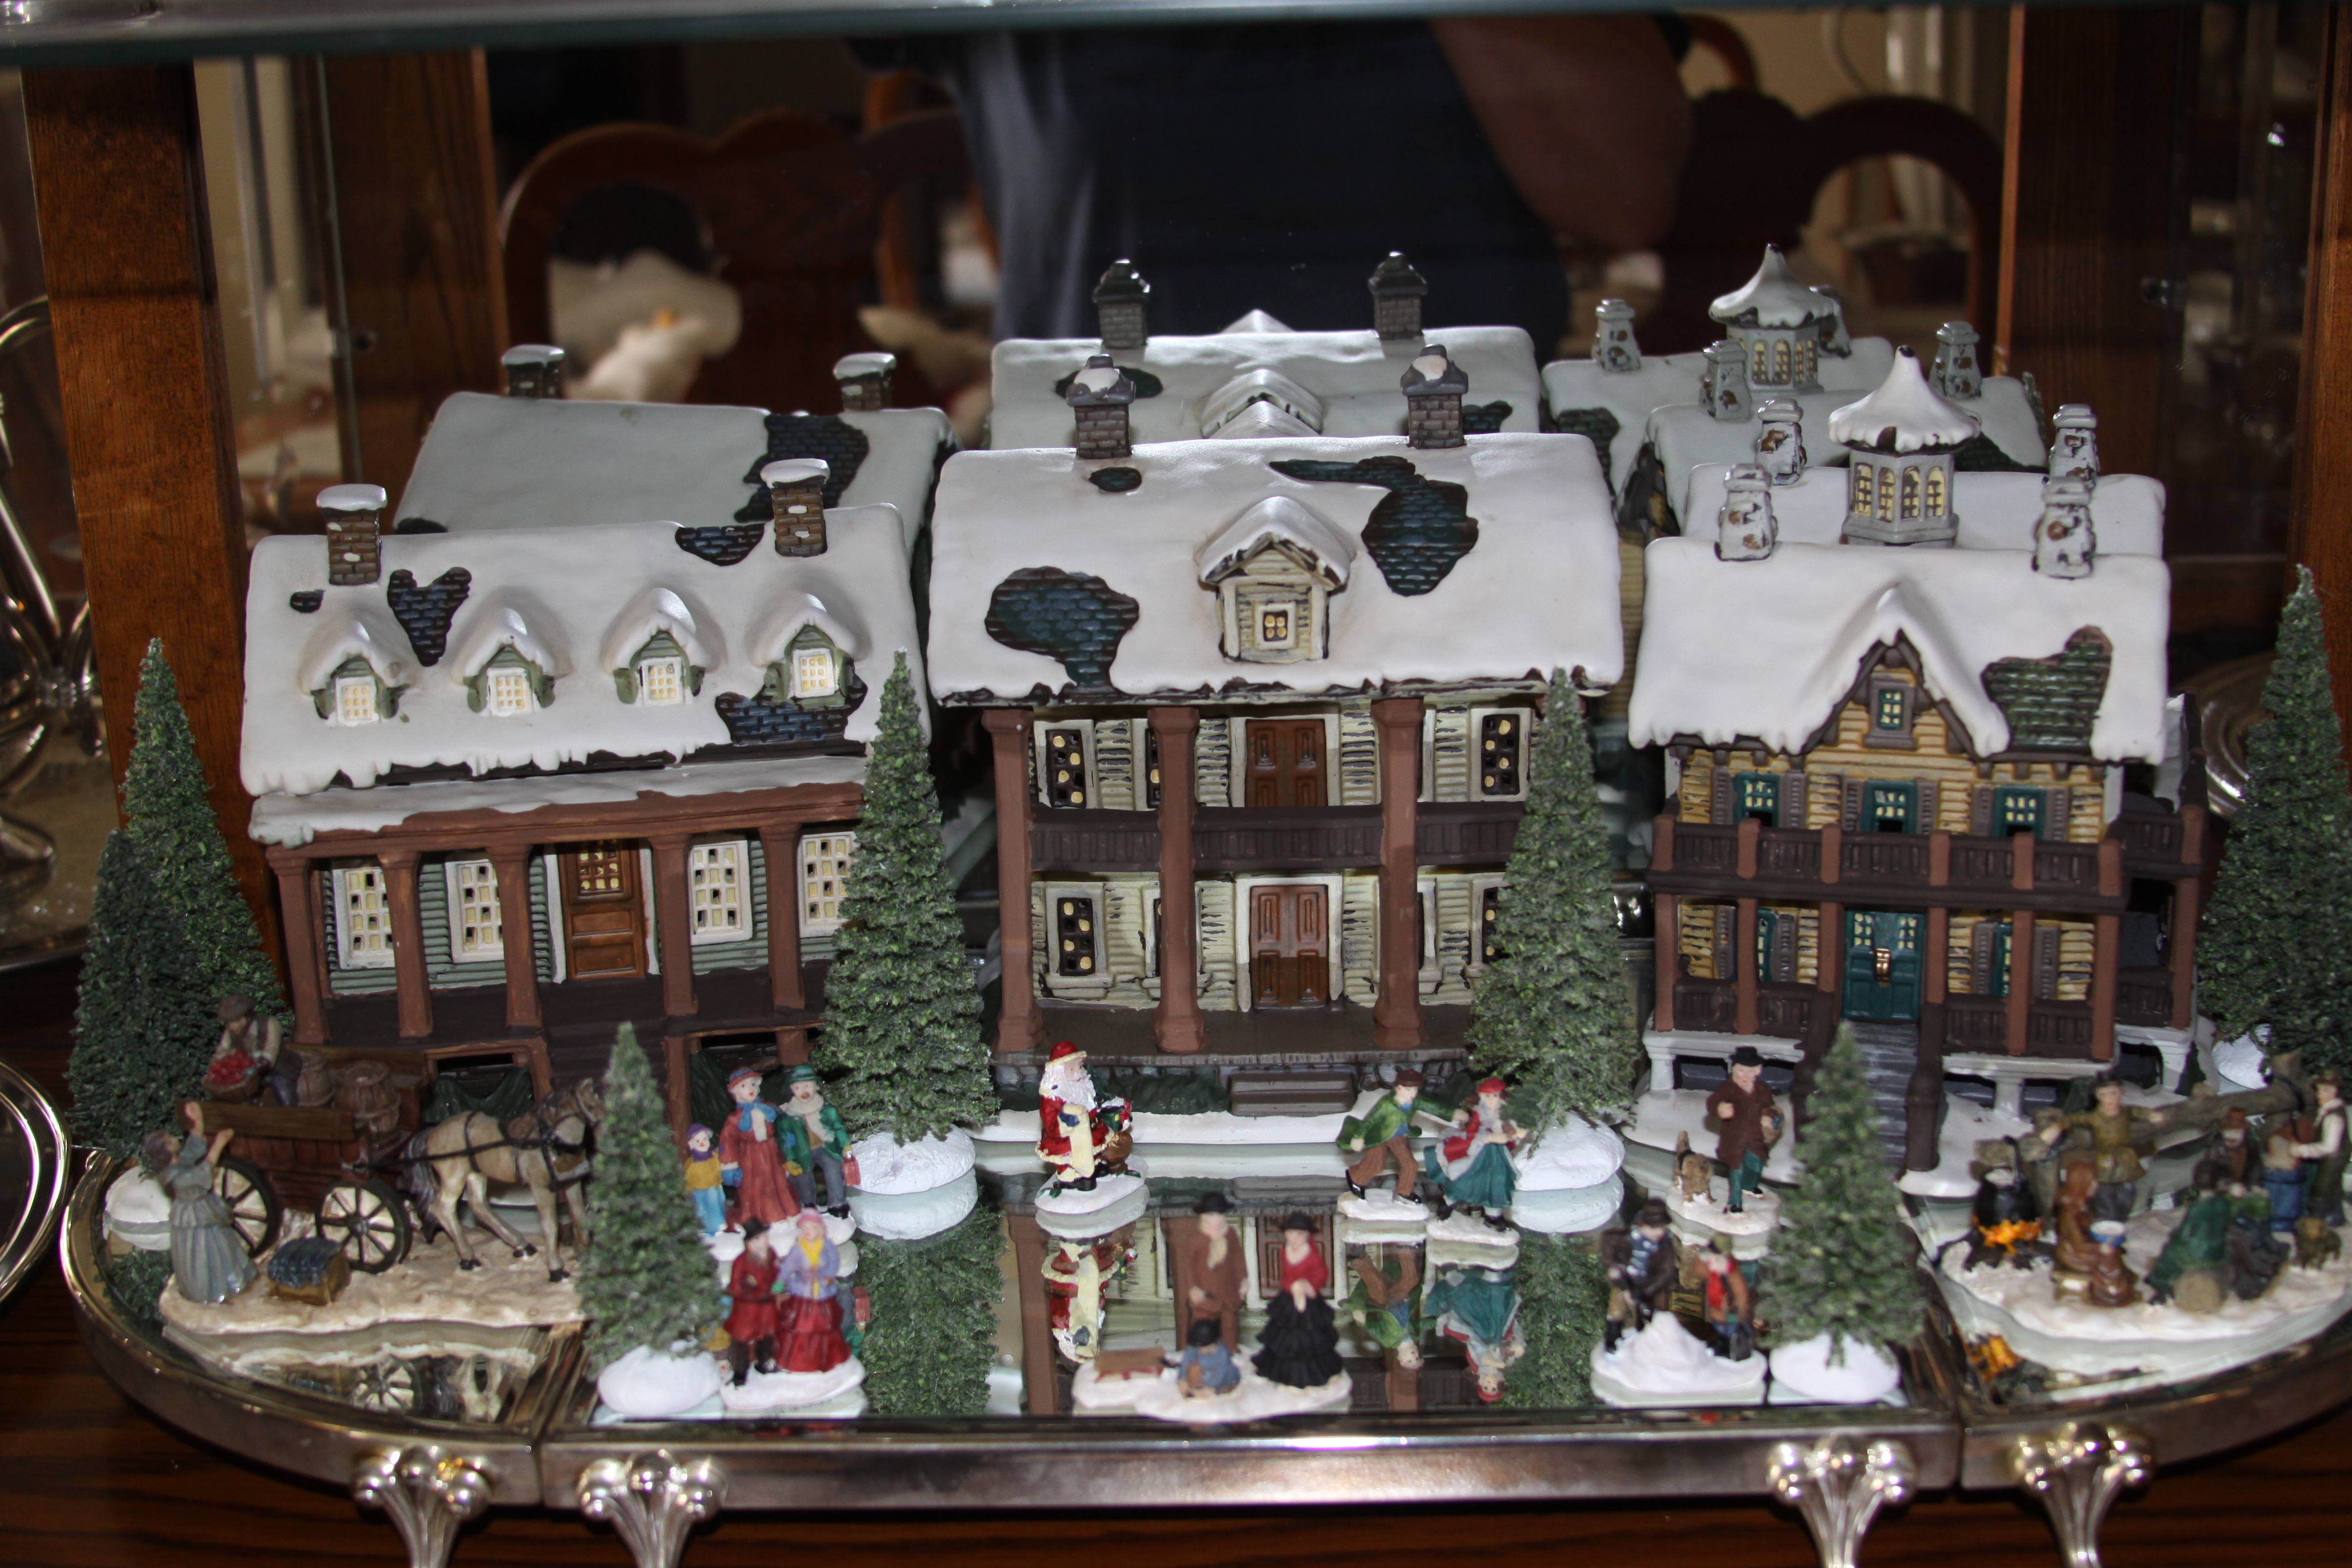
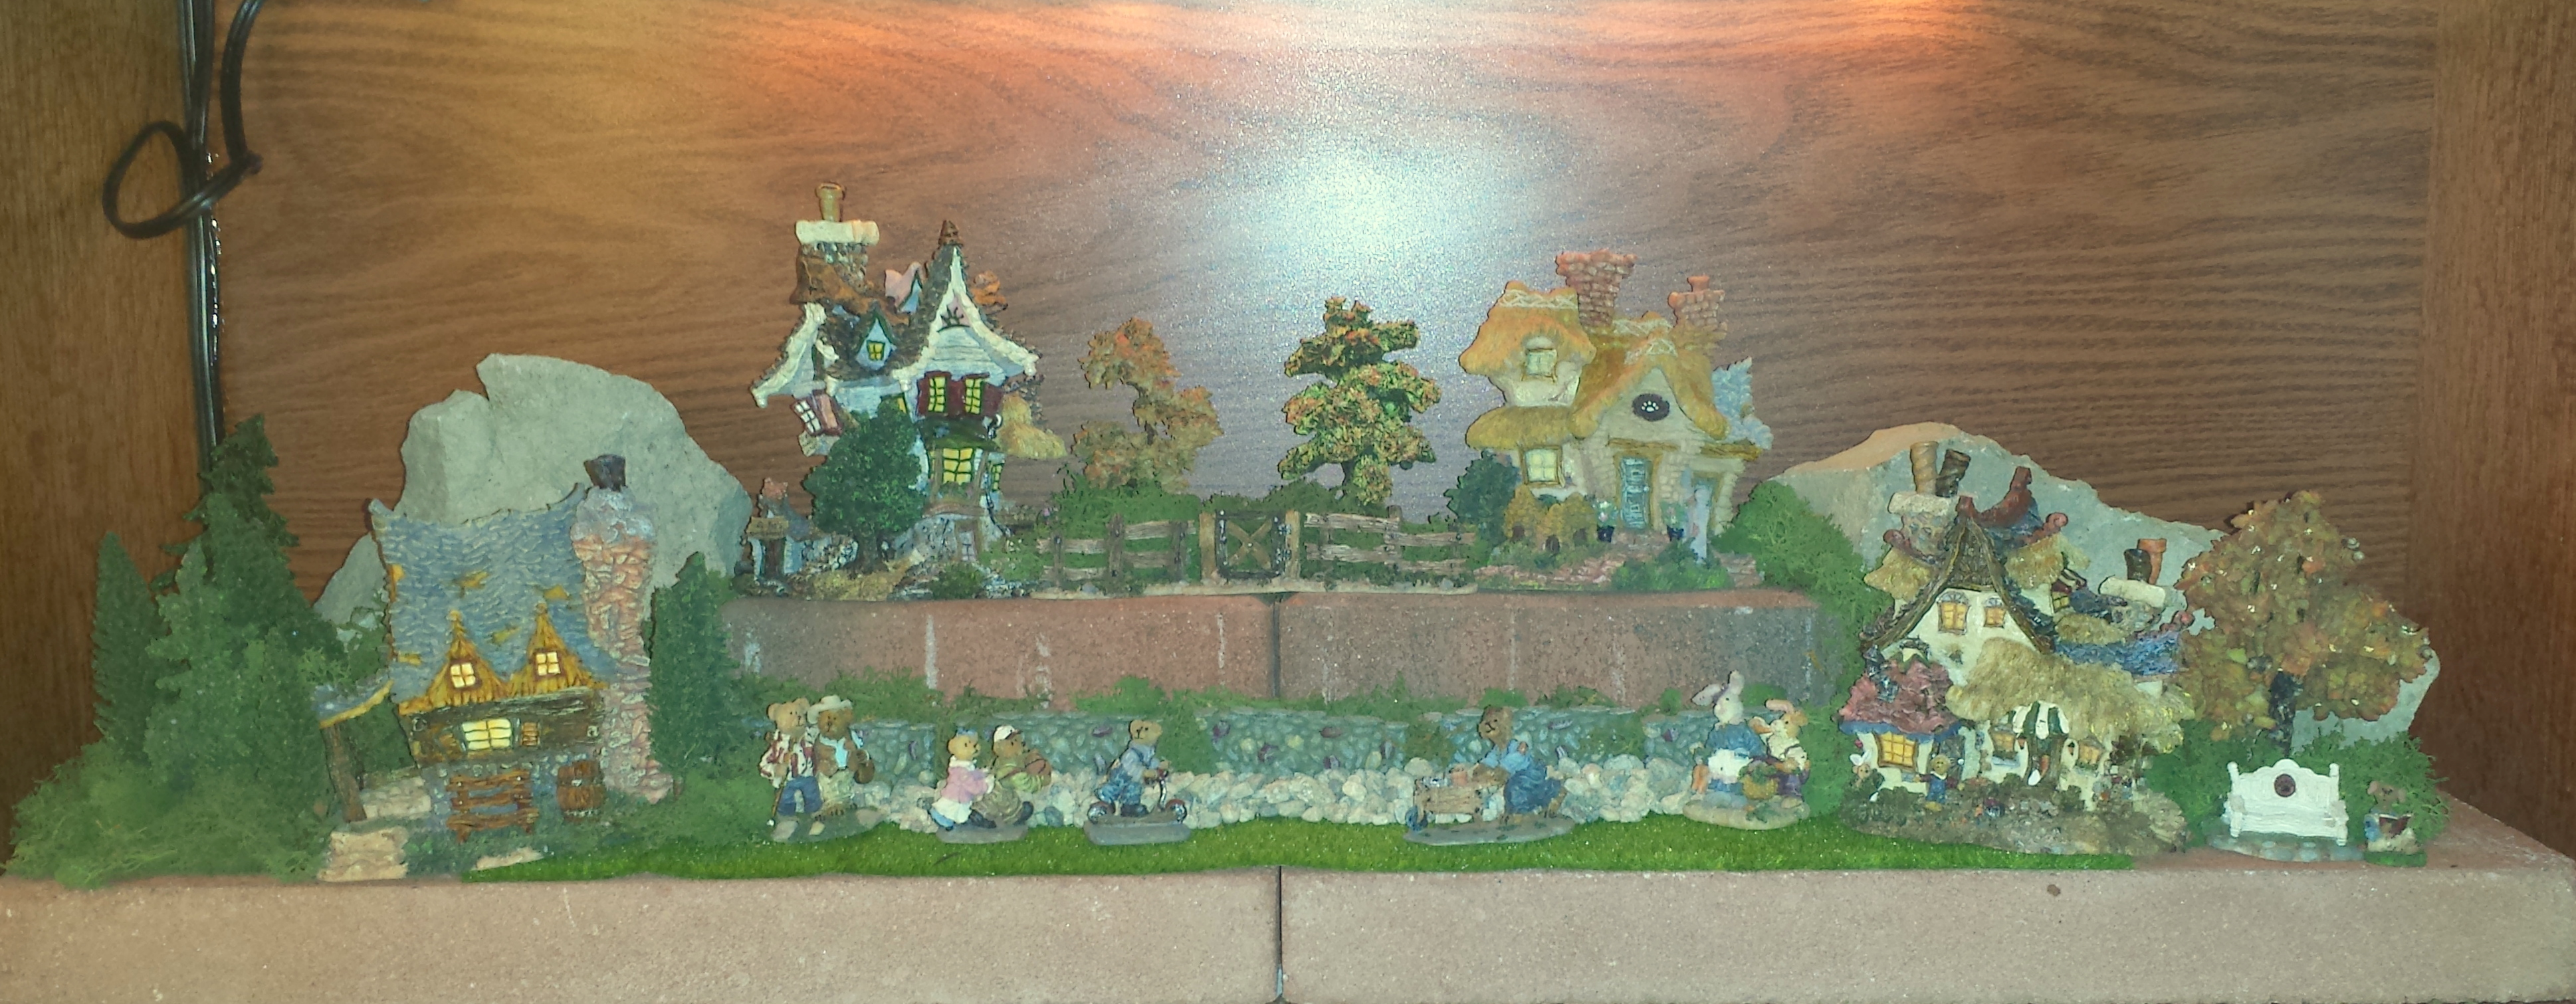
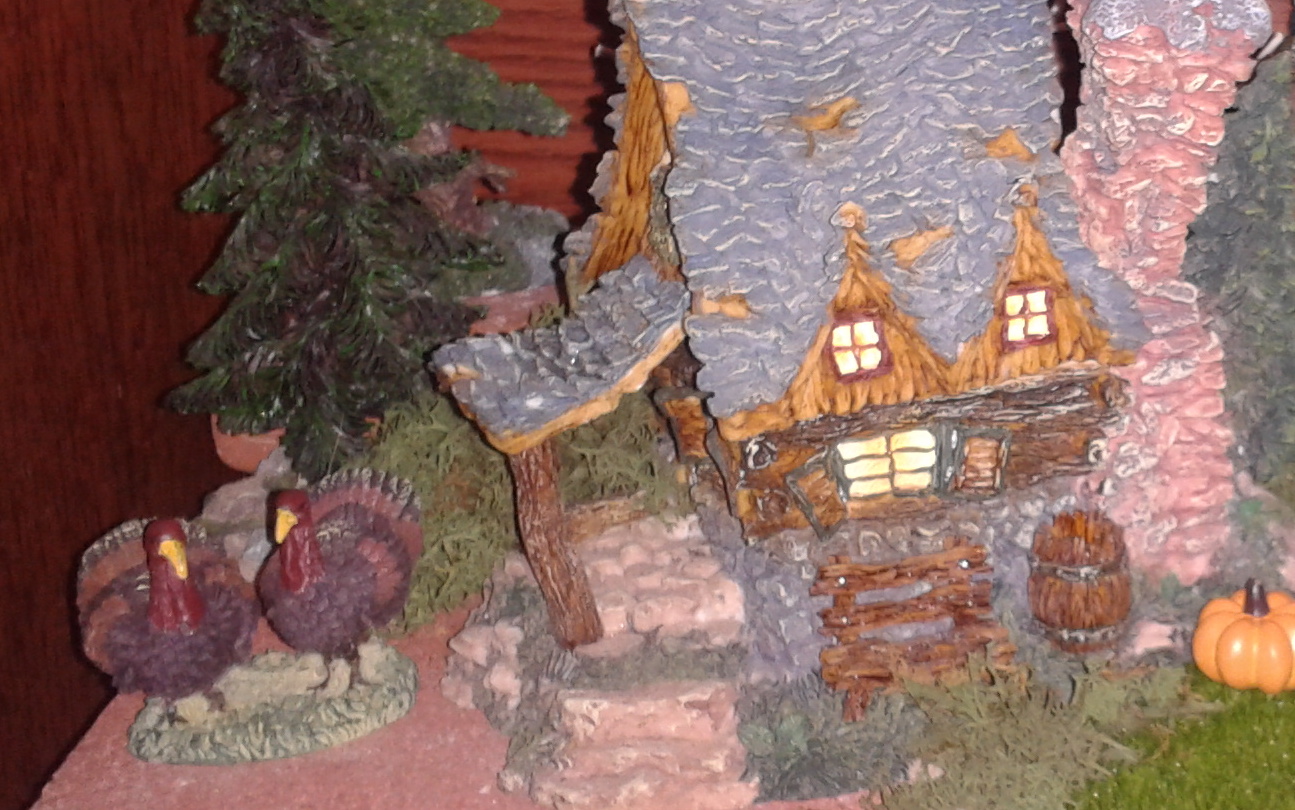
The focus of this post will be the setting up a Boyds Bear Village Display and will included step-by-step instructions of how I set up the display.  In addition, I will show how I change or add special seasonal items to the display for the various holidays.  The Boyds Bear Village display is set-up on the bottom shelf of my Boyds Bear cabinet with several of the charming Boyds Bear Village houses that remain in place throughout the entire year.  The Boyds Bear Village house are: “Edmund’s Hideaway”, “Grenville and Beatrice’s Homestead”, “Emily’s Carrot Cottage”, and “Bailey’s Cozy Cottage”.

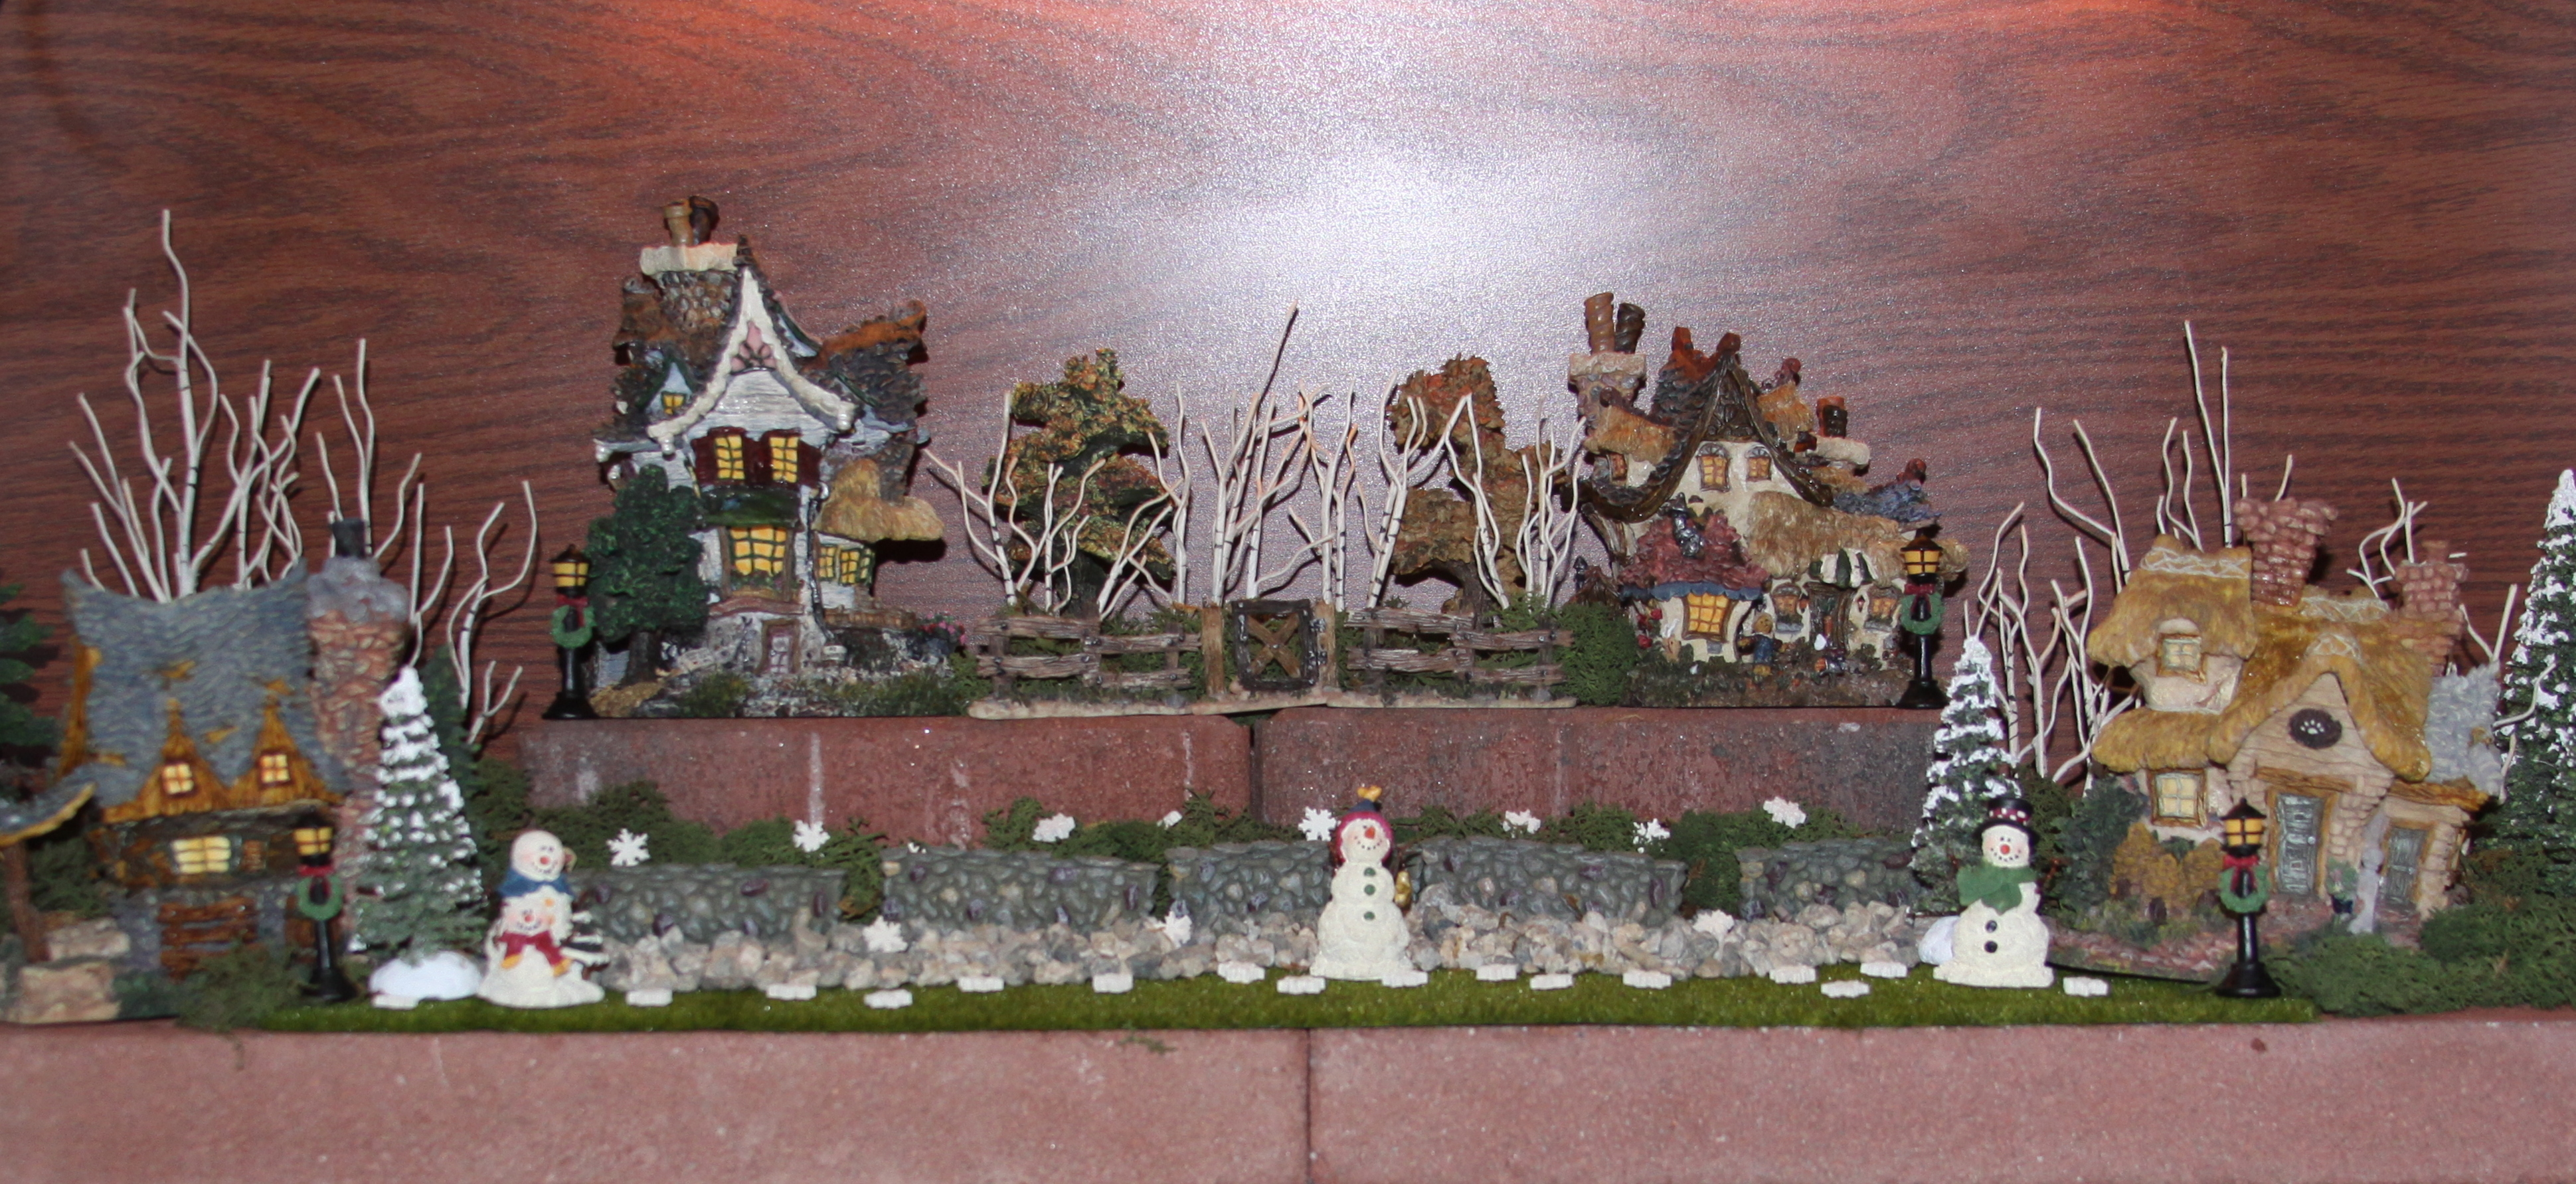
Below are the step-by-step instructions and photos of how I set up the display:

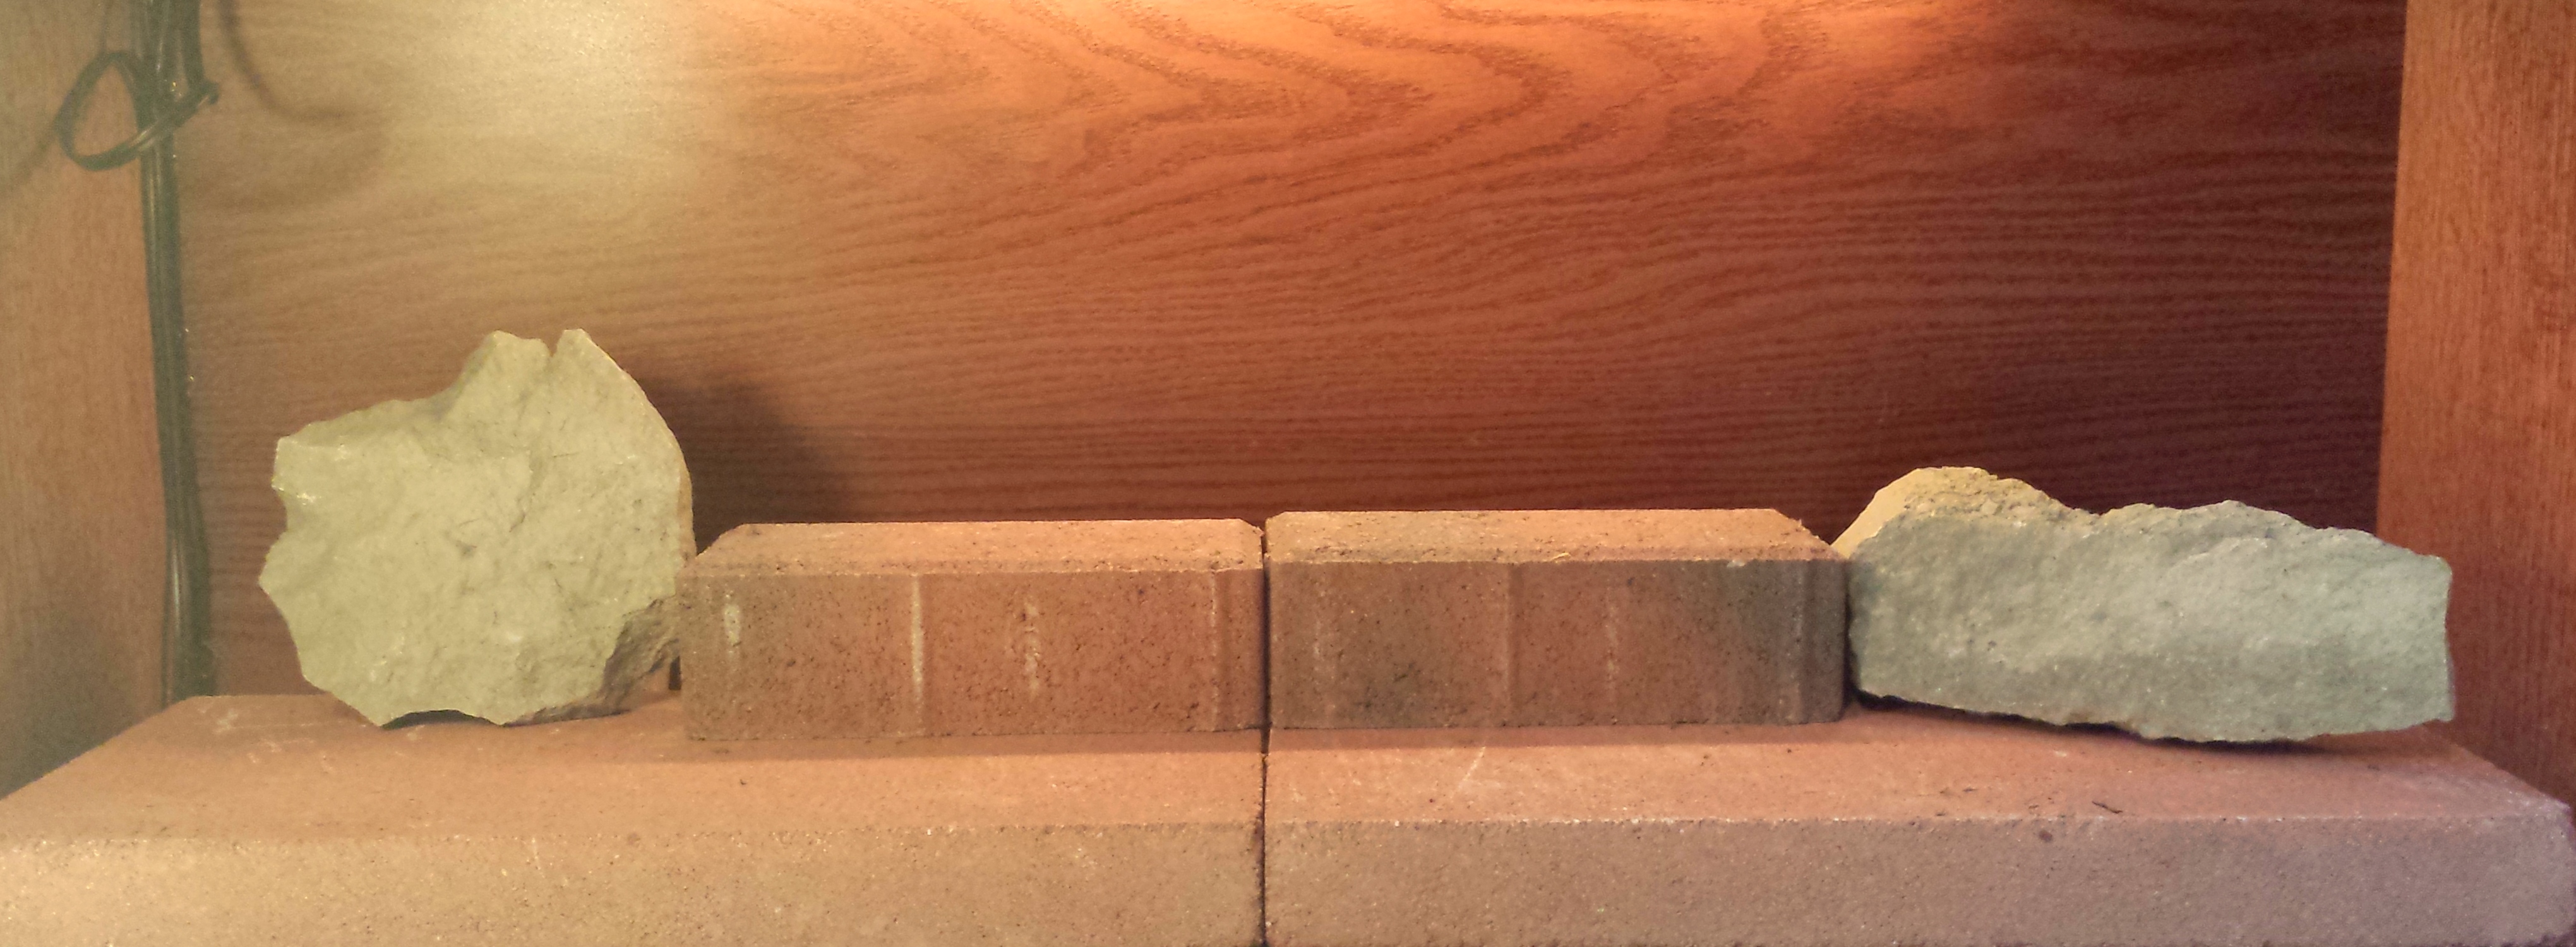
First, I lined the bottom shelf with newspaper and then placed two large bricks to add height to the display.  The newspapers were used to prevent the bricks from scratching the oak bookcase.  Next, I placed two smaller bricks to create more height in the center of the top section of the display.  I also used two large rocks on either side of the display to create more texture and visual interest.

Boyds Bear Village set-up 1
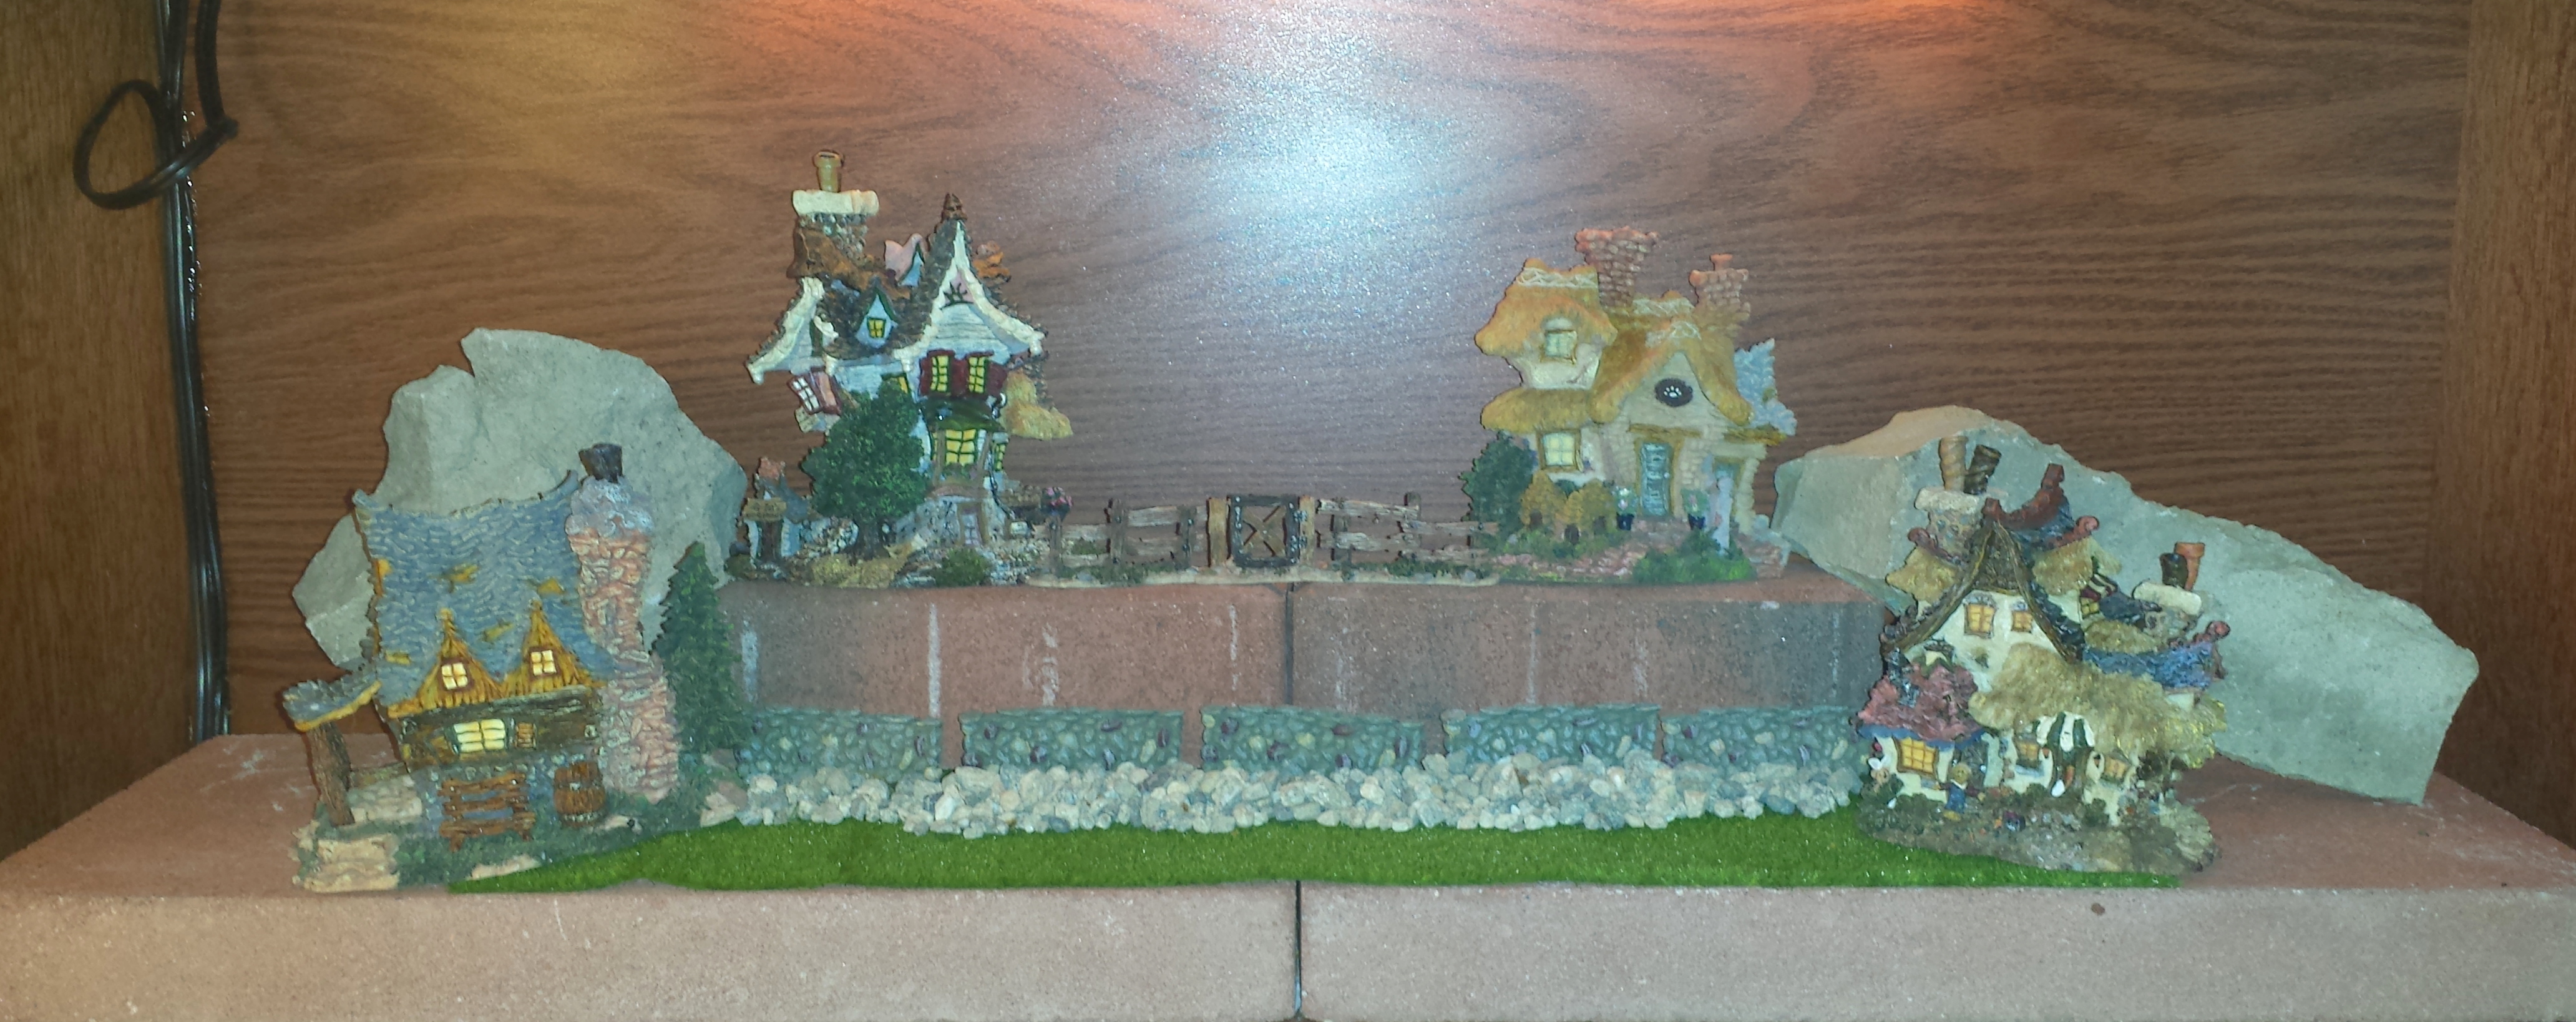
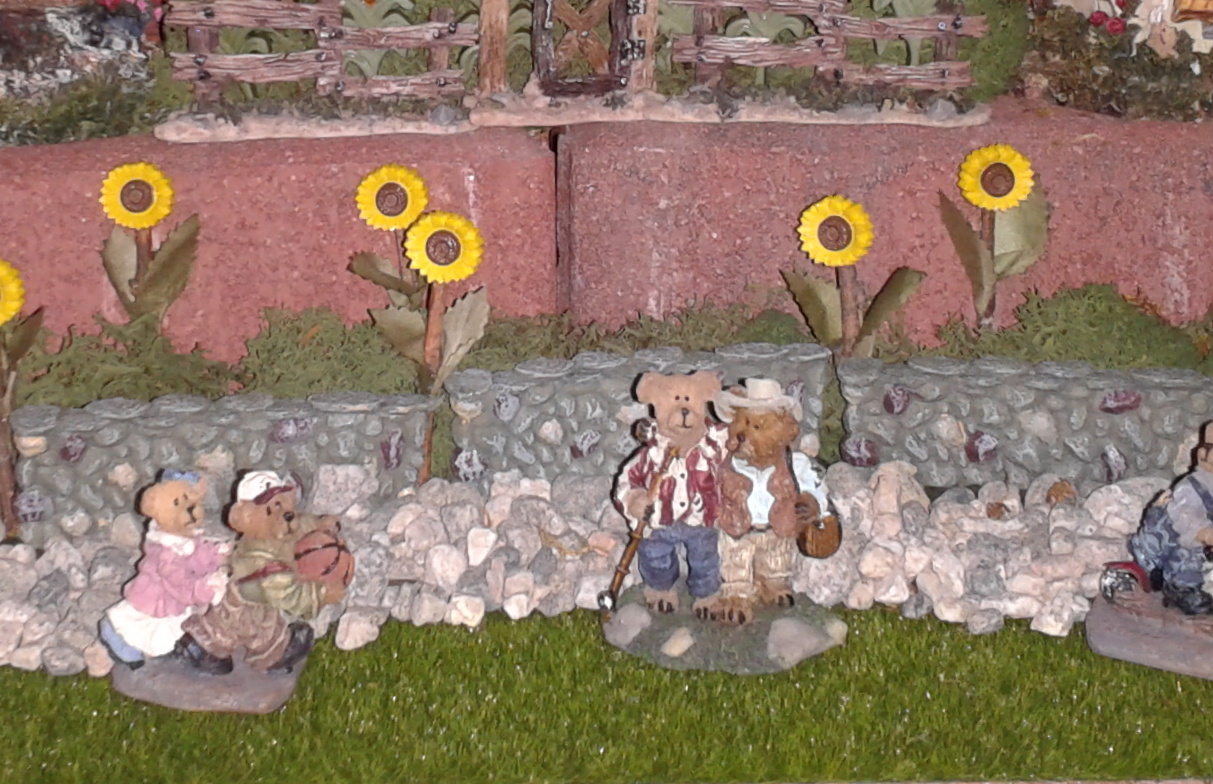
Then, I placed the four Boyds houses, leaving space in the middle for additional accessories.  On the lower section of the display, I placed a piece of artificial grass.  To hide some of the brick, I used four sections of stone walls and added small rocks.  On the top section of the display, I used a three piece section of fencing between the two houses.

Boyds Bear Village set-up 2
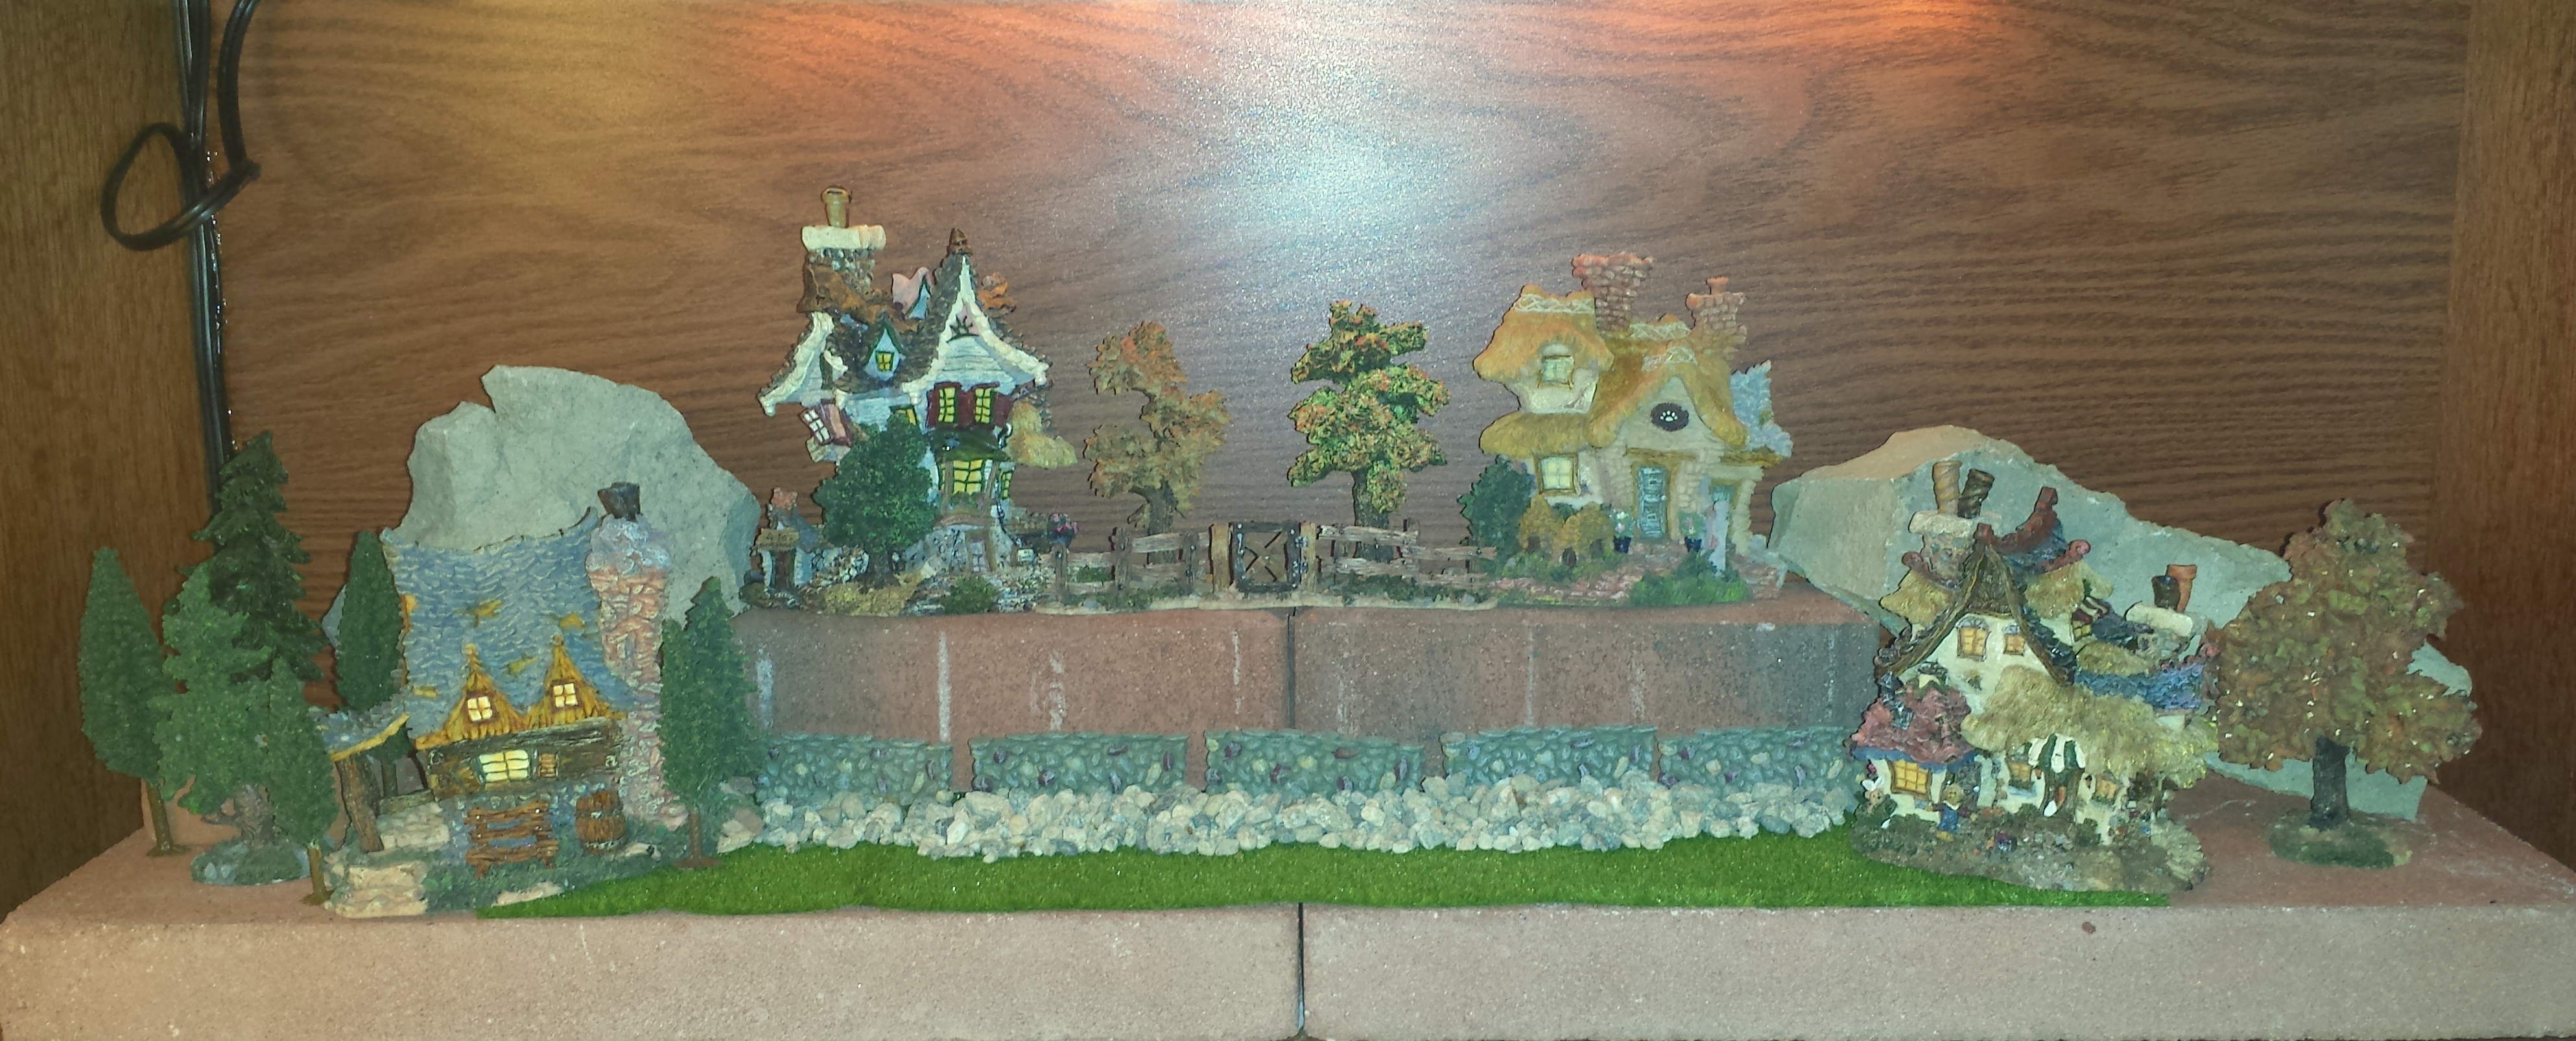
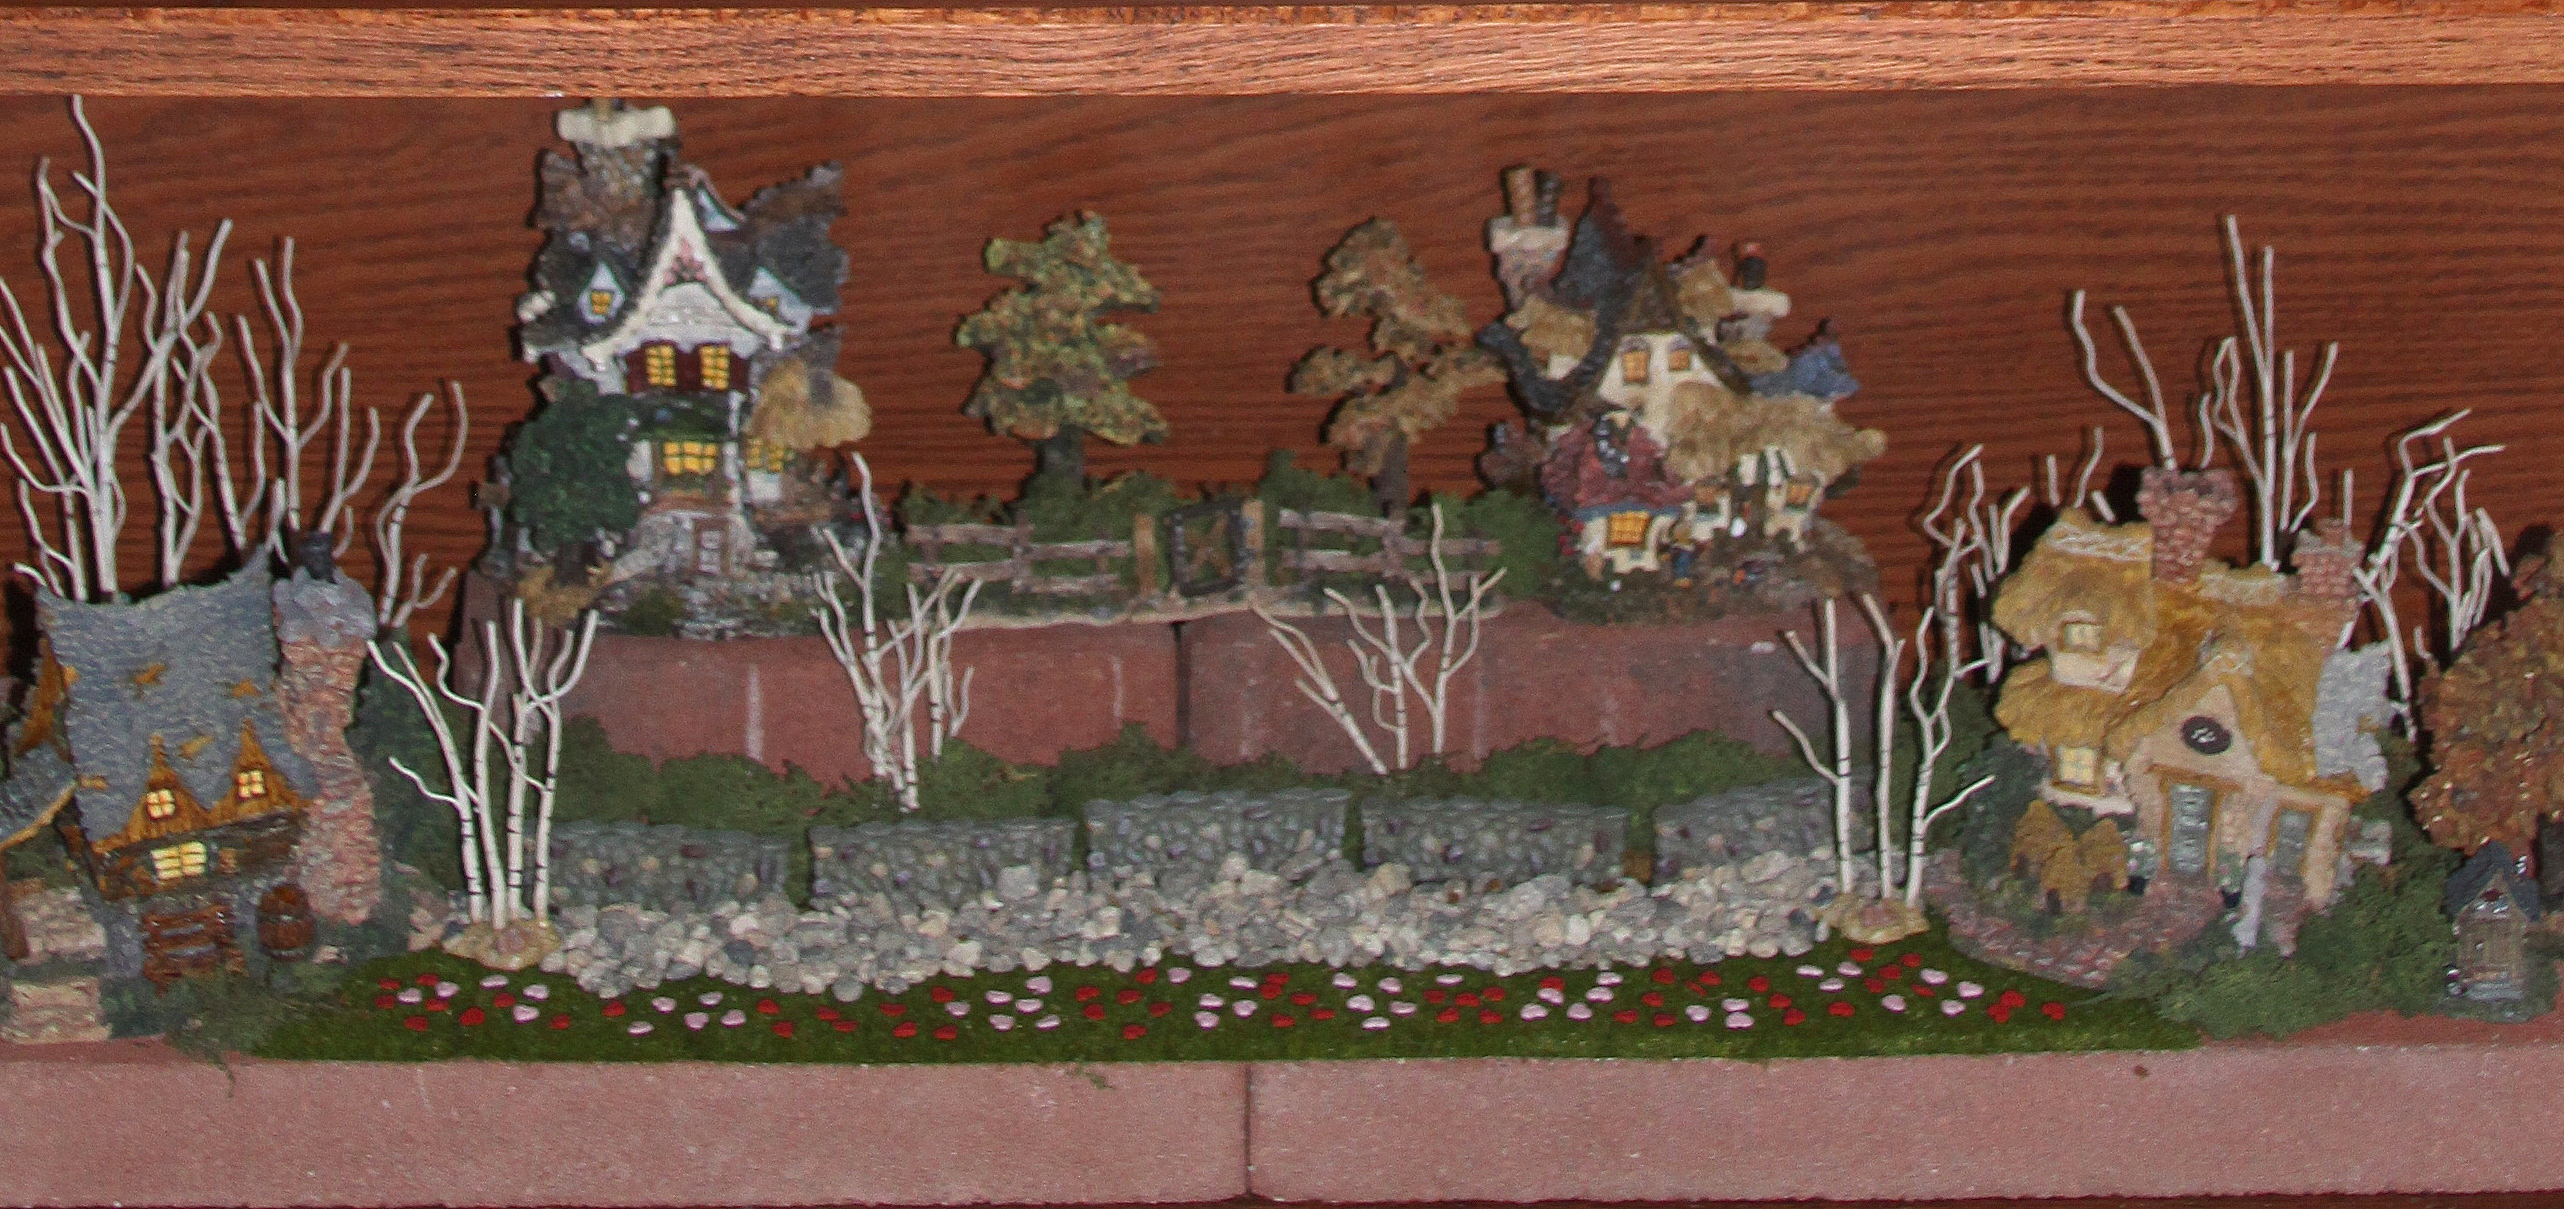
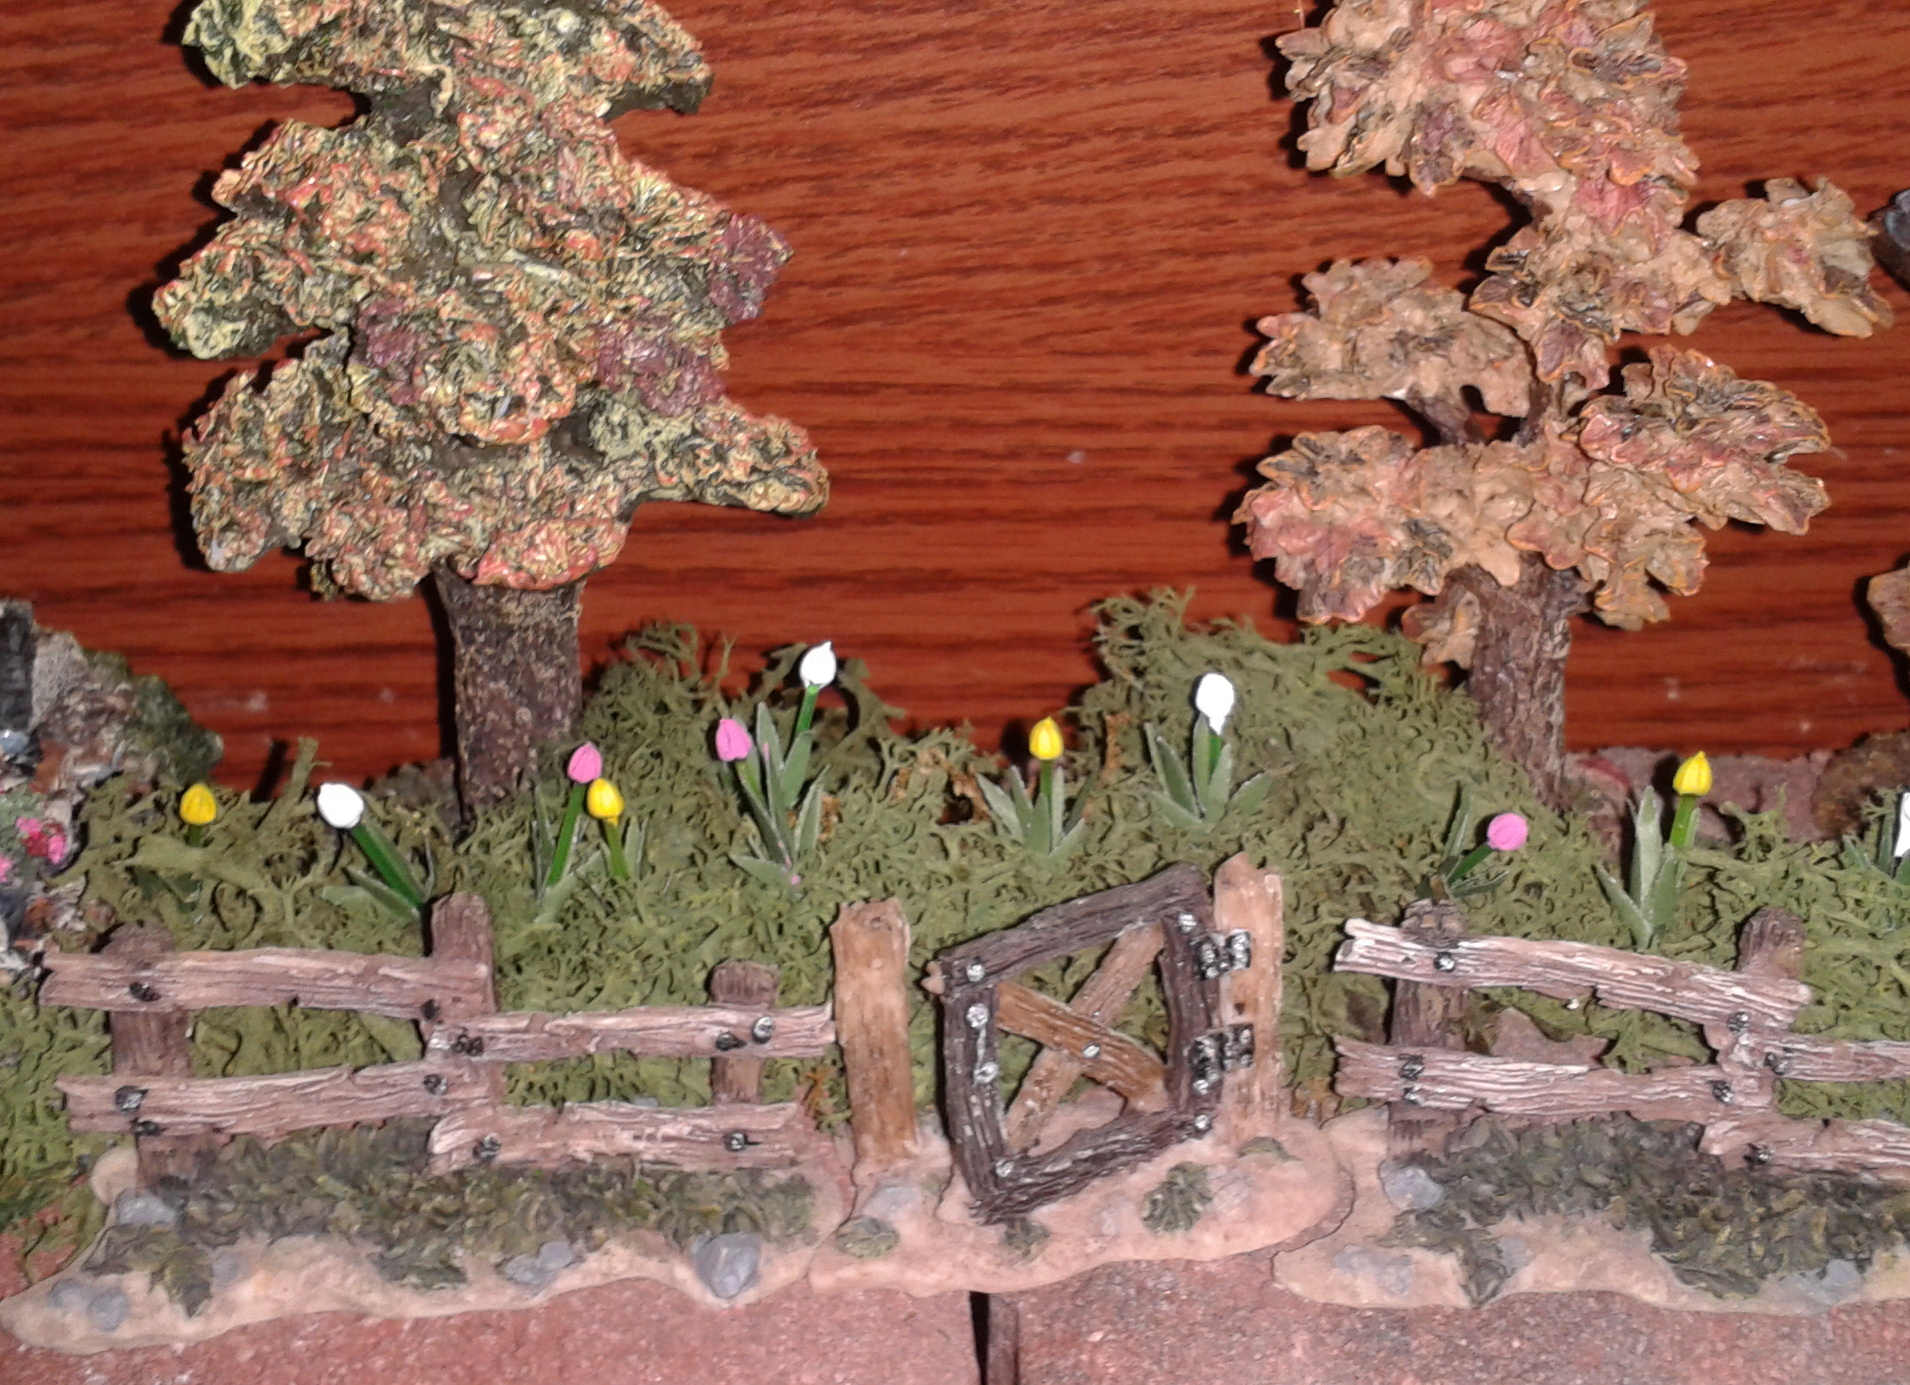
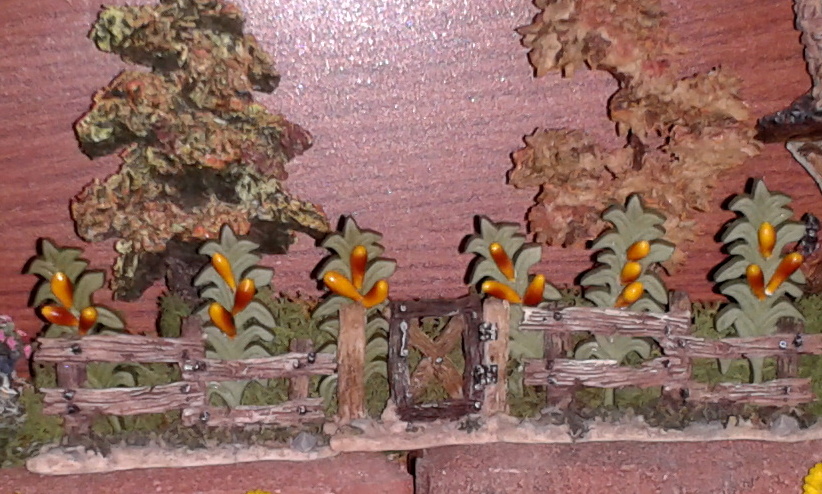
Next, I placed several trees around the display.  Special Note:  I have several sets of seasonal trees for the different holidays.  Such as full green trees for summer/spring, bare-branch and golden brown trees for fall and pine trees for winter.

Boyds Bear Village set-up 3To hide the base of the trees, the spaces behind the wall on the lower section and behind the fence on the top section and also to fill the other empty areas of the display I used Spanish moss.

Boyds Bear Village set-up 4
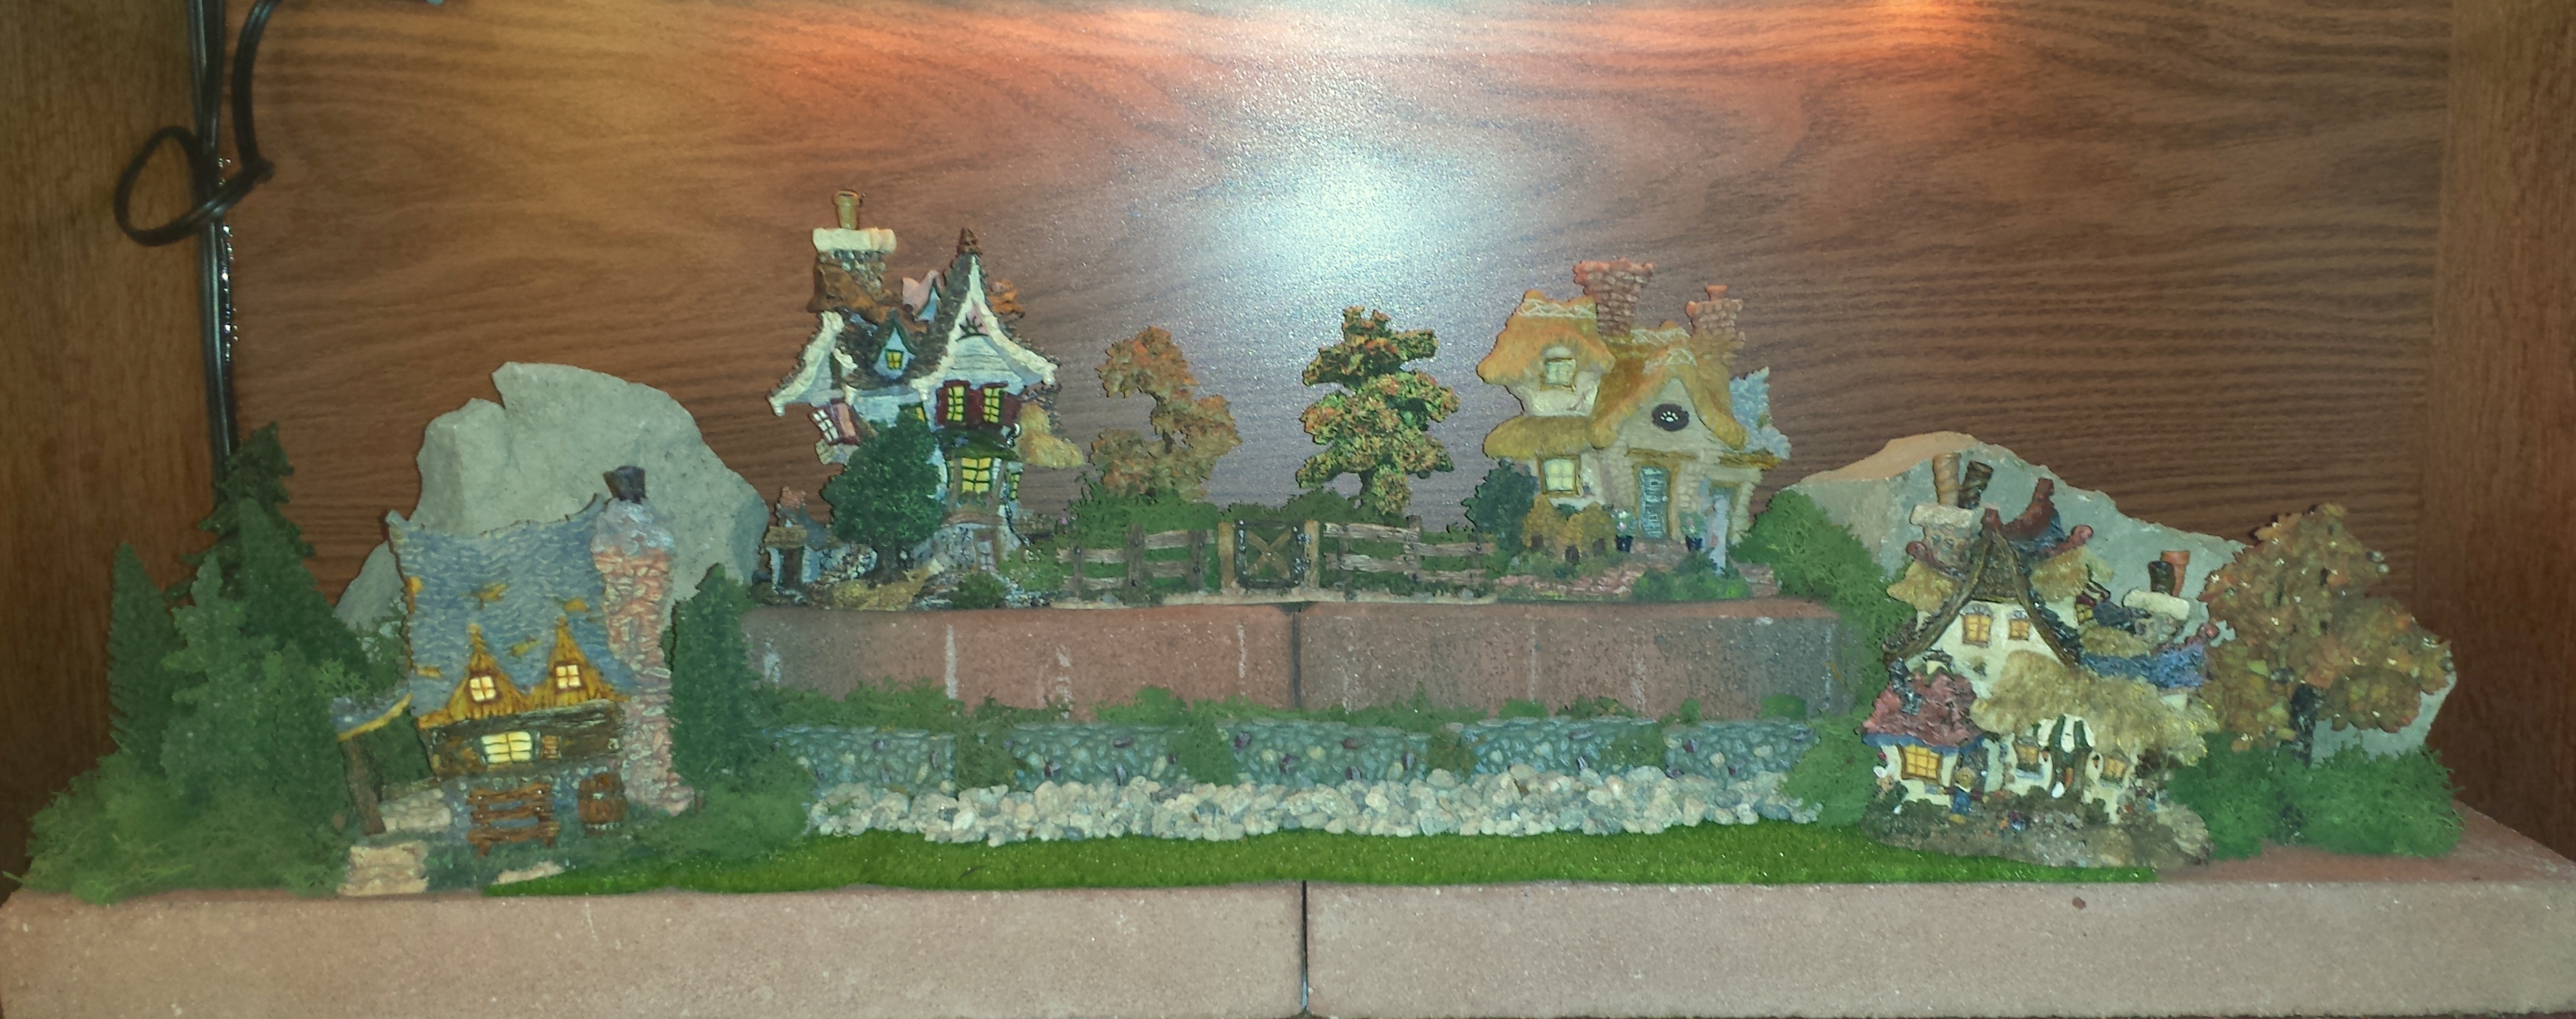
Finally, I place some of the Boyds Bear Village bear/hare figurines around the display.  Special Note: I have several different sets of small seasonal figurines that I add or remove during the different seasons and holidays.

Boyds Bear Village set-up 5

Below are several photos taken of the Boyds Bear Village display throughout the year for the various seasons with a description of the items that I add or remove depending on the holidays.  Some of these additional items are from the Boyds Bears product line, I also use some Department 56 items and other items were purchased at local craft stores.  Every year I try to change or add to the seasonal displays!  Craft Tip: Keep an eye out during the various holidays throughout the year for miniature decorative accents; also check the dollhouse section in the craft stores for more miniature items to add to a display.

Valentine’s Day

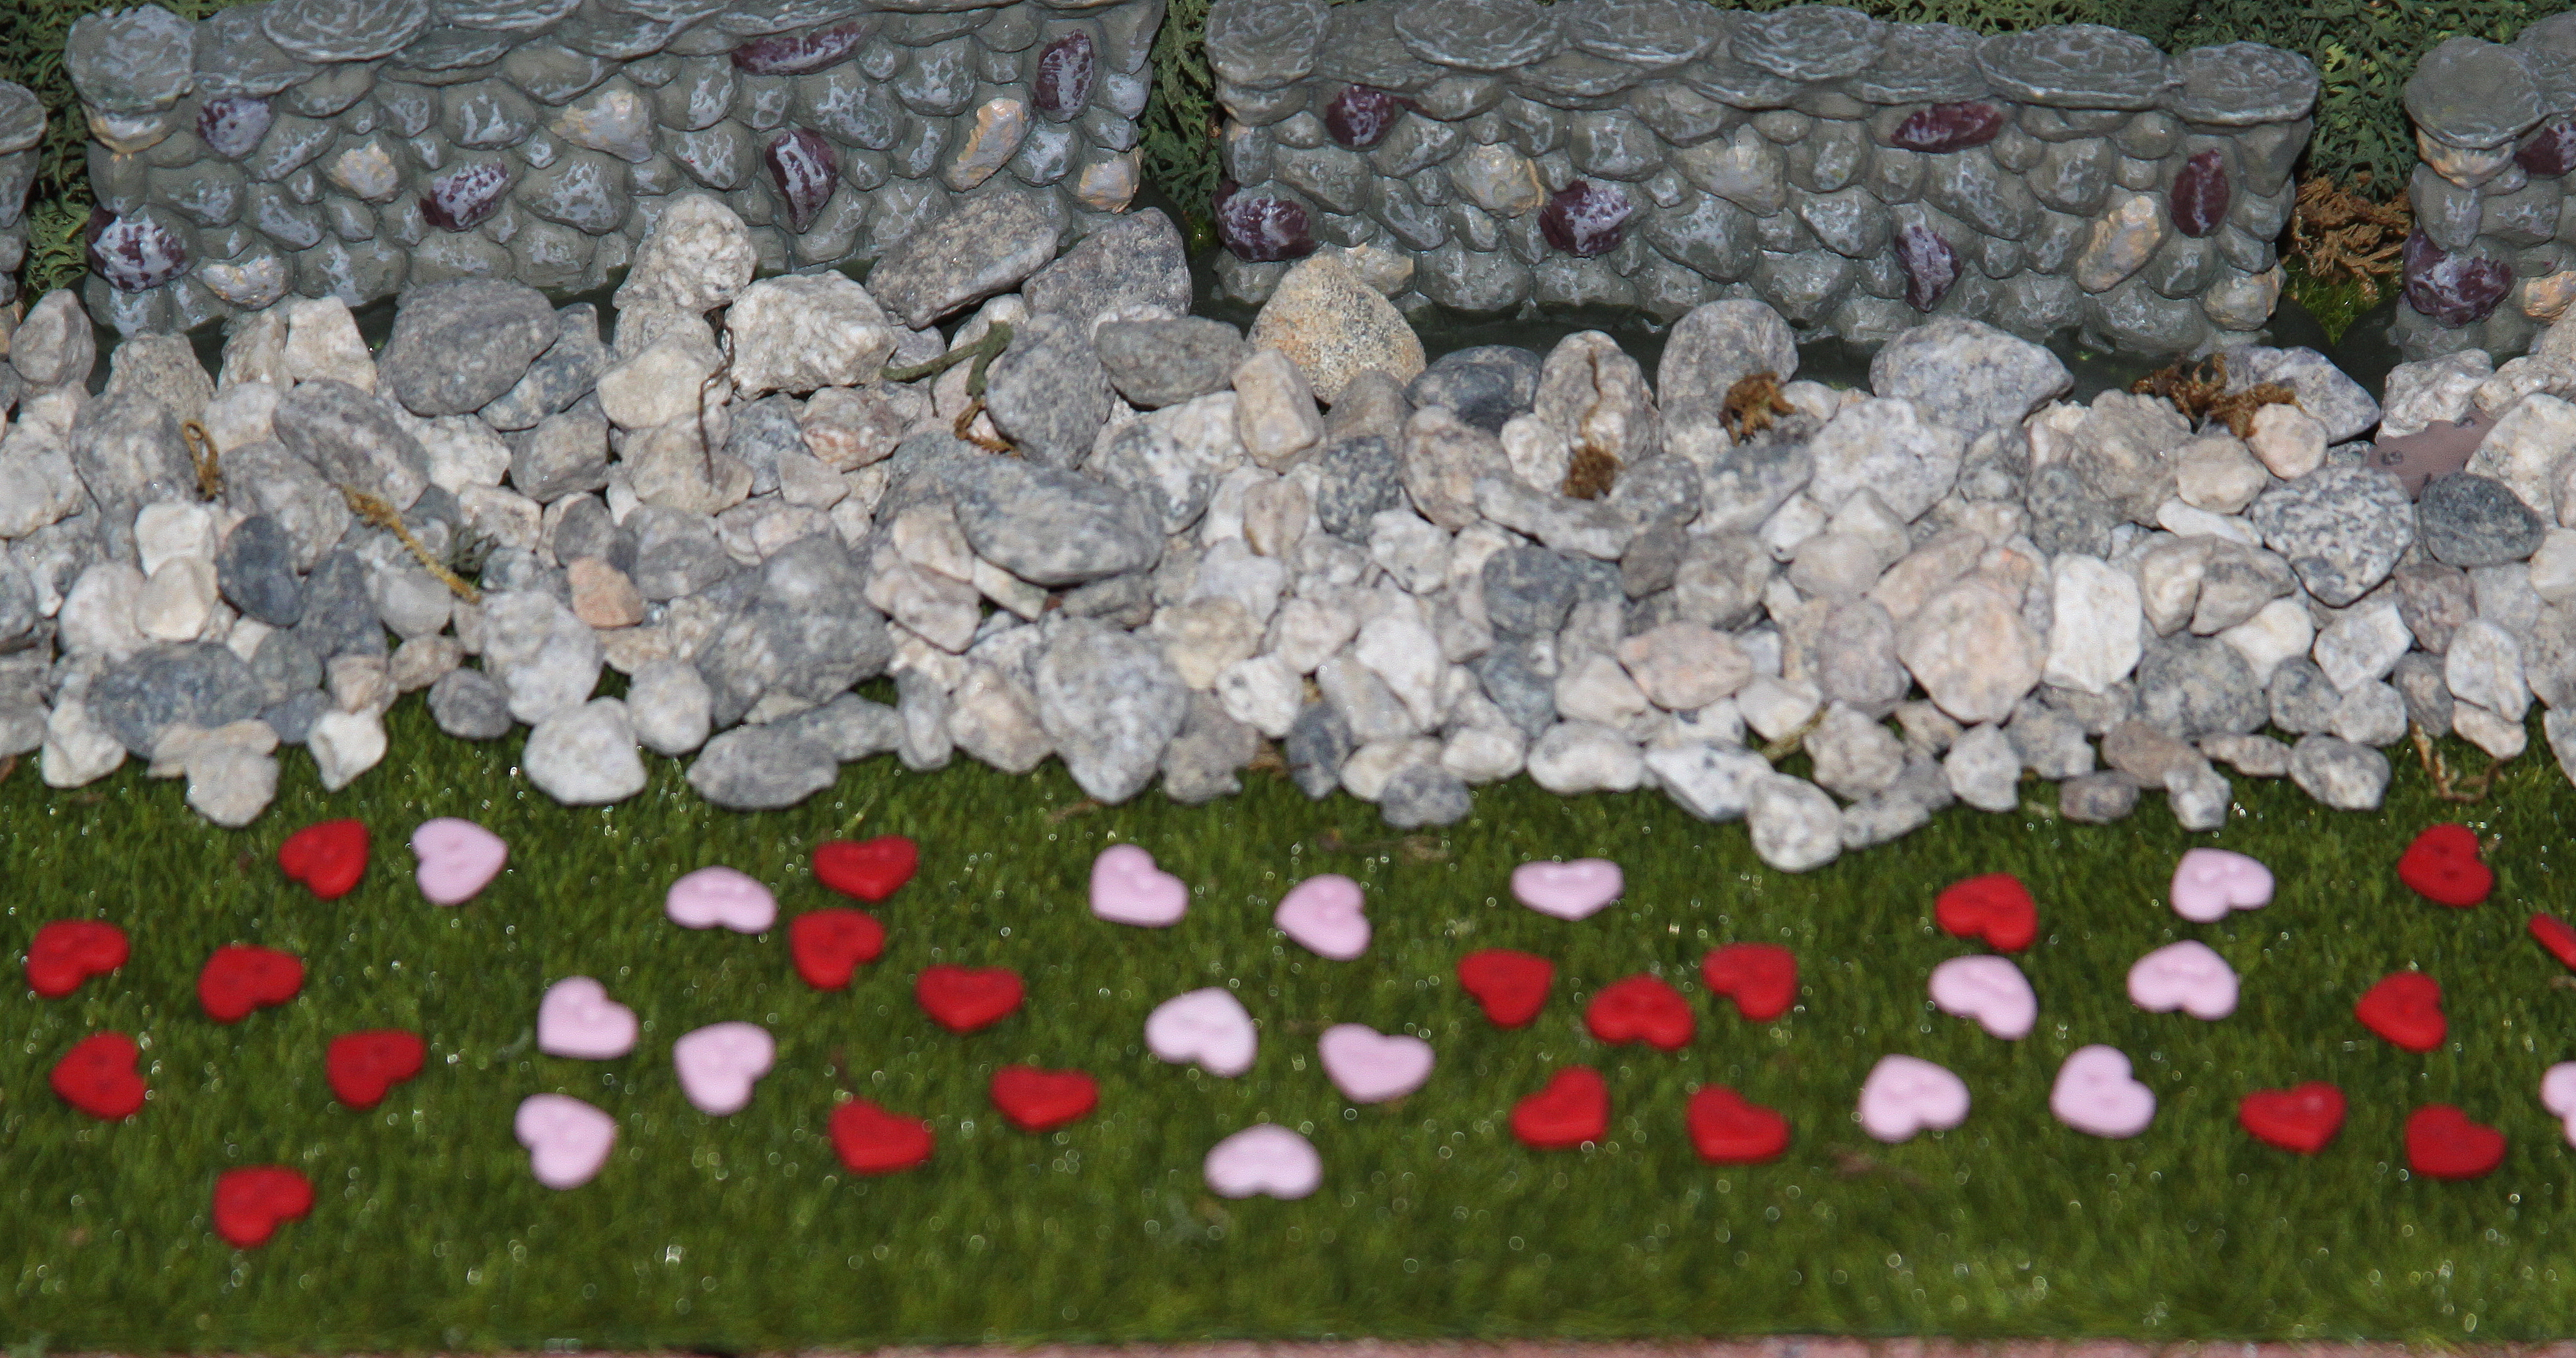
Sometime near the end of January, I will remove some of the winter accessories, such as the Christmas figurines and pine trees leaving only the bare-branch trees.  Then, in my local craft store I found miniature pink and red hearts that I sprinkle on the grass area of the display for Valentine’s Day.  (Next year, I’m thinking of adding more small hearts to the bare-branch trees for an extra special touch)

2012 Valentine's Day Boyd's Bear Village2012 Valentine's Day Boyd's Bear Village closeup

Spring/Summer

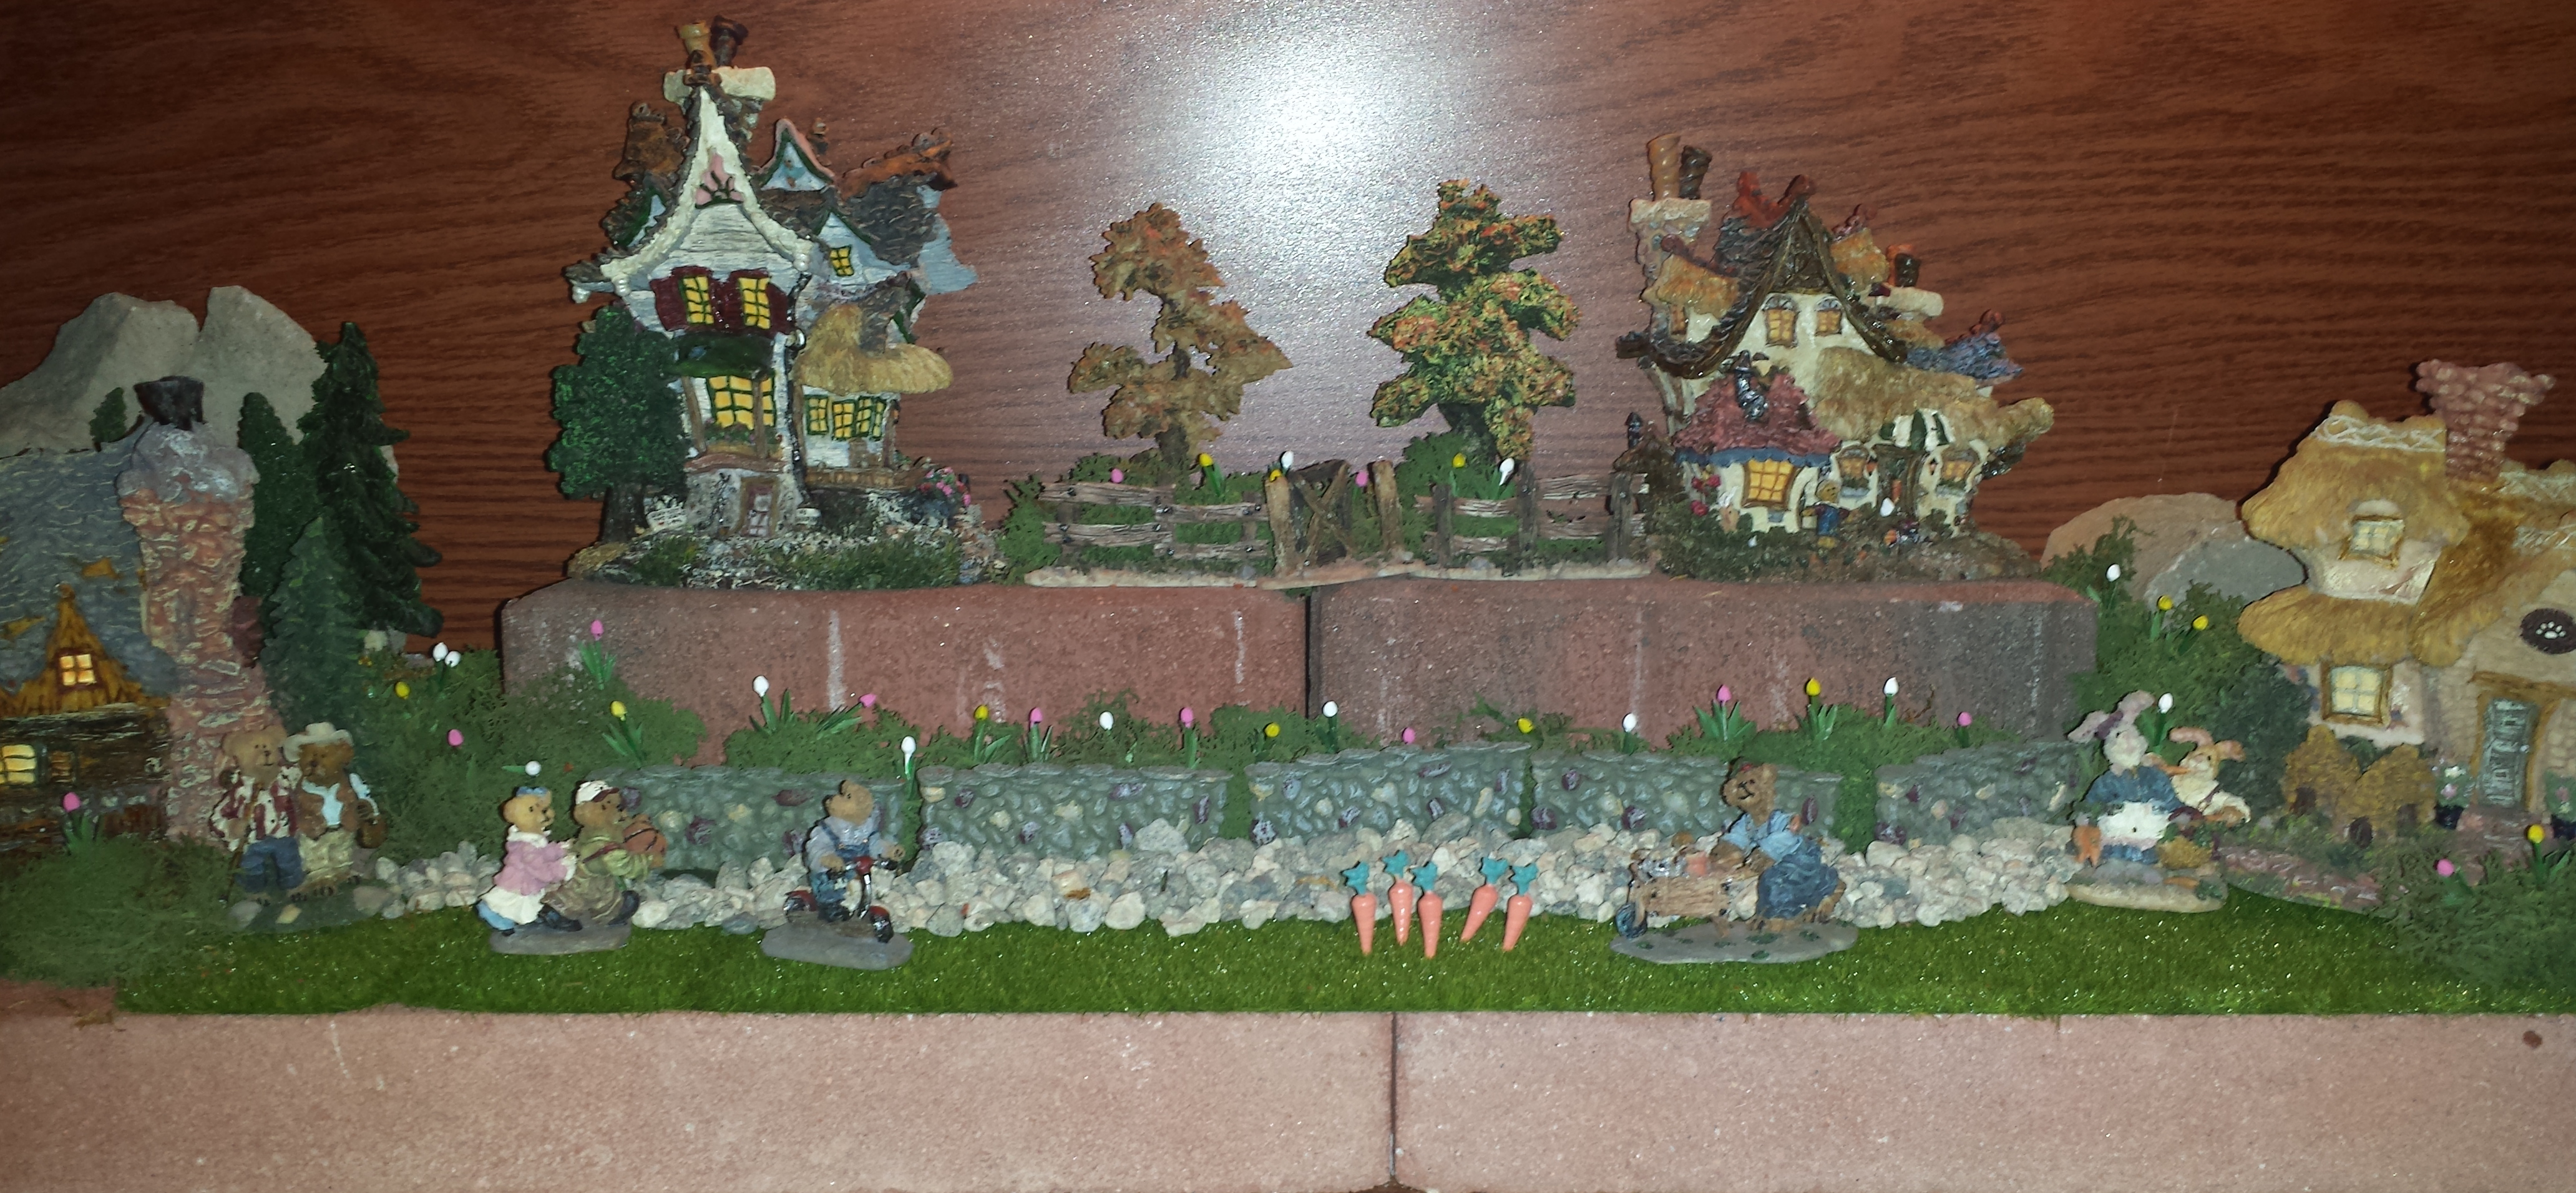
Usually in March, I will remove the bare-branch trees and will replace them with a set of full green trees.  Next, in the railroad model section of my local craft store I found miniature white, pink and yellow tulips which I added to the top and bottom sections of the display inserting them into the Spanish moss so they would remain upright.  To complete the Spring/Summer display I placed several of the Boyds Bear Village small figurines.

2013 Spring Boyd's Town2013 Spring Boyd's Town closeup 1

Fall – Halloween & Thanksgiving

In mid-October, I will remove all the Spring/Summer accessories.  Then, I will replace the Spring/Summer trees with several bare-branch and golden brown trees for a more seasonal autumn look.  Next, for Halloween I will add several “trick or treaters” figurines, a pumpkin patch figurine and several miniature pumpkins to display.  As a final touch, I will add a “harvest moon” in the right corner of the display.  For Thanksgiving, I will remove the Halloween figurines and on the left side I will add a figurine of two small turkeys.  Last year, I could find the right accessories to add to the Fall display so I made sunflowers from small buttons that I found in my local craft store.  I added small twigs, which I attached through the button hooks on the back and glued small leaves onto the twigs and placed them near the rock wall on the lower section.  I also added small corn stalks near the fence on the top section.

2012 Halloween Boyd's Bear Village

2012 Fall  Boyd's Bear Village closeup 1    2012 Fall  Boyd's Bear Village closeup 2
2013 Fall Boyd's Town closeup 1    2013 Fall Boyd's Town closeup 2

Winter – Christmas

At the beginning of December, I remove all of the Fall figurines and replace the Fall Trees with snow covered pine trees for a winter look.  Next, I add a small Santa bear and several snowmen figurines.  I also add several tiny lamp posts accented with Christmas wreaths and place them near each of the Boyds Bear Village house.  To finish the display I sprinkle several miniature snowflakes which I found in my local craft store.

2012 Christmas Boyd's Bear Village 1

So, I hope you enjoyed seeing how I set up my Boyds Bear Village and also how I accessorize the display throughout the year!


Decor – Memorabilia Displays

Shadowboxes are a great way to display memorabilia such as travel souvenirs, vintage items, or personal heirlooms.  By having these items protected under glass you and your family, along with the visitors to your home, can enjoy looking at them while keeping these items protected from any damage.   Over the years I have made several shadowboxes that are displayed throughout our home and in this post I will show these examples.

Travel souvenirs

As I mentioned previously in a July 2013 Décor Post, Displaying Travel Souvenirs, in the library of our home nestled among the books are several items that we have collected over the years during our travels across the United States and other distant places such as Europe and Asia.  I have found that shadowboxes are an excellent way to display these travel souvenirs.  One example, shown below, is the shark weapon that we purchased on a visit to the Polynesian Culture Center in Hawaii.  This beautifully crafted piece is displayed in a shadowbox to be admired but the real purpose for having it behind glass is that the sharp edges of the shark teeth are enclosed to prevent anyone from handling this dangerous weapon.  Several other smaller shadowboxes are also displayed on the bookshelves and the examples are shown below and they are: a framed piece of Edelweiss purchased in a small shop near Neuschwanstein Castle in Germany, a small piece of brick from the home of Abraham Lincoln located in Springfield, IL and a piece of cable that we purchased at the San Francisco Cable Car Museum.

Hawaiian travel souvenirs
Germany travel souvenir    Springfield travel souvenir

San Fransico travel souvenir

Discussed in the May 2013 Décor Post, Framing Small Items, during our family road trips, I always purchase pins as inexpensive souvenirs and over the years I have collected hundreds.  These pins, shown below, are displayed in special walnut cases with black liners.  Also shown below are additional cases, one case displays my collection of Hard Rock Café guitar pins purchased during over visits to the restaurants throughout our travels and in another case is a very small part of my collection of over two hundred Disney pins.

Pin collection 2  Pin collection 1
Pin collection 4    Pin collection 3

Another memorabilia display featuring travel souvenirs can be found in our basement displayed above my Disney bookshelves.  It is a vintage Disneyland pendant in a black shadowbox and is shown in the photo below.    As I mentioned previously in the April 2013 Decor Post, Disney Memorabilia Collection, I go into details about my Disney obsession and the items that I have collected over the years.

Disneyland pendant shadowbox

So, instead of storing your travel souvenirs in boxes which are hidden away from view, try displaying them in shadowboxes or special display cases which allow you to look at these items while the items are protected from dust or damage and you will be able enjoy the memories of your travels!

Vintage items

As many of you know from reading previous posts, I enjoy browsing and shopping in antique stores and on EBay.  Over the years I have purchased many vintage items and scattered around our home are several small and unusual framed items which add personality and interest to our home decorations.  In the May 2013 Décor Post, Framing Small Items, I featured a shadowbox that is on display in my home office that contains commemorative medals of the British Kings and Queens that I had purchased inexpensively on EBay.  The pins, shown below, range from Queen Victoria to the present Queen Elizabeth II and it is a wonderful way to have a little piece of interesting history.

Framed collectible 3

In another Décor Post, Framed Jewelry, posted previously in February 2014 features several vintage jewelry items that I also purchased while shopping in antique stores and on EBay.  These vintage jewelry pieces look wonderful displayed in small frames and add an elegant touch to our home décor.  Shown below is a beautiful crystal fur clip which is attached to a piece of white velvet and displayed in a small gold frame.

Framed Fur clip

Recently, one of my Spring cleaning projects was organizing the closet in our master bedroom.  The room is a rather large walk-in closet with a counter positioned in the center and has a wonderful and convenient chute to the laundry room downstairs.  The room also has useful built-in shelving where I have displayed two shadowboxes, which are shown below.  One shadowbox has a set of antique lace collars and cuffs while the other one has a pair of antique men’s spats.  Using these antique items displayed in the closet seemed perfect and I think they look great!

Vintage women's lace collar and cuffs    Vintage men's spats

So, next time you are shopping in antique stores or on EBay think about how you can decorate with vintage items displayed in shadowboxes in your home.

Personal heirlooms

Showcasing family memorabilia or heirlooms is a wonderful way to add a personal touch to any home.  In a May 2013 Décor Post, Framing Small Items, I featured quite a unique item displayed in a shadowbox.  The items, shown in the photo below, are a personal letter and a religious medal from Pope John Paul II and included in the shadowbox is a photo taken on the day of our daughter’s baptism. This is an example of how these very personal items can be displayed to commemorate a blessed event.  For more information about this shadowbox and to read the story of how we came to receive these special items, please click on the link above. 

Framed collectible 1a    Childhood beach shovel

The next item of family memorabilia is an old rusty beach shovel shadowbox display, shown in the photo above.  When I was a child living in California, our family used to enjoy the occasional day at the beach.  This old metal beach shovel, found in my parent’s garage.  The trick to making this type of shadowbox is finding one that has enough depth to accommodate the shovel and then using a piece of sandpaper for the background of the shadowbox because it would look like the sand on the beach, finally the shovel was attached to the paper with hot glue.  Seeing the beach shovel shadowbox hanging in our downstairs bathroom brings back wonderful memories of Paradise Cove.

The next two examples of family memorabilia are framed items of clothing which are shown below.  The first is one of our daughter’s baby outfits and I also included a baby photo of her in a small gold frame, these items are simply displayed in a white shadowbox.  The second shadowbox which contains our daughter’s 5th grade graduation t-shirt and it is hung in her bedroom, she likes looking at the names and remembering her classmates.

Cassie shadowbox 2    Cassie shadowbox 1

The final example of a family memorabilia shadowbox was used a few years ago when my husband’s Grandmother passed away.  She was an artist and for her funeral/memorial services and we displayed several of her paintings and other pieces of artwork and her art ribbons won at local fairs and competitions was arranged in the shadowbox and also put on display at the funeral home.  Sadly, if you are ever put in the position of making funeral arrangements or planning a funeral service, it is always a thoughtful idea to add some items that were of personal interest to the deceased.  When these items are displayed among photos of the deceased, along with the floral arrangements, it helps to “tell the story” of the person’s life.

Grandma Hodge's art ribbons

So, memorabilia shadowboxes can be used to decorate and add personality to the home.  These items can be travel souvenirs, vintage pieces and family heirlooms. For another idea using shadowboxes, please be sure to check out next week’s Craft Post, Childhood Shadowboxes, for an easy and simple craft project to use as a display in your home.

Decor – Elegant Easter Eggs

20140418_191001

Inspired by this month’s craft project, Elegant Easter Eggs, I decide to make several larger eggs to add to my annual Spring decorations for this year.  These larger Elegant Easter Eggs look wonderful displayed in the family room bookshelves of our home.  I made three different ones using oversized paper-mâché eggs tied with beautiful ribbons and then I attached lovely pieces of jewelry to add some elegant sparkle.  The jewelry items that I used were purchased inexpensively on Ebay, but maybe you have a wonderful heirloom broach or pin from your mother, grandmother or other special relative that could be used for a special sentimental touch.  The jewelry that is selected, paint and ribbon can be customized to incorporate the colors and design style of any home.  The Easter Eggs can also be made to give as a wonderful gift for family and friends or maybe a hostess gift when visiting during the Easter season and another suggestion would be to possibly give one as a teacher’s present before Spring Break.

The first Elegant Easter Egg I made was painted with a beautiful gold metallic color. (Décor Art paint called Glorious Gold)  I found 2” wide ribbon at my local craft store in an ivory color and then I wrapped the ribbon around the egg and tied a bow.  Next, I attached a gold and pearl pin that I purchased on Ebay as part of a vintage 1950s parure set that included a necklace, a bracelet and earrings.

The second one that I made was painted with a pretty green metallic color. (Folk Art paint called Metallic Peridot)  I wrapped a 2” wide green ribbon which matched the color of the paint and then I laced the ribbon through a beautiful crystal pin that I also purchased on Ebay to finish the egg with an elegant touch.

The third one was painted with a lovely blue pearl color. (Martha Stewart paint called Glazing Ball)  I found ribbon at my local craft store that matched the color of the paint and then I wrapped the ribbon around the egg and tied a bow.  Next, I attached a crystal and blue round pin that I also purchased on Ebay to complete the craft project.

For more Easter egg decoration ideas, please check out two previous craft posts.  In the first post I discussed how our way of decorating Easter eggs has changed over the years into a more elegant style since our children are now older.  Instead of the mess of coloring eggs, we now decorate our eggs with crystal and pearl stickers.  For more information on this easy craft project from last year, please click on the link to Jeweled Easter Eggs.

Another craft project posted this month, shows three different styles of smaller Elegant Easter Eggs, click on the link to view the photos.  In the post I have included supply lists and easy instructions.  These smaller eggs can be used for display, Easter luncheon or dinner table accessories or party favors and would also make wonderful gifts for family or friends.

Decor – Framed Floral Shadowbox

Framed florals - finalWe are a family that loves to travel and see different parts of the United States, hence the numerous travel posts on this blog.  We enjoy finding historic or scenic destinations to experience and learn about both local sites and locations in other states.  Whenever our family travels on local weekend day trips or longer road trips that last for a couple of weeks at a time, we always try to take fun photos to remember those happy times.  In this post I will discuss two special travel photos that were framed in shadowboxes and combined with artificial flowers to create wonderful mementos of our travel experiences.

The library room of our home is filled with our numerous family travel mementos and it gives us great pleasure to look at them and remember fun times at some great places.  Having these travel items displayed in the library has also proven to lead to great conversations with family and friends that have visited our home.  (For more information and decorating tips on displaying travel photos and souvenirs, please click on the Décor Post – Displaying Travel Souvenirs)

The first step to creating the travel-themed framed floral shadowboxes discussed in this post is finding the appropriate frame with some space between the photo mat and the glass front.  This is very important because the artificial flowers that are being used for the project need to have some enough room to be displayed without being flattened against the frame’s glass.  Craft Tip: Sometimes finding shadowbox frames that fit the project size and color specifications might not be available, so when I see shadowbox frames on sale at our local craft stores I always purchase extra ones to have on hand for future craft projects.

Another key element in creating the framed floral shadowboxes is the selection of the photo.  When selecting a photo chose one that has something of interest – it could be a person, an animal or maybe a building such as a barn.  Then, using a computer with a photo application (I use Picasa) crop the photo so that the focus of the picture is slightly offset to the opposite side that the flowers will be display within the frame.  When you are happy with the cropped version, print a copy of photo selecting a size that would fit into the frame.  Next, disassembled the frame, cut the flowers stems to fit the size of the frame and then inserted the flowers off to one side fitting them between the frame and the glass.  When you are happy with the placement of the flowers, insert the photo into the frame and reassembled the backing.

The final element is the selection of the floral items to be displayed within the shadowbox frame.  In the two examples shown below, I tried to color coordinate the type of flower with the photo that I selected.  Another thing to keep in mind when choosing flowers is the size or scale of the flowers should be in proportion to the size of the photo and frame.  Larger photos and frames would require larger flowers while smaller photos and frames would require smaller flowers.  Also in the two examples I used artificial flowers but dried flowers can also be used.

First example of a travel-themed framed floral shadowbox –

During one of our weekend day trips back in 2005 we visited the California Poppy Reserve located near Los Angeles, CA where we took several photos of the beautiful scenery that sunny spring day and one of those photos was a cute picture of our daughter wearing a yellow shirt and crouching behind some orange poppy plants.  Using this photo I wanted to create a shadowbox to display in our library home.  Taking inspiration from the colorful flowers that we saw during our visit to the reserve I found some artificial flowers that looked very similar to poppies.  I was very happy with the result of this easy craft project and the photo is now displayed on the shelf in the library of our home.  (For more information about our trip to the reserve which we highly recommend if you are in the area during the wildflower bloom in early spring, please check out the Antelope Valley California Poppy Reserve travel post)

Framed florals - poppies - supplies    Framed florals - poppies - final

Second example of a travel-themed framed floral shadowbox –

In 2006, our family took another weekend trip to the Lompoc Flowers Fields located in Central California.  It was another beautiful and sunny day during our visit and the fields of flowers were beautiful.  One of the photos we took that day is of our daughter wearing a purple shirt standing in front of rows of colorful sweet-peas.  Taking inspiration from her purple shirt, I used a few stems of artificial lavender that coordinated with the colors of the pale pink, purple and bright red sweet-peas.  I think the framed floral looks great displayed in our home.

Framed florals - lavender - supplies    Framed florals - lavender - final

(For more information and decorating tips on displaying travel photos and souvenirs, please click on the Décor Post – Displaying Travel Souvenirs)

Decor – Decorating a China Cabinet

There is one item in a house that we normally do not think of as a decorative piece of furniture; it is the dining room china cabinet.  Most people would think the only function of a china cabinet is to store their fine china dinnerware, crystal glasses or silver serving pieces when they are not being used for a formal luncheon or dinner in the dining room.  In this post I am going to show how I display the items in our china cabinet and also how I change some of the decorative items seasonally throughout the year for many different holiday styles.

Decorating a china cabinet

Shown below is a photo of how I have decorated our china cabinet and this is how it looks during most of the year and I am sure it looks a lot like a typical china cabinet display.  Inside on the top two shelves of the china cabinet I have displayed pieces from our Noritake Rothschild china; each of the eight place settings has a dinner plate, luncheon plate, salad or dessert plate, soup bowl and cup/saucer.  The china is very special to me because it was a wedding gift from my mother.  To add some interest to the cabinet I have displayed the dinner plates on edge so the delicate floral pattern of the plate is shown, there is a groove on the glass shelf to prevent the plates from moving.  I also have added eight glass and silver plate chargers that are displayed beneath each of the stacked place settings.

China Cabinet display

Displayed with the china are four sets of Tiffany crystal glasses that were a wedding present from a good friend, each set has a champagne glass and a wine glass.  On the top shelf I have displayed two vintage crystal champagne glasses that were given to me by my mother.  I have a very sentimental idea that when my children get married I will loan them the set as the “something old” from their maternal grandparents and it can be used as their wedding “toasting glasses”. (Unfortunately, in the photo above the bright light shining on the top shelf does not allow the vintage glasses to be seen)

Inside the china cabinet I have also displayed several silver serving pieces.  On the second shelf there are two small silver candlesticks.  On the bottom shelf there are two round silver serving trays and placed on top on the left is a silver pitcher and on the right is a silver and glass pitcher.  In the middle of the bottom shelf there is a mirrored silver stand that is made in three sections, one square piece and two half rounded pieces.  I really like the versatility of stand since I can displayed the three pieces together for one long surface or separately, the square piece can be used as one stand or the two half pieces can be joined together to form a round stand.  During most of the year I displayed a silver oval-shaped covered serving piece on the top of the silver stand using all three pieces.  Shown below are two photos of how I have used the mirrored silver stand in other displays.  The photo on the right shows the stand used during the fall/winter season, I have displayed a set of three Currier and Ives porcelain house complete with small pine trees and several figurines.  The photo on the left shows the stand when it was used a couple of years ago on the dining room table as part of a New Year’s Party buffet, displayed on top of the stand is a beautiful floral arrangement of white poinsettias and crystal sprays in a silver bowl.  (For more information and photos about the other decorations for the party, please check out the Décor post New Year’s Party decorations)

2012 Christmas Currier and Ives 1a    New Year's Eve Dinner centerpeice

The last decorative items that are displayed in the china cabinet are several Napoleon Capodimonte porcelain rose figurines.  On the top shelf is a Napoleon white porcelain rose figurine which I had given to my mother as a birthday present many years ago because white roses were her favorite flower.  When she died recently the piece came back to me and it is displayed near my mother’s vintage glasses.  On the second shelf I have displayed another Napoleon porcelain rose figurine, the cluster of roses are a beautiful pale pink and the figurine is set on a small silver candleholder which I’ve used as a stand.  On the bottom shelf of the china cabinet I have displayed two more Napoleon porcelain rose figurines, these two figurines are a lovely deep shade of pink roses with stems and they are placed on top of the round silver trays on the left and right.

Seasonal china cabinet decorations

When decorating a china cabinet for the different holidays you will want to take into consideration that it is already filled with china, crystal and silver pieces so select just a few simple but elegant decorative seasonal items the compliment the colors of the china.  I am lucky because the Nortitake Rothschild pattern of my china is very neutral in color and the season items that I use blend very well with the other items already on display.

Spring/Easter –

Several years ago I found four large silver and white glass eggs in a local retail store and for the Easter holiday I set the eggs inside four of the Noritake china tea cups which sit atop the stacked china place settings.  I also have collected a Hallmark series of Peter Rabbit themed ornaments over the years and I display these around the china cabinet resting against some of the teacups.  I think these Easter decorations add the perfect touch to decorating the china cabinet for the season.

2013 Easter china cabinet closeup 2    2013 Easter china cabinet closeup 1

Patriotic –

For the Fourth of July holiday I was looking for some patriotic decorations for the china cabinet.  I wanted something that would match the elegance of the china, crystal and silver items already displayed in the cabinet.  A few years ago I had purchased four large stars made out of mirrors and trimmed in silver and they looked wonderful placed in the china tea cups and are a simple and the perfect patriotic touch.

IMG_3666a

Fall/Autumn –

Once again I was looking for simple yet elegant decorative items to add to the china cabinet for the Halloween and Thanksgiving seasons.  I couldn’t find anything that I like in my local retail stores so I decided to make them.  I found two small ceramic pumpkins in my local craft store that I painted orange with green stems and decorated them with small topaz-colored crystals.  I placed the pumpkins on the two of the china tea cups and they looked wonderful in the china cabinet with the light reflecting off the crystals.  (For a supply list and instructions on making the jeweled pumpkins, please check out the Craft post link Jeweled Pumpkins)

2013-09-11 08.46.25

Finally, when decorating a china cabinet think about using the area outside of the cabinet to incorporate some design elements for the holiday seasons.  Shown below are three photos of the china cabinet decorated for the Fall and Christmas seasons.  When we lived in California our dining room had very high ceiling and I wanted to take advantage of that height by decorating the top of the cabinet with a pine garland.  The first photo was taken during Christmas 2002 and features the pine garland decorated with red poinsettias and holly leaves.  The second photo was taken during the Fall season in 2003 and it featured the pine garland decorated with a variety of fruit and berries.  The third photo was taken during Christmas 2003 and it features sugared fruit accented with a red silk ribbon.  (For more information about these decorations, check out the Décor post My Christmas Decorations from Past Years)

OLYMPUS DIGITAL CAMERA

2003 Fall - Dining Room China Cabinet    OLYMPUS DIGITAL CAMERA

As you can see, there are a variety of ways to decorate a china cabinet.  The important thing to remember is to keep the decorations to a minimum since the china, crystal and silver are the stars of the show!!