Decor – Displaying a Boyds Bear Collection (Part 2)

As you might know from reading yesterday’s Décor post, “Decorating with Boyds Bears (Part One)”, I started collecting Boyds Bears back in the 1980s.  Since then my collection has grown to a couple of hundred figurines, plush bears, photo frames, trinket boxes and even Christmas ornaments.  Then, after our daughter was born I started a collection for her which included Boyds resin dollstone figurines, porcelain dolls and stuffed bears.

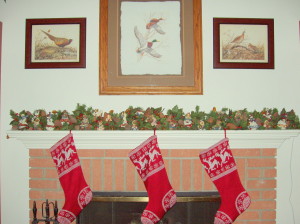
Before we moved to the Midwest, we had a beautiful home in California.  For every Christmas I would love to decorate our fireplace mantel with a pine garland which I decorated with amber pinecone lights, red berry sprays and more real pinecones.  By this time I had collected over 20 Boyds Bears ornaments with the intent that I would use them on our Christmas tree.  One of the rules of decorating is that when you have a collection of items it is best to display them together for the most visual impact.  So, that is exactly what I did with the Boyds Bears ornaments, instead of using them for the Christmas tree I added them to the pine garland on the fireplace mantel and it think it turned out wonderful!

OLYMPUS DIGITAL CAMERA

Christmas fireplace mantel decorations for 2004

Over the years I had collected several more Christmas decorations from the Boyds Bear Company.  I had figurines, photo frames, plush bears and even a moose.  Every Christmas I pull these items for storage and find a place for them in our home.  To keep things looking interesting from year to year, I would display a plush Santa bear on a chair one Christmas and the next year I would place it on a bookshelf.  I would also do this with Christmas figurines and photo frames, one year the item would be in one room and the next year it would be in another part of the house.

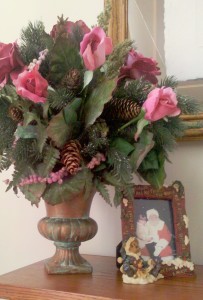
2011 Christmas Boyds bear picture frame

Christmas 2011, “Edmund … the night before Christmas” photo frame

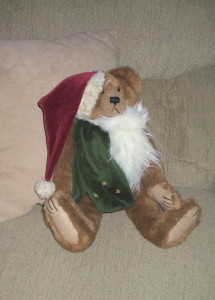
2012 Christmas Boyds Bear Santa

 Christmas 2012, “Nickleby S. Claus”

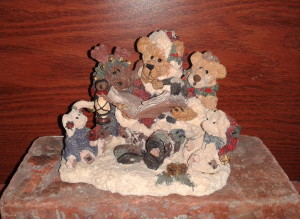
2012 Christmas Boyds figurine

Christmas 2012, “Alexis Bearinsky … the night before Christmas” figurine

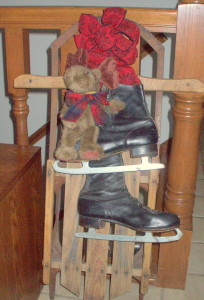
One of my favorite Christmas decorations is an antique sled that I picked up on one of our road trips across the country.  I attached a festive red bow to the sled with wires.  Next, I hung an old pair of black ice skates and as a finishing touch I added a Boyds Bear plush moose named “Mortimer Von Hindenmoose”.  This display greets our holiday guests in our entrance hall during the Christmas season every year.

2012 Christmas Boyds Bear - Mortimer Moose

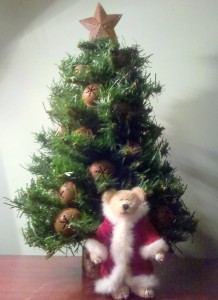
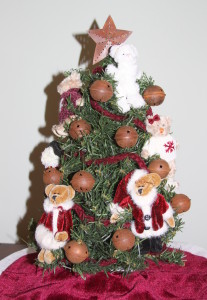
Sometimes the smallest item can hold the most impact in a display.  For the first Christmas after we moved to the Midwest, I set out a small tabletop Christmas tree on the beautiful roll-top desk in our master bedroom.  I decorated it simply with several rusted jingle bells, put a rusted star on top and placed a very small Boyds Bear Santa, called “Nicholas Bearington”, in front of the tree.  Now, that idea inspired me the next year to decorate that same small Christmas tree with some non-Boyds bears that I found in my local craft store; Santa and Mrs. Claus, a couple of bears in snowflake sweaters, a ballerina dressed in a pink tutu, a royal guard and a little white angel bear.

2011 Christmas Boyds Bear Santa    2012 Christmas bear tree

As I mentioned in my previous post yesterday, I have an oak lawyer cabinet with glass doors that holds part of my collection of Boyds Bears figurines, picture frames and Boyds Town houses.  Over the years I have also collected several holiday-themed figurines that I display in this cabinet.  (Please see yesterday’s post for photos of my collection of shoebox bears for Easter, Halloween, Thanksgiving and Christmas)

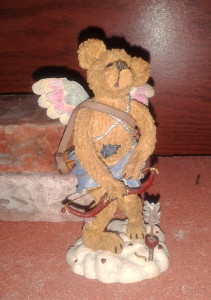
2013 Valentine's Day figurine

For Valentine’s Day, I display a cute cupid bear called “Valentino Slipshot”

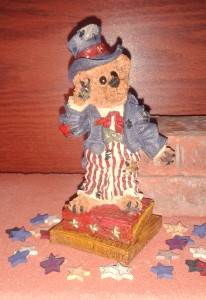
2012 Fourth of July Boyds figurine

For Fourth of July, I display a patriotic bear called “Uncle Elliott”

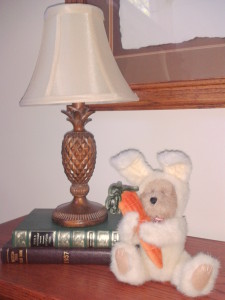
2012 Easter Boyds Easter bear

In Spring on top of the Boyds Bears cabinet I display a 6” plush Easter bear called “Agatha Snoopstein”, a brown bear dressed in a white bunny suit.

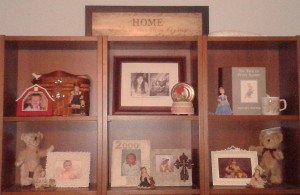
As I mentioned previously, after our daughter was born I started a collection of the resin dollstone figurines to mark the special moments in her life.  These figurines are displayed in the bookshelf in her room.  TIP: When displaying figurines on a shelf, choose accessories that are compatible in the theme, style or color tone of the figurine for the most pleasing displays.  For example, with the ballerina figurine I choose a floral pale pink rose frame and a light brown teddy bear to create a lovely display.

2013 Cassie's Boyds dollstone figurines

On the top shelves, left to right:  “Laura & Jane – the first day of school” and “Emma as Cinderella – magical moments”.  On the second shelves, left to right: “Melissa & Katie – the ballet”, “Teresa & John – the prayer”, “Lisa & Plato – graduation day”.

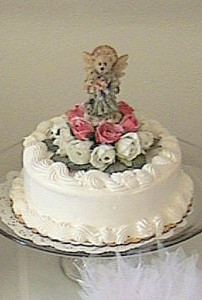
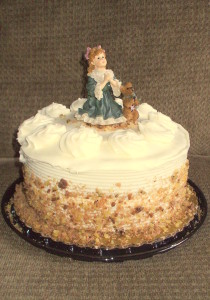
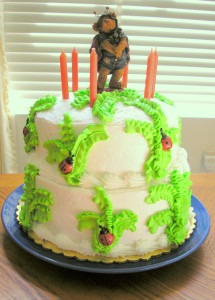
Finally, here is a great idea for using Boyds figurines in a very unexpected way.  We have all been to weddings where the cake is beautifully decorated and sitting on top is usually some sort of figurine.  I thought this idea was perfect for our daughter’s baptism cake and I used a Boyds figurine as a cake topper.  The cake looks very sweet with the figurine named “Zoe … the Angel of Life” resting on top of a bed of white and pink roses.  For the next important religious event in her young life, her first communion, I decided to decorate the cake with another Boyds figurine, I used a figurine named “Teresa & John … the prayer”.  Then, for our daughter’s 6th ladybug themed birthday party, I used the figurine named “D. Lovebug” which added just the right festive touch to the birthday cake that was decorated with leaves and resin ladybugs that I found in my local craft store.

2000 Cassie's Baptism cake   2009 Cassie's First Communion cake   OLYMPUS DIGITAL CAMERA

So, you can have a lot of fun decorating with a Boyds Bears collection in some traditional and even some unusual ways.  I would love to hear your comments about these displays and decorations.  Also, please share how you display a Boyds Bears collection.

Decor – Displaying a Boyds Bears Collection (Part 1)

I started collecting Boyds Bears back in the 1980s.  The first one was a plush brown bear in red overalls called Christopher, which I received as a gift which happens to be the name of my son.  By this time I was now working in a small retail store that sold the Boyds Bears line, and I started collecting the resin bears figurines for special occasions and holidays.  I now have a collection of figurines, plush bears in both small and large sizes, photo frames, and even Christmas ornaments.  When the Boyds Bear Village was released in 2000, I purchased several of these delightful houses and accessories to add to my collection.  But I wasn’t done yet!  After our daughter was born I started a collection of the resin dollstone figurines to mark the special moments in her life, such as the first day of school and her first communion.  Her collection also includes a couple of Boyds porcelain dolls and stuffed bears.
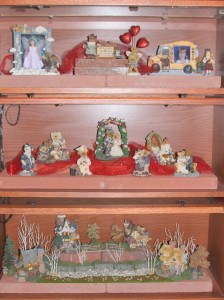
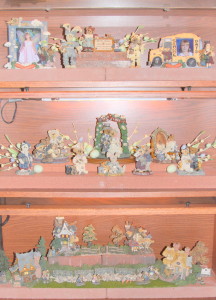
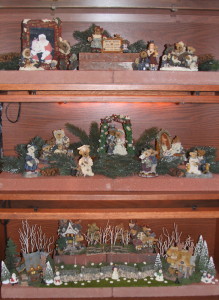
The main portion of my Boyds Bears collection is displayed in the library of our home in a lovely oak lawyer cabinet with glass front doors.  The shelves display several figurines, picture frames and several houses from my Boyds Town collection.  These items are displayed year-round in the cabinet and I will add some additional holiday themed figurines and decorative accents seasonally. TIP: To add height, I used two large bricks for each shelf and these fit perfectly across the entire length of the cabinet.
These photos show the cabinet decorated for the various holidays –

2012 Valentine's Day Boyds Bear bookcase   2013 Easter Boyds Bear bookcase   2012 Christmas Boyds Bear bookcase

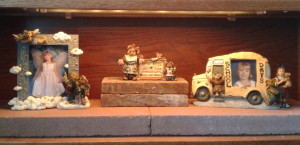
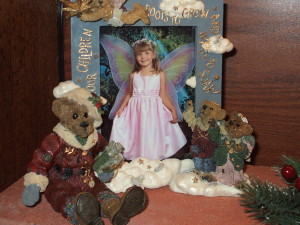
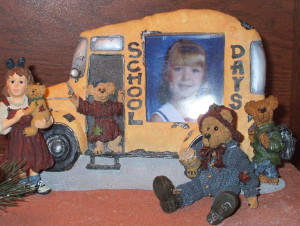
On the first shelf of the cabinet, I stacked two smaller bricks in the center to add some additional height.  To define that this is a Boyds Bears themed cabinet, I placed a figurine called, “Tessa, Ben & Cissie … A Sign of the Times” which reads “Boyds Bears and Friends … bears and hares you can trust”.  To the left is a picture frame, “Wings to Soar” with an enchanting picture of our daughter dressed in fairy wings.  To the right is another picture frame, “Pam and Dave …All Aboard” which features a school bus and holds our daughter’s kindergarten photo.  This shelf is where I display my Boyds Bears seasonal figurines.

2013 Boyds Bears bookcase - first shelf

These photos show the shelf with my various Boyds Shoebox Bears figurines –

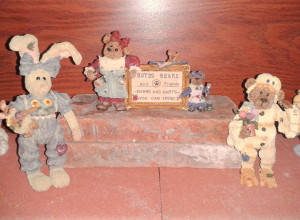
2013 Easter Boyds figurines

Easter – “Winnie Hopkins” and “Webster Grizberg”

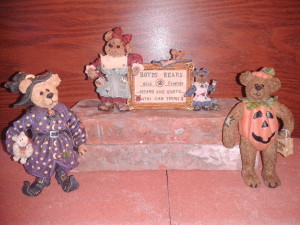
2012 Halloween Boyds figurines

Halloween – “Hazel Spooksbeary” and “Bradley Boo Bear”

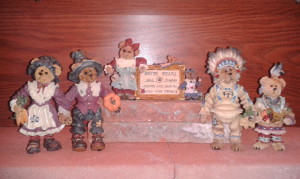
2012 Thanksgiving Boyds figurines

Thanksgiving – “Virginia Grizberg”, “Miles Grizberg”, “Chief Sitting Bear” and “Princess Standing Bear”

2011 Christmas Boyds Shoebox Bear 1    2011 Christmas Boyds Shoebox Bear 3

Christmas – “Nicholas Grizberg” and “Elias Grizberg”

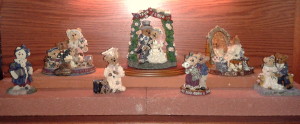
The second shelf of my Boyds Bears cabinet features several resin bear figurines.  I have arranged the pieces to tell a story of life from birth to old age.  The figurines left to right are:  “Momma McBear … anticipation”, “The Family” a special 1999 limited edition piece, “Bailey … the graduate”, “Grenville & Beatrice … true love, “Momma & Poppa McNewbear with Baby Bundles”, “Beatrice … we are always the same age inside” a 1998 limited edition piece, and finally “Grenville & Beatrice … best friends”.  These items are displayed year-round in the cabinet and I will try to change the display by adding seasonal decorations.  TIP: Keep an eye out during the various holidays at your local craft stores for seasonal decorative accents to add to a display.  I have found that in the floral section there are usually small spray decorations specific to each of the different seasons and holidays.

This photo shows my Boyds Bears figurines on the second shelf of the cabinet –

2013 Boyds Bears bookcase - second shelf

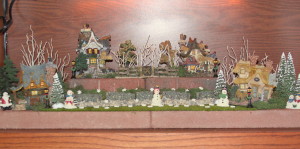
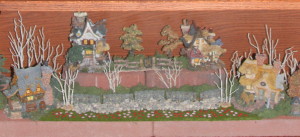
The bottom shelf of my Boyds Bears cabinet features the charming little houses from the Boyds Town collection.  From left to right the houses are: “Edmund’s Hideaway”, “Grenville and Beatrice’s Homestead”, “Emily’s Carrot Cottage”, and “Bailey’s Cozy Cottage”.  The Boyds Town is decorated seasonally with additional small figurines and decorative accents.  Some of these additional items are from the Boyds Bears product line, other items are purchased at a variety of local craft stores and I also have used some Department 56 items. TIP: Keep an eye out during the various holidays for miniature decorative accents; also check the dollhouse section in the craft stores for more miniature items to add to a display.
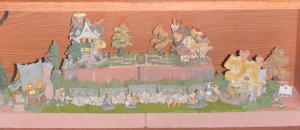
These photos are of the Boyds Town collection decorated for the various holidays –

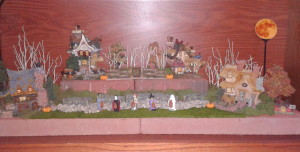
2012 Halloween Boyds Bear Village

Halloween 2012 – I used bare-branch trees for a more seasonal autumn look and added a “harvest moon” in the right corner of the display.  I displayed a couple of “trick or treaters” figurines and a small pumpkin patch.

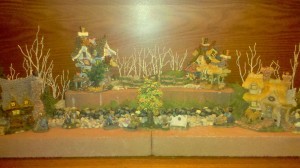
2011 Fall Boyds Bear Village

Fall 2011 – For Thanksgiving, I kept the pumpkin patch but removed the Halloween kids and added small resin turkeys.

2012 Christmas Boyds Bear Village

Christmas 2012 – I added small pine trees, a small bear Santa and several snowmen figurines, tiny lamp posts with Christmas wreaths and also a sprinkling of mini snowflakes.

2012 Valentine's Day Boyds Bear Village

Valentine’s Day 2013 – I removed all the Christmas decorations and added a sprinkling of tiny hearts to the display.

2013 Easter Boyds Bear Village

Spring 2013 – I remove all the previous seasonal trees and add more spring-like green trees.  I found a small section of “grass” and miniature tulips in a variety of colors in the model railroad section of my local craft store and I added these items to the front of the display.  Then, I added more seasonal figurines to the display.

Look for tomorrow’s Décor Post, “Decorating with Boyds Bears (Part Two) for more ideas and tips for decorating with a collection for the different holiday seasons and even some special events.

 A Brief history of the Boyds Bears Company

The Boyds Bears Company was founded by Gary Lowenthal and his wife Justina Unger.  It all started back in 1979 when they moved to Boyd, Maryland and opened a small antique store.  Gary soon began making reproduction duck decoys which led to him making small resin houses called “The Gnomes Homes” in 1984.  Eventually they added to their product line and started making plush bears and rabbits and by 1993 they began making resin bears.  The company was now called the Boyds Bears Figurines and Collectibles with the company administration offices and product processing building located just outside Gettysburg, Pennsylvania.

By this time, the Boyds Bear Company has added several more additional product lines but the resin bears remained the most popular.  In 1996, the Boyds Bears Company started their own official fan club called the “Loyal Order of Friends of Boyds” or better known as the FOBs.  The cost of the annual membership included a special FOB kit each year that could be purchased that included exclusive member’s only items, such as figurines, plush bears and a special resin member pin.  Members also had access to an online newsletter and a member’s only website.
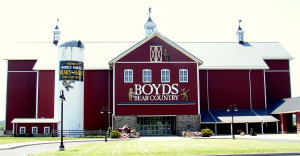
Over the years, many of the Boyds Bear products have won numerous prestigious awards, including the Teddy Bear of the Year Awards and Doll of the Year Awards.  Then, in 2001 they opened their first store located in Gettysburg, PA near their company headquarters and later an additional store in Pigeon Forge, TN.  Unfortunately, due to changes in the retail market and difficult economic conditions the Tennessee store closed in 2007 and the Pennsylvania store closed in 2011.  (When we visited Gettysburg in 2008 and again in 2009 I was able to visit the Boyds Bear Country store.  It was a delightful barn–themed building filled with the complete line of Boyds Bears products.  Needless to say, I was there for a couple of hours just looking at all the items and the wonderful displays throughout the multi-level building.)

2008 Boyds Bear Country

Boyds Bear Country in 2008

Enecso, a large American company which specializes in the sales and distribution of a variety of giftware and collectible, acquired the Boyds Bear Company in 2008.  Currently the Boyds collection is sold in independent gift and collectible stores as well online.

John Glenn’s Birthday

John H. Glenn, Jr. (Born: July 18, 1921) is best known as the first American astronaut to orbit the earth.  Glenn was born in Cambridge, Ohio but moved to New Concord when he was two years old.  As a boy he was interested in science and flying airplanes.  He graduated from New Concord High School and attended the local Muskingum College.  In 1943, Glenn married his childhood sweetheart, Anna Castor.

Shortly after Pearl Harbor, when the United States entered into World War II, Glenn enlisted and became a Marine pilot.  Glenn flew 149 missions between World War II and the Korean War.  Later, he served as a test pilot for Naval and Marine aircraft and after setting a speed record in 1957 on a flight between Los Angeles to New York, Glenn earned a reputation as one of the country’s top test pilots.  This eventually led him to the astronaut corps program.

In 1959, NASA selected Glenn as one of the seven astronauts in the U.S. Mercury space program.  On February 20, 1962 Glenn rode the Friendship 7 spacecraft into space and became the first American to orbit the earth.  At the time the U.S. was lagging behind the Soviet Union in the “Space Race” and Glenn was welcomed back to earth as a hero.  Afterwards, he continued to serve as a NASA advisor until 1964 and the following year he retired from the Marine Corps, resigned from NASA and decided to run for political office.  Glenn was elected and served as a U.S. Senator for the state of Ohio for 24 years.

Over three decades after his first flight, Glenn returned to space on the Space Shuttle Discovery on October 29, 1998.  At the age of 77 he made history again as the oldest person to fly in space and he is the only astronaut to fly in both the NASA Mercury and the Space Shuttle programs.  This second flight offered valuable research from a perspective of space flight on the same person at two different points in their life, thirty-six years apart, providing information on the effects of spaceflight and weightlessness on the elderly.  Glenn returned to earth a hero for the second time and he is the only astronaut to have experienced both a splashdown and a touchdown.

John Glenn received a Congressional Space Medal of Honor in 1978; he was inducted into the Astronaut Hall of Fame in 1990 and received the Presidential Medal of Freedom in 2012.  Currently John Glenn and Scott Carpenter are the only remaining Mercury astronauts.

The John and Annie Glenn Historical Site in New Concord, Ohio

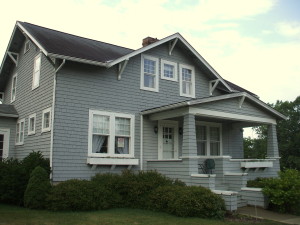
John Glenn Boyhood Home - exterior    John Glenn Boyhood Home - interior

While traveling on a road trip to Pennsylvania in 2009, we stopped in New Concord, Ohio to see John Glenn’s boyhood home.  The house where Glenn grew up was originally located on the “National Road” and when the road was widened, the home was moved to Friendship Drive and then moved again in 2001 to the current location on Main Street.  It has been restored and it is decorated in the style of the late 1930s.  The John and Annie Glenn Historical Site has a small museum of memorabilia for both Glenn’s space and political careers and in the visitor center they show several different videos regarding the life of both John and Annie Glenn.

Travel – Tips for Traveling with Kids

Summer – time for the annual family vacation!  We have been taking our children on trips since they were very small.  We’ve gone on short weekend trips that are only a few hours from our house and longer road trips when we are gone for weeks at a time and we’ve even traveled by plane to the East Coast and also Hawaii.  With any travel destination,  we always start with a specific travel plan and over the years I have found that organization is the key and packing lists are very important.  In this post I’m going to share some tips and offer some suggestions that I have learned over the years.

Road Trip

Tips and suggestions for a road trip –

  • Start by cleaning out the car, then vacuum the floor and upholstery, wash the car.
  • Get a car tune-up, check the oil level and fluid levels, check the air pressure in the tires, replace the windshield wipers if needed, fill the car with gas.
  • Have these items handy – a flashlight, first aid kit, a fire extinguisher, road flares and booster cables.
  • Store a roll of paper, hand wipes, hand sanitizer and a box of tissues for easy clean-ups during the trip and bring a couple of plastic shopping bags for trash.
  • Pack a cooler with healthy snacks such as water and juice, string cheese, fruit, carrot sticks.  Also bring snacks like goldfish crackers, raisins, fruit rolls – whatever the family likes to eat.
  • Shop ahead for small toys or a new book, movie, video game, CD or borrow a library book-on-tape to keep the kids occupied during the trip.
  • Pack a couple of blankets and pillows for naps in the car.
  • Allow time during the trip for visiting tourist attractions along the way.
  • If you know there will be toll, be sure to have dollar bills and coins handy for the toll booths.
  • Get an early start, the kids can fall back to sleep for a few hours.
  • Give each child their own backpack, have them pack it with their toys and comfort items.

 Suggested items to include in a road trip activity bag –

  • Portable IPhone, Android phone, IPhone, Kindle or Tablet with music and audiobooks downloaded.  (Don’t forget the headphones)
  • Portable electronic games.
  • Activity books, sticker books, etc. (Don’t forget to bring colored pencils or washable markers; they are better than crayons that can melt!)
  • Simple and inexpensive items for activities – a bottle of bubbles, colored pipe cleaners. (for creating shapes and even jewelry such as: rings, bracelets, necklaces)
  • A large inexpensive cookie sheet and a bag of magnetic letter, numbers and fun shapes.

Suggested items to bring for the hotel room –

  • An extension cord – for those inconvenient electrical outlets.
  • A couple of electrical outlet covers – to childproof the room.
  • A nightlight – in case the kids wake up in the middle of the night.

Plane Trip

Tips and suggestions for a plane trip –

  • Try to book a nonstop flight if possible; this limits the number of flights which could be good for two reasons.  First, sometimes cabin pressure changes can be uncomfortable on take-off and landings.  Second, this will avoid the hassle of getting on and off planes and carrying luggage through the airport for connecting flights.
  • On the other hand, some times on longer domestic or international flights, it might be a good idea to schedule a layover for the kids to burn off some of their energy by running around and their legs.
  • If you need to book a connecting flight, allow at least an hour between connections, this will give extra time in case of flight delays.  (nobody wants to run through an airport with luggage and kids from one airport gate to another with only minutes to catch a connecting flight!)
  • Take advantage of early boarding, (and if there is no assigned seating) it is a good way to select seats in a preferred area, have the kids settled and if you are using a carseat it can be fastened into the plane seats before the other passengers board the plane.
  • Some parents highly recommend front-row seats known as bulkhead seating.  The advantages are extra legroom and the seats are usually close to the restrooms but the disadvantages are that there is no under-seat storage and carry-on bags need to be stowed in the overhead compartment for takeoff and landings.
  • Prior to the trip, be sure to talk to your kids about the travel plans; discuss where you are going, what you will see and most importantly what to expect on the plane ride.
  • Prior to an airplane flight, it is a good idea to have your child’s ears checked for any possible ear infections because if undetected it could be very painful on the plane takeoff and landing, and it might be possible that the trip would have to be delayed until the infection is gone.
  • Prior to the flight, if you are using a carseat or booster seat, be sure that it is meets airline regulations.
  • Before the flight or if you are waiting for a connecting flight, let the kids get our all their excess energy.  (maybe you will be lucky and the kids will be so tired that they will take a nap once you are on the plane!)
  • During the flight, keep the kids busy and entertained with items from a carry-on bag.  Be sure to answer their questions and have them look out the window to play the “I spy” game.
  • When the plane lands, think about waiting for the other passengers to leave the plane.  It will take time to gather items and, if you are using a car seat, to unfasten it from the plane seat.

Suggested items to include in a carry-on bag –

  • A backpack is a good choice for a carry-on because it will keep hands free to hold hands with your child.  Whatever bag you select, always check to see that it will meet airline regulations.
  • Pack a change of clothes for your child in case of spills or other accidents; don’t forget a set of clothes for yourself.  Planes can also be chilly, so be sure to bring a sweater or jacket.
  • Pack some healthy snacks in resealable plastic bags, such as: cheerios, goldfish crackers, pretzels, peanuts or raisins.  Airport food can be very expensive and it is a good idea to have something the kids will like to eat in case of delays.
  • Toss in a couple of different sizes of plastic zip-lock bags to store dirty clothes, etc.
  • In case of emergencies, have your kid’s pediatrician phone number and insurance information handy, it is also a good idea to have your kid’s immunization record.  Keep any medicine your child is currently taking in your carry-on, stored in the original container, because in case of flight delays you will have it accessible.
  • Please refer to the activity bag list above for items to keep your child busy and entertained.

Craft – Embellished Photo Frames

Shopping in the local retail stores I always admire the fancy embellished frames but the prices are usually a little expensive.  In this craft post, I will show you how to take a simple and inexpensive plain frame and with a few simple steps you can have great looking embellished frame at very little cost.  Here is a list of some items that are needed:

Embellished Photo Frame – supplies

  • An inexpensive plain frame
  • 1 or 2 simple small items (these are determined by the subject of the photos)
  • Hot glue gun and glue sticks
  • Paint or stain (optional)

Embellished Photo Frame – insturctions

  1. Select a simple plain frame, size is determined by the photo you will be using.
  2. Remove the backing and glass from the frame.
  3. (Optional) If you are using an unfinished wood frame, now is the time to paint or stain the frame.
  4. Determine placement of the embellishment items on the front of the frame.
  5. Once you have decided on the position of the item, attach it with hot glue.
  6. Add glass, photo and backing to frame.

Here are some examples of frames that I have done for our home:

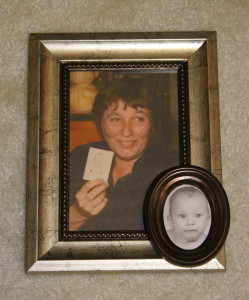
This first embellished frame is one of my favorites.  The silver painted frame with bronze trim has a picture of my mother-in-law holding a picture of my husband when he was a baby.  In the small bronze oval frame attached is the baby photo of my husband.  This is a fun way to highlight the photo she is holding.

Embellished photo 1

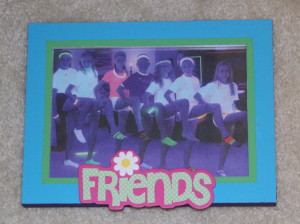
The next embellished frame started out as a plain white frame.  Using painter’s tape, I taped off sections and painted three colors, blue, green and purple on the frame edge. Then I added a wooden prepainted “friends” to a photo taken at our daughter’s recent backlight party.  The colors go great in her colorful bedroom and sits on her desk.

Embellished photo 2

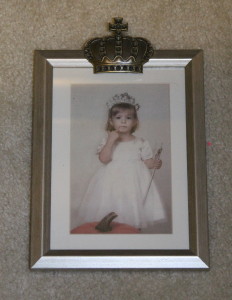
In another embellished frame, I added a silver metal crown to the top of a silver frame.  The photo I used was our daughter wearing her princess costume from Halloween a couple of years ago.  I thought it was a cute way to match the photo with the embellishment.

Embellished photo 3

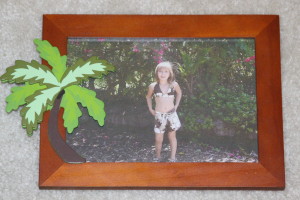
The next embellishment is a simple wooden frame with a palm tree embellishment, the photo of our daughter was taken in Hawaii and I thought the palm tree was a good idea.

Embellished photo 4

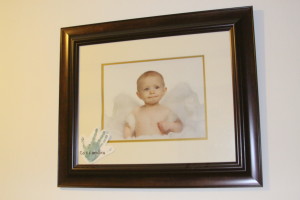
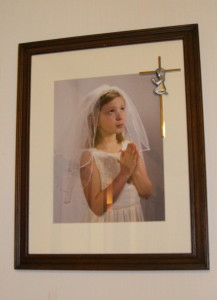
The next two embellished photos hang in our upstairs hallway.  The first is a large frame with a photo of our daughter and in the corner is attached cut-out hand print that she did in kindergarten.  The second is another large frame with her First Communion photo and in the corner I attached the silver cross that my mother had bought for her when she was born.

Embellished photo 5    Embellished photo 6

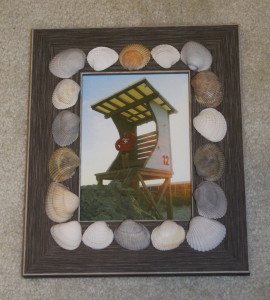
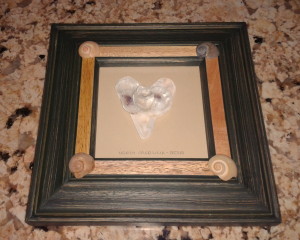
The final two embellished photos are a little more complicated.  The first one is a wooden photo frame that resembles driftwood and I glued several seashells that we collected on the beach in North Carolina.  Inside the frame is a photo of our daughter at the lifeguard station at the same beach.  The second one is another wooden frame and at the four corners of the frame I glue more of the seashells.  Inside the frame I created a heart shape with several fragments of seashells collected from the same trip.

Embellished photo 7     Embellished photo 8

I hope this gives you some ideas for creating some of your own embellished photo frames!