Decor – Halloween Decorations

Front door autumn wreath

Like most seasons throughout the year I enjoy decorating our home for each of the different holidays and Halloween is no exception!  I try to keep the decorations fun with just a touch of elegance.

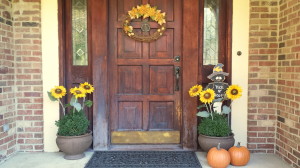
Let’s start on the front porch … every year I place two artificial pumpkins outside near the potted plants.  Usually I will add several more real pumpkins that we will later use to make roasted pumpkin seeds and my husband’s delicious pumpkin pies for Thanksgiving dinner.  Next, I placed a wooden “Trick or Treat” black cat into the potted plant for a whimsical Halloween touch and I also added several long-stemmed sunflowers.  Just under the front porch overhang I hung a quirky “Enter If You Dare” wooden sign and on the front door I hung an oval fall wreath decorated with golden chrysanthemums and autumn leaves.  After Halloween I will attach a resin oval pumpkin that has a small metal “Welcome” sign to the Autumn wreath.

Front porch

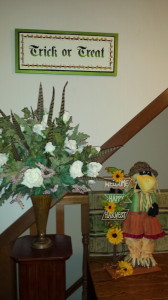
In our entry foyer is a low wooden bench and I placed a three foot high scarecrow which holds a wooden sign that says, “Welcome Happy Harvest”, that is decorated with sunflowers and berry sprays.  Next to the bench is a wooden pedestal with a floral arrangement of white rose and during the fall season I add several peasant feathers to the arrangement for a festive touch.  This year I change the picture on the wall with a new Halloween “Trick or Treat” sign that I recently made.  (For more information and instructions on how to create this one of these for your home, please check out this month’s Craft post, Halloween signs)

Front entry

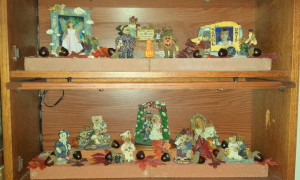
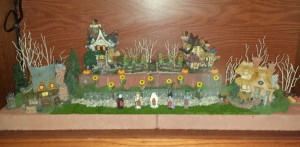
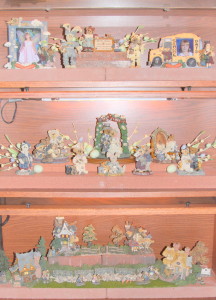
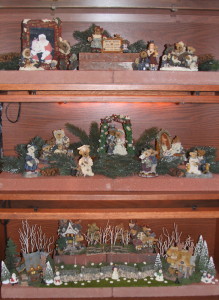
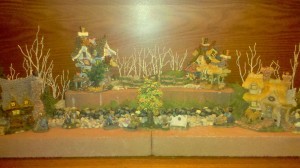
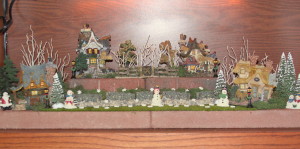
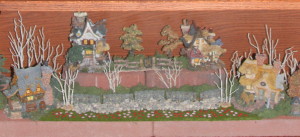
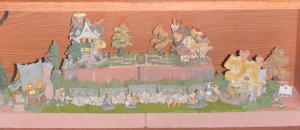
To the right of the entry is our library and in this room is an oak wooden lawyer’s bookcase which holds my Boyd’s Bear collection.  As discussed in a previous post, Displaying a Boyds Bear Collection Part One, I usually decorate the bookcase for each of the different seasons and holidays throughout the year.  For Autumn I added several acorns and oak leaves to the Boyds figurines to the top two shelves.  On the bottom shelf of the bookcase my Boyds Bear Village is displayed and this will also get a seasonal change.  This year I added several cornstalks and sunflower plants, I had searched in the local craft stores and couldn’t find any that I liked or were the size that I needed.  Finally, I found plastic cornstalks and small sunflower buttons.  I added small berry seeds to the cornstalks that would resemble ears of corn and for the small sunflower buttons I added twigs to resemble stems.  To finish the display I add a group of Halloween trick or treaters.

Boyds Bears Bookcase - fall decorations

Boyds Bears Bookcase - Boyds Village fall decorations

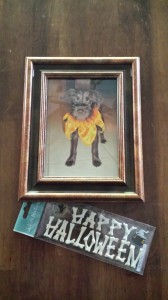
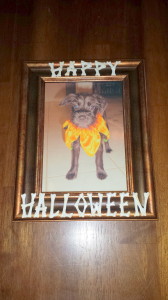
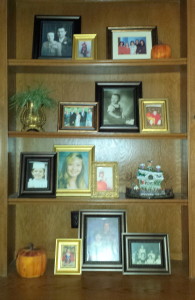
Moving on to the family room, I decorated the fireplace mantel with artificial pine boughs and layered on sprays of berries, grapes and burgundy colored magnolias to create a festive autumn floral arrangement and on either side I finished the display by adding two scarecrows.  To the left of the fireplace is a bookcase that has a display of family photos that are displayed year-round.  For Halloween I removed some of the photos in a few of the gold frames and exchanged them for other photos of my children wearing some of my favorite Halloween costumes.  To the right bookcase I replaced a photo with a cute photo of my dog when she was wearing her Halloween costume.  To give the photo a festive look I add simple scrapbook letters in the shape of bones that spell out “Happy Halloween”.  These simple changes are a wonderful way to add some seasonal style in an easy way.  To the bookcase I also added a few wooden pumpkins and a special ceramic pumpkin that my daughter made years ago.  Also displayed in the bookshelf is a display of the Disneyland Haunted Mansion decorated as Tim Burton’s Nightmare Before Christmas.  (For more information about this entertaining 1993 Disney movie, please see this month’s post, the Nightmare Before Christmas movie)
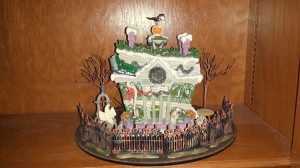
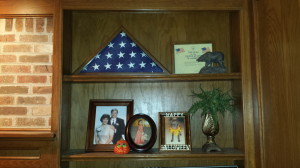
Family room bookshelves

Family room bookshelves  - Haunted Mansion Holiday   Family room bookcase 2
Halloween picture frame supplies  Halloween picture frame

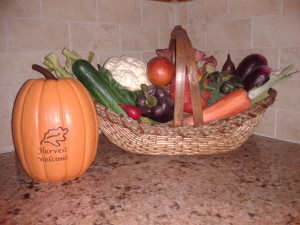
The next room to be decorated is the kitchen.  On one side of the kitchen sink is a next to a basket of artificial vegetables where I placed a small resin pumpkin and on the other side of the sink I placed a Halloween witch.  On the granite top kitchen island is a lovely ceramic pitcher filled with ivory sunflowers and for an unexpected touch I’ve added several peacock feathers.
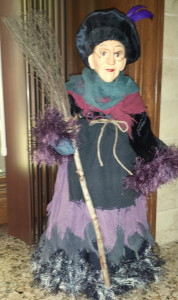
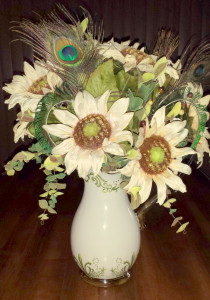
2012-11-15 07.59.06

Kitchen witch  Kitchen autumn floral arrangement

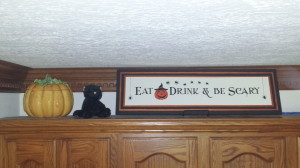
Across the room there is counter desk area with cabinets overhead.  In the space above the cabinet I removed the sign that is usually there year-round and replaced it with a Halloween sign I made recently that says “Eat drink & be scary” that is decorated with spiders.  Next to the sign I placed a large ceramic pumpkin and a black cat stuffed toy to complete the display.  (For more information and instructions on how to create a seasonal sign your home, please check out this month’s Craft post, Halloween signs)

Kitchen 1

The room to be decorated is the dining room.  Currently there is a lovely floral arrangement of gold roses that usually is displayed with an antique doily on the dining room table.  The color of the roses is still appropriate for the autumn season and will remain there until I set the dining room table for our thanksgiving dinner in November when I have some wonderful plans for some festive decorations.  (Please check next month for a Décor Post, Thanksgiving table Decorations, for more information and photos)

The finishing touches to the dining room are two different jeweled pumpkins that I made this year.  The first one was very easy; it is a plain ivory ceramic pumpkin that I bought from a local craft store which I decorated with black crystals and spiders. for an elegant Halloween Pumpkin.  This elegant Halloween pumpkin sits on top of the tall cabinet near the dining room table.  The other two pumpkins are also very easy to make, they are small bisque pumpkins that I bought from the craft store and painted in a beautiful bronze metallic color with the stem painted a pale green metallic color.  Then to add a little sparkle I glued individually placed beautiful dark topaz crystals.  The pumpkins are placed into two Nortiake Rothschild teacups and displayed in the china cabinet.  (For more information about creating these elegant pumpkins, please check out this month’s Craft Post, Jeweled Pumpkins)
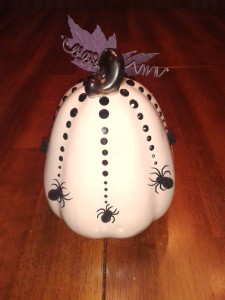
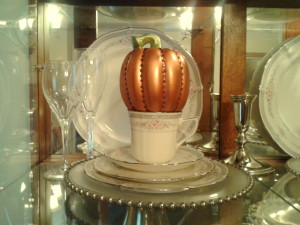
Jeweled Pumpkin 2 final  Jeweled Pumpkin on display in china cabinet

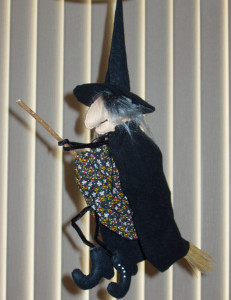
The last few items that I want to share when I’m decorating for the Halloween season are handmade decorations that my Mom made several years ago.  Now that she passed away, these decorations have become very sentimental to me and eventually they will be passed onto my children so that they will have something to cherish from their grandmother.  The first is a fabric witch with pipe cleaner arms and legs riding on a broom that my mother crafted almost 35 years ago and it has hung in all the houses that I have lived in since my mother made it for me.  The second is a fabric bat that my mother made around the same time and it has been a part of my annual decorations for years.  The third item is a large fabric cat that my mother made and I use as a pillow decoration of our sofa or recliner chair.  Bringing these decorations that my Mom created and displaying them every Halloween just puts a smile on my face!

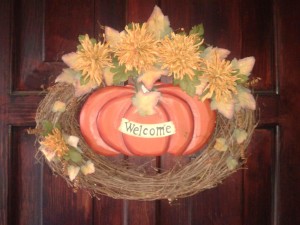
Halloween 2003 - Witch


Decor – Preparing a Guest Bedroom

Summer … it is a time when we hit the road or take the plane for a vacation … but sometimes that means that guests could be coming to visit your home!  Living in the Midwest, hundreds of miles from our family out west, we have frequent visitors.  We absolutely love when our family comes to visit whether it is grandparents, parents, aunts, or cousins, but I especially love when my son comes to visit!!

Right now, the room that we use for our out-of-town guests is actually my daughter’s old bedroom.  When we moved to the Midwest, we suddenly had a five bedroom house and there were only three of us and we had lots of space!  We gave our daughter two rooms, one was the “bedroom” where she sleeps at night and across the hall was her “playroom”.  Eventually as she got older, she thought her bedroom was too girly and she wanted more bold colors and something a little trendier.  She moved permanently into the playroom and we redecorated the room as her “new bedroom” and it was now more appropriate for a teenager – she loved it!
Her “old bedroom” now became the guest room.  There was no really no need to redecorate the room, the beautiful sleigh bed with a matching dress/mirror and side table were perfect.  The lovely pale green paisley bedspread, the storage bench at the foot of the bed and the chair in the corner also stayed.  Just a basic cleaning and the room was ready and waiting for our guests!

Let’s breakdown what is considered a comfortable room for guests:

  1. The perfect combination for a guest bedroom is a room with an adjoining bathroom; this will give guests the most privacy.  But don’t despair if your house cannot accommodate this type of arrangement.
  2. Don’t overwhelm guests with an overly feminine room, try to keep the decorating style to simple and traditional but the most important element is comfort.
  3. Be sure the bed has a clean and beautiful bedspread and sheets.  Provide several comfortable pillows for sleeping, also have extra blankets available.
  4. A comfortable chair is a great idea for guests to use for reading or sitting in to put on their shoes.  Be sure to provide good lighting and a lovely soft throw for chilly nights.  A thoughtful thing to do is place some interesting books nearby, local history or the latest best seller, and a couple of magazines.
  5. Speaking of lighting, if there is a side table with a lamp; make sure the guests can reach it easily from the bed.  Overhead lighting is also a good idea and if the budget allows a ceiling fan is great for the summer months.  (or a table fan can be a good alternative choice)
  6. Make sure to provide guests with a table or luggage rack to keep their suitcases off the floor.  Provide some drawers and closet space for their clothing; add some extra hangers and a nice touch is to have a full-length mirror for the guests to use when dressing.  A small iron and ironing board are also great idea to store in the closet for the guests to use if needed and a small sewing kit would also be helpful.
  7. Make sure that the bathroom the guests will be using is clean.  Provide several clean towels – bath towels, hand towels and washcloths.  Stock up on a couple of new toothbrushes, toothpaste, soap, shampoo and conditioner just in case the guests forgot to bring something. (Check out the pocket towel idea shown below for storing those bathroom basics)

Pocket Towel

This clever idea is used to not only make your guests feel welcome, but also to provide them with those convenient bathroom essentials.  You will need: 1 bath towel, 1 hand towel, 1 washcloth, a toothbrush and tube of toothpaste.  Follow the steps to create a pocket towel.

  1. Lay out a hand towel, front side facing down.
  2. Fold up the bottom about a quarter of the way.
  3. Turn the towel over and fold in the sides so they overlap completely.
  4. Turn the towel over again and lay it over a bath towel already hanging on a towel rod.
  5. Fill the pocket with a washcloth and tuck in a toothbrush and toothpaste.

More special touches to add to a guest room:

  • Tourist information – local maps, brochures of nearby attractions, a list of favorite restaurants or shopping areas.
  • A beautiful notepad and pens or pencils for jotting down information, etc.
  • An alarm clock or portable music system.
  • Plug in nightlights for bedroom and bathroom
  • A small flashlight

The idea is to make your guests feel comfortable during their visit to your home and the main thing to remember is to enjoy this special time with them.

Decor – Beach Memorabilia Display

Beach bookshelf - finished

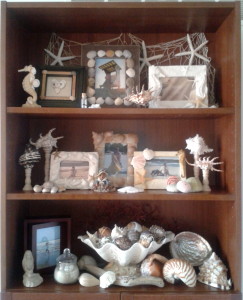
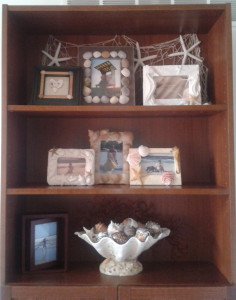
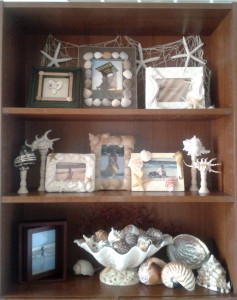
There is a bookcase that was moved recently from our basement into our library and it is the place in our home that most of our beach memorabilia is displayed.  We love going to the beach, whether it is on the west coast, east coast and even Hawaii and Mexico.  We’ve collected seashells, sea glass and pieces of driftwood when we were living in California and most recently on our annual trip to North Carolina.  When I am shopping I always look for beach themed picture frames or small decorative pieces. Decorators advise that when you have a collection of items it is best to display them together for the most visual impact.  That is exactly what I did with the beach memorabilia that we have collected over the years.

To start the process of moving the bookcase from the basement to the library, I took a photo of the existing beach bookcase so I could reference the placement of the items.  Next, I cleared the bookcase and carefully boxed all the fragile seashells and picture frames.  Once it was emptied, the bookcase was finally ready to move upstairs.

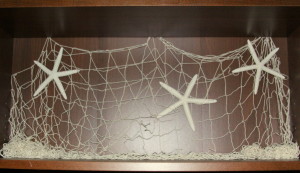
Now, that the bookcase was in its new place in our library it was time to return the beach memorabilia back to the shelves.  Before doing that, I made sure the shelves were cleaned and ready to go.  To add some visual interest, on the top shelf of the bookcase I hung some fishing netting and attached some starfish.

Beach book shelf netting

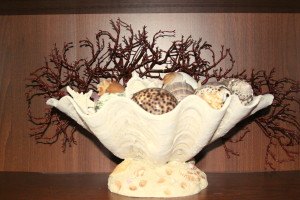
I had purchased a large resin seashell “bowl” several years ago from a local retail store and I wanted to position this large piece in the center of the third shelf of the bookcase.  To add more interest I put some pieces of artificial red coral behind the bowl and then I filled the container with small seashells.

Beach book shelf resin shell container

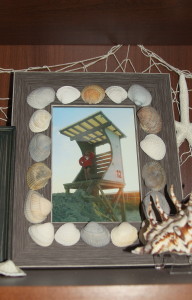
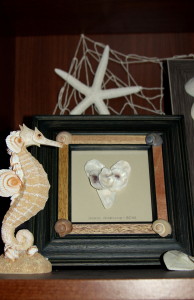
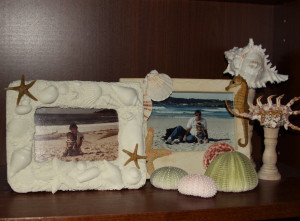
Next, I positioned all the picture frames because I considered them the main focus of each shelf and, generally speaking, these are the items that draw the eyes’ attention.  On the top shelf are three picture frames, two of them are special craft projects.  The first one is a wooden photo frame that resembles driftwood and I glued several seashells that we collected on the beach in North Carolina.  Inside the frame is a photo of our daughter at the lifeguard station at the same beach.  The second one is another wooden frame and I glued seashells at the four corners.  Inside the frame I created a heart shape using several fragments of seashells collected from the same trip.  This is one of my favorite pieces of our beach memorabilia collection.

Beach bookshelf - frames

Beach bookshelf 3Beach bookshelf 2

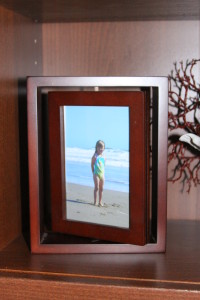
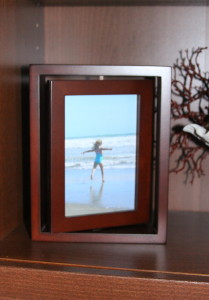
More beach photos are displayed on the other two shelves.  On the next shelf are two great photos taken almost 20 years apart.  One photo is of my son and I on the beach at Carmel, CA and the other one is of my husband and daughter at the same beach.  I thought it was a great way to remember this very special beach that we loved to visit.  On the next shelf is a fun photo frame that revolves to show two different photos of our daughter at the beach in Santa Barbara, CA and you can see the joy that she had playing on the sand and surf.

Beach bookshelf 4

Beach book shelf rotating frame 1    Beach book shelf rotating frame 2

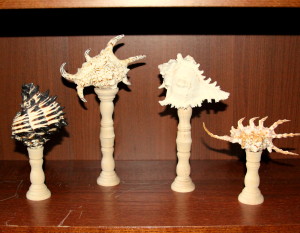
Once I was pleased with the placement of the picture frames, I added the largest seashells from the collection to the shelves.  To create some interest to a couple of the seashells, I bought unfinished wooden pieces and used the single height for two of them and doubled the height for the other two simply by hot gluing two pieces together.  All four seashells are hot glued into place at the top so they are secure on the wooden pieces.  The other large seashells were placed directly on the shelves.  To finish the beach memorabilia bookcase display I placed other beach accessories on the shelves, I included a piece of driftwood, a small sand sculpture of a mermaid, a resin seahorse and even a Boyds Bear figurine called “Wilson at the Beach”.  (Post Note: the photo of the finished Beach Memorabilia Bookshelf is shown at the top of the page)

Beach Bookshelf - shells    Beach book shelf shells on pedestals

Decor – Displaying a Boyds Bear Collection (Part 2)

As you might know from reading yesterday’s Décor post, “Decorating with Boyds Bears (Part One)”, I started collecting Boyds Bears back in the 1980s.  Since then my collection has grown to a couple of hundred figurines, plush bears, photo frames, trinket boxes and even Christmas ornaments.  Then, after our daughter was born I started a collection for her which included Boyds resin dollstone figurines, porcelain dolls and stuffed bears.

Before we moved to the Midwest, we had a beautiful home in California.  For every Christmas I would love to decorate our fireplace mantel with a pine garland which I decorated with amber pinecone lights, red berry sprays and more real pinecones.  By this time I had collected over 20 Boyds Bears ornaments with the intent that I would use them on our Christmas tree.  One of the rules of decorating is that when you have a collection of items it is best to display them together for the most visual impact.  So, that is exactly what I did with the Boyds Bears ornaments, instead of using them for the Christmas tree I added them to the pine garland on the fireplace mantel and it think it turned out wonderful!

OLYMPUS DIGITAL CAMERA

Christmas fireplace mantel decorations for 2004

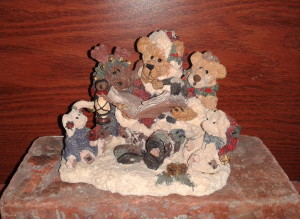
Over the years I had collected several more Christmas decorations from the Boyds Bear Company.  I had figurines, photo frames, plush bears and even a moose.  Every Christmas I pull these items for storage and find a place for them in our home.  To keep things looking interesting from year to year, I would display a plush Santa bear on a chair one Christmas and the next year I would place it on a bookshelf.  I would also do this with Christmas figurines and photo frames, one year the item would be in one room and the next year it would be in another part of the house.

2011 Christmas Boyds bear picture frame

Christmas 2011, “Edmund … the night before Christmas” photo frame

2012 Christmas Boyds Bear Santa

 Christmas 2012, “Nickleby S. Claus”

2012 Christmas Boyds figurine

Christmas 2012, “Alexis Bearinsky … the night before Christmas” figurine

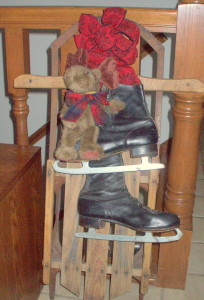
One of my favorite Christmas decorations is an antique sled that I picked up on one of our road trips across the country.  I attached a festive red bow to the sled with wires.  Next, I hung an old pair of black ice skates and as a finishing touch I added a Boyds Bear plush moose named “Mortimer Von Hindenmoose”.  This display greets our holiday guests in our entrance hall during the Christmas season every year.

2012 Christmas Boyds Bear - Mortimer Moose

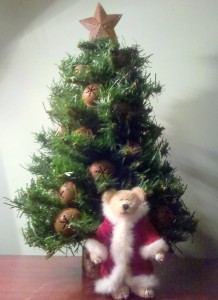
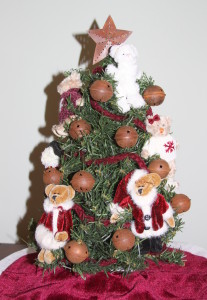
Sometimes the smallest item can hold the most impact in a display.  For the first Christmas after we moved to the Midwest, I set out a small tabletop Christmas tree on the beautiful roll-top desk in our master bedroom.  I decorated it simply with several rusted jingle bells, put a rusted star on top and placed a very small Boyds Bear Santa, called “Nicholas Bearington”, in front of the tree.  Now, that idea inspired me the next year to decorate that same small Christmas tree with some non-Boyds bears that I found in my local craft store; Santa and Mrs. Claus, a couple of bears in snowflake sweaters, a ballerina dressed in a pink tutu, a royal guard and a little white angel bear.

2011 Christmas Boyds Bear Santa    2012 Christmas bear tree

As I mentioned in my previous post yesterday, I have an oak lawyer cabinet with glass doors that holds part of my collection of Boyds Bears figurines, picture frames and Boyds Town houses.  Over the years I have also collected several holiday-themed figurines that I display in this cabinet.  (Please see yesterday’s post for photos of my collection of shoebox bears for Easter, Halloween, Thanksgiving and Christmas)

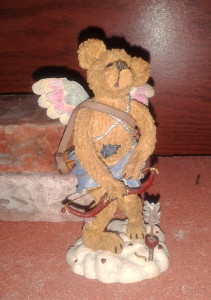
2013 Valentine's Day figurine

For Valentine’s Day, I display a cute cupid bear called “Valentino Slipshot”

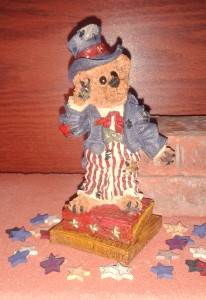
2012 Fourth of July Boyds figurine

For Fourth of July, I display a patriotic bear called “Uncle Elliott”

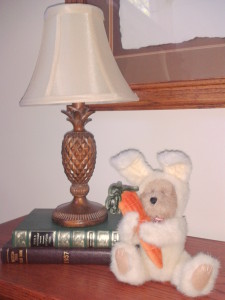
2012 Easter Boyds Easter bear

In Spring on top of the Boyds Bears cabinet I display a 6” plush Easter bear called “Agatha Snoopstein”, a brown bear dressed in a white bunny suit.

As I mentioned previously, after our daughter was born I started a collection of the resin dollstone figurines to mark the special moments in her life.  These figurines are displayed in the bookshelf in her room.  TIP: When displaying figurines on a shelf, choose accessories that are compatible in the theme, style or color tone of the figurine for the most pleasing displays.  For example, with the ballerina figurine I choose a floral pale pink rose frame and a light brown teddy bear to create a lovely display.

2013 Cassie's Boyds dollstone figurines

On the top shelves, left to right:  “Laura & Jane – the first day of school” and “Emma as Cinderella – magical moments”.  On the second shelves, left to right: “Melissa & Katie – the ballet”, “Teresa & John – the prayer”, “Lisa & Plato – graduation day”.

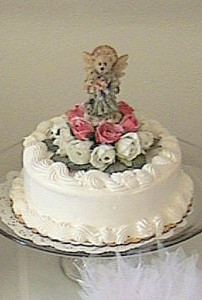
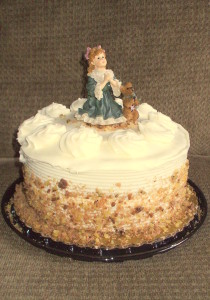
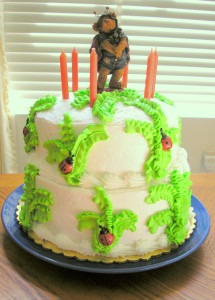
Finally, here is a great idea for using Boyds figurines in a very unexpected way.  We have all been to weddings where the cake is beautifully decorated and sitting on top is usually some sort of figurine.  I thought this idea was perfect for our daughter’s baptism cake and I used a Boyds figurine as a cake topper.  The cake looks very sweet with the figurine named “Zoe … the Angel of Life” resting on top of a bed of white and pink roses.  For the next important religious event in her young life, her first communion, I decided to decorate the cake with another Boyds figurine, I used a figurine named “Teresa & John … the prayer”.  Then, for our daughter’s 6th ladybug themed birthday party, I used the figurine named “D. Lovebug” which added just the right festive touch to the birthday cake that was decorated with leaves and resin ladybugs that I found in my local craft store.

2000 Cassie's Baptism cake   2009 Cassie's First Communion cake   OLYMPUS DIGITAL CAMERA

So, you can have a lot of fun decorating with a Boyds Bears collection in some traditional and even some unusual ways.  I would love to hear your comments about these displays and decorations.  Also, please share how you display a Boyds Bears collection.

Decor – Displaying a Boyds Bears Collection (Part 1)

I started collecting Boyds Bears back in the 1980s.  The first one was a plush brown bear in red overalls called Christopher, which I received as a gift which happens to be the name of my son.  By this time I was now working in a small retail store that sold the Boyds Bears line, and I started collecting the resin bears figurines for special occasions and holidays.  I now have a collection of figurines, plush bears in both small and large sizes, photo frames, and even Christmas ornaments.  When the Boyds Bear Village was released in 2000, I purchased several of these delightful houses and accessories to add to my collection.  But I wasn’t done yet!  After our daughter was born I started a collection of the resin dollstone figurines to mark the special moments in her life, such as the first day of school and her first communion.  Her collection also includes a couple of Boyds porcelain dolls and stuffed bears.

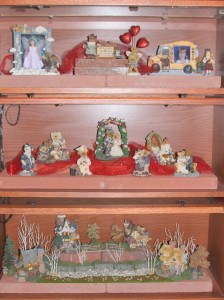
The main portion of my Boyds Bears collection is displayed in the library of our home in a lovely oak lawyer cabinet with glass front doors.  The shelves display several figurines, picture frames and several houses from my Boyds Town collection.  These items are displayed year-round in the cabinet and I will add some additional holiday themed figurines and decorative accents seasonally. TIP: To add height, I used two large bricks for each shelf and these fit perfectly across the entire length of the cabinet.

These photos show the cabinet decorated for the various holidays –

2012 Valentine's Day Boyds Bear bookcase   2013 Easter Boyds Bear bookcase   2012 Christmas Boyds Bear bookcase

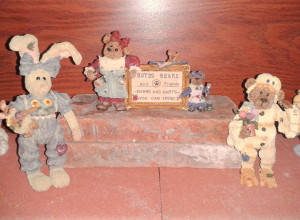
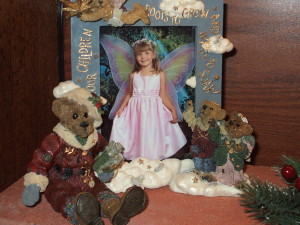
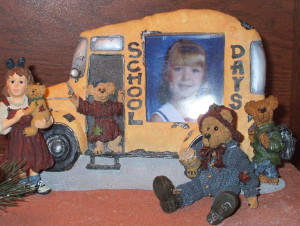
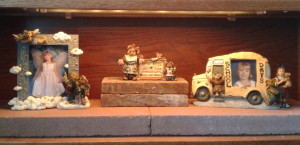
On the first shelf of the cabinet, I stacked two smaller bricks in the center to add some additional height.  To define that this is a Boyds Bears themed cabinet, I placed a figurine called, “Tessa, Ben & Cissie … A Sign of the Times” which reads “Boyds Bears and Friends … bears and hares you can trust”.  To the left is a picture frame, “Wings to Soar” with an enchanting picture of our daughter dressed in fairy wings.  To the right is another picture frame, “Pam and Dave …All Aboard” which features a school bus and holds our daughter’s kindergarten photo.  This shelf is where I display my Boyds Bears seasonal figurines.

2013 Boyds Bears bookcase - first shelf

These photos show the shelf with my various Boyds Shoebox Bears figurines –

2013 Easter Boyds figurines

Easter – “Winnie Hopkins” and “Webster Grizberg”

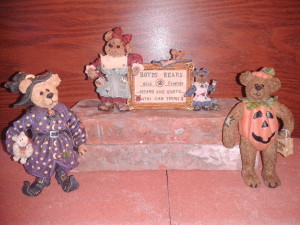
2012 Halloween Boyds figurines

Halloween – “Hazel Spooksbeary” and “Bradley Boo Bear”

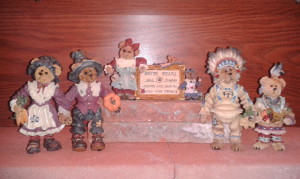
2012 Thanksgiving Boyds figurines

Thanksgiving – “Virginia Grizberg”, “Miles Grizberg”, “Chief Sitting Bear” and “Princess Standing Bear”

2011 Christmas Boyds Shoebox Bear 1    2011 Christmas Boyds Shoebox Bear 3

Christmas – “Nicholas Grizberg” and “Elias Grizberg”

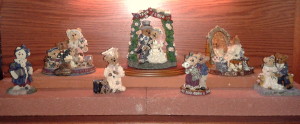
The second shelf of my Boyds Bears cabinet features several resin bear figurines.  I have arranged the pieces to tell a story of life from birth to old age.  The figurines left to right are:  “Momma McBear … anticipation”, “The Family” a special 1999 limited edition piece, “Bailey … the graduate”, “Grenville & Beatrice … true love, “Momma & Poppa McNewbear with Baby Bundles”, “Beatrice … we are always the same age inside” a 1998 limited edition piece, and finally “Grenville & Beatrice … best friends”.  These items are displayed year-round in the cabinet and I will try to change the display by adding seasonal decorations.  TIP: Keep an eye out during the various holidays at your local craft stores for seasonal decorative accents to add to a display.  I have found that in the floral section there are usually small spray decorations specific to each of the different seasons and holidays.

This photo shows my Boyds Bears figurines on the second shelf of the cabinet –

2013 Boyds Bears bookcase - second shelf

The bottom shelf of my Boyds Bears cabinet features the charming little houses from the Boyds Town collection.  From left to right the houses are: “Edmund’s Hideaway”, “Grenville and Beatrice’s Homestead”, “Emily’s Carrot Cottage”, and “Bailey’s Cozy Cottage”.  The Boyds Town is decorated seasonally with additional small figurines and decorative accents.  Some of these additional items are from the Boyds Bears product line, other items are purchased at a variety of local craft stores and I also have used some Department 56 items. TIP: Keep an eye out during the various holidays for miniature decorative accents; also check the dollhouse section in the craft stores for more miniature items to add to a display.

These photos are of the Boyds Town collection decorated for the various holidays –

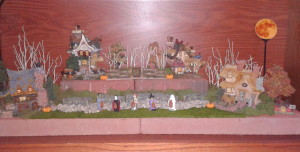
2012 Halloween Boyds Bear Village

Halloween 2012 – I used bare-branch trees for a more seasonal autumn look and added a “harvest moon” in the right corner of the display.  I displayed a couple of “trick or treaters” figurines and a small pumpkin patch.

2011 Fall Boyds Bear Village

Fall 2011 – For Thanksgiving, I kept the pumpkin patch but removed the Halloween kids and added small resin turkeys.

2012 Christmas Boyds Bear Village

Christmas 2012 – I added small pine trees, a small bear Santa and several snowmen figurines, tiny lamp posts with Christmas wreaths and also a sprinkling of mini snowflakes.

2012 Valentine's Day Boyds Bear Village

Valentine’s Day 2013 – I removed all the Christmas decorations and added a sprinkling of tiny hearts to the display.

2013 Easter Boyds Bear Village

Spring 2013 – I remove all the previous seasonal trees and add more spring-like green trees.  I found a small section of “grass” and miniature tulips in a variety of colors in the model railroad section of my local craft store and I added these items to the front of the display.  Then, I added more seasonal figurines to the display.

Look for tomorrow’s Décor Post, “Decorating with Boyds Bears (Part Two) for more ideas and tips for decorating with a collection for the different holiday seasons and even some special events.

 A Brief history of the Boyds Bears Company

The Boyds Bears Company was founded by Gary Lowenthal and his wife Justina Unger.  It all started back in 1979 when they moved to Boyd, Maryland and opened a small antique store.  Gary soon began making reproduction duck decoys which led to him making small resin houses called “The Gnomes Homes” in 1984.  Eventually they added to their product line and started making plush bears and rabbits and by 1993 they began making resin bears.  The company was now called the Boyds Bears Figurines and Collectibles with the company administration offices and product processing building located just outside Gettysburg, Pennsylvania.

By this time, the Boyds Bear Company has added several more additional product lines but the resin bears remained the most popular.  In 1996, the Boyds Bears Company started their own official fan club called the “Loyal Order of Friends of Boyds” or better known as the FOBs.  The cost of the annual membership included a special FOB kit each year that could be purchased that included exclusive member’s only items, such as figurines, plush bears and a special resin member pin.  Members also had access to an online newsletter and a member’s only website.

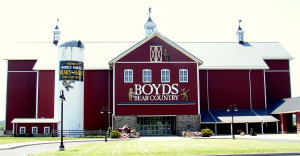
Over the years, many of the Boyds Bear products have won numerous prestigious awards, including the Teddy Bear of the Year Awards and Doll of the Year Awards.  Then, in 2001 they opened their first store located in Gettysburg, PA near their company headquarters and later an additional store in Pigeon Forge, TN.  Unfortunately, due to changes in the retail market and difficult economic conditions the Tennessee store closed in 2007 and the Pennsylvania store closed in 2011.  (When we visited Gettysburg in 2008 and again in 2009 I was able to visit the Boyds Bear Country store.  It was a delightful barn–themed building filled with the complete line of Boyds Bears products.  Needless to say, I was there for a couple of hours just looking at all the items and the wonderful displays throughout the multi-level building.)

2008 Boyds Bear Country

Boyds Bear Country in 2008

Enecso, a large American company which specializes in the sales and distribution of a variety of giftware and collectible, acquired the Boyds Bear Company in 2008.  Currently the Boyds collection is sold in independent gift and collectible stores as well online.