Decor – Changing Christmas Displays (Part Two)

In the Changing Christmas Displays – Part One post, I discussed how I changed my Fontanini Nativity display from year to year.  I frequently change my seasonal displays by moving them into various rooms of our house or adding different accessories.  In Part Two, I will feature my Department 56 North Pole village display.

One of my favorite Christmas decorations is our Department 56 North Pole Village.  Almost twenty years ago I purchased four of these whimsical buildings; they were the Home of Santa & Mrs. Claus’ home, Santa’s Workshop, Elves’ Bunkhouse and Reindeer Barn.  I also purchased two other important pieces – Santa & Mrs. Claus and the sleigh and eight reindeer set (can’t have a North Pole without Santa!). Over the years, I have added other buildings and accessories, such as the North Pole Gate, the North Pole Train Station and North Pole Forge & Assembly Shop, Candy Cane Lamp Posts, a variety of elves figurines and other accessories.  When I unpack my Christmas boxes from storage every year, I always try to arrange the various North Pole buildings and accessories in different ways and sometimes I will also change the room where I set up the display. 

Shown below are photos from past North Pole Village displays: 

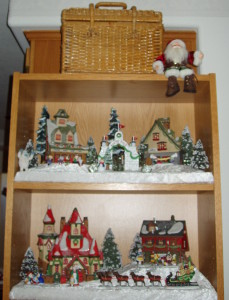
The first year I displayed the North Pole Village in our kitchen bookshelf.  It was very simple and small display with four buildings (Santa & Mrs. Claus’ home, Santa’s Workshop, Elves’ Bunkhouse and Reindeer Barn) and the North Pole Gate.  I used Styrofoam pieces used as platforms for each building and then I covered each shelf with white velvet material to create the illusion of snow (the white material was very inexpensive and it would be used repeatedly over the following years).  At the time, I only had a few accessory pieces which were Santa & Mrs. Claus, the sleigh and eight reindeer and two North Pole pine trees which were placed in the display. 

OLYMPUS DIGITAL CAMERA

The next year I displayed the North Pole Village in the same kitchen bookshelf but arranged the buildings and accessories differently.  I also added several more accessories; such as elves and a few more Christmas trees.  As you can see from the photo above and the photo below, even though I was using the same buildings of my North Pole Village the display looks different from one year to the next.

OLYMPUS DIGITAL CAMERA

The following year, I decided to move the North Pole Village into our living room.  The oak entertainment center had a shelf above the TV that was a perfect place for setting up the display.  I used the same buildings and accessories which I arranged on several different sized boxes to create some interest with a variety of levels and then covered everything with the white velvet material.  Next, I placed the four North Pole buildings and the North Pole Gate onto the shelf.  That year I added a few new pieces; the North Pole Train Station, the North Pole Express Train and the Ticket Booth which were placed on the far right side of the shelf.  Of course, I bought several more elves to add to the display … you could never have too many elves at the North Pole!  I also purchased three sets of three resin Christmas trees for a total of nine trees and I placed these around the display (these trees are an example of using non Department 56 pieces in a display and they were less expensive).
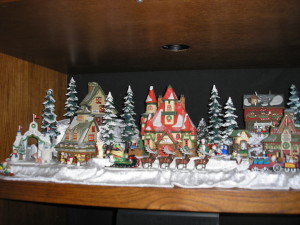
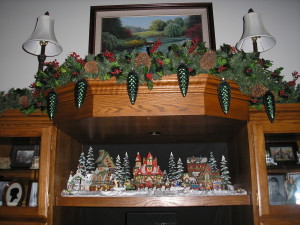
OLYMPUS DIGITAL CAMERAOLYMPUS DIGITAL CAMERA

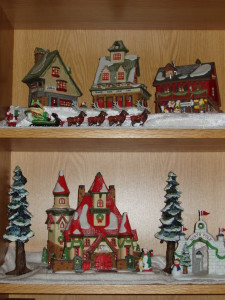
The next Christmas, we had recently moved from California to the Midwest and our new living room had wonderful built-in wooden bookcases on either side of the fireplace and this is where I set up the North Pole Village.  I arranged the five North Pole Village and North Pole Gate on two shelves and once again I used several different boxes to create a variety of levels covered with the white material.  I had bought a new Department 56 North Pole piece called “Untangling the Christmas Lights” and it was added to the display.  When shopping that year I found a set of miniature “Rudolph the Red-nosed Reindeer” ornaments and also a set of resin rock wall which I thought would be great additions to the display (these ornaments and the rock wall would be another example of using non Department 56 pieces).
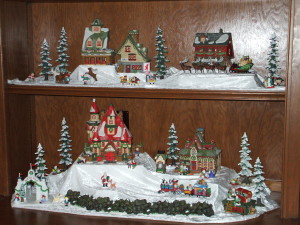
2007 Christmas 1

For Christmas the following year I had added a three piece Styrofoam base which I had purchased the previous year at an after-Christmas clearance sale.   The base would prove to be very versatile because it could be placed linked together for one long piece or separated and stacked to create two levels (this is a great example of shopping and taking advantage of sale items after the holidays)  To conceal the three separate pieces and create a unified look, I sprinkled artificial snow.  I also added a background using a tri-fold display foam boards usually used for school projects or presentations, I painted the board with blue metallic paint and clear sparkle paint.  As you can see from the two photos below, the one on the left shows an electrical outlet that I wanted to hide and the one on the right shows the background board which cleverly covers the outlet while enhancing the overall look to the display (this is an example of solving the problem of unsightly outlets, cords, etc.).
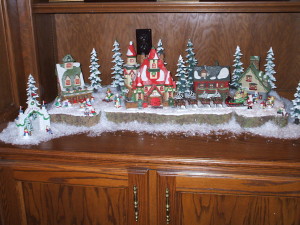
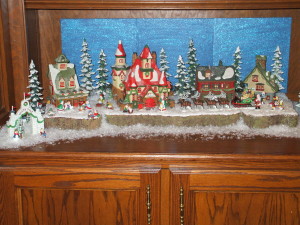
2011 Christmas North Pole Village  2011 Christmas North Pole Village with background

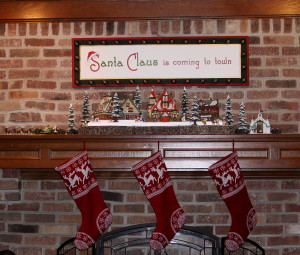
The next year I decided to move the North Pole displayto the fireplace mantel in our living room.  Throughout the year a beautiful English landscape painting normally hangs over the fireplace and I replaced it with a special Christmas sign that I made using a Christmas window/wall decal that said “Santa Claus is coming to town” which I knew would look great with my North Pole Village displayed underneath it on the fireplace mantel.  The sign is accented with bronze jingle bells that were the perfect decorative touch!  Next, I used two of the base sections but I had to make a third section because the original middle one was too wide to fit the narrow fireplace mantel.  Then I set out four North Pole buildings, the North Pole Gate and the various accessories.  (This display was featured in a previous post from my blog and for more detailed information on how it was created please click on the link to Setting up a Department 56 Village)

2012 Christmas  Family room fireplace mantel

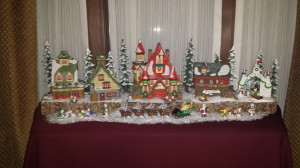
The following year I decided to move the North Pole display to the library in our home.  I set the display on the same long table that I had previously put my Fontanini Nativity display.  I started by covering the table with burgundy material (this fabric has been used over several Christmas seasons and has been repurposed from year to year)  Then, I used the same three base section from the previous year as well as the four North Pole buildings, the North Pole Gate and accessories.

2014 Christmas 3

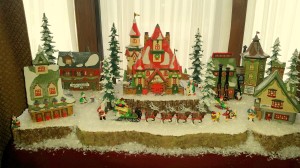
The next year I set-up the North Pole display in the same place in our library.  The only difference this time was the addition of a new North Pole building, the North Pole Forge & Assembly Shop.

2015 Christmas

As this post has shown in detail, a Department 56 display can be frequently changed from year to year by moving it to different rooms or areas of your home and also by adding accessories or other decorations to the display.  I hope this will inspire my readers to think about the options for displaying a nativity set in several different ways!

Decor – Framed Mission Map and Medals

California Mission Medals

This month I am doing a four part series on the California Missions and I thought I would take the opportunity to show you a craft project that I did a few years ago.  As previously mentioned, in the California Mission Travel post, there are 21 missions that were established by the Junipero Serra along the coastline of California to convert the Native Americans to Christianity.  When we lived in California as a small child our family visited many of the missions, in fact the San Fernando Mission was located a few miles from my childhood home in the San Fernando Valley.  Several years later when I had my own family we often visited the Missions that were located near our weekend travel destinations.  In fact, at one point it became our quest to visit ALL the Missions!  So, over the next few years we visited 16 out of the 21 Missions before we had moved to the Midwest.  (Our plan is to visit those 5 last remaining Missions when we return to California for summer vacations!!)

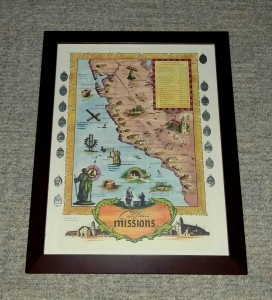
When visiting the Missions we would stop in the gift store to buy souvenirs, sometimes a book or saint holy cards and I always bought a medal from that particular Mission and so far I have collected the 16 medals.  I wasn’t sure what I was going to do with them; I thought maybe I would put them on a charm bracelet.  I knew that I wanted to create something special to remember the Missions that were an important part of our lives in California.  Then when we moved into our new house in the Midwest I came up with a great idea!  I remembered during one of our visits to the Missions that I had bought a map of California showing the location of the 21 Missions and I decided it would be perfect for what I was planning. 

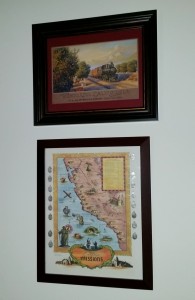
I bought an inexpensive frame to fit the size of the map, it was an irregular sized frame but I was able to find one that worked.  The map had a blank space around the edge and this is where I hot glued the Mission medals to the glass of the frame making sure to leave an empty spot for the ones that we were missing.  It was a simple craft project and it now hangs on the wall of our home next to our bookcase filled with our California memorabilia and it will forever bring back memories of family trips to the California Missions.  

California Mission Medals 1

Decor – Displaying Hawaiian Vacation Souvenirs

Hawaiian vacation souvenirs

As I mentioned in a previous Décor Post, Displaying Travel Souvenirs, in the library of our home nestled among the books are several items that we have collected over the years during our travels across the United States and other distant places such as Europe and Asia.  I have found that shadowboxes are an excellent way to display these travel souvenirs.

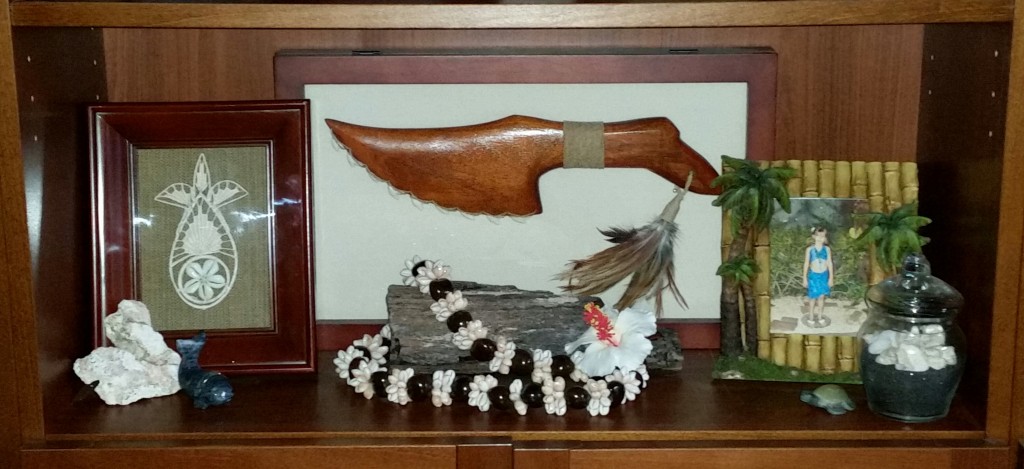
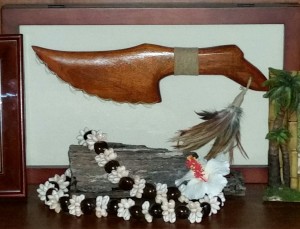
One of the keys to displaying travel souvenirs is thinking about how the items will be framed.  For items that have some depth, I have found that shadowboxes are an excellent way to display those souvenirs.  An example of using a shadowbox for travel memorabilia is the shark tooth weapon that we got at the Polynesian Culture Center in Hawaii.  This wonderful piece of craftsmanship is beautifully displayed in a shadowbox but the real purpose of the frame is to that the sharp edges of the shark teeth are enclosed to prevent anyone from handling this dangerous weapon.  (For more information about the Polynesian Culture Center located on the Hawaiian island of Oahu, please click on the link)

Hawaiian weapon and lei

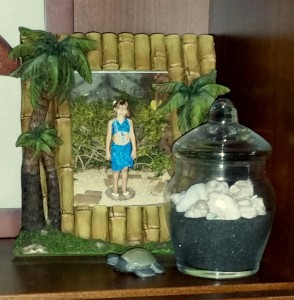
In front of the shadowbox is a piece of driftwood draped with a Hawaiian shell and nut lei.  On the same shelf is a photo of our daughter dressed in her Hawaiian outfit that was taken at the Polynesian Culture Center display in a frame embellished with bamboo and palm trees, also displayed on the shelf is the artificial Hawaiian floral that she is wearing in the photo.  On the other side of the photo is a small glass jar filled with black sand from Hawaii and shells we had gathered from the beach during our trip.

Hawaiian photo and black sand    Hawaiian souvenirs

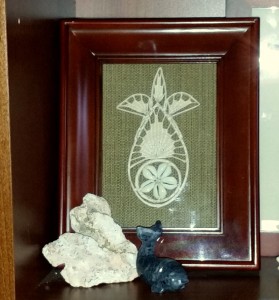
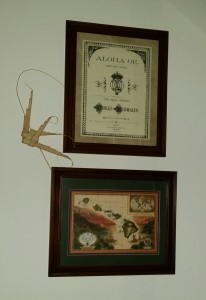
Also displayed on the bookshelf is a small trinket made of seashells and straw that I bought in Honolulu, it was a very inexpensive item but it is given more importance by displaying it in a small shadowbox.  Two more Hawaiian souvenirs are displayed on the wall of our library near the bookcases; they are more framed Hawaiian souvenirs.  The first is a framed sheet music cover of “Aloha Oe” I had purchased at the small gift shop at the Iolani Palace in Honolulu, Hawaii.  This song was written by Princess Lili’uokalani in 1877 and has become synonymous with Hawaii.  The second piece is hung below and is a beautiful print of the Hawaiian Islands (formerly known as the Sandwich Islands) that was purchased at the Polynesian Cultural Center.   Tucked under the framed “Aloha Oe” music cover is an interesting item from one of the demonstrations at the Polynesian Cultural Center, it is an intricately woven palm leaves shaped into a bird.

Hawaiian framed artworkAll these items are a wonderful way to remember our fantastic trip to Hawaii and are an example of grouping travel souvenirs that tell the story of a vacation trip.  (For some great travel suggestions on what to see and do in Hawaii, please click on the link)

Decor – Decorating a Girl’s Bedroom (from birth to teenager)

When I look back on the photos of my daughter’s bedroom throughout the years, I see how she has changed and grown.  When she was a baby/toddler we lived in California and her room was decorated in soft colors with stuffed animals and porcelain dolls on the shelves.  As a small child, most of the decorating style was determined by me.   Then when we moved to the Midwest her room was decorated first decorated in soft blue and green (even briefly a leopard and tiger print phase!) for a pre-teen and then bold dark pink and black chalkboard paint for a teenager.  As a teenager, she had very definite opinions about how she wanted her room decorated and she selected everything.  In this post, I will discuss how her bedroom decorations have changed over the last sixteen years.

 Baby/toddler bedroom –

Before our daughter was born I knew I wanted soft colors to decorate her first bedroom, so I selected pale sage green, rosy pink and white.  The furniture in the room included a simple crib of light wood accented with dark wood and two matching dressers.  The large closet had mirrored sliding doors with plenty of room inside to hang clothes and store her numerous toys, our daughter loved to play dress-up and dancing in front of the mirrors.  For some reason I could not find a photo of the crib, but it was made with sage green sheets and a baby bumper.  Later a twin bed was exchanged for the crib as she grew older.

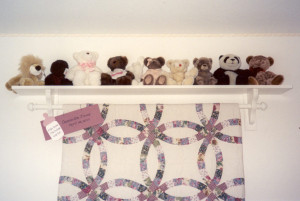
Positioned above the crib was a long white shelf with several of our daughter’s stuffed animal collection on display, attached to the shelf was a long rod which was used to hang a quilt.  The shelf and rod unit was made by my husband and it was a great project for him to get involved in decorating our daughter’s room.  The project was very easy and it only took him the weekend to assemble.  He used two wooden brackets, a long wooden plank cut for the shelf and two additional pieces cut to attach the brackets, a long wooden rod, two wooden finials and a can of white paint.

2000 Cassie bedroom 2

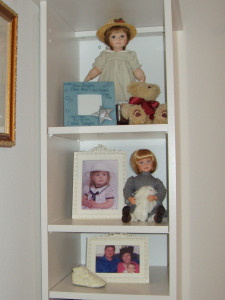
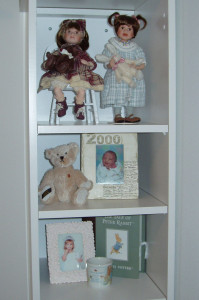
On either side the crib were two tall and narrow shelves with cabinets.  On the shelves I placed several porcelain dolls, picture frames with favorite photos of our daughter and other decorative items.  I love to fill the rooms of our home with photos that were taken of special occasions or to capture a moment in our lives; my daughter’s bedroom was no exception.  The dolls were collected for my daughter and I hope that someday she will have them to look at and have some beautiful memories of her childhood.

2000 Cassie bedroom 3    2000 Cassie bedroom 4

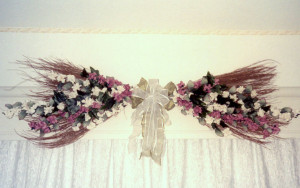
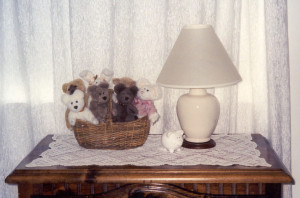
On the other side of the room, placed below the window was a dresser.  On top of the dresser was an antique crocheted linen, a table lamp, a small piggy bank (every child needs one right?) and a basket filled with Boyd’s Bears.  Above the window was a wooden cornice painted white and attached was a twig spray floral arrangement.  I enjoy making floral arrangements and I have several throughout our home, it is one of my favorite hobbies.  For my daughter’s room, I used a twig spray as the base and I decorated it with ivy, eucalyptus, white and pink floral sprays and accented with a sage green bow.

2000 Cassie bedroom 62000 Cassie bedroom 5

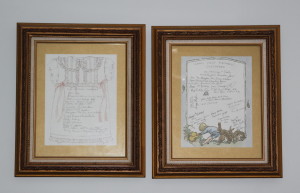
On the walls of the bedroom were framed artwork, two special ones which commemorated our daughter’s baptism and her first birthday.  These were a very easy craft project using gold mats, scrapbook paper signed by the guests at the events which were placed in gold frames.  (For more information, please click on the décor post – Not Your Normal Wall Art!)

Childhood events framed

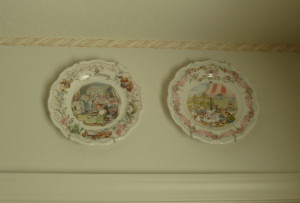
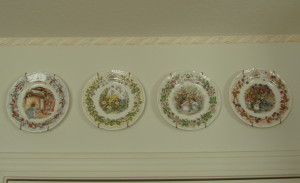
Also on the wall around the room were several Brambly Hedge plates, the decorative plates featured scenes from the charming children stories written by Jill Barklem.  I enjoy decorating our home with special plates and I have several different series – for more information about Decorating With Plates, please click on the link.

OLYMPUS DIGITAL CAMERA

OLYMPUS DIGITAL CAMERA

 Pre-teen / teenager bedroom –

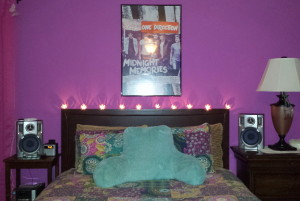
After our family moved to the Midwest, our daughter was a pre-teen.  Our daughter now had very definite opinions about how she wanted her bedroom decorated.  We bought her a beautiful queen-sized sleigh bed and a matching dresser and side table for her new room.  She used the bedroom set for a few years and when she became a teenager she wanted something different so everything was moved to our guest bedroom.  Then, we found a simpler headboard for her bed; we also bought a desk and chair for her to do homework and two tall narrow bookshelves and a CD tower to hold all her things.  The furniture in her bedroom in California had been light wood or painted white and now the furniture was dark wood or painted black.  To complete the bedroom, I bought a new bedspread which was very colorful and reminiscent of a Vera Bradley fabric.   To complete the bed, we found pink flower lights and strung them on top of the headboard and at night they provide a great glow to the room!

2014 Cassie bedroom 1a2014 Cassie bedroom 1

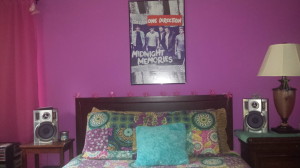
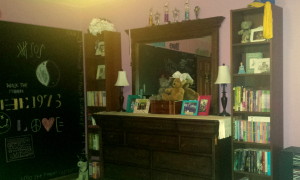
One of the first things she changed in her room after becoming a teenager was that we painted her room a wonderful shade of dark pink, it as a bold choice but she really like it!  We painted the fourth wall with blackboard paint; another interesting choice because she wanted to write on the walls with chalk and it has been great fun for her and her friends.

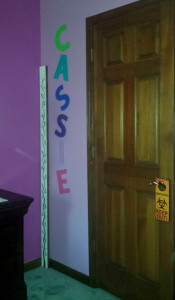
Next to the bed, in the corner of the room is a painted board that I made to mark our daughter’s height throughout the years.  Most often parents will mark their children’s growth with marks on a door frame or wall, this is what a relative did and when they moved it broke their heart to leave those behind.  Before our daughter was born I knew at some point in our lives we would be moving and I wanted to preserve those memories, so I made a height marker for her room.  It was a simple wooden board, painted white with winding ivy and flower buds for decoration.  I am so glad we have the height marker and it is something our daughter will have.  To add more interest in the corner I painted large letters to spell our her name.

2014 Cassie bedroom 3

Recently, I created several special framed artworks to hang in her room.  Our daughter has participated in several plays and I framed the t-shirts from each of the plays as a reminder of the fun see had during these school productions.  I addition to those ones, I framed t-shirts commemorating graduation from elementary school, middle school cheer team and a t-shirt from her high school.  Also, with our daughter being on a competition cheer, she has collected many bows.  To have a place for her to hang them I created a special board with a framed logo from an old jacket.  (For more information on these projects, please look for future craft posts)

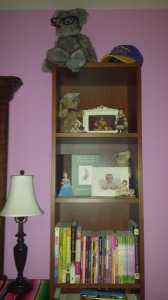
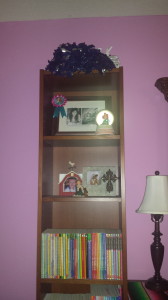
On either side of the dresser we positioned the two tall bookshelves, some of the items such as framed photos had remained the same but other items were more grown-up.  By the time she was a teenager the items in her room changed from stuffed animals, toys and games to numerous books and CDs, a keyboard and an electric guitar.  Scattered around the room were trophies and cheerleading items and more colorful frames with photos of her and her friends.  After a recent trip to Cancun this summer we came back with a colorful Mexican blanket and we added it to the dresser.

2014 Cassie bedroom 2

2014 Cassie bedroom 4    2014 Cassie bedroom 3

I like both her child and teenage bedrooms, they are so different.  But what I love about our daughter’s room now is that her bedroom shows her personality, her hobbies and the things that are important to her.


Decor – Tea Table Displays

Several years ago on a trip to Asheville, NC I purchased a lovely antique tea table which is now placed in the corner of our formal dining room.  Our dining room was already furnished with a beautiful dining table with 8 chairs and matching china cabinet.  Also in the room was a tall cherry wood cabinet where I store silverware and table linens.  I had been searching for a long time to find a piece of furniture to complete the room’s furnishings and the addition of the antique tea table was the perfect piece.

So what does a person place on a tea table?  A china tea set of course!

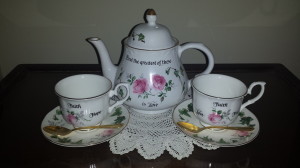
The china tea set that I placed on the tea table was purchased several years ago when I worked in a small retail store that sold home decorative items and various collectibles.  The white china tea pot has pretty pink roses and ivy, on the front are printed the words “And the greatest of these is Love”.  The two teacups and saucers also feature pink roses and ivy, trimmed in gold.  The words, “Love, Faith and Hope” are printed on the front of each teacup.  I search and was able to find gold teaspoons that I placed on the saucers to match the gold trim.  The saying on the teapot has a very special meaning to my husband and me because at our wedding we had the 1 Corinthians 13:13 verse read during the ceremony.

China Teapot, cup & saucer set

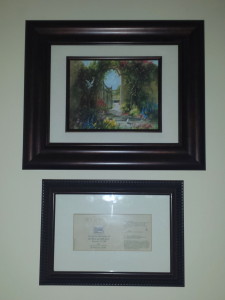
Hanging above the tea table are two framed items that will continue the story of our wedding and complete the decorations in this area of our dining room.  The first is a framed print of the Marty Bell painting “Sweetheart’s Gate”.  I love the vivid colors of print and if you look closely there are hidden hearts which Marty Bell painted into many of her paintings.  Below that framed print is another framed item; it is the custom label from the wine served at our wedding.  Before we got married my husband and I took a wonderful trip to the Napa Valley and toured several of the wineries.  Knowing that we would be married in a few months we order several bottles of wine from a small winery in the area and had custom labels made with our names and the wedding date.  I had a few extra labels and I decided to mat and frame one of the labels to create a unique wedding keepsake.  (Décor Tip:  When decorating an area of the home, think about displaying related items that tell a special story, this is what I did in the corner of our dining room)

Artwork above tea table

As most of the readers to my blog know, I love to decorate for the different seasons throughout the year.  In this post, I will show how I have decorated the tea table with various seasonal items.

Spring/Easter –

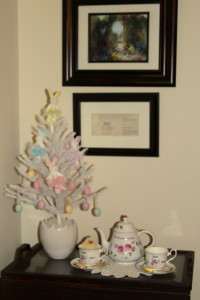
Shown below is a photo of the seasonal decorations I used for Easter.  I keep the china tea set on the tea table and then placed a special holiday decoration.  The used a white feather tree and placed it in a cute cracked egg white vase that I found in my local craft store.  Then I decorated the feather tree with sparkle egg ornaments in pastel colors and for a little bit of whimsy I also added a few small white bunny wearing pastel colored tutus.  For another touch of merriment I place a small stuffed duck into one of the teacups.

Tea Table Easter 2013

Fall/Thanksgiving –

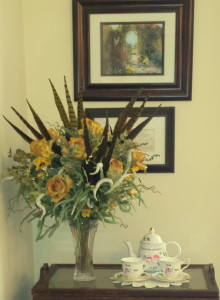
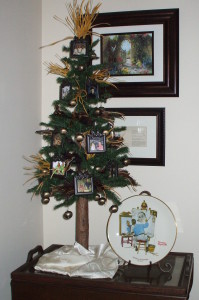
Shown below are two different seasonal decorations for fall.  The first photo shows a lovely floral arrangement of golden roses and greenery placed in a crystal vase, this arrangement usually sits on the dining room table.  To add an extra festive touch, I added several peasant feathers to the arrangement.  The second photo shows a unique decoration that I made especially for the year that we hosted Thanksgiving dinner for several family members and since the holiday season is a time of celebration and remembrance I wanted to create a special “Memory Tree”.  I used a small tabletop artificial pine tree which I decorated with family photo frame ornaments, golden feathers and bronze jingle bells.  (For complete instructions on creating a “Memory Tree” for your home, please click on the link)

 Tea Table Fall 2013    Tea Table Fall 2012

Christmas –

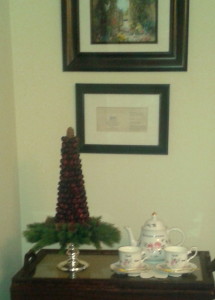
Shown below is the special Christmas decoration that I made.  Inspired by the cranberry topiary that I had seen in the Red Room on the HGTV White Christmas special a few years ago I decided to create one for the tea table in our dining room.  It was very easy to make and I used two different Styrofoam pieces, artificial pine, pinecones and artificial cranberries.  When I completed the decoration, I placed is on a silver pedestal to add height.  (For complete instructions on creating a Cranberry Topiary for your home, please click on the link).

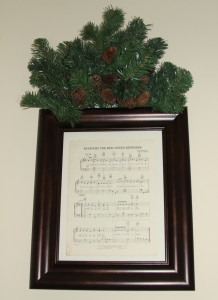
Several years ago on one of our antique shopping adventures I came across old sheet music of “Rudolph the Red-nosed Reindeer”.  I thought that it would look wonderful framed to match the other two framed sheet music that hang on the wall on either side of the china cabinet.  So, for the Christmas season I remove and store the framed Marty Bell print and the framed wedding label that usually hang above the tea table.  Also to match the other two framed sheet music, I add artificial pine boughs and pine cones placed above the frame.

Tea Table Christmas 2012    2012 Christmas  Rudolph the Red-nosed Reindeer sheet music