Craft – Glass Dome Arrangement

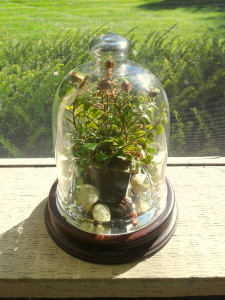
Glass dome arrangement final

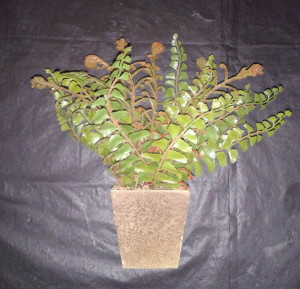
One of the most popular trends right now in home accessories is the terrarium container.  I have been looking at these decorative terrariums in the local retail and craft supply stores all summer long.  I knew I had a glass dome container I had bought on clearance a few years ago with the thought that I would use it for a future craft project.  Now, I finally had the idea to create a glass dome arrangement with the container.  I found some additional items from my floral supply box and the only item I purchased was a small container of ferns from my local craft store that were on clearance.

Craft Note: Shopping the craft stores in my area weekly, I find items on clearance that I purchase for a minimum amount and then later finding a craft project that I can use them for.  This glass dome arrangement craft project is a great example of using items that I previously purchased and buying a few additional items to create a beauty decorative arrangement for our home.

Glass dome arrangement supplies

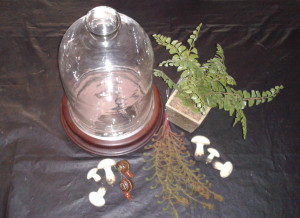
Glass Dome Arrangement – supplies

  • Glass dome with base or terrarium
  • Ferns and leaves, amount will be determined by the size of the container
  • A small pot for the ferns and leaves (Spanish moss for the pot is optional)
  • A few container accessories, amount will be determined by the size of the container
  • Hot glue gun and glue sticks

Glass Dome Arrangement – instructions

  1. Any type of glass dome with base can be used or any size of terrarium. If you are using a glass dome it is very important to have a matching base because this is needed to attach the fern or leaves and container accessories.  Using the glass dome with base, I hot-glued a small container with ferns that I had purchased on clearance from my local craft store.  (To add more fullness to the container I used several additional ferns and the contrast of the two different types of ferns looked great!Glass dome arrangement 1
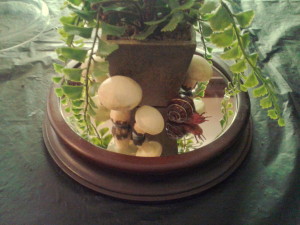
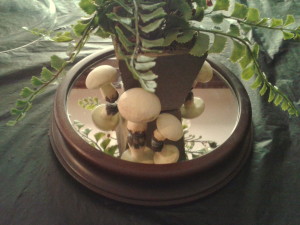
  2. Next, attach the accessories to the base with hot glue.  (I had found several small mushrooms and snails that I had previously purchased)  Any type of container accessories can be used but the scale of the items should be relatively small.  I have seen items such as small fairies, miniature garden benches and trellis –there such a nice selection in the craft stores.
    Glass dome arrangement 2a Glass dome arrangement 3
  3. This next step can be tricky if you are using a glass dome, if you are using a terrarium or an open-topped container this next step is not required.  As you fit the glass dome onto the base, be sure to be aware of where the ferns and leaves are being placed.  (I used my fingers to move the ferns so that they were not blocking the view any of the container accessories)

This Glass Dome Arrangement craft project was very easy to do and only took about 30 minutes to complete.

Craft – Fold-up Homework Station

2013-08-16 17.14.31

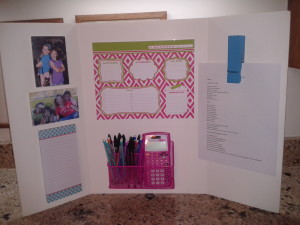
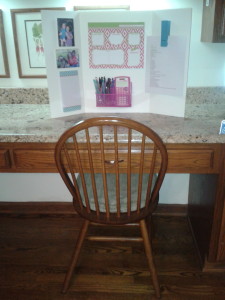
The idea of a fold-up homework station came from an article in the Family Fun Magazine.  I really like the idea for an organized place to do homework and it was an easy project to make for our daughter back in 2009.  She loved the fold-up work station and it was a great way to teach her about the organization of her school homework, a place to keep track of her school schedule and when upcoming projects were due for class.  She used it in elementary school and recently asked if I could make a new one for middle school.

Fold-up Homework Station – supplies

  • 1 tri-fold display board, choose white if it will be decorated or any color board if not
  • Double stick tape or adhesive glue dots
  • Adhesive Velcro dots
  • Calendar, size is determined by the display board used
  • Dry-erase memo board, size is determined by the display board
  • Sticky-note dispenser
  • Clip to attached homework and school notices
  • Pencil pouch filled with pencils, pens, erasers, child-safe scissors
  • Calculator

Fold-up Homework Station – instructions

  1. Display board can be decorated with paint, stickers, etc.  The idea is to get your child involved with the decorations so that they get excited about using the homework station.  (I choose to leave the board white and let the accessories add the color to the project).
  2. Prior to attaching accessories, determine placement on the board.  Be aware of the items positions, especially in the left and right sections because those will be folded in when the homework station is not in use.  (I choose to position the calendar in the center section, the memo board in the left section and the supplies and other accessories in the right section).
  3. Attach the accessories with double-stick tape or adhesive dots for paper or light items.  Use adhesive Velcro dots for accessories that will be removable, such as a calculator.
  4. The fold-up homework station is now complete and ready to use.  When your child is not using the homework station it can be folded and stored away in a nearby closet. (I choose to leave the homework station out all the time because we have a countertop/desk area in our kitchen that is used specifically for our daughter to do her homework)

2013-08-16 17.14.13

The fold-up homework station is a great idea if you have several children at your home.  Make a homework station for each child, set them up at a table and the children can work with disturbing each other because the homework stations will act as a partition to separate them.

For more information about getting your kids ready for back-to-school, please check out the post Ideas and Tips for a Great School Year.

I hope your new school year gets off to a great start!!

Craft – Framed Floral Decoration for Autumn

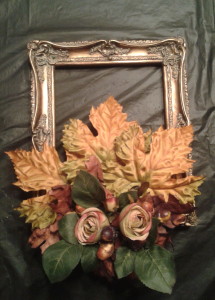
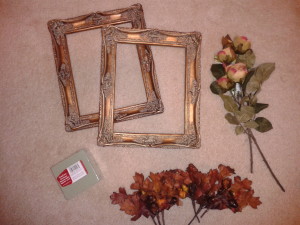
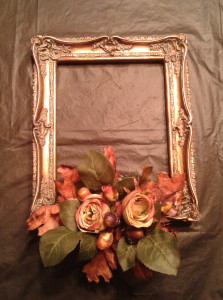
Framed floral 6While out shopping in one of my local craft stores I saw these great framed floral decorations but I was shocked by the retail price, it was $29.99 (are they crazy?).  So, I thought I can make a nicer one at a fraction of the price!  (The photo above is the one I made!)  I went back home to search in my floral supply box and I found some extra flowers from a previous fall project.  I also found two wonderful frames that were perfect to use, I had picked them up in the clearance aisle of my local craft last year for $4 each, they were a little more ornate than the store-bought inspiration piece but I actually like them better.  The only thing I needed to get started on this project was a small floral foam, I found one for $2.50 and was able to cut it in half to make two framed floral decorations.

So, if you are keeping track of my cost for this project, it totals out to $10.50.  Divided by the two framed floral decorations it was $5.25 for each one.  Now, that is much better price than the original ones I saw at the craft store!!  To make your own framed floral decorations, please see the supply list and easy instructions found below.

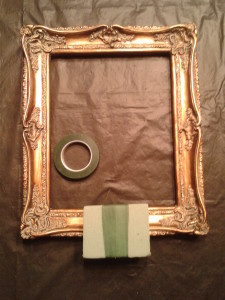
Framed Floral Decoration – supplies for one

  • 1 frame, any size (the frame’s glass and backing are not used for this project)
  • 1 floral foam, size it determined by the size of the frame
  • Floral tape
  • Flowers, number of flowers needed is determined by the size of the frame
  • Hot glue gun and hot glue sticks

2013-08-06 09.40.40

Framed Floral Decoration – instructions for one

1.  Select a frame to use, remove the frame’s glass or picture backing, you will not need them for this craft project.  Frames can be any size with an opening from a smaller size of 5 X 7” to a larger 10 X 13”.  (I am using frames with a 5 X 7” opening)

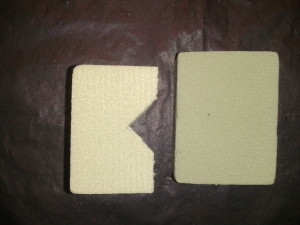
2.  Use a piece of floral foam and cut a notch to fit on the frame.

Framed floral 1

3.  Then using floral tape, secure the foam to the frame.  (Originally I was going to hot glue the foam directly to the frame, but I decided to use floral tape instead because I didn’t want to harm the frame in case I wanted to recycle it for another project!)

Framed floral 2

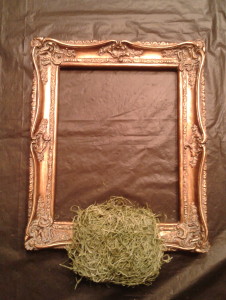
4.  Hot glue Spanish moss or shredded grass to cover the foam.

Framed floral 3

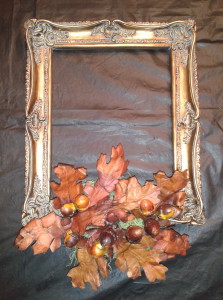
5.  Insert flowers and other decorations into the floral foam.  Be sure that the back of the arrangement is relatively flat because this side will be going against the wall when it is hung.

Framed floral 4 Framed floral 5 Framed floral 6

The final photo shows the framed floral decorations that I created for the upcoming Fall season  and I think they look great!  As you can see from the difference of the second photo and the final photo, I decided to add some large fall leaves that I had in my floral box. I think it gives the framed floral decoration a little more “presence” and the pair look wonderful hanging on our dining room wall.  This craft idea can be used for any season throughout the year, just use flowers or decorations that are appropriate for the particular holiday.

Craft – Seashell embellished mirror

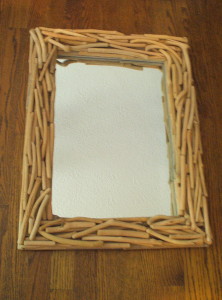
When I was shopping in a retail store last year I found a great mirror which was framed with pieces of wood that reminded me of driftwood the is found on the beach.  We had just come back from a trip to the North Carolina coast where we had brought back numerous seashells that we found on the beach.  I decided to accent this relatively plain mirror with the seashells to hang in our downstairs bathroom.  Craft Note: The key to this design is to build the layers slowly; test several different arrangements of shells until you are pleased with the result, then secure the shells with hot-glue.

Seashell Mirror 1

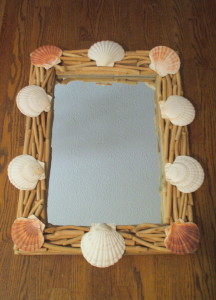
Step one –

I started embellishing the mirror with ten large scallop shells.  I placed them evenly along the border, setting the orange ones on the corners and the white ones along the straight edges.  When I decided it was the right arrangement, the shells were hot-glue the seashells into place.

Seashell Mirror 2

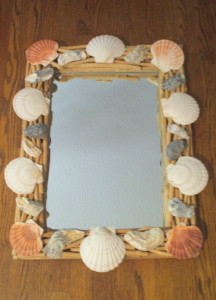
Step two –

Next, I added twelve clam shells to the mirror and placed them evenly between each of the scallop shells.  Once again, when I decided it was the right arrangement, the shells were hot-glued the seashells into place.

Seashell Mirror 3

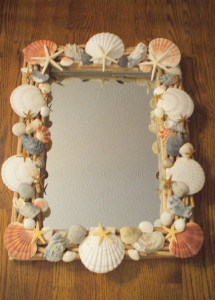
Step three –

This final step involves using several different types of shells, I used smaller scallop shells and a variety of small and large starfish.  The idea is to fill in all the remaining spaces along the border of the mirror.  My design style tends to be symmetrical; this is the most pleasing to my eye.  So, I evenly spaced the seashells around the edges, making sure to match the different varieties of seashells from side to side and top to bottom.  When I decided everything was placed in the right arrangement, the shells were hot-glued.

Seashell Mirror 4

This beautiful seashell embellished mirror now hangs in our downstairs bathroom against a lovely blue wall.

Craft – Embellished Photo Frames

Shopping in the local retail stores I always admire the fancy embellished frames but the prices are usually a little expensive.  In this craft post, I will show you how to take a simple and inexpensive plain frame and with a few simple steps you can have great looking embellished frame at very little cost.  Here is a list of some items that are needed:

Embellished Photo Frame – supplies

  • An inexpensive plain frame
  • 1 or 2 simple small items (these are determined by the subject of the photos)
  • Hot glue gun and glue sticks
  • Paint or stain (optional)

Embellished Photo Frame – insturctions

  1. Select a simple plain frame, size is determined by the photo you will be using.
  2. Remove the backing and glass from the frame.
  3. (Optional) If you are using an unfinished wood frame, now is the time to paint or stain the frame.
  4. Determine placement of the embellishment items on the front of the frame.
  5. Once you have decided on the position of the item, attach it with hot glue.
  6. Add glass, photo and backing to frame.

Here are some examples of frames that I have done for our home:

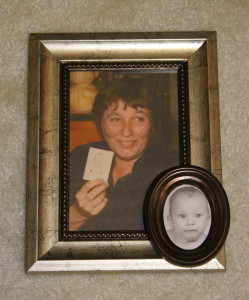
This first embellished frame is one of my favorites.  The silver painted frame with bronze trim has a picture of my mother-in-law holding a picture of my husband when he was a baby.  In the small bronze oval frame attached is the baby photo of my husband.  This is a fun way to highlight the photo she is holding.

Embellished photo 1

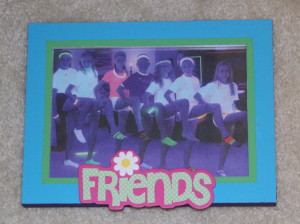
The next embellished frame started out as a plain white frame.  Using painter’s tape, I taped off sections and painted three colors, blue, green and purple on the frame edge. Then I added a wooden prepainted “friends” to a photo taken at our daughter’s recent backlight party.  The colors go great in her colorful bedroom and sits on her desk.

Embellished photo 2

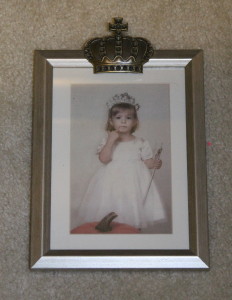
In another embellished frame, I added a silver metal crown to the top of a silver frame.  The photo I used was our daughter wearing her princess costume from Halloween a couple of years ago.  I thought it was a cute way to match the photo with the embellishment.

Embellished photo 3

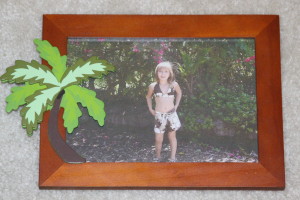
The next embellishment is a simple wooden frame with a palm tree embellishment, the photo of our daughter was taken in Hawaii and I thought the palm tree was a good idea.

Embellished photo 4

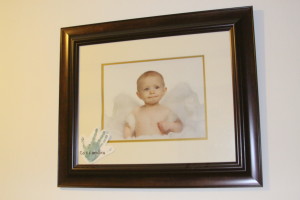
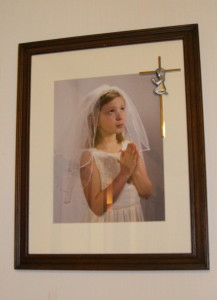
The next two embellished photos hang in our upstairs hallway.  The first is a large frame with a photo of our daughter and in the corner is attached cut-out hand print that she did in kindergarten.  The second is another large frame with her First Communion photo and in the corner I attached the silver cross that my mother had bought for her when she was born.

Embellished photo 5    Embellished photo 6

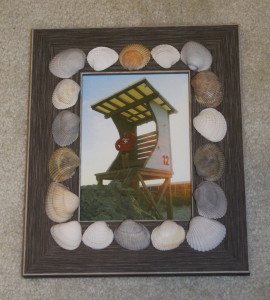
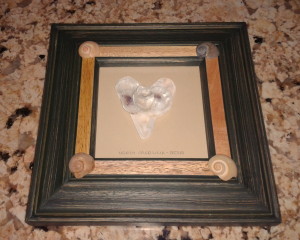
The final two embellished photos are a little more complicated.  The first one is a wooden photo frame that resembles driftwood and I glued several seashells that we collected on the beach in North Carolina.  Inside the frame is a photo of our daughter at the lifeguard station at the same beach.  The second one is another wooden frame and at the four corners of the frame I glue more of the seashells.  Inside the frame I created a heart shape with several fragments of seashells collected from the same trip.

Embellished photo 7     Embellished photo 8

I hope this gives you some ideas for creating some of your own embellished photo frames!