Craft – Jeweled Christmas Tree

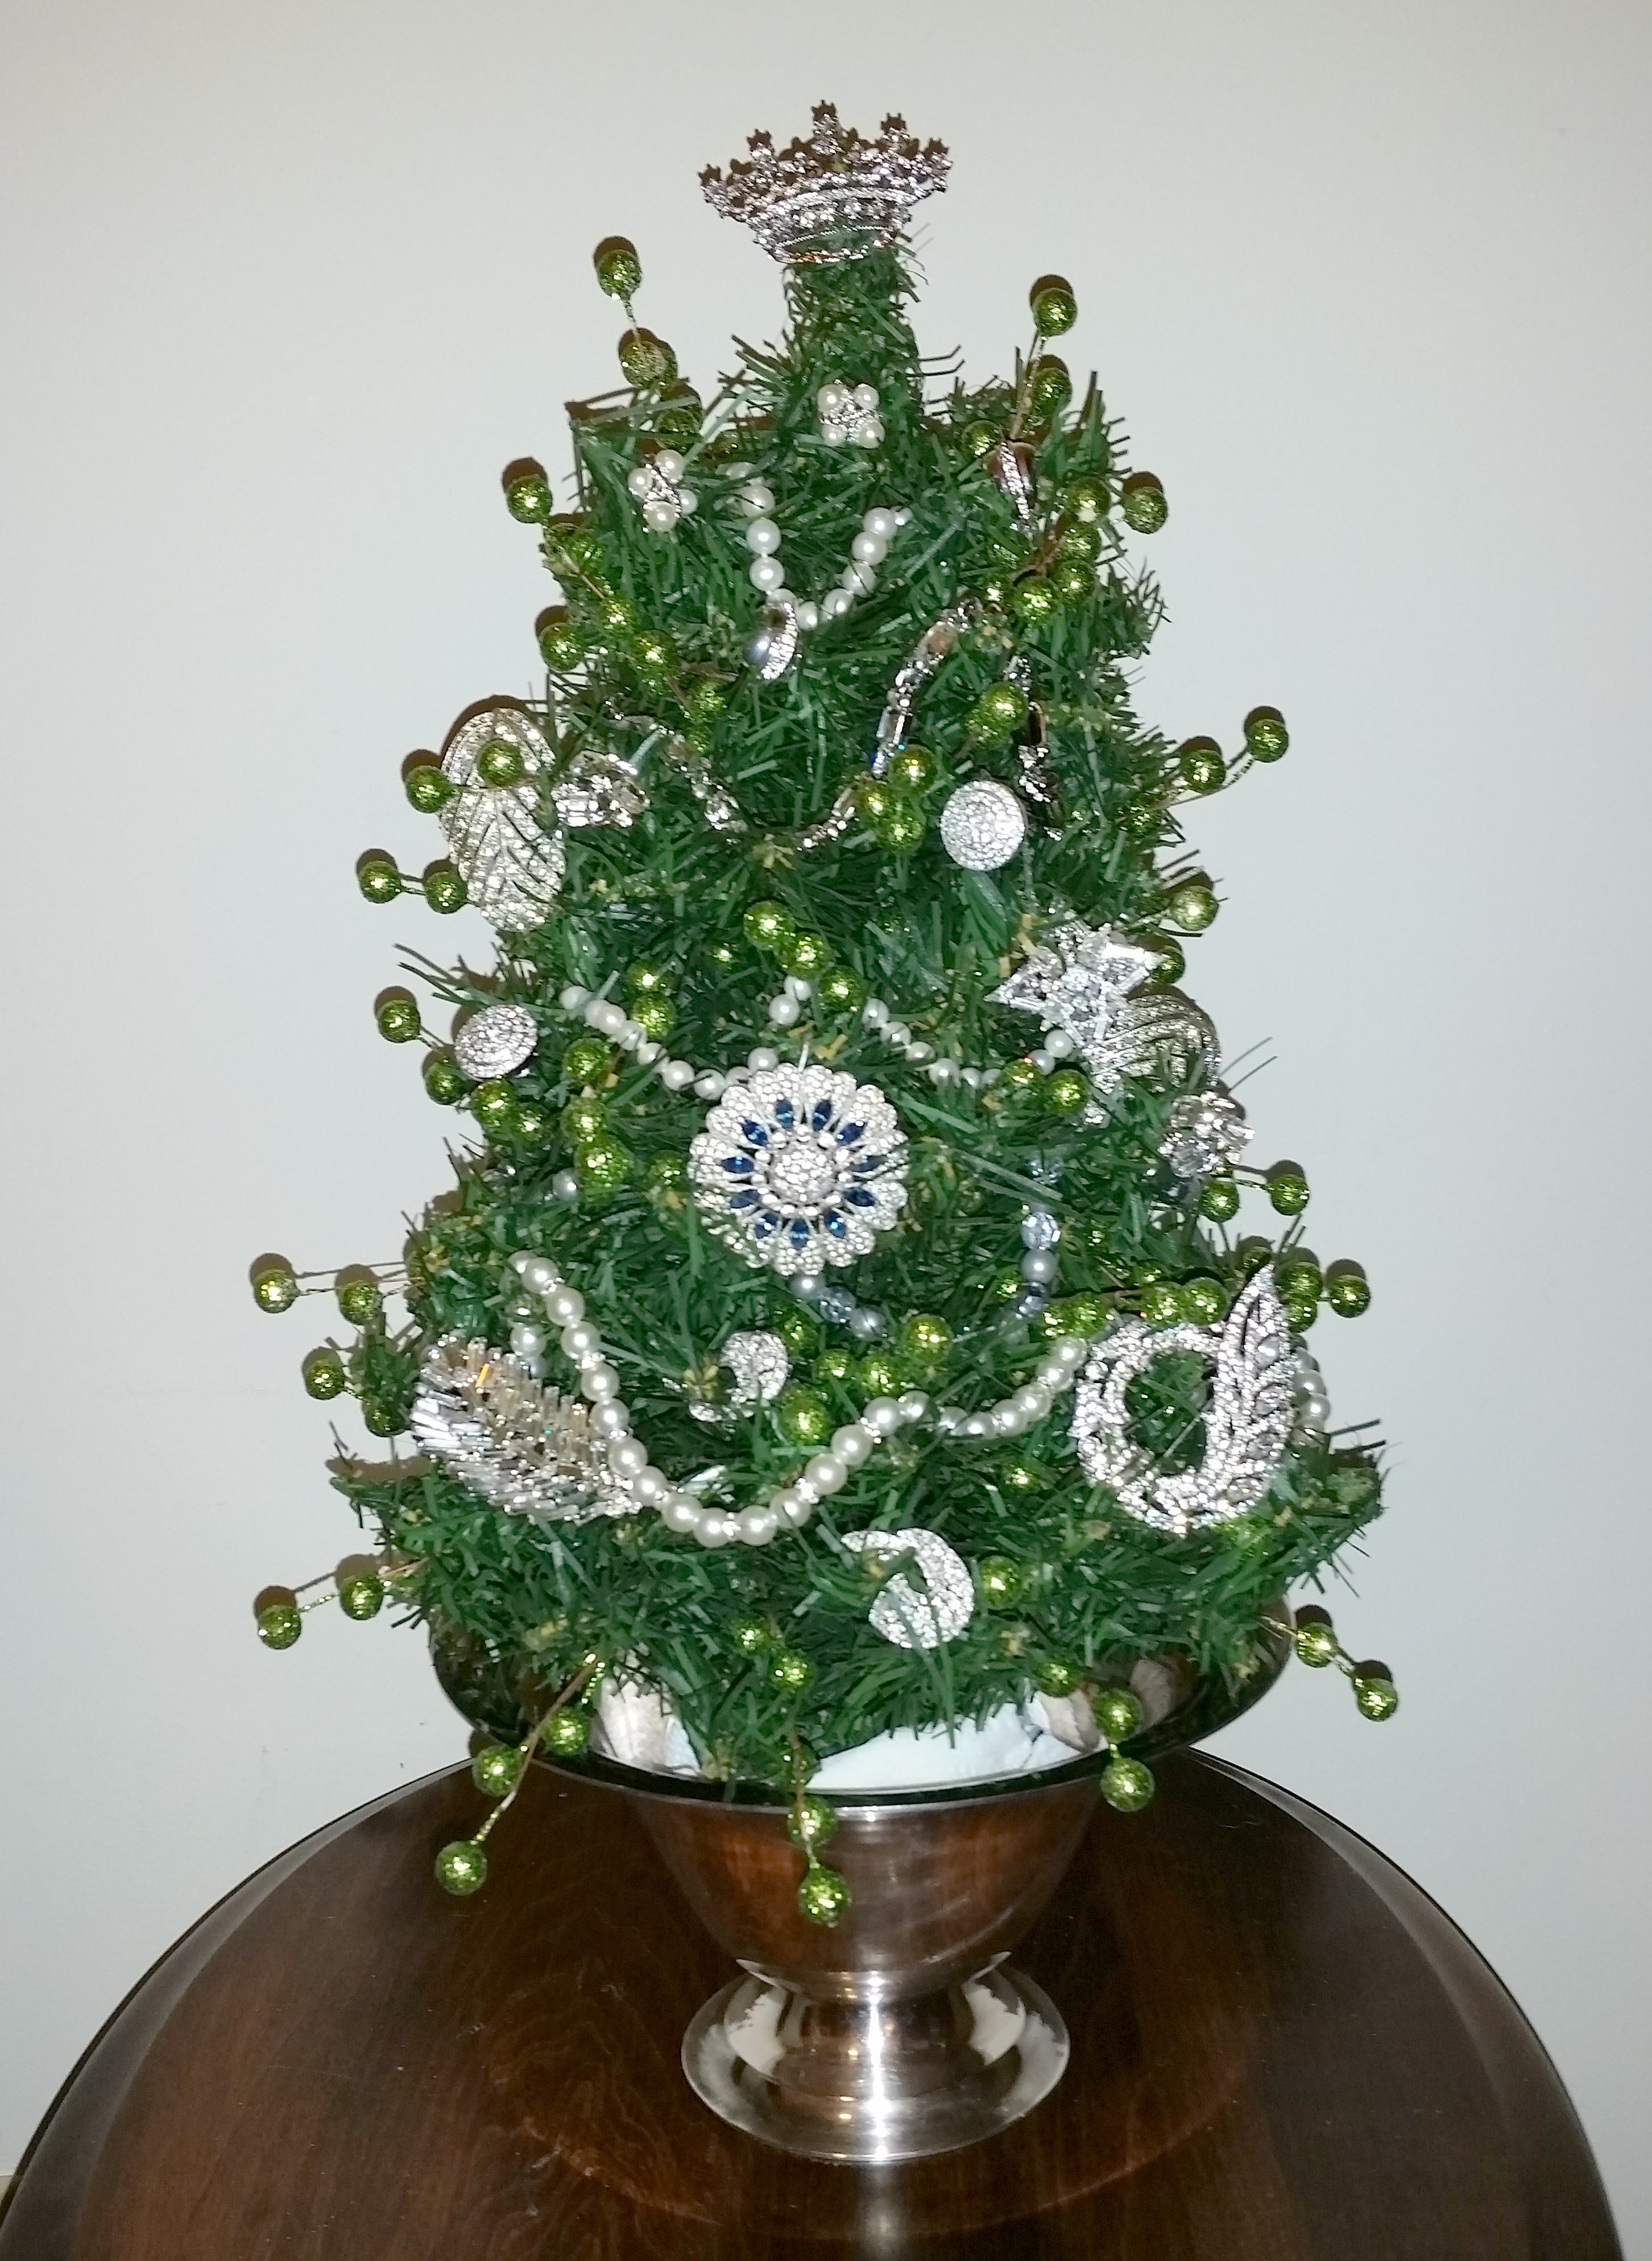
What could be more charming than a Jeweled Tabletop Christmas Tree?  In this post I will show a beautiful tabletop Christmas Tree created with various pieces of jewelry, the ones I used came from my personal jewelry box and include pearl and rhinestone necklaces, brooches and earrings.  Most of these items were purchased from a variety of vintage stores and Ebay, but heirloom jewelry passed down from a mother or grandmother would also make a very sentimental Christmas decoration.

Jeweled Tabletop Christmas Tree – supplies

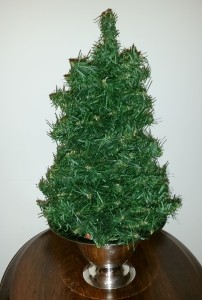
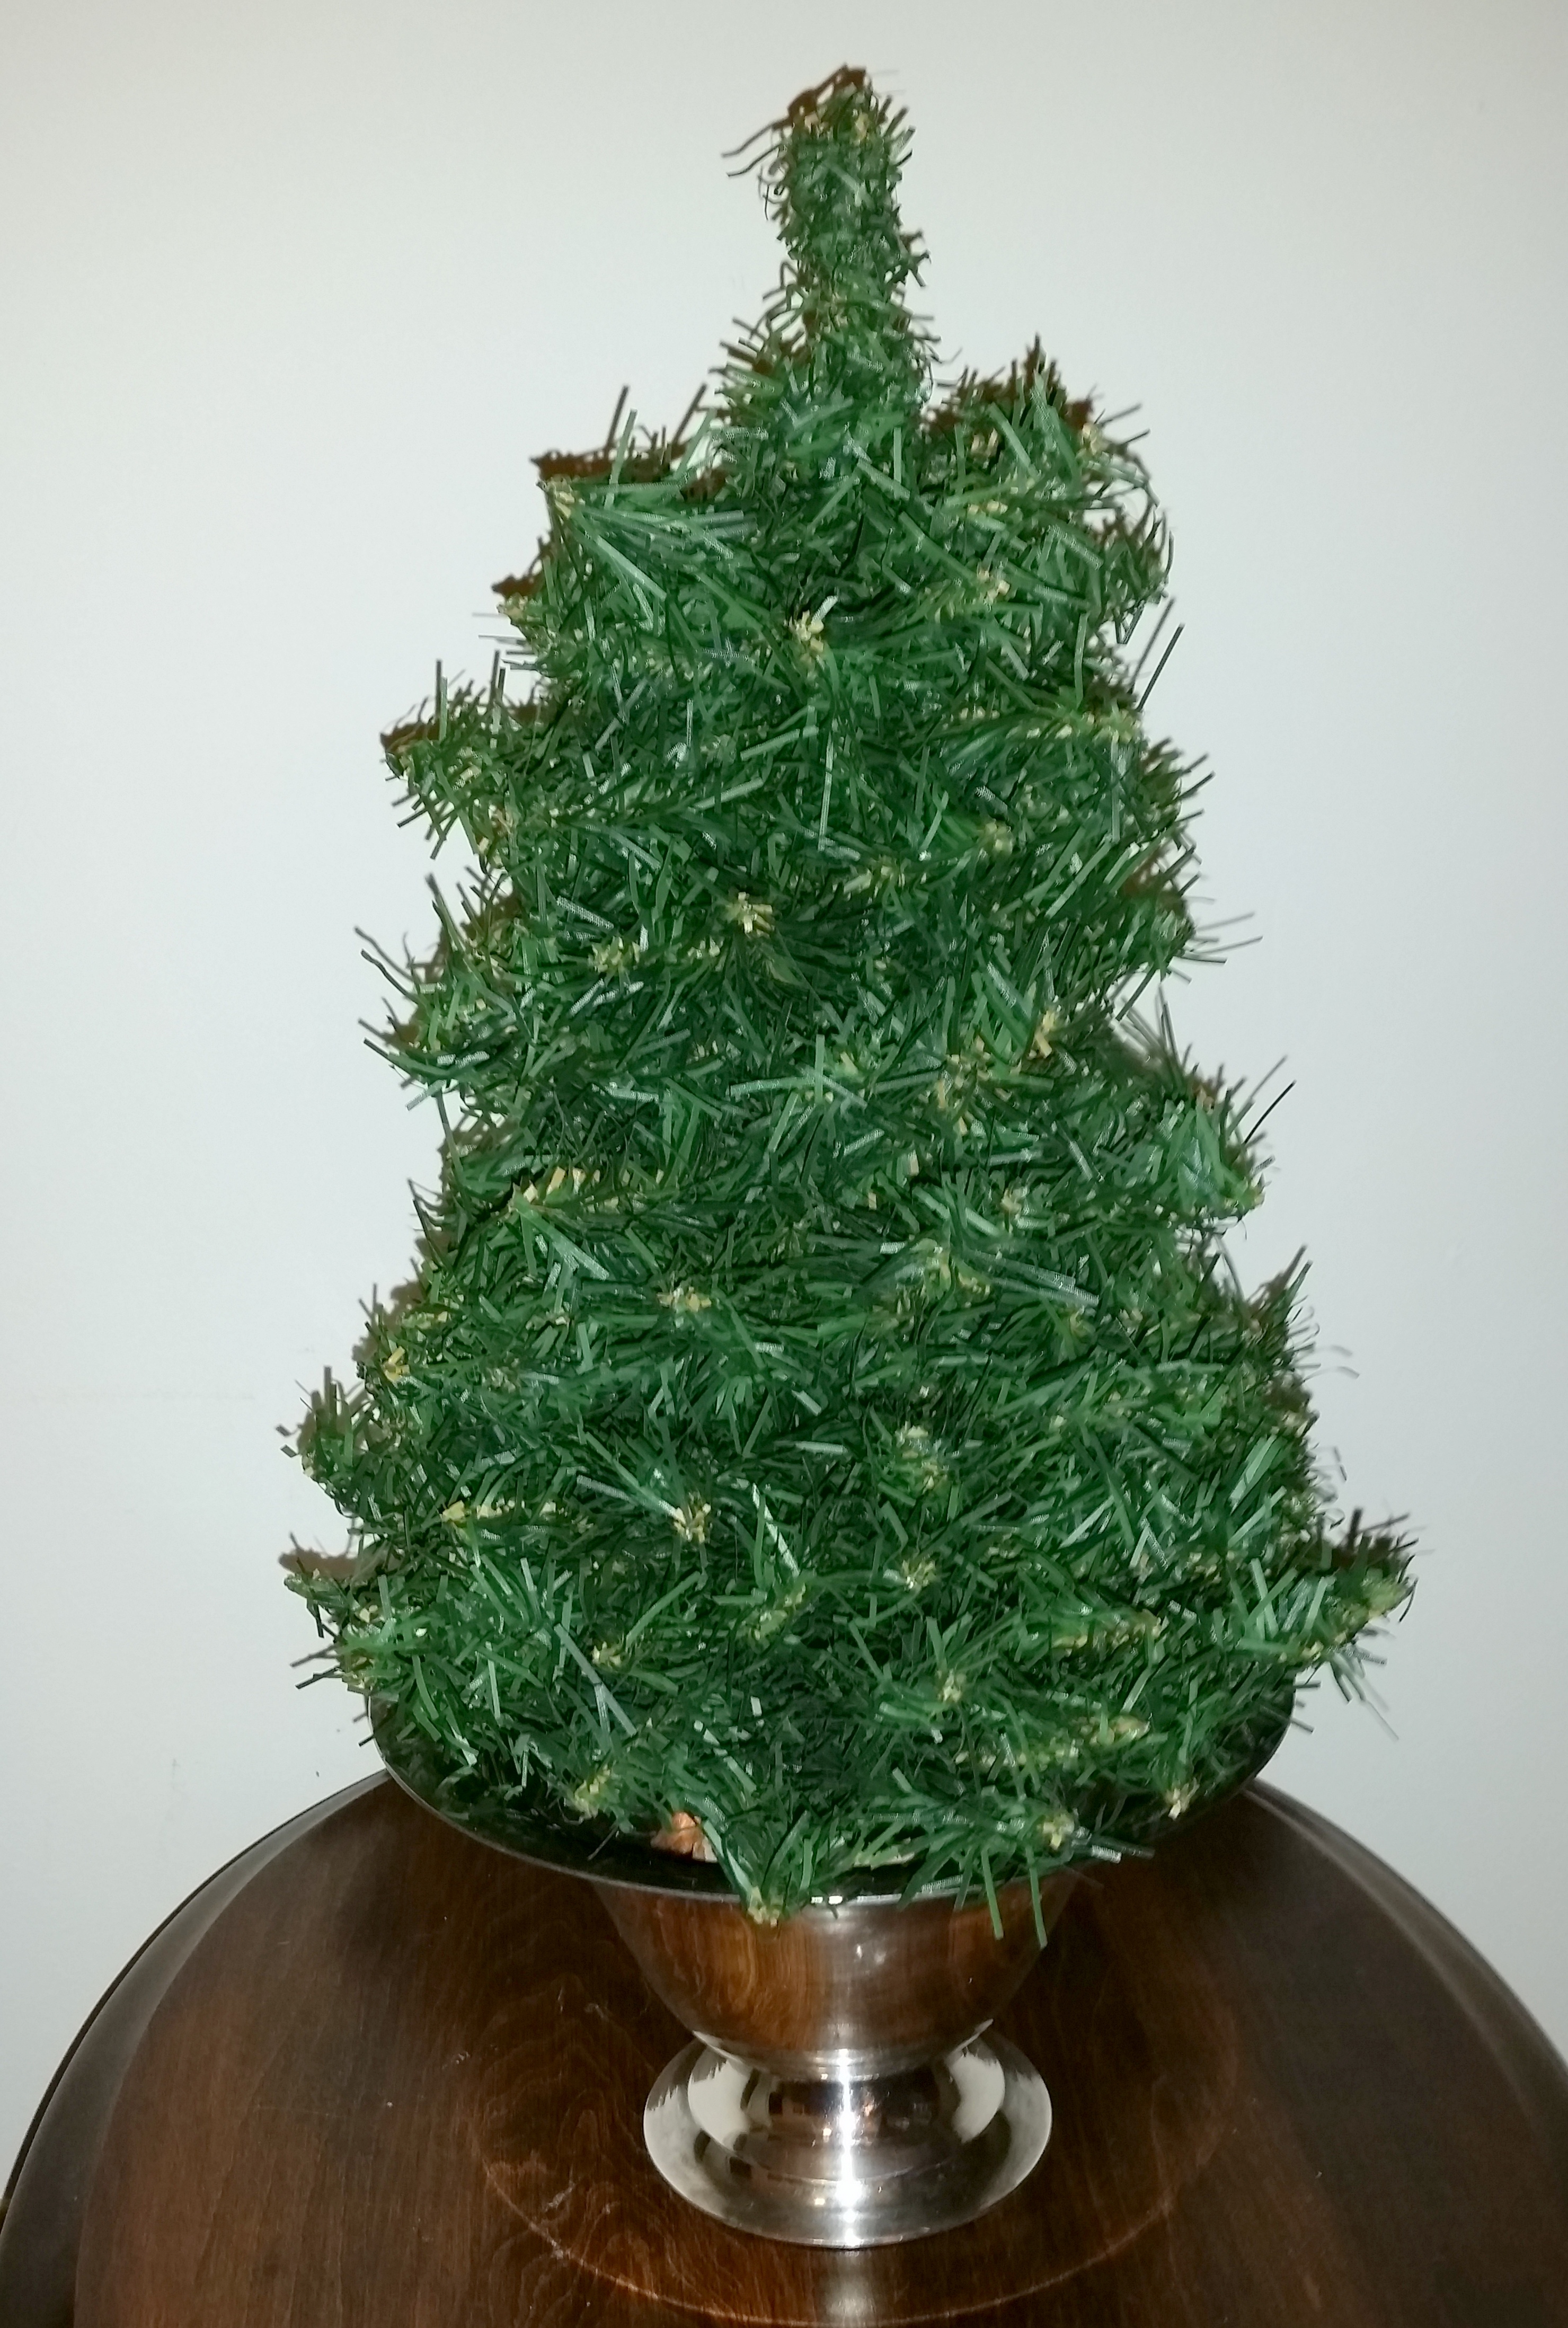
  • Tabletop Christmas tree (I used an artificial pine tree)
  • Container (I used a vintage silver bowl)
  • Jeweled necklaces, brooches and earrings (I used silver, pearl and rhinestone jewelry)
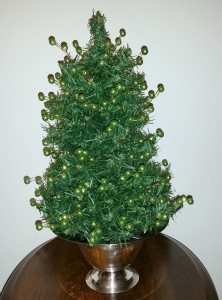
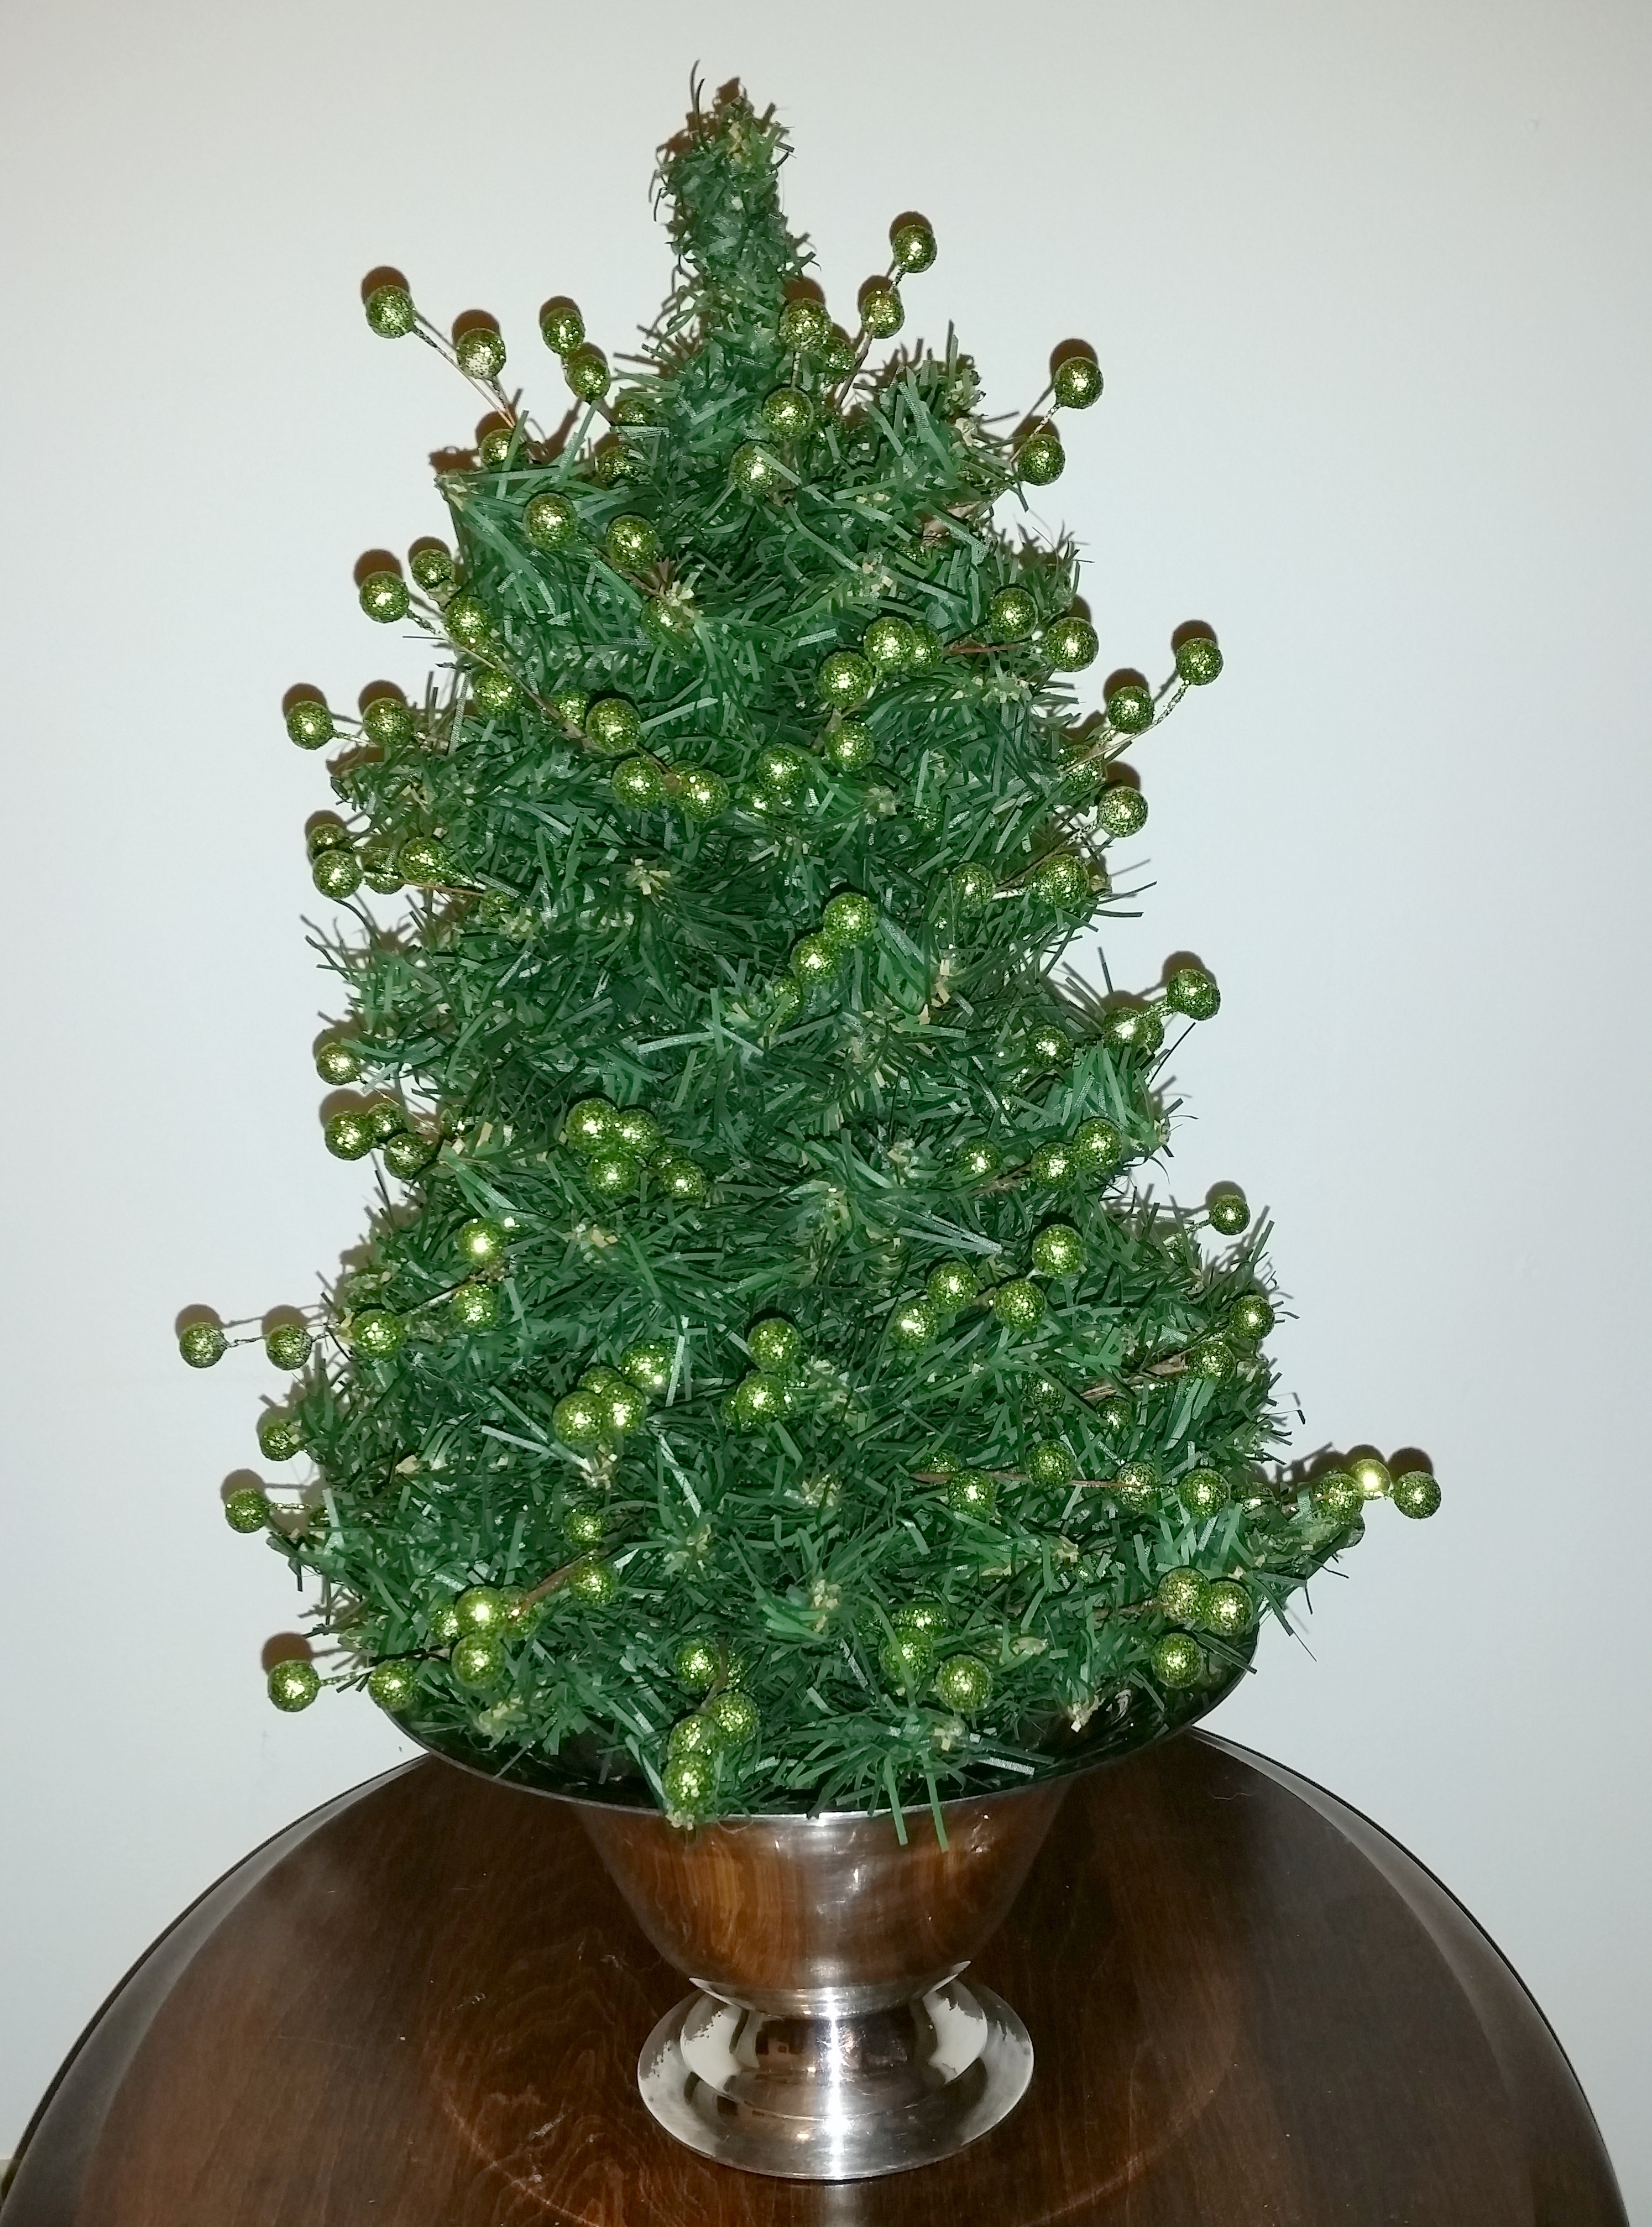
  • Pearl sprays (I used green ones)
  • White material (to tuck into the container)
  • Hot glue gun and glue sticks (optional)

Jeweled Tabletop Christmas Tree – instructions

  1. Select a container, the size is determined by the size of the tabletop Christmas tree used.
  2. Set the tabletop Christmas tree into the container, I used a silver bowl.  Attached the tree with hot glue to stabilize and prevent it from tipping over (weighs can also be added to the container, especially if several heavy pieces of jewelry are used)
    Jeweled Tabletop Christmas Tree 1
  3. Add pearl sprays to the tree, I used green ones to add interest but in a color similar to the tree because I wanted the jewelry to be featured without distraction.
    Jeweled Tabletop Christmas Tree 2
  4. Add several necklaces to the tree, I arranged them so that they gently swagged across the tree.
    Jeweled Tabletop Christmas Tree 3
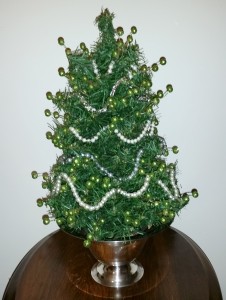
  5. Add brooches and earrings, start by positioning the larger pieces at the bottom and the smaller ones toward the top.  Set aside a special one piece of jewelry for the top of the tree (I used a crown brooch).Jeweled Tabletop Christmas Tree 4
  6. Set some white material inside to fill the container for a finished look.

Shown below is an alternate craft project, it is a lovely jeweled wreath using the same supplies as the tabletop tree.

Wreath - jewlery 

Craft – Mickey Mouse Wreath

Mickey Mouse wreath - closeup

To honor Mickey Mouse’s birthday, here is a fun wreath to make for the upcoming Christmas season.  As a collector of Disneyana (a term meaning a wide variety of collectible toys, books, theme-park souvenirs and other items produced and/or licensed by The Walt Disney Company) I have several figurines, stuffed animals, and other collectibles of Mickey Mouse … and so much more!!  (Please click on the link, Disney Memorabilia Collection, for information on how I have displayed these items in our home)

For this craft project I decided to use a porcelain Mickey Mouse figurine that stands about 6 inch tall.  I made two different version of the wreath using different accessory items. Version #1 is simple design using just the Mickey figurine and a few embellishments and version #2 uses the same items but I have added three Mickey Christmas ornaments depicting iconic Disney movies.  Mickey made his official debut in the short film, “Steamboat Willie (1928) which was one of the first sound cartoons and Mickey went on to appear in over 130 films such as “The Band Concert” (1935) and Fantasia (1940).

Mickey Mouse Wreath Supplies

  • Artificial pine wreath (size is determined by items used)
  • Wreath accents to create more interest to the plain wreath (for version #1 I added velvet holly leaves and gold berry sprays and for version #2 I also added gold leaves)
  • 1 large Mickey Mouse item (for both versions I used a porcelain figurine, but a stuffed Mickey would also look great!)
  • A variety of embellishments (I used some Mickey key chains for version #1 and for version #2 I used three Mickey Christmas ornaments)
  • Wire, used to secure the items
  • Hot glue gun and glue sticks, used to secure the items

Mickey Mouse Wreath Instructions

  1. Start with a plain artificial pine wreath
  2. Add some accents to the wreath to create interest or add color, attach with hot glue
  3. Place the large Mickey Mouse item in the center of the wreath, attach with wire
  4. Add embellishments to the wreath, attach with wire to secure or hot glue

Mickey Mouse wreath version #1 - final  Mickey Mouse wreath version #2- final

(photo on the left is version #1 and on the left is version #2)

For some other ideas for Disney wreaths, please click on the following links: Christmas Wreath Craft Post featuring the Hallmark ornament series called “Mickey’s Holiday Parade” and next month’s Disney Wreaths Decor Post and Special Ornaments Wreaths Decor Post.

Craft – Framed Vacation Photos

I don’t know about you but after our family comes back from a vacation we have hundreds of photos and I in this craft post I will show you how to make special framed vacation photos. Specialized photo frames can be a little pricey or maybe you can’t find one that you like or fits your vacation destination and I will show you how to take a simple frame and custom design it to fit any vacation destination.  For this craft project I chose five different themes: Disney, Beach, Road trip, World traveler and Disney.  To make these five themed Framed Vacation Photo craft project I used a variety of embellishments; such as scrapbook stickers, wooden and metal items and even Christmas ornaments.

Disney Theme

Disneyland in California and Walt Disney World in Florida are two favorite family vacation destinations. Shown below is an idea for Framed Disney Vacation Photos using scrapbook embellishments.  Disney offers lots of scrapbook embellishments and I’m sure that you can find the perfect ones at your local craft store.  They have a great selection of stickers for every Disney adventure for theme parks, various characters, ride attractions, Disney dining at the park, a Disney movie or play and a Disney cruise. 

For this craft project, I used a “Friends” stickers and several character stickers.  I arranged it for a portrait (vertical) photo but you can very easily change it for a landscape (horizontal) photo, too!  

20151014_130725-1

Shown below is a selection of some of the Disney stickers available to create your own custom designed Framed Vacation Photos

Disney stickers 1 Disney stickers 3

Beach Theme

Our family loves a great trip to the beach and while living in California it was one of our favorite fun weekend destination.  Maybe your family went on a great trip to Hawaii, Florida, Mexico or the Caribbean.  Shown below is an idea for Framed Beach Vacation Photos using pre-cut wood pieces.  Pre-cut wooden items come in a variety of themes and I found palm trees, pineapples, Hawaiian flowers, beach pail and a beach shovel.

For this craft project, I used two pre-painted wooden palm trees.  In order to use them to “frame” the photo opening I had to disassemble one of the trees.  Since I needed to paint the back side of the tree I decided to change the look and painted both of them to match. 

20151013_175455-1

Shown below on the right is the original palm tree and on the left is the re-painted one!

painted palm trees
Beach Vacation 1  Beach Vacation 2

Family Road Trip Theme

During the summer months our family loves to get in the car and travel to some fun destination for the weekend and sometimes we take longer road trips to visit interesting cities or national parks.  A variety of embellishments can be used for Family Road Trip Vacation Photos, just shop your local craft store and I’m sure they will have ones that would match the destination!

I found a great “Road Trip” sticker and one that says, “Are we there yet?”

20151013_175716-1

World Traveler Theme

Maybe your family has been lucky and you’ve been able to travel to the different countries around the world.  (Personally my dream trip would be to Australia!!).  A variety of embellishments can be used for World Travel Vacation Photos, just shop your local craft store to select the perfect ones that would match the destination!    

I found a “World Traveler” sticker and metal embellishments – a compass and camera.

20151013_180502-1

Western Theme

Maybe your family went on a great trip to a fun destination like Texas, Wyoming or another western state or you went on a great horseback ride during your vacation.  A variety of Western embellishments can be used for this craft project, just shop your local craft store for stickers, wood or metal embellishments.

I found some western themed ornaments to use for a fun three dimensional look!  

20151013_175421-1

So have fun creating your own Framed Vacation Photos, the options are endless!!!

Craft – Chanel-Inspired Shadowbox

Chanel inspired shadowbox - final

This month, in honor of Gabrielle “Coco” Chanel (born: August 19, 1883 died: January 10, 1971), I wrote a Celebration Post about the famous French fashion designer.  In Part One of a two part series I discuss her personal and professional life in which she changed what women had been previously wearing.  As a result of my research in writing the post, I decided to create a Chanel-inspired Shadowbox.  I made two variations of the shadowbox; one a traditional Chanel style version and a second one that was more personalized using the first initial of my daughter’s name.

Chanel inspired shadowbox

Chanel-Inspired Shadowbox – supplies

  • Shadowbox frame, size will be determined by the size of letters used
  • Letters, version #1 uses the traditional double C that mimics the Chanel logo and version #2 uses the first initial of my daughter’s name, which happens to be a C
  • Quilted fabric, used to mimic a classic Chanel purse.  Craft note: while shopping in my local craft stores I could not find black quilted leather fabric but I did find a dark purple one, so I decided to use black paint to cover the purple color and it turned out great!

Quilted fabric

  • Pearls, version #2 used pearls stickers
  • Glue gun, glue sticks
  • (Optional) gold or white paint

Chanel-Inspired Shadowbox – instructions  

  1. Disassemble the shadowbox, remove glass and frame backing and keep to cardboard backing to use later.
  2. Cut a piece of quilted leather fabric to fit the size of the selected shadowbox. Craft tip: Wrap the fabric around a piece of strong cardboard to create a more solid and stable surface.
  3. Attach the initial to the quilted fabric.  Craft note: in version #1 the gold initials used had a self-sticking back and in version #2 I attached the white initial that I used with a glue gun and glue stick.
  4. (Optional ideas: Use pearls to embellish the display.  Version #1 – the edge of the fabric surrounding the frame could have a string of pearls attached to further enhance the “Chanel” look (I opted not to add the pearls).  Version #2 – I add self-stick pearls attached to the white initial.
  5. Re-assemble the shadowbox, replace glass and frame backing.

Chanel inspired shadowbox - final    Version 2 - final
For more information about the personal and professional life of  Coco Chanel,
please click on the link to Coco Chanel (Part One)

Craft – Tartan & Stag Decorative Crafts

Tartan & Stag - version #2 finished 1

This month I did a Travel post on Balmoral Castle located in the Highlands of Scotland.  The British Royal Family for centuries has been spending the summer months at Balmoral annually since the time of Queen Victoria.  Balmoral has a certain style unlike any of the other Royal residences.  The interior of the house is decorated in the distinctive Highland style with plenty of tartan material and stags that were stalked and killed at Balmoral and featured throughout its many rooms.  So, inspired by this style of design I decided to make a few tartan and stag decorative items.  Listed below are the craft project supply lists and instructions for three different versions.

Tartan & Stag - supplies

Tartan & stag decorative craft item supply list

  • Tartan patterned scrapbook paper
  • Stag accessory – all three ornament pieces I used were found in the Christmas section of my local craft store.
  • Picture frame for version #1, size determined by ornament used
  • Wooden plaque for versions #2 & 3, size determined by ornament used
  • Sandpaper for versions #2 & 3
  • Paint / paint brush for versions #2 & 3, gold and bronze colors
  • Glue stick to attach scrapbook paper
  • Glue gun and glue stick to attach stag ornaments

Tartan & stag decorative craft item – version #1

  1. Disassemble the picture frame; remove frame backing, inserts and glass
  2. Cut the tartan scrapbook paper to fit the frame size
  3. Attach stag ornament to scrapbook paper used hot glue gun and glue stick.  For heavier ornaments use glue in multiple places to secure it properly.  Option: To provide additional support for a heavier ornament, scrapbook paper can be glued to a piece of cardboard.
  4. Reassemble the picture frame; first insert the ornament/scrapbook paper (optional cardboard attachment), then the glass and lastly the frame backing

Tartan & Stag - version #1 finished

Tartan & stag decorative craft item – versions #2 and 3

  1. Sand the wooden plaque to provide a smooth surface and prepare it for painting
  2. Paint the wooden plaque with gold paint, let dry
  3. Cut the tartan scrapbook paper to fit the wooden plaque, allow space to show a small border.  Craft Tip: Be sure to level the pattern before cutting
  4. Attach the tartan scrapbook paper to the wooden plaque with glue stick, smooth if necessary allow paper to lay flat with no wrinkles
  5. Paint the stag ornament(s) with bronze paint, let dry

Tartan & Stag - version #2 painted stag

  1. Attach stag ornament(s) to the wooden plaque using hot glue gun and gun stick  Craft Tip: To add dimension to the piece and raise it off the wooden plaque, add a small piece of wood under the stag ornament(s)

Tartan & Stag - version #3 finished