About barbara

I'm sure you are wondering how the blog was named, "The Enchanted Manor". Well, this blog will be like home to me and I wanted a name that reflected my different interests. During a normal day you can find me in several rooms of the house. Maybe I'll be in the living room decorating, or in my craft room working on a project, or in the dining room planning a great dinner party or at the computer in my office planning a great vacation. When you come to visit my blog you might find me in any room! Please return often for ideas and inspiration because this blog will be about decor, craft, celebration and travel. So, welcome to the "Enchanted Manor". Come in, sit down and let's talk!

Travel – Catalina Island, CA

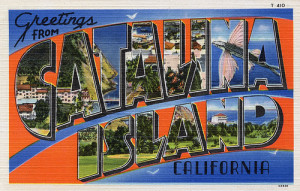
Catalina Island postcard

Years ago, when I was a child growing up in Southern California, I remember taking a special summer day trip to Catalina Island.  Part of the adventure was traveling by boat to the island and seeing the flying fish as we crossed the Pacific Ocean from the port of Long Beach to the tiny city of Avalon located on the island.  It was such an exciting sea adventure!  Then, once we arrived at Catalina we took a ride on a glass bottom boat to see the underwater sea creatures hidden in the kelp forests, toured the Wrigley Mansion with its beautiful gardens which were at the top of the hill overlooking the city and also the Catalina Casino located on the other side of Avalon Bay.  We had so much fun that day and I have so many wonderful memories!!

A brief history of Catalina Island (Santa Catalina Island)

Catalina Island is part of the Channel Islands archipelago and is located just 22 miles from the coast of California.  The island measures 22 miles long and 8 miles across at its widest point.  Archeologists have found evidence that the first settlers to the island, dating back to 7000 BC, were a group of Native Americans known as the Pimugnans or Pimuvit.  Other archaeological findings indicate that the Pimugnans settled near the present day city of Avalon and that they mined soapstone on the island and traded with other Native American tribes along the coast of California.

Documentation indicates that the first European to visit the island was a Portuguese explorer named Juan Cabrillo.  He arrived on October 7, 1542 claiming the island for Spain and naming it San Salvador.  The island remained unsettled by the Europeans for almost 60 years until another Spanish explorer, Sebastian Vizcaino rediscovered the island and renamed it Santa Catalina.

By the 1830s, a series of catastrophic events caused the island’s entire native population to be eliminated from the island.  With the Spanish colonization on the island, the Pimugnans population significantly declined due deaths caused by the introduction of diseases to which the Native Americans had no natural immunity.  Also the Pimugnans trade system was severely disrupted by the presence of the Spanish on the island and along the coast of California with the establishment of the chain of Missions by the Franciscan friars.  The remaining Pimugnans migrated from the island to find work at the Missions or on the vast rancheros owned by the Spanish settlers.

Over the centuries, the island has been used by distant Aleutian hunters from Russia and eventually local American hunters using it as a basecamp for the lucrative sea otter and seal pelt industry.  An abundance of these animals in the waters around Catalina, the nearby Channel Islands and along the coast of California provided a seemingly unlimited supply of these pelts which were in demanded at very high prices to foreign markets.  Later the island was used by frequently by pirates because of the numerous coves which provided the perfect hiding places which were within easy travel distance from the coast.  (Catalina Trivia: China Point, which is located on the southwest end of Catalina, received its name because that area of the island was once used by smugglers to hide illegal Chinese immigrants)

Over the following years, the ownership of the island changed hands numerous times.  In 1846, the Mexican Governor awarded the island in a large land grant to a local sea captain named Thomas Robbins.  Then, in 1850 it was sold to Jose Covarrubias who sold it to Albert Packard in 1853 who sold to James Lick in 1864 and maintained control of the entire island for the next 25 years.  Catalina Island was eventually developed as a vacation destination due to its close location to the growing metropolis of Los Angeles on the mainland of California.  In 1887, the Michigan real estate developer, George Shatto, built the island’s first hotel located at the site of the new city of Avalon.

Then in 1891 the Banning bothers bought the island from Lick, formed the Santa Catalina Island Company, and immediately started developing it as a vacation resort.  The main focus was the small island town of Avalon where more tourist accommodations were built but additional improvements were made around the entire island with dirt roads into the interior were paved, hunting lodges were constructed and stagecoach tours around the island were soon started.

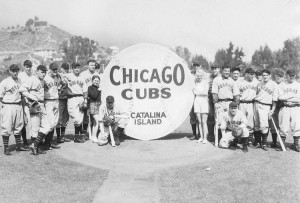
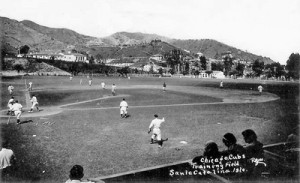
In 1919, the island came under the ownership of William Wrigley Jr., the chewing gum company owner, when he purchased a controlling interest in the Santa Catalina Company.  Wrigley invested millions to further develop the island and constructed the Catalina Casino which opened in May 1929 attracting tourists from the mainland of California.  (Catalina Trivia: Wrigley also owned the Chicago Cubs baseball team and starting in 1921 their spring training facility was located on Catalina from 1921 until 1951)
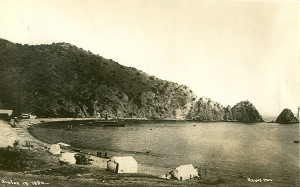
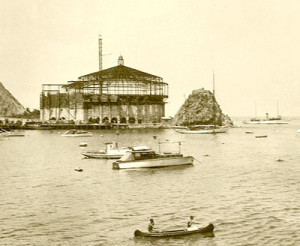
Avalon before the Catalina Casino built    Catalina Casino being constructed
 

Chicago Cubs training camp, Catalina Island 1    Chicago Cubs training camp, Catalina Island 2

After the death of Wrigley in 1932, the control of the Santa Catalina Island Company sent to his son, Philip Wrigley, who continued with his father’s master plan to develop and improve the island.  The island was closed to tourists during World War II and used as a military training facility.  Upon his death in 1975, Philip Wrigley deeded 90 percent of the original Santa Catalina Island Company, approximately 42,135 acres; to the newly formed Catalina Island Conservancy (which he helped to establish in 1971) while the remaining 10 percent was retained and control of a majority of the resort properties and tourist operations on the island.  The Conservancy, a private nonprofit organization, has made it their mission to protect and preserve the natural and cultural heritage of Catalina.

Travel information for Catalina Island

Catalina can be reached by passenger ferries that depart from Long Beach and San Pedroas well as Newport Beach.  The island can also be reached by helicopter service from either Long Beach or San Pedro.  Please see the following website, www.catalinachamber.com, for more specific information on traveling to Catalina and to view available dates, times and prices.  (Travel Note: Back in the 1990s the Royal Caribbean, Princess and Carnival cruise lines starting making Catalina a regular stop on their Baja cruise itineraries.  The ships usually anchor approximately 100 feet outside of Avalon Harbor and passengers are ferried by small boats onto the island)

Catalina is unique because motor vehicles are restricted on most areas of the island with the exception of the city of Avalon.  Most residents use golf carts but bicycles are also a popular alternative and there are several rental shops available for tourists to rent either types of transportation.  The Catalina Island Conservancy offers bus and jeep tours into the interior of the island and they also issue hiking and mountain biking permits that can be obtained through the Conservancy office.  (Travel Note: Hiking permits are free but there is an annual fee for mountain bike permits with additional helmet and tire requirements)  For more information regarding transportation on the island of Catalina, please see the website www.catalinachamber.com

Things to see and do on Catalina

Once visitors are on Catalina there are numerous sites to see and a variety of activities to enjoy.  Here is a list of just a few of the things to see and do on the island:

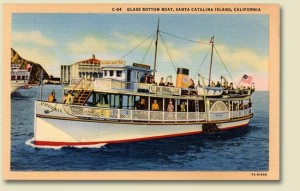
  • Glass Bottom Boat Tours – This popular tour takes visitors on a trip in a glass bottom boat to the Lover’s Cove Marine Preserve to view the abundant sea life in the kelp forests located just off shore.  Advance reservations are required and highly recommended.  For further information regarding the tours offered by the Santa Catalina Island Company please call 310-510-8687 or view their website at www.visitcatalinaisland.com  (Catalina Trivia: The 1966 movie, “The Glass Bottom Boat starring Doris Day and Rod Taylor was based on the original Catalina tours and portions of the movie were filmed on the island)

Glass Bottom Boat vintage postcard

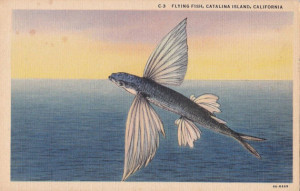
  • Flying Fish Tours – Another popular boat tour for visitors to take while on the island is the Flying Fish Tour.  The famed flying fish can be seen seasonally off the coast of Catalina from late May to September every year.  These amazing fish propel themselves out of the water sometimes reaching heights as high at 30 feet above the water.  For more information regarding these tours offered by the Santa Catalina Island Company please call 310-510-8687 or view their website at www.visitcatalinaisland.com

Flying fish vintage postcard

    • Other water activities – snorkeling, scuba diving, para sailing, kayaking and paddle boarding.  (Travel Note: Please be advised to check your preferred Catalina Island vendors to inquire about reservation, availability and price information prior to your trip to Catalina and it is always a good idea to also ask about cancellation policies just in case of scheduling problems)
    • Catalina Casino Tour – The iconic landmark of Avalon is the Catalina Casino circular 12-story high building which was built in 1929 by William Wrigley, Jr.  The building’s art deco style interior features the Catalina Island Museum and a movie theater on the first floor and a large ballroom on the top floor.  Guided tours of the Catalina Casino are available and visitors can learn the history of Catalina Island and in the museum there are displays showing the distinctive Catalina tiles and pottery that was once made locally on the island.  For further information regarding the tours offered by the Santa Catalina Island Company, please call 310-510-8687 or view their website at www.visitcatalinaisland.com (Catalina Trivia: Most visitors will assume that the Catalina Casino was a place for gambling but, like most things on the island that have been inspired or influenced by a Mediterranean style, the name is derived from the Italian word casino which means a “gathering place”)
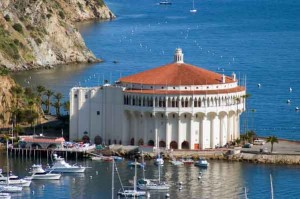
Catalina Casino    Catalina Casino entrance - the Lady of the Casino tilework

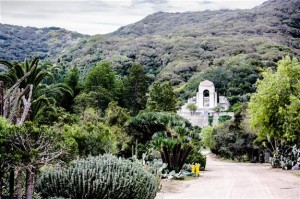
  • The Wrigley Memorial and Gardens – High on the hill on the opposite side of Avalon Bay and the Catalina Casino is the Wrigley Memorial and Gardens, from this vantage point on the island there are spectacular views of Avalon Harbor. The Memorial, which honors William Wrigley Jr, is the centerpiece of the 38 acre Botanical Gardens which features a variety of desert plants that were originally planted at the direction of Wrigley’s wife, Ada.  The Memorial was built in 1933-34 using Catalina stone quarried on the island and the red roof tile and beautiful handmade tile where produced locally by the Catalina Pottery plant which operated on the island from 1927 to 1937.  The Memorial and the Gardens are operated by the Catalina Island Conservancy, please see www.catalinaconservancy.org for more information regarding hours of operation and tour prices.  (Catalina Trivia:  William Wrigley Jr. was originally buried in the sarcophagus located in Wrigley Memorial.  The Memorial is located near the former Wrigley home on Catalina; unfortunately the house is not open to public tours but currently provides deluxe accommodations for island visitors as the Inn at Mt. Ada.  In 1947, Wrigley’s remains were moved to the Forest Lawn Cemetery in Glendale, CA)
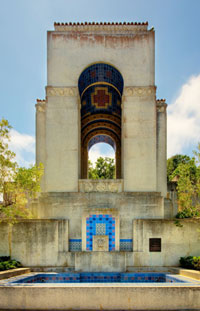
Wrigley Memorial    Wrigley Memorial Gradens

Decor – Fall Mantel Decoration

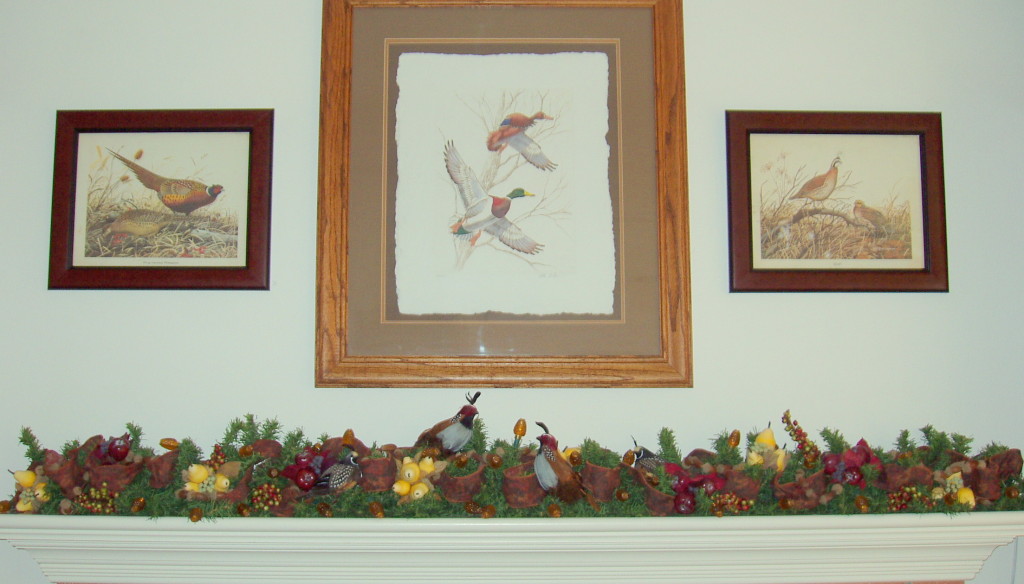
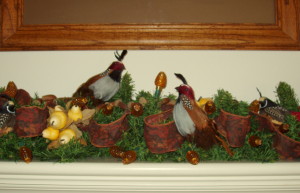
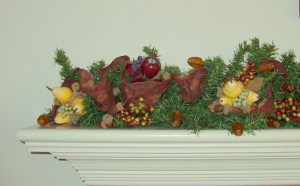
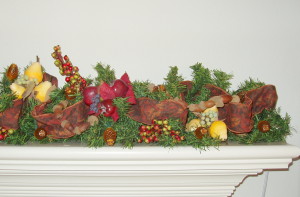
For this Décor post I would like to highlight a 2004 Fall Mantel Decoration from our old house in California.  In the family room three animal prints were hung above the fireplace, a large duck print and two vintage prints of a peasant and quail that I had purchased at an antique store.  Using the artwork as inspiration, I went shopping at my local Craft store for themed accessories to use for the mantel decoration.  I start assembling the decoration by using a pine garland placed across the mantel.  Next, I intertwined a string of amber pine cone lights and laced brown autumn 2” wide ribbon throughout the garland.  Then, I added several bunches of berries, red apples and yellow pears.  The final touch was a family of stuffed quails which were the perfect way to tie in the mantel decoration with the animal prints.

OLYMPUS DIGITAL CAMERAOLYMPUS DIGITAL CAMERA    OLYMPUS DIGITAL CAMERA

This 2004 Fall Mantel Decoration is a wonderful example of using existing home accessories as inspiration for seasonal decoration.  So, take a look around your house and maybe you will find ideas for some holiday decorations to create for your own home!

The Queen’s Jewelry Collection (Part Two)
The current British Monarch, Queen Elizabeth II, has an extensive collection of tiaras, necklaces, earrings and brooches that are part of her personal collection.  Most of these items have been acquired and passed down through previous members of the royal family.  The Queen’s Jewelry Collection Part One featured such items as the George IV State Diadem, Queen Mary’s Fringe Tiara, Cambridge Lover’s Knot Tiara and the Cartier Halo Tiara, which was worn by Katherine Middleton when she married Prince William in 2011, and also the Prince Albert Sapphire Brooch and the Cullinan III & IV Diamonds that the Queen appropriately wore for her Diamond Jubilee in 2013.  (For more information on these beautiful tiaras and brooches, please click on the link)

In this post, I will discuss several additional pieces from the Queen’s Jewelry Collection.

Queen Victoria’s Golden Jubilee Necklace

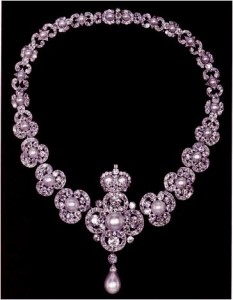
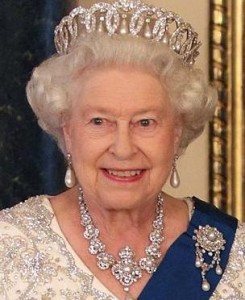
In 1887, to mark the fiftieth anniversary of Queen Victoria’s accession to the British throne, a committee was formed to raise funds for a commemorative statue of Prince Albert to honor the beloved husband of the Queen who died in 1861.  (Eventually the completed statue was dedicated in 1890 at Windsor)  The remainder of the fund was used for an impressive necklace with 26 large pearls and over 300 diamonds which Queen Victoria wore in the official Golden Jubilee photograph.  The necklace has a large central pearl and diamond quatrefoil with a large pearl in the middle, a pearl and diamond crown set at the top with a large pearl drop hanging at the bottom.  The remaining necklace comprises of graduated diamond and pearl trefoil links, six of the largest trefoils were designed to be worn separately as brooches.  After Queen Victoria’s death in 1901, the necklace became the personal property of the crown and was worn infrequently by subsequent queen consorts.  The necklace is said to be a favorite of the current Queen Elizabeth II.

Queen Victoria's Golden Jubilee Necklace    Queen Victoria's Golden Jubilee Necklace - worn by Queen Elizabeth

Queen Alexandra’s Dagmar Necklace

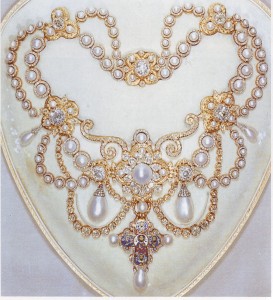
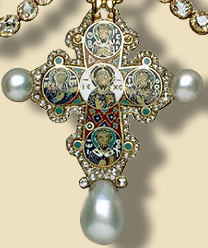
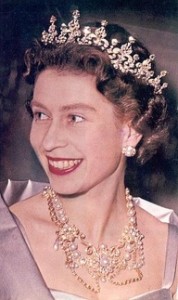
Another remarkable necklace in the Queen’s personal jewelry collection is known as the Dagmar Necklace which was given by King Frederik VII of Denmark to Princess (later Queen) Alexandra upon her marriage to the Prince of Wales (later King Edward VII) in 1863.  The necklace was designed in a Byzantine style comprising of alternating diamond and pearls swags set in gold connected with diamond and pearl medallions also set in gold and features a replica of the famous Dagmar Cross, hence the name of the necklace.  The history is that Queen Dagmar was buried with a similar cross laid on her breast and since then the tradition is that when Danish princesses are married they wear a replica of the cross.  The Byzantine style cross on the necklace is detachable with an image of Christ at the center with four additional saintly images on the front while the back depicts a scene from the Crucifixion, included within the cross is a piece of silk from the grave of King Canute and a sliver of wood from the original Dagmar Cross.  Upon the death of Queen Alexandra in 1925, the necklace was given to the Crown eventually passing to Queen Elizabeth II; she appropriately wore the necklace on her state visit to Denmark in 1957.

Dagmar Necklace 1   Dagmar Necklace closeup  Queen Alexandera's Dagmar Necklace  - Queen Elizabeth wearing

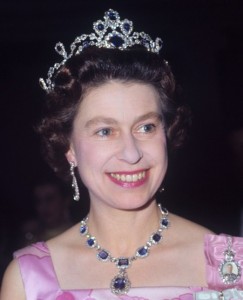
King George VI Sapphire Necklace

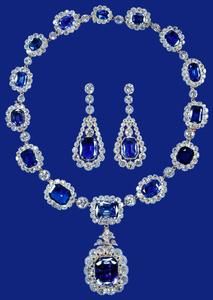
The sapphire necklace is part of the King George VI Sapphire Suite which was given by King George VI as a wedding present for his daughter, Princess Elizabeth (the future Queen Elizabeth II) when she married Prince Phillip in 1947.  The suite was originally created in 1850 and includes a necklace links of oblong sapphires surrounded by diamonds and a matching pair of oblong sapphire earrings also surrounded with diamonds.  In 1959, Princess Elizabeth had the necklace shortened and the large center sapphire made into a drop pendant which could also be detached from the necklace to use as a separate brooch.  Later in 1963, Queen Elizabeth commissioned a new sapphire and diamond tiara and bracelet from sapphires that once belonged to Princess Louise of Belgium.

King George VI Victorian necklace and earrings    King George VI Victorian necklace and earrings - Queen Elizabeth

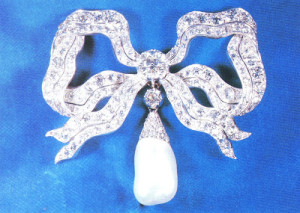
Kensington Bow Brooch 

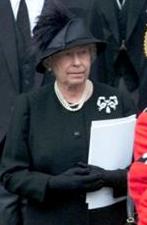
The Kensington Bow Brooch was inherited by Queen Elizabeth from the large jewelry collection of her maternal grandmother, Queen Mary.  The brooch was a gift to mark the 1893 wedding of Princess May of Teck (the future Queen Mary) to the Duke of York (the future King George V) She wore the brooch at both the coronations of King Edward VII (her father-in-law) and King George V (her husband) The brooch was made by Collingwood & Co. with two rows of diamonds set in silver and gold to resemble a bow tied around a single large diamond in the center with a detachable pave set baroque pearl pendant.  Queen Elizabeth inherited the brooch in 1953 and often wears it to secure a sash at her shoulder for formal events and has infrequently worn it without the pearl drop for more casual day appearances.  Most recently the Queen wore the Kensington Bow Brooch at the funeral of her mother, Queen Elizabeth the Queen Mother, who died in 2002.

Kensington Bow Brooch    Kensington Bow Brooch - Queen Elizabeth at funeral 1

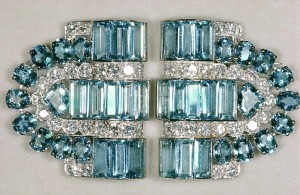
Cartier Clips

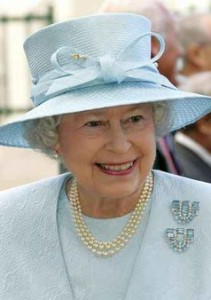
In the 1930s the French jeweler, Louis Cartier, started designing matching brooches that could be worn together to form one large jewelry accessory or separately as single brooches.  Princess Elizabeth was given a set of Cartier Clips as an 18th birthday gift from her parents in 1944.  The brooches are designed in an Art Deco style with 20 oval and 22 baguette aquamarines and 38 round diamonds.  The pair of Cartier Clips are among Queen Elizabeth’s favorites and she has worn them frequently throughout the years.

    Cartier Clips - Queen Elizabeth1

Cullinan Brooches

The famous and massive Cullinan diamond that was acquired by the British Crown in 1910 was cut into multiple pieces.  The largest cut, the Cullinan I diamond, is set in the Sovereign’s Sceptre which is part of the British Royal Coronation Regalia.  The Cullinan II is set into the Imperial State Crown.  (For more information, please click on the links Crown Jewels of England Part One & Part Two)

Cullinan V Heart Brooch –   

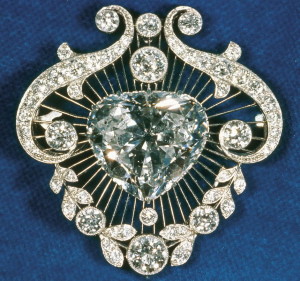
The Cullinan V is an 18.8 carat heart-shaped diamond featured in a beautiful platinum setting with a pave border of smaller diamonds.  Queen Mary wore the Cullinan V Heart Brooch as the center section of the stomacher (in “royal terms” it is a decorative jeweled piece that is attached to the front bodice of a gown) which was part of the diamond and emerald parure she wore for the Delhi Durbar in 1911.  Queen Mary also frequently wore the Cullinan VII pendant attached to the Cullinan VII brooch to form a large stomacher.

Cullinan VII and Cullian VIII Brooch    

Cullinan VII and Cullinan VIII Brooch –

The Cullinan VII is an 11.5 carat marquise cut diamond set as a pendant and the Cullinan VIII is an 6.8 emerald-cut diamond mounted in the center of a platinum setting with a pave border of smaller diamonds.  Even though Queen Elizabeth inherited the brooch in 1953, she has rarely worn it in public.

For more information about the other pieces in the Queen’s personal collection, please clink on the link The Queen’s Jewelry Collection Part One.

Also, if you are interested in more information about the Royal Family and their jewels, please click on the links to the following posts:  The Crown Jewels (Part One and Part Two) and the Cambridge Emeralds.

Decor – Seasonal Front Door Decorations

Festive decorations on the front porch are a wonderful way to welcome guests during the holiday seasons.  In this post I will showcase the seasonal front door decorations that I have used for our home throughout the year.

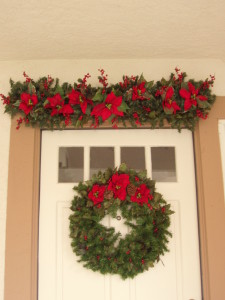
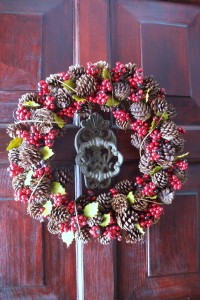
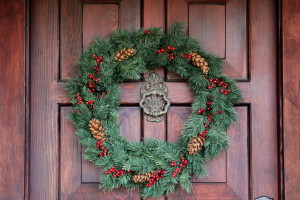
Shown below are three photos from past Christmas front door decorations I have used.  The first photo was taken in 2003 and shows the Christmas wreath and front door garland I used for our home in California.  Both decorations feature pine boughs, poinsettias and red berries.  The second photo was taken in 2008 and shows the Christmas wreath I used for our new home in the Midwest.  The grapevine wreath is covered entirely with pine cones and I added red berries and holly leaves.  The third photo was taken in 2012 and shows the pine wreath and I added several pine cones and red berries.  (For more information about my home’s Christmas decorations, please click on the following links: Christmas Home Decorations, Christmas Wreaths Décor post, Christmas Wreaths Craft post, and More Christmas Wreaths and Christmas Decorations from Past Years)

OLYMPUS DIGITAL CAMERA    2008 Christmas front door wreath

2012 Christmas  Front door wreath

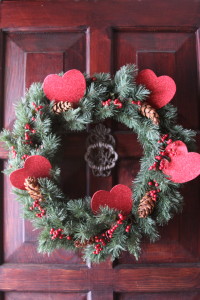
The next photo shows the Valentine’s Day wreath that I used for the front door of our home in 2012.  It is the same pine wreath that I used for Christmas the previous year and I just added some large red glitter hearts.  I used the wreath as a front door decoration for the Queen of Hearts Party that I had for Valentine’s Day.  (For more information about the Queen of Hearts Party, please click on the link)

2012 Queen of Hearts party wreath

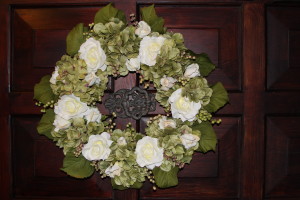
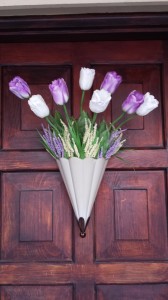
Below are two photos that show two of the different front door decorations that I have used during the Spring and Summer months at our home in the Midwest.  The first shows a very special and sentimental wreath that was originally used at my Mother’s funeral.  The floral wreath that I made features white roses that were my Mother’s favorite flowers – six white full roses to represent my parents and their four daughters, nine white rose buds represent their nine grandchildren and finished with green hydrangeas and berries in a lovely pastel shade of rose pink.  The second photo shows my most recent Spring/Summer front door decoration.  I had purchased a metal cone-shaped container which I filled with white and purple tulips.  (For instructions and supply list for this Spring Door Decoration, please click on the link.  Also, for more information about my home’s Easter decorations, please clink on the link)

2013 Easter wreath 1a    2014 Spring Front door wreath

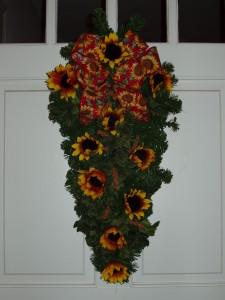
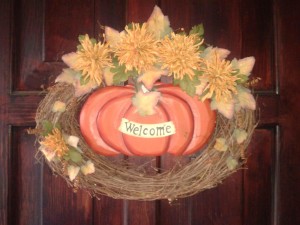
Finally, below are two photos that show two different shaped front door decorations that I have used for the Fall season.  The first photo shows an unusually triangular shaped pine wreath that features several sunflowers, orange berries and a festive autumn bow.  The second photo shows another unique door decoration, it is an oval grapevine wreath that features a pumpkin wall hanging, orange mums and autumn leaves.  (For more information about my home’s Fall Decorations, please click on the following links:  Fall Home Decorations, Halloween Decorations and Nightmare Before Christmas Wreath inspired by the classic Disney animated movie)

OLYMPUS DIGITAL CAMERA    2013 Front door autumn wreath

Decor – Setting up a Boyds Bear Village display

In two previous posts I discussed the many wonderful pieces of my Boyds Bear collection that I started in the 1980s.  Throughout the years I have collected Boyds stuffed animals, whimsical figurines and picture frames.  The main portion of my Boyds Bear collection is displayed in the library of our home in a lovely oak glass-front lawyer cabinet.  These items are displayed year-round in the cabinet and I also add additional seasonal holiday themed figurines.  (If you would like to see more of this collection, please click on the following links:  Displaying a Boyds Bear Collection Part One and Two)

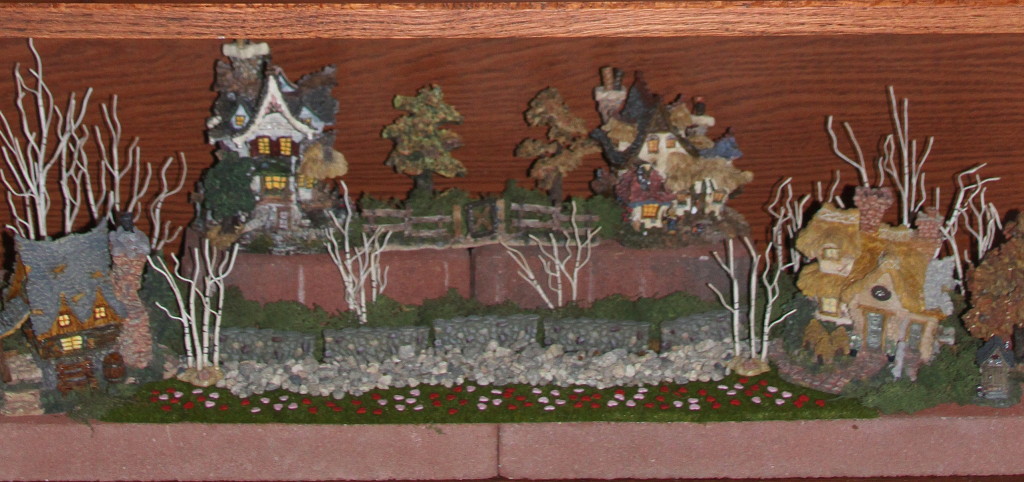
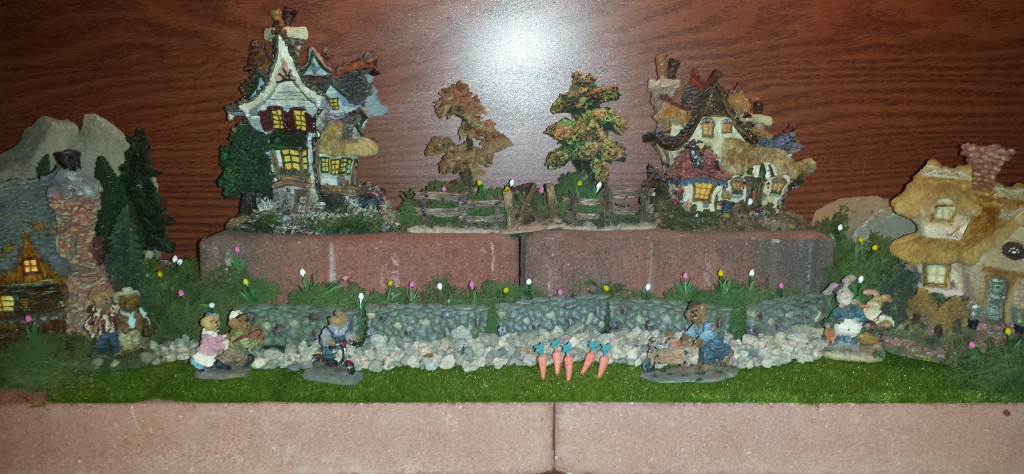
The focus of this post will be the setting up a Boyds Bear Village Display and will included step-by-step instructions of how I set up the display.  In addition, I will show how I change or add special seasonal items to the display for the various holidays.  The Boyds Bear Village display is set-up on the bottom shelf of my Boyds Bear cabinet with several of the charming Boyds Bear Village houses that remain in place throughout the entire year.  The Boyds Bear Village house are: “Edmund’s Hideaway”, “Grenville and Beatrice’s Homestead”, “Emily’s Carrot Cottage”, and “Bailey’s Cozy Cottage”.

Below are the step-by-step instructions and photos of how I set up the display:

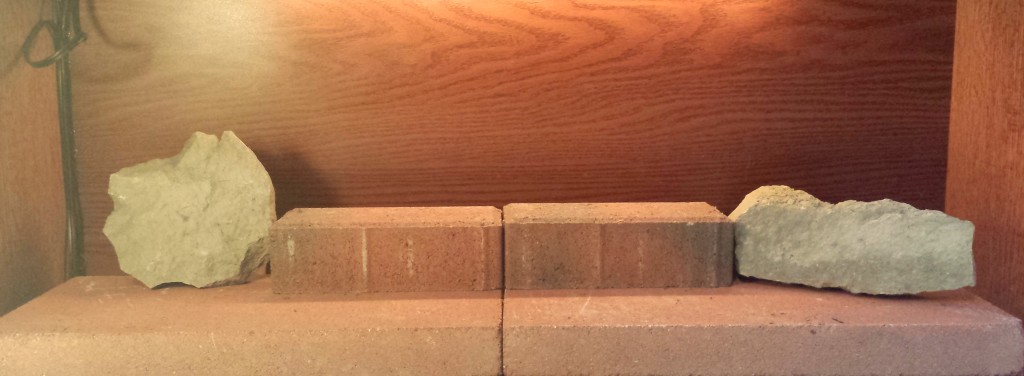
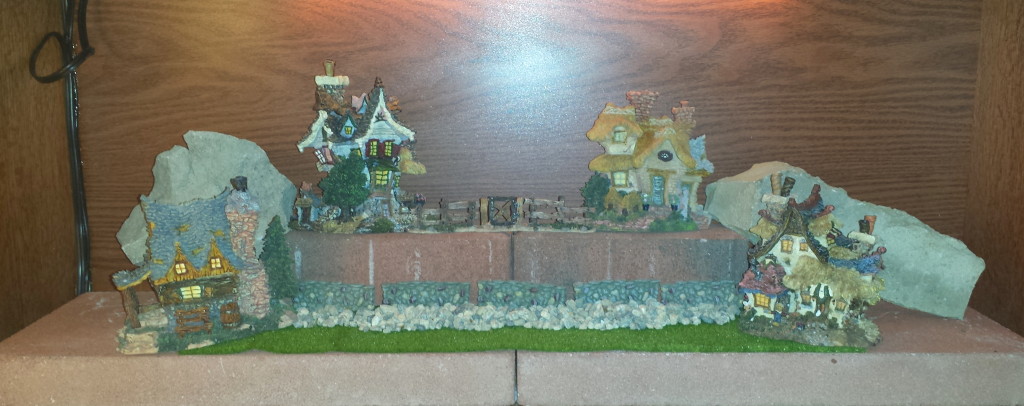
First, I lined the bottom shelf with newspaper and then placed two large bricks to add height to the display.  The newspapers were used to prevent the bricks from scratching the oak bookcase.  Next, I placed two smaller bricks to create more height in the center of the top section of the display.  I also used two large rocks on either side of the display to create more texture and visual interest.

Boyds Bear Village set-up 1Then, I placed the four Boyds houses, leaving space in the middle for additional accessories.  On the lower section of the display, I placed a piece of artificial grass.  To hide some of the brick, I used four sections of stone walls and added small rocks.  On the top section of the display, I used a three piece section of fencing between the two houses.

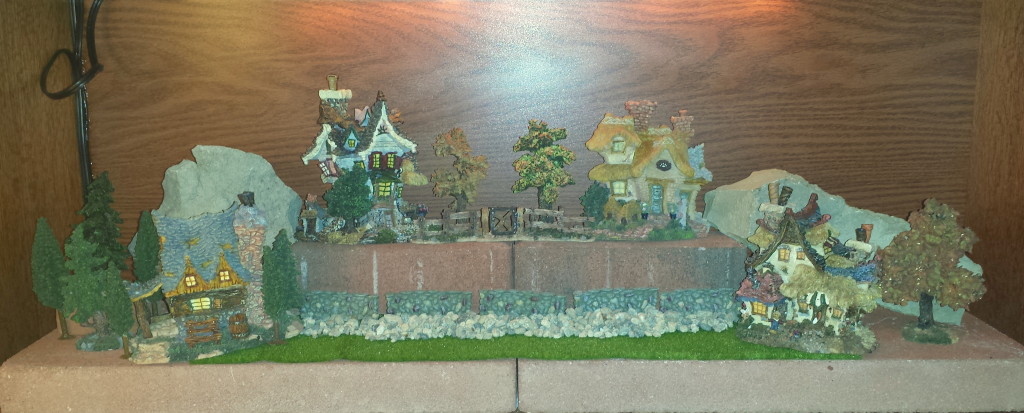
Boyds Bear Village set-up 2Next, I placed several trees around the display.  Special Note:  I have several sets of seasonal trees for the different holidays.  Such as full green trees for summer/spring, bare-branch and golden brown trees for fall and pine trees for winter.

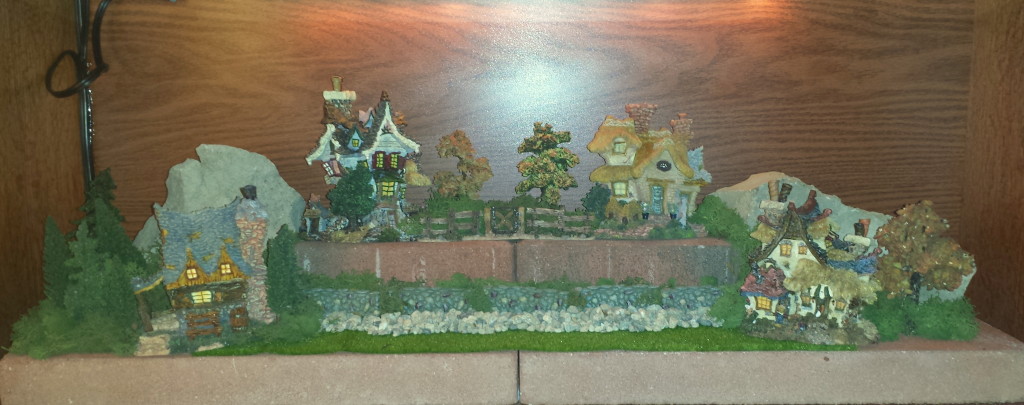
Boyds Bear Village set-up 3To hide the base of the trees, the spaces behind the wall on the lower section and behind the fence on the top section and also to fill the other empty areas of the display I used Spanish moss.

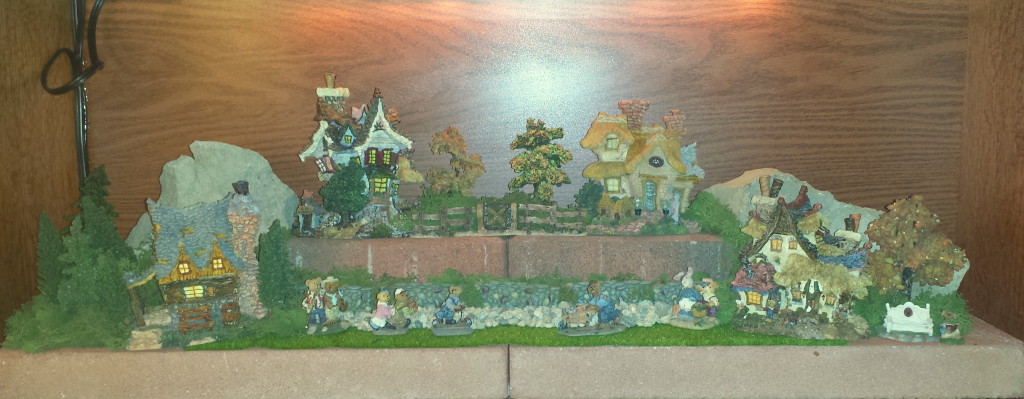
Boyds Bear Village set-up 4Finally, I place some of the Boyds Bear Village bear/hare figurines around the display.  Special Note: I have several different sets of small seasonal figurines that I add or remove during the different seasons and holidays.

Boyds Bear Village set-up 5

Below are several photos taken of the Boyds Bear Village display throughout the year for the various seasons with a description of the items that I add or remove depending on the holidays.  Some of these additional items are from the Boyds Bears product line, I also use some Department 56 items and other items were purchased at local craft stores.  Every year I try to change or add to the seasonal displays!  Craft Tip: Keep an eye out during the various holidays throughout the year for miniature decorative accents; also check the dollhouse section in the craft stores for more miniature items to add to a display.

Valentine’s Day

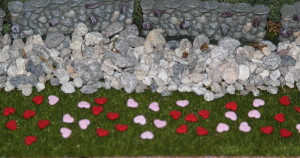
Sometime near the end of January, I will remove some of the winter accessories, such as the Christmas figurines and pine trees leaving only the bare-branch trees.  Then, in my local craft store I found miniature pink and red hearts that I sprinkle on the grass area of the display for Valentine’s Day.  (Next year, I’m thinking of adding more small hearts to the bare-branch trees for an extra special touch)

2012 Valentine's Day Boyd's Bear Village2012 Valentine's Day Boyd's Bear Village closeup

Spring/Summer

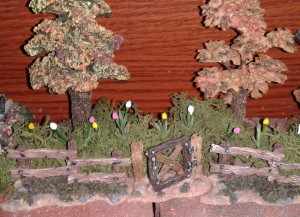
Usually in March, I will remove the bare-branch trees and will replace them with a set of full green trees.  Next, in the railroad model section of my local craft store I found miniature white, pink and yellow tulips which I added to the top and bottom sections of the display inserting them into the Spanish moss so they would remain upright.  To complete the Spring/Summer display I placed several of the Boyds Bear Village small figurines.

2013 Spring Boyd's Town2013 Spring Boyd's Town closeup 1

Fall – Halloween & Thanksgiving

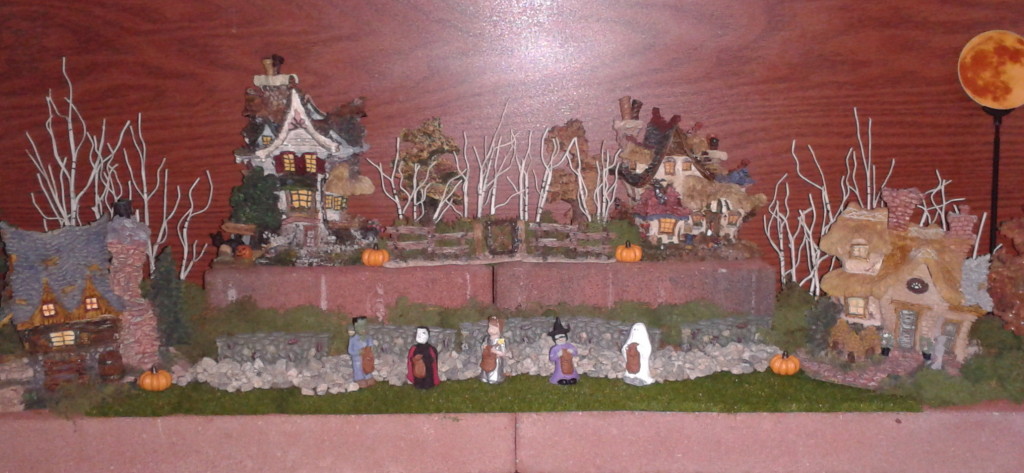
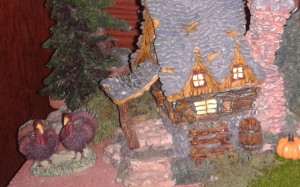
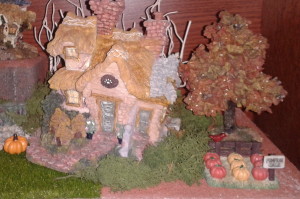
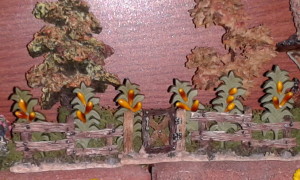
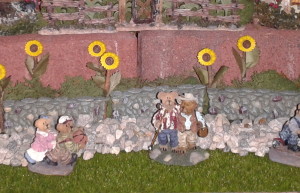
In mid-October, I will remove all the Spring/Summer accessories.  Then, I will replace the Spring/Summer trees with several bare-branch and golden brown trees for a more seasonal autumn look.  Next, for Halloween I will add several “trick or treaters” figurines, a pumpkin patch figurine and several miniature pumpkins to display.  As a final touch, I will add a “harvest moon” in the right corner of the display.  For Thanksgiving, I will remove the Halloween figurines and on the left side I will add a figurine of two small turkeys.  Last year, I could find the right accessories to add to the Fall display so I made sunflowers from small buttons that I found in my local craft store.  I added small twigs, which I attached through the button hooks on the back and glued small leaves onto the twigs and placed them near the rock wall on the lower section.  I also added small corn stalks near the fence on the top section.

2012 Halloween Boyd's Bear Village

2012 Fall  Boyd's Bear Village closeup 1    2012 Fall  Boyd's Bear Village closeup 2
2013 Fall Boyd's Town closeup 1    2013 Fall Boyd's Town closeup 2

Winter – Christmas

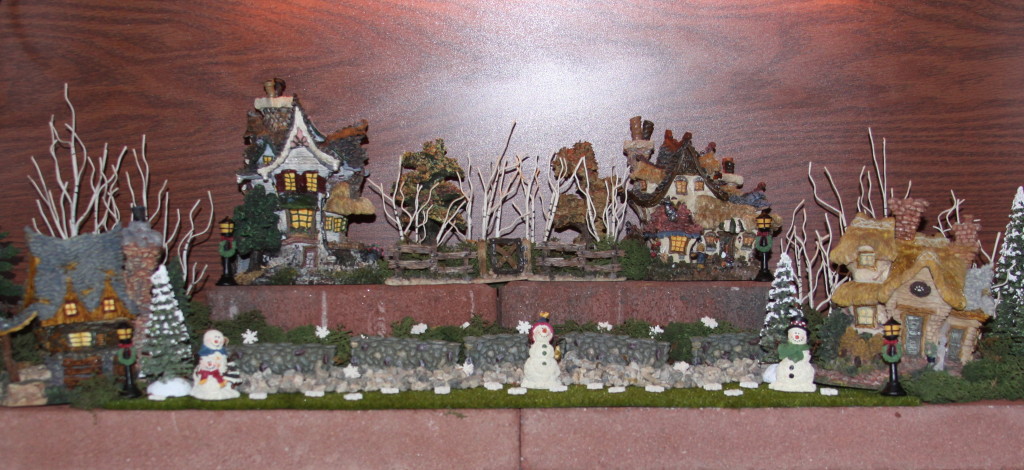
At the beginning of December, I remove all of the Fall figurines and replace the Fall Trees with snow covered pine trees for a winter look.  Next, I add a small Santa bear and several snowmen figurines.  I also add several tiny lamp posts accented with Christmas wreaths and place them near each of the Boyds Bear Village house.  To finish the display I sprinkle several miniature snowflakes which I found in my local craft store.

2012 Christmas Boyd's Bear Village 1

So, I hope you enjoyed seeing how I set up my Boyds Bear Village and also how I accessorize the display throughout the year!