Charm Bracelets

As a child I remember my Grandmother had a golden bracelet that was filled with charms that represented all of her children, grandchildren and even great-grandchildren.  All the links of the bracelet seemed to be filled and she would only wear it for special occasions, it would make a lovely “jingle” sound as she would move her arm.  My mother also had a similar bracelet but our family was much smaller and there were not quite so many charms.  I also received a golden charm bracelet as a present for my 16th birthday that I still have in my jewelry box.

The popularity of charms is not a new fashion trend and has been around for a very long time.  In fact, the ancient Egyptian Pharaohs, Romans and the Medieval knights all wore charms as decorative pendants and amulets to ward off evil spirits or charms that were worn into battle for good luck or charms that were worn to signify a person’s heritage or their religious belief.

As she has influenced so much of our modern traditions, Queen Victoria wore a charm bracelet and started a popular fashion among the European royalty back in the late 1800s.  Sadly when Prince Albert died, the Queen made mourning charms popular and these charms were lockets containing the hair of a deceased loved one or a miniature portrait of the deceased and the bracelets were made of black jet which was a popular gemstone used during the traditional mourning period.

After World War II, charm bracelets became very popular with the American women and their daughters.  The custom of purchasing or receiving charms to mark special events is another lovely tradition.  Movie stars worn them in their films and they were also seen wearing them for photos shoots in the movie magazines and this is the trend that I remember from my childhood.

After my daughter was born I decided that I wanted to start collecting charms for her to remember special events of her life with the hope that it would become a wonderful keepsake for her as she grows older.  I actually started with charms for one bracelet and have now collected so many charms that there are enough for not just one bracelet but several more!

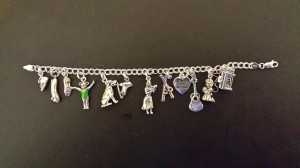
The first one is a traditional charm bracelet with charms that mark my daughter’s special events, hobbies or activities.  From left to right: a baby shoe, ballet and tap shoes, a little gymnast, a dog to represent our three rescue dogs, ice skates and a hula dancer for when she took lessons, skis and boots, High School Musical and Hannah Montana charms (I’ve got to find a One Direction charm!), a little girl praying on her knees for her first communion, a piano with a musical note added to mark her weekly piano lessons and also for her participation in the school choir.  As you can see from the photo shown below, there is a space left for the cheerleader charm that I recently ordered.  I hope that my daughter remembers all the fun things she did while growing up and I think the charm bracelet is also a wonderful way to remember those special events from her childhood.

Childhood charm bracelet

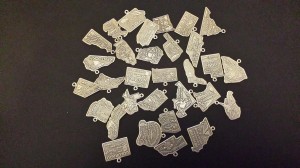
The next collection of charms was bought during our family vacations and trips around the United States that we have taken since my daughter was born.  I also found a great online source to purchase “state” charms to go with the other travel souvenirs, the web site is bluemud.com.  With such a large collection of travel charms there is no way they could all fit on a bracelet, so I have decided to attach them to a necklace that I have recently purchased but I have not got around to attaching the charms yet.  Below are two photos: one of the travel charms and the other the state charms.
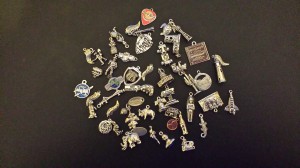
travel charms    state charms

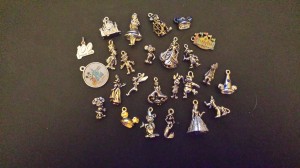
Another collection of charms were bought on our many visits to Disneyland in California and Walt Disney World in Florida.  As many of you know from previous posts, our family loves everything Disney!  In the photo shown below, I have collected quite a number of the Disney charms.  Once again there were so many charms to put on a bracelet, so I will be attaching them to the other necklace that I recently purchased.

Disney charms

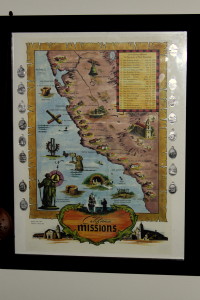
Charms are not just for bracelets and necklaces and here is a story to tell of a great idea I had for an alternative way of displaying them.  When we lived in California, our family tried to visit all of the 21 Missions scattered across the state.  We had a great time exploring most of them during weekend trips or summer vacations and by the time we moved to the Midwest we had only three more to go!!  Each time we visited the Missions I would purchase one of the Mission medals so I had another collection of charms.  I didn’t want to display the medals on a bracelet so I came up with another idea.  During one of our visits I had purchased a small poster showing the California Missions.  I framed the poster and then hot glued the medals along the border and left space for the missing medals.  It looks great hanging in our home and next time we visit California we are going to visit the last remaining California Missions to get those missing medals!

California Mission print

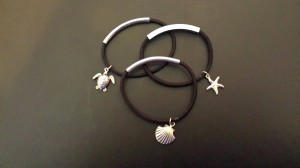
Another idea for using charms that I saw when shopping in a gift store recently was charms attached to rubber and metal “hair ties” which were sold to be used as a “bracelet”.  These bracelets were priced at $5 and I thought I could make ones for my daughter for a much lower price.  I found similar rubber and metal hair ties at my local retail store and I used some ocean themed silver charms because we had a planned summer vacation to the North Carolina coast and my daughter loved them when she wore them during the trip.  As you can see from the photo below the bracelets were so easy to make and they look great!!

charms attached to hair ties

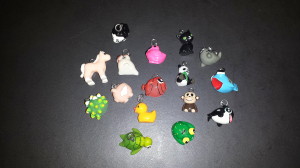
The last collection of charms is unusual and not the traditional metal ones but small resin charms that I found in our local craft store.  As you can see from the photo below, the charms are cute animal characters and my daughter absolutely loves them.  I am not sure if I will put them on a bracelet or a necklace, I haven’t decided yet!

Resin charms

So, in conclusion I hope you enjoy this post about charm bracelets.  If you collect charms, send me a picture because I would love to see your collection.

Decor – Adding Personality to a Home

Many years ago I envisioned my home as a place filled with family photographs, travel mementos, a collection of interesting books and other various decorative items that would bring a smile to my face … and that is exactly how I would describe the home that I live in today with my family.

My approach to adding personality to a room is displaying interesting pieces and decorative items throughout a home that have special meaning to our family so that when guests visit these items will tell a story of our life or convey our personal interests and this can be a wonderful starting point for conversations.  Decorating a home with family photos and memorabilia are wonderful ways to remember the people and important events that hold special memories in our lives and they are an important way to surround ourselves with family love and heritage.  Displaying decorative items gathered throughout the years, such as travel souvenirs or themed collectibles also convey our interests and hobbies.  So, let me get started with some ideas and suggestions for adding personality to your home!

Family photos

Decorating with family photos is a perfect opportunity to add our family’s character and personality into a room.  Every year, just before my children’s birthday, I always schedule an appointment at the portrait studio at our local department store.  These formal portraits are displayed throughout our house; some are in the bookshelf in our family room, the upstairs hallway and in our daughter’s bedroom.  It is a wonderful way to show how our children have grown and changed over the years!

In a bookshelf to the left of our family room fireplace are a collection of family photos.  As mention, some of the photos are our children’s formal portraits but others include old family photos such as childhood photos of me and my husband and also my parent’s wedding portrait.  Other family photos are more informal and were taken at family events over the years.  I love the fact that when guests come to visit they are able to see in one place in our home photos of all of our family members taken at various times in our lives.

Displayed in another room of our house, in our master bedroom are formal wedding portraits of my husband and I and these are displayed on the dresser along with childhood photos of the both of us.  I really like the idea of displaying the childhood photos and our wedding photos together because there is such a lovely contrast of the past and it is fun to see how we looked when we were younger!

As you can see, I like to surround ourselves with photos taken over the years but not all of them need to be formal portraits.  Examples of this are the informal photos taken on family vacations and trips that are displayed in the bookshelves of our home library.  Our family loves to travel to places such as national parks or historic sites but we also enjoy getting out into nature by hiking or fishing. Looking at these photos always brings back wonderful memories of fun times and interesting places spent together as a family.

For more information about displaying family photos, please check out the following post, Not Your Normal Wall Art!

Family memorabilia

Over the years I have collected several items that can be classified as family memorabilia.  The idea for displaying these pieces throughout our home is to remember special events or important times in our lives.  Here are a few examples:

Displayed in the upstairs hallway of our home is a large wedding portrait with the date of our marriage inscribed on a small gold plaque and on the mat surrounding the portrait are the signatures of our wedding guests.  To the left of this piece is another series of four photos taken on our wedding day with our families.  These two sentimental pieces commemorate that special day at the start of our lives together as husband and wife.

Two more family memorabilia pieces displayed in our home are hung on the wall above the bed in my daughter’s room.  The two framed pieces commemorate her baptism and her first birthday, two important events in her childhood.  Using an uncut mat board and some special scrapbook paper that was signed by the guests that were in attendance at those two events and then later framed in matching golden frames I created these two pieces that will hopefully be something my daughter will treasure forever as a unique childhood heirloom.

Sometimes other important influences in our lives are the places we have lived.  In the dining room of our home I have displayed two framed pieces of sheet music.  The first one is “My Kind of Town” as sung by Frank Sinatra which is often referred to as the “Chicago” song.  Chicago is a special place in my family history because my mother was born there and my parents met, married and lived there before moving to California.  The other framed sheet music is of the song “San Fernando Valley” as sung by Bing Crosby.  This is another important place to me because that is where I was born and raised and I have very fond memories of living there as a child.

For more information about displaying family memorabilia commemorating special events, please check out the following post, Not Your Normal Wall Art!

Travel Souvenirs

Our family enjoys traveling across the United States and we also have traveled to different parts of Europe to see family and friends and my husband has visited parts of Asia while he was getting his master’s degree.  All of these travel experiences have provided us with interesting opportunities to learn about our country and the world and we have thoroughly enjoyed our time together as a family visiting these places.

During these travels we have collected various items and these are displayed in the library of our home.  The bookcases are filled with interesting souvenirs, such as a weapon made from sharks teeth purchased at the Polynesian Culture Center in Hawaii, Polish dolls and a city certificate commemorating our visit to Krakow in Poland, a piece of the Berlin Wall and framed Edelweiss from a trip to Germany, two jade lions displayed with a photo from my husband’s visit to Asia and a photo of our family taken at the Kennedy Space Center displayed with a model of the Space Shuttle.  All these unusual items are displayed as reminders of wonderful trip that we have taken over the years and are also great way to start interesting conversations with guests visiting our home.

The other parts of the bookshelves are also filled with rocks, minerals and fossils that my husband has collected over the years.  This interesting hobby is highlighted in a post that he wrote recently called “The Rock Guy”.  Please click on the link to check out how he started his collection and information about the different items.

On the opposite wall in the library is another bookshelf filled with beach memorabilia that I have collected throughout the years.  Living in California our family has spent many wonderful hours at the beach walking along the shore, playing in the sand and watching the waves and some very beautiful sunsets over the Pacific Ocean.  We have collected many seashells from the beaches of Southern California and on our visits to the east coast in North Carolina and Florida.  These seashells are also displayed with family photos from those trips and decorative pieces that tell the story of our love for the beach and the oceans.

For more information and suggestions on how to display these items, please check out the following posts:  Displaying Travel Souvenirs and Beach Memorabilia

Themed Collectibles

Over the years I have collected several themed items that are displayed throughout our home and reflect my interests and hobbies.  I have several different series of collectible plates that displayed in various rooms, such as Danbury Mint National Park plates that hang above the bookshelves in our library and within the bookshelves are several plates displayed on easels, two collectible nature plates of ducks and wolves and a Native American decorative plate we bought during our southwest travels.  These collectible plates are another reminder of our family travels and our love and respect for nature and animals.  For more information about the other collectible plates displayed in our home, please check out the post Decorating with Plates.

Living in California our family has been going to Disneyland since it opened in 1955 and we have spent many wonderful times together as a family enjoying the “happiest place on earth”.  Over the years I have started a collection of Disney memorabilia including Disneyland items, Mickey Mouse, Pinocchio and Disney princess figurines and these items are displayed in a trio of glass door bookshelves in the basement of our home and reflect our family’s love for all things Disney!  For more information, please check out Disney Memorabilia Collection.

Another special collection displayed in our home is my Boyd’s Bear figurines and stuffed animals.  In the library of our home is an oak bookcase which displays some of my favorite Boyd’s Bear figurines, some of these items are changed seasonally.  Additional holiday Boyd’s Bear items are displayed in other rooms of our home.  My collection of the whimsical Boyd’s Bears items never fails to put a smile on my face and brings joy to my heart!  For more information, please check out the following posts: Displaying a Boyd’s Bear Collection Part One and Part Two.

In conclusion, decorating a home with family photographs, travel mementos, a collection of interesting books and other various decorative items is a wonderful way to reflect a family’s interests and hobbies.  For additional examples about adding decorative pieces that will add personality to a room, please check out the following Décor posts, Framing Small Items and Home Office.  In addition, please check out the Craft Section of this blog for some wonderful projects, such as Embellished Photo Frames.

Travel – Valley Forge National Historical Park, PA

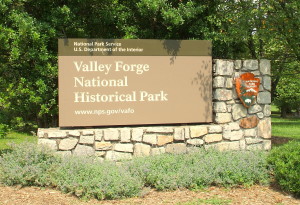
Valley Forge sign

When traveling during our summer vacations or road trips taken throughout the year we always like to stop at historical sites or interesting museums to learn about our country’s history.  Valley Forge was one of those places on our list of things to see since it was such an important event in the history of the United States during the American Revolutionary War.  While on a trip to Philadelphia, Pennsylvania in 2009, we also took a short 40 minute drive to Valley Forge which is located just 25 miles from downtown Philadelphia.  (For more information on our trip and travel suggestions, please check out the link to the post Philadelphia, PA).

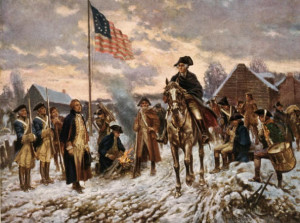
Valley Forge National Historical Park was the site of the 1777-78 winter encampment of the Continental Army which was under the command of General George Washington.  Some historians say that despite the harsh weather, limited food supplies and difficult living conditions, the Continental Army came through the severe winter with an unwavering spirit of patriotism and an increased determination to win our country’s fight for independence against the British in the Revolutionary War.

George Washington at Valley Forge

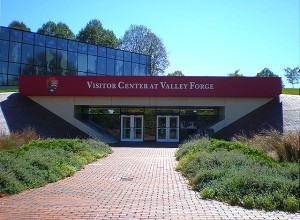
While walking around the picturesque grounds of the Valley Forge National Historical Park in the summer of 2009 it was hard to visualize and fully understand exactly what Washington’s Army went through so our first stop after arriving was the visitor center.  It is always a good idea when visiting any of our National Parks to stop at the information counter to pick up a park map and brochures and take the time to speak with a ranger for suggestions on places to visit and guided or driving tours that are available within the park.  The Valley Forge Visitor Center also has a small museum with several exhibits pertaining to the Continental Army winter encampment as well as the Revolutionary War and the culture and natural history of Valley Forge.  Before leaving the Valley Forge Visitor Center, be sure to get your National Park Passport book stamped and if you have children in your group pick up a Junior Ranger worksheet for them to earn their Junior Ranger badge at the end of your visit!

Visitor Center at Valley Forge

Below is a list of several sites to see in the Valley Forge National Historical Park –

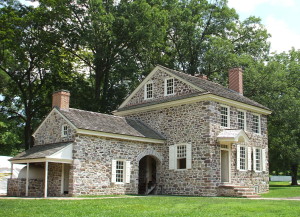
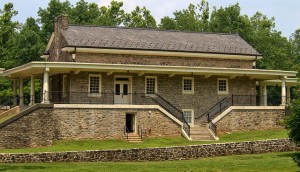
  • Washington’s headquarters – This 18thcentury stone building was used as the headquarters for General George Washington during the six months of the winter encampment of the Continental Army.  The exterior and interior of the building have been fully restored and the interior is furnished with period pieces, artifacts and exhibit items pertaining to the use of the building by Washington and his staff.

DSCF9534

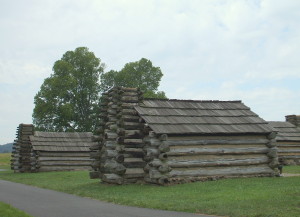
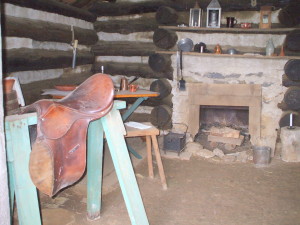
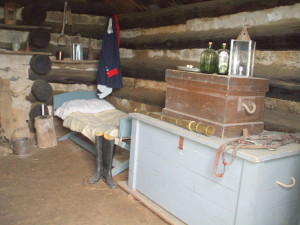
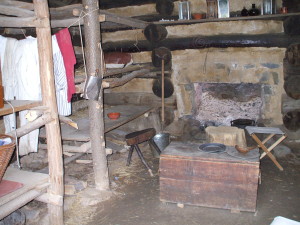
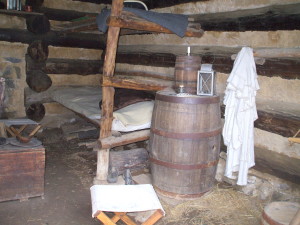
  • Soldier’s cabins – Reconstructed soldier cabins are located in several areas of the Valley Forge National Historical Park.  About two thousand cabins within the encampment were laid out in parallel rows.  In general, the cabins measured approximately 14 feet by 16 feet with a door situated on the south side to allow the sun to heat the cabin during the day.  Roofs were constructed in a variety of materials but oak shingles proved to be the best for insulation.  Wooden fireplaces were lined with 18 inches of clay to prevent a fire hazard.  The cabins housed either twelve enlisted men, six junior officers, three staff officers or one general.

Log housing for the troops 1

officer's quarters interior left    officer's quarters interior right
 

troops  quarter's interior left    troops  quarter's interior right

  • Valley Forge Train Station – The train station is located on a hilltop overlooking the Schuylkill River and construction was completed in 1913 for use by the Reading Railroad, at that time passenger rail excursions were popular with the general public.  Currently the train station is the site where guided-ranger tours of the nearby Washington Headquarters start and within the building there are several exhibits.

Valley Forge Train Station

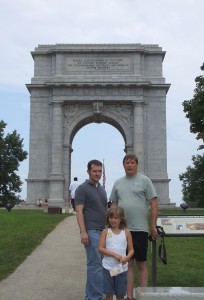
  • Valley Forge Memorial Arch – The Arch was erected in 1910 and the inscription on the front of the Arch reads, “To the officers and soldiers of the Continental Army December 19, 1777 to June 19, 1778”.  Inside the Arch are both the front and the back of the Great Seal of the United States.  There are many other inscriptions on the memorial, such as a list the names of the Generals that fought in the Revolutionary War and on the back of the memorial is a quote from George Washington which reads, “Naked and starving as they are, we cannot enough admire incomparable patience and fidelity of the soldiery”.

Memorial Arch 1

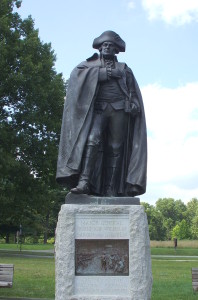
  • Baron Friedrich von Steuben statue – Within the Valley Forge National Historical Park there are many other monuments and statues.  One important statue is dedicated to the former Prussian Army Officer named Baron Steuben.  He has been credited with training the Continental Army during their winter encampment at Valley Forge into a more efficient military force.   

Stuben statue

The history of Valley Forge

The original story of Valley Forge was a very careful constructed tale told after the Revolutionary War to teach the American people about perseverance.  It recalled the suffering of the Continental Army during their winter encampment from 1777 to 1778.  With harsh weather and miserable conditions caused by inadequate clothing and limited food supplies, the soldiers were transformed during that six month period and they became strong in patriotic spirit and able to fight with renewed vigor for the cause of liberty and independence.

Traditionally as the winter months came, the normal course of military action at the time called for battles and military maneuvers to stop and the armies would withdraw into winter encampments.  In the third year of the American Revolutionary War, the British had recently captured Philadelphia and Washington decided to set up camp in Valley Forge which was a location close enough to Philadelphia to maintain pressure on the enemy yet far enough away to prevent any surprise attacks from the British troops.

As Washington’s Continental Army entered Valley Forge in mid-December of 1777 they found a vast area cleared for spring crop plantings and large open spaces used for animal pastures with nearby woods that would provide building materials for housing and timber for heating purposes during the upcoming winter months.  Washington ordered log cabins to be built to house the troops and officers from the cold weather and trenches and earthen fortifications were built for a line of defense against the British.

It has always been depicted that the Continental Army suffered unusually harsh weather conditions, but according to the records at the time the temperatures were on the average 33 degrees during that first month of the winter encampment, December 1777 to January 1778.  Supplies to the troops were also very limited because the supply wagons were delayed due to muddy roads and rising rivers that were difficult to cross due to heavy rainfall.  Despite the delays, the soldiers looked to alternative resources and began foraging for food within the area and making clothing from rags to keep them warm during the winter months while many of the soldiers lacked shoes because they were destroyed during long marches and blankets were scarce.  Eventually Washington commissioned the Continental Congress to fund the war effort and by February 1778 food, clothing and military supplies started to arrive in Valley Forge.  Sadly, most of the casualties and deaths of the soldiers was not from cold or starvation but from diseases such as influenza, typhoid and dysentery during the warmer months of March, April and May 1778.

By the time former Prussian Army Officer Baron Friedrich von Steuben arrived in the encampment in February 1778 the Continental Army was ready to become a more “professional” military force.  During the following months Steuben directly trained the army to become a more efficient military unit with improved weapon skills and marching precision.  As a result by June 1778 the Continental Army had a new confidence that would sustain them in their fight for independence from the British.

Nichelle Nichols Birthday

Hello again, it’s Jeff here to talk about Nichelle Nichols, who was born on December 28, 1932.  I, like most people, knew Nichelle from her role as Uhura in Star Trek and didn’t think much beyond that.  When Barbara asked me to write a post about Gene Roddenberry I found out through my research that after the network refused to give Nichelle a contract he kept her on at a week to week basis.  In trying to confirm this I ended up doing further research on Nichelle and became fascinated by her life story.  

Nichelle, who’s birth name is Grace Dell Nichols, was born in Robbins Illinois, originally a small town south of Chicago, but now part of the greater Chicago metro area.  The area was first proposed as a suburb of Chicago in the early 1890s and lots were sold to whites at exorbitant prices with the expectation that Chicago would grow that way after the World’s Columbian Exposition, but the city did not grow as anticipated and most of the speculators lost their investments.  In the early 1900s Henry Robbins acquired the land and began marketing it to African Americans.  The town grew and had a population of 300 by 1917 when it was officially incorporated, one of the first towns to be incorporated by African Americans and one of the few towns.  The town supported one of the few airports that allowed African American pilots.  This airport, which was destroyed by a tornado in 1933, was the model for the Tuskegee Airmen.  The town was also a hotspot for African Americans from Chicago supporting green spaces for picnics and an active nightclub scene. By 2010 the population was 5,337 with 96% of the inhabitants African American and it is one of the poorer Chicago suburbs.  This being said, for so small a town, it has produced a number of notable celebrities, including Nichelle, Dwyane Wade, Joe Montgomery, James Loving and Shaun Wiggins.

Nichelle’s was a gifted dancer who started ballet when she was 7.  When she was 14 she auditioned for the Chicago Ballet Academy.  At first the instructor refused to let her audition because “Black people can’t dance ballet.”  After her father insisted that she would be able to audition, she did and was admitted to the dance school.  During this time she also took Afro-Cuban dance lessons and started getting jobs in hotels.  She was discovered by Duke Ellington and started touring with him.  By the end of the tour she was the lead singer and her career kept growing from there.  In the mid 50’s she had earned enough money to move her extended family to Los Angeles where she could focus on her career in television, which lead to Star Trek role and her current fame.

Her role in Star Trek wasn’t what I found so interesting though.  Instead it was her commitment to being a role model that caught my eye.  After the first year of Star Trek she was ready to quit.  The network was treating her as a second class citizen and constantly downgrading her role.  The same week that she told Gene of her intentions she also attended a NAACP fund raiser.  There she met Dr. Martin Luther King who told her:

You have opened a door that must not be allowed to close. I’m sure you have taken a lot of grief, but you changed the face of television forever. You have created a character of dignity and grace and beauty and intelligence. Don’t you see that you’re not just a role model for little black children? You’re more important for people who don’t look like us. For the first time, the world sees us as we should be seen, as equals, as intelligent people–as we should be…Remember, you are not important there in spite of your color. You are important there because of your color.

This changed her mind about quitting and she stayed on the show until it was cancelled, but never stopped being an inspiration to the black community.  In the 70’s she gave a speech criticizing NASA for not selecting women and people of color to the astronaut programs.  NASA challenged her to help with the recruitment effort.  In response she created Women in Motion, a company dedicated to attracting minority candidates to the space program.  While it is hard to say the direct impact she had, the number of applicants jumped from 1,500 to 8,000 during this time and we do know she directly inspired Dr. Mae Jemison, the first black woman in space, as well as Col. Guion Bluford, Dr. Ronald McNair and Dr. Sally Ride.  She also inspired Charles Bolden who is now the Administrator of  NASA.

Finally, she is a member of the board of Governors of the National Space Society and actively works to get kids interested in Science and Technology, something I really support!  It has been a lot of fun researching Nichelle.  If you have a minute take a look at these short interview clips or check out her autobiography Beyond Uhura – Star Trek and Other Memories.  Maybe some day I will be lucky enough to meet her in person!

Here are some of her works if you don’t already have them:

Jeff Jones

Craft – Christmas Gift Card Box

If you are looking for a special way to give a Christmas gift card here is a unique idea. The Christmas Gift Card Box needs just a few supplies and easy, simple instructions to make a wonderful presentation.  Craft Note: The stickers and other items that I used for this project might not be available but don’t be discouraged, instead visit your local craft store and be inspired by the stickers and other items in the scrapbook section.

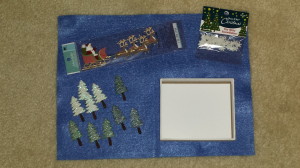
Christmas Gift Card Box – supplies

  • Small box
  • Felt, color is determined by the “scene” in the shadowbox
  • A variety of scrapbook 3-dimentional stickers and/or small plastic Christmas-themed items
  • White glue, it will work better than a glue stick on the felt and accessories

Christmas Shadowbox - supplies

Christmas Gift Card Box – instructions

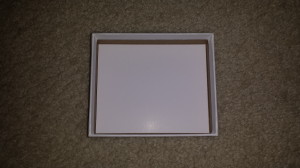
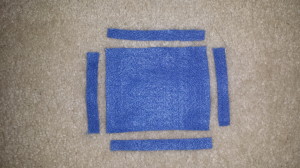
  1. Take the measurements of the inside dimensions of the bottom of the box.  Use these measurements to cut the felt into five pieces, one for the bottom and the four sides of the box.

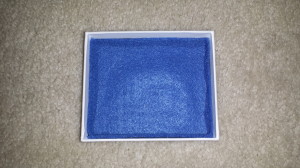
Christmas Shadowbox - bottom of box 1Christmas Shadowbox - bottom of box 22.  Glue these five pieces to the inside of the box to fully line the interior.  By lining the box it will give the shadow box a wonderful background for the stickers or other accessories.Chirstmas Shadowbox - bottom of box 3

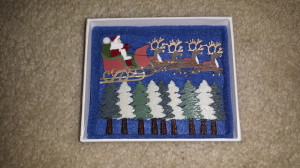
3.  The next step is where the look of the “scene” if determined by the stickers and other items available in your local craft store.  Using 3-dimensional stickers helps to create depth to the shadowbox and avoids the flatness of regular stickers.  Also check out the other sections of the craft store for small plastic Christmas items that could inspire a “scene” for the shadowbox.

Christmas Shadowbox - final

The Christmas Shadowbox gift Box is a beautiful way to present a gift card.  After the shadow box is completed, attach the gift card to the inside of the top of the box.