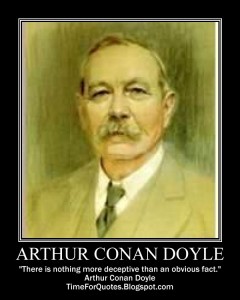
Sir Arthur Conan Doyle’s Birthday

Arthur Conan DoyleHello, it’s Jeff again.  I’m here to tell you something about the author of Sherlock Holmes.  Sir Arthur Conan Doyle was born May 22, 1859 to Mary and Charles Doyle. His full name was Arthur Ignatius Conan Doyle.   The Doyles were a prosperous family, but Arthur’s father was an alcoholic and never amounted to much and his mother was the big influence in Doyle’s life and gave him a passion for story telling.

When Arthur was nine wealthy relatives offered to pay for his education and in 1868 he was sent to Jesuit boarding school in England.  He hated the harsh punishment and bulling that he suffered in school.  While at school, he started writing his mother regularly, a habit he kept up until her death.   At school he found he had inherited his mother’s gift for storytelling and frequently told stories to the younger students.  In addition to his storytelling he also excelled in sports, particularly Cricket.

The Doyle family was in the art business, but Arthur decided he wanted to be a physician and in 1876 he went to the University of Edinburgh Medical School.  While he was a student at the university he met many soon to be famous authors including James Barrie and Robert Louis Stevenson.  He also met Dr. Joseph Bell who was “a master at observation, logic, deduction, and diagnosis”.  During this time he also starting writing short stories.  His first published work was “The Mystery of the Sasassa Valley” in 1879.   Before he graduated he took a job as a ship surgeon on the whaler called the Hope.  He greatly enjoyed that voyage and after he graduated he signed on as medical officer on the steamer Mayumba bound for Africa.  He detested Africa and resigned as soon as the ship returned to England.
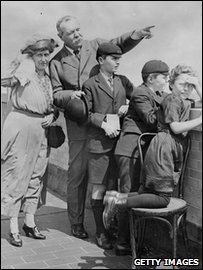
Doyle FamilyArthur married his first wife, Mary Louise, in 1885 and they had two children, Mary Louise and Arthur Alleyne Kingsley.  After the death of his first wife from tuberculosis in 1906, he married Jean Elizabeth Leckie and had three additional children:  Denis Percy Stewart, Adrian Malcom and Jean Lena Annette.

After graduating from medical school Arthur became a partner in a medical practice in Plymouth, but the partnership was difficult and extremely challenging and he soon set up his own practice in Southsea.  While waiting for his clientele to build he wrote more stories.  Initially he struggled to find someone to publish his works, but in 1886 he was able to publish “A Study in Scarlet” which introduced the world to his most memorable characters, Sherlock Holmes and Dr. Watson.  Sherlock Holmes was patterned after his former professor, Dr. Bell.  At the time, what we call forensic science was just starting to develop and the general public was amazed at Sherlock’s abilities and scientific process in solving crimes and Sherlock quickly became a world celebrity.

As the Sherlock Holmes stories became popular and Author’s medical practice started to take off he had trouble balancing being both a good doctor and satisfying his passion for writing.  After a near death experience with influenza in 1891 he decided to give up his medical practice and focus on his writing full time.

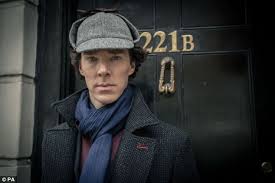
Interestingly enough, Arthur considered the Sherlock Holmes stories “commercial” and felt they took too much time away from what he liked to write.  This is why in the story “The Final Problem” he killed off the character of Sherlock.  The public outcry over the death of Sherlock Holmes was so great that he eventually brought him back in 1901 in a flashback story called “The Hound of the Baskervilles” and finally permanently in 1903 in “The Return of Sherlock Holmes”.  In 1902 King Edward VII knighted Arthur, for the contribution of his book “The Great Boor War”, but rumor has it that the King wanted to persuade Doyle to write more Sherlock Holmes stories.  In the end he wrote 56 Sherlock Holmes stories and plays.  Many movies and television series have been made about Holmes over the years, including the popular BBC series “Sherlock” staring Benedict Cumberbatch and the American television show “Elementary” with Lucy Lu.

Sherlock

Arthur was a staunch supporter of the criminal justice system and he personally investigated a number of cases which exonerated the accused and eventually led to the set up of the Court of Criminal Appeal in England which was formed in 1907.  He also ran unsuccessfully for a house seat in Central Edinburgh.

ghosts

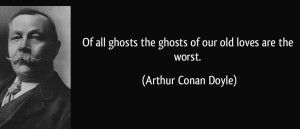
Probably the most controversial aspect of Arthur was his belief in Spiritualism the started after the death of his wife, son and several other close relatives.  He debated Joseph McCab on the claims of spiritualism at Queen’s Hall in London.  He was friends with Harry Houdini until he tried to convince Arthur that his “powers” were only tricks and illusions and became an opponent of Spiritualism.

Over the last year I have written posts for this bog about several different authors that lived at the same time and I didn’t know much about Sir Arthur Conan Doyle other the fact that he had written some of my favorite books.  After researching his life he appears to have been a truly good person who cared about his family and society in general. He died on July 7, 1930 surrounded by his family.   If you are looking for a more in depth biography, please check out the following website:  http://www.sherlockholmesonline.org/

Decor – Memorabilia Displays

Shadowboxes are a great way to display memorabilia such as travel souvenirs, vintage items, or personal heirlooms.  By having these items protected under glass you and your family, along with the visitors to your home, can enjoy looking at them while keeping these items protected from any damage.   Over the years I have made several shadowboxes that are displayed throughout our home and in this post I will show these examples.

Travel souvenirs

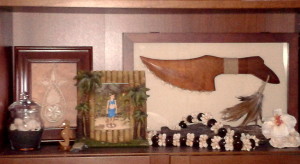
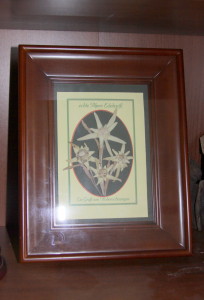
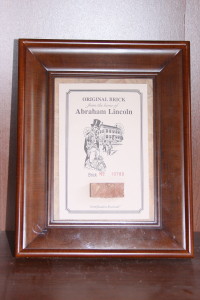
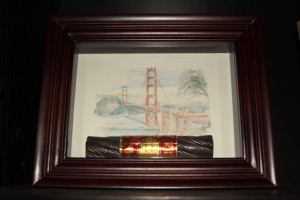
As I mentioned previously in a July 2013 Décor Post, Displaying Travel Souvenirs, in the library of our home nestled among the books are several items that we have collected over the years during our travels across the United States and other distant places such as Europe and Asia.  I have found that shadowboxes are an excellent way to display these travel souvenirs.  One example, shown below, is the shark weapon that we purchased on a visit to the Polynesian Culture Center in Hawaii.  This beautifully crafted piece is displayed in a shadowbox to be admired but the real purpose for having it behind glass is that the sharp edges of the shark teeth are enclosed to prevent anyone from handling this dangerous weapon.  Several other smaller shadowboxes are also displayed on the bookshelves and the examples are shown below and they are: a framed piece of Edelweiss purchased in a small shop near Neuschwanstein Castle in Germany, a small piece of brick from the home of Abraham Lincoln located in Springfield, IL and a piece of cable that we purchased at the San Francisco Cable Car Museum.

Hawaiian travel souvenirs
Germany travel souvenir    Springfield travel souvenir

San Fransico travel souvenir

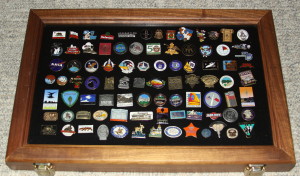
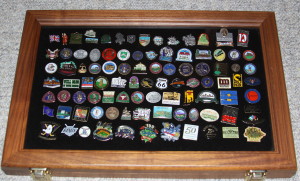
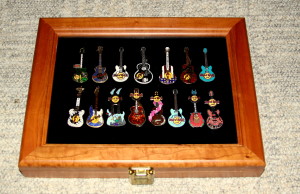
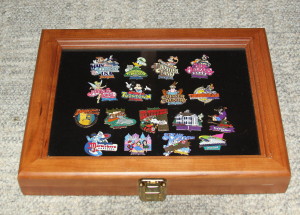
Discussed in the May 2013 Décor Post, Framing Small Items, during our family road trips, I always purchase pins as inexpensive souvenirs and over the years I have collected hundreds.  These pins, shown below, are displayed in special walnut cases with black liners.  Also shown below are additional cases, one case displays my collection of Hard Rock Café guitar pins purchased during over visits to the restaurants throughout our travels and in another case is a very small part of my collection of over two hundred Disney pins.

Pin collection 2  Pin collection 1
Pin collection 4    Pin collection 3

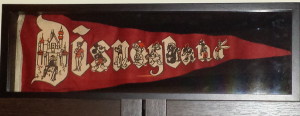
Another memorabilia display featuring travel souvenirs can be found in our basement displayed above my Disney bookshelves.  It is a vintage Disneyland pendant in a black shadowbox and is shown in the photo below.    As I mentioned previously in the April 2013 Decor Post, Disney Memorabilia Collection, I go into details about my Disney obsession and the items that I have collected over the years.

Disneyland pendant shadowbox

So, instead of storing your travel souvenirs in boxes which are hidden away from view, try displaying them in shadowboxes or special display cases which allow you to look at these items while the items are protected from dust or damage and you will be able enjoy the memories of your travels!

Vintage items

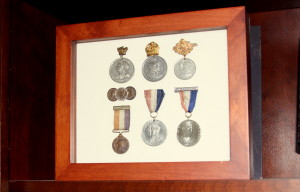
As many of you know from reading previous posts, I enjoy browsing and shopping in antique stores and on EBay.  Over the years I have purchased many vintage items and scattered around our home are several small and unusual framed items which add personality and interest to our home decorations.  In the May 2013 Décor Post, Framing Small Items, I featured a shadowbox that is on display in my home office that contains commemorative medals of the British Kings and Queens that I had purchased inexpensively on EBay.  The pins, shown below, range from Queen Victoria to the present Queen Elizabeth II and it is a wonderful way to have a little piece of interesting history.

Framed collectible 3

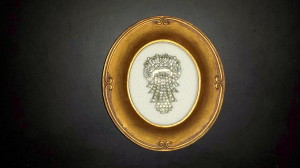
In another Décor Post, Framed Jewelry, posted previously in February 2014 features several vintage jewelry items that I also purchased while shopping in antique stores and on EBay.  These vintage jewelry pieces look wonderful displayed in small frames and add an elegant touch to our home décor.  Shown below is a beautiful crystal fur clip which is attached to a piece of white velvet and displayed in a small gold frame.

Framed Fur clip

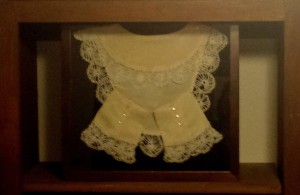
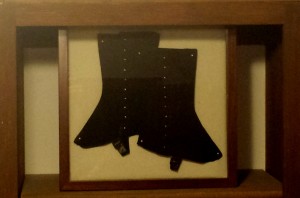
Recently, one of my Spring cleaning projects was organizing the closet in our master bedroom.  The room is a rather large walk-in closet with a counter positioned in the center and has a wonderful and convenient chute to the laundry room downstairs.  The room also has useful built-in shelving where I have displayed two shadowboxes, which are shown below.  One shadowbox has a set of antique lace collars and cuffs while the other one has a pair of antique men’s spats.  Using these antique items displayed in the closet seemed perfect and I think they look great!

Vintage women's lace collar and cuffs    Vintage men's spats

So, next time you are shopping in antique stores or on EBay think about how you can decorate with vintage items displayed in shadowboxes in your home.

Personal heirlooms

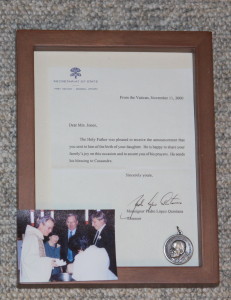
Showcasing family memorabilia or heirlooms is a wonderful way to add a personal touch to any home.  In a May 2013 Décor Post, Framing Small Items, I featured quite a unique item displayed in a shadowbox.  The items, shown in the photo below, are a personal letter and a religious medal from Pope John Paul II and included in the shadowbox is a photo taken on the day of our daughter’s baptism. This is an example of how these very personal items can be displayed to commemorate a blessed event.  For more information about this shadowbox and to read the story of how we came to receive these special items, please click on the link above. 

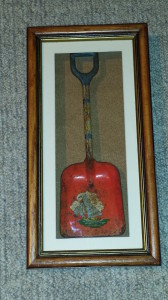
Framed collectible 1a    Childhood beach shovel

The next item of family memorabilia is an old rusty beach shovel shadowbox display, shown in the photo above.  When I was a child living in California, our family used to enjoy the occasional day at the beach.  This old metal beach shovel, found in my parent’s garage.  The trick to making this type of shadowbox is finding one that has enough depth to accommodate the shovel and then using a piece of sandpaper for the background of the shadowbox because it would look like the sand on the beach, finally the shovel was attached to the paper with hot glue.  Seeing the beach shovel shadowbox hanging in our downstairs bathroom brings back wonderful memories of Paradise Cove.

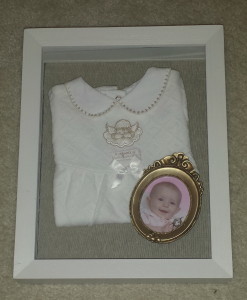
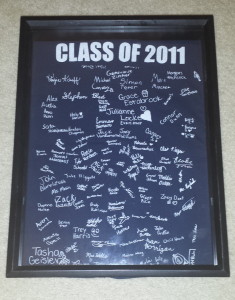
The next two examples of family memorabilia are framed items of clothing which are shown below.  The first is one of our daughter’s baby outfits and I also included a baby photo of her in a small gold frame, these items are simply displayed in a white shadowbox.  The second shadowbox which contains our daughter’s 5th grade graduation t-shirt and it is hung in her bedroom, she likes looking at the names and remembering her classmates.

Cassie shadowbox 2    Cassie shadowbox 1

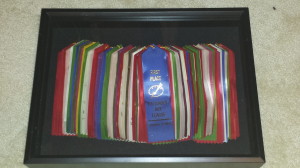
The final example of a family memorabilia shadowbox was used a few years ago when my husband’s Grandmother passed away.  She was an artist and for her funeral/memorial services and we displayed several of her paintings and other pieces of artwork and her art ribbons won at local fairs and competitions was arranged in the shadowbox and also put on display at the funeral home.  Sadly, if you are ever put in the position of making funeral arrangements or planning a funeral service, it is always a thoughtful idea to add some items that were of personal interest to the deceased.  When these items are displayed among photos of the deceased, along with the floral arrangements, it helps to “tell the story” of the person’s life.

Grandma Hodge's art ribbons

So, memorabilia shadowboxes can be used to decorate and add personality to the home.  These items can be travel souvenirs, vintage pieces and family heirlooms. For another idea using shadowboxes, please be sure to check out next week’s Craft Post, Childhood Shadowboxes, for an easy and simple craft project to use as a display in your home.

Craft – “Breakfast at Tiffany’s” frame

Breakfast at Tiffany frame - final 2

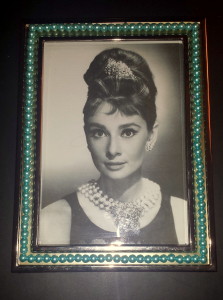
In honor of Audrey Hepburn (born: Audrey Kathleen Ruston May 4, 1929 died: January 20, 1993) I was inspired to create this picture frame using a simple silver frame that I decorated with “Tiffany” blue Swarovski pearls.  Audrey Hepburn was the famous actress that starred in the classic 1960 romantic comedy film, “Breakfast at Tiffany’s”.  (Please see the end of this post for more information about the movie)

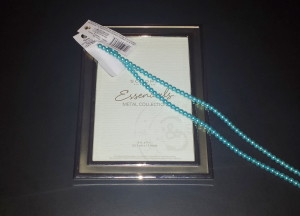
“Breakfast at Tiffany’s” frame supplies 

  • A simple silver frame (select one that has a space between the frame’s interior and exterior edges)
  • Several dozen “Tiffany” blue Swarovski pearls, the color has been associated with the famous jewelry store and is used for their sales boxes and bags.  (Craft Tip: the trick to this project is to measure the frame and calculate the amount of pearls needed to avoid running out and coming up short!)
  • Glue stick
  • Pliers

Breakfast at Tiffany frame - supplies

“Breakfast at Tiffany’s” frame instructions –

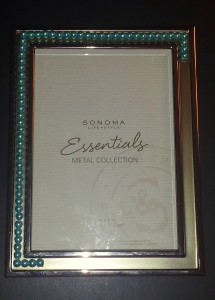
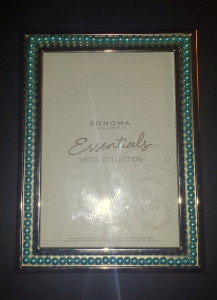
  1. Pick up each individual pearl with the pliers, be sure the prongs are placed over the pearls holes.  Then put a small amount of glue on the bottom of the pearl.
  2. While the pearl is still within the grasp of the pliers, place the pearl onto the frame in the space between the frame’s interior and exterior edges.  (Craft Tip:  Be sure to position the pearl so that the holes are lined up and hidden by each of the other pearls when placed on the frame)
    Breakfast at Tiffany frame - step 2    Breakfast at Tiffany frame - final 1
  3. In keeping with the “Breakfast at Tiffany’s” theme, to finish the project I used a photo from the movie of Audrey Hepburn as Holly Golightly.

“Breakfast at Tiffany’s” movie information and trivia

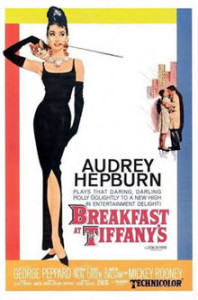
Breakfast at Tiffanys movie posterThe classic 1961 Paramount movie  which stars Audrey Hepburn and George Peppard and also features a supporting cast of Patricia Neal, Buddy Ebsen and Mickey Rooney, the movie is based on the novel written by Truman Capote.  “Breakfast at Tiffany’s” was nominated for several Academy Awards and won for Best Original Score and Best Original Song, “Moon River” with music by Henry Mancini and lyrics by Johnny Mercer.

The character of Holly Golightly was one of Audrey Hepburn’s most memorable roles.  Hepburn’s portrayal of the naive but eccentric society girl living in New York City was regarded by her to be one of her most challenging roles because she was a normally quiet and introverted person and she needed to play the character in the film as a delightfully extroverted woman.

Movie Trivia –

    • “Breakfast at Tiffany’s” premiered at Radio City Music Hall on October 5, 1961 and received wonderful reviews and became an instant hit.  Despite the movie’s success, Truman Capote was uphappy with the director, the casting and his altered storyline; he thought Marilyn Monroe should have played the lead role.  Others actresses considered for the part were Shirley MacLaine, Kim Novak and a very young Jane Fonda
    • The film was set in New York City but very little of the movie was actually filmed on location, the production company only filmed for 8 days in Manhattan.  Most of the movie was shot on the Paramount soundstages in Hollywood.
    • The world famous Tiffany & Co. store at the corner of Fifth Avenue and 57th Street located in the heart of Manhattan made an unprecedented decision to open their flagship store on a Sunday for the filming of the movie, at the time the store was normally closed on that day of the week.  On the day of filming there were over 40 armed guards and several Tiffany sales clerks in the store to prevent any thief of the expensive jewelry.
    • In regards to the famous opening scene of the movie, when the character of Holly emerges from a taxi in the early morning hours to stand in front of the Tiffany store windows while eating her breakfast Danish, people always question how the iconic scene seem to be have been filmed on a deserted Fifth Avenue.  In reality, not visible on camera, were several hundreds of onlookers watching the filming and according to Blake Edwards, the director of the film, the scene was shot in one take.
    • The film established Hepburn as a fashion icon and she looked amazingly svelte especially given that fact that at the time of filming it had been only three months since the birth of her son.  Hepburn worked closely with the designer Hubert de Givenchy to create the wardrobe for the film.  The version of the “little black dress” Hepburn wore in the film became one of the most influential fashion choices ever in movie history.  The concept of the “little black dress” proved so popular because of the movie that since that time most modern women have a similar one in their closets!
    • In 2006, Christie’s auctioned the original “little black dress” that Hepburn wore in the film and it sold for $923.000.

Celebration – Mall Scavenger Hunt Birthday Party

My teenager daughter’s birthday is this month and she wanted to dress-up with her girlfriends and have a limo take them to a fancy dinner.  Well, my husband and I decided to add a little fun and have the girls make a quick trip to our local mall for a scavenger hunt before dinner at a restaurant nearby.  After the party, our daughter said it was the best birthday she had ever had!  My husband and I actually enjoyed this party, too.  In this post, I will discuss what it takes to have a scavenger hunt party at the mall!!

Planning a Mall Scavenger Hunt

The basic idea for a scavenger hunt at the mall is really very simple and it was the perfect birthday party to have for our teenaged daughter and her group of friends.  The 10 girls that attended the party were divided into 5 teams, two girls to each team.  (Party Tip:  I would not recommend this party idea for girls that are younger and need to be supervised by their parents)

To start the process of planning the party, we took a quick trip to our local mall to gather ideas and suggestions for the scavenger hunt.  Our first stop after arriving at the mall was the customer service desk which quickly referred us to the mall administration office. This was a good idea because it is important to confirm the rules and regulations of the mall and another reason is that the mall security team should be notified of the party is case there are any problems or concerns.  (Party Tip:  When we were writing the scavenger hunt list, we made sure to include a friendly reminder to the girls about having good manners and to behave properly while participating in the scavenger hunt)

Another great reason for stopping by the mall office is to inquire about any free gift items that were available for the scavenger hunt participates.  At our local mall, we were able to get a free “leather” shopping bag for each of the girls.  This worked out wonderful for our party because each team had a bag to put all the items that they were gathering during the game.  (Party Tip: My suggestion is when planning a mall scavenger hunt is to visit the mall office to inquiry about your local mall’s policies and procedures for parties and maybe if you are lucky you can score some free items, it doesn’t hurt to ask … you never know what they will do for you!)

The Mall Scavenger Hunt List

Our scavenger hunt was divided into three different sections and each section had a list of several different tasks:

  1. The “find” section – a list of items that needed to be found
  2. The “photo” section – a list of photos that needed to be taken
  3. The “quiz” section – a list of questions that needed to be answered

(For some specific items or tasks that we used for each section, please see the scavenger hunt list that we used for our daughter’s party at the end of this post)

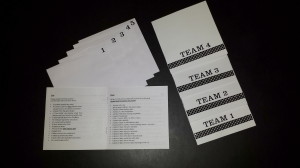
Once we determined the tasks for each section, we printed out the scavenger hunt list for each team.  Shown in the photo below is our printed scavenger hunt list for my daughter’s party.  We decided to make it into a booklet form instead of one printed page.  I bought some inexpensive blank cards and envelopes at my local craft store, printed out the rules and scavenger hunt list in booklet form and stapled it to the inside of the blank card.  Next, I decorated the front of the card with strips of black crystals and added self-adhesive glitter stickers to identify the different teams.

Mall Scavenger Hunt List

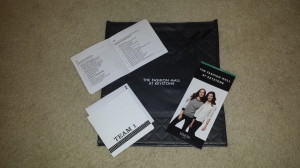
Also, in the photo shown below, is the scavenger hunt package that each team was given before the game started.  As you can see, the black “leather” bag that the mall provided had a pocket which was the perfect place to store the scavenger hunt list and a map of the mall.  We also proved two pens for each team in case they lost one they would have a spare.  (Party Tip:  If your mall doesn’t provide any shopping bags don’t worry because you can purchase inexpensive gift bags from your local craft store!)

Mall Scavenger Hunt team packet

Before sending the girls out into the mall, we met inside at the mall entrance and quickly went over the rules and confirm the finish line and designated time that the game needed to be completed.  We allowed an hour and a half for the scavenger hunt, we expected the girls to take longer but most teams were done within an hour because our  scavenger hunt list was fairly easy.  (Party Tip:  Each mall has different stores and your scavenger hunt list should be altered to fit with those stores within your mall)

Here is a sample of our Mall Scavenger Hunt list:

Rules

  • The Mall Scavenger Hunt will be a timed one hour event.  The start time is 6:00 P.M. and the finish time is 7:30 p.m.  Finish line is the same mall entrance as the start of game.
  • The game is divided into three sections: Find, Photo, and Quiz.  Please try to complete each section. Each task is worth one point.
  • Bonus points can also be earned and are noted in the game.
  • Points are given to teams that complete the game and return to the finish line sooner but points are also taken away for teams that arrive after the designated time.
  • Please be polite to other shoppers and store staff while participating in the game.
  • Please be safe and follow the rules of the mall, no running, blocking store entrances, etc.
  • The team with the most points earned at the end of the game will win the grand prize!
  • Call us if there are any questions about the game or other concerns or problems.

Find

Please collect the following items:  (use the black tote to store the items)

  • A perfume sample (any store)
  • A business card from two different stores (usually found on the check-out counter)
  • A napkin from Elevation Burger
  • A “Paint & Play” vinyl sampler  sheet from Sephora with your favorite nail polish color
  • A small sample spoon from PinkBerry
  • An employee application (any store)
  • An unused ketchup packet
  • A store catalog (any store)
  • A Starbucks straw
  • A found receipt with today’s date
  • A plastic fork
  • A take-out menu (any restaurant)
  • A make-up sample (any store)
  • A store credit card application (any store)
  • An unused sugar packet

Photo

Using your cell phone, please take a photo of the following: (please save the photos for proof!!)

  • A photo with a car (bonus point if sitting in the driver’s seat)
  • A photo of team wearing hats
  • A photo of  a fire extinguisher
  • A photo of the team wearing sunglasses
  • A photo of a sale sign (10% = 1 point , 20% = 2, 30% = 3, etc.)
  • A photo with a butterfly
  • A photo of team in one bathroom stall (bonus point for a photo of team washing hands in one sink)
  • A photo of team riding the escalator
  • A photo of team wearing tiaras
  • A photo of team trying on red shoes
  • A photo of team reading a book
  • A photo in front of the team’s favorite store
  • A photo of team cuddling a teddy bear
  • A photo of team with a cute guy
  • A photo of team in front of store that begins with a C

Quiz

  • Please answer each of the following questions: What is the flavor of the month at Pinkberry?
  • What is the name of a candy store in the mall?
  • In the women’s bathroom near the food court, how many bathroom stalls are there? (Bonus points – how many children sized sinks?)
  • What is the name of the store that is opening soon in the mall?
  • What is the store with a compass direction in the name?
  • What is the cheapest item you can buy at Chipotle?
  • How many colors of a Tesla car are available?
  • What store in the mall that is named after a fruit?
  • Name an optional Elevation burger topping that starts with the letter “J”.
  • What store has a color in the name?

Thanks for playing the game!  When every task is completed, please return to the same mall entrance as the start of game.

For more themed ideas and additional information on children’s birthday parties, please click on the following links – Children’s Birthday Parites Part One and Part Two.

Decor – Elegant Easter Eggs

20140418_191001

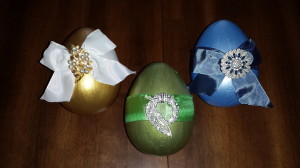
Inspired by this month’s craft project, Elegant Easter Eggs, I decide to make several larger eggs to add to my annual Spring decorations for this year.  These larger Elegant Easter Eggs look wonderful displayed in the family room bookshelves of our home.  I made three different ones using oversized paper-mâché eggs tied with beautiful ribbons and then I attached lovely pieces of jewelry to add some elegant sparkle.  The jewelry items that I used were purchased inexpensively on Ebay, but maybe you have a wonderful heirloom broach or pin from your mother, grandmother or other special relative that could be used for a special sentimental touch.  The jewelry that is selected, paint and ribbon can be customized to incorporate the colors and design style of any home.  The Easter Eggs can also be made to give as a wonderful gift for family and friends or maybe a hostess gift when visiting during the Easter season and another suggestion would be to possibly give one as a teacher’s present before Spring Break.

The first Elegant Easter Egg I made was painted with a beautiful gold metallic color. (Décor Art paint called Glorious Gold)  I found 2” wide ribbon at my local craft store in an ivory color and then I wrapped the ribbon around the egg and tied a bow.  Next, I attached a gold and pearl pin that I purchased on Ebay as part of a vintage 1950s parure set that included a necklace, a bracelet and earrings.

The second one that I made was painted with a pretty green metallic color. (Folk Art paint called Metallic Peridot)  I wrapped a 2” wide green ribbon which matched the color of the paint and then I laced the ribbon through a beautiful crystal pin that I also purchased on Ebay to finish the egg with an elegant touch.

The third one was painted with a lovely blue pearl color. (Martha Stewart paint called Glazing Ball)  I found ribbon at my local craft store that matched the color of the paint and then I wrapped the ribbon around the egg and tied a bow.  Next, I attached a crystal and blue round pin that I also purchased on Ebay to complete the craft project.

For more Easter egg decoration ideas, please check out two previous craft posts.  In the first post I discussed how our way of decorating Easter eggs has changed over the years into a more elegant style since our children are now older.  Instead of the mess of coloring eggs, we now decorate our eggs with crystal and pearl stickers.  For more information on this easy craft project from last year, please click on the link to Jeweled Easter Eggs.

Another craft project posted this month, shows three different styles of smaller Elegant Easter Eggs, click on the link to view the photos.  In the post I have included supply lists and easy instructions.  These smaller eggs can be used for display, Easter luncheon or dinner table accessories or party favors and would also make wonderful gifts for family or friends.