Craft – Fragrant Floral Sachets

Floral sachets

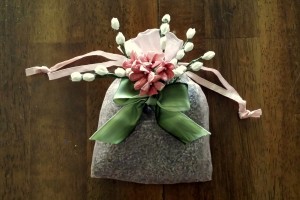
Here is an easy craft project that can be made for the upcoming spring season.  After a very harsh winter with heavy snowfall and freezing temperatures here in the Midwest and other parts of the country, I know that I am looking forward to more mild weather and the beauty of the spring flowers.  These floral sachets are a perfect way to get in the mood and can be made in an endless variety of colors to match any décor, just select a sachet bag and decorate it with matching or contrasting colors of flowers and ribbons.

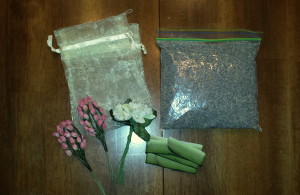
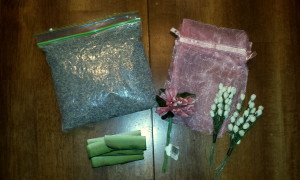
Floral Sachets – supplies

  • Sachet bags (I used bags that measured 5 inches by 6½  inches)
  • Loose lavender buds (other fragrant dried flowers can also be used)
  • Full bloom small flowers, several stems
  • Bud flowers, several stems
  • Ribbon (I used one inch wide variegated green ribbon)
  • Hot glue gun and glue sticks

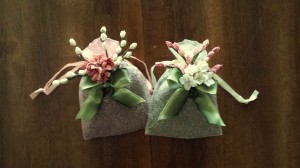
Floral sachet 1 - supplies    Floral sachet 2 - supplies

Floral sachets – instructions

  1. Fill the sachet bags with lavender; leave some room at the top of the bag so it can close with the drawstring.
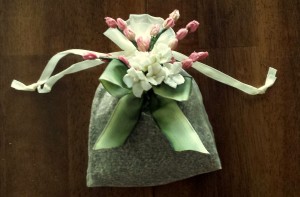
  2. Arrange small full flowers and buds together and tie the bunch together with ribbon, trim the excess flower and bud stems, cut the ribbon to a shorter length and angle the ends for a finished look.
  3. Hot glue the ribbon to the sachet.

Floral sachet 1 - finished    Floral sachet 2 - finished

There are so many uses for these floral sachets and listed below are a few ideas:

  • The floral sachets are a wonderful way to add a subtle fragrance when they are placed in the linen closet with the sheets and towels.
  • Tuck a sachet into a lingerie drawer to add a lovely scent to your “unmentionables”!
  • The sachets also make wonderful gifts to give as presents to family or friends (just a reminder that Mother’s Day is coming up in May!)
  • Add one of the floral sachets to the inside of a gift box when wrapping a gift of clothing.  First lay the tissue in the box, set the item of clothing on top and fold the tissue over.  Then, lay the sachet on top of the tissue and close the box to finish gift wrapping the present.
  • The sachet can also be used as a decorative element on the outside of a gift box and you can coordinate the colors of the sachet to match any gift wrapping paper.
  • Add a floral sachet to a car interior, place one under a seat or, since the sachets are so pretty, place one where it can be seen.

Special Warning:  Please be careful when using the floral sachets for display and keep them out of reach of small children and animals that can eat or destroy the contents.

Craft – Mardi Gras Masks

This craft project is inspired by the annual Mardi Gras celebration in New Orleans, which is a popular cultural event that seems to be increasing in attendance every year.  These masks can be worn at a Mardi Gras themed party or would the perfect accessory for a Halloween costume party.  In this post, I will show two different masks craft projects which include a list of supplies and instructions.

(Special Note:  “Fat Tuesday” will be March 4, 2014.  For information about the origins and traditions of the Mardi Gras celebration, please check out the history of Mardi Gras section at the end of this post)

Mask #1

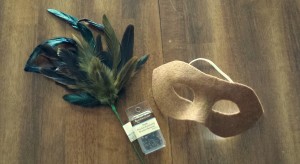
Supplies –

  • paper mask
  • brown felt
  • glue stick
  • glue gun and glue sticks
  • scissors
  • feathers
  • brads

Mask 1 - supplies

 Instructions –

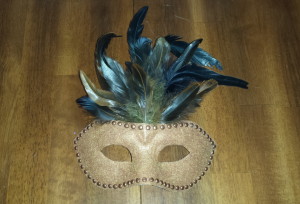
  1. Apply the felt to the front of the mask.  Start by covering a small area on one side of the mask with glue, lay the felt flat on of the mask, moving from one side to the other, smoothing any bumps along the way.  Craft note: Be sure to leave a section at the top of the mask unglued in order to add the feathers.
  2. Trim the excess felt, cutting as close to the edge of the mask as possible.  Next, cut the eye openings.  Craft Note: The trick for cutting the felt is to use very sharp scissors.
  3. Then, working slowly around the mask, carefully hot glue the brads to the edge of the mask.
  4. At the top center of the mask, using a small amount of glue attach several feathers between the layer of the mask and the felt.  Once the feathers are arranged be sure to seal the area closed by gluing the felt over the feathers.

Mask 1 - finished

Mask #2

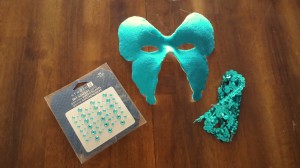
Supplies –

  • paper mask
  • blue felt
  • glue stick
  • scissors
  • blue sequins
  • self-adhesive flat-back blue crystals

Mask 3 - supplies

Instructions –

  1. Apply the felt to the front of the mask.  Start by covering a small area on one side of the mask with glue, lay the felt flat on of the mask, moving from one side to the other while smoothing any bumps along the way.  Craft note: Be sure to leave a section at the top of the mask unglued.
  2. Trim the excess felt, cutting as close to the edge of the mask as possible.  Next, cut the eye openings.  Craft Note: The trick for cutting the felt is to use very sharp scissors.
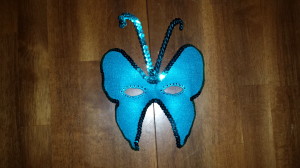
  3. Then, working slowly around the mask, carefully glue the blue sequins to edge of the mask, slightly overlapping them.
  4. At the top center of the mask, using a small amount of glue attach two butterfly antennas made from blue sequins between the layer of the mask and the felt.  Be sure to seal the area closed by gluing the felt over the antennas.

Mask 3 - finished

A brief history of the Mardi Gras

The celebration of Mardi Gras dates back centuries with origins in the pagan spring and fertility rites.  During ancient Roman times the Christians incorporated many of those pagan traditions into their own celebration preceding the season of Lent.  Lent is the 40 days between Ash Wednesday and Easter Sunday and it is a time of religious penance and fasting.  Traditionally, the week before Lent is spent indulging in food and drink with the culmination being the day before Ash Wednesday which became known as “Fat Tuesday”.  Over following centuries, the celebration spread to other parts of Europe in predominately Catholic countries.

Some historians believe the first American celebration of Mardi Gras (the French word for “Fat Tuesday”) took place in 1699 when two French explorers named Iberville and Bienville arrived in the New World.  The French settlement of New Orleans began celebrating the holiday of Mardi Gras with masked balls, lavish dinners and street parties.  For a brief period of time when the Spanish took control of New Orleans the celebrations were prohibited and strictly enforced until Louisiana came under the control of the United States and eventually this part of the country became a state in 1812.

The first officially documented New Orleans Mardi Gras celebration took place in 1837.  Then, in 1857 a secret society of prominent businessman called the Mistick Krewe of Comus organized a Mardi Gras torch-lit procession through the streets with marching bands and decorated floats which was followed by a grand ball for the krewe members and their guests and this set the tradition for all the future Mardi Gras celebrations in the city of New Orleans.

Almost from the start of the Mardi Gras celebrations in New Orleans during the late 1800s, different secret social organizations or krewes were responsible for planning their own parades and balls.  Originally, the krewes had restrictive membership policies but currently in order to get a parade permit all New Orleans krewes must sign affidavits agreeing not to discriminate against new members.  Unfortunately, some of the older more established krewes continue to allow new members by “invitiation only”.  Each krewe takes their names from mythological characters and there are dozens of krewes with names such as Rex, Bacchus, Knights of Babylon, Knights of King Arthur, Corps de Napoleon and the Zulu Social Aid.

In 1872, the Russian Grand Duke Alexis Romanoff visited New Orleans and he inspired the colors now traditionally associated with the Mardi Gras celebration.  The members of the Rex Krewe choose the colors for their symbolic meaning: purple for justice, green for faith and gold for power.  During the Mardi Gras season these colors can be seen in a variety of decorations such as the traditional Mardi Gras “throws”.  Throws are items that krewe members riding the parade floats will toss into the crowds.  The most common throws are strings of colorful beads or doubloons which are aluminum or wood coins usually imprinted with the krewe logo.


Celebration – The Academy Awards

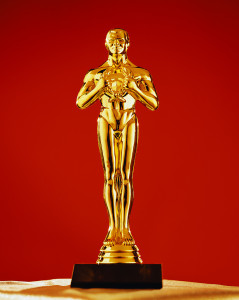
Gold TrophyOn March 2, 2014, the 86th Academy Awards will be held at the Dolby Theatre in Los Angeles, California.  This annual ceremony honors the outstanding achievements in the film industry and the top awards include Best Picture, Best Director, Best Actor and Best Actress.  It is one of the most exciting nights in Hollywood and it seems like everyone is watching the show to see if their favorite movie, actor or actress wins the coveted Oscar but most importantly everyone loves to see what the stars are wearing on the famous red carpet! 

In 1927, the Academy of Motion Picture Arts and Sciences (AMPAS) was established by Louis B. Mayer along with Douglas FairbanksSid Grauman, Mary Pickford and Joseph Schenck.  At the time, Mayer owned Louis B. Mayer Pictures which would later become part of one of Hollywood’s major studios, Metro-Goldwyn-Mayer (MGM).  The idea behind the creation of the Academy Awards ceremony was to unite the five creative services of the film industry (actors, directors, producers, writers and technicians) by gathering them together and acknowledging the best achievements for the year in those different categories.

The first Academy Awards ceremony took place on May 16, 1929 during a private AMPAS dinner held at the Hollywood Roosevelt Hotel in Los Angeles, CA.  The dinner was attended by 270 people and during the brief ceremony the awards were given for outstanding achievements for the films of 1927 and 1928 in twelve categories.  Douglas Fairbanks, the president of the AMPAS, announced the following winners: “Wings” for Best Picture, Emil Jannings for Best Actor and Janet Gaynor for Best Actress.  Two special awards were also given that evening to Charlie Chaplin who was nominated for multiple awards including Best Actor, Best Writer and Best Director for “The Circus”.  The other special award was given to Warner Brothers Studios for their major contribution to the film industry of the first talking picture, “The Jazz Singer”.
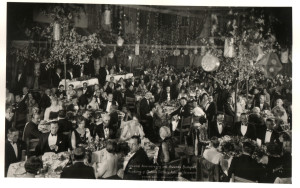
1929 Academy Awards

There have been many changes to the Academy Awards selection process over the years.  For the first four Academy Awards the winners received acknowledgement for all their work done during the specified time period but since 1933 the nominees were selected for their work in only a single film.  Another change concerned the way the winners were announcement to the press and public.  For the first Academy Awards, the winners were notified three months prior to the ceremony, so there was very little surprise to the event.  Then, during the next 10 years the winners names were withheld from the press until 11 PM the night of the ceremony.  In 1941, when the names of the winners were leaked by the Los Angeles Times, the process changed yet again and the winners names for each category were sealed in envelopes and not revealed until the actual ceremony which added to the anticipation and the drama of the event.  Still another change to the Academy Awards was the eligibility period, for the first six ceremonies the time period spanned two consecutive calendar years and then starting in 1935 the time period changed to January 1 to December 31 of a single year with the winners being announced at the ceremony held a few months later. 

The Academy of Motion Picture Arts and Sciences currently has a membership of over 6,000.  The membership is divided into several different branches representing all the professions involved in film production.  Members from each branch vote to determine the nominees in their categories, such as actors nominate actors, etc.  All members are eligible to choose the best picture nominees.  Once the final nominations are made all the voting members vote for the winners in their specific categories.  The animated short film, live action short film, documentary feature, documentary short and foreign-language film are voted by all members attending special screenings. 

The road to the Academy Awards starts with the nomination process.  The nomination ballots are mailed to members in December and must be returned by the specified date, usually two weeks later.  The ballots are returned directly to PricewterhouseCoopers which is the accounting firm in charge of tabulating the votes. Then the final nominees are announced in January and the voting process starts over again.  Once the final ballots are return to the accounting firm they are counted to determine the winners in each of the categories.  The results are kept secret and only two of the partners of PricewaterhouseCoopers know the winner until the sealed envelopes are opened during the Academy Awards ceremony. 

The first Academy Awards dinner was a private event so the press and the public did not have access to the ceremony but it received such interest that a local Los Angeles radio station decided to broadcast a live one hour show that continued annually for several years.  The ceremony continued as a dinner event until 1942 when the meal was completely omitted and the event was moved to a more formal setting in a theater.  Then in 1953, the Academy Awards was televised allowing millions to see the ceremony for the first time.  In 1966 the ceremony began to broadcast in color and in 1969 the show started broadcasting internationally and currently is seen in over 200 countries.  In 1999, the day of the week that the ceremony was held changed from Monday to Sunday nights as a way to make the broadcast available for even more viewers.  For more than 60 years the Academy Awards have been held in late March or early April usually six weeks after the announcement of the nominees.  Then in 2004, the decision was made to move the ceremony to an earlier time in the year to late February or early March as a way to shorten the intense and competitive lobbying and ad campaigns by the film studios during the time before the actual ceremony. 
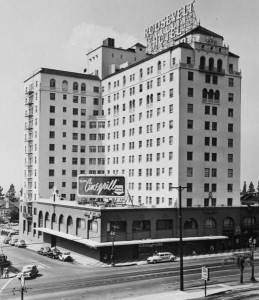
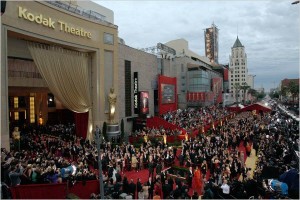
Roosevelt HotelThe venue where the Academy Awards ceremony has taken place has also changed numerous times over the years.  As mentioned previously the first ceremony took place at the Hollywood Roosevelt Hotel in 1929.  After that first year the venue alternated between the Ambassador Hotel and the Biltmore Hotel in Los Angeles during the years 1930 to 1943.  Then from 1944 to 1946 the awards ceremony was held at the Grauman’s Chinese Theater in Hollywood, followed by the Shrine Auditorium in Los Angeles from 1947 to 1948.  For one year in 1949 the ceremony took place at the Academy’s headquarters in Hollywood. Then, once again the venue changed to the Pantages Theatre and the awards ceremony took place there from 1953 to 1957 while it was televised simultaneously with an additional location in New York City. In 1961, the Academy Awards ceremony moved to the Santa Monica Civic Auditorium followed by another move of venue in 1969 to the Dorothy Chandler Pavilion at the Los Angeles Music Center.  Finally in 2002, the award ceremony found a permanent venue at the Kodak Theatre in Hollywood but the name of the building changed several times until 2012 when it was renamed the Dolby Theatre.   
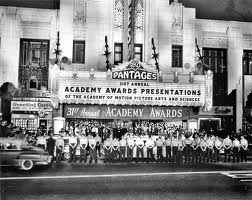
Pantages Theatre    Kodak Theatre - red carpet   

Academy Awards Trivia

  • Three movies have tied for being awarded the most Oscars with 11 each – “Ben Hur” (1959), “Titanic” (1997) and “Lord of the Rings: Return of the King” (2003).
  • Two movies have tied for the most Oscar nominations with 14 each – “All About Eve” (1951) and “Titanic”  (1997)
  • The youngest person to receive an Oscar was Shirley Temple; she was 5 years old when she received her honorary Oscar in 1934.
  • The youngest actress to win an Oscar was Tatum O’Neal; she was 10 years old when she won the Best Supporting Actress for her performance in “Paper Moon” in 1974. 
  • The oldest person to win an Oscar was Christopher Plummer; he was 82 years old when he won the Best Supporting Actor for his performance in “Beginners” in 2012.
  • The oldest person to win an Oscar for Best Actor was Henry Fonda; he was 76 when he won for his performance in “On Golden Pond” in 1982.
  • The oldest person to be nominated for an Oscar was Gloria Stewart who was 87 years old for her performance as the older Rose in “Titanic” in 1997.
  • The actor with the most Best Actor awards is Daniel Day-Lewis; he won three Oscars for his performances in “My Left Foot” (1989), “There Will Be Blood” (2007), and most recently “Lincoln” (2012).
  • The actress with the most Best Actress awards is Katherine Hepburn; she won four Oscars for her performances in “Morning Glory” (1932), “Guess Who’s Coming to Dinner” (1967), “The Lion in Winter”  (1968) and “On Golden Pond” (1981).
  • The actor with the most Oscar nominations is Jack Nicholson who was nominated 12 times.  He won three times – twice for Best Actor for his performances in “One Flew Over the Cuckoo’s Nest” (1975), “As Good As It Gets” (1997 ), and once for Best Supporting Actor for his performance in “Terms of Endearment” (1983).
  • The actress with the most Oscar nominations is Meryl Streep who was nominated 18 times.  She won three times – twice for Best Actor for her performances in “Sophie’s Choice” (1982), “The Iron Lady” (2011) and once for Best Supporting Actress for her performance in “Kramer vs Kramer” (1979).
  • The director with the most Oscars is John Ford; he won for “The Informer” (1935), Grapes of Wrath” (1939), “How Green Was My Valley” (1941) and “The Quiet Man’ (1951).
  • The person awarded the most Oscars was Walt Disney, he won 26 Academy Awards during his lifetime – 22 Oscars and 4 honorary ones.  He also received an astounding 64 Oscar nominations.
  • The Oscar statuette is made of gold plated britannium sitting on a black metal base and weighs 8.5 pounds and is 13.5 inches tall, the statuette is an Art Deco design depicting a knight holding a crusader’s sword standing on a reel of film with five spokes.  The five spokes are symbolic to represent the original branches of the Academy – actors, directors, producers, writers and technicians.
  • The original Oscar mold was cast in 1918 by the C.W. Shumway & Sons Foundry in Batavia, Illinois.  Since 1983, the Oscars have been made by the R.S. Owens & Company in Chicago, Illinois. 
  • During World War II, the statuettes were made of plaster in support of the armed services which were in desperate need of metal materials for guns and ammunitions.  Later, after the war the statuettes were replaced for the normal gold ones.
  • There are several stories as to how the Oscar statuette received its name.  One story dates to 1931 when Margaret Herrick, the Academy librarian, remarked that the statuette looked like her Uncle Oscar Pierce.  Another story is credited to Bette Davis who named her award Oscar after her first husband the band leader Harmon Oscar Nelson.  The award was officially named “Oscar” by the Academy in 1939.           
  • Since 1950, the Oscar statuettes that is awarded is legally the property of the Academy and the rules state that the winner or their heirs may not sell the statuette without first offering to sell the statuette back to the Academy for $1.  If the winner refuses to agree to this then the Academy will keep the statuette.  Of course this rule has been questioned most recently as 2004 when the heirs of Orson Welles took the matter to court and won the case because the Oscar was originally awarded to Welles in 1941 prior to the rule.  Subsequently, the Best Original Screenplay for “Citizen Kane” was sold in December 2011 at auction for $861,542.     

Decor – Decorating a China Cabinet

There is one item in a house that we normally do not think of as a decorative piece of furniture; it is the dining room china cabinet.  Most people would think the only function of a china cabinet is to store their fine china dinnerware, crystal glasses or silver serving pieces when they are not being used for a formal luncheon or dinner in the dining room.  In this post I am going to show how I display the items in our china cabinet and also how I change some of the decorative items seasonally throughout the year for many different holiday styles.

Decorating a china cabinet

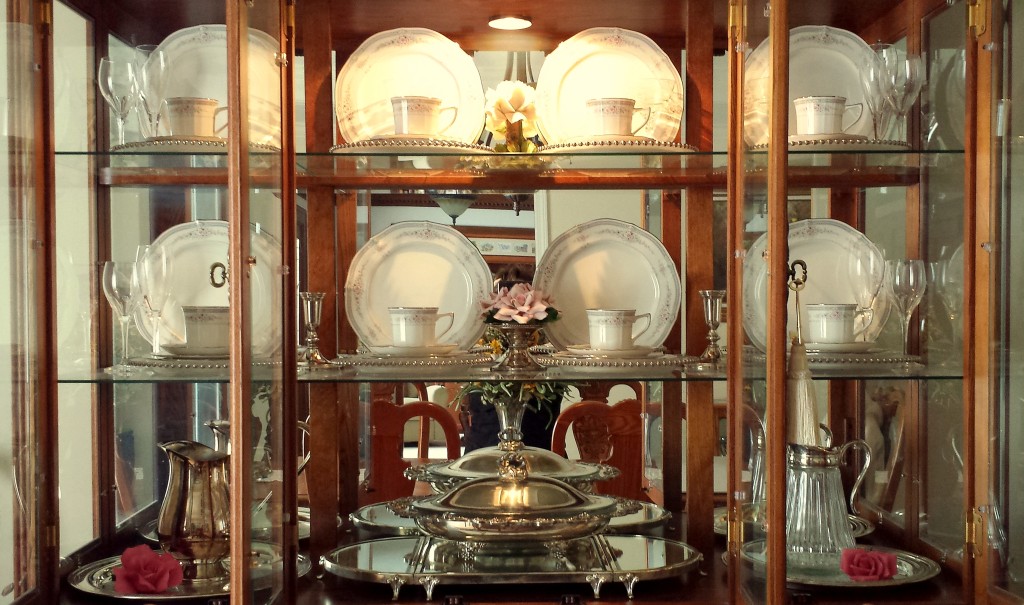
Shown below is a photo of how I have decorated our china cabinet and this is how it looks during most of the year and I am sure it looks a lot like a typical china cabinet display.  Inside on the top two shelves of the china cabinet I have displayed pieces from our Noritake Rothschild china; each of the eight place settings has a dinner plate, luncheon plate, salad or dessert plate, soup bowl and cup/saucer.  The china is very special to me because it was a wedding gift from my mother.  To add some interest to the cabinet I have displayed the dinner plates on edge so the delicate floral pattern of the plate is shown, there is a groove on the glass shelf to prevent the plates from moving.  I also have added eight glass and silver plate chargers that are displayed beneath each of the stacked place settings.

China Cabinet display

Displayed with the china are four sets of Tiffany crystal glasses that were a wedding present from a good friend, each set has a champagne glass and a wine glass.  On the top shelf I have displayed two vintage crystal champagne glasses that were given to me by my mother.  I have a very sentimental idea that when my children get married I will loan them the set as the “something old” from their maternal grandparents and it can be used as their wedding “toasting glasses”. (Unfortunately, in the photo above the bright light shining on the top shelf does not allow the vintage glasses to be seen)

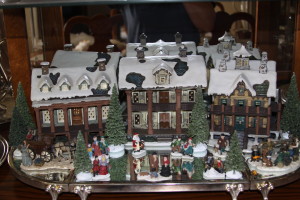
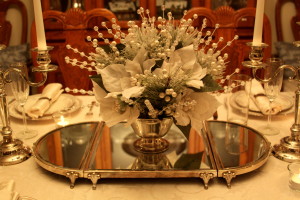
Inside the china cabinet I have also displayed several silver serving pieces.  On the second shelf there are two small silver candlesticks.  On the bottom shelf there are two round silver serving trays and placed on top on the left is a silver pitcher and on the right is a silver and glass pitcher.  In the middle of the bottom shelf there is a mirrored silver stand that is made in three sections, one square piece and two half rounded pieces.  I really like the versatility of stand since I can displayed the three pieces together for one long surface or separately, the square piece can be used as one stand or the two half pieces can be joined together to form a round stand.  During most of the year I displayed a silver oval-shaped covered serving piece on the top of the silver stand using all three pieces.  Shown below are two photos of how I have used the mirrored silver stand in other displays.  The photo on the right shows the stand used during the fall/winter season, I have displayed a set of three Currier and Ives porcelain house complete with small pine trees and several figurines.  The photo on the left shows the stand when it was used a couple of years ago on the dining room table as part of a New Year’s Party buffet, displayed on top of the stand is a beautiful floral arrangement of white poinsettias and crystal sprays in a silver bowl.  (For more information and photos about the other decorations for the party, please check out the Décor post New Year’s Party decorations)

2012 Christmas Currier and Ives 1a    New Year's Eve Dinner centerpeice

The last decorative items that are displayed in the china cabinet are several Napoleon Capodimonte porcelain rose figurines.  On the top shelf is a Napoleon white porcelain rose figurine which I had given to my mother as a birthday present many years ago because white roses were her favorite flower.  When she died recently the piece came back to me and it is displayed near my mother’s vintage glasses.  On the second shelf I have displayed another Napoleon porcelain rose figurine, the cluster of roses are a beautiful pale pink and the figurine is set on a small silver candleholder which I’ve used as a stand.  On the bottom shelf of the china cabinet I have displayed two more Napoleon porcelain rose figurines, these two figurines are a lovely deep shade of pink roses with stems and they are placed on top of the round silver trays on the left and right.

Seasonal china cabinet decorations

When decorating a china cabinet for the different holidays you will want to take into consideration that it is already filled with china, crystal and silver pieces so select just a few simple but elegant decorative seasonal items the compliment the colors of the china.  I am lucky because the Nortitake Rothschild pattern of my china is very neutral in color and the season items that I use blend very well with the other items already on display.

Spring/Easter –

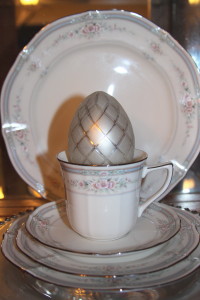
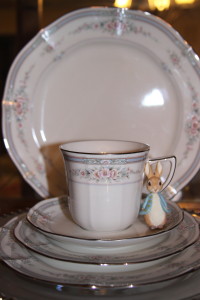
Several years ago I found four large silver and white glass eggs in a local retail store and for the Easter holiday I set the eggs inside four of the Noritake china tea cups which sit atop the stacked china place settings.  I also have collected a Hallmark series of Peter Rabbit themed ornaments over the years and I display these around the china cabinet resting against some of the teacups.  I think these Easter decorations add the perfect touch to decorating the china cabinet for the season.

2013 Easter china cabinet closeup 2    2013 Easter china cabinet closeup 1

Patriotic –

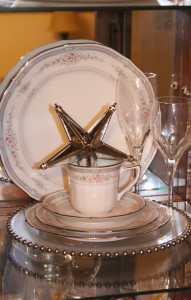
For the Fourth of July holiday I was looking for some patriotic decorations for the china cabinet.  I wanted something that would match the elegance of the china, crystal and silver items already displayed in the cabinet.  A few years ago I had purchased four large stars made out of mirrors and trimmed in silver and they looked wonderful placed in the china tea cups and are a simple and the perfect patriotic touch.

IMG_3666a

Fall/Autumn –

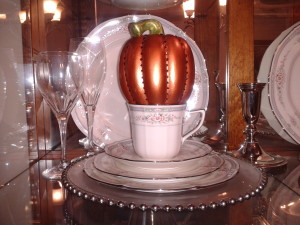
Once again I was looking for simple yet elegant decorative items to add to the china cabinet for the Halloween and Thanksgiving seasons.  I couldn’t find anything that I like in my local retail stores so I decided to make them.  I found two small ceramic pumpkins in my local craft store that I painted orange with green stems and decorated them with small topaz-colored crystals.  I placed the pumpkins on the two of the china tea cups and they looked wonderful in the china cabinet with the light reflecting off the crystals.  (For a supply list and instructions on making the jeweled pumpkins, please check out the Craft post link Jeweled Pumpkins)

2013-09-11 08.46.25

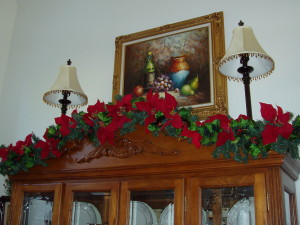
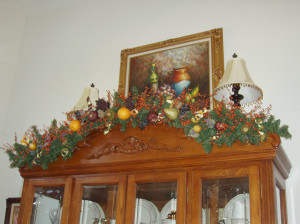
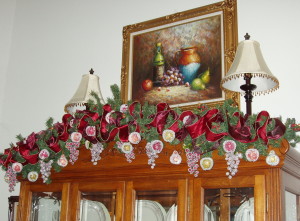
Finally, when decorating a china cabinet think about using the area outside of the cabinet to incorporate some design elements for the holiday seasons.  Shown below are three photos of the china cabinet decorated for the Fall and Christmas seasons.  When we lived in California our dining room had very high ceiling and I wanted to take advantage of that height by decorating the top of the cabinet with a pine garland.  The first photo was taken during Christmas 2002 and features the pine garland decorated with red poinsettias and holly leaves.  The second photo was taken during the Fall season in 2003 and it featured the pine garland decorated with a variety of fruit and berries.  The third photo was taken during Christmas 2003 and it features sugared fruit accented with a red silk ribbon.  (For more information about these decorations, check out the Décor post My Christmas Decorations from Past Years)

OLYMPUS DIGITAL CAMERA

2003 Fall - Dining Room China Cabinet    OLYMPUS DIGITAL CAMERA

As you can see, there are a variety of ways to decorate a china cabinet.  The important thing to remember is to keep the decorations to a minimum since the china, crystal and silver are the stars of the show!!

Craft – Wooden Initials

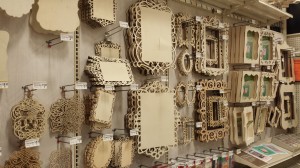
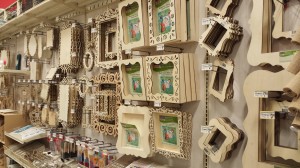
For this Craft post I am going to show several different projects that were made with items currently available at Michael’s Craft Stores nationwide.  Recently simple wooden initials, laser cut plaques and frames so I spent a pleasant hour selecting various items for two separate craft projects and list below are the list of supplies and instructions needed.

Michaels 1    Michaels 2

Initial door or wall plaque #1

Supplies –

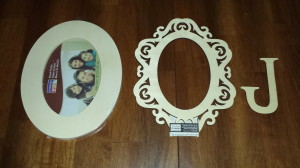
  • Large wood initial (I used the initial of our last name)
  • 1 oval wood frame
  • 1 laser-cut wood frame with oval opening (it is much thinner than the oval frame)
  • Small piece of material or paper (to use as backing for the initial)
  • Small can of wood stain (I used a deep mahogany stain)
  • Bronze metallic paint
  • Paint brushes
  • Hot glue gun and hot glue sticks

Initial 1 - supplies

 Instructions –

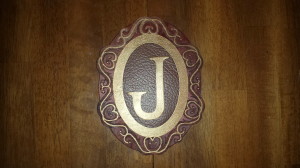
  1. Stain the wood frame and the laser-cut wood frame, let the paint dry completely.
  2. Since both the frame and the thinner laser-cut frame the same dark color I wanted to add some interest.  So, using the bronze paint, I painted an oval shape around the laser-cut frame opening.  Using a gold paint pen, I drew a continuous line accenting the curves of the laser-cut frame.
  3. Attach the two pieces, the wood frame and the thinner laser-cut wood frame, together using hot glue.
  4. Next, I painted the large initial with the bronze paint, let the paint dry completely.
  5. Then, I cut a piece of scrapbook paper that looks like leather into the size and shape of the frame opening.  Then, attach the painted large initial to the paper using the hot glue.  Before gluing the initial, be sure that the placement is centered to show within the rectangular frame opening.
  6. Finally, assemble all the pieces together to complete the craft project.

Initial 1 - finished

Initial door or wall plaque #2

Supplies –

  • Small wood initial (I used the initial of my daughter’s first name)
  • 1 rectangular wood frame
  • 1 laser-cut wood frame with rectangular opening (thinner than the oval frame)
  • Small piece of material or paper (to use as backing for the initial)
  • Pink paint
  • White paint and clear sparkle paint
  • Paint brushes
  • Pink crystals, self adhesive
  • Hot glue gun and hot glue sticks

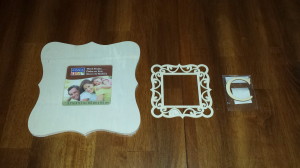
Initial 2 - supplies

 Instructions –

  1. Paint the wood frame with the pink paint, let the paint dry completely.
  2. Using the white paint as a base color, I painted the laser-cut frame and the small wood initial, let the paint dry completely.
  3. Then, using the clear sparkle paint as a clear top color, I applied two layers of paint to the laser-cut frame and the small wood initial, let the paint dry completely between the two coats.
  4. Attached the two pieces, the wood frame and the thinner laser-cut wood frame, together using hot glue.
  5. I cut a piece of scrapbook paper in glitter purple into the size and shape of the frame opening.  Then, attach the painted small initial to the paper using hot glue.  Before gluing the initial, be sure that the placement is centered to show within the rectangular frame opening.
  6. Individually attached the pink crystals to the border of the fame to add a little more sparkle.
  7. Finally, assemble all the pieces together to complete the craft project.

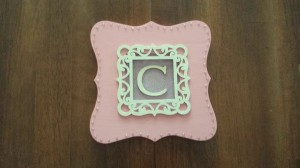
Initial 2 - finished

So, next time you are looking for a personalized gift for a special occasion, such as a new baby, wedding or new home celebrations, please consider one of these wooden initial craft projects because they would make a great gift!!