
Both Mount Rushmore and Crazy Horse are located less than 20 miles from each other in the Black Hills of South Dakota and both of these monuments have many similarities but also there are some distinct differences. Both monuments honor our American history, Mount Rushmore is carved with the faces of four very recognizable U.S. presidents while the Crazy Horse monument honors a Native American Lakota chief who is largely unknown with no photographic evidence of what he looked like. Both monuments were carved into the mountains of the Black Hills over a long period of time; Mount Rushmore was carved in fifteen years while the work on Crazy horse was started in 1948 and is still a work in progress and far from completion. Mount Rushmore was built using Federal funds and the Crazy Horse monument is being built with funds generated from tourism revenues and donations.
Both sculptors of these iconic monuments were born to immigrant parents, both carved the mountains in the Black Hills to honor our American history and both died before the projects were completed and the work was taken over their children. Mount Rushmore’s sculptor, Gutzon Borglum, was the son of Danish immigrants, grew-up in a Mormon household and later became involved with the Ku Klux Klan. The sculptor of Crazy Horse, Korczak Ziolkowski, was the son of Polish immigrants and he originally came to South Dakota to work with Borglum on Mount Rushmore but soon quit when there were disagreements between the two men and Ziolkowski left to serve in World War II.
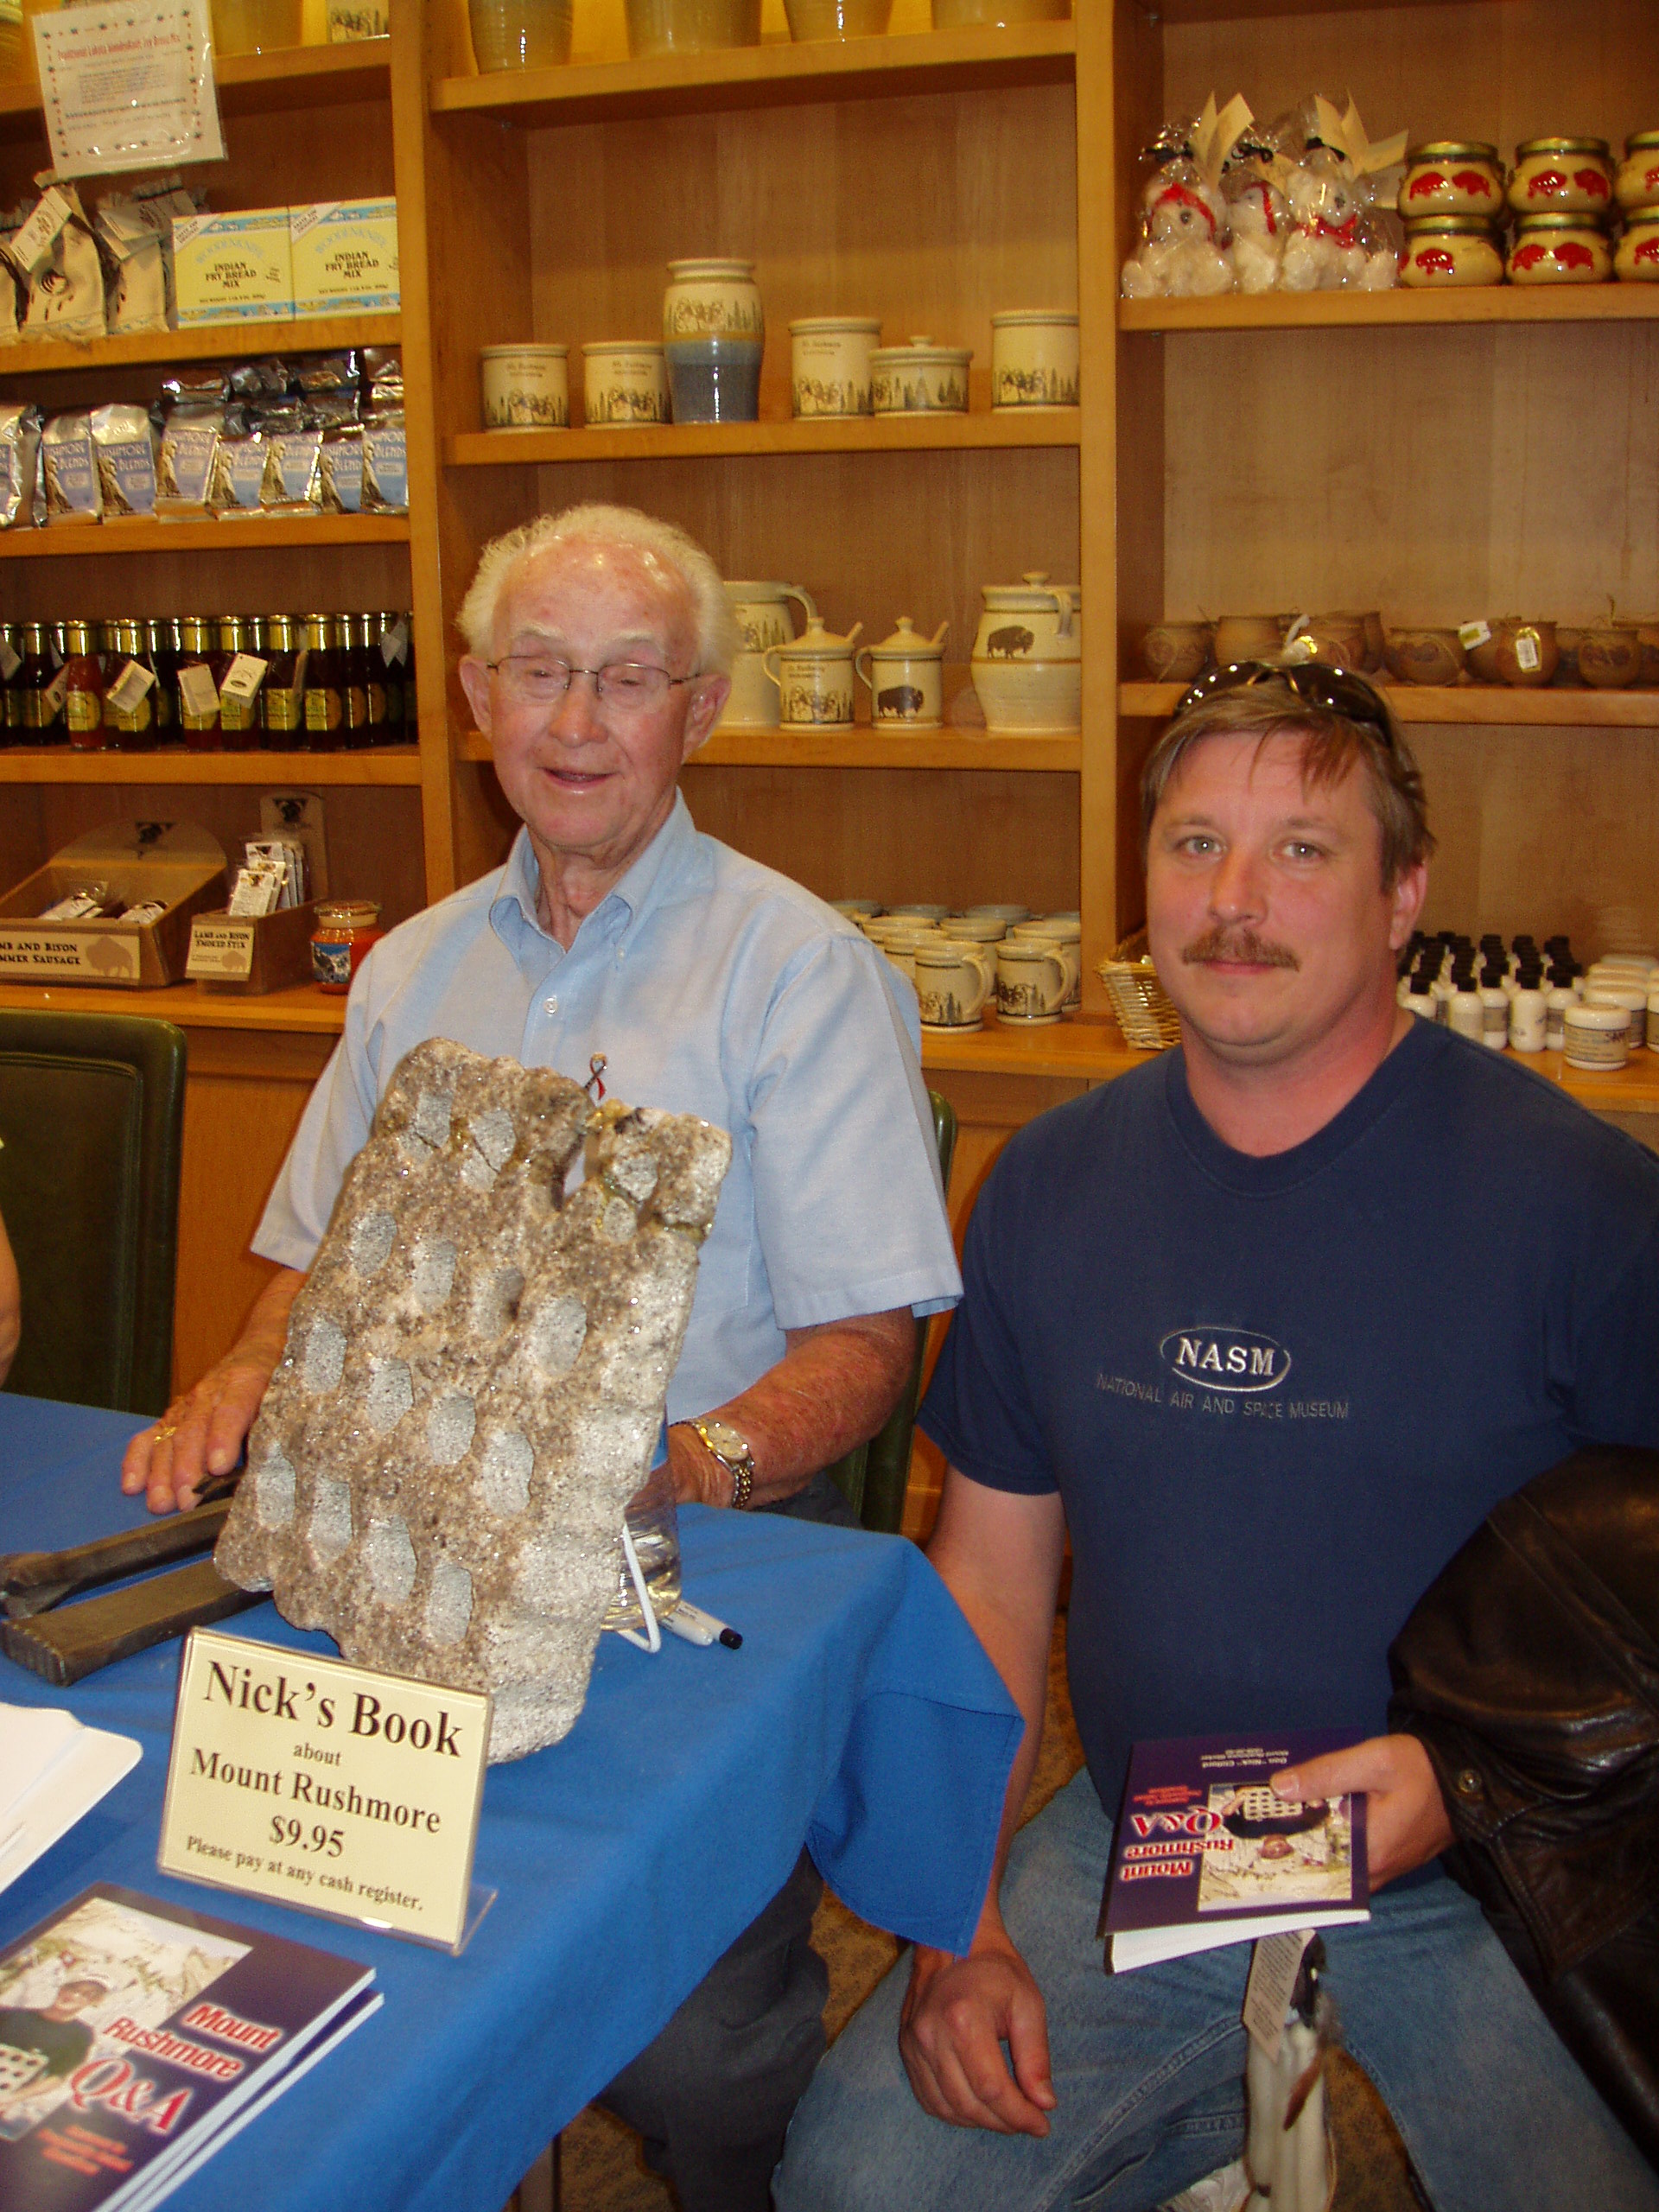 When we visited Mount Rushmore in 2004, there was a book signing event for one of the last surviving workers, Don “Nick” Clifford, on the day we were there. We had the opportunity to meet him and have an interesting conversation about his experiences back in the late 1930s carving Mount Rushmore. Then the next day, when we arrived at the Crazy Horse Monument they were still actively blasting the mountain! It was very exciting and we were able to take a short bus ride up to the base of the mountain. Our personal opinion is that Mount Rushmore, while being extremely patriotic, had an atmosphere that was very commercial while the Crazy Horse monument seemed to have a purpose of using their revenue to provide scholarships to the Native Americans. Both are very iconic monuments carved into the Black Hills that teach important cultural as well as historical lessons of our country and are definitely worth a visit to South Dakota.

Mount Rushmore
Mount Rushmore National Memorial, located in the Black Hills of South Dakota, is carved from a mountain known by the Lakota Native Americans as the Six Grandfathers. This area of the Black Hills of South Dakota was perpetually granted to the Lakota Native Americans with an 1868 treaty guaranteed by the U.S. government but when gold was found in the area in 1874 the land was seized and the Lakota were forced to relocate elsewhere. In 1923, the idea for the Mount Rushmore project was originally conceived by a local historian as a way to increase tourism to the area. After securing federal funding, construction on the memorial began in 1927, and the presidents’ faces were completed between 1934 and 1939. Gutzon Borglum, a prominent sculptor, led a team of 400 workers between 1927 and 1941 who carved the granite mountain using dynamite and hand tools. The work was extremely difficult and dangerous, the wages were low and employment was uncertain but astonishingly there were no worker fatalities.
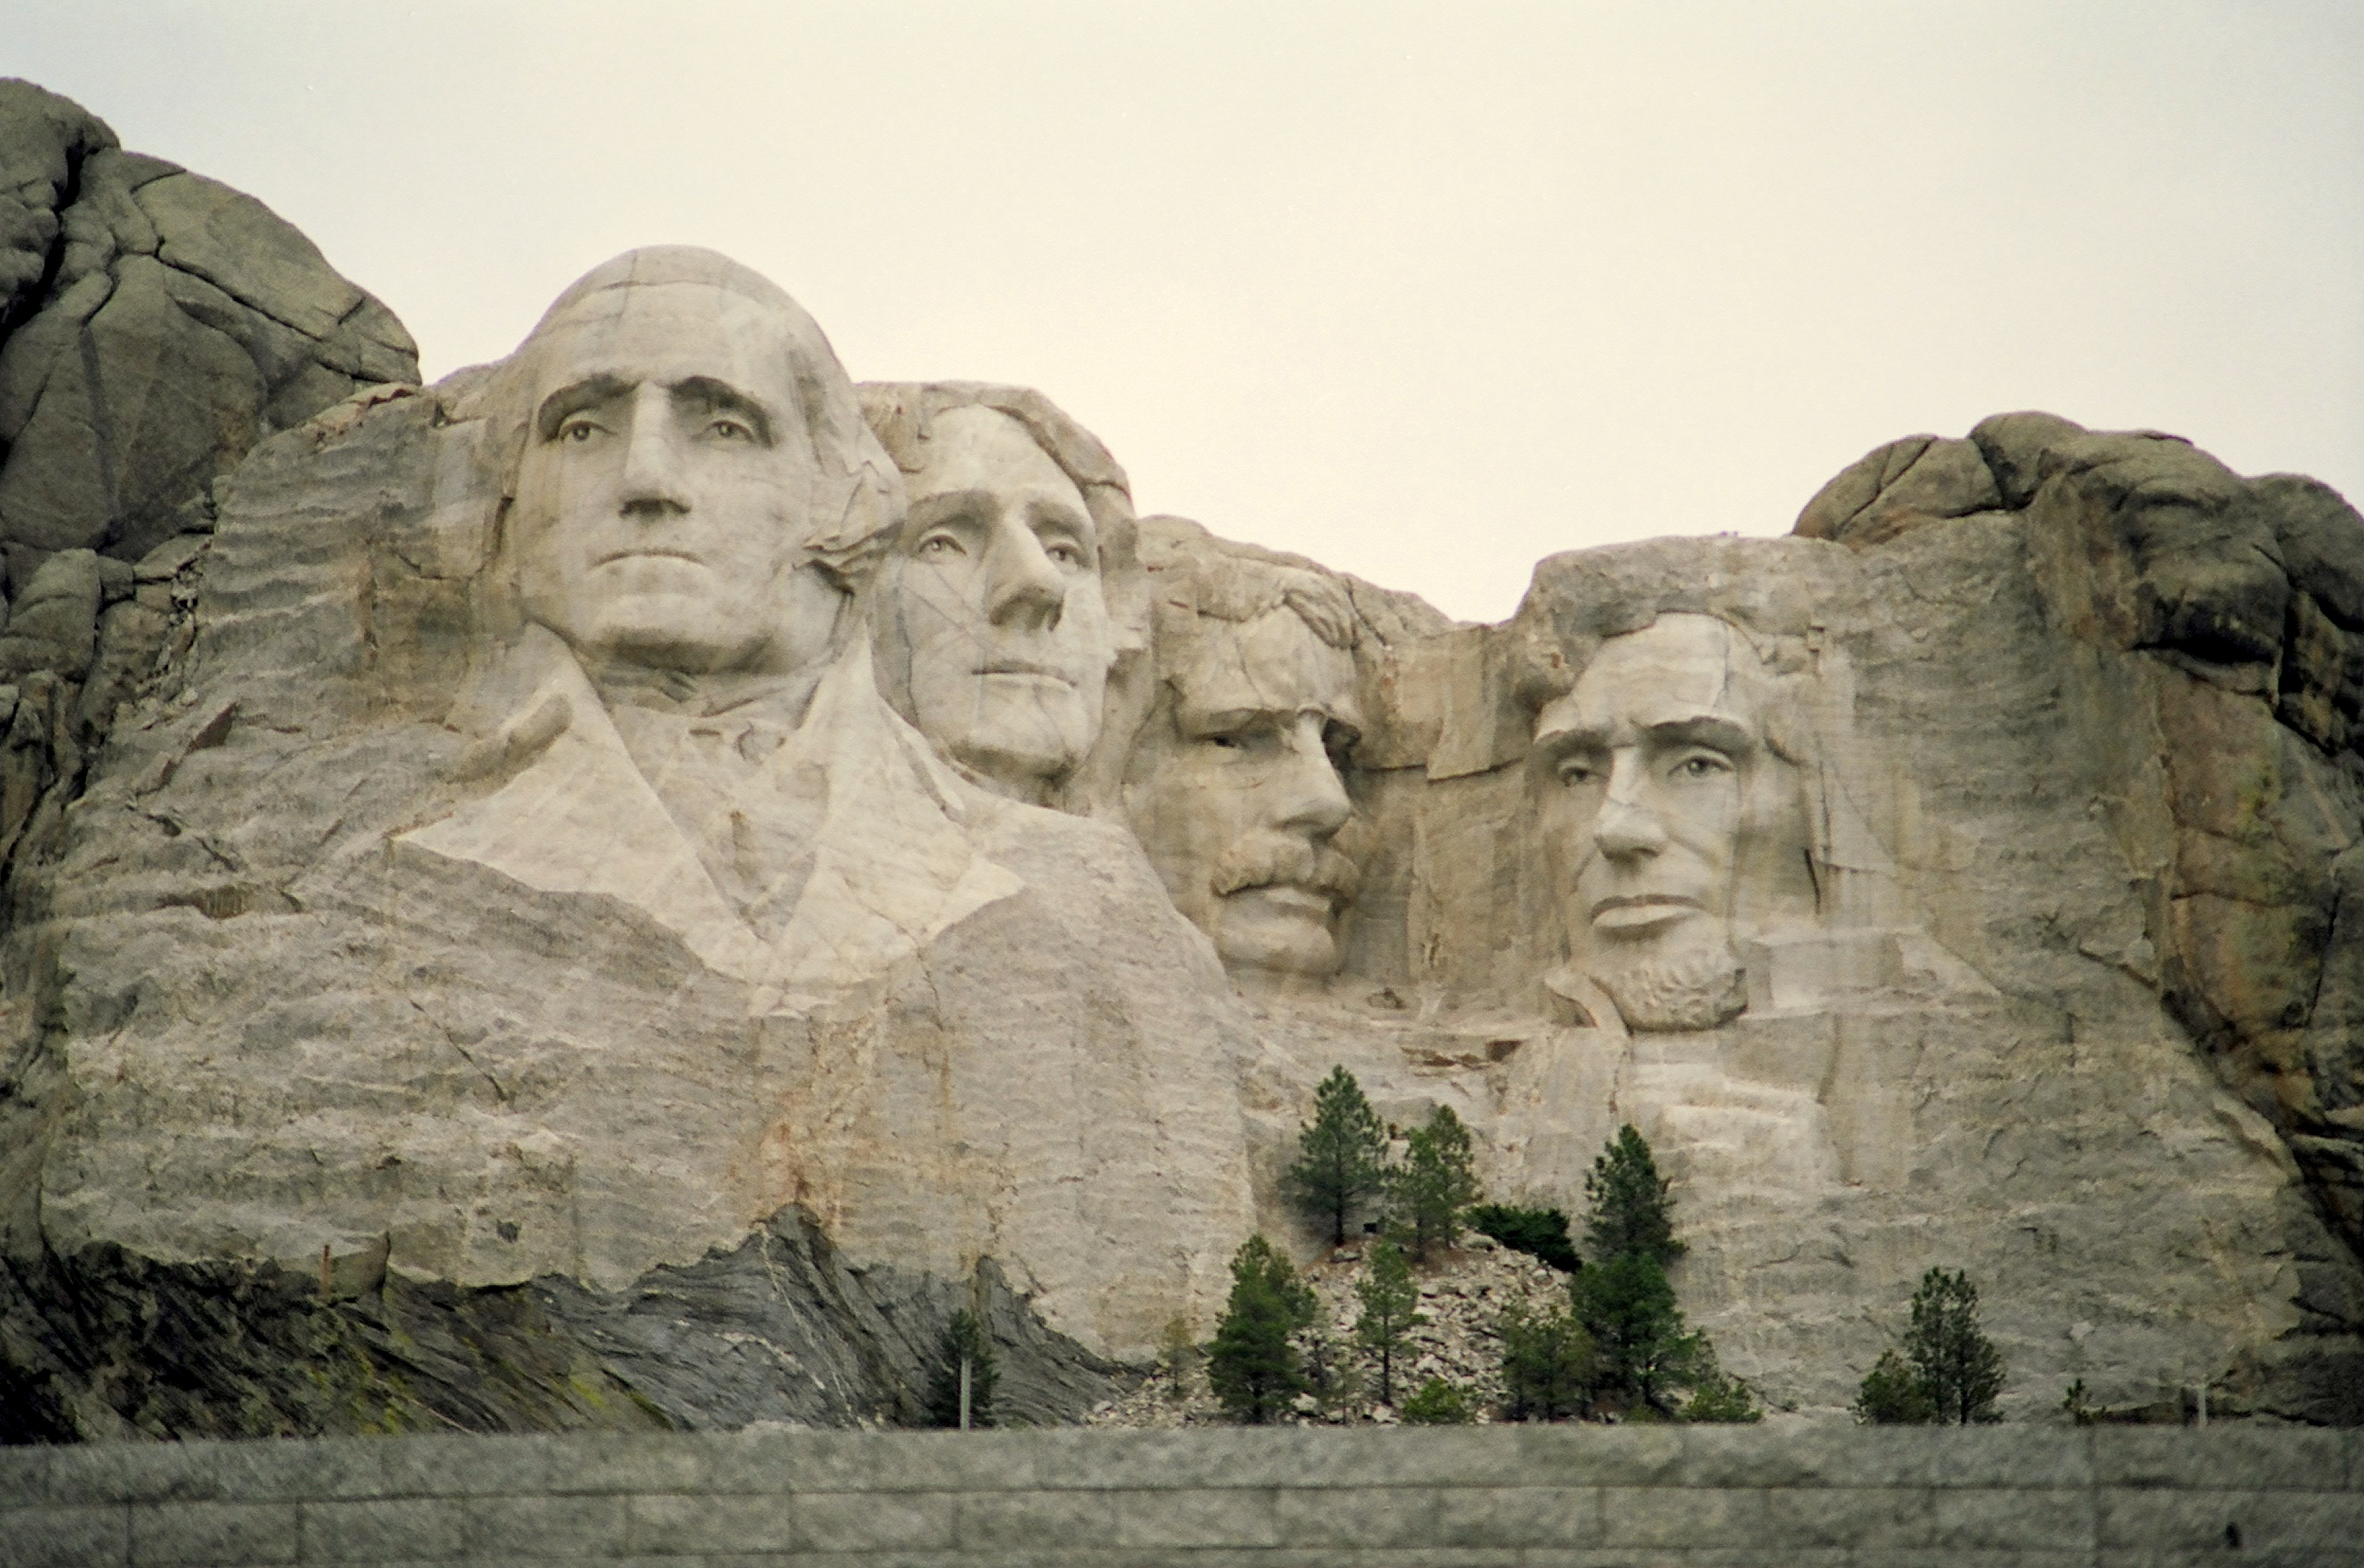
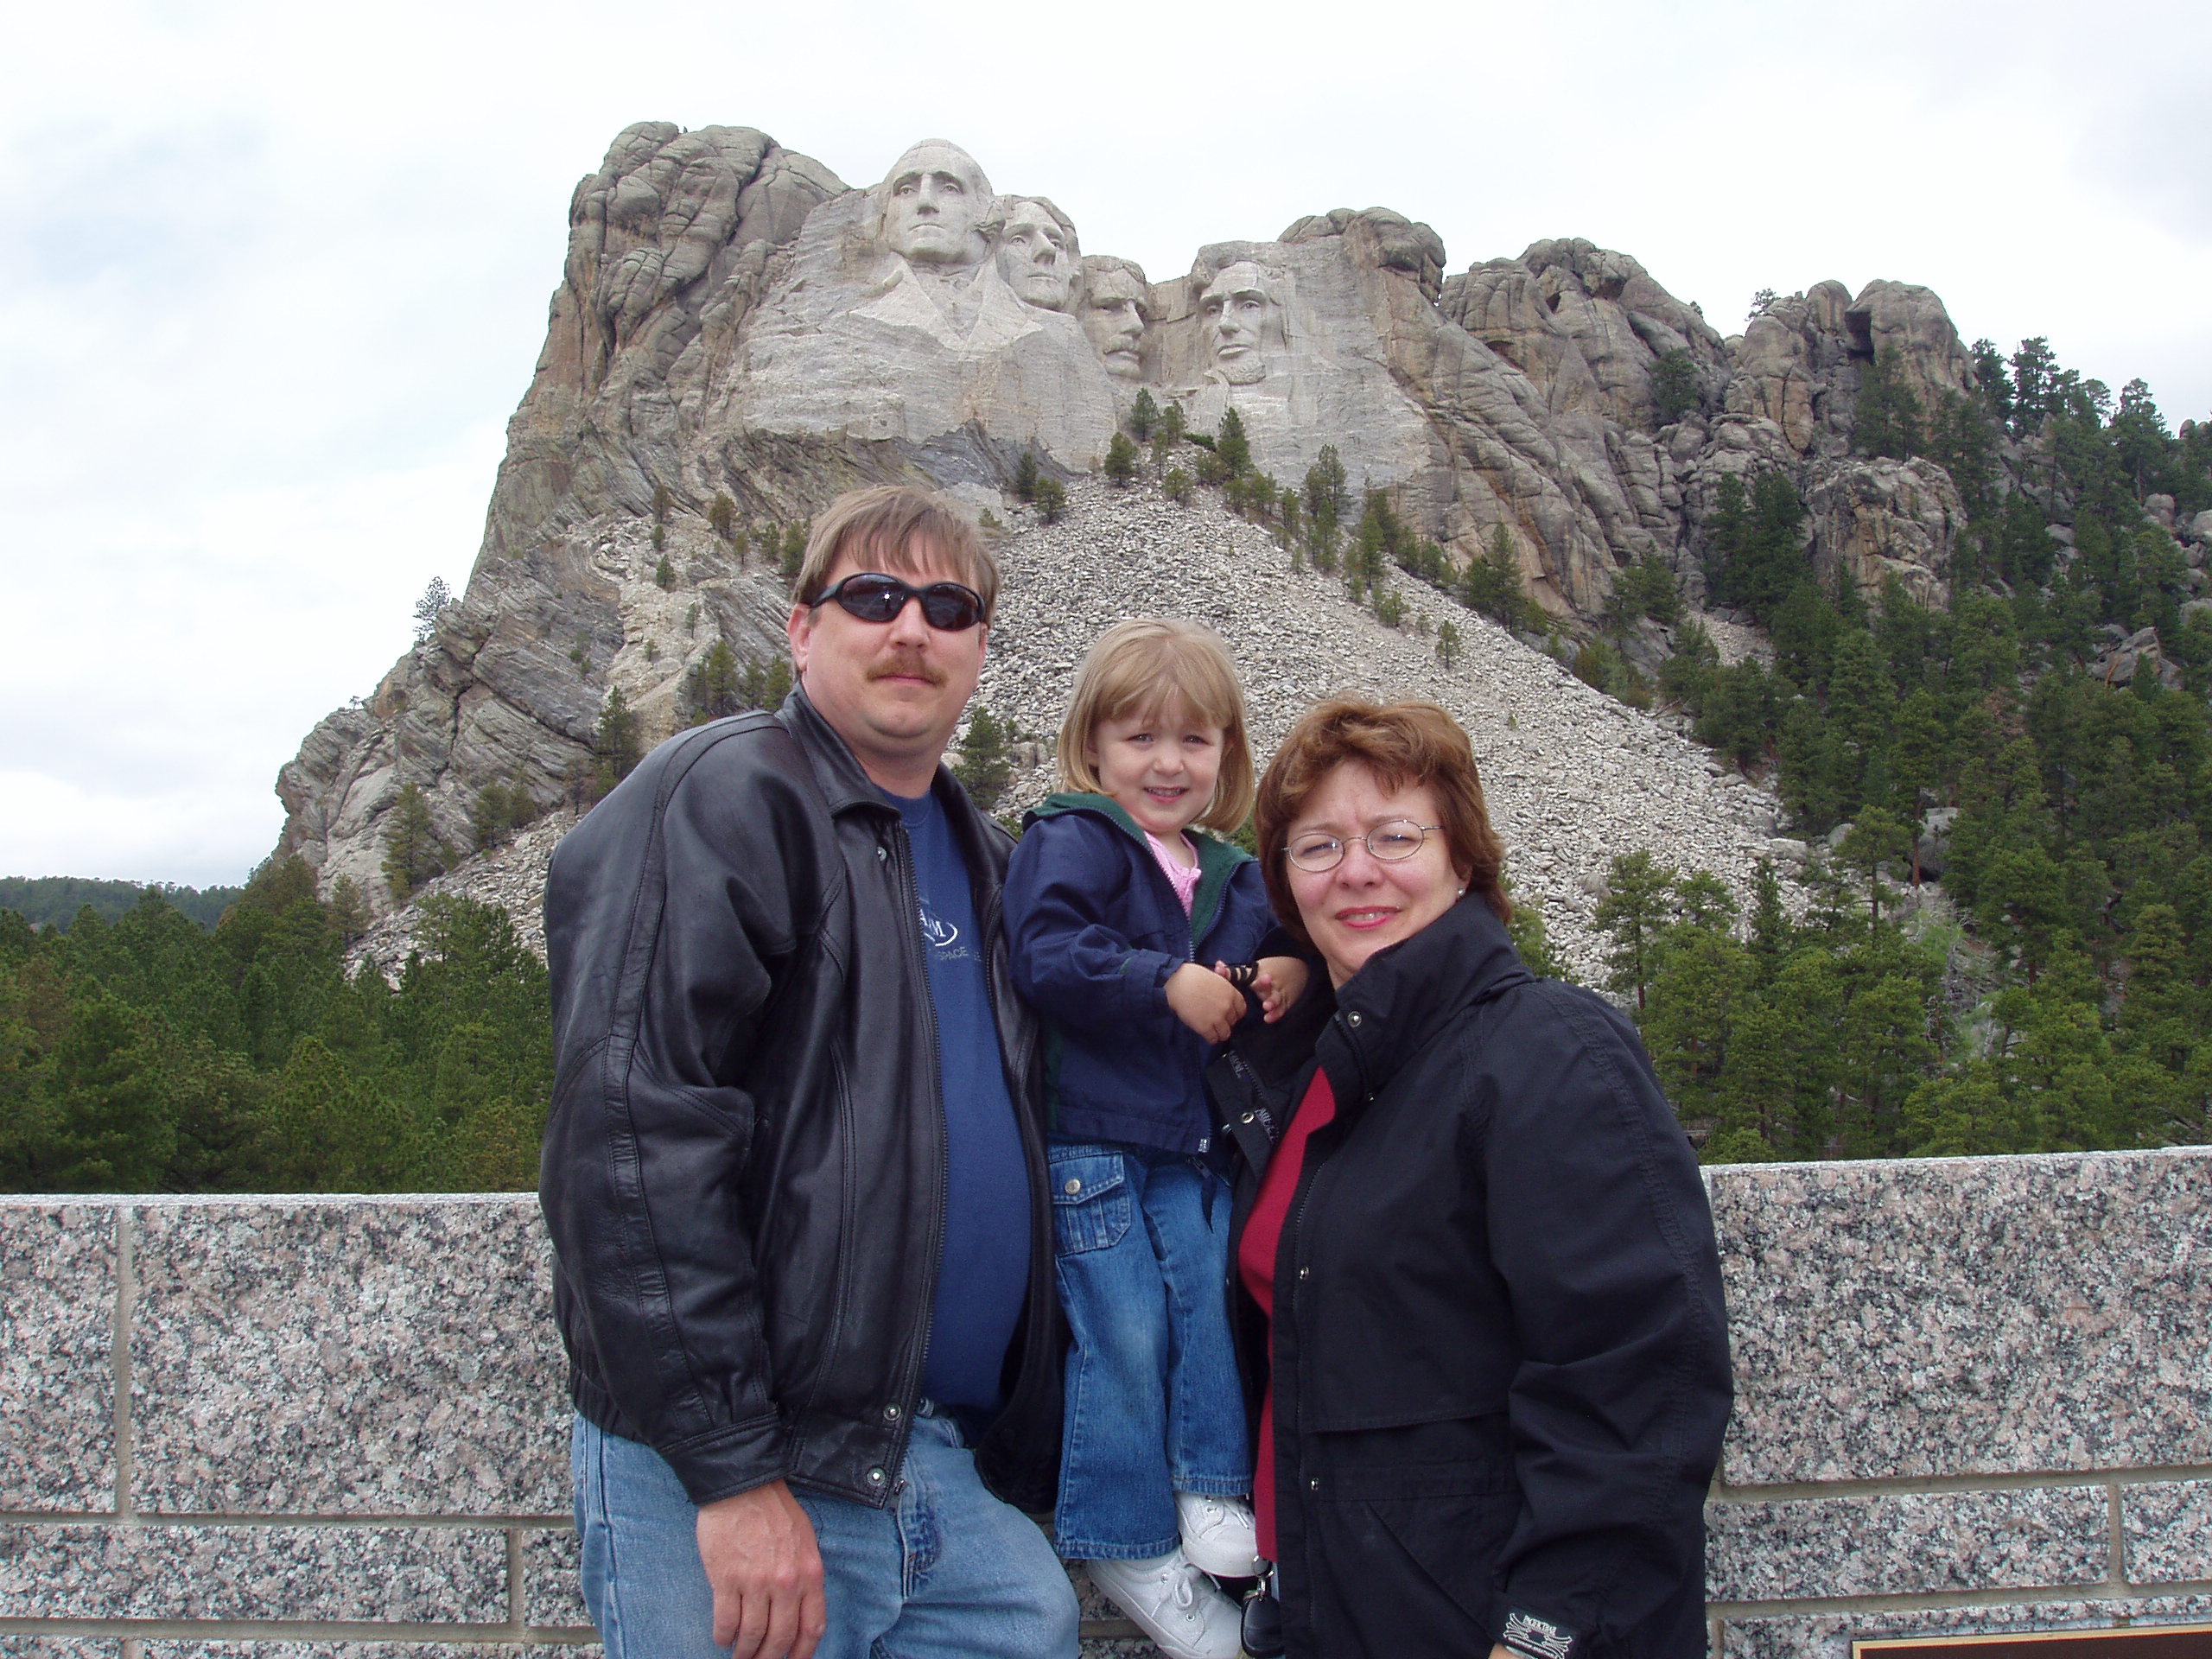
The Mount Rushmore National Memorial covers over 1,278 acres and is 5,725 feet above sea level. The 60 foot high carvings of the faces of George Washington, Thomas Jefferson, Abraham Lincoln and Theodore Roosevelt represents the first 150 years of American history. In 1933, while the memorial was still under construction, the U.S. National Park Service took control of the memorial. Upon Gutzon Borglum’s death in March 1941, his son Lincoln Borglum took over the construction team. Although the initial concept for Mount Rushmore was to depict each of the four presidents from their head to waist, with the U.S. involvement in World War II and lacking the funds to complete the project the construction was forced to end in late October 1941 with only the heads being carved. In 1966, Mount Rushmore was listed on the National Register of Historic Places. In 1991, President George Bush officially dedicated Mount Rushmore and currently the monument attracts nearly three million visitors annually.
Mount Rushmore trivia and interesting facts
- The Lakota, called the mountain the Six Grandfathers, but officially in 1885 it became known as Mount Rushmore and was named after New York attorney Charles Rushmore who came to this area of South Dakota to check on the legal titles of properties located in the Black Hills.
- About 90% of the mountain was carved by dynamite blasts and 450,000 tons of granite was removed from the mountain to carve the four Presidents. Geologists have estimated that the granite will erode at a rate of only one inch every 10,000 years. Currently, maintenance teams use silicone sealant to fill any cracks in the faces on Mount Rushmore.
- The nose on George Washington is longer than the other three, it measures 21 feet and the others measure 20 feet. Thomas Jefferson was originally intended to be on the right side of Washington but after 18 months of work the granite was deemed unsuitable and was blasted off the mountain and work was restarted on the left side.
- Borglum had originally planned a large room within the mountain to hold the documents and artifacts that shaped the history of America. Construction of the Hall of records started in 1938 and by 1939 a 70 foot tunnel was blasted into the mountain. In 1941, with Borglum’s death and World War II, all work on the memorial including the hall stopped and idea was eventually abandoned. Then recently in 1998, a teakwood box inside a titanium vault covered by a granite capstone was placed on the floor of the entry hall. Inside were sixteen porcelain enamel panels, inscribed on the panels are the story of Mount Rushmore explaining why and how it was carved, why these four Presidents were chosen and their biographies, the text of the Declaration of the Independence and the Constitution, and a brief history of the United States to be preserved for the future generations.
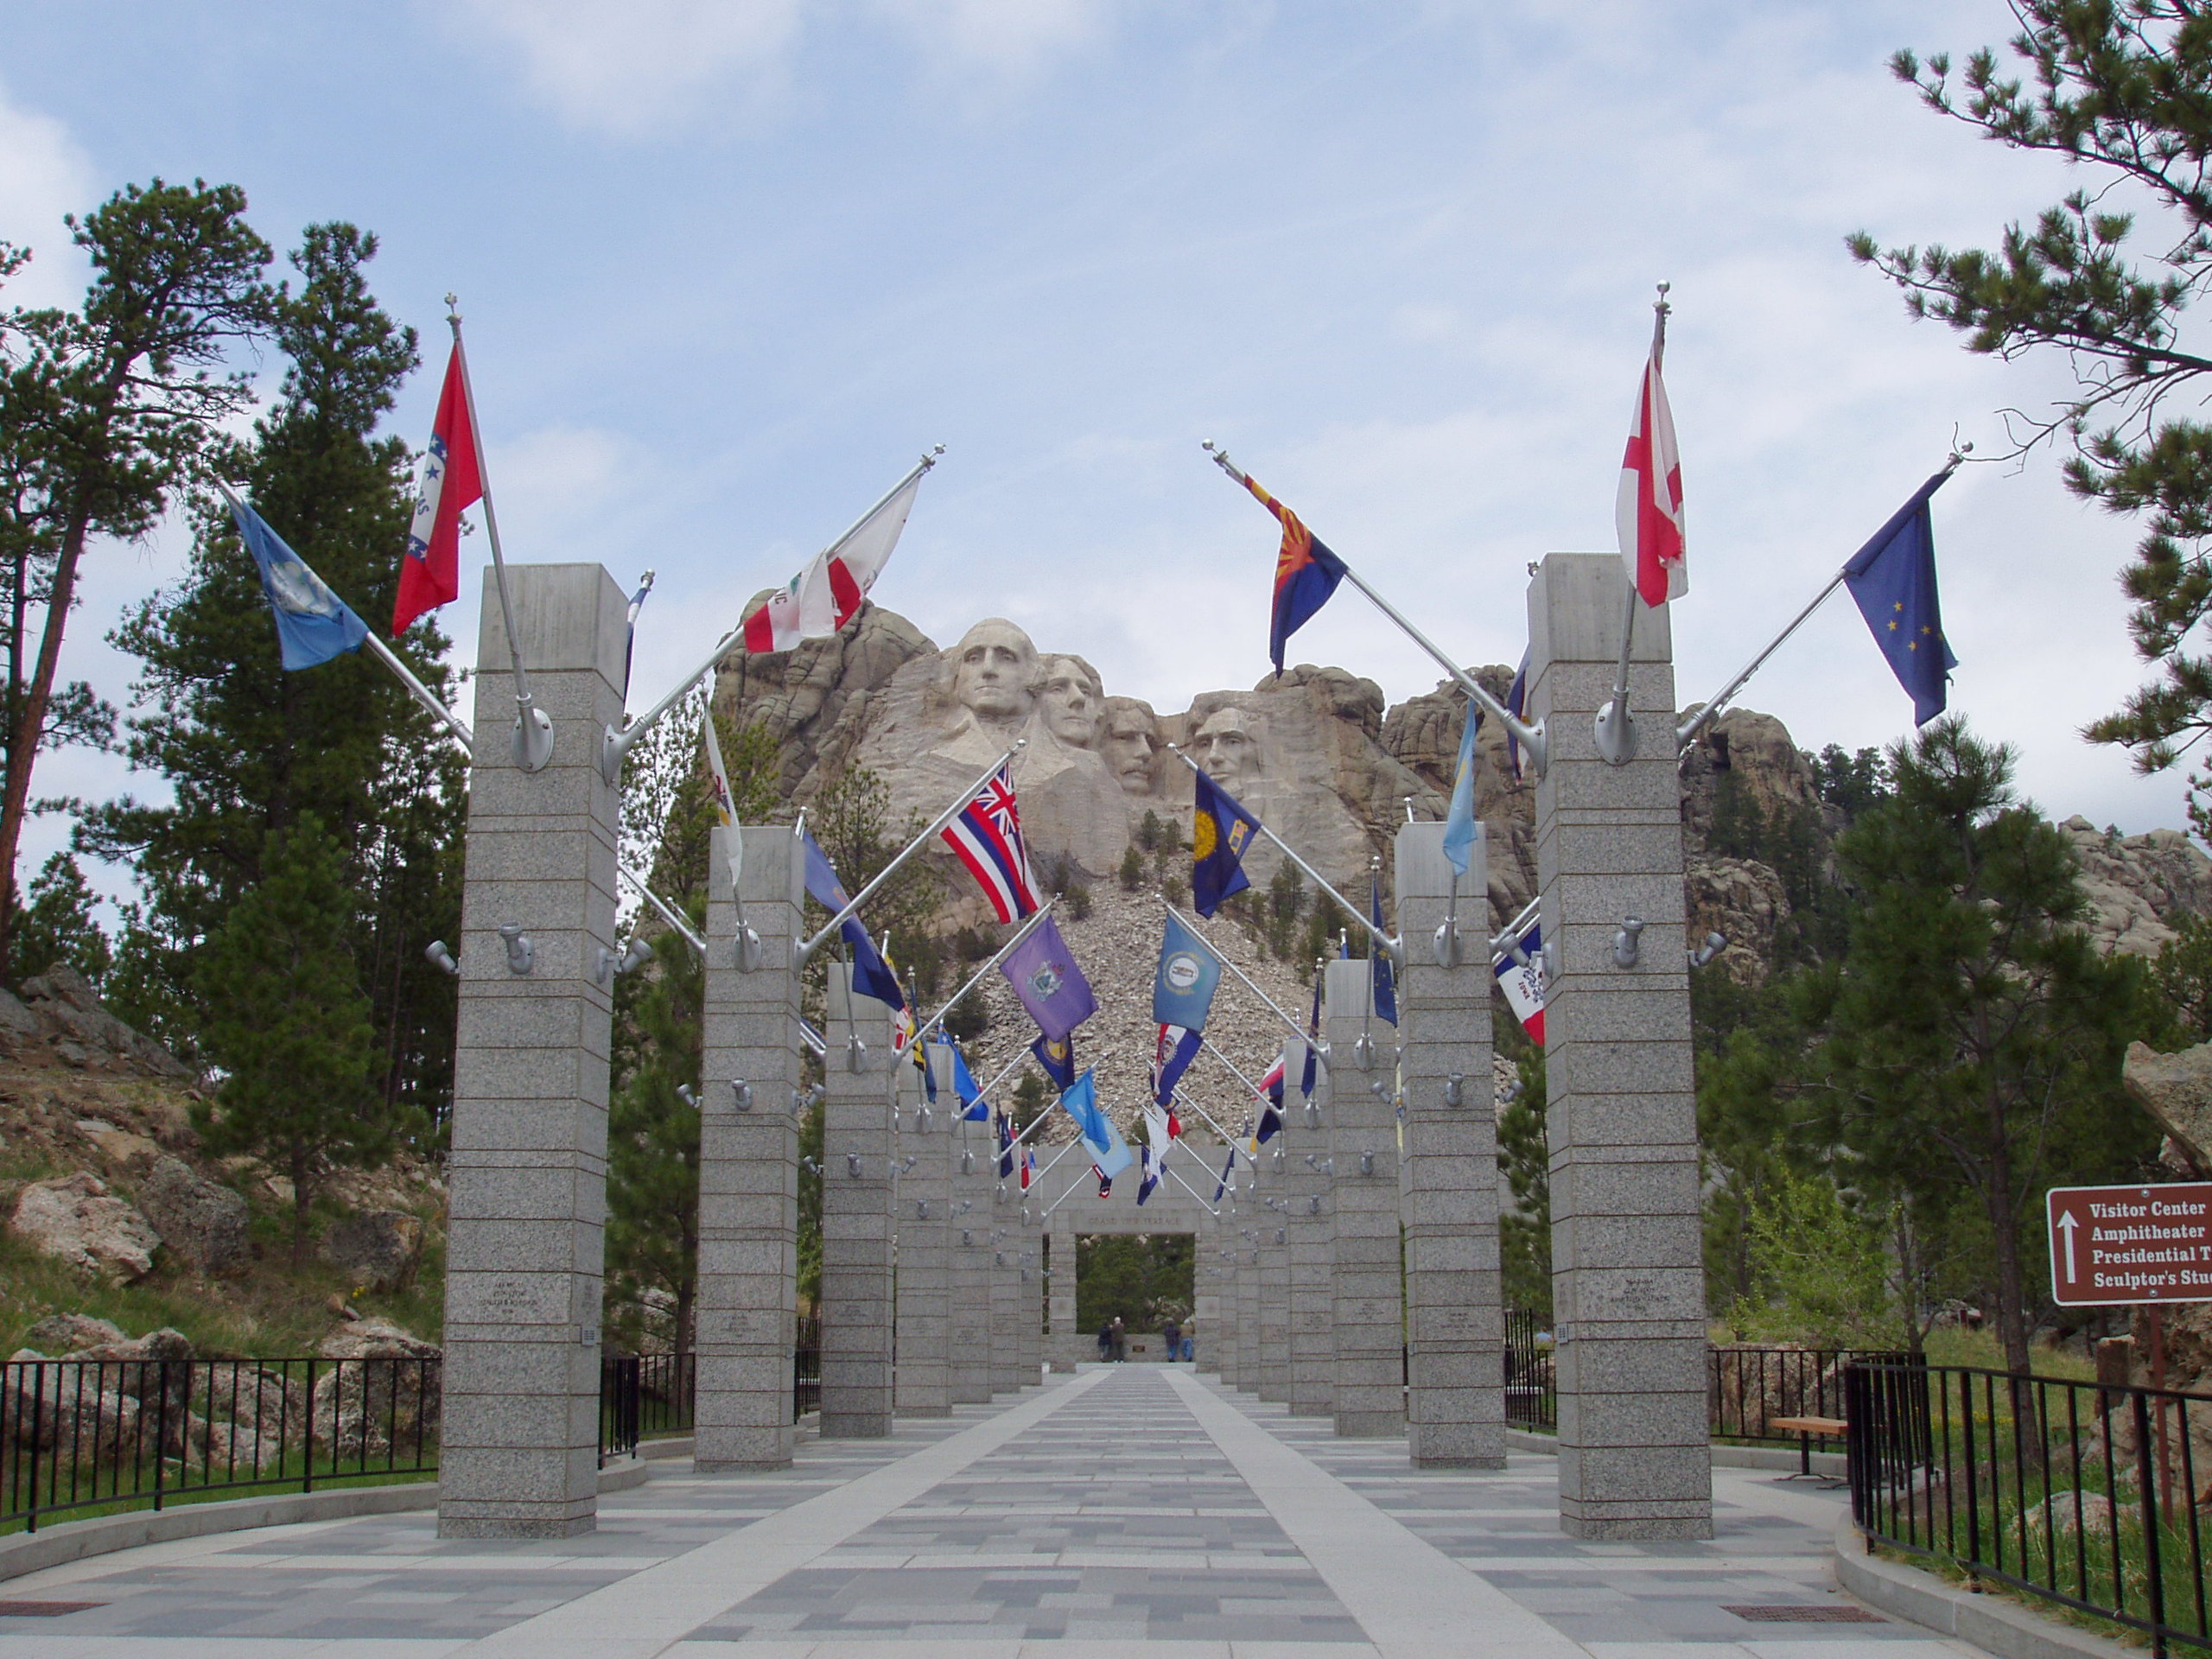
- The Avenue of Flags was established during the celebration of the United States Bicentennial. There are 56 flags that represent the 50 states, the Washington D.C. district, three U.S. territories and two commonwealths. The flags are arranged in alphabetical order, if you cannot locate your state’s flag just ask a park ranger for assistance.
- Mount Rushmore has been used as the location of several movies, including the dramatic chase scene in the 1959 Alfred Hitchcock movie “North by Northwest”. Recently, the monument was used in the 2004 movie, “National Treasure: Book of Secrets”. According to the fictitious plot, the monument was constructed to hide the City of Gold.
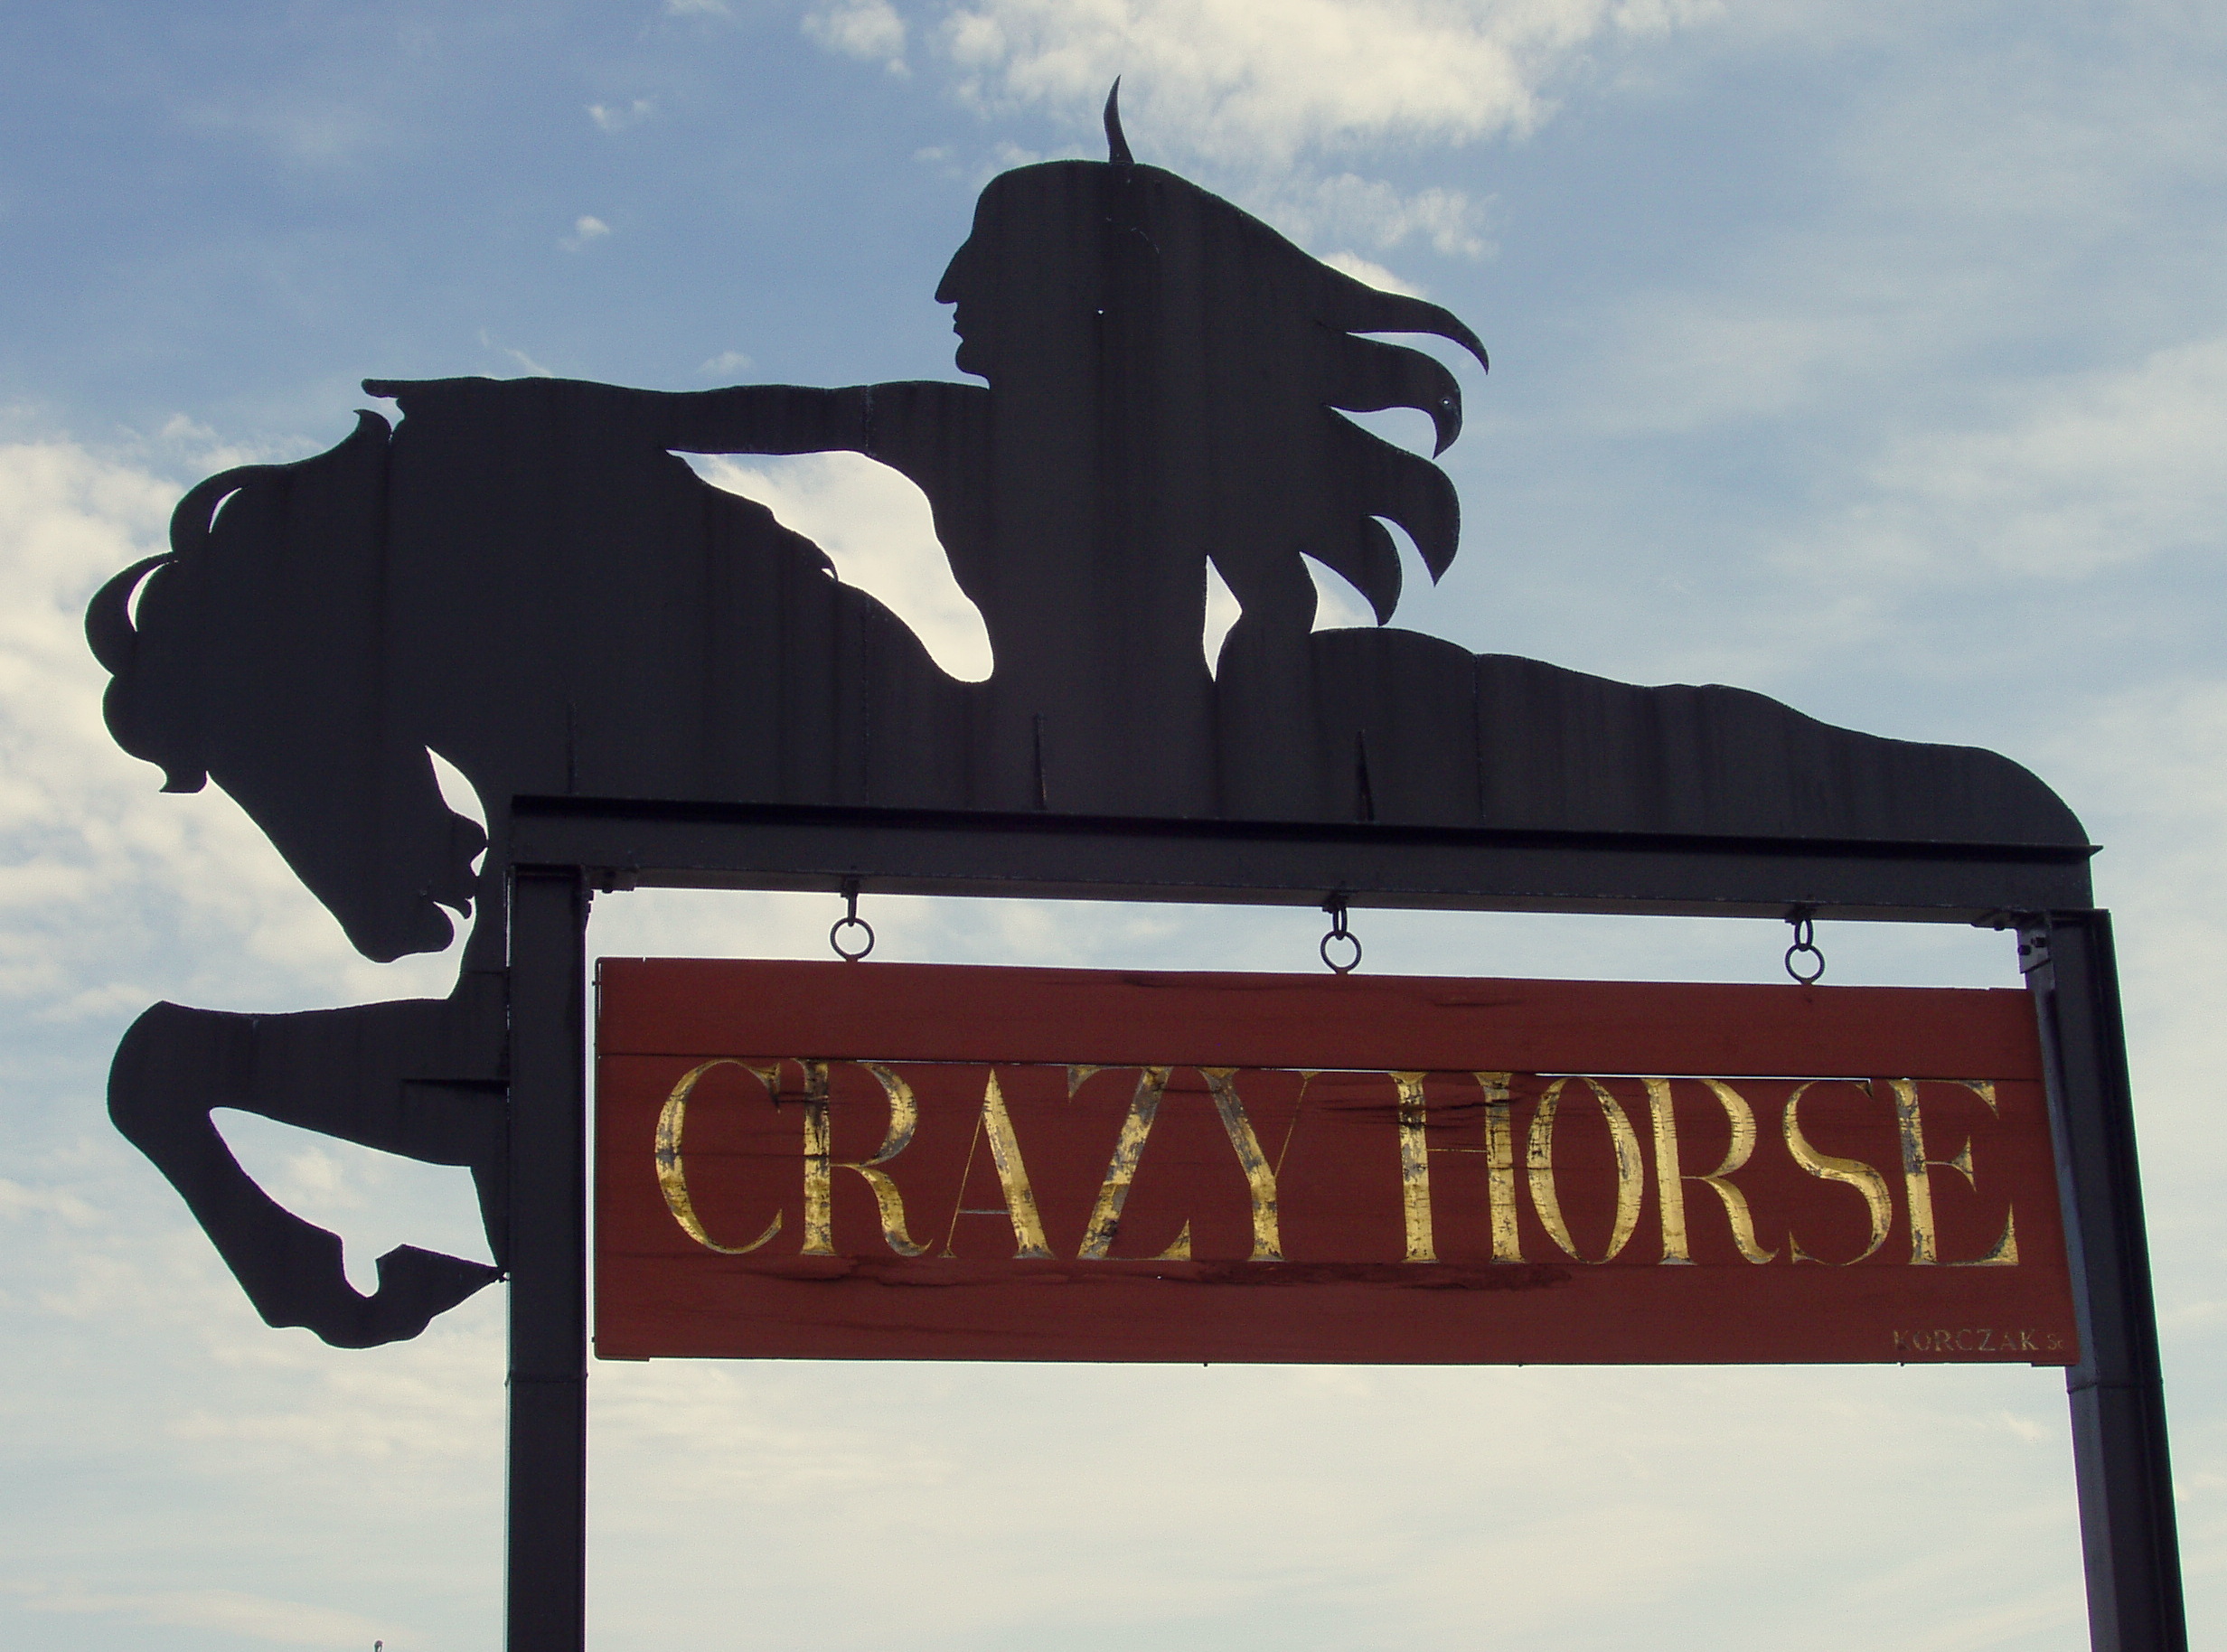
Crazy Horse Monument
Crazy Horse was a Lakota chief who defeated General Custer at the battle of Little Bighorn in 1876. He never signed a treaty with the U.S. government, never learned English and when the other Native Americans were forced onto reservations he never left his home on the Plains. The Crazy Horse monument is being carved out the Thunderhead Mountain on land that is sacred to the Lakota and honors the famous chief Crazy Horse and also the culture and traditions of the Native Americans. Originally the monument was commissioned in 1929 at the request of Chief Standing Bear to be sculpted by Korczak Ziolkowski. In his letter to the sculptor Ziolkowski, Chief Standing Bear said that in response to the carving of Mount Rushmore the Lakota would like “the white man to know that the red man has great heroes, too”.
When looking for an area to start the massive project, Ziolkowski briefly consider a location in the Grand Tetons of Wyoming, but Chief Standing Bear was determined that the monument should be built in the Black Hills of South Dakota, an area which is very important to the Lakota. Before Ziolkowski started work on the project the federal government offered $10 million in funding but he turned it down stating that he feared his ambitious plans for an educational and cultural center adjacent to the memorial would be rejected if the federal government was involved in the process.


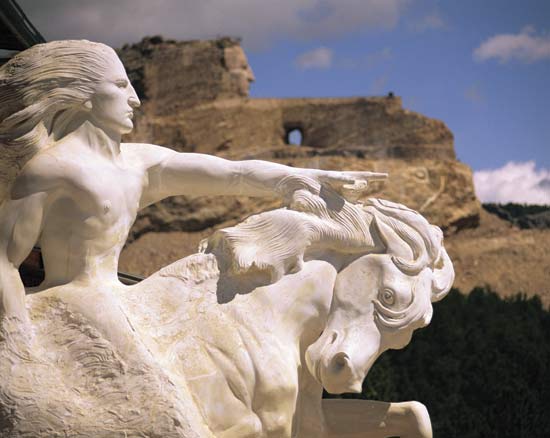
The Crazy Horse monument was blasting was started in 1948 by Ziolkowski, his wife and seven of their ten children. The memorial will show Crazy Horse sitting on his horse with his arm outstretched and pointing to the land of the Lakota and when completed it will have the final dimensions of 641 feet wide by 563 feet high. But Ziolkowski did not live to see the memorial’s competition and died in 1982, since that time work has been continued by the Ziolkowski family. The head of Crazy Horse was completed in 1998 and is 87 feet high as compared with Mount Rushmore and the heads of the four U.S. Presidents which are each 60 feet high. When the horse’s head is completed it will be 219 feet high. Since financing of the project is uncertain and because of the challenges associated with the mountain’s carving, no completion date has been estimated for the Crazy Horse Memorial.
The Crazy Horse Memorial is visited by more than one million people annually. The visitor complex currently consists of the monument, the Indian Museum of North America and the Native American Cultural Center and is run by the private non-profit organization, the Crazy Horse Memorial Foundation, and receives no federal or state funding. Eventually, the Crazy Horse memorial will be the centerpiece to a Native American educational and cultural center. The University and Medical Training Center for the North American Indian will eventually be a satellite campus of the University of South Dakota and will have educational classrooms and a residence hall. In 2007, T. Denny Sanford made a $2.5 million donation with an additional $5 million paid over a five year period. In 2010, Paul and Donna Christen announce an additional $5 million donation paid as an endowment to support the operation of the campus and the memorial is also funded by the tourist revenue from admission fees and gift store purchases. Since 1978, the Crazy Horse Memorial Foundation has awarded more than $1.2 million in scholarships going to Native American students with South Dakota.
Interesting facts about the Crazy Horse Memorial
- The Crazy Horse Memorial Foundation sponsors many Native American cultural events and educational programs. Each June, the memorial hosts a Volksmarch festival when visitors are permitted onto the mountain and attendance has grown to be over 15,000.
- Much of the earth-moving equipment used on carving the Crazy Horse monument is donated by corporations with the work primarily supported by visitor fees and gift shop revenues. Periodically the memorial publicizes blasting events, which attract thousands of people from all over the region. They may wait for hours but can see numerous detonations as rocks and dust are blow from the mountain. The visitor center contains many pieces of rocks blasted from the mountain and the rocks are available for a small donation. (My husband, the “Rock Guy”, was very excited about gathering his Crazy Horse rocks and we took several home as souvenirs of our visit!)
The Black Hills of South Dakota has so many historic places to visit and the scenery is absolutely beautiful in this area of the United States. When we visited in 2004, we stayed for a week because there was so much to see and do. Custer State Park was our “home base” with daily trips to see several nearby attractions. Please see last month’s Travel post, Custer State Park, and this month’s posts on Mammoth Site, Wind Cave and Jewel Cave for reports on the other sites to see in Black Hills of South Dakota.