Disneyland’s Haunted Mansion

Haunted Mansion exterior April 2007
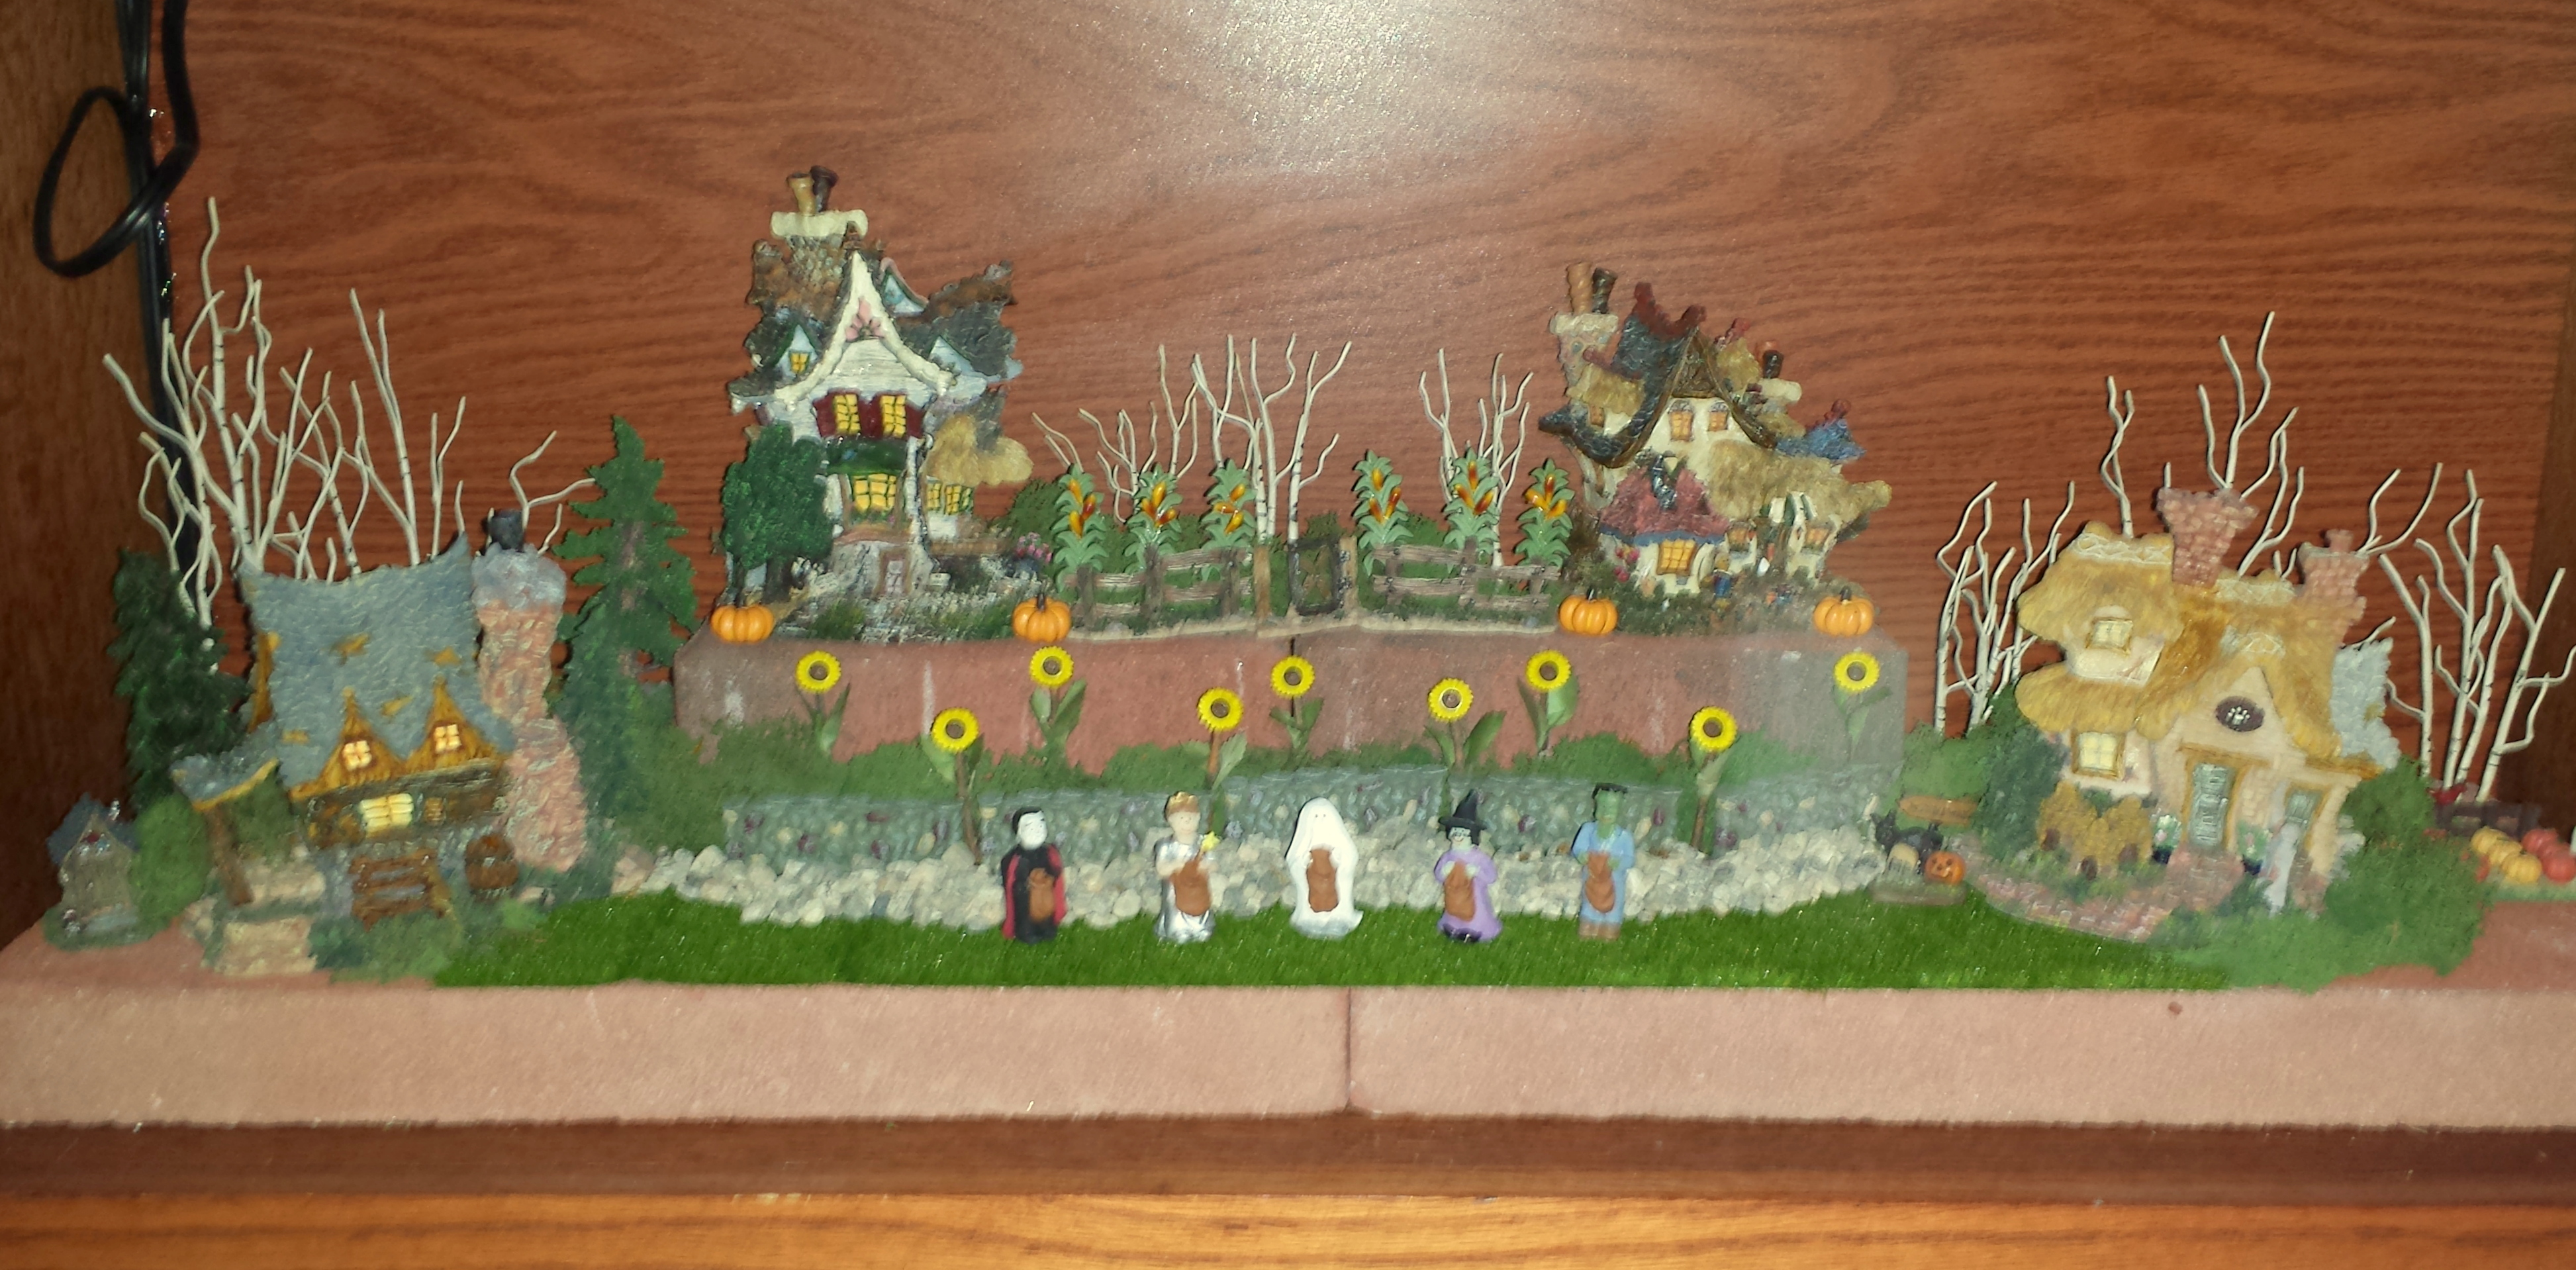
With the celebration of Halloween this month I thought it would be a great time to do a post about Disneyland’s Haunted Mansion located in Anaheim, CA.  There is a Haunted Mansion attraction located in the other Disney Parks: Walt Disney World, Tokyo Disneyland, in Disneyland Paris it is known as Phantom Manor and the newest in located at Hong Kong Disneyland is known as Mystic Manor.

Back in the early 1950s, the original concept of Walt Disney’s Disneyland illustrated by legendary Imagineer Harper Goff was designed with an old manor house and adjoining graveyard on a hill overlooking the main street.  Eventually the attraction was omitted from the plans and not included when Disneyland opened in 1955.

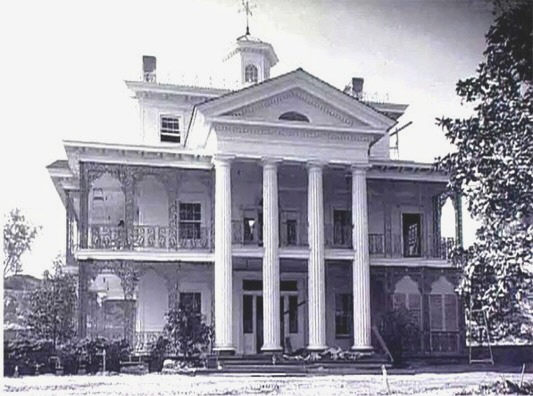
Years later when Disney was planning an expansion of the park to include New Orleans Square located between Frotierland and Adventureland, Disney Imagineer Ken Anderson was assigned the task of creating a story using the original concept of a “haunted manor” and developing it as a walk-through attraction.  For inspiration Anderson traveled to New Orleans to study the architecture and designed an old plantation antebellum style manor in a state of disrepair.  Disney had the plans revised because he thought a neglected looking building should not be located in his clean park.  He famously said, “We will take care of the outside and the ghost can take care of the inside”.

Andersen came back with a new redesigned mansion and a basic story concept about a sea captain who kills his wife in a rage and then hangs himself when he sadly realizes the tragedy that he has caused. Additional Imagineers, Rolly Crump and Yale Gracey, were brought in to further develop the project.  In the Disney tradition of fully researching a project, the Imagineers studied ghost hauntings and old horror movies for inspiration and they experimented with different types of special effects to further expand the basic storyline.  Walt appreciated the ideas and the special effects that they were creating but he did not like the sinister stories that they were developing and the project was once again put on hold for several more years.

Disney announced the new attraction in 1961 even though Walt was still unhappy with the ride’s current concept. Construction on the building began in 1962 and the exterior of the “haunted manor” was completed by 1963.  But the building stayed empty for several years as the Disney Imagineers worked on several other attractions for the New York World’s Fair of 1964-65 and then  the project was further delayed when Walt suddenly died in 1966.

Haunted Mansion construction 1

As the project continued a few years later for the newly renamed Haunted Mansion attraction, the concept changed significantly from a walk-through to a vehicle ride attraction using the Omnimover system that was developed for the Monsanto “Adventure Thru Inner Space” ride that Disney created for the New York World’s Fair.  This new ride system would solve the problem of the original low capacity walk-through attraction.  Now these new Omnimover vehices, renamed the Doombuggies, would be able to accommodate a much higher ride capacity using approximately 131 cars with an hourly guest capacity of over 2,400.  These new ride vehicles would also help in the attraction’s storytelling because the Doombuggy could be rotated in any direction at any point in the ride and this would allow the Imagineers to control what the guests not only heard but saw throughout the ride.

Around this time Anderson left the project and several other Disney Imagineers, Marc Davis, Claude Coats and X Atencio, were brought in to develop the attraction’s interior.  Coats was originally a Disney background artist and he wanted the attraction to be a scary adventure with a moody interior designed with endless hallways and a corridor of unusual doors.  Davis was a Disney animator that wanted spooky characters and funny gags throughout the ride.  X Atencio combined these two different concepts of scary and funny into an entertaining ride and he also wrote the lyrics for the ride’s theme song, “Grim Grinning Ghosts”.

Haunted Mansion hitchhiking ghosts

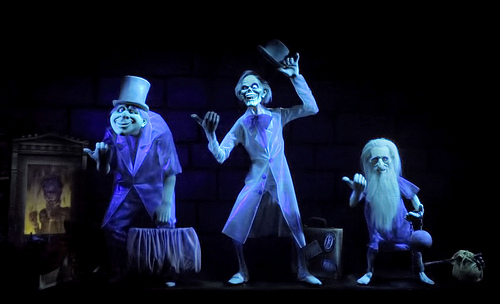
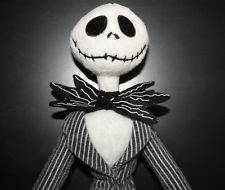
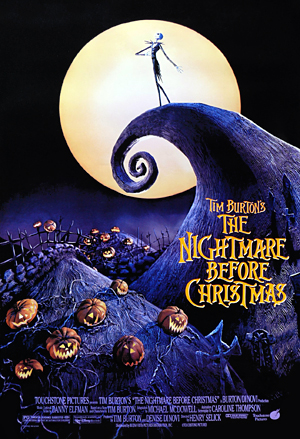
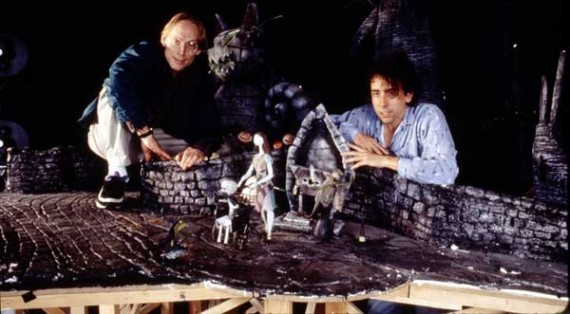
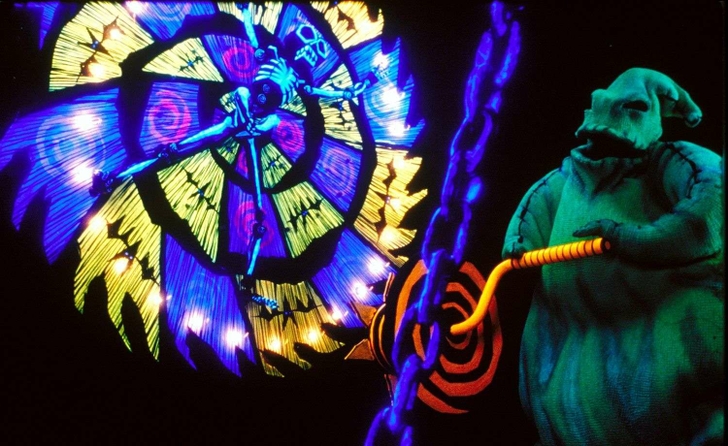
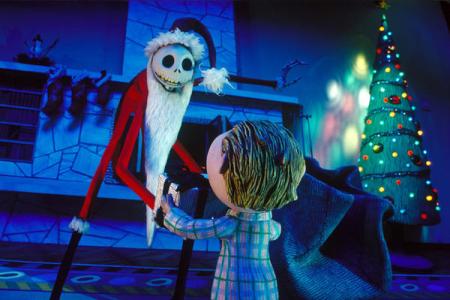
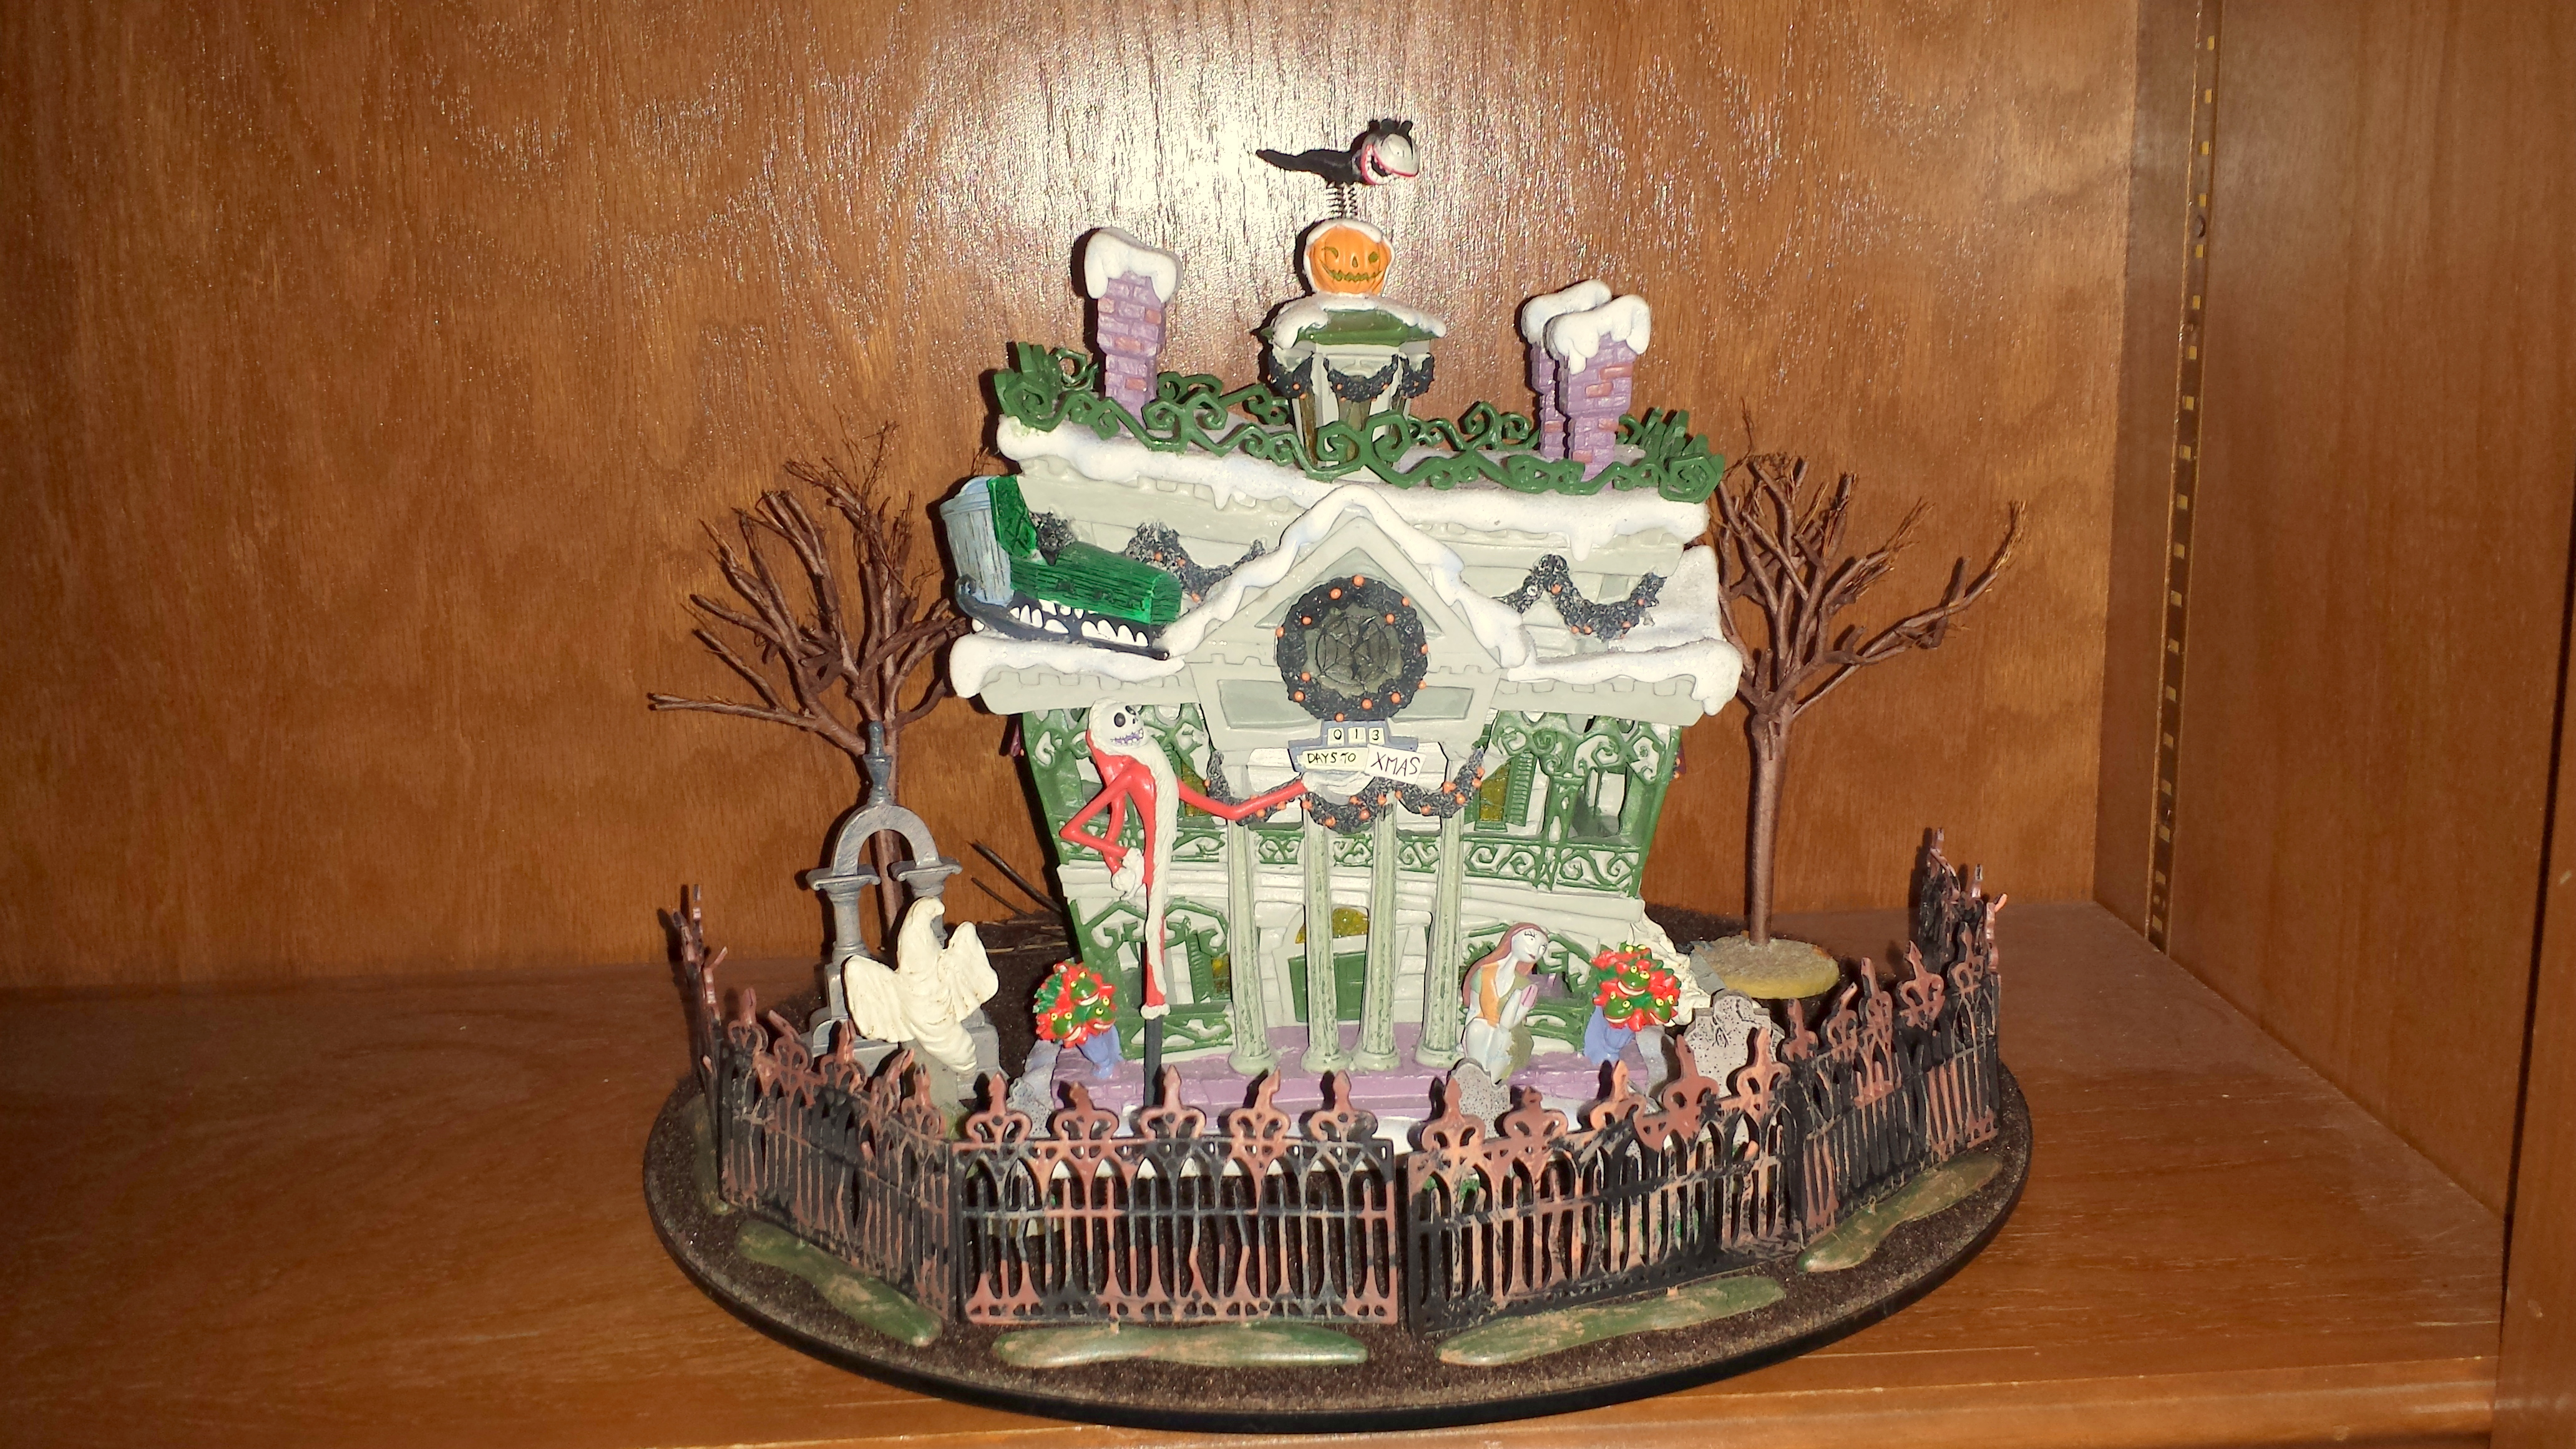
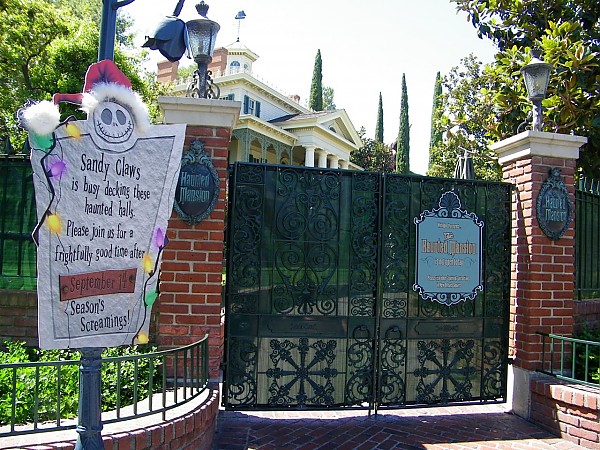
The Haunted Mansion opened in August 1969 and the attraction was an immediate success and has proven to be one of Disneyland’s most popular rides.  As mentioned previously in the post, The Nightmare Before Christmas movie, in October 2001 the attraction premiered the seasonal overlay featuring characters from Tim Burton’s 1993 movie and from mid-September to early January the attraction becomes “The Haunted Mansion Holiday”.

Haunted Mansion Holiday 1

Disneyland’s Haunted Mansion Trivia

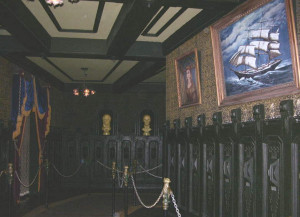
  • As noted earlier, the Haunted Mansion original building stayed empty for several years before the Disney Imagineers moved forward with creating the ride attraction.  For this reason, the Haunted Mansion that is seen from New Orleans Square is just the elaborate entrance to the ride; the show building that contains the actual ride is located outside the park’s berm or boundary.  The Disneyland Railroad tracks that circle the park are directly behind the Haunted Mansion and in order to reach the main show building on the other side of the tracks there is an elevator cleverly disguised as the stretching room that takes guest down and the hallway with the changing portraits is really a tunnel where guests are actually walking under the railroad tracks and the Doombuggy boarding area is located on the other side of the tracks in the main show building.
    Haunted Mansion - the streching room Haunted Mansion interior 150
  • As guests travel on their Doombuggy through the Haunted Mansion attraction they will notice a raven in every scene.  Inspired by the Edgar Allan Poe’s poem, “The Raven” originally published in 1845, the Disney Imagineers planned on using these ravens as the narrator on earlier versions of the ride.  The idea never made the final plan but the ravens have still remained in their original positions in each scenes.
  • As guests travel through the ballroom scene in the Disneyland Haunted Mansion, just before leaving this section in one of the last plexiglass panels look for a bullet hole caused by a gunshot from someone years ago, it is cleverly disguised with a spider web.
  • Before leaving the ballroom scene look for the large organ at the end of the room being played by a ghost organist, the organ was actually a prop from the 1954 Disney movie “20,000 Leagues Under the Sea”.
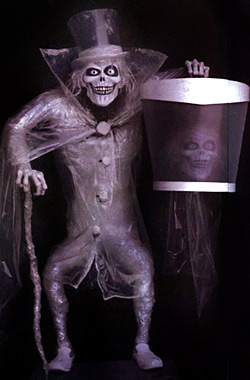
  • Originally in the attic scene there was briefly a “Hat Box Ghost”.  Located near the end of the room, on the left there was a bride and on the right was a groom holding a hat box.  The groom’s head would slowly disappear and then reappear inside the hatbox and then the illusion would continue cycling back and forth.  The special effect never worked quite right and was soon removed from the attic scene and the bride was repositioned from the left to her present position on the right side.
    Hat Box Ghost
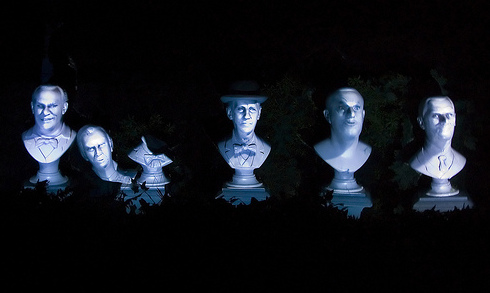
  • One the signing busts at the end of the graveyard scene is not Walt Disney.  The bust that is confused as being the face of Walt is actually modeled after Thurl Ravenscroft who provides the deep bass voice heard in the theme song of the Haunted mansion, “Grim Grinning Ghosts”.  Ravenscroft sang in a popular quartet known as the Mellomen that provided backup vocals for many popular recording artists such as Rosemary Clooney, Bing Crosby, Doris Day and even Elvis Presley.  The group went on to sing in several Disney movies, such as Alice in Wonderland, Peter Pan and Lady and the Tramp.  Ravenscroft is best known as the voice of Tony the Tiger from the cereal commercials.

Haunted Mansion - singing busts


Be sure to check out the five part Disneyland series for information about the history and park information about the eight different “lands”.  Part One – The history of Disneyland, Part Two – Main Street and Fantasyland, Part Three – Adventureland and Frontierland, Part Four – New Orleans Square and Critter Country, Part Five – Tomorrowland and Mickey’s Toontown.

Craft – Nightmare Before Christmas wreath

Jack SkellingtonThis quirky Halloween wreath is inspired by Tim Burton’s 1993 movie, “The Nightmare Before Christmas”.  Jack Skellington, the main character in the movie, is the Pumpkin King who lives in the fantasy world of Halloween Town.  The town is filled with ghosts, vampires, werewolves, witches and other monsters who only celebrate the one holiday of Halloween.  Jack has a very unusual appearance; he is a skeleton who wears a black pin-striped suit and a bow tie that resembles a bat.  For more information about the making of the movie and a brief synopsis of the film, please check out yesterday’s post, The Nightmare Before Christmas movie.

I have been planning on making a Nightmare Before Christmas wreath for several years and this year I finally came up with a design that I liked.  Below is a list of supplies and instructions to make this unique Halloween wreath.

Nightmare Before Christmas wreath – supplies

1 black wreath, (a pine wreath spray painted black would work if you can’t find one)
5 round and flat bisque ornaments
Black Sharpie
1 small Santa hat
Several black berry sprays (I found these in the Halloween section of local craft store)
3” wide black and white striped ribbon
Hot glue gun and glue sticks
wire, cut into 5 4-inch lengths

Nightmare Before Christmas - supplies

Nightmare Before Christmas wreath – instructions

  1. Using the 5 round bisque ornaments, draw 5 different faces of Jack Skellington with a pencil.  When you are satisfied with the faces, trace over the designs using a black Sharpie, be sure to fill in the eyes completely.
    Nightmare Before Christmas - Jack faces 1  Nightmare Before Christmas - Jack faces 2
  2. Choose one of the Jack faces and using hot glue attach a small Santa Hat.  This Jack will be the “Sandy Claws” for the Nightmare Before Christmas wreath.
    Nightmare Before Christmas - Sandy Claws
  3. Position “Sandy Claws” in the center of the lower section of the black wreath, position the remaining 4 Jack faces around the wreath.  Individually attach each Jack face with wire to the wreath.
    Nightmare Before Christmas  - adding berries
  4. Hot glue black berry sprays to the wreath; evenly space the berries around the wreath.
  5. Using the black and white striped ribbon make a bow and attach it to the wreath just below the “Sandy Claws”.
    Nightmare Before Christmas - finished

“The Nightmare Before Christmas” movie

The Nightmare before Christmas 1

One of our favorite family traditions at Halloween every year is watching “The Nightmare Before Christmas”.  I must be honest and say that when I first saw the movie I did not like it but over the years I have come to enjoy this quirky movie by Tim Burton.  When we lived in California, we also went every year to see the Haunted Mansion in Disneyland when it received the annual “Nightmare Before Christmas” overlay with the characters of Jack Skellington, Zero, Sally and Oogie featured throughout the attraction. (Please see the post, Disneyland’s Haunted Mansion, for more information on this iconic attraction)

Haunted Mansion Holiday 1

Tim Burton was born in Burbank, CA in 1958 and as a teenager he started making short films using the stop motion animation technique.  After graduating from Burbank High School, Burton studied at the California Institute of the Arts located in Valencia, CA.  Founded and created by Walt Disney in the early 1960s the university, known as CalArts, was created specifically for the visual and performing arts which Disney used as a resource for their future employees.  Interestingly, some of Burton’s classmates were John Lasseter and Henry Selick.

Eventually Burton went to work as a Disney animator and in 1982 he had some mild success with an animated six minute stop action short film called “Vincent”.  At this same time, Burton wrote a three page poem, “The Nightmare Before Christmas”.  Disney had considered developing the idea into a short film or possibly a television special.  In 1984 Burton’s next film was a live action short called “Frankwnweenie” but shortly after the film was completed Disney thought Burton’s work was too dark and scary for children which was Disney’s target audience and he left the company.  Burton went on to direct such Warner Bros. films as “Pee-Wee’s Big Adventure” (1985), “Beetlejuice” (1988), “Batman” (1989), and the 20th Century Fox film “Edward Scissorhands” (1990).

During those years, Burton kept returning to the story of “The Nightmare Before Christmas” but Disney still owned the film rights.  Finally in 1990 Burton entered into an agreement to produce a full length feature film but due to the darker theme of the film, Walt Disney Pictures had decided to release the movie under their more mature movie division, Touchstone Pictures.  Burton’s old classmate from CalArts, Henry Selick, was the film’s director and Danny Elfman, who Burton had worked with since 1984 on his previous films, collaborated on the storyline and co-wrote the songs for the movie.

The Nightmare before Christmas - filming

By 1991 Selick had organized a team of animators and began the complicated and long production of the stop action film with a crew of 120 workers using 20 sound stages in San Francisco, CA.  To film the movie they had created 227 puppets for the various characters in the movie.  Just for the character of Jack Skellington there were over four hundred heads to allow for every possible facial expression, emotion and head position.  The movement of Sally’s mouth was animated later through a different process utilizing ten different types of faces each with a series of various expressions and synchronized mouth movements.  By this time Burton was involved in a previous commitment to film “Batman Returns” (1992) and preproduction for his next film “Ed Wood” (1994).  According to Selick, because of Burton involvement with the other movies he rarely visited the set of “The Nightmare Before Christmas” during the two years it took to complete the principal filming of the movie.

The movie was released in 1993 and includes a cast of characters with the voices of Chris Sarandon as Jack Skellington (Danny Elfman provides the singing voice of Jack), Catherine O’Hara as Sally, William Hickey as Doctor Kinklestein, Ed Ivory as Santa Claus and Ken Page as Oogie Boogie.  Although the movie received positive reviews for originality it only had limited success due to the darker and quirky style of storytelling.  With the DVD release of the film in 1997 and the wonderful CD soundtrack of songs co-written by Burton and Elfman, the movie has become a popular with the general public and has proven to be a new Halloween classic.

With this increase in the movie’s popularity Disney Imagineers decided to take a chance and starting in 2001 the Haunted Mansion at Disneyland receives a seasonal overlay that blends the settings and characters of the original attraction and “The Nightmare Before Christmas”.  The Haunted Mansion in New Orleans Square closes for two weeks in September to be converted into “The Haunted Mansion Holiday” attraction.  “The Haunted Mansion Holiday” runs from mid September to early January then the attraction closes to have the overlay removed.

“The Nightmare Before Christmas” synopsis

As the movie starts we are introduced to Halloween Town which is filled with ghosts, vampires, werewolves, witches and other monsters.  Jack Skellington, also known as the Pumpkin King, is the center of the Halloween celebration but he is growing tired of the same routine every year.  While wandering in the forest he accidentally finds a portal to Christmas Town and Jack is fascinated with this new holiday.  He loves the feeling of Christmas and the idea of Santa Claus with all the gift giving traditions.  Jack decides to bring the ideas of Christmas back to Halloween Town.

Back in Halloween Town there is a rag doll women named Sally that was created by a mad scientist.  Sally has begun to fall in love with Jack, but she thinks his idea of Christmas will be disastrous. Jack enlists the help of a trio of children named Lock, Shock and Barrel to kidnap the real Santa and bring him back to Halloween Town.  Instead the trio brings Santa to Oogie Boogie who is a bogeyman with a fondness for gambling and Oogie decides to play a game with Santa’s life and he is in terrible danger.

The Nightmare before Christmas - Oogie Boogie

When Christmas Eve arrives and Jack finds out Santa is missing he decides to return to Christmas Town and Sally tries to stop Jack.  But Jack, now dressed as Sandy Claws, leaves on a sleigh made from a coffin pulled by a skeletal reindeer which is actually his ghost dog named Zero.  Sandy Claws starts to deliver presents which are not lovely gifts but scary things like shrunken heads and Christmas tree eating snakes that terrify the children.  Christmas Town is on alert and the military hunts Sandy Claws down while he is flying in his make-shift sleigh.  After the crash, news gets back to Halloween Town that Jack (Sandy Claws) is presumed dead.

The Nightmare before Christmas - Sandy Claws

Somehow Jack survives the crash and lands the cemetery.  He is sad that his Christmas plan has failed but his spirit is renewed when he begins to make new and exciting plans for next Halloween.  Finding out that the missing Santa is being held by Oogie Boogie and that when Sally tries to rescue Santa but she also gets captured, Jack tries to save them both.  Unfortunately, Oogie attacks Jack with metal playing card that keep popping up but Oogie is finally defeated and everybody is saved.

Afterwards, Santa reprimands Jack for almost ruining Christmas.  As Santa leaves Halloween Town he makes the snow fall to show that there are no hard feelings towards Jack.  The town’s people are at first confused by the snow (they have never seen it before) but then they begin to play in the snow and are very happy.  Then, Jack notices that Sally is heading towards the graveyard and he follows her and finally reveals that he loves her too.  The last scene ends with the couple kissing on the top of a large hill in the cemetery with a full moon behind them.

The Nightmare before Christmas - final scene

Craft – Halloween Signs

Haloween sign - Treat or Treat finished sign  Haloween sign - Eat Drink and Be Scary  finished sign

Last year I made a Christmas sign to hang over our fireplace mantel where I displayed my Department 56 North Pole Village in our family room.  Then, when I was decorating my home office where I write my lifestyle blog, I made a sign for The Enchanted Manor.  (To take a look at the Christmas and home office signs, please see the photos from these two Décor Posts, Department 56 North Pole Village and Home Office)  Both these signs turned out great and I was very happy with the results, so this year I decided to make two new signs for Halloween.

The inspiration for the signs starts with the popular wall decals that are sold in the craft stores.  Usually these self-adhesive decals are directly attached to the walls, but I decided to use them in a different way and make seasonal holiday signs that I can be display in our home.  With a little bit of paint and a few additional items to add some interest to the signs, these craft projects may take a little longer to create but I think the results are worth the effort!  I have seen seasonal signs in retail stores that sell for a minimum of $50 or more and I can create great looking custom signs for a fraction of that cost.

In this post I will explain the steps needed to create my custom Halloween signs.

Step one

The first item needed to create a seasonal sign is a self-adhesive wall decal or wooden letters.  Wall decals are very popular and there is a great selection available in local craft store.  If you can’t find the exact wording needed for your sign, consider using large wooden letters.  The two Halloween signs created for this craft project will be using decals, one is “Trick or Treat” and the other is “Eat Drink & Be Scary”.

Haloween sign - checking placement

Step two

After the decal for the craft project is selected, I will shop for additional items to use as embellishments.  Select decorative items that match the theme of the decal which also add interest and some dimension to the sign.  For the “Trick or Treat” sign I found some resin candy corns to use.  For the “Eat Drink & Be Scary” sign I found a small resin pumpkin wearing a witch hat and some spiders.

Step three

Select a board that will fit the decal’s measurements with additional space around the decal of a minimum of 3 inches.  Wood can be used for this craft project but there is always a risk of the wood warping or splitting over time.  For my seasonal signs I used MDF board which usually costs less than a piece of wood and the surface is much smoother and no sanding is required.  Next, with the help of my husband, he cut the MDF boards to match the measurements I needed for the two signs.

Step four

Select a color for the sign’s base paint, this color will become the background color of the sign. Using a paint roller for a smoother finish, paint the board.  Be sure to paint the edges of the board for a finished look.  Allow it to dry overnight, if the paint is not completely dry it will cause problems later in step five.  For my signs, I used an off white semi-gloss paint that we had leftover from a previous home project.

Haloween sign - painting the base color

Step five

Determine what color or colors to use for the boarder or trim sections of the sign.   When selecting colors, choose ones that coordinate and compliment the colors of the decal.  Then, when the base paint of the board has completely dried, use painter’s tape to create straight edges for the boarders of the sign.  Allow the paint to dry completely; if the tape is removed too soon the edges can smug.

For the “Trick or Treat” sign I used a metallic green paint for the boarder and black paint for the trim and for the “Eat Drink & Be Scary” sign I used black paint for the boarder and a metallic bronze paint for the trim.

Haloween sign - using painter's tape for border and trim

Haloween sign - painting border and trim

Haloween sign - boarder and trim paint

Step six

When the board is completely dried but before peeling the back off the decal, place the decal in the desired position on the board and add the decorative items.  When you find a visually pleasing arrangement, remove the backing from the self-adhesive decal and carefully attach it to the boards while smoothing out any bumps.  If you need help making the wording level and straight, you can draw a very light pencil mark to aid in the placement of the decal.

Step seven

The final step is to attach the decorative items in their pre-determined places on the board with hot glue for heavier items and stick glue for lighter items.  For the “Trick or Treat” sign I hot glued resin candy canes around the board to create a fun border.  For the “Eat Drink & Be Scary” sign I hot glued a cute pumpkin in a witch’s hat between the words.  I found some fuzzy spiders in the scrapbook section of my local craft store, they had self-adhesive backs and I attached them to the board.  On either side of the board I positioned a spider and drew a black line with a marker to create the illusion of a spider hanging from a web.

Haloween sign - decorative items placement

I was very happy with the results of these two Halloween sign craft project.  The “Trick or Treat” sign was hung in our entry foyer, a picture hook was attached to the back so that it could be hung on the wall.  The “Eat Drink & Be Scary” sign was put on the top of the kitchen cabinets using a standing plate holder and displayed with a ceramic pumpkin and my daughter’s toy black cat.  They both look great and are a fun addition to our Halloween decorations!

Front entry

Kitchen 1

Decor – Halloween Decorations

Front door autumn wreath

Like most seasons throughout the year I enjoy decorating our home for each of the different holidays and Halloween is no exception!  I try to keep the decorations fun with just a touch of elegance.

Let’s start on the front porch … every year I place two artificial pumpkins outside near the potted plants.  Usually I will add several more real pumpkins that we will later use to make roasted pumpkin seeds and my husband’s delicious pumpkin pies for Thanksgiving dinner.  Next, I placed a wooden “Trick or Treat” black cat into the potted plant for a whimsical Halloween touch and I also added several long-stemmed sunflowers.  Just under the front porch overhang I hung a quirky “Enter If You Dare” wooden sign and on the front door I hung an oval fall wreath decorated with golden chrysanthemums and autumn leaves.  After Halloween I will attach a resin oval pumpkin that has a small metal “Welcome” sign to the Autumn wreath.

Front porch

In our entry foyer is a low wooden bench and I placed a three foot high scarecrow which holds a wooden sign that says, “Welcome Happy Harvest”, that is decorated with sunflowers and berry sprays.  Next to the bench is a wooden pedestal with a floral arrangement of white rose and during the fall season I add several peasant feathers to the arrangement for a festive touch.  This year I change the picture on the wall with a new Halloween “Trick or Treat” sign that I recently made.  (For more information and instructions on how to create this one of these for your home, please check out this month’s Craft post, Halloween signs)

Front entry

To the right of the entry is our library and in this room is an oak wooden lawyer’s bookcase which holds my Boyd’s Bear collection.  As discussed in a previous post, Displaying a Boyds Bear Collection Part One, I usually decorate the bookcase for each of the different seasons and holidays throughout the year.  For Autumn I added several acorns and oak leaves to the Boyds figurines to the top two shelves.  On the bottom shelf of the bookcase my Boyds Bear Village is displayed and this will also get a seasonal change.  This year I added several cornstalks and sunflower plants, I had searched in the local craft stores and couldn’t find any that I liked or were the size that I needed.  Finally, I found plastic cornstalks and small sunflower buttons.  I added small berry seeds to the cornstalks that would resemble ears of corn and for the small sunflower buttons I added twigs to resemble stems.  To finish the display I add a group of Halloween trick or treaters.

Boyds Bears Bookcase - fall decorations

Boyds Bears Bookcase - Boyds Village fall decorations

Moving on to the family room, I decorated the fireplace mantel with artificial pine boughs and layered on sprays of berries, grapes and burgundy colored magnolias to create a festive autumn floral arrangement and on either side I finished the display by adding two scarecrows.  To the left of the fireplace is a bookcase that has a display of family photos that are displayed year-round.  For Halloween I removed some of the photos in a few of the gold frames and exchanged them for other photos of my children wearing some of my favorite Halloween costumes.  To the right bookcase I replaced a photo with a cute photo of my dog when she was wearing her Halloween costume.  To give the photo a festive look I add simple scrapbook letters in the shape of bones that spell out “Happy Halloween”.  These simple changes are a wonderful way to add some seasonal style in an easy way.  To the bookcase I also added a few wooden pumpkins and a special ceramic pumpkin that my daughter made years ago.  Also displayed in the bookshelf is a display of the Disneyland Haunted Mansion decorated as Tim Burton’s Nightmare Before Christmas.  (For more information about this entertaining 1993 Disney movie, please see this month’s post, the Nightmare Before Christmas movie)

Family room bookshelves

Family room bookshelves  - Haunted Mansion Holiday   Family room bookcase 2
Halloween picture frame supplies  Halloween picture frame

The next room to be decorated is the kitchen.  On one side of the kitchen sink is a next to a basket of artificial vegetables where I placed a small resin pumpkin and on the other side of the sink I placed a Halloween witch.  On the granite top kitchen island is a lovely ceramic pitcher filled with ivory sunflowers and for an unexpected touch I’ve added several peacock feathers.

2012-11-15 07.59.06

Kitchen witch  Kitchen autumn floral arrangement

Across the room there is counter desk area with cabinets overhead.  In the space above the cabinet I removed the sign that is usually there year-round and replaced it with a Halloween sign I made recently that says “Eat drink & be scary” that is decorated with spiders.  Next to the sign I placed a large ceramic pumpkin and a black cat stuffed toy to complete the display.  (For more information and instructions on how to create a seasonal sign your home, please check out this month’s Craft post, Halloween signs)

Kitchen 1

The room to be decorated is the dining room.  Currently there is a lovely floral arrangement of gold roses that usually is displayed with an antique doily on the dining room table.  The color of the roses is still appropriate for the autumn season and will remain there until I set the dining room table for our thanksgiving dinner in November when I have some wonderful plans for some festive decorations.  (Please check next month for a Décor Post, Thanksgiving table Decorations, for more information and photos)

The finishing touches to the dining room are two different jeweled pumpkins that I made this year.  The first one was very easy; it is a plain ivory ceramic pumpkin that I bought from a local craft store which I decorated with black crystals and spiders. for an elegant Halloween Pumpkin.  This elegant Halloween pumpkin sits on top of the tall cabinet near the dining room table.  The other two pumpkins are also very easy to make, they are small bisque pumpkins that I bought from the craft store and painted in a beautiful bronze metallic color with the stem painted a pale green metallic color.  Then to add a little sparkle I glued individually placed beautiful dark topaz crystals.  The pumpkins are placed into two Nortiake Rothschild teacups and displayed in the china cabinet.  (For more information about creating these elegant pumpkins, please check out this month’s Craft Post, Jeweled Pumpkins)

Jeweled Pumpkin 2 final  Jeweled Pumpkin on display in china cabinet

The last few items that I want to share when I’m decorating for the Halloween season are handmade decorations that my Mom made several years ago.  Now that she passed away, these decorations have become very sentimental to me and eventually they will be passed onto my children so that they will have something to cherish from their grandmother.  The first is a fabric witch with pipe cleaner arms and legs riding on a broom that my mother crafted almost 35 years ago and it has hung in all the houses that I have lived in since my mother made it for me.  The second is a fabric bat that my mother made around the same time and it has been a part of my annual decorations for years.  The third item is a large fabric cat that my mother made and I use as a pillow decoration of our sofa or recliner chair.  Bringing these decorations that my Mom created and displaying them every Halloween just puts a smile on my face!

Halloween 2003 - Witch