Craft – “Breakfast at Tiffany’s” frame

Breakfast at Tiffany frame - final 2

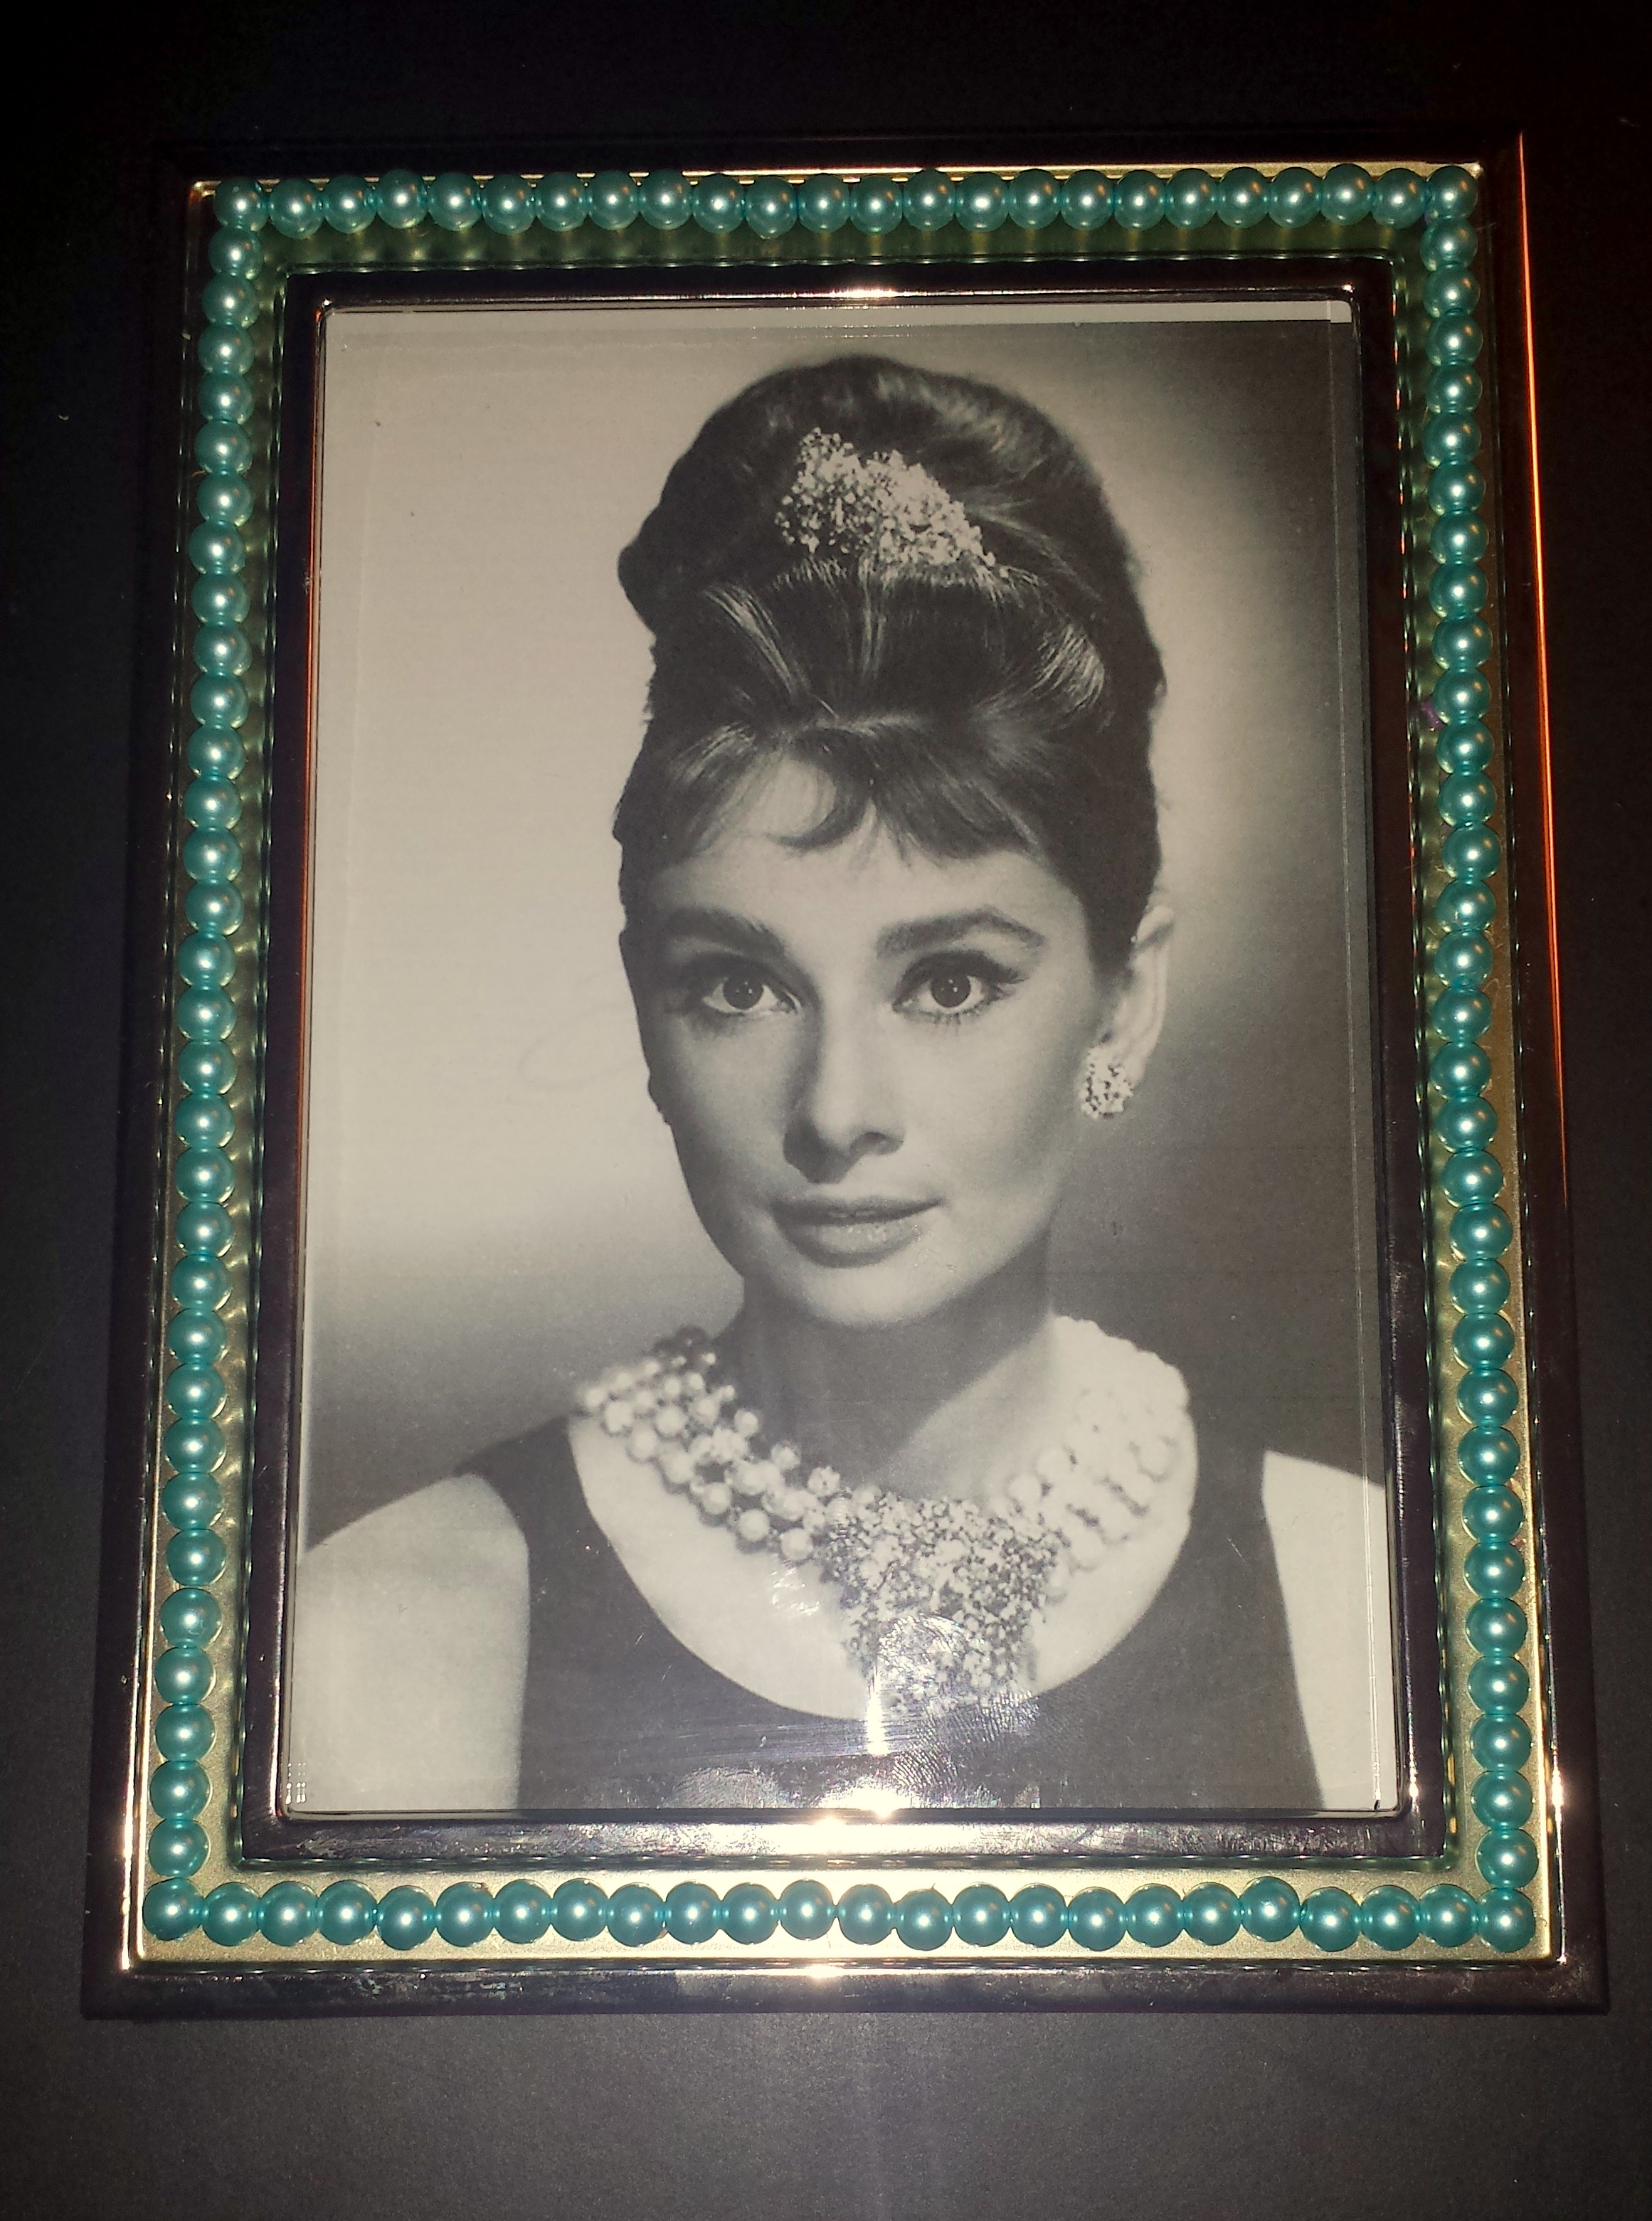
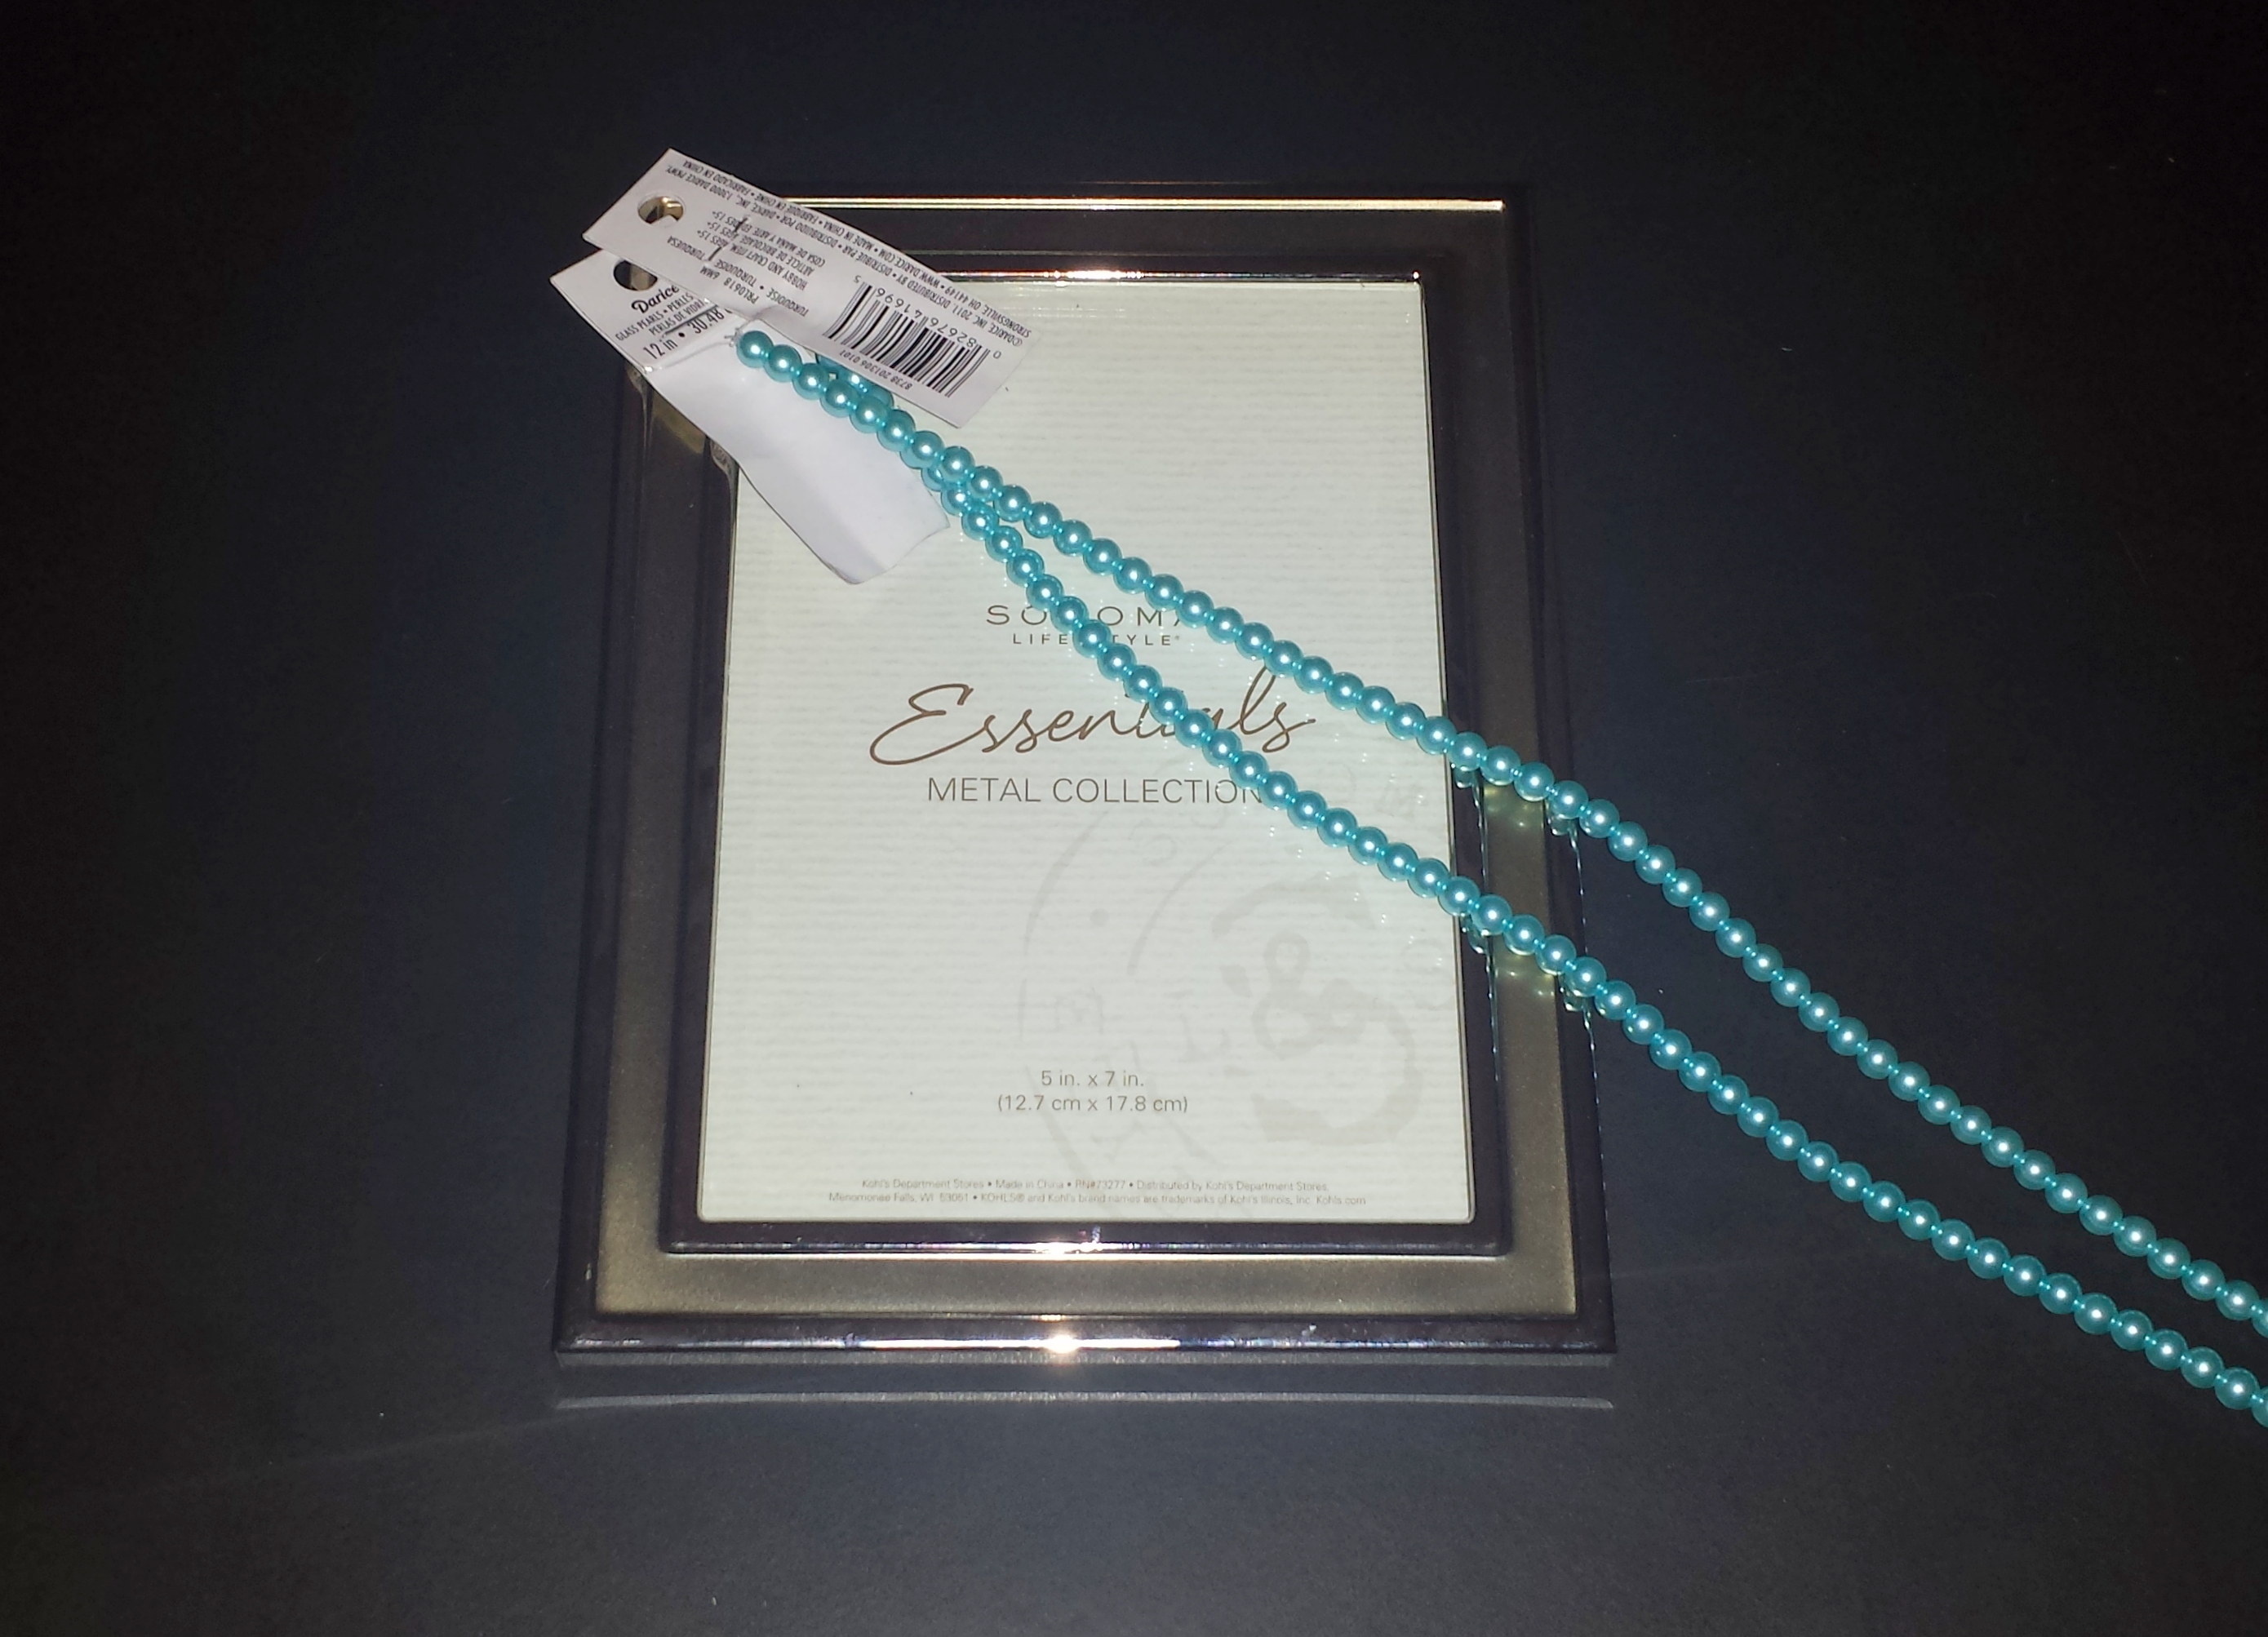
In honor of Audrey Hepburn (born: Audrey Kathleen Ruston May 4, 1929 died: January 20, 1993) I was inspired to create this picture frame using a simple silver frame that I decorated with “Tiffany” blue Swarovski pearls.  Audrey Hepburn was the famous actress that starred in the classic 1960 romantic comedy film, “Breakfast at Tiffany’s”.  (Please see the end of this post for more information about the movie)

“Breakfast at Tiffany’s” frame supplies 

  • A simple silver frame (select one that has a space between the frame’s interior and exterior edges)
  • Several dozen “Tiffany” blue Swarovski pearls, the color has been associated with the famous jewelry store and is used for their sales boxes and bags.  (Craft Tip: the trick to this project is to measure the frame and calculate the amount of pearls needed to avoid running out and coming up short!)
  • Glue stick
  • Pliers

Breakfast at Tiffany frame - supplies

“Breakfast at Tiffany’s” frame instructions –

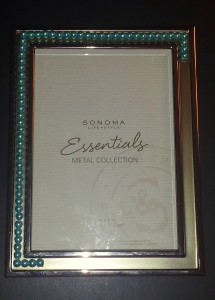
  1. Pick up each individual pearl with the pliers, be sure the prongs are placed over the pearls holes.  Then put a small amount of glue on the bottom of the pearl.
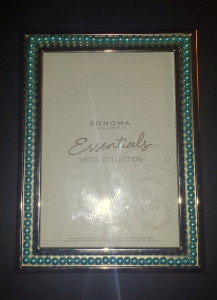
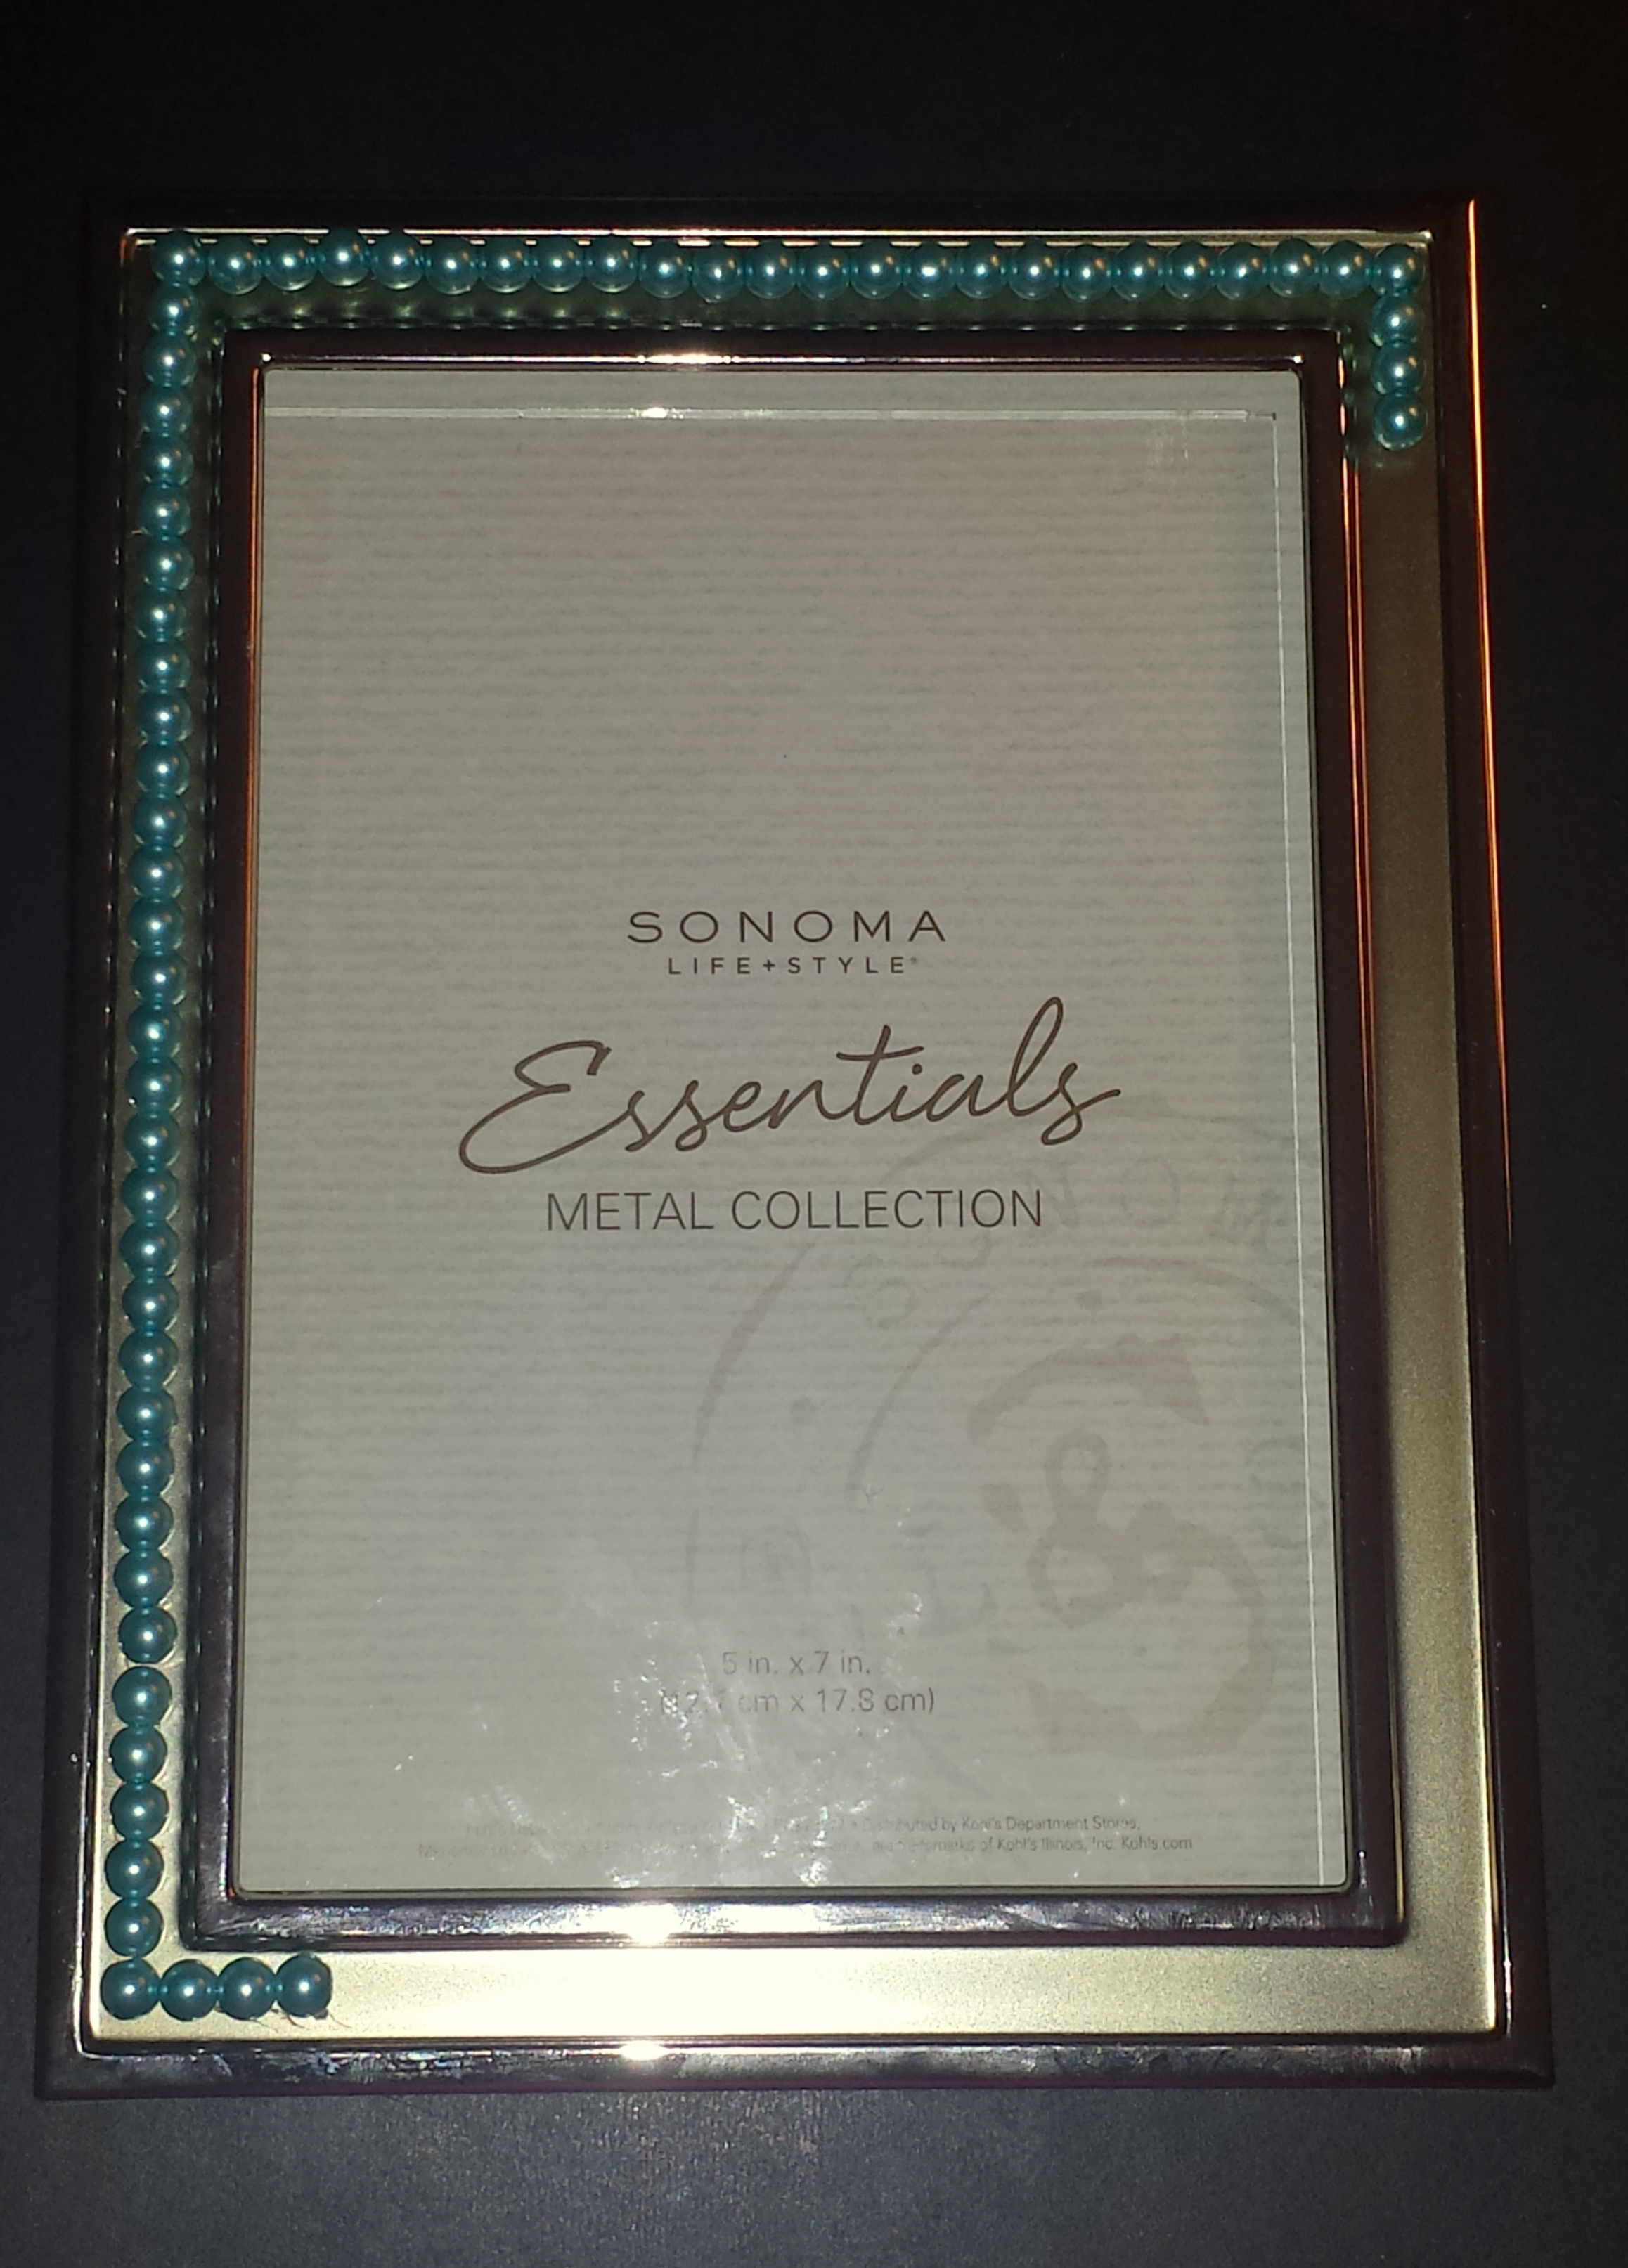
  2. While the pearl is still within the grasp of the pliers, place the pearl onto the frame in the space between the frame’s interior and exterior edges.  (Craft Tip:  Be sure to position the pearl so that the holes are lined up and hidden by each of the other pearls when placed on the frame)
    Breakfast at Tiffany frame - step 2    Breakfast at Tiffany frame - final 1
  3. In keeping with the “Breakfast at Tiffany’s” theme, to finish the project I used a photo from the movie of Audrey Hepburn as Holly Golightly.

“Breakfast at Tiffany’s” movie information and trivia

Breakfast at Tiffanys movie posterThe classic 1961 Paramount movie  which stars Audrey Hepburn and George Peppard and also features a supporting cast of Patricia Neal, Buddy Ebsen and Mickey Rooney, the movie is based on the novel written by Truman Capote.  “Breakfast at Tiffany’s” was nominated for several Academy Awards and won for Best Original Score and Best Original Song, “Moon River” with music by Henry Mancini and lyrics by Johnny Mercer.

The character of Holly Golightly was one of Audrey Hepburn’s most memorable roles.  Hepburn’s portrayal of the naive but eccentric society girl living in New York City was regarded by her to be one of her most challenging roles because she was a normally quiet and introverted person and she needed to play the character in the film as a delightfully extroverted woman.

Movie Trivia –

    • “Breakfast at Tiffany’s” premiered at Radio City Music Hall on October 5, 1961 and received wonderful reviews and became an instant hit.  Despite the movie’s success, Truman Capote was uphappy with the director, the casting and his altered storyline; he thought Marilyn Monroe should have played the lead role.  Others actresses considered for the part were Shirley MacLaine, Kim Novak and a very young Jane Fonda
    • The film was set in New York City but very little of the movie was actually filmed on location, the production company only filmed for 8 days in Manhattan.  Most of the movie was shot on the Paramount soundstages in Hollywood.
    • The world famous Tiffany & Co. store at the corner of Fifth Avenue and 57th Street located in the heart of Manhattan made an unprecedented decision to open their flagship store on a Sunday for the filming of the movie, at the time the store was normally closed on that day of the week.  On the day of filming there were over 40 armed guards and several Tiffany sales clerks in the store to prevent any thief of the expensive jewelry.
    • In regards to the famous opening scene of the movie, when the character of Holly emerges from a taxi in the early morning hours to stand in front of the Tiffany store windows while eating her breakfast Danish, people always question how the iconic scene seem to be have been filmed on a deserted Fifth Avenue.  In reality, not visible on camera, were several hundreds of onlookers watching the filming and according to Blake Edwards, the director of the film, the scene was shot in one take.
    • The film established Hepburn as a fashion icon and she looked amazingly svelte especially given that fact that at the time of filming it had been only three months since the birth of her son.  Hepburn worked closely with the designer Hubert de Givenchy to create the wardrobe for the film.  The version of the “little black dress” Hepburn wore in the film became one of the most influential fashion choices ever in movie history.  The concept of the “little black dress” proved so popular because of the movie that since that time most modern women have a similar one in their closets!
    • In 2006, Christie’s auctioned the original “little black dress” that Hepburn wore in the film and it sold for $923.000.

Craft – Spring Mantel Decoration

Spring Mantel Decoration - final with bunniesThis year for the upcoming spring season I decided to make a special arrangement for the mantel in our family room.  Every year I usually set out two large “Bunnies by the Bay” stuffed white rabbits on the mantel, one on either side of the picture hanging over the fireplace.  This year, taking inspiration from the painting of the English countryside, I knew that whatever floral arrangement I made I wanted it to blend with the style and colors of the painting.  Instead of using a vase or basket for the container for the arrangement I used a log, the look is similar to the craft project from November – Rustic Table Centerpiece.  I think the natural element of the log and the pale colors of the flowers look wonderful displayed on our family room fireplace mantel!

Spring Mantel Decoration

Supplies –

  • Several bunches of small flowers (I used a mixture of white and yellow flowers)
  • A log
  • A drill and small bit for drilling holes in the log
  • Wire cutter
  • Work gloves, safety glasses (optional but highly advised)

Spring Mantel Decoration - supplies

Instructions –

1.  Start by selecting a log, the length will be determined by where the floral arrangement is being displayed.  Be sure the log is completely dried and “bug-free”.

2.  Determine the desired height of the floral stems; use the wire cutters to cut the floral stems to the proper length.

3.  Prepare a sturdy flat surface by covering it with newspaper.

4.  When selecting a drill, be sure to use one that is equal to the size of the floral stems that are being used.  (the holes should be large enough for the floral stems but small enough for the stems to remain upright without tipping over.

Spring Mantel Decoration - close-up of log5.  Place the log on the work surface, using the drill make several holes into the top surface of the log.  When drilling the holes vary the placement so that the floral stems are staggered throughout the top of the log.

6.  Once the holes are drilled, insert one floral stem into each hole.  (optional step – floral stems can be hot glued to secure)

Spring Mantel Decoration - final

Craft – Spring Door Decoration

Spring Door Decoration - finalNow that milder weather is finally here in the Midwest it is time to start thinking about decorating for the spring season.  As I mentioned in previous posts, I always start my seasonal and holiday decorations by decorating the exterior of our house.  This year I decided to make a new Spring Door Decoration.  I really loved the artificial tulips that I used last year for a floral arrangement in our kitchen and decided I wanted to use those flowers again for a front door decoration.  I choose an easy design that needed just a few supplies, there was no hot glue or flower foam used, and it took under half an hour to make.

Spring Door Decoration – supplies

  • Triangle shaped hanging wall container
  • 5 white artificial tulips
  • 5 purple artificial tulips
  • Several bunches of small white flowers
  • Several bunches of small purple flowers

Spring Door Decoration - supplies

Spring Door Decoration – instructions

  1. Remove all pricing and labels from container and flowers.
  2. Arrange the small white and purple flower bunches in the container.  (The flowers that I used were the perfect length for the container so no stem cutting was required and no floral foam was needed to keep them in place)
  3. Cut each individual white and purple tulip stem to a length that is several inches longer than the length of the container, when the tulips are placed in the container they should gracefully arch into a pleasing arrangement.  (When I arranged the tulips in the container I tried to alternate the colors of white and purple)
  4. When you are satisfied with the arrangement, hang the container from a hook or nail on a door.  (The container I used had a decorative loop at the top, so it was very easy to hang on the existing nail on our front door)

Spring Door Decoration

The Spring Door Decoration was so easy to make and I really like the way it turned out!  I think it looks beautiful hanging on our front door, the color of the container and the flowers are a wonderful contrast to the dark wood of the door and it sets a very festive Spring touch for our visitors to see when they come for our Easter celebration.

Craft – Fragrant Floral Sachets

Floral sachets

Here is an easy craft project that can be made for the upcoming spring season.  After a very harsh winter with heavy snowfall and freezing temperatures here in the Midwest and other parts of the country, I know that I am looking forward to more mild weather and the beauty of the spring flowers.  These floral sachets are a perfect way to get in the mood and can be made in an endless variety of colors to match any décor, just select a sachet bag and decorate it with matching or contrasting colors of flowers and ribbons.

Floral Sachets – supplies

  • Sachet bags (I used bags that measured 5 inches by 6½  inches)
  • Loose lavender buds (other fragrant dried flowers can also be used)
  • Full bloom small flowers, several stems
  • Bud flowers, several stems
  • Ribbon (I used one inch wide variegated green ribbon)
  • Hot glue gun and glue sticks

Floral sachet 1 - supplies    Floral sachet 2 - supplies

Floral sachets – instructions

  1. Fill the sachet bags with lavender; leave some room at the top of the bag so it can close with the drawstring.
  2. Arrange small full flowers and buds together and tie the bunch together with ribbon, trim the excess flower and bud stems, cut the ribbon to a shorter length and angle the ends for a finished look.
  3. Hot glue the ribbon to the sachet.

Floral sachet 1 - finished    Floral sachet 2 - finished

There are so many uses for these floral sachets and listed below are a few ideas:

  • The floral sachets are a wonderful way to add a subtle fragrance when they are placed in the linen closet with the sheets and towels.
  • Tuck a sachet into a lingerie drawer to add a lovely scent to your “unmentionables”!
  • The sachets also make wonderful gifts to give as presents to family or friends (just a reminder that Mother’s Day is coming up in May!)
  • Add one of the floral sachets to the inside of a gift box when wrapping a gift of clothing.  First lay the tissue in the box, set the item of clothing on top and fold the tissue over.  Then, lay the sachet on top of the tissue and close the box to finish gift wrapping the present.
  • The sachet can also be used as a decorative element on the outside of a gift box and you can coordinate the colors of the sachet to match any gift wrapping paper.
  • Add a floral sachet to a car interior, place one under a seat or, since the sachets are so pretty, place one where it can be seen.

Special Warning:  Please be careful when using the floral sachets for display and keep them out of reach of small children and animals that can eat or destroy the contents.

Craft – Mardi Gras Masks

This craft project is inspired by the annual Mardi Gras celebration in New Orleans, which is a popular cultural event that seems to be increasing in attendance every year.  These masks can be worn at a Mardi Gras themed party or would the perfect accessory for a Halloween costume party.  In this post, I will show two different masks craft projects which include a list of supplies and instructions.

(Special Note:  “Fat Tuesday” will be March 4, 2014.  For information about the origins and traditions of the Mardi Gras celebration, please check out the history of Mardi Gras section at the end of this post)

Mask #1

Supplies –

  • paper mask
  • brown felt
  • glue stick
  • glue gun and glue sticks
  • scissors
  • feathers
  • brads

Mask 1 - supplies

 Instructions –

  1. Apply the felt to the front of the mask.  Start by covering a small area on one side of the mask with glue, lay the felt flat on of the mask, moving from one side to the other, smoothing any bumps along the way.  Craft note: Be sure to leave a section at the top of the mask unglued in order to add the feathers.
  2. Trim the excess felt, cutting as close to the edge of the mask as possible.  Next, cut the eye openings.  Craft Note: The trick for cutting the felt is to use very sharp scissors.
  3. Then, working slowly around the mask, carefully hot glue the brads to the edge of the mask.
  4. At the top center of the mask, using a small amount of glue attach several feathers between the layer of the mask and the felt.  Once the feathers are arranged be sure to seal the area closed by gluing the felt over the feathers.

Mask 1 - finished

Mask #2

Supplies –

  • paper mask
  • blue felt
  • glue stick
  • scissors
  • blue sequins
  • self-adhesive flat-back blue crystals

Mask 3 - supplies

Instructions –

  1. Apply the felt to the front of the mask.  Start by covering a small area on one side of the mask with glue, lay the felt flat on of the mask, moving from one side to the other while smoothing any bumps along the way.  Craft note: Be sure to leave a section at the top of the mask unglued.
  2. Trim the excess felt, cutting as close to the edge of the mask as possible.  Next, cut the eye openings.  Craft Note: The trick for cutting the felt is to use very sharp scissors.
  3. Then, working slowly around the mask, carefully glue the blue sequins to edge of the mask, slightly overlapping them.
  4. At the top center of the mask, using a small amount of glue attach two butterfly antennas made from blue sequins between the layer of the mask and the felt.  Be sure to seal the area closed by gluing the felt over the antennas.

Mask 3 - finished

A brief history of the Mardi Gras

The celebration of Mardi Gras dates back centuries with origins in the pagan spring and fertility rites.  During ancient Roman times the Christians incorporated many of those pagan traditions into their own celebration preceding the season of Lent.  Lent is the 40 days between Ash Wednesday and Easter Sunday and it is a time of religious penance and fasting.  Traditionally, the week before Lent is spent indulging in food and drink with the culmination being the day before Ash Wednesday which became known as “Fat Tuesday”.  Over following centuries, the celebration spread to other parts of Europe in predominately Catholic countries.

Some historians believe the first American celebration of Mardi Gras (the French word for “Fat Tuesday”) took place in 1699 when two French explorers named Iberville and Bienville arrived in the New World.  The French settlement of New Orleans began celebrating the holiday of Mardi Gras with masked balls, lavish dinners and street parties.  For a brief period of time when the Spanish took control of New Orleans the celebrations were prohibited and strictly enforced until Louisiana came under the control of the United States and eventually this part of the country became a state in 1812.

The first officially documented New Orleans Mardi Gras celebration took place in 1837.  Then, in 1857 a secret society of prominent businessman called the Mistick Krewe of Comus organized a Mardi Gras torch-lit procession through the streets with marching bands and decorated floats which was followed by a grand ball for the krewe members and their guests and this set the tradition for all the future Mardi Gras celebrations in the city of New Orleans.

Almost from the start of the Mardi Gras celebrations in New Orleans during the late 1800s, different secret social organizations or krewes were responsible for planning their own parades and balls.  Originally, the krewes had restrictive membership policies but currently in order to get a parade permit all New Orleans krewes must sign affidavits agreeing not to discriminate against new members.  Unfortunately, some of the older more established krewes continue to allow new members by “invitiation only”.  Each krewe takes their names from mythological characters and there are dozens of krewes with names such as Rex, Bacchus, Knights of Babylon, Knights of King Arthur, Corps de Napoleon and the Zulu Social Aid.

In 1872, the Russian Grand Duke Alexis Romanoff visited New Orleans and he inspired the colors now traditionally associated with the Mardi Gras celebration.  The members of the Rex Krewe choose the colors for their symbolic meaning: purple for justice, green for faith and gold for power.  During the Mardi Gras season these colors can be seen in a variety of decorations such as the traditional Mardi Gras “throws”.  Throws are items that krewe members riding the parade floats will toss into the crowds.  The most common throws are strings of colorful beads or doubloons which are aluminum or wood coins usually imprinted with the krewe logo.