Craft – Wooden Initials

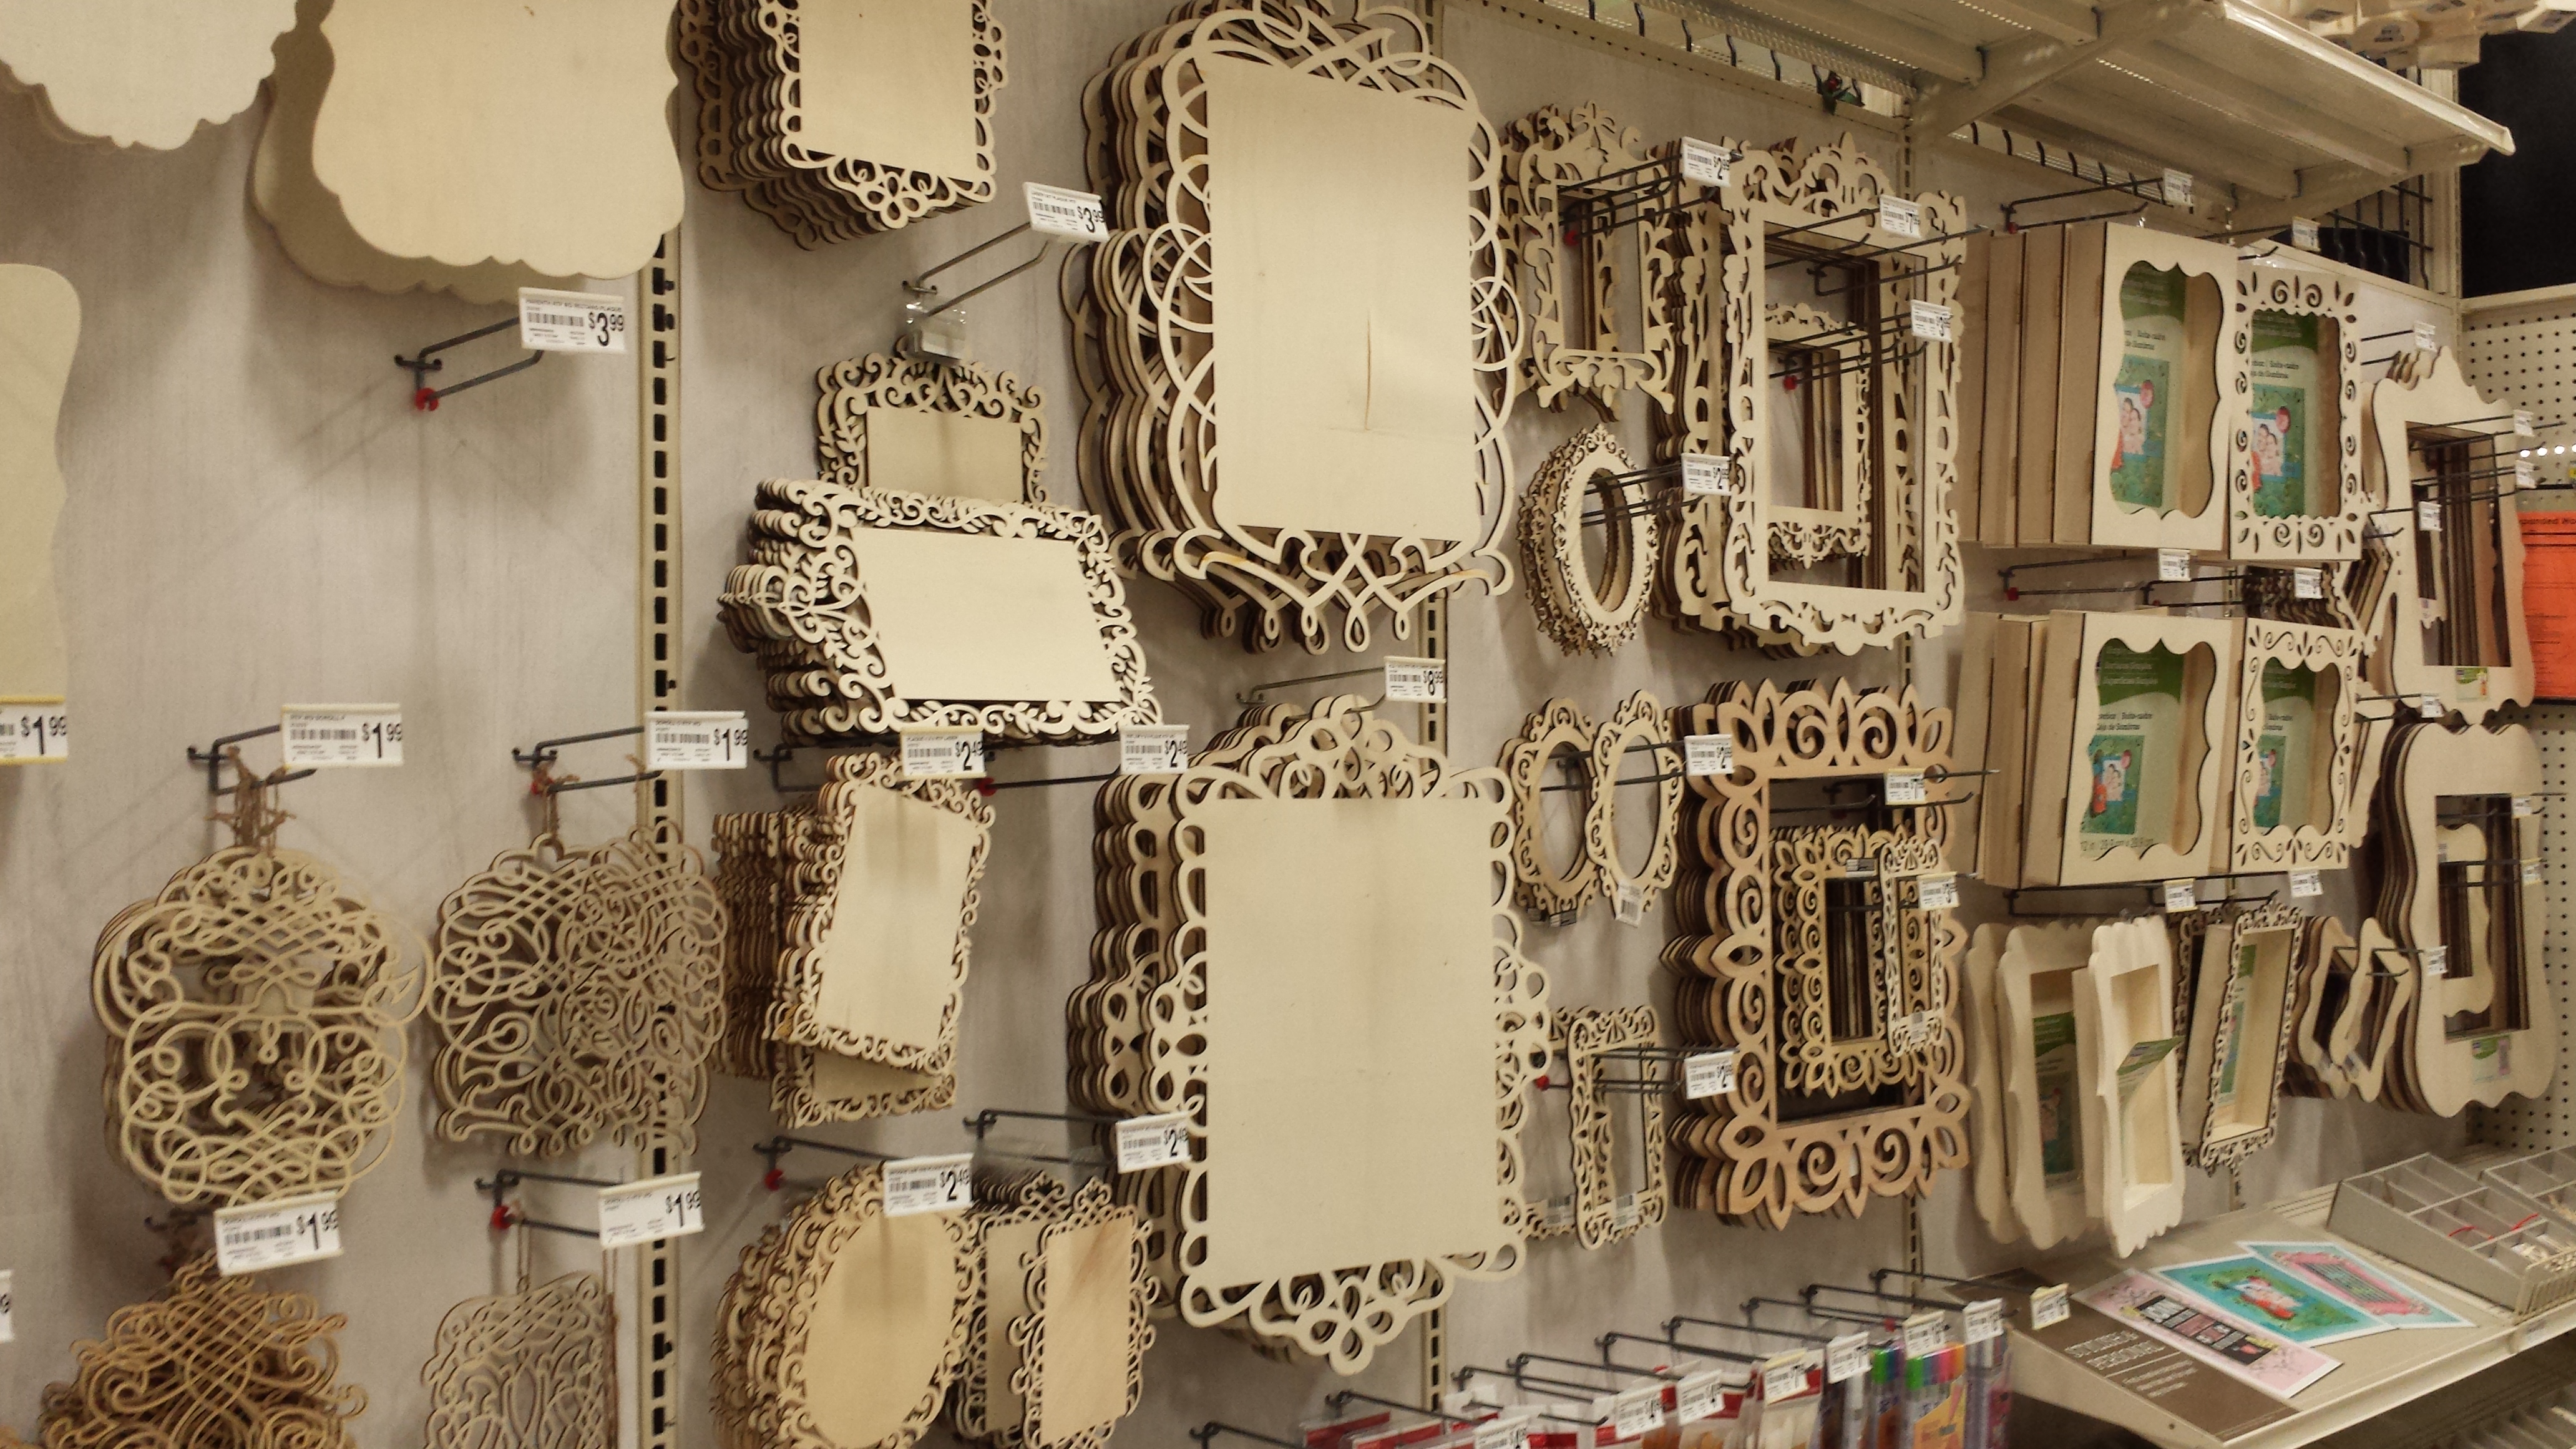
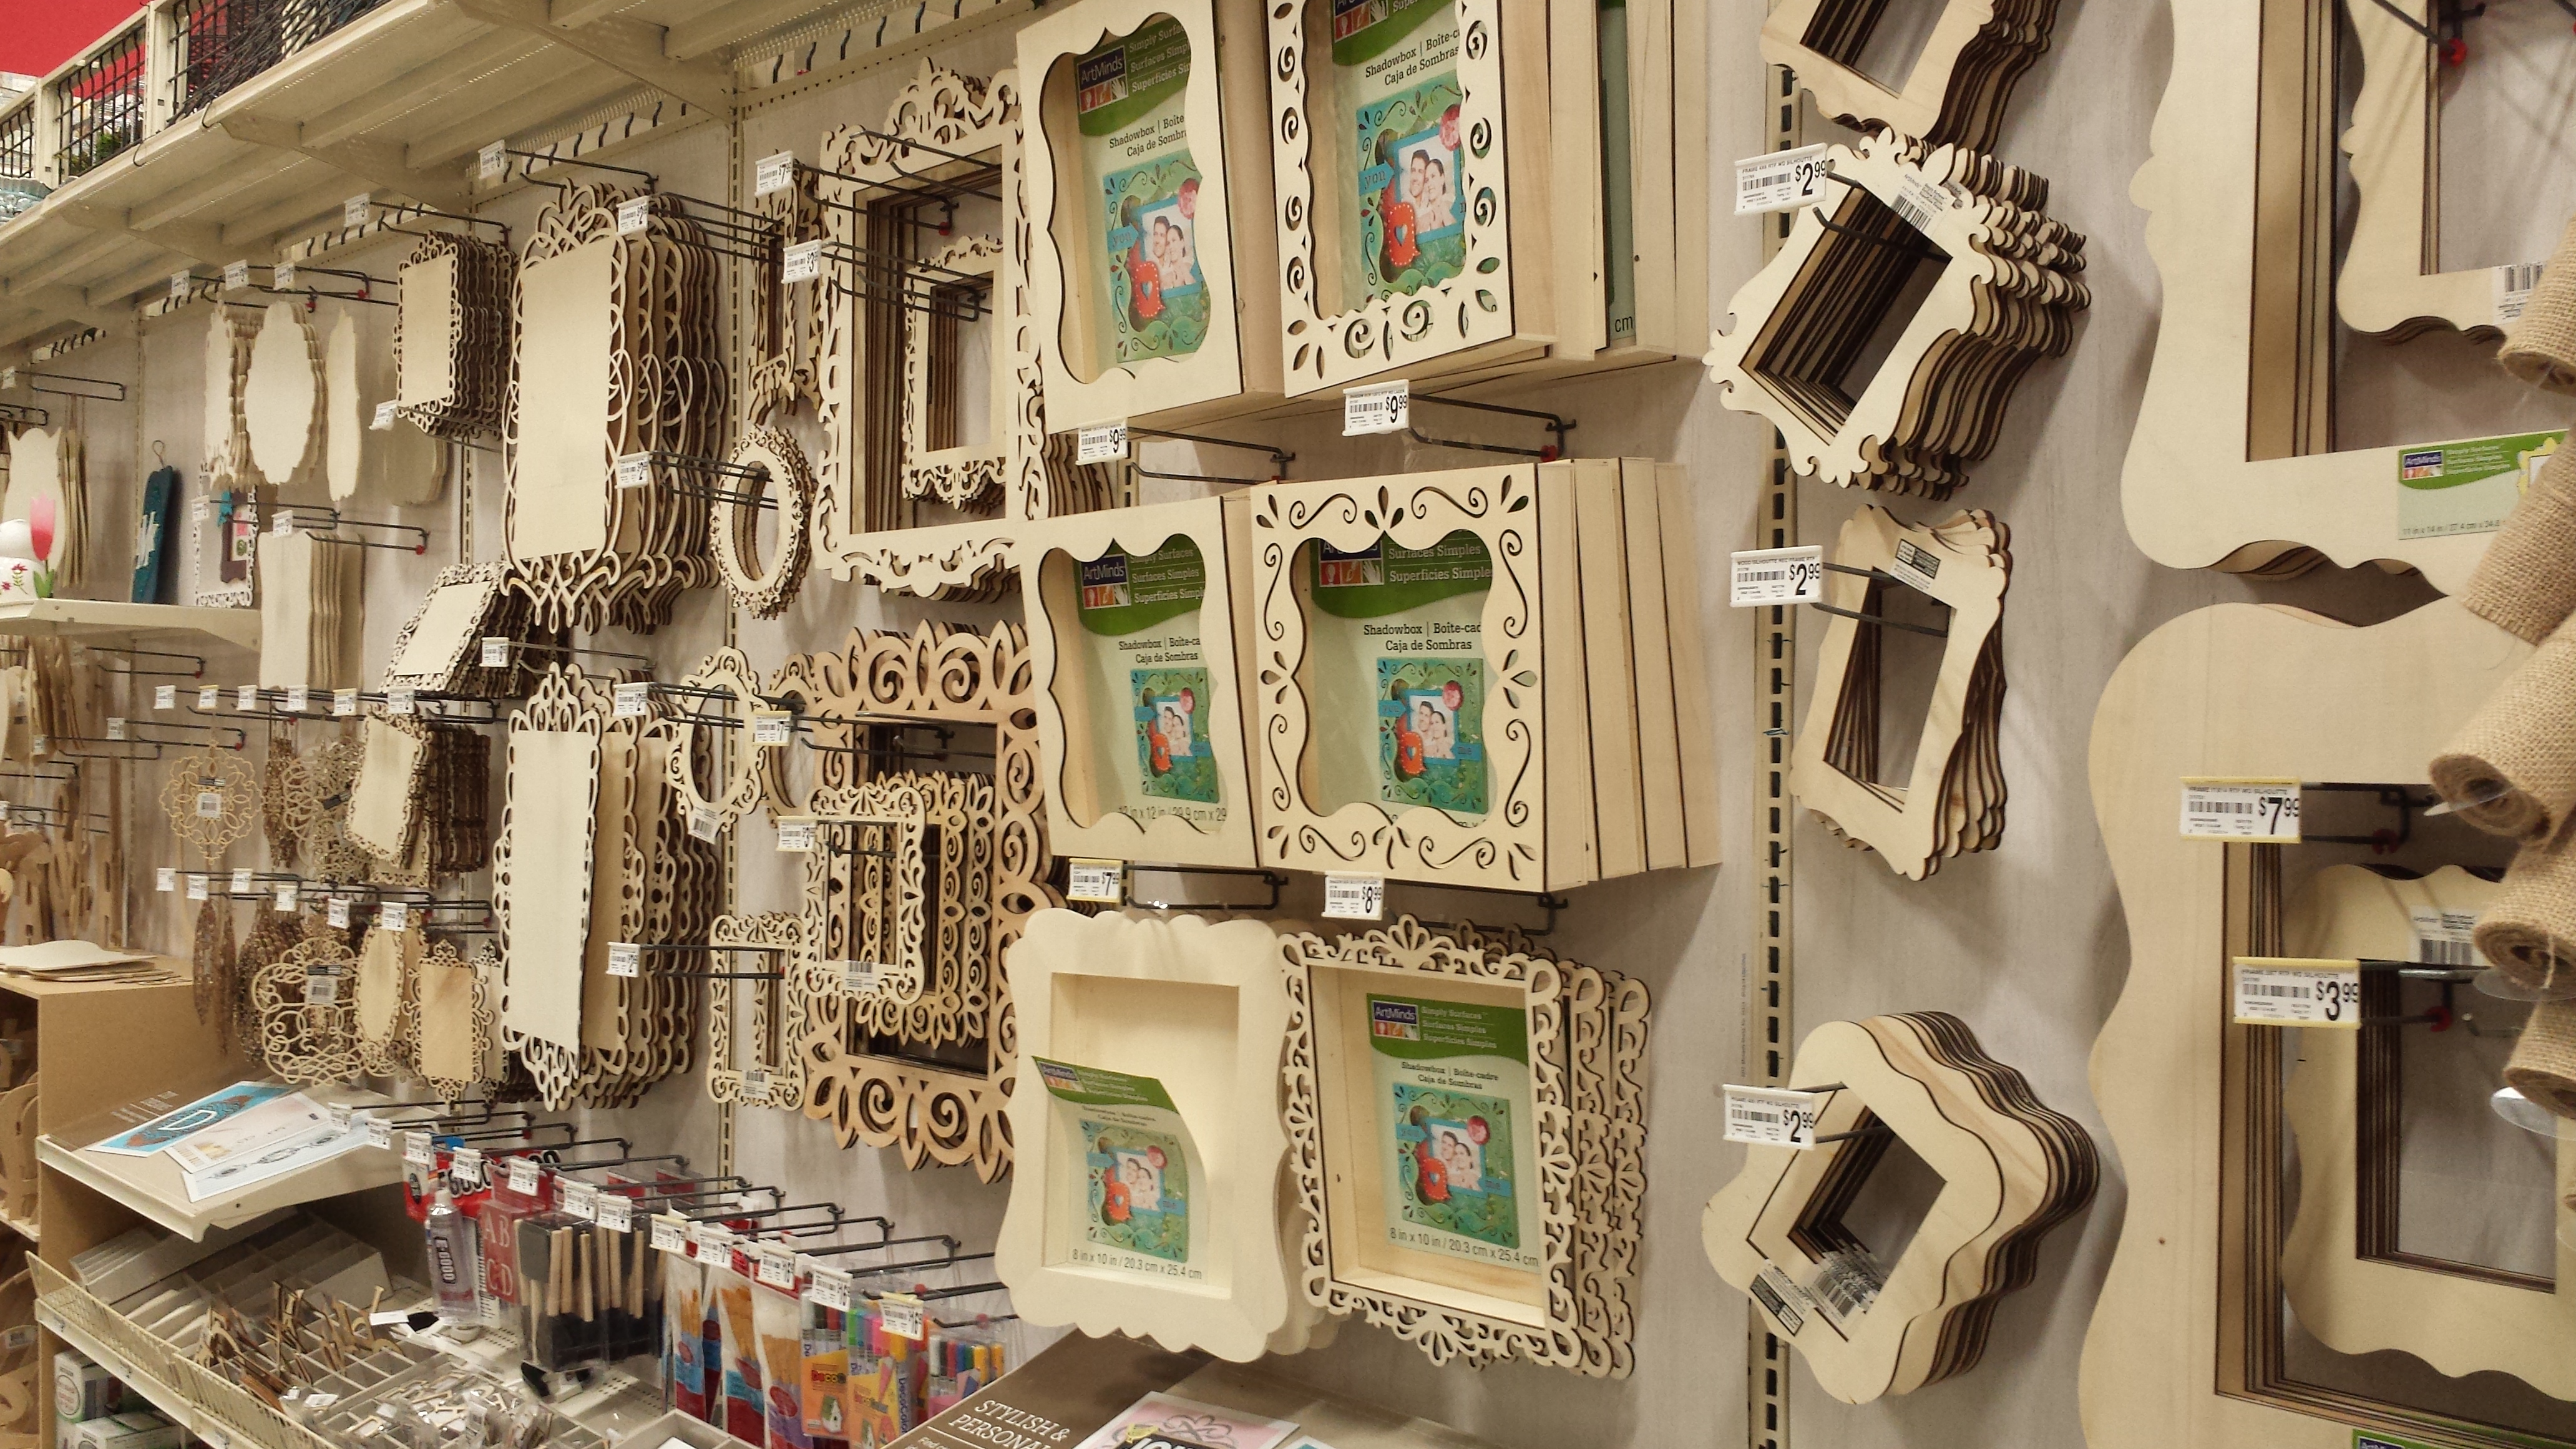
For this Craft post I am going to show several different projects that were made with items currently available at Michael’s Craft Stores nationwide.  Recently simple wooden initials, laser cut plaques and frames so I spent a pleasant hour selecting various items for two separate craft projects and list below are the list of supplies and instructions needed.

Michaels 1    Michaels 2

Initial door or wall plaque #1

Supplies –

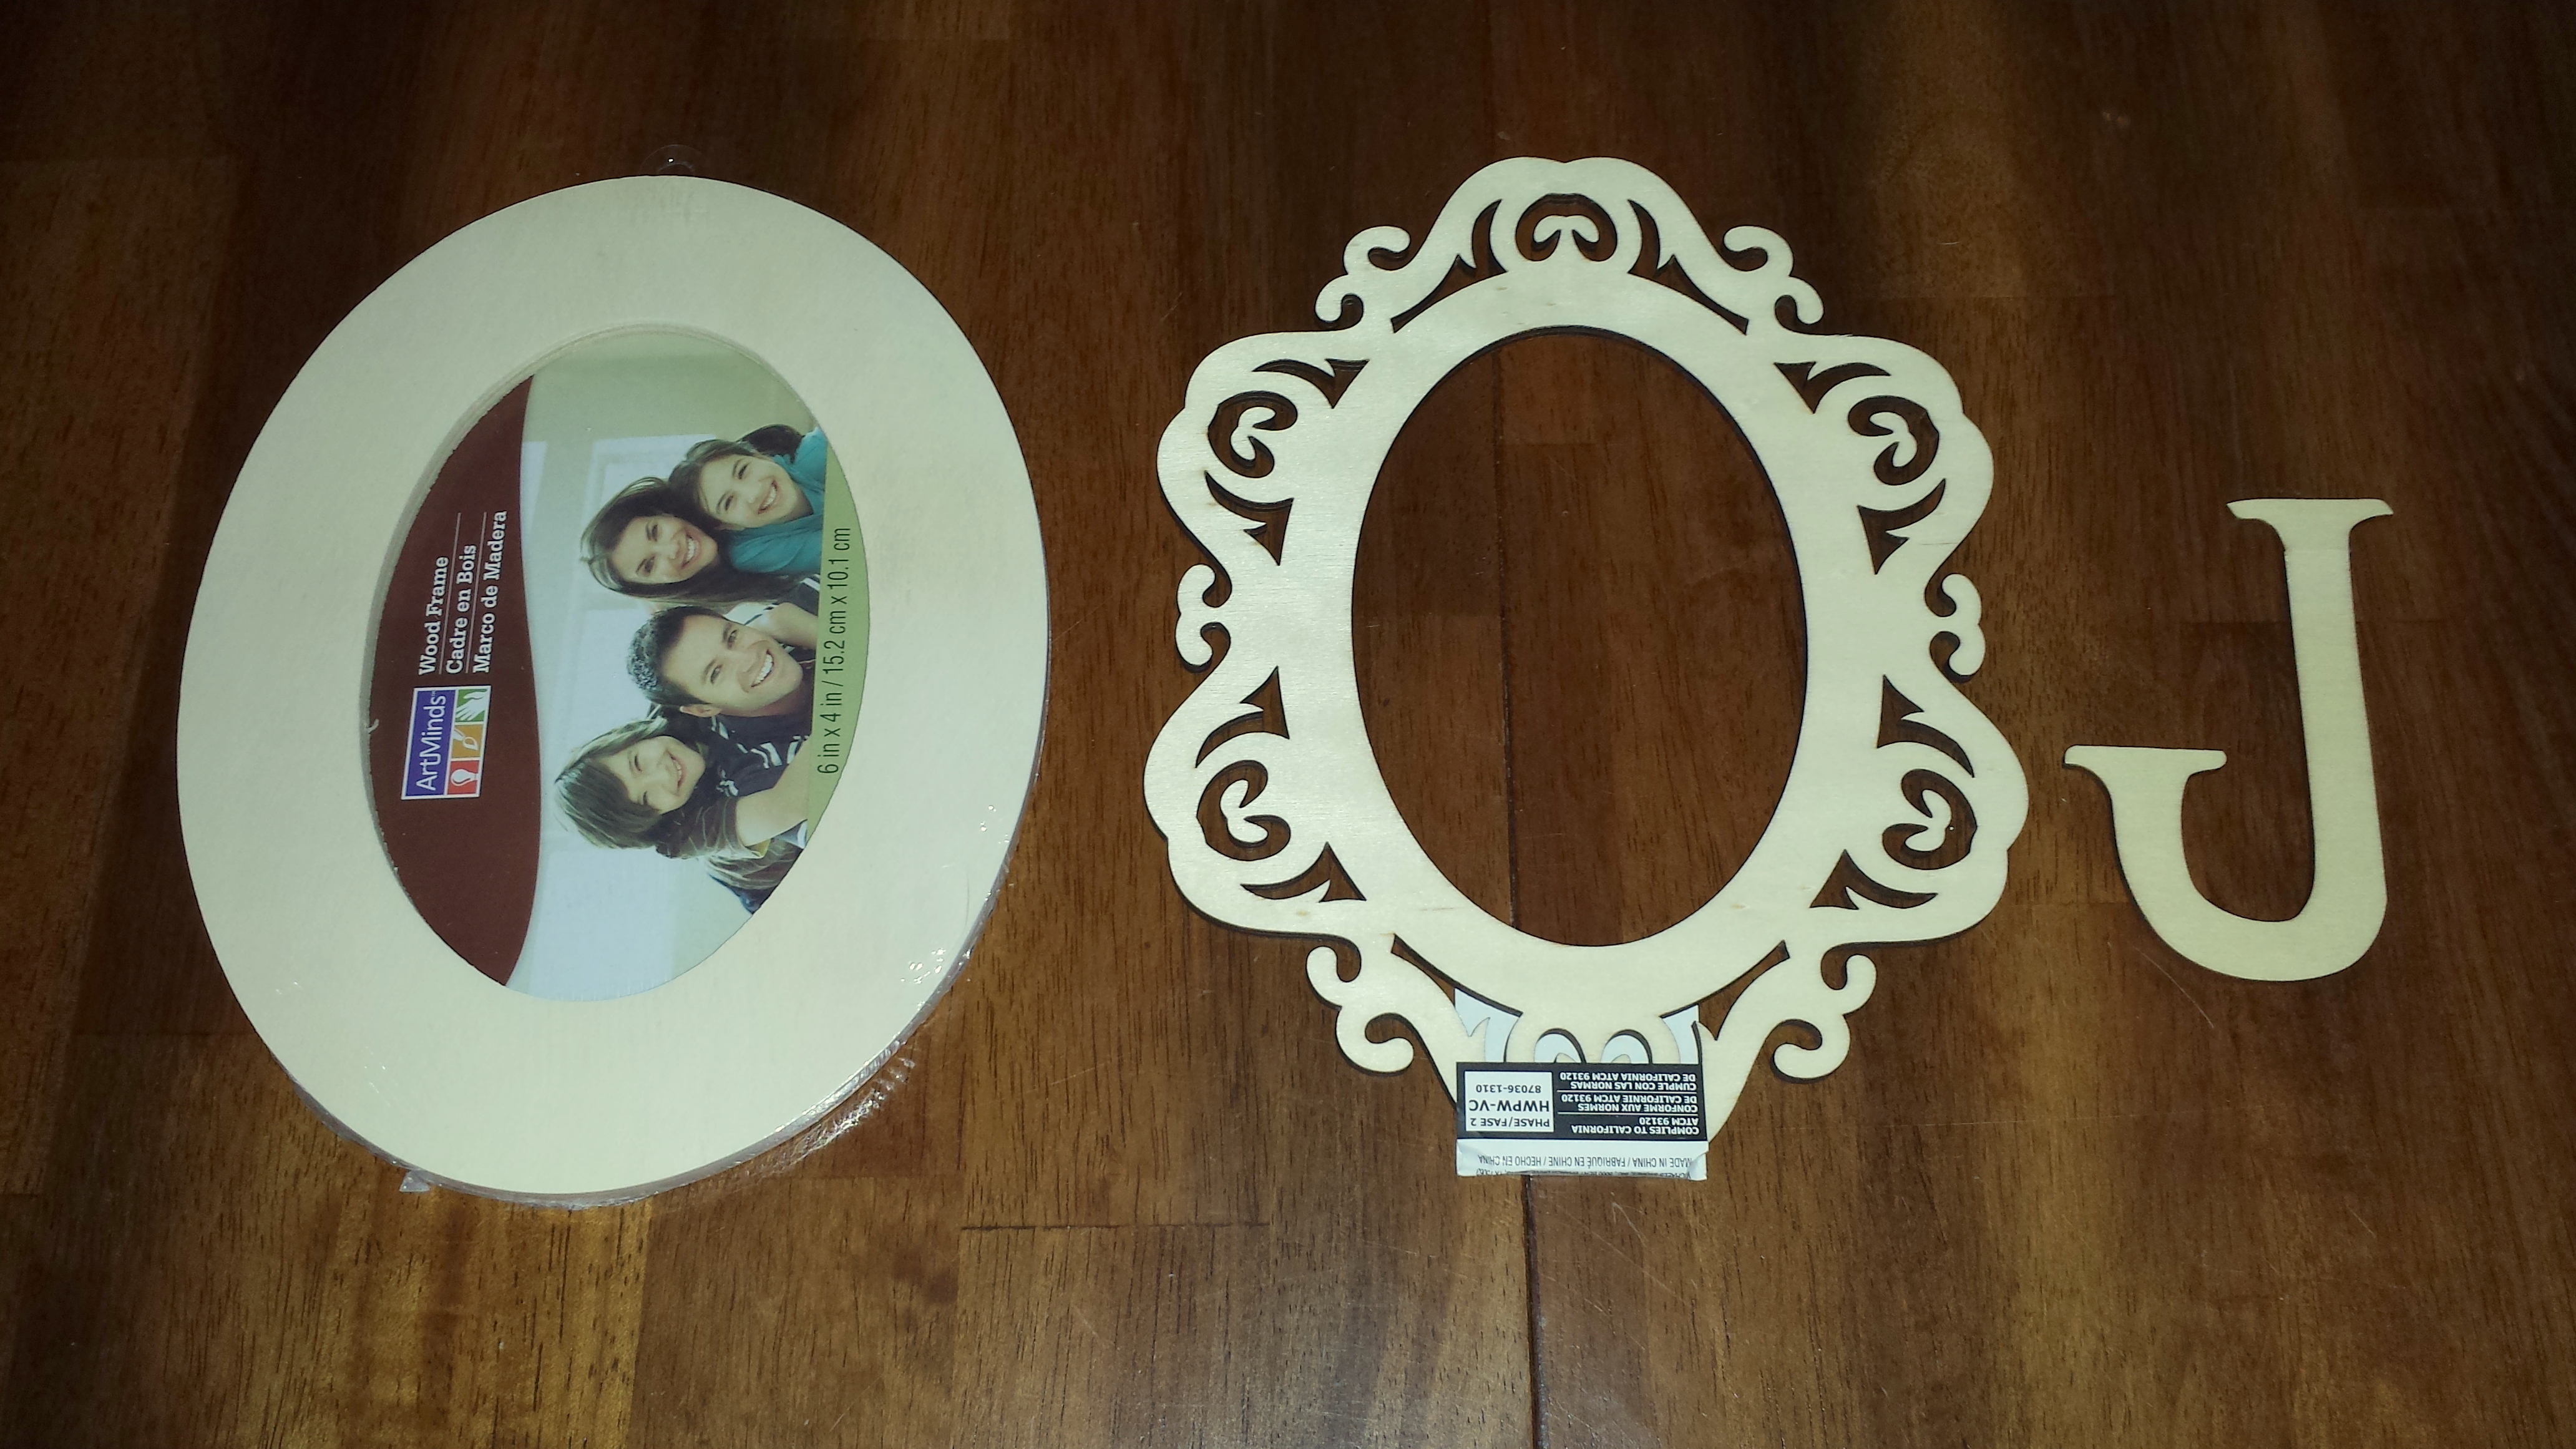
  • Large wood initial (I used the initial of our last name)
  • 1 oval wood frame
  • 1 laser-cut wood frame with oval opening (it is much thinner than the oval frame)
  • Small piece of material or paper (to use as backing for the initial)
  • Small can of wood stain (I used a deep mahogany stain)
  • Bronze metallic paint
  • Paint brushes
  • Hot glue gun and hot glue sticks

Initial 1 - supplies

 Instructions –

  1. Stain the wood frame and the laser-cut wood frame, let the paint dry completely.
  2. Since both the frame and the thinner laser-cut frame the same dark color I wanted to add some interest.  So, using the bronze paint, I painted an oval shape around the laser-cut frame opening.  Using a gold paint pen, I drew a continuous line accenting the curves of the laser-cut frame.
  3. Attach the two pieces, the wood frame and the thinner laser-cut wood frame, together using hot glue.
  4. Next, I painted the large initial with the bronze paint, let the paint dry completely.
  5. Then, I cut a piece of scrapbook paper that looks like leather into the size and shape of the frame opening.  Then, attach the painted large initial to the paper using the hot glue.  Before gluing the initial, be sure that the placement is centered to show within the rectangular frame opening.
  6. Finally, assemble all the pieces together to complete the craft project.

Initial 1 - finished

Initial door or wall plaque #2

Supplies –

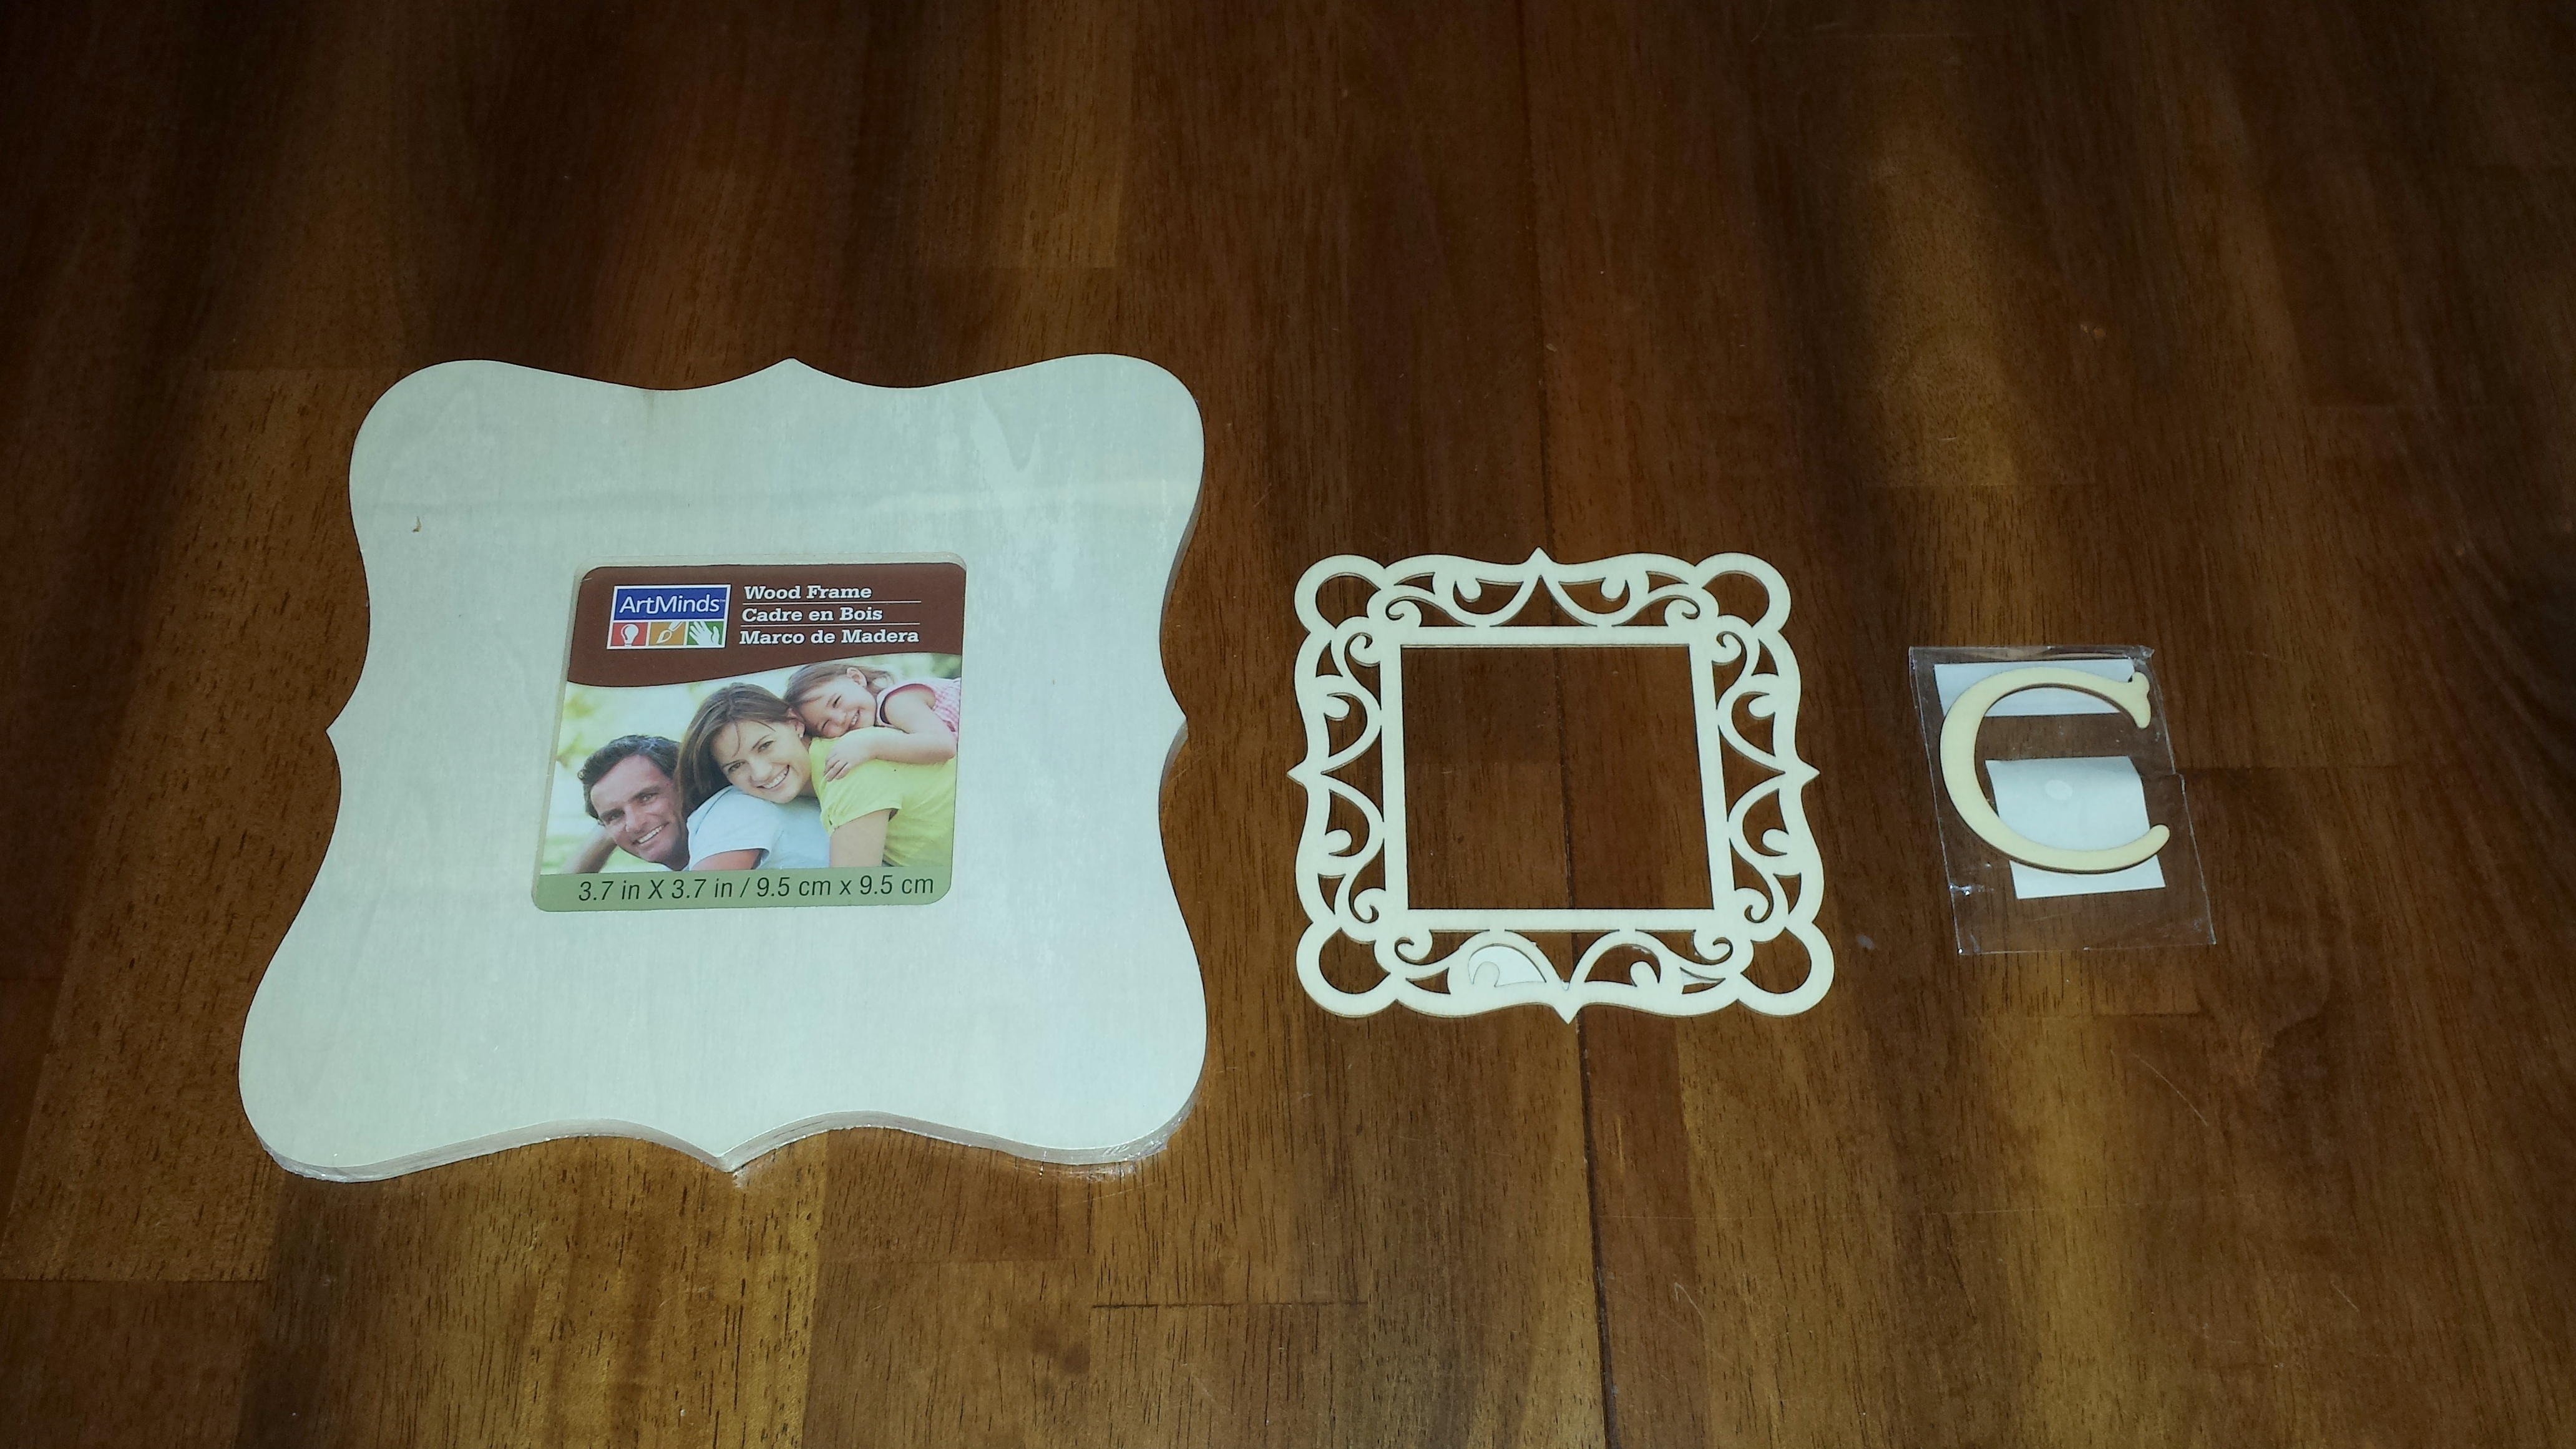
  • Small wood initial (I used the initial of my daughter’s first name)
  • 1 rectangular wood frame
  • 1 laser-cut wood frame with rectangular opening (thinner than the oval frame)
  • Small piece of material or paper (to use as backing for the initial)
  • Pink paint
  • White paint and clear sparkle paint
  • Paint brushes
  • Pink crystals, self adhesive
  • Hot glue gun and hot glue sticks

Initial 2 - supplies

 Instructions –

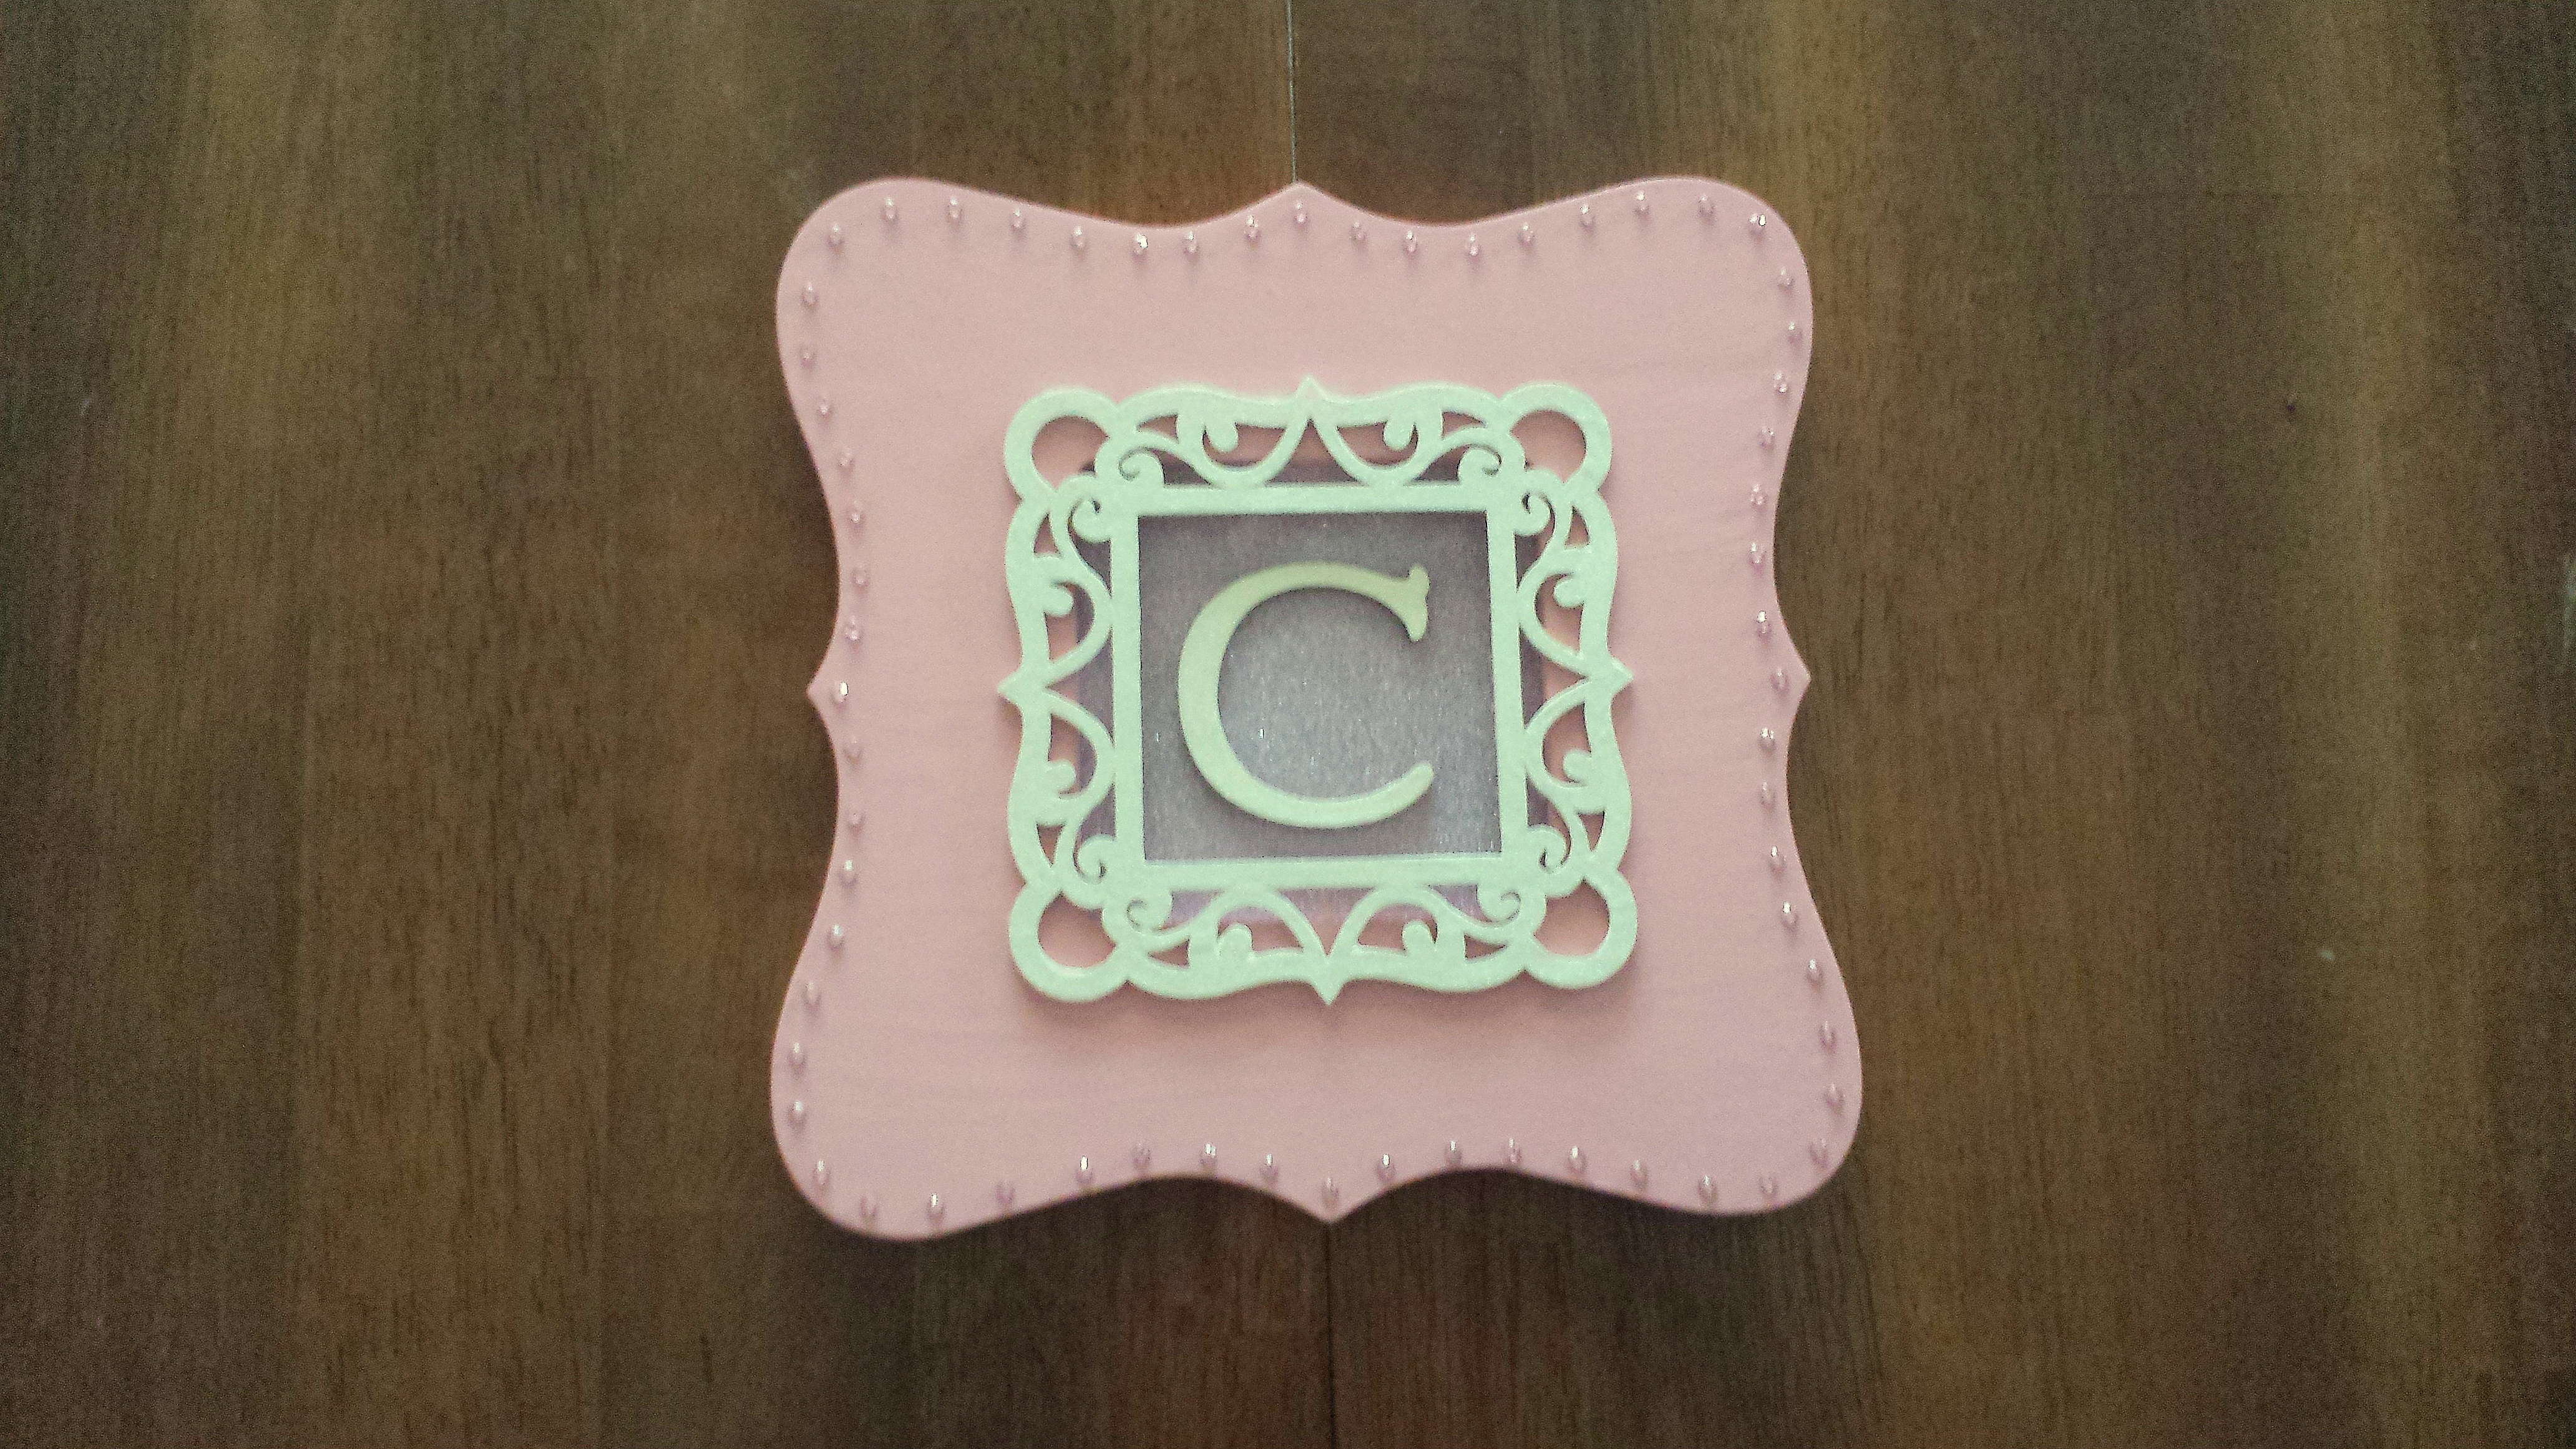
  1. Paint the wood frame with the pink paint, let the paint dry completely.
  2. Using the white paint as a base color, I painted the laser-cut frame and the small wood initial, let the paint dry completely.
  3. Then, using the clear sparkle paint as a clear top color, I applied two layers of paint to the laser-cut frame and the small wood initial, let the paint dry completely between the two coats.
  4. Attached the two pieces, the wood frame and the thinner laser-cut wood frame, together using hot glue.
  5. I cut a piece of scrapbook paper in glitter purple into the size and shape of the frame opening.  Then, attach the painted small initial to the paper using hot glue.  Before gluing the initial, be sure that the placement is centered to show within the rectangular frame opening.
  6. Individually attached the pink crystals to the border of the fame to add a little more sparkle.
  7. Finally, assemble all the pieces together to complete the craft project.

Initial 2 - finished

So, next time you are looking for a personalized gift for a special occasion, such as a new baby, wedding or new home celebrations, please consider one of these wooden initial craft projects because they would make a great gift!!

Craft – Miniature Bottle Necklaces

I have seen a variety of miniature bottle necklaces on many different craft websites. These miniature bottle necklaces would make great gifts for children or adults and they could also make wonderful paper favors for a little girl’s birthday celebration.  For this post I will go into detail on the supplies needed for several themed miniature bottle necklaces with ideas for several more.

Supplies for miniature bottle necklaces

In general, the supplies need to make a miniature bottle necklace are very minimal but the important thing to remember is that the shape of the bottle, the content used inside the bottle, the selection of chain or ribbon used to wear the bottle and any additional charms attached to the bottle.  All these elements will create the unique style for each individual miniature bottle necklace.

Miniature bottles – Miniature bottles come in a variety of sizes.  The content of the bottle or personal preference should be taken into consideration when selecting a miniature bottle.  The bottles can be found in the jewelry section of most major craft stores and they range in size from very small to large.

CRAFT NOTE:  For the craft projects shown in this post I used miniature bottle sizes ranging in size from one inch to over two inches in length.

miniature bottles

Content for the miniature bottle necklaces – The content of each bottle is defined as the filling used inside the bottle necklace, some suggested contents can be glitter, sand, or maybe a liquid such as honey or colored water.  Here is another filling suggestion … who remembers those mustard seed necklaces from their childhood?  Others content ideas are small watermelon seeds, tiny seashells or pine cones or acorns.  The content selection is only limited by the imagination and the size of the bottle.

CRAFT NOTE:  The important thing to remember is that no matter what the content is used for the miniature bottle necklace, the lid needs to be securely attached to prevent the contents from leaking or spilling.
miniature bottle glitter

Necklace used to hang or wear the miniature bottle – The miniature bottle will be hung on a necklace to wear as a piece of jewelry.  The necklaces can variety in style, such as chains, thin ribbon or silk cords.  The length of the necklace is determined by personal preference.

Optional charms – A variety of charms can be attached to the bottle and the charm is usually suggested by the content of the bottle, such as a bottle filled with snow-like glitter has a snowflake charm or a bottle filled with sand has a starfish charm or a bottle filled with honey has a bee charm.  CRAFT NOTE:  The use of a charm attached to the miniature bottle necklace will add personality and interest to the jewelry’s appearance.

minature bottle charms

The following are few ideas for miniature bottle necklaces:

 Wish or Fairy-dust miniature bottle necklace

This is one of the most common of styles for a miniature bottle necklace.  Shown below are two wish miniature bottle necklaces.  The bottles are filled glitter (one silver glitter and the other gold glitter), worn on a silver chain necklace and with a special “wish” charm attached (one has a silver fairy charm and the other a silver wishbone charm)

Fairy-dust bottle necklace    Wish bottle necklace

Seasonal -themed miniature bottle necklace

This first seasonal miniature bottle necklace is filled with white glitter that is meant to resemble snow.  The bottle is accessorized on a silver chain necklace with a silver snowflake charm attached.

Snow-filled bottle necklace

This Valentine-themed miniature bottle necklace is a lovely idea for a present to give to a loved one or perhaps a gift for a child’s special teacher.  The bottle is filled with red glitter accessorized on a silver chain necklace with a silver heart charm attached.

St, Valentine's Day bottle necklace

Here is a cute idea to wear green on this Irish special holiday; it is a bottle filled with green glitter, worn on a silver chain necklace with a silver green enameled four-leaf clover charm attached.  Another idea for a St. Patrick Day themed miniature bottle necklace is a bottle filled with gold glitter with a small leprechaun charm attached.

St. Patrick Day bottle necklace

This miniature bottle necklace is a wonderful way to remember the beach or a special summer vacation.  The bottle is filled with sand, worn on a silver chain necklace with a silver enameled starfish charm attached.  Another idea for a beach-themed miniature bottle necklace is to add small seashells inside the bottle with just a little amount of sand.

Beach-themed bottle necklace

“Honey-pot” miniature bottle necklace

This sweet idea for a miniature bottle necklace, it is a bottle filled with honey, worn on a silver chain necklace with a bronze-colored metal bee charm attached.  When wrapping the bottle necklace as a present here is a special idea – put it in a small gift box and include a note referring to the “sweetness of life”.

Honey-pot bottle necklace

As you can see from the ideas above, there are endless combinations for making these simple and inexpensive miniature bottle necklaces for any occasion and holiday.

Craft – Christmas Gift Card Box

If you are looking for a special way to give a Christmas gift card here is a unique idea. The Christmas Gift Card Box needs just a few supplies and easy, simple instructions to make a wonderful presentation.  Craft Note: The stickers and other items that I used for this project might not be available but don’t be discouraged, instead visit your local craft store and be inspired by the stickers and other items in the scrapbook section.

Christmas Gift Card Box – supplies

  • Small box
  • Felt, color is determined by the “scene” in the shadowbox
  • A variety of scrapbook 3-dimentional stickers and/or small plastic Christmas-themed items
  • White glue, it will work better than a glue stick on the felt and accessories

Christmas Shadowbox - supplies

Christmas Gift Card Box – instructions

  1. Take the measurements of the inside dimensions of the bottom of the box.  Use these measurements to cut the felt into five pieces, one for the bottom and the four sides of the box.

Christmas Shadowbox - bottom of box 1Christmas Shadowbox - bottom of box 22.  Glue these five pieces to the inside of the box to fully line the interior.  By lining the box it will give the shadow box a wonderful background for the stickers or other accessories.Chirstmas Shadowbox - bottom of box 3

3.  The next step is where the look of the “scene” if determined by the stickers and other items available in your local craft store.  Using 3-dimensional stickers helps to create depth to the shadowbox and avoids the flatness of regular stickers.  Also check out the other sections of the craft store for small plastic Christmas items that could inspire a “scene” for the shadowbox.

Christmas Shadowbox - final

The Christmas Shadowbox gift Box is a beautiful way to present a gift card.  After the shadow box is completed, attach the gift card to the inside of the top of the box.

Craft – Christmas Ornament Displays

As I mentioned in this month’s Décor post, Ornaments Used in Unusual Ways, ornaments are not just for the Christmas tree and they can be used in many different ways throughout the house during the holiday season.  In this post I will show three examples on how ornaments can be displayed in some fun and creative ways.

Ornament Snowglobe

The idea for the Ornament Snowglobe is to use an ornament that can create a winter scene and then be able to turn the jar upside down for the artificial snow to create a falling snow effect.  The gingerbread house is a great example to use for this craft project, other ornament suggestions are: a Santa Claus ornament, a Snowman ornament or a single Christmas tree.

For this display I used a small glass container with a lid, a gingerbread house ornament, some artificial snow, and a glue gun/glue sticks.  Craft NoteWhen purchasing an ornament for this craft project, be sure that the ornament is small enough to fit inside the jar with the lid closed, also check the width of the ornament so it can fit through the jar’s opening.

Snowglobe ornament display - supplies

To start, be sure the inside of the jar is clean and remove any price tags or metal display loop from the top of the ornament.  To remove the display loop, grab hold of the loop with a plier and then twist with an upward movement.

Secure the gingerbread house ornament to the bottom of the jar with glue.  Optional step: For a permanent “snow base”, lay some cotton balls or batting onto the bottom of the jar after attaching the ornament OR paint the bottom of the jar with white paint and let it completely dry before attaching the ornament.

Next, add a small layer of artificial snow to the bottom of the jar.  Then, to finish the ornament snowglobe, securely glue the lid onto the top of the jar so that the jar can be turned for the “snow effect”.

Snowglobe ornament display - final

Framed ornament

For this display it is important to use ornaments with flat backs, such as the deer or gingerbread ornaments seen below.  I used a wallpaper remnant (but scrapbook paper can also be used) for the background, a frame that matches the ornament and a hot glue gun/glue sticks.

Framed deer ornament - supplies

Disassemble the picture frame, separating the glass and back from the frame.  Cut the wallpaper remnant (or scrapbook paper) to fit the size of the frame.  Then, glue the paper to the glass.  Re-assemble the glass and the frame backing inside the frame.  To finish the display, center and attach the ornament to the paper.

Framed deer ornament - final

Craft Note: The theme of this Framed Ornament is not specific to any holiday and would look wonderful on a side table or bookcase and can be displayed year-round.

Ornaments Under Glass

This project is similar to the ornament snowglobe but the difference is that this larger display can only remain stationary and uses multiple ornaments or accessories.

For this ornament display I used a large glass container with a lid, a boy and girl skater ornaments, four small artificial pine trees, artificial snow and a glue gun/glue sticks.  The idea for this craft project is to have one or two ornaments and use accessories like trees and artificial snow to set a winter scene in soft pastels or whimsical with primary colors.

Ornaments under glass - supplies

To start, be sure the inside of the glass container  is clean and remove any price tags or metal display loop from the top of the ornament.

Next, position the accessories, such as the pine trees, and secure into place at the bottom of the glass container with the hot glue gun/glue.  Be sure to leave room for the ornaments by positioning the accessories to the sides of the container and leave the area in the front clear to view the scene inside.

Then, secure the ornaments into place at the bottom of the glass container.  To finish the Ornaments Under Glass display, add a small layer of artificial snow to the bottom of the container to look like fresh fallen snow.

Ornaments under glass - final

So, next time you are shopping in the local retail or craft stores during the holiday season check out the Christmas ornaments and think about a different way of displaying them in fun and creative ways!

Craft – More Christmas Wreaths

As I mentioned in a previous Décor post, Christmas Wreaths, I decorate our home during the Christmas season with several different wreaths hung throughout the house, some of these are traditional in style and other are more whimsical in design.  This Craft post will feature four wreaths with complete supply lists and instructions.

Gingerbread Men wreath

This Christmas wreath was inspired by one that I had seen on the 2012 HGTV White House Christmas television special.  The wreath featured was very simple in design and made from a pine wreath with several freshly baked gingerbread men placed side by side in a circular pattern to match the round shape of the wreath and interlaced with a red ribbon to secure the gingerbread men in place.

2012 White House gingerbread wreath

For the Gingerbread Men wreath, I used an 18”artificial pine wreath, a dozen paper-mâché gingerbread men, bronze metallic paint and paint, 18 bronze jingle bells and red ribbon in two widths (one roll of ¼”inch wide  to lace through the gingerbread men and one roll 2” wide to hang wreath).

Gingerbread Men wreath - supplies

First, the paper-mâché gingerbread men were painted in a beautiful bronze metallic paint to resemble the color of real gingerbread.

Gingerbread Men wreath - paint

After the paint has dried, position the gingerbread men around the wreath and interlaced the red ¼” wide ribbon between each of them to secure to the wreath.  Next, I add the bronze jingle bells throughout to complete the wreath.  The Gingerbread Men wreath will be displayed on the cabinet in our kitchen this holiday season, this room is usually decorated for Christmas with a candy cane and gingerbread theme.  To hang the wreath I used the 2”wide ribbon tied in a loop and finished with a bow.

Gingerbread Men wreath - final 1

Nutcracker wreath

Each Christmas, since our daughter was a small girl, our family tradition has been to a performance of the Nutcracker Ballet during the holiday season.  Over the years sometimes the show is a professional production or a cast of ballerinas from the local college or amateur dance company.  We always look forward the story, music and the dancing of the Nutcracker Ballet.

For the Nutcracker wreath, I started with an 18” artificial pine wreath.  At my local craft store I found a collection of eight Nutcracker ornaments that depicted the main characters of the ballet.  I placed these evenly spaced around the wreath, and then I added small white berries and completed the wreath with a “frosty” white bow.  The Nutcracker wreath will be displayed on the door to my daughter’s bedroom during this holiday season.

Nutcracker wreath - supplies    Nutcracker wreath - final

Boyd’s Bear wreath

I have a collection of Boyd’s Bear ornaments, in the past I have displayed them scattered among a pine garland on the fireplace mantel in our California home.  (For a photo of the fireplace garland please check out the Décor post, Displaying a Boyd’s Bears Collection – Part Two)  Since we moved to the Midwest a few years ago I have not displayed the ornaments and this year I decided to use the ornaments in a different way by displaying them on a Christmas wreath.

For the Boyd’s Bear wreath, I started with an 18” artificial pine wreath.  I arranged eight of my Boyd’s Bear ornaments evenly around the wreath and secured them with wire.  Next, I added small wooden snowflakes scattered in between the ornaments.

Boyds Bears wreath - supplies    Boyds Bears wreath - final

Teddy Bear wreath

Over the years I have collected some small teddy bears, last year I displayed them on a tabletop Christmas tree which I set on the top of the roll-top desk in out master bedroom.  (For a look at a photo, please check out the Décor post, Displaying a Boyd’s Bear collection – Part Two) and this year I decided to display the collection on a Christmas wreath.

For the Teddy Bear wreath, I started with an 18” artificial pine wreath.  I evenly spaced the small teddy bears around the wreath with the Santa and Mrs. Claus teddy bears at the bottom.  At the top, I left a space for a small “Happy Holidays” sign.  Next, I added four pine sprays with berries and added four large pinecones to the wreath.  Finally, to complete the wreath I added several red berries scattered around.

Teddy bear wreath - supplies    Teddy bear wreath - final

These four Christmas wreaths are a great way to use a specific theme and ornaments and hopefully inspire you to take a trip to your local craft or retail store.  There are some additional examples of themed wreaths in a December 2012 Craft post, Christmas Wreaths, with complete supply lists and instructions.  The three wreaths are a Dickens Village Wreath and a North Pole Wreath using miniature Department 56 building ornaments and a Disney Wreath, using Hallmark ornaments of Disney characters.