Today’s Craft project will show three different versions of Valentine’s Day Shadowboxes. These would make wonderful holiday decorative items and would look great on a fireplace mantel or bookshelf. They could also be given as gifts for family, friends or maybe a special teacher.
The tip for making this craft project is that after you have selected the shadowbox that you will use, check out your favorite craft store for inexpensive items that would fit into the dimensions and depth of the shadowbox. This is where your creatively can be used to make a customized and one-of-a-kind Valentine’s Day Shadowbox.
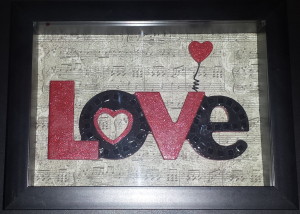
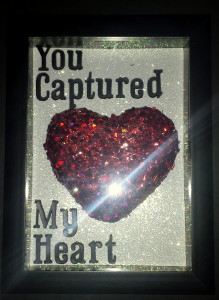
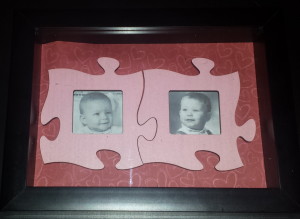
The three items that I selected were a red sequin heart for shadowbox #1, a wooden love for shadowbox #2 and two interlocking puzzle photo frames for shadowbox #3.
Valentine’s Day Shadowbox #1 – supplies and instructions
- Shadowbox
- Red sequin heart
- White sparkle scrapbook paper
- Black self-stick black letters
- Disassemble the shadowbox, remove the backing.
- Using the cardboard backing, trace the size onto the scrapbook paper and cut.
- Attach the red sequin to the scrapbook paper using glue, allow time to dry completely.
- Reassemble the shadowbox.
- Using the self-stick letters, spell out “You Captured My Heart” and attach letter to the glass front.
Valentine’s Day Shadowbox #2 – supplies and instructions
- Shadowbox
- Wooden word (I used one that spelled “love” which I painted red and black, then I attached self-stick black sequin onto the black letters for extra sprakle!)
- Valentine’s Day themed scrapbook paper
- Disassemble the shadowbox, remove the backing.
- Using the cardboard backing, trace the size onto the scrapbook paper and cut.
- Attach the wooden love to the scrapbook paper using glue, allow time to dry completely.
- Reassemble the shadowbox.
Valentine’s Day Shadowbox #3 – supplies and instructions
- Shadowbox
- 2 pink puzzle photo frames
- 2 small black and white photos, copied to fit the size of the puzzle frames
- Valentine’s Day themed scrapbook paper
- Disassemble the shadowbox, remove the backing.
- Using the cardboard backing, trace the size onto the scrapbook paper and cut.
- Copy/print two black and white photos to fit the size of the puzzle frames.
- Attach the photos to the puzzle frames using glue or tape.
- Attach the puzzle frames to the scrapbook paper using glue.
- Reassemble the shadowbox.

 Valentine’s Day … a time to celebrate love!! As many of you know, I love to decorate the house for each holiday celebration, it brings me a lot of pleasure and I know my family appreciates my efforts. This year I am adding a couple of new Craft projects, Rosebud Hearts and a Heart-shaped Door Wreath. For Valentine’s Day I don’t have very many decorations like the other holidays so I will keep it simple and easy!
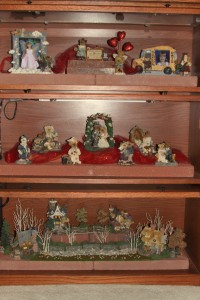 To greet visitors at our front door or guests attending the Queen of Hearts tea luncheon, I am hanging a new Heart-shaped Door Wreath. In the library, there is the glass-front lawyer bookcase filled with my Boyd’s Bear Collection, and I will add my special Valentine’s Day figurines. I will repurpose the red sparkle netting that I used on the chair backs for the tea luncheon and arrange it among the Boyd’s Bear figurines on the top two shelves. On the bottom shelf that holds the Boyd’s Bear Village, which is still decorated for winter, I will sprinkle tiny red hearts. In the dining room, the table is still set with a red tablecloth and the deep pink rose floral arrangement from the family room. I’ve added red feather sprays and three red sparkle hearts on sticks for the tea luncheon. In the kitchen, I will hang several red and silver glass ornaments from the light fixture and maybe I will add some red ribbons to make it more festive. Lastly, I will hang the Rosebud Heart from my daughter’s bedroom door with a special note attached so she finds it in the morning when she wakes up for school.