Travel – Mount Rushmore and Crazy Horse

Mount Rushmore 2004 1    Crazy Horse 3

Both Mount Rushmore and Crazy Horse are located less than 20 miles from each other in the Black Hills of South Dakota and both of these monuments have many similarities but also there are some distinct differences.  Both monuments honor our American history, Mount Rushmore is carved with the faces of four very recognizable U.S. presidents while the Crazy Horse monument honors a Native American Lakota chief who is largely unknown with no photographic evidence of what he looked like.  Both monuments were carved into the mountains of the Black Hills over a long period of time; Mount Rushmore was carved in fifteen years while the work on Crazy horse was started in 1948 and is still a work in progress and far from completion. Mount Rushmore was built using Federal funds and the Crazy Horse monument is being built with funds generated from tourism revenues and donations.

Both sculptors of these iconic monuments were born to immigrant parents, both carved the mountains in the Black Hills to honor our American history and both died before the projects were completed and the work was taken over their children.  Mount Rushmore’s sculptor, Gutzon Borglum, was the son of Danish immigrants, grew-up in a Mormon household and later became involved with the Ku Klux Klan.  The sculptor of Crazy Horse, Korczak Ziolkowski, was the son of Polish immigrants and he originally came to South Dakota to work with Borglum on Mount Rushmore but soon quit when there were disagreements between the two men and Ziolkowski left to serve in World War II.
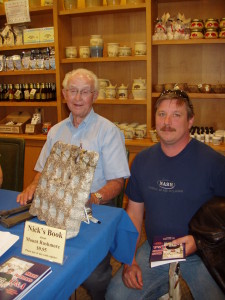
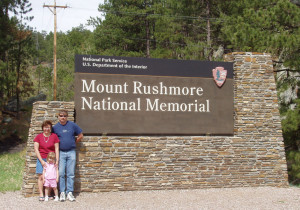
OLYMPUS DIGITAL CAMERAWhen we visited Mount Rushmore in 2004, there was a book signing event for one of the last surviving workers, Don “Nick” Clifford, on the day we were there.  We had the opportunity to meet him and have an interesting conversation about his experiences back in the late 1930s carving Mount Rushmore.  Then the next day, when we arrived at the Crazy Horse Monument they were still actively blasting the mountain!  It was very exciting and we were able to take a short bus ride up to the base of the mountain.  Our personal opinion is that Mount Rushmore, while being extremely patriotic, had an atmosphere that was very commercial while the Crazy Horse monument seemed to have a purpose of using their revenue to provide scholarships to the Native Americans.  Both are very iconic monuments carved into the Black Hills that teach important cultural as well as historical lessons of our country and are definitely worth a visit to South Dakota.

Mount Rushmore 2004 2   OLYMPUS DIGITAL CAMERA

Mount Rushmore

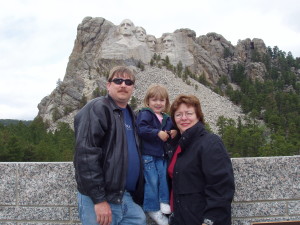
Mount Rushmore National Memorial, located in the Black Hills of South Dakota, is carved from a mountain known by the Lakota Native Americans as the Six Grandfathers.  This area of the Black Hills of South Dakota was perpetually granted to the Lakota Native Americans with an 1868 treaty guaranteed by the U.S. government but when gold was found in the area in 1874 the land was seized and the Lakota were forced to relocate elsewhere. In 1923, the idea for the Mount Rushmore project was originally conceived by a local historian as a way to increase tourism to the area.  After securing federal funding, construction on the memorial began in 1927, and the presidents’ faces were completed between 1934 and 1939.  Gutzon Borglum, a prominent sculptor, led a team of 400 workers between 1927 and 1941 who carved the granite mountain using dynamite and hand tools. The work was extremely difficult and dangerous, the wages were low and employment was uncertain but astonishingly there were no worker fatalities.

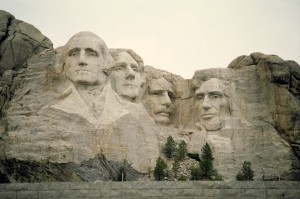
The Mount Rushmore National Memorial covers over 1,278 acres and is 5,725 feet above sea level.  The 60 foot high carvings of the faces of George Washington, Thomas Jefferson, Abraham Lincoln and Theodore Roosevelt represents the first 150 years of American history.  In 1933, while the memorial was still under construction, the U.S. National Park Service took control of the memorial.  Upon Gutzon Borglum’s death in March 1941, his son Lincoln Borglum took over the construction team. Although the initial concept for Mount Rushmore was to depict each of the four presidents from their head to waist, with the U.S. involvement in World War II and lacking the funds to complete the project the construction was forced to end in late October 1941 with only the heads being carved.  In 1966, Mount Rushmore was listed on the National Register of Historic Places. In 1991, President George Bush officially dedicated Mount Rushmore and currently the monument attracts nearly three million visitors annually.

OLYMPUS DIGITAL CAMERA

Mount Rushmore trivia and interesting facts

  • The Lakota, called the mountain the Six Grandfathers, but officially in 1885 it became known as Mount Rushmore and was named after New York attorney Charles Rushmore who came to this area of South Dakota to check on the legal titles of properties located in the Black Hills.
  • About 90% of the mountain was carved by dynamite blasts and 450,000 tons of granite was removed from the mountain to carve the four Presidents.  Geologists have estimated that the granite will erode at a rate of only one inch every 10,000 years.  Currently, maintenance teams use silicone sealant to fill any cracks in the faces on Mount Rushmore.
  • The nose on George Washington is longer than the other three, it measures 21 feet and the others measure 20 feet.  Thomas Jefferson was originally intended to be on the right side of Washington but after 18 months of work the granite was deemed unsuitable and was blasted off the mountain and work was restarted on the left side.
  • Borglum had originally planned a large room within the mountain to hold the documents and artifacts that shaped the history of America.  Construction of the Hall of records started in 1938 and by 1939 a 70 foot tunnel was blasted into the mountain.  In 1941, with Borglum’s death and World War II, all work on the memorial including the hall stopped and idea was eventually abandoned.  Then recently in 1998, a teakwood box inside a titanium vault covered by a granite capstone was placed on the floor of the entry hall.  Inside were sixteen porcelain enamel panels, inscribed on the panels are the story of Mount Rushmore explaining why and how it was carved, why these four Presidents were chosen and their biographies, the text of the Declaration of the Independence and the Constitution, and a brief history of the United States to be preserved for the future generations.
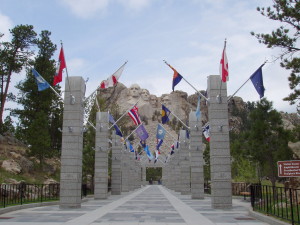
  • The Avenue of Flags was established during the celebration of the United States Bicentennial.  There are 56 flags that represent the 50 states, the Washington D.C. district, three U.S. territories and two commonwealths.  The flags are arranged in alphabetical order, if you cannot locate your state’s flag just ask a park ranger for assistance.
  • Mount Rushmore has been used as the location of several movies, including the dramatic chase scene in the 1959 Alfred Hitchcock movie “North by Northwest”.  Recently, the monument was used in the 2004 movie, “National Treasure: Book of Secrets”.  According to the fictitious plot, the monument was constructed to hide the City of Gold.

Crazy Horse 1

Crazy Horse Monument

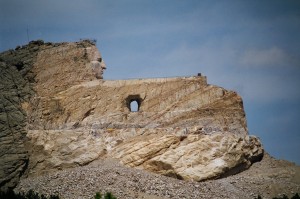
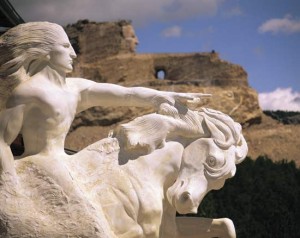
Crazy Horse was a Lakota chief who defeated General Custer at the battle of Little Bighorn in 1876.  He never signed a treaty with the U.S. government, never learned English and when the other Native Americans were forced onto reservations he never left his home on the Plains.  The Crazy Horse monument is being carved out the Thunderhead Mountain on land that is sacred to the Lakota and honors the famous chief Crazy Horse and also the culture and traditions of the Native Americans.  Originally the monument was commissioned in 1929 at the request of Chief Standing Bear to be sculpted by Korczak Ziolkowski.  In his letter to the sculptor Ziolkowski, Chief Standing Bear said that in response to the carving of Mount Rushmore the Lakota would like “the white man to know that the red man has great heroes, too”.

When looking for an area to start the massive project, Ziolkowski briefly consider a location in the Grand Tetons of Wyoming, but Chief Standing Bear was determined that the monument should be built in the Black Hills of South Dakota, an area which is very important to the Lakota.  Before Ziolkowski started work on the project the federal government offered $10 million in funding but he turned it down stating that he feared his ambitious plans for an educational and cultural center adjacent to the memorial would be rejected if the federal government was involved in the process.

Crazy Horse 2    OLYMPUS DIGITAL CAMERA

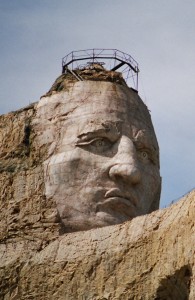
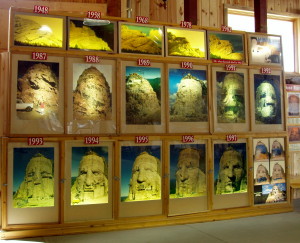
The Crazy Horse monument was blasting was started in 1948 by Ziolkowski, his wife and seven of their ten children.  The memorial will show Crazy Horse sitting on his horse with his arm outstretched and pointing to the land of the Lakota and when completed it will have the final dimensions of 641 feet wide by 563 feet high.  But Ziolkowski did not live to see the memorial’s competition and died in 1982, since that time work has been continued by the Ziolkowski family.  The head of Crazy Horse was completed in 1998 and is 87 feet high as compared with Mount Rushmore and the heads of the four U.S. Presidents which are each 60 feet high.  When the horse’s head is completed it will be 219 feet high.   Since financing of the project is uncertain and because of the challenges associated with the mountain’s carving, no completion date has been estimated for the Crazy Horse Memorial.

The Crazy Horse Memorial is visited by more than one million people annually.  The visitor complex currently consists of the monument, the Indian Museum of North America and the Native American Cultural Center and is run by the private non-profit organization, the Crazy Horse Memorial Foundation, and receives no federal or state funding.  Eventually, the Crazy Horse memorial will be the centerpiece to a Native American educational and cultural center.  The University and Medical Training Center for the North American Indian will eventually be a satellite campus of the University of South Dakota and will have educational classrooms and a residence hall.  In 2007, T. Denny Sanford made a $2.5 million donation with an additional $5 million paid over a five year period.  In 2010, Paul and Donna Christen announce an additional $5 million donation paid as an endowment to support the operation of the campus and the memorial is also funded by the tourist revenue from admission fees and gift store purchases.  Since 1978, the Crazy Horse Memorial Foundation has awarded more than $1.2 million in scholarships going to Native American students with South Dakota.

OLYMPUS DIGITAL CAMERA

Interesting facts about the Crazy Horse Memorial

  • The Crazy Horse Memorial Foundation sponsors many Native American cultural events and educational programs. Each June, the memorial hosts a Volksmarch festival when visitors are permitted onto the mountain and attendance has grown to be over 15,000.
  • Much of the earth-moving equipment used on carving the Crazy Horse monument is donated by corporations with the work primarily supported by visitor fees and gift shop revenues.  Periodically the memorial publicizes blasting events, which attract thousands of people from all over the region. They may wait for hours but can see numerous detonations as rocks and dust are blow from the mountain.  The visitor center contains many pieces of rocks blasted from the mountain and the rocks are available for a small donation.  (My husband, the “Rock Guy”, was very excited about gathering his Crazy Horse rocks and we took several home as souvenirs of our visit!)

The Black Hills of South Dakota has so many historic places to visit and the scenery is absolutely beautiful in this area of the United States.   When we visited in 2004, we stayed for a week because there was so much to see and do.  Custer State Park was our “home base” with daily trips to see several nearby attractions.  Please see last month’s Travel post, Custer State Park, and this month’s posts on Mammoth Site, Wind Cave and Jewel Cave for reports on the other sites to see in Black Hills of South Dakota.

Travel – Zoos

As you know from my blog’s other Travel posts, our family loves to travel and visit exciting place and have wonderful adventures.  Some of our favorite zoos that we have visited are the San Diego Zoo and the Santa Barbara Zoo.  The San Diego Zoo is very large zoo and would generally be an all-day event and we would stay overnight in San Diego since we lived in Los Angeles.  Larger zoos tend to have more animals and several hundred different types of species.  Smaller zoos, like the Santa Barbara Zoo, have fewer animals and a limited numbers of species.  When our daughter was a toddler we preferred the smaller zoos because we could see everything in a few hours which was the perfect amount of time for a young child with a short attention span and the need for afternoon naps!  We decided to purchase an annual zoo membership at the Santa Barbara Zoo and went every month, this turned out to be wonderful idea because our daughter became very familiar with the animals there and was able to watch the baby animals as they grew over the years.

Another advantage to having a zoo membership is the access to activities and special events.  Either way, if you choose a large zoo or a smaller one, consider a behind the scenes tour.  We highly recommend these types of tours because they go into areas that the general public does not normally get to see, like the zoo kitchen where the zoo staff prepares the animals food and sometimes behind the scenes into areas where you can see the animals off exhibit or in the animal hospital.

A trip to the local zoo can be great family fun and it can also be a wonderful learning experience for both children and adults.  Listed below are some tips and suggestions for planning a visit to the zoo.

Before the zoo visit

  1. Plan ahead and be prepared by checking out the zoo’s website for hours and  admission prices, also to familiarize yourself with the park layout and a list of the zoo’s current animals.  Most zoo websites will have some of the zoo animal details, such as: the animal’s names, new births, etc.
  2. If you or your children have an interest in a particular species of animal, do some research online for more information.  Check out the local bookstore or library for animal books to read before the visit to the zoo.
  3. Generally the best time to visit a zoo is when the zoo opens in the morning.  Most animals that live outdoors will have just come out of their night area, investigating their day area and sometimes the zoo keepers will add enrichment activities to stimulate the animals’ physical and mental behaviors.
  4. Check the weather report before you leave home for current conditions.  Dress in layers you can take off or put on since you may be moving indoors into air conditioned buildings or outside into the heat and sun.  Take along a jacket and wear comfortable shoes because chances are you will be doing a lot of walking.
  5. Most zoos offer some type of meal service, sometimes there are full service restaurants, ice cream and cotton candy stands.  Consider bringing healthy snacks and water or a better idea is to check ahead to see if there are picnic areas and take the time to pack a delicious lunch. Bring reusable water containers to stay hydrated during the hot summer days.
  6. Consider bringing a stroller because even the most energetic toddler can easily become exhausted walking around the zoo.  Strollers are also a great way to carry extra jackets, snacks and water bottles or even picnic lunches.  Be sure to tuck in a small first aid kit because you never know when there will be cuts or scraps as the children run around the zoo.

During the zoo visit

  1. When visiting the zoo, be sure to observe the zoo’s safety rules.  Check the zoo’s map/brochure for the rules and observe posted signs.  Don’t forget the animals in the zoo are wild and are kept in the enclosures for the visitors safety as well as their own.  Be sure to teach your children not to feed the zoo animals and explain they are on special diets and other food could make them sick.
  2. Be sure to supervise small children.  Zoos can become very crowded at times and children can easily be separated from their parents if they run ahead.  When we visited zoos when our daughter was small we purchased a small metal tag that had her name and our cell phone numbers in case she got lost.
  3. Consider a small backpack for holding items like a small first aid kit, snacks, a reusable water bottle, etc.  Be aware of the weight of the backpack when it is loaded and remember it will be carried around all day.  One thing that I carried in my backpack was a small light weight book about animals that I found in my local bookstore and we would read it throughout the day while looking at the different exhibits or while eating lunch.
  4. Some zoos have a petting area where animals can be seen up close.  This can be exciting for children as well as adults.  But with this direct contact of the animals it is possible to be exposed to harmful germs.  Consider tucking a small anti-bacterial hand sanitizer into your first aid kit or backpack.
  5. When visiting the zoo, take lots of pictures of the animals.  We took of our photos from the Santa Barbara Zoo and put them into a scrapbook with printed information from the zoo’s website.  Some zoo websites have information and statistics on their individual animals or other online sources can be used for additional information of a specific species.  It takes a little time to assemble one of these scrapbooks but the cost of supplies can be relatively inexpensive.  My daughter enjoyed looking at her “zoo scrapbook” and even now that she is older and we have moved away from the area she still looks at it from time to time.

The following are the two of our family’s favorite zoos –

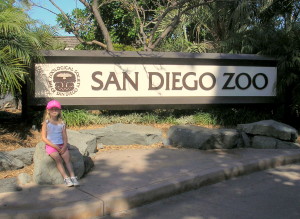
OLYMPUS DIGITAL CAMERA

San Diego Zoo

We highly recommended the world famous San Diego Zoo if you are ever in the southern California area, it is the located in Balboa Park in San Diego.  This zoo is one of the best that we have ever visited and it is huge!  The Zoo, located near downtown San Diego, has 100 acres with over 3,700 animals of more than 650 species.  The San Diego Zoo was started with the exotic animals that were abandoned after the 1915 Panama-California Exposition.  In 1916, the Zoological Society of San Diego was founded by Dr. Harry Wegeforth and when a permanent home was established in Balboa Park in 1921, by mutual agreement it was decided that the city of San Diego would own all the animals and the zoo would manage them.

The zoo was one of the first in the nation to create “cageless” exhibits in which the animals were contained within their areas by deep moats; the lion exhibit was the first.  Exhibits are often designed around a particular animal habitat which features many different animals found normally living within the same locations in the wild.  The zoo is very large and is definitely an all day visit.  If visitors are not up to walking, have very small children or have physical restrictions; the zoo offers a guided tour bus that covers about 75% of the park.  There is also a Skyfari ride that provides aerial views over the zoo with some amazing sights of Balboa Park and beyond.

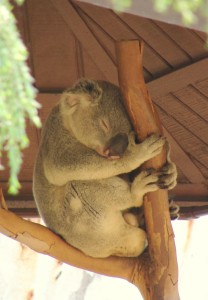
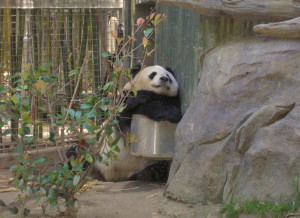
The Australian Outback area of the zoo has the largest number of koalas outside of Austrailia.  The Panda Trek area is one of only four zoos in the U.S. with giant pandas and has a very successful panda reproduction program.   The Ituri Forest exhibit has many animal species from this region of Africa but my favorite is the hippo exhibit.  (While visiting the zoo, if possible time a visit to this area when the zoo staff feeds whole watermelons to the hippos)  Polar Bear Plunge is home not only to the polar bears but to over 30 species of animals from the arctic region.  These are just a few of the areas that are found in the world famous San Diego Zoo.


BOOK SUGGESTION:  “It Began With A Roar” by Harry M. Wegeforth and Neil Morgan.

San Diego Zoo 2006 Koala    OLYMPUS DIGITAL CAMERA


Santa Barbara Zoo

Santa Barbara Zoo sign 1This smaller zoo is located on the coast of California in the wonderful seaside town of Santa Barbara.  Formerly known as Child’s Estate, this property was deeded to the Santa Barbara Foundation upon the death of Lillian Childs, a long-time resident of the community.  In 1963, the 30 acre Santa Barbara Zoological Gardens was opened to the public and is considered one of the nation’s best small zoos.  There are over 600 animals on exhibit and visitors are first greeted near the entrance by several capybaras and a couple of river otters.  The African Veldt area has several giraffes and a nearby smaller exhibit has meerkats. The Forest’s Edge area of the zoo currently houses two gorillas and the Elephant Walk area has both a large land area and small pool for the zoo’s two Asian elephants.  The Cats of Africa opened in 2003 and is built into a small hillside and houses several lions. Eeeww! is a building which houses all kinds of creepy crawly bugs, lizards, spiders and snakes.  California Trails is the newest exhibit to the zoo and houses several California condors and Channel Island foxes.

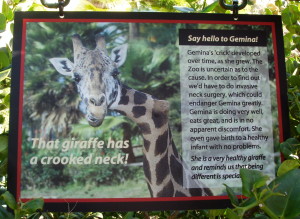
One of the zoo’s most popular animals was Gemina, the “crooked-necked giraffe”.  (born: July 16, 1986  died: January 9, 2008)  She was a female Baringo giraffe born with a straight neck at the San Diego Wild Animal Park and acquired by the Santa Barbara Zoo shortly after her birth.  At the age of three she developed a bend in her neck and despite her deformity she was treated as a normal member of the herd of giraffes and appeared to be in no discomfort.

OLYMPUS DIGITAL CAMERA

Here is a craft suggestion after a day at the zoo check out the Craft Post, Zoo Animal handprints.

Travel – National Parks Travel Tips (Part Two)

A trip to one of our national parks can be a wonderful vacation filled with amazing adventures for you and your family.  The United States National Park Service administrates the 59 National Parks, 108 National Monuments, 78 Historical Sites and hundreds of other sites throughout the United States.  Pull out a United States map and take a look, there are probably several national park sites within an easy drive from your home.

In this post, I am going to discuss one of my favorite topics in regards to the national parks … taking photographs.

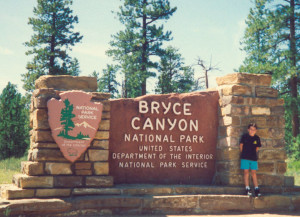
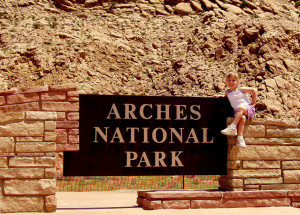
National Parks have many scenic views of picturesque lakes, majestic mountains, magical forests and arid deserts, the photo opportunities are endless.  One of our family traditions is the classic photo at the national park sign.  (I can hear my children now complaining, “Not another picture by a sign, why do we have to do this?)  These are some of my favorite photos taken at the national parks and I am so glad we have them.  One wall in our home is filled with all of these photos displayed in white mats and simple black frames.  Below each photo, on the mat, I’ve written the date of each visit.  Looking at these photos I can see my children growing from year to year and the wonderful memories we’ve shared at those national parks.

Bryce NP 1992    Arches NP 2004
OLYMPUS DIGITAL CAMERA

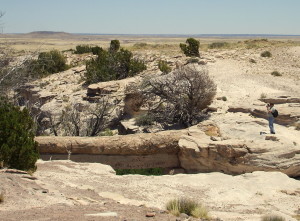
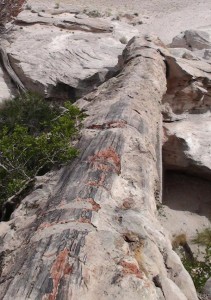
When I am taking photos of the park’s beautiful landscape I usually take several photos of just the scenery but then I’ll take more with the family.  For example, everybody takes a classic photo the family standing with Mount Rushmore in the background.  It is a great photo but not a very original idea.  Now, look at the some photos taken during a visit to the Petrified Forest National Park in 2011.  The photo is of the petrified agate log bridge but look to the right and you will notice my husband standing there taking his own photo of the log.  I love taking photos like this because when I put them into the scrapbook I place them side by side and caption the photos as “my view and his view”.

Petrified Forest NP 2011 2    Petrified Forest NP 2011 5

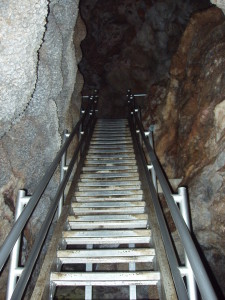
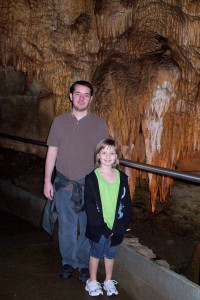
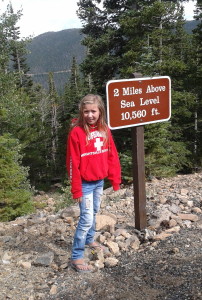
When visiting the national parks one of our favorite activities, when available, is taking a cave tour.  Caves can be a difficult environment in which to take photos, generally caves can be dark with very limited lighting.  Using a flash would be helpful but you don’t want to distract the other visitors with a bright flash going off in a darken cave.  When we visited Mammoth Cave NP in 2010, we stopped to take a photo of my son and daughter in one of the larger caverns with the lights on.  When taking photos sometimes it is a good idea to tell the story of the experience.  Shown below is a photo showing one of the stairways used by the visitors to descend into the caves.  Another example of photos telling the story of a trip was taken in Rocky Mountain NP in 2012.  Driving through the park, visitors can climb to very high elevations and I took a photo of my daughter with an elevation sign that read two miles above sea level to explain how high we actually were.

OLYMPUS DIGITAL CAMERA   Mammoth Caves 2010 3   Rocky Mountain NP 2012 1

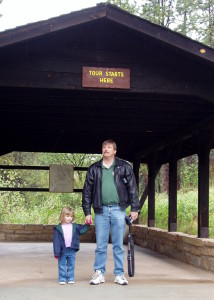
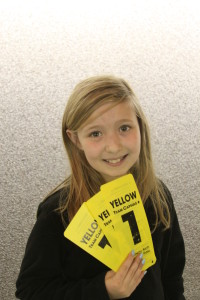
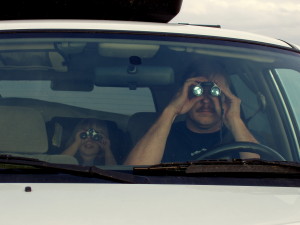
When we visit NPS sites we usually like to take tours and try to experience special activities.  One example of this type of photo was taken at Wind Cave NP in 2004 and shows my husband and daughter standing under a sign that reads “tour starts here”.  Another example is a photo taken in 2011 at the Jefferson National Expansion Memorial in St Louis, MO.  There is a ride there that will take visitors to the top of the Gateway Arch and I took a photo of my daughter holding the tickets.  Another fun photo was taken at the Badlands NP in 2004, we had pulled into an area where we could watch the prairie dogs and I got out of the car and took the photo of my husband and daughter looking out into the prairie with their binoculars, a very cute photo.

OLYMPUS DIGITAL CAMERA    St Louis Arch 2011 1
OLYMPUS DIGITAL CAMERA

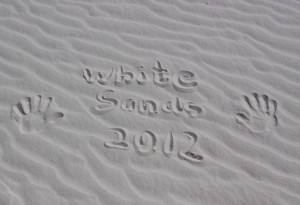
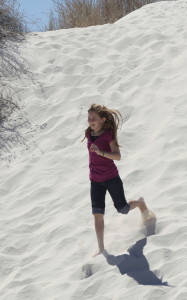
Sometimes the scenery with inspire a creative photo.  Usually when we are on vacation at the beach we write our names, location and date of the visit in the sand with a stick.  When we visited the White Sands National Monument in 2012 I took the classic writing in the sand photo.  Along with this photo I took some great action shots of my daughter running down the sand dunes, she was having a great time.

White Sands 2012 2


White Sands 2012 3   OLYMPUS DIGITAL CAMERA

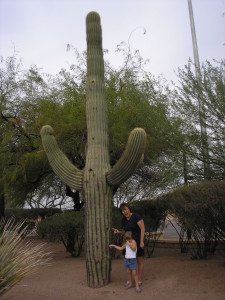
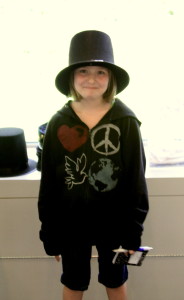
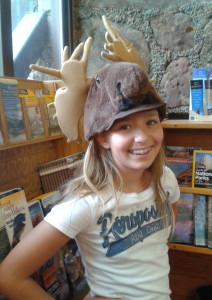
Occasionally we take silly photos, like the one my husband took when we were visiting Saguaro NP.  It’s a funny photo of my daughter and I touching the prickly saguaro and we are making silly faces.  Sometimes shopping in the park gift shop will inspire a funny photo, like the one of my daughter wearing a stovetop hat at Abraham Lincoln Birthplace Historic Site in Kentucky or the silly moose hat she is wearing at Rocky Mountain NP.

Lincoln birthpalce 2010 2    Rocky Mountain NP 2012 2

Have fun taking photos and send me some of your favorites – I would love to see them!

For additional ideas and tips when visiting a National Park please check out National Park Travel Tips (Part One).

Travel – National Park Travel Tips (Part One)

Within the National Park Service there are 59 National Parks, 108 National Monuments, 78 Historic Sites and hundreds of other sites which they administrate and maintain.  The national parks in particular are popular travel destinations which offer beautiful scenery as well as offering hiking, camping, boating and other recreational activities.  Across the United States there are numerous opportunities to enjoy these magnificent parks.  So, get out a map and look for the national parks in your area or plan a longer road trip and visit several along the way.

The first thing to do when planning a trip to a national park is to book lodge or campsite reservations.  Sometimes accommodations within a national park can be very limited and popular destinations book far in advance, so researching the information regarding accommodations is very important.  Facilities can range from luxurious lodges to very rustic campsites and these decisions are determined by your personal preference.  Our family had stayed at all different types of accommodations and we have enjoyed every one of them.  Honestly, unless you are very particular about your sleeping arrangements, in the evening when bedtime comes around you can be so exhausted from the day’s activities that you are asleep before your head hits the pillow!  When we have been on past road trips and visiting several national parks in a period of time longer then a week, we have found that a combination of campsites and lodges accommodations can be a great balance because sometimes you want the luxury of a comfortable bed and a private shower or bath.  If the national park you are visiting is close to a city, sometimes the hotel accommodations are more plentiful and rooms are available in all price ranges.

Visiting a national park can be an exciting adventure for you and your family.  To make the trip a successful one a little advance research is a good idea.  Once you decide on a destination and have accommodation reservations made, try to gather as much information as you can regarding the area in which you are planning to visit.  The local library is a good resource for tour and guide books on a particular national park or check out online book sources like Amazon or Barnes and Noble.  I always like to read a book about the history of the area before visiting.  Then, when we are on the trip, sometimes it is a good idea to have something to read in the evening when you are back at the campsite or lodge.

When I first visited Yosemite National Park I purchased a book by John Muir.  Muir was a naturalist and author who wrote about his adventures in Yosemite and the importance of protecting and preserving areas like Yosemite throughout the United States.  His activism efforts lead to founding the Sierra Club which is one of the most important conservation organizations in the United States.  I really enjoyed reading about his adventures in Yosemite and then visiting the places he was talking about in his books.  I think I appreciated my time in Yosemite more when looking at the beauty of the scenery through the eyes of John Muir.

The next major decision when planning a national park trip is determining a schedule of activities and things to do.  Gathering information about the activities of the national park is a very helpful way to setting the trip budget because it allows for additional expenses such as: guided tours, rock climbing, horseback riding, raft trips, etc.  Once the trip dates are confirmed, I would advise booking any type of popular activities in advance.  Sometimes these activities fill up quickly especially during the peak summer vacation months.  Nothing can ruin a trip more than arriving at a destination and finding out that activity you were looking forward to experiencing has been sold out.  When we visited the Grand Canyon we wanted to take the mule ride on the Bright Angel Trail, so we booked the ride in advance and were able to pick the day and time that fit into our trip schedule.  On this same trip we also reserved a popular river raft tour on the Colorado River in advance so as not to miss out on this exciting adventure.  As early as possible, take the time to get these important reservations made and it will eliminate the stress so you can enjoy the trip knowing that your activities are confirmed!

Listed below are several additional tips and suggestions to help when planning a national park trip.

Tips and suggestions when planning a trip

  • When starting to plan a trip to a national park, a great resource is the National Park Service website at www.nps.gov  This website will have information regarding specific national parks such as: hours, fees, reservation, history, geology, animal, plant info as well as a special section for kids.
  • Be sure to involve the kids in the planning process, talk to them about what sites they would be interested in visiting.  Plan a balance of adult and children activities to keep everyone happy.  Be flexible in planning the activities and don’t over schedule, smaller child need time to simply play and run or maybe even take a nap.
  • When traveling, be sure to break up the trip with frequent stops at rest areas or for meal times.  Sometimes national parks are located far away from cities and facilities may be limited.  Be sure to check in advance for this type of information.  Plan ahead with extra snacks and drinks or perhaps pack a picnic lunch.  When on the hiking trails or outside the car, be sure to carry enough water for everybody and especially in the southwestern national parks in the summer it can get very hot and you will want to avoid dehydration.
  • Before leaving, consider purchasing a special map for the kids so they can enjoy following along during the trip.  This will answer that inevitable question of, “are we there yet”!  Also, when you know the specific national park you are visiting, check out the children’s section in your local bookstore or online at Amazon.com, sometimes you can find a fun book for them to read about that particular park.
  • If you are traveling to several national parks, consider purchasing the National Park Annual Pass.  The pass is $80 and valid for a full year from the month of purchase.  Do the math and see if this would be economical purchase for you.  If you are traveling with a senior citizen, consider the Senior National Park Pass which costs $10 and is valid for a lifetime.  The purchaser must be 62 years or older and the Senior Pass admits the pass holder and up to three additional adults traveling together in the same vehicle.  (Children under 16 are always admitted free in a national park)  We found out about this from a park ranger when we were traveling with my husband’s mother and we joked that from now on when we visit a national park we are taking her with us because basically we could get in for free!
  • When at the national park visitor center, consider purchasing the Passport to Your National Parks Stamp Book.  This is a great way for the kids to collect stamps from the parks they visit and a fun way to remember the places.  One of our first stops in any national park we visit is the visitor center for maps and current park info, while there our daughter always heads to the passport stamp section to get the park’s stamps for her passport book.
  • Another great idea for the kids is the educational Junior Ranger Program and it is totally free.  When you are at the park’s visitor center pick up a copy for your child.  Usually the booklet has activities and questions for them to answer while they are exploring the park.  When the book is completed return to the visitor center for them to participate in a quick ceremony administrated by the park ranger, the child will raise their right hand and repeat the Junior Ranger oath before receiving the park’s Junior Ranger patch.  We always try to do this with our daughter and it is a great photo opportunity!
  • Taking a pet, particularly dogs, on a trip may sound like a good idea but most national parks have rules and regulations.  Always check in advance for information regarding pet limitations as this will be helpful in determining whether to leave them at home and making alternative arrangements.
  • When visiting the national parks, be sure to observe all the rules and regulations such as speed limits.  Be sure to take into consideration any special safety signs such as bear warnings.  Respect the park’s wildlife and be sure to observe bear safety rules when on hiking trails and other areas of the park.  It is always a good idea to make a quick check of the weather report at the park’s visitor center and while there also check for road or trail closures.  Heat or high altitude conditions can effect visitor’s health, so take precautions and be prepared.  When we go on hikes in the national parks, we always carry a small backpack with a small first aid kit, flashlight and enough water for everyone.  Consider purchasing a couple of reusable water bottles prior to your visit for use while hiking, this is an excellent way to be green (earth) smart.
  • Since one of the goals of the National Park Service is protecting and preserving our national parks, be aware of your impact on the environment.  Consider parking your vehicle and walk, bike or take the park’s public transportation when available because these simple choices will reduce the carbon emissions into the environment.  Be sure to observe the recycling cans while at the visitor center, lodges, campsites, etc. while in the park.  Conserve water whenever possible while in the parks, such as washing dishes at campsites.  When at the campgrounds be sure to minimize your campfire impact, when leaving extinguish the fire fully and be sure to dispose of waste properly.
  • When camping in the park, before to check all camping equipment before leaving.  If the tent is new, consider setting up and taking down the tent.  Solve any possible problems and check that all equipment is functioning properly, such as the camp stove or lantern.  Be sure to have extra batteries for flashlights, etc.
  • Please stop and take a moment with your family to enjoy the national park with all the beauty and activities that are available.  If you have limited time when visiting the parks, be sure to stop at the visitor center. These facilities offer information and other services, excellent natural and historical displays and orientation movies as well as shopping and sometimes dining opportunities.  Be sure to take a drive on any of the scenic roads because it is a great way to explore the park.  Take the time to get out of your vehicle and walk even a short distance on one of the park’s hiking trails.  This is a great idea especially when a park can be crowded during the busy summer months.

Finally, I hope that you and your family consider a trip to one of our national parks.  There are so many diverse natural and historical sites to see and I’m sure any one of those chosen will provide you and your family with experiences and moments that will be remembered for a lifetime.

For additional ideas and tips when visiting a National Park please check out National Park Travel Tips (Part Two).