This month I posted a craft project on a Fabergé-inspired Egg. Peter Carl Fabergé was the famous designer of these beautiful jeweled Russian Imperial Eggs which were specially created for the Russian Tsar Alexander III and later his son Tsar Nicholas II between 1885 and 1917. (For readers interested in more detailed information about the House of Fabergé or the Fabergé Eggs, please click on the link to the previous blog posts)
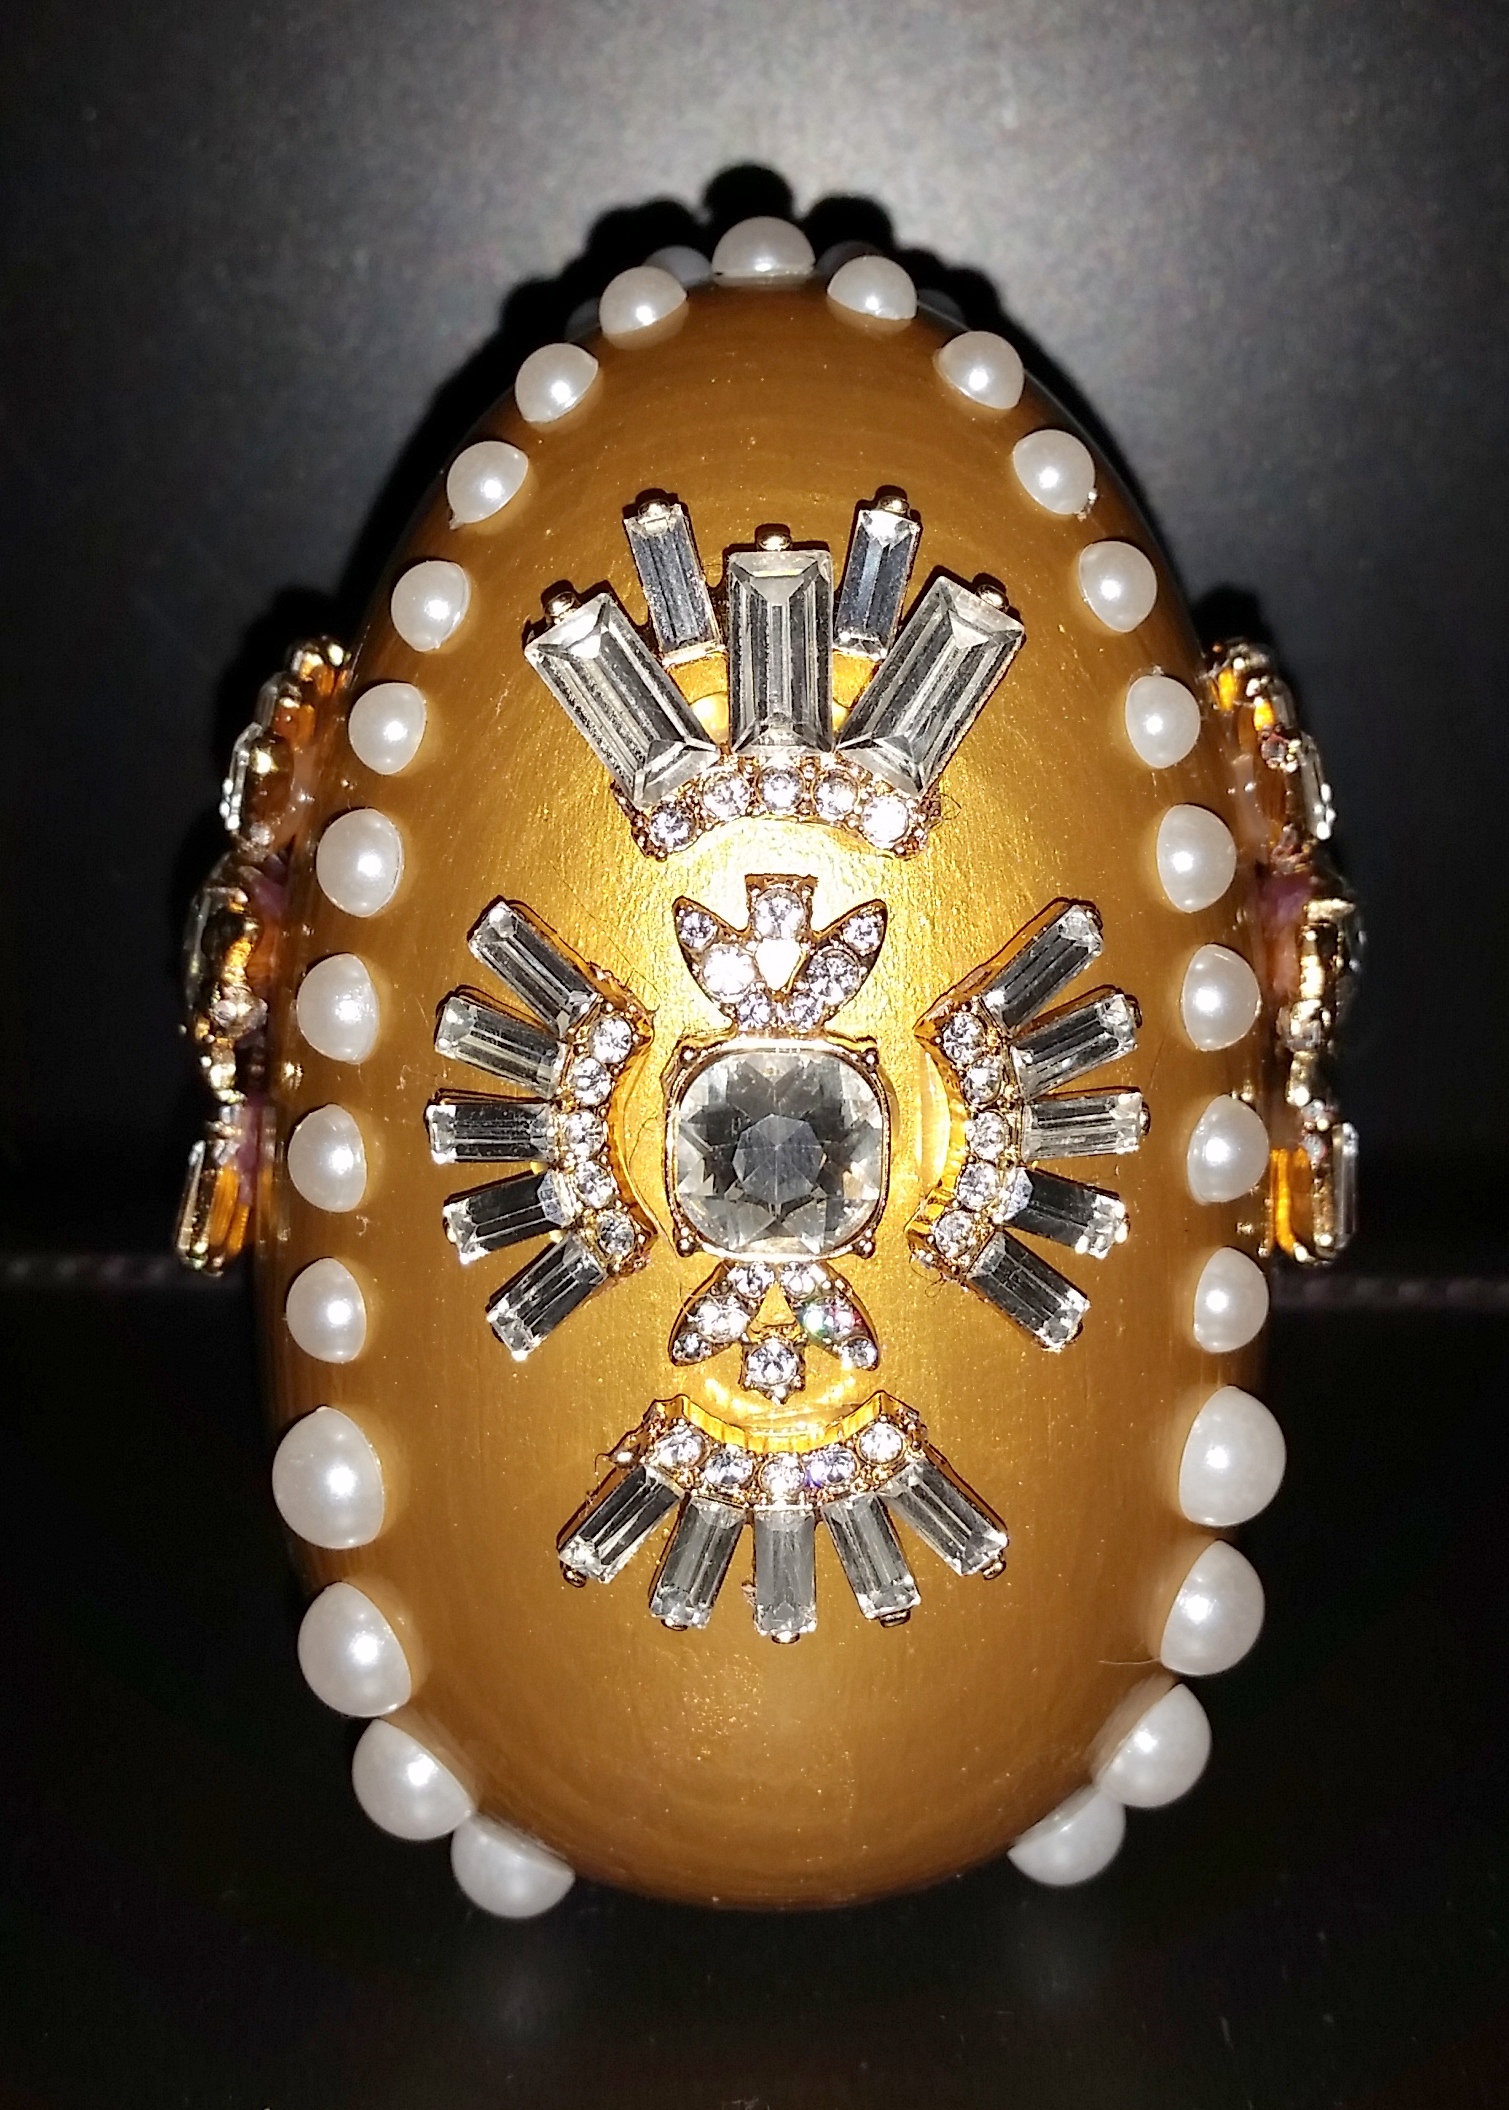
The previous Fabergé-inspired Egg craft post featured a lovely golden eagle pendant with a large blue gem which seemed to copy the style of the Russian Imperial crest. Then, recently when in the jewelry/accessory store Charming Charlie looking through the clearance section, I found two inexpensive necklaces, a bracelet and earrings that I decided would be perfect for two more Fabergé-inspired egg craft projects.
Fabergé-inspired Egg supply list
- Large wooden egg
- “Inspiration pieces” of jewelry (necklace and bracelet)
- Self-stick pearls (select a color to coordinate)
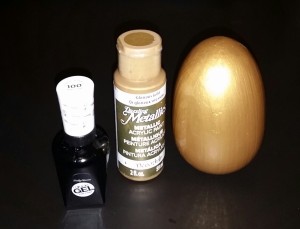
- Metallic paint – for one egg I used gold and for the other I used silver
- Paint, paint brush
- Sally Hansen Miracle Gel – Top Coat nail polish
- Sandpaper
- Hot glue and glue sticks
- Wire cutter
Fabergé-inspired Egg instructions
- Use sandpaper to smooth any rough surfaces to prepare the wooden egg for painting.
- Begin painting the bottom portion of the wooden egg, let dry completely. Then paint the upper portion and let it dry completely. (I selected a metallic paint color to coordinate with the metal of the “inspiration pieces”)
- After the paints dries, to give the egg a beautiful finish to resemble the enamel technique that was often used in the creation of the original Fabergé Eggs I used the Sally Hansen Miracle Gel – Top Coat nail polish to achieved this effect. Apply the nail polish covering the entire egg; let it dry completely before proceeding to the next step. (I think that the nail polish worked much better than a gloss paint to create an enamel look)
- Prepare the necklace and bracelet by clipping the links to create separate pieces, use sandpaper to smooth any rough or sharp edges.
- Hot glue the individual pieces to the painted egg, work out the placement before gluing by marking with a small dot to indicate the position.
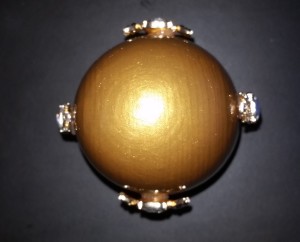
- Attach the self-stick pearls to the egg. (If desired, the pearls can be additionally made secure with the use of glue)


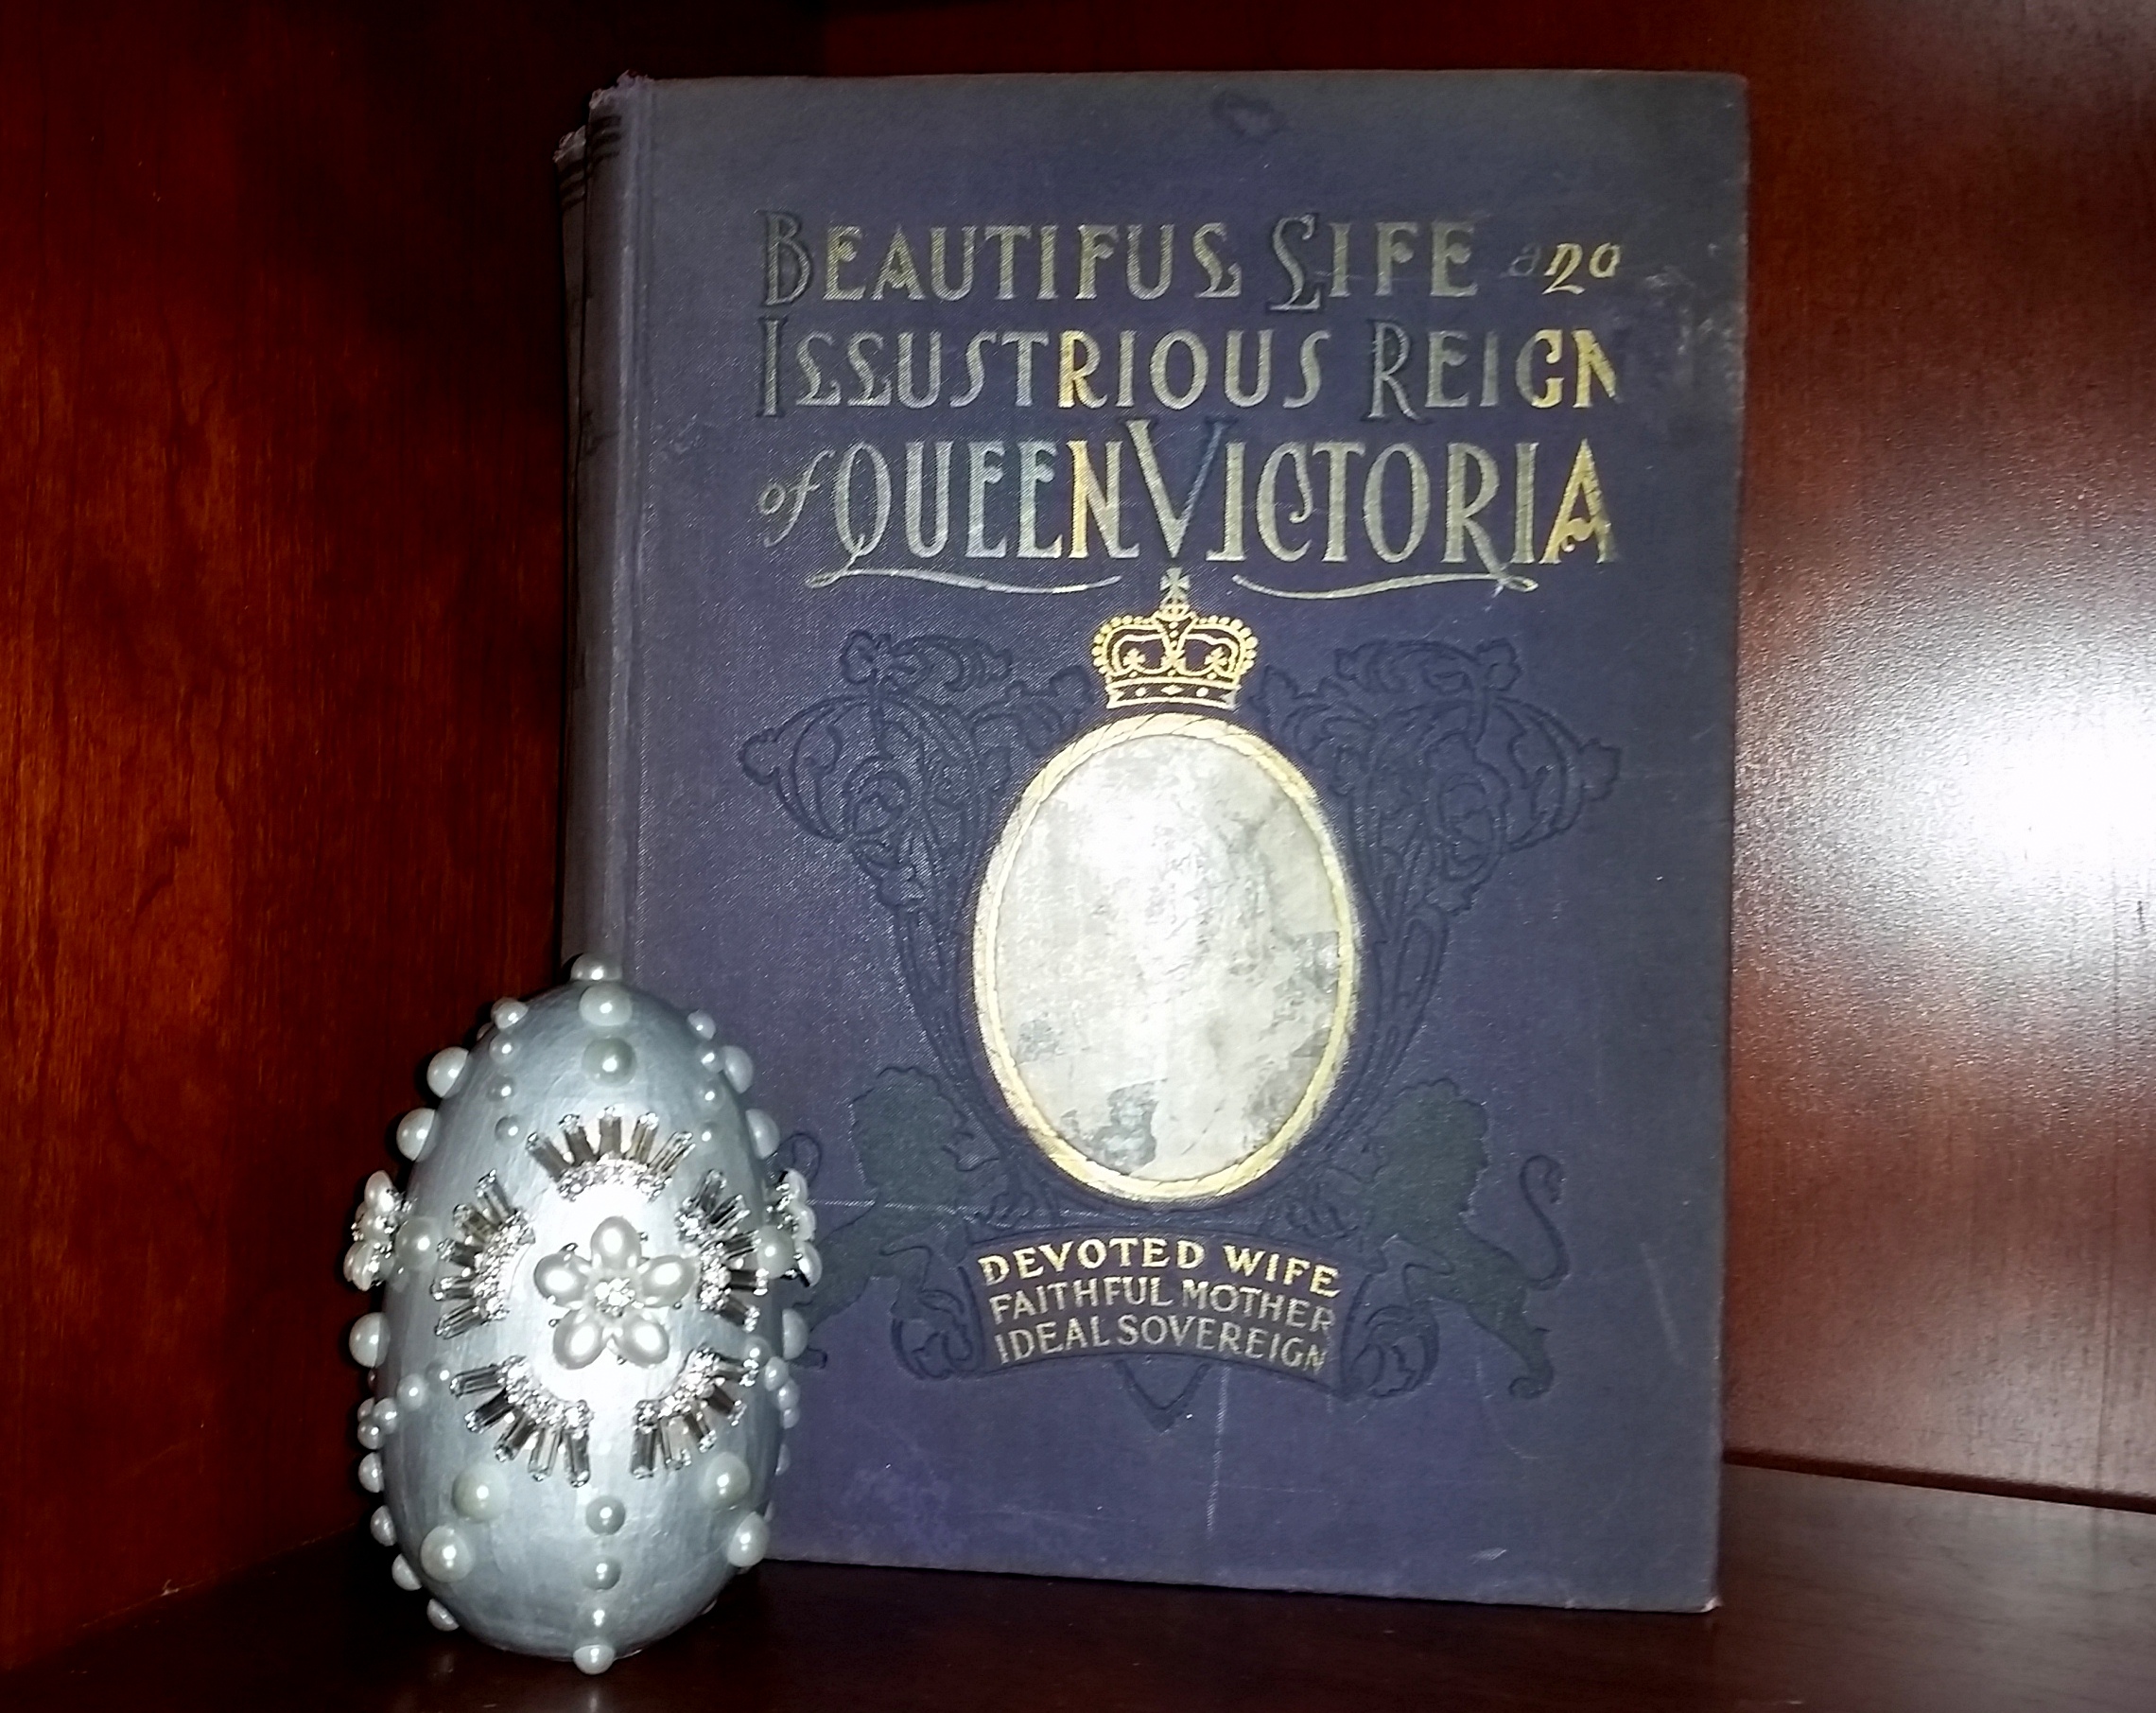
Please check out the two previous craft posts also inspired by the Fabergé Eggs. The first craft project is an elegant Fabergé-inspired oval box that is painted and decorated with crystal and pearl stickers. This box is still displayed in our family room bookshelf during the Easter season. The second craft project, as previously mentioned, is a Fabergé-inspired Egg which features a lovely golden eagle pendant with a large blue gem which resembles the style of the Russian Imperial crest. (For more information regarding the supply list and instructions for these two craft projects, please click on the links)