Craft – Faberge-inspired Egg Box

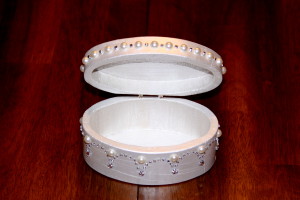
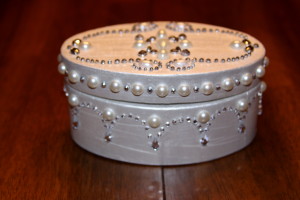
Faberge eggIn my Décor post, Faberge Eggs, this month I told the story of these beautiful eggs and their connection with the Russian Romanov family.  Inspired by those Faberge eggs, I decided to recreate a simpler but still elegant oval “egg-shaped” wooden box that is painted and decorated with crystal and pearl stickers.  This box will be displayed in our family room bookshelf during the Easter season.
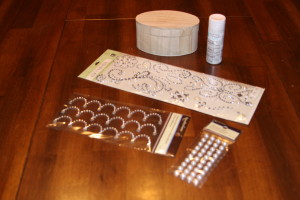
IMG_9366Faberge-inspired Egg Box – supplies

  • 1 wooden oval-shaped box (I used an oval to mimic the shape of an egg)
  • Sandpaper, used to prepared the rough surface of the wooden box
  • Pearl paint (I used Martha Stewart brand pearl acrylic paint in Mother of Pearl)
  • Paint brush
  • Pearl stickers
  • Crystal stickers
  • Glue stick, to fix or repair loose pearls/crystals
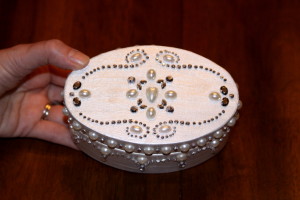
Faberge egg top Faberge egg open
Faberge-inspired Egg Box – instructions

  1. Pre-determine the pearl and crystal sticker placement prior to painting.
    (Sometimes stickers will come in an already established pattern as one application, like the one I used on the side of the wooden box.  On the edge of the lid, I alternated with placement of an individual pearl and diamond design. On the top of the lid, I pieced together several different patterns for a nice combination)
  2. Prepare the wooden oval-shaped box for painting, use sandpaper on all the surfaces, including both exterior and the interior of the box, to create a smooth surface.
  3. Paint the wooden box; let the paint on the different areas completely dry.
    (I suggest painting the inside of the box first, then the bottom, then the sides/top)
  4. Attach the pearl and crystal stickers in the different pattern combinations that were pre-determined ahead of time.  If any pearl or crystals come loose, use a glue stick to re-attach.

Craft Tip: For the wooden box that I created, I used a simple color palette of Martha Stewart pearl paint in white with pearl and “diamond” crystals for an almost monochromatic look.  Experiment with a color palette; using one, two or even three different colors, until you find the right combination that you like.

In a previous post on the House of Fabergé I gave a brief history of the company.  Peter Carl Fabergé was famous for designing the beautiful jeweled Russian Imperial Eggs which were specially created for the Russian Tsar Alexander III and later his son Tsar Nicholas II between 1885 and 1917.  In 2013 I published a post on the 54 Imperial Eggs that Fabergé created during that time.  (For readers interested in more detailed information about the House of Fabergé or on the Fabergé Eggs, please click on the link to the previous blog posts)

In another post, I was inspired by the original Russian Imperial Fabergé Eggs, I decided to recreate a more traditional and elegant style.  This idea started when I found the double eagle pendant in my local craft store.  The golden eagle pendant has a large blue gem set in the center and accented with diamond-like crystals.  I thought this pendant was a perfect inspiration for an Imperial Fabergé-style Egg.  (For more information on this craft project with a supply list and instructions, please click on the link to the Faberge-inspired Egg post)

Celebration – Last Minute Valentine’s Day Ideas

Sometimes with our busy lives the holidays come too soon and we are not prepared!!  Valentine’s Day is one of those times; it comes after Christmas when most of the time in we have just finished packing the holiday decorations and moving them into storage. Well, Valentine’s Day is quickly approaching and here are some ideas for last minute projects that are easy to make and take very little money.

“Showered with Love”

This a great project to do with the kids!  All that’s needed are a couple of bags of balloons, I used red and hot pink balloons, but you could also add white balloons.  A variety of colors keeps the display visually interesting.  You can blow up all the balloons in advance and store them in a place hidden from the person you are surprising.  You can fill the balloons with fun messages.  Just write the notes on small pieces of papers tightly roll them up and insert them into the balloons.  Fill the shower stall with the balloons and close the shower curtain.  Tape a large note to the shower door that says, “Good morning!  You have been showered with love!” It is a lot of fun and the kids will love writing the notes and surprising the person!!

This is also a great idea to surprise someone with on a special birthday!!  Just attach a note to the shower door that says, “Happy Birthday! You are showered with love!”

“Heart Attack”

This is another great project for your spouse, family or friend.  The supplies needed for this project are simply some construction paper or scrapbook paper and tape.  You can get fancy; I used red glitter foam left over from the Queen of Hearts Party.  Cut the paper into the shape of different size hearts. You can use red, pink and white for a great look.  Be sure to include one larger heart that says, “With love from your name(s).  Attach the paper or foam hearts with tape and please be sure not to obstruct the front window.  Now, you have one of two chooses: decorate the special person’s car at their home either parked inside the garage or outside on the driveway or street.  Where you decorate the car should be determined by the local weather because snow or rain will definitely affect the paper hearts, please keep that in mind when you are planning this project!

This is another project that could be used for a birthday or anniversary, you can use others colors of paper or foam hearts for the decorations.

A Trail of Kisses

Here is a fun project to do for your kids or adults, too!  Buy a bag of Hershey’s kisses, any flavor.  Leave a trail of kisses on the floor leading to a special gift, maybe a stuffed animal, Barbie, Lego set, etc.  Decide if you want one special gift or several, it is up to you!  It’s easy; the child would follow the trail of kisses to get to the special present!

SPECIAL NOTE:  Please be advised that chocolate can be very harmful for dogs, so take caution when you are doing this activity, we don’t want any dogs getting sick.

Craft – Christmas Kissing Ball

The holly and the ivy have been used in English Christmas decorations for centuries.  The English people in olden days had no retail stores available to purchase holiday decorations so they decorated their houses with the evergreens available in their local woodland and forest areas – holly, ivy, mistletoe, pine and fir.  These plants stayed green all year and became symbols of life during the cold winter months.  They decorated with swags and garlands made of pine and fir boughs intertwined with holly and ivy.  Mistletoe was believed to have miraculous healing powers and was placed over doorways to ward off evil spirits and bring health, happiness and good luck.

An old midwinter custom in English villages dating back to medieval times was to hold a singing contest between the men and the women.  It was a chance for the villagers to gather for celebration, singing and dancing.  Using the holly and ivy as symbols, the men sang songs praising the masculine qualities of the rigid leafed holly while the women sang about the feminine qualities of the softer ivy.  The matter of who won the contest was frequently resolved under the mistletoe where young men of the village had the privilege and opportunity of kissing the girls.  As the couples kissed, they would pluck a berry from the mistletoe and when all the berries are gone the kissing privilege ceases.  (What a charming and romantic story!)

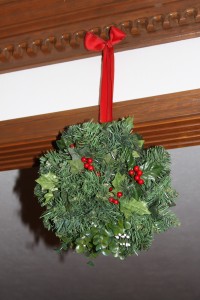
For your next Christmas party try adding some fun and excitement by making your own Kissing Ball.  Hang it in an area of the home where your guests are sure to walk under it – just don’t hang it too low so they hit their heads!

Christmas Kissing Ball – supplies

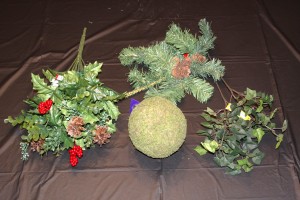
  • 3 or 4 inch Styrofoam ball (I found one already covered in moss at my local craft store)
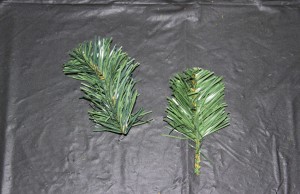
  • Artificial pine, ivy, holly and mistletoe
  • Artificial red berries
  • Ribbon

Christmas Kissing Ball – instructions

  1. Cut the pine, ivy, holly and mistletoe into small workable pieces about 3 inches long.
    (Check the Christmas floral aisle in your local craft store early for the best selection – sometimes you can buy pre-cut pieces already shortened to the desired length)
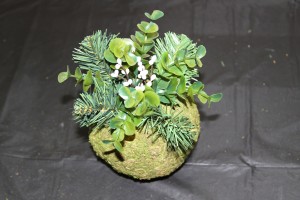
  2. Insert and glue each piece of pine, ivy, holly and mistletoe separately.  Evenly space each type of greenery across the entire Styrofoam ball and fill all the empty spaces.
    (If desired, hot glue small amounts of Spanish moss to fill any empty spaces)
  3. Insert and glue red berries, scattered evenly across the Styrofoam ball.
  4. When the Styrofoam ball is completely covered, cut some festive ribbon to the desired length for hanging and attach to the top of the ball.


The Christmas Kissing Ball is finished and ready to hang – so, get ready to pucker up!!

Craft – Cranberry Topiary

Depending on the current First Lady’s Christmas theme and decorative style for the White House, some variation of a cranberry covered decoration is always in the Red Room. Some years it can be a cranberry wreath or another variation but I have long admired the cranberry topiary.  I always thought that it was one of those perfect decorations for Christmas with the red color of the cranberries and the green color of the pine.

For years now I’ve always keep a silver bowl of artificial cranberries in our dining room during the holiday season.  This year I wanted to do something different and decided that I was finally going to use those cranberries to make a topiary for our dining room.

Listed below are the materials and instructions to make a cranberry topiary.

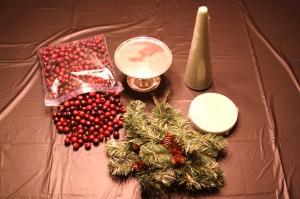
Cranberry Topiary – supplies

  • 1     Styrofoam come
  • 1     Styrofoam circle, a couple of inches wider than the base of the Styrofoam cone
  • 1     Container, as wide as the bottom of the Styrofoam cone
  • Cranberries, artificial
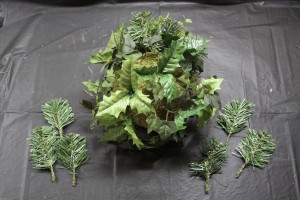
  • Pine boughs or other type of greenery for base
  • Small Pinecones, several
  • Hot glue gun/ glue sticks
  • Sheet moss, to cover the Styrofoam cone (optional)
  • Foam adhesive spray, to attach the sheet moss to the Styrofoam cone (optional)
  • Hot glue gun /glue sticks

Cranberry Topiary – instructions

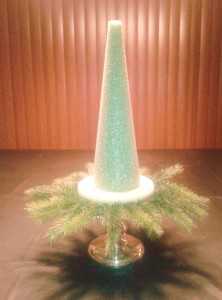
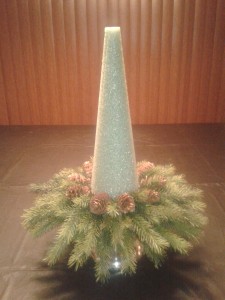
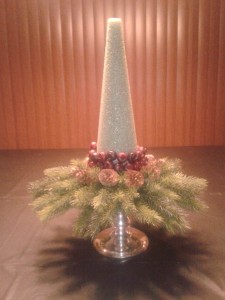
Center the Styrofoam cone on the Styrofoam circle; attach the cone securely to the circle with hot glue. This will create one piece that you can set a silver bowl or I used a silver pedestal base.

Option #1 – Use spray adhesive to attach sheet moss onto the Styrofoam, this covers any empty spaces left between the cranberries and gives a finished look.

Option #2 – Paint the Styrofoam cone a burgundy shade to match the cranberries so the empty spaces between are not noticeable.  (Even though it is not pictured, this is the option I used for my cranberry topiary)

  1. Insert the pine boughs or greenery into the Styrofoam circle at the base of the Styrofoam cone.
  2. Hot glue small pinecones at the base of the Styrofoam circle.  Be sure to save one for the top of the Styrofoam cone
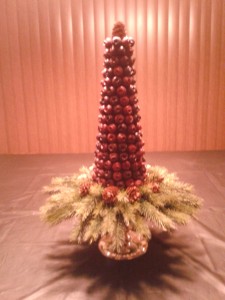
  3. Using a small amount of hot glue, attach each individual cranberry to the cone.  Starting at the bottom, work in rows until the cone is completely filled to the top.  Try to leave as little space as possible between cranberries.
  4. Hot glue a small pinecone to the top of the Styrofoam cone to complete the topiary.


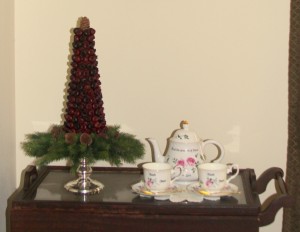
As you can see from the photo at the top of the post, the cranberry topiary looks wonderful on the tea cart in our dining room.  Additional ideas for places for a topiary: on a side table in the family room, placed into the corner of the kitchen counter or two topiaries on a buffet table for a Christmas luncheon.

Craft – Christmas Wreaths

What could be more traditional then a Christmas wreath during the holiday season.  I decorate our house with several different wreaths – some are classic and some are whimsical in design.  For this craft project, I will show you how to create three unique wreaths.  The first wreath will use small Department 56 porcelain house ornaments from the Dickens Village collection.  The second wreath will also use small Department 56 house ornaments but this time from the North Pole collection.  For the third wreath, I will use a collection of a Hallmark series ornaments featuring Disney characters as a marching band.

NOTE: The small Department 56 Village house ornaments can be hard to find in stores and I recommend checking EBay as a good source for purchasing them.


DICKENS VILLAGE WREATH

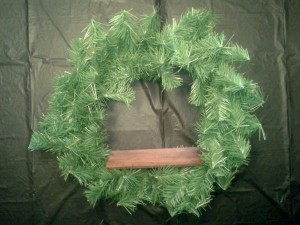
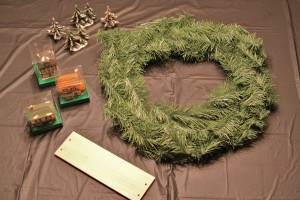
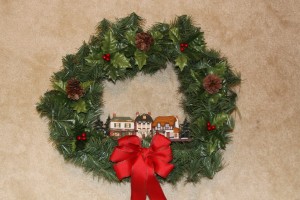
For the Dickens wreath, I used a 12” pine wreath, several small Department 56 Dickens Village house ornaments and small resin pine trees.  I also used a 6 X 3” piece of balsa wood painted brown and the piece of wood will provide a flat surface to securely glue the Department 56 house ornaments and a few small pine trees.  Holes should be drilled at each end of the wood piece and attached to the wreath with wire.  Next, I added a coordinating bow to complete the wreath and give it a finished look.


NORTH POLE WREATH

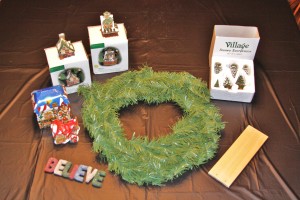
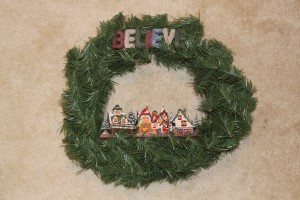
For the North Pole wreath, I start with a 12” pine wreath, several small Department 56 North Pole house ornaments and small pine trees.  I also used a 6 X 3” piece of balsa wood painted brown and he piece of wood will provide a flat surface to securely glue the Department 56 house ornaments and a few small pine trees.  Holes should be drilled at each end of the wood piece and attached to the wreath with wire.  To complete this North Pole themed wreath, at the top I attached a small resin sign that says “Believe”.

NOTE: If you cannot find an appropriate sign for the top of your wreath, use small snowflake ornaments attached by wire and cascading down from the top for a wonderful winter look.


DISNEY CHARACTERS WREATH

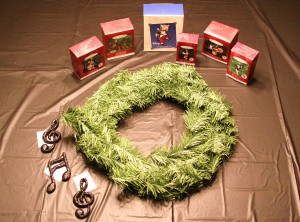
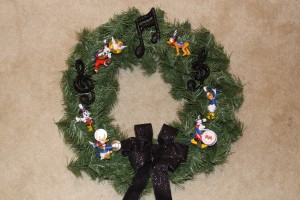
For this Disney themed wreath, I started with a 12” pine wreath, a collection of a Hallmark series ornaments featuring Disney characters as a marching band and several plastic musical notes.  I attach the Disney ornaments and musical notes to the wreath with wire – creating a pleasing arrangement.  Next, I added a black sparkle bow to complete the wreath and give it a finished look.


For additional ideas on decorating with Christmas wreaths, please look for this week’s Décor post.  Also, check out last month’s Craft project for a special Memory Wreath decorated with small photo frame ornaments.