Craft – Christmas Wreaths

What could be more traditional then a Christmas wreath during the holiday season.  I decorate our house with several different wreaths – some are classic and some are whimsical in design.  For this craft project, I will show you how to create three unique wreaths.  The first wreath will use small Department 56 porcelain house ornaments from the Dickens Village collection.  The second wreath will also use small Department 56 house ornaments but this time from the North Pole collection.  For the third wreath, I will use a collection of a Hallmark series ornaments featuring Disney characters as a marching band.

NOTE: The small Department 56 Village house ornaments can be hard to find in stores and I recommend checking EBay as a good source for purchasing them.


DICKENS VILLAGE WREATH

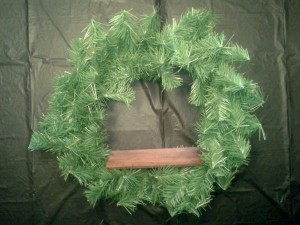
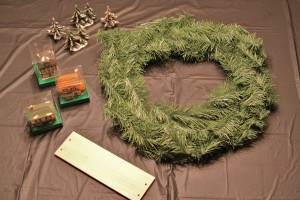
For the Dickens wreath, I used a 12” pine wreath, several small Department 56 Dickens Village house ornaments and small resin pine trees.  I also used a 6 X 3” piece of balsa wood painted brown and the piece of wood will provide a flat surface to securely glue the Department 56 house ornaments and a few small pine trees.  Holes should be drilled at each end of the wood piece and attached to the wreath with wire.  Next, I added a coordinating bow to complete the wreath and give it a finished look.


NORTH POLE WREATH

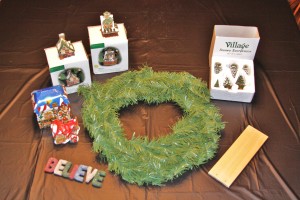
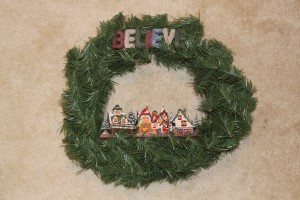
For the North Pole wreath, I start with a 12” pine wreath, several small Department 56 North Pole house ornaments and small pine trees.  I also used a 6 X 3” piece of balsa wood painted brown and he piece of wood will provide a flat surface to securely glue the Department 56 house ornaments and a few small pine trees.  Holes should be drilled at each end of the wood piece and attached to the wreath with wire.  To complete this North Pole themed wreath, at the top I attached a small resin sign that says “Believe”.

NOTE: If you cannot find an appropriate sign for the top of your wreath, use small snowflake ornaments attached by wire and cascading down from the top for a wonderful winter look.


DISNEY CHARACTERS WREATH

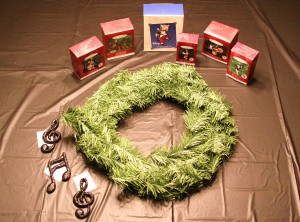
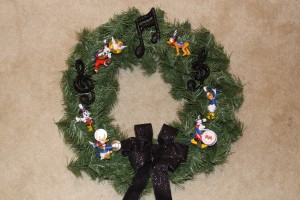
For this Disney themed wreath, I started with a 12” pine wreath, a collection of a Hallmark series ornaments featuring Disney characters as a marching band and several plastic musical notes.  I attach the Disney ornaments and musical notes to the wreath with wire – creating a pleasing arrangement.  Next, I added a black sparkle bow to complete the wreath and give it a finished look.


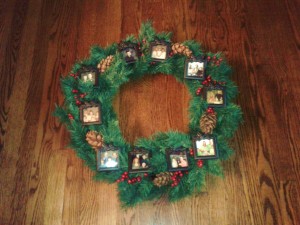
For additional ideas on decorating with Christmas wreaths, please look for this week’s Décor post.  Also, check out last month’s Craft project for a special Memory Wreath decorated with small photo frame ornaments.

Craft – Memory Tree or Wreath

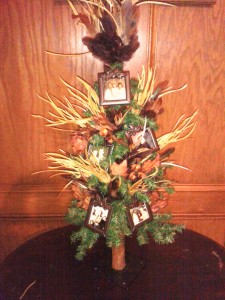
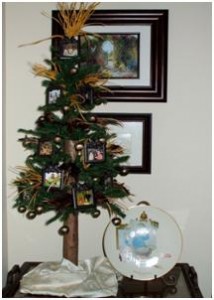
Since the holiday season is a time of celebration and remembrance, I have created a “Memory Tree” to decorate a small antique table in our family room for Thanksgiving.  I used a small tabletop pine tree which is I decorated with family photo frame ornaments, golden feathers and oak leaves with acorns.  Since we now live in the Midwest and most of our families are still on the West Coast, it is a wonderful way to honor them.

        
The following instructions are a guide to creating your own “Memory Tree” –

  1. Start with a tabletop pine tree, size does not matter but should be determined by the table it will be displayed on.  It can be a full traditional tree or a more open spaced feather tree.
  2. Find small photo frame ornaments for the number of family members you wish to display.  The frames do not necessarily need to match.  The photos of an individual or group can be used and the size can be reduced on the computer and printed to fit the frames used.  (Try to purchase the photo frame ornaments during the holiday season when they should be available at your local craft store)
  3. Display the photo frame ornaments evenly around the front and sides of the tree when the tree is set in a corner or against the wall.  If the tree will be displayed with a full view of all sides, make sure to space the photo frame ornaments around the entire tree.  If desired, attach the photo frame ornaments with ribbon for added decoration or wire for a more secure hold.
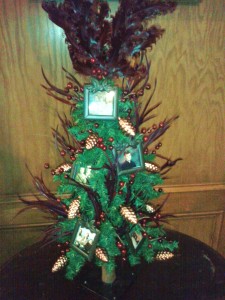
  4. Add embellishments, I used golden feathers and oak leaves with acorns evenly spaced throughout the tree for Thanksgiving.  For Christmas I remove the golden feathers and oak leaves and change the decorations to burgundy feathers and small glass pinecones.  To add even more memories to the “Memory Tree” in years past I’ve used bronze jingle bells with our favorite vacation destinations and dates written with gold pen.  This is a great way to remember fun family trips!
    (Additional suggestions would be to add small pinecone or acorn glass ornaments for Thanksgiving and holly leaves, red berry sprays or small ball ornaments for Christmas)
  5. The final step would be to add some sort of tree topper.  For the tree pictured, I gathered several feather sprays and secured to the top with wire.

A “Memory Tree” would be a perfect decoration for both Thanksgiving and Christmas.  Another option is to create a “Memory Wreath” using the same family photo frame ornaments and decorations.  This is a great idea when there is no space for a tabletop tree.  NOTE: I would recommend only hanging the wreath inside the house since the decorations would not be weather-proof for displaying on an exterior door.