Craft – Floral Purse Arrangement

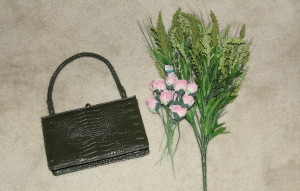
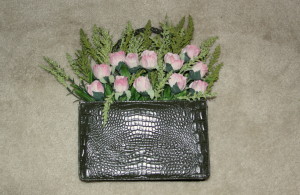
Floral purse green 2

With Mother’s Day celebrated this month, why not consider creating one of these floral purses as a lovely gift.  This beautiful floral purse gift would also be a fun idea for a present for a daughter’s sweet sixteen or a best friend’s birthday.  This gift would also make a great bridal or wedding shower gift and for additional suggestions please check out the ideas at the end of this post.

To get stated creating one of these floral purses, just follow a few easy steps to create this amazing gift!

Floral purse green 1Floral Purse – instructions

  1. To assemble a floral purse gift, the first thing to do is to find a great purse to use as the base for the floral arrangement.  Look for a beautiful purse in a local retail store or consider a vintage purse from an antique store.
  2. Before adding anything else to the purse, fill the bottom with tissue paper or a layer of small glass marbles if you need to add weight to the purse to keep it from tipping over.
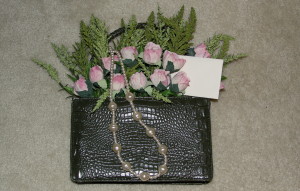
  3. Next, depending on the color and style of the purse, add some flowers and greenery to coordinate.  Any type of flowers can be used, such as: roses, sunflowers, tulips, etc.  Don’t forget to use some greenery or berry sprays to add some accent color to compliment the flowers and the purse.
  4. Add some small additional gifts.  Consider one or two jewelry items, such as: a beautiful broach attached to the purse or artistically drape a necklace or bracelet among the flowers.  Consider other small gift items, such as: a wonderful perfume, body sprays and lotions or a collection of beauty products.
  5. Finally, be sure to attach a gift tag to the handle of the purse or tuck a birthday card into the flowers.
Floral purse green 3Floral purse gift ideas and suggestions

  1. A fun gift idea for a young girl’s sweet sixteen birthday gift is to purchase a fabulous designer bag, add some flowers and greenery.  Next, add some gift cards to their favorite stores or spa and nail salon certificates, tuck them into the flowers for an extra special present.  (The same idea could be used for a friend’s birthday gift)
  2. This idea could also be used for a wedding shower gift idea, consider adding gift cards from the store where the bridal couple has their registry.  For a kitchen themed shower, add several kitchen utensils and maybe a couple of favorite or family recipes written out on some cute recipe cards.
  3. For a daughter’s bridal shower, consider giving a lovely bridal purse for her to carry on her wedding day.  Think about adding something old, something new and something blue!  A family locket necklace, grandma’s broach, a vintage handkerchief or maybe even their first communion rosary for something old.  Something new could be the wedding purse or maybe new earrings, a bracelet or a necklace to wear on the wedding day.  Something blue could be a lovely blue garter or perhaps a pair of sapphire earrings or a blue handkerchief.  Don’t forget to put a lucky penny into the bottom of the purse!
  4. For a bridesmaid luncheon, the bride could consider giving matching purses for the bridesmaids to use on the wedding day and maybe artistically hanging matching necklaces among the flowers.  Don’t forget to attach a thank you note from the bride letting each one know how much she values their friendship and how excited she is to have them share in her special day.
  5. For a baby shower, use a beautiful diaper bag.  Fill it with a floral arrangement and tuck in several small baby items, maybe even toys.
  6. This idea could also be used for creating a lovely floral arrangement for a bedroom dresser or nightstand for a home.  The floral purse pictured in this post sits on the shelf in my master bedroom closet and it is the perfect decoration for the room!!

Craft – Zoo Animal Hand Prints

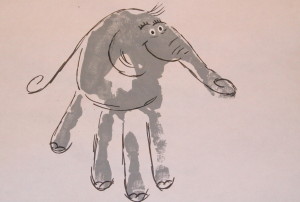
 Zoo hand print - elephant 2 

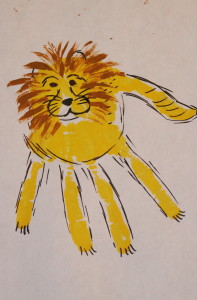
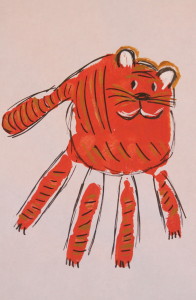
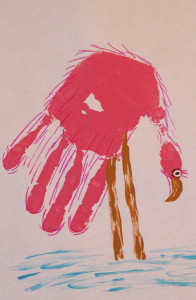
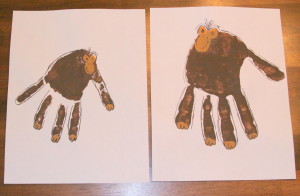
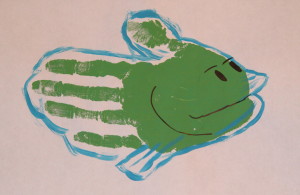
While visiting a local zoo, I saw a cute idea for creating zoo animals with hand prints.  The items for purchase were expensive and I thought I could easily produce some animal prints at a relatively low cost at home and would be a fun project to do with the family.  Several handprints of the same animal are great for the whole family (create a herd of elephants walking across the savannah, a group of monkeys hanging from a tree or a group of ducks swimming on the water)  Be sure to include individual animal prints for separate family members that expresses their personalities. (maybe a lion for the father, a tiger for the mother, a monkey, zebra, giraffe, elephant or flamingo for the kids)  I suggest framing each print in a white mat and simple black frame which won’t distract from the colorful prints.  Take the time to label the prints with the names of each family member and be sure to include the year.   Several of these individual prints along with one group print would look great to create an interesting wall display in a family room.

Zoo hand prints - lion    Zoo hand prints - tiger    Zoo hand print - flamingo
Zoo Animal print – supplies

  • Washable tempera paint – select corresponding animal colors
  • Paint brush
  • Black marker – to write names and date
  • Set of markers in a variety of colors – for drawing animal details
  • White paper – several sheets
  • Paper towels or wipes for easy clean-up afterwards

Zoo hand print - monkey 1    Zoo hand print - fish
Zoo Animal print – instructions

  1. Decide which type of animal print to make.
  2. Cover the work surface with newspapers or plastic tablecloth
  3. Apply a very thin coat of paint onto the palm of the hand, a minimum amount of paint is preferred for a better hand print, an excess of paint can create one big blob!  Be sure to experiment to determine the correct amount for the hand print.
  4. Once the paint is applied onto the hand, press the hand firmly onto the paper, apply even pressure on the entire hand for a nice print.  When finished, lift hand straight up for a clean and clear print with no smudges. 
  5. Using the markers, create the animal details (such as: the lion’s mane, the giraffe’s spots, the tiger or zebra stripes, etc.)
  6. Using the markers, create the prints accents (such as: green grass on the ground, a brown tree and green leaves or blue water)  
  7. Be sure to write the name of the family member and also the year when the print was made.
  8. Let the print dry for at least 24 hours.
  9. Once the hand print is dry, mat and frame the print, hang on the wall and enjoy the new art work you created!


Craft – Spring Garden Gift Basket

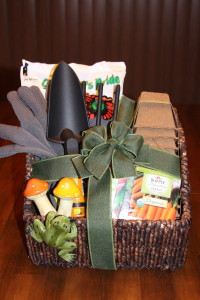
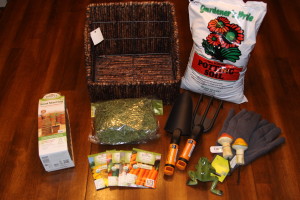
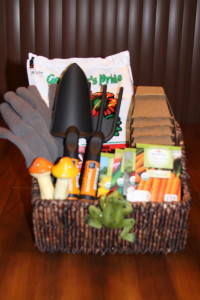
IMG_9660Springtime brings Easter and the weather starts to turn a little warmer and our thoughts turn to the outdoors and planning our gardens.  A Spring Garden Gift Basket is a wonderful craft idea with everything inside the basket that a person would need for inspiration. Consider bring one to an Easter celebration as a gift for the host/hostess.  The basket would also make an excellent birthday gift for your family/friends or perhaps for a new neighbor as a thoughtful welcome gift.  The Spring Garden Gift Basket can be as simple or elaborate as you wish but the amount of the items used is determined by the size of the basket you choose.  Here are a few suggestions:

IMG_9632

Spring Garden Basket  – supplies

  • One basket
  • A package of moss, used to fill the bottom of the basket
  • 3 – 4 small pots
  • Potting soil, enough to fill the pots
  • 1 large zip-loc plastic bag for the potting soil
  • 3- 4 seed packets
  • Garden tools
  • A pair of garden gloves
  • Several artificial flowers for basket decoration
  • A small garden-themed accessory (I am using a “pot-hanger” frog)
  • Raffia for a bow and a gift tag

Spring Garden Basket – instructions

  1. In a large zip-loc plastic bag add enough soil to fill the pots.  Be sure to seal the bag securely.  Stuff newspaper in the bottom of the basket; place the bag of soil on top.  Cover completely with some moss.
  2. Arrange the pots, seed packet and garden supplies in the basket.  Insert some artificial flowers for addition basket decoration.
  3. Tie a raffia bow onto the basket, attach the small garden accessory.  Be sure to include a gift tag to the basket.

IMG_9634

Additional ideas and suggestions

  • Using a tiny water can as an accessory, fill it will some moss and insert a gift card to the local garden shop.
  • Depending on the size of the basket used, consider adding a gardening book.
  • Instead of using artificial flowers for the basket decorations, consider adding an African violet or miniature rose plant.


Craft – Faberge-inspired Egg Box

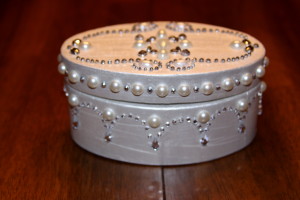
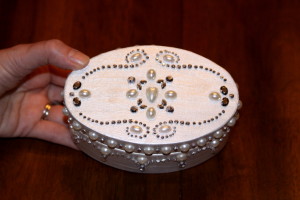
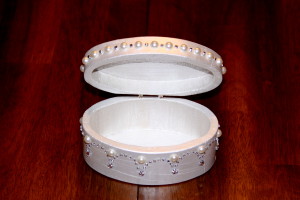
Faberge eggIn my Décor post, Faberge Eggs, this month I told the story of these beautiful eggs and their connection with the Russian Romanov family.  Inspired by those Faberge eggs, I decided to recreate a simpler but still elegant oval “egg-shaped” wooden box that is painted and decorated with crystal and pearl stickers.  This box will be displayed in our family room bookshelf during the Easter season.

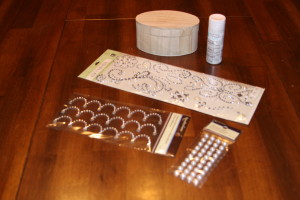
IMG_9366Faberge-inspired Egg Box – supplies

  • 1 wooden oval-shaped box (I used an oval to mimic the shape of an egg)
  • Sandpaper, used to prepared the rough surface of the wooden box
  • Pearl paint (I used Martha Stewart brand pearl acrylic paint in Mother of Pearl)
  • Paint brush
  • Pearl stickers
  • Crystal stickers
  • Glue stick, to fix or repair loose pearls/crystals

Faberge egg top Faberge egg open
Faberge-inspired Egg Box – instructions

  1. Pre-determine the pearl and crystal sticker placement prior to painting.
    (Sometimes stickers will come in an already established pattern as one application, like the one I used on the side of the wooden box.  On the edge of the lid, I alternated with placement of an individual pearl and diamond design. On the top of the lid, I pieced together several different patterns for a nice combination)
  2. Prepare the wooden oval-shaped box for painting, use sandpaper on all the surfaces, including both exterior and the interior of the box, to create a smooth surface.
  3. Paint the wooden box; let the paint on the different areas completely dry.
    (I suggest painting the inside of the box first, then the bottom, then the sides/top)
  4. Attach the pearl and crystal stickers in the different pattern combinations that were pre-determined ahead of time.  If any pearl or crystals come loose, use a glue stick to re-attach.

Craft Tip: For the wooden box that I created, I used a simple color palette of Martha Stewart pearl paint in white with pearl and “diamond” crystals for an almost monochromatic look.  Experiment with a color palette; using one, two or even three different colors, until you find the right combination that you like.

In a previous post on the House of Fabergé I gave a brief history of the company.  Peter Carl Fabergé was famous for designing the beautiful jeweled Russian Imperial Eggs which were specially created for the Russian Tsar Alexander III and later his son Tsar Nicholas II between 1885 and 1917.  In 2013 I published a post on the 54 Imperial Eggs that Fabergé created during that time.  (For readers interested in more detailed information about the House of Fabergé or on the Fabergé Eggs, please click on the link to the previous blog posts)

In another post, I was inspired by the original Russian Imperial Fabergé Eggs, I decided to recreate a more traditional and elegant style.  This idea started when I found the double eagle pendant in my local craft store.  The golden eagle pendant has a large blue gem set in the center and accented with diamond-like crystals.  I thought this pendant was a perfect inspiration for an Imperial Fabergé-style Egg.  (For more information on this craft project with a supply list and instructions, please click on the link to the Faberge-inspired Egg post)

Craft – Christmas Kissing Ball

The holly and the ivy have been used in English Christmas decorations for centuries.  The English people in olden days had no retail stores available to purchase holiday decorations so they decorated their houses with the evergreens available in their local woodland and forest areas – holly, ivy, mistletoe, pine and fir.  These plants stayed green all year and became symbols of life during the cold winter months.  They decorated with swags and garlands made of pine and fir boughs intertwined with holly and ivy.  Mistletoe was believed to have miraculous healing powers and was placed over doorways to ward off evil spirits and bring health, happiness and good luck.

An old midwinter custom in English villages dating back to medieval times was to hold a singing contest between the men and the women.  It was a chance for the villagers to gather for celebration, singing and dancing.  Using the holly and ivy as symbols, the men sang songs praising the masculine qualities of the rigid leafed holly while the women sang about the feminine qualities of the softer ivy.  The matter of who won the contest was frequently resolved under the mistletoe where young men of the village had the privilege and opportunity of kissing the girls.  As the couples kissed, they would pluck a berry from the mistletoe and when all the berries are gone the kissing privilege ceases.  (What a charming and romantic story!)

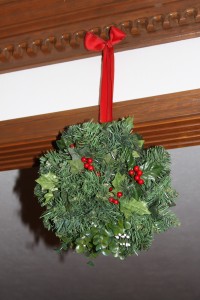
For your next Christmas party try adding some fun and excitement by making your own Kissing Ball.  Hang it in an area of the home where your guests are sure to walk under it – just don’t hang it too low so they hit their heads!

Christmas Kissing Ball – supplies

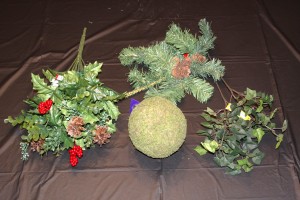
  • 3 or 4 inch Styrofoam ball (I found one already covered in moss at my local craft store)
  • Artificial pine, ivy, holly and mistletoe
  • Artificial red berries
  • Ribbon

Christmas Kissing Ball – instructions

  1. Cut the pine, ivy, holly and mistletoe into small workable pieces about 3 inches long.
    (Check the Christmas floral aisle in your local craft store early for the best selection – sometimes you can buy pre-cut pieces already shortened to the desired length)
  2. Insert and glue each piece of pine, ivy, holly and mistletoe separately.  Evenly space each type of greenery across the entire Styrofoam ball and fill all the empty spaces.
    (If desired, hot glue small amounts of Spanish moss to fill any empty spaces)
  3. Insert and glue red berries, scattered evenly across the Styrofoam ball.
  4. When the Styrofoam ball is completely covered, cut some festive ribbon to the desired length for hanging and attach to the top of the ball.


The Christmas Kissing Ball is finished and ready to hang – so, get ready to pucker up!!