Shopping in the local retail stores I always admire the fancy embellished frames but the prices are usually a little expensive. In this craft post, I will show you how to take a simple and inexpensive plain frame and with a few simple steps you can have great looking embellished frame at very little cost. Here is a list of some items that are needed:
Embellished Photo Frame – supplies
- An inexpensive plain frame
- 1 or 2 simple small items (these are determined by the subject of the photos)
- Hot glue gun and glue sticks
- Paint or stain (optional)
Embellished Photo Frame – insturctions
- Select a simple plain frame, size is determined by the photo you will be using.
- Remove the backing and glass from the frame.
- (Optional) If you are using an unfinished wood frame, now is the time to paint or stain the frame.
- Determine placement of the embellishment items on the front of the frame.
- Once you have decided on the position of the item, attach it with hot glue.
- Add glass, photo and backing to frame.
Here are some examples of frames that I have done for our home:
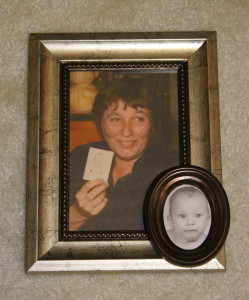
This first embellished frame is one of my favorites. The silver painted frame with bronze trim has a picture of my mother-in-law holding a picture of my husband when he was a baby. In the small bronze oval frame attached is the baby photo of my husband. This is a fun way to highlight the photo she is holding.
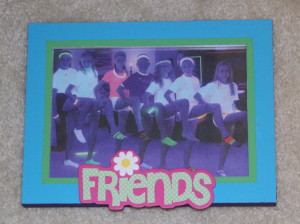
The next embellished frame started out as a plain white frame. Using painter’s tape, I taped off sections and painted three colors, blue, green and purple on the frame edge. Then I added a wooden prepainted “friends” to a photo taken at our daughter’s recent backlight party. The colors go great in her colorful bedroom and sits on her desk.
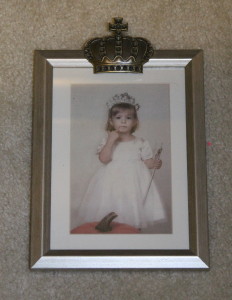
In another embellished frame, I added a silver metal crown to the top of a silver frame. The photo I used was our daughter wearing her princess costume from Halloween a couple of years ago. I thought it was a cute way to match the photo with the embellishment.
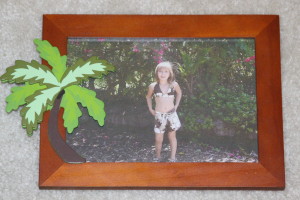
The next embellishment is a simple wooden frame with a palm tree embellishment, the photo of our daughter was taken in Hawaii and I thought the palm tree was a good idea.
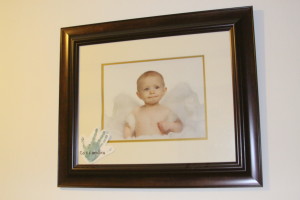
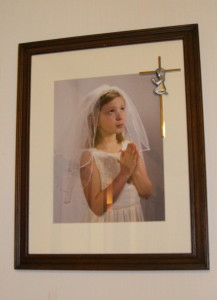
The next two embellished photos hang in our upstairs hallway. The first is a large frame with a photo of our daughter and in the corner is attached cut-out hand print that she did in kindergarten. The second is another large frame with her First Communion photo and in the corner I attached the silver cross that my mother had bought for her when she was born.
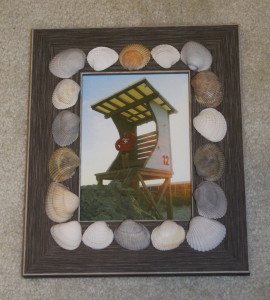
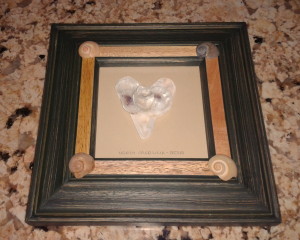
The final two embellished photos are a little more complicated. The first one is a wooden photo frame that resembles driftwood and I glued several seashells that we collected on the beach in North Carolina. Inside the frame is a photo of our daughter at the lifeguard station at the same beach. The second one is another wooden frame and at the four corners of the frame I glue more of the seashells. Inside the frame I created a heart shape with several fragments of seashells collected from the same trip.
I hope this gives you some ideas for creating some of your own embellished photo frames!

Pingback: Travel – North Carolina Coast | The Enchanted Manor