
CHRISTMAS… the weather has turned a little frosty and there might even be snow on the ground. (if you are lucky!) If you live in a warmer climate, don’t worry about it because as soon as you put on some Christmas music to set the mood and start to unpack those Christmas decoration boxes you will definitely get into the holiday spirit!
After Thanksgiving, I pack up all the fall decorations and the boxes are stored down in the basement. Then, my husband brings up the Christmas decorations and it can take awhile because I have several boxes! The process of decorating our house for Christmas can take several days but I enjoy every minute of it! The interior house Christmas decorations I have collected over the years are not specific to a certain room and I can be creative with the different accessories, so I’m not limited to the same decorations in the same place every year and this keeps things interesting and fun! I have fewer exterior house decorations and generally they are the same every year. For the last couple of years we have decided not to decorate the outside of the house with lights to save both time and money – please don’t call us Scrooge!!
Like most holidays when I start the decorating process for the holiday season, I begin with setting up the Christmas decorations outside on the front porch. Living in the Midwest the weather conditions can get very harsh and I usually keep all my exterior decorations under the roof of the porch to keep everything safe from the elements. I start with a couple of pre-lite artificial Christmas trees and for the last couple of years I have added a pre-lite snowman bought at a Target after holiday sale. I liked the size of the snowman but embellished him a little by gluing on larger black buttons, topped it off with an old black winter hat and this year I’m going to change the wire nose and add a large artificial carrot instead! To complete the front porch, I hang a Christmas wreath on the front door. I have three different wreaths that I rotate from year to year. One is a large pine wreath decorated with pinecones and red berry sprays, another is a wreath covered completely in velvet holly leaves and the third one is a pine cone wreath accented with holly leaves and red berries.
With the outside of the house done I can now start decorating the inside of the house. In the entry hall I set up a whimsical 24” Santa displayed with two elves hanging onto the branches of a small Christmas tree. Nearby I have a pair of black ice skates hanging from an antique sled with a Boyd’s moose named Mortimer. Whenever I am shopping in the antique stores, I always look for holiday items – on my wish list is a set of old skis and poles and hopefully I will be able to find it before next year. This year I have added a Christmas Kissing Ball and I think it will be fun for our guests’ arrival and departures this holiday season! (Please look for the December Craft post for instructions on how to make your own Christmas Kissing Ball)


The next room of the house is our library; this is the room where all our books and vacation memorabilia are in bookshelves that fill up an entire wall. On the other side of the room, I keep my Boyd’s Bear collection year-round in a small lawyer’s bookcase. I add my Boyd’s Christmas figurines and I decorate the two shelves with pine branches to give it a festive Christmas look. The bottom shelf holds the Boyd’s Bear Village and I decorate the display with winter trees and tiny snowflakes. I also add a Boyd’s Bear Santa to one of the ivory chairs in the library. On another side of the room, I have displayed for the last a couple of years our Fontanini Nativity set on an antique table that my husband’s Grandmother kindly gave us. This heirloom table is very special to us because it has been in the family for a very long time. (Please see a previous December Décor post for more detailed information on the Fontanini Nativity Display)
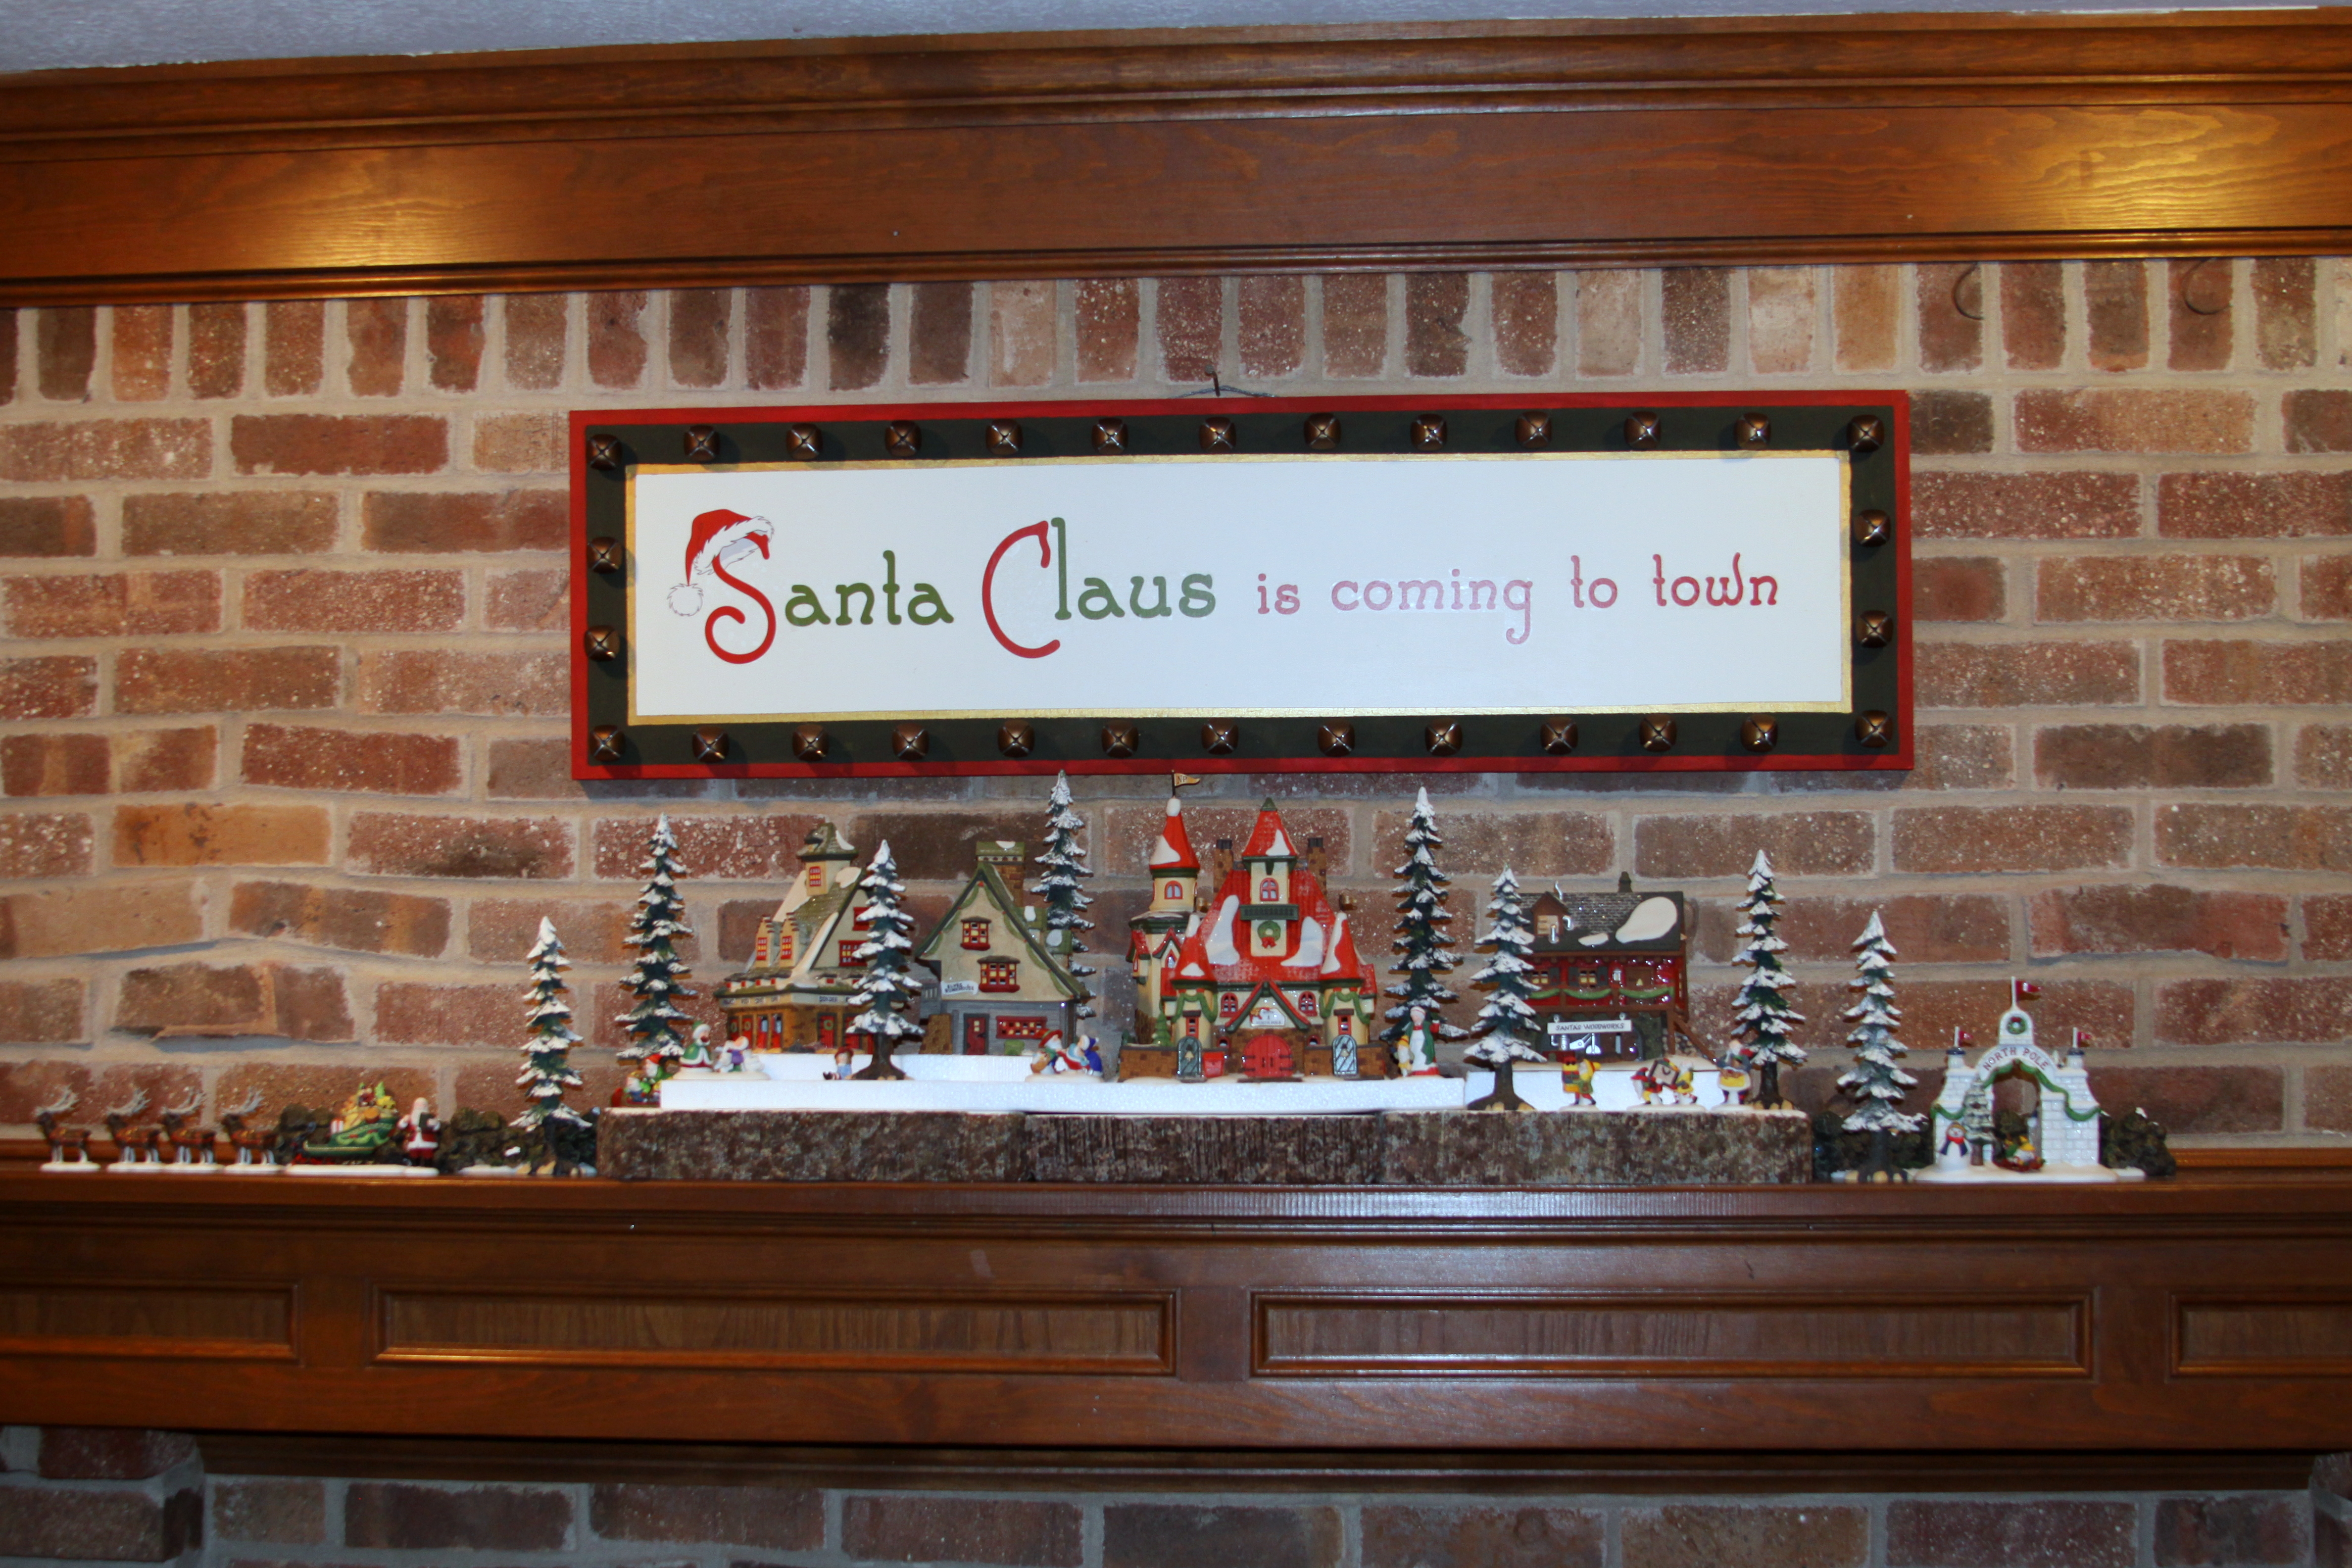
The next room to decorate is the family room. One wall of the room has a fireplace and mantel flanked by two bookcases/cabinets. For the past few years I have displayed our Department 56 North Pole Village in the bookshelf but this year I will be doing something new and it will be displayed across the fireplace mantel. The fireplace mantel is also the place where we traditionally hang our Christmas stockings. Next, to complete the family room, I will set-up a display on the fireplace hearth with a traditional 29” Santa, his two reindeers and a small Christmas tree. (Please check out my previous December Décor posts for more detailed information on the Department 56 North Pole Village display and the Christmas stockings and Fireplace Mantel decorations)
In the dining room, the Memory Tree set out for Thanksgiving will be moved to the family room. (Please refer to last month’s Craft post for ideas and tips on how to create your own family Memory Tree) In November I had displayed in the china cabinet three Currier and Ives porcelain houses I purchased at a local craft store a few years ago. Our china cabinet has a mirrored back so you are able to see both the back and the front of the display of the houses. I add a few small pine trees and additional figurines and these are set-up on a beautiful elongated mirror and silver stand. This display is an example of a decoration that works for both Thanksgiving and Christmas seasons – I love when that happens! This year I have added two new Craft projects to our dining room decorations – a Victorian inspired fruit arrangement that I made last month for our Thanksgiving table and a Cranberry topiary inspired by one I had seen in a past HGTV White House Christmas shows. I think they are great additions to our traditional dining room design. (Please look for full instructions on making both projects – the Fall Victorian Centerpiece is a November Craft post and the Cranberry Topiary is a December Craft post)

The last room on the main floor of the house to decorate for the holidays is the kitchen. Now, this can get a little tricky because the room needs to function as a full service kitchen, so the counters need to stay clear of decorations because food and meals are being prepared and eaten at the table on a daily basis. We have a fairly large kitchen that is open to the family room and these two rooms of the house are where we spend most of our time.
Several years ago I found the perfect Christmas theme for the holiday decorations in the kitchen – gingerbread and candy canes!! Since there are several areas in the kitchen that I decorate for Christmas, I start with an area that has a long chair height counter with upper and lower cabinets. This is the area my daughter does her homework and the counter needs to stay free of clutter. So, in the space above the upper cabinets I usually set-up a Department 56 gingerbread train that is displayed with pine boughs, red berry sprays and this year I have added “white icing” snowflakes to give it a different look. I also hang two holly wreaths with red berries and gingerbread snowflakes on the cabinet doors.


The last area that needs some Christmas attention is the area by the stove and oven. Please be careful with the holiday decorations in this area because with the extreme heat from cooking you don’t want anything that is flammable or a fire hazard. I have a basket of artificial vegetables on the counter and I add a cute “North Pole Candy Canes” container that holds some wooden candy canes and pine sprays. I also hang some Santa towels from the oven bar handle.
I hope you enjoyed the tour of our house decorated for the holiday season and I try to create decorations that are classic and traditional but fun and interesting. Please let me know your comments or suggestions; I would love to hear what you think.


")
")
")
")