Craft -Twelve Days of Christmas Shadowbox

20141228_190202

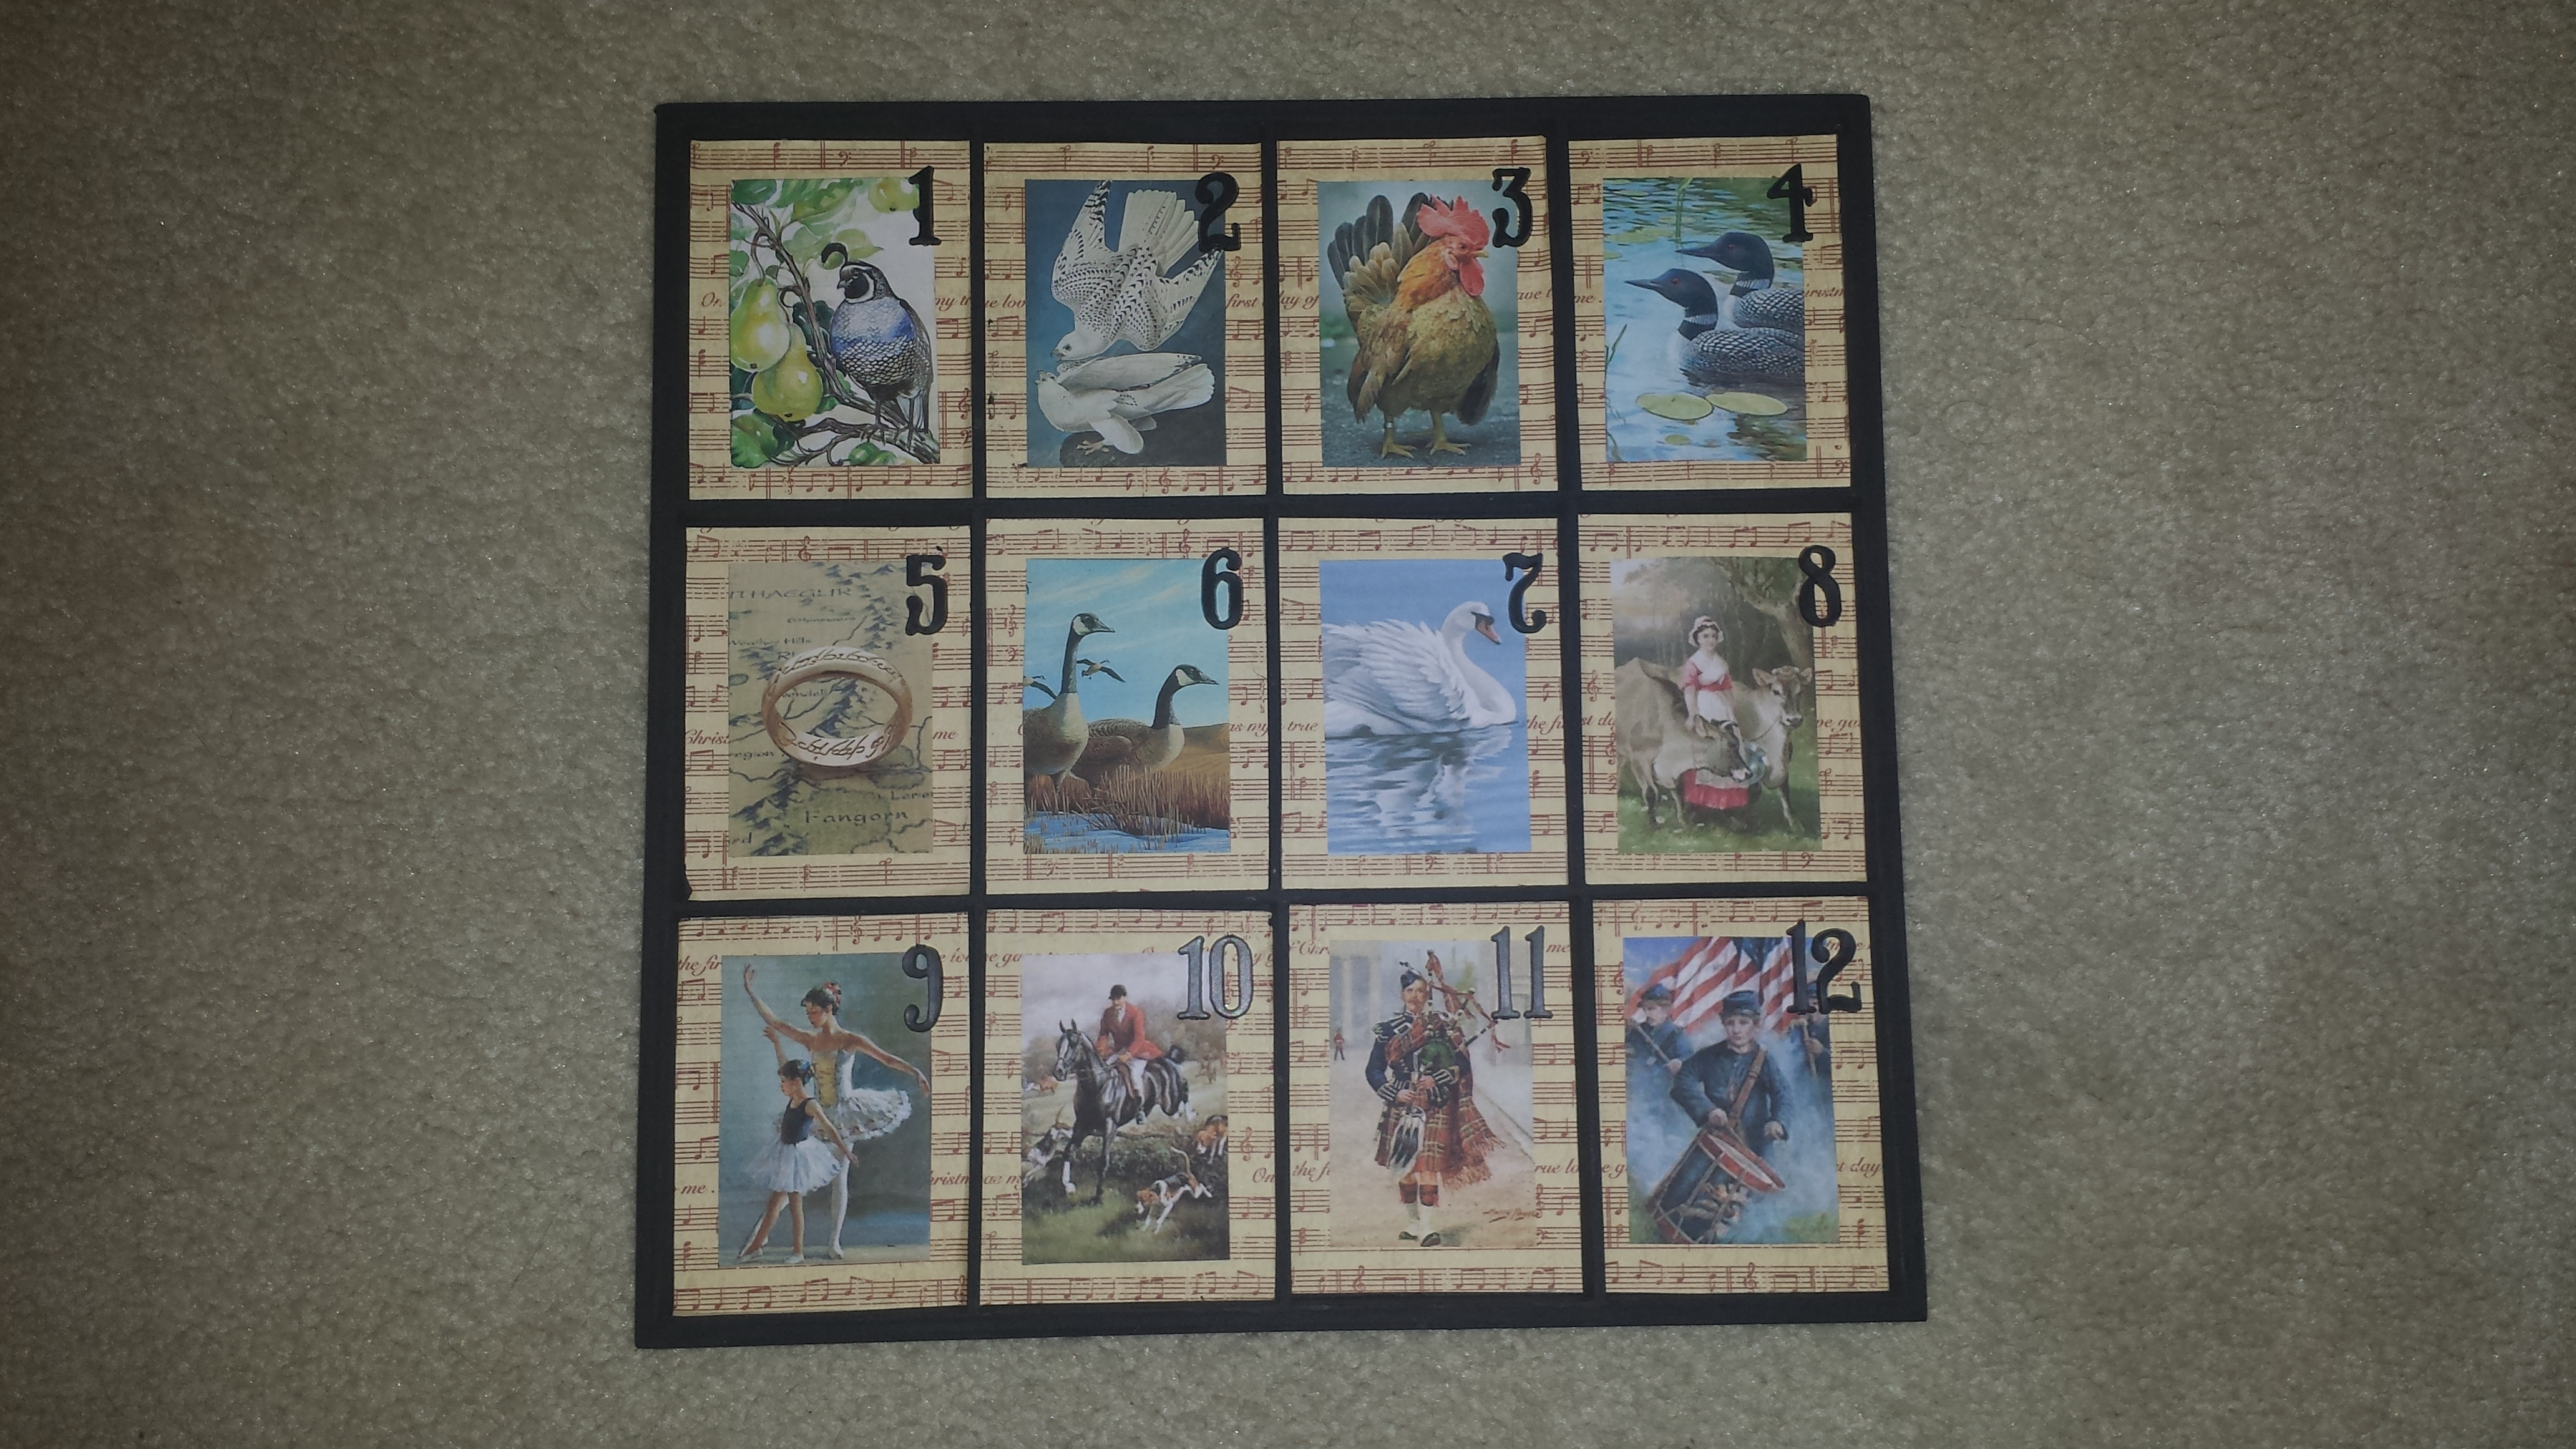
The Twelve Days of Christmas Shadowbox described in this craft post is a wonderful way to create a special piece of holiday artwork to display in a home either hung on the wall or placed on an easel in a bookcase or on the mantel.  This craft project is relatively simple to create requiring just a few supplies that should be available at a minimum cost.

“The Twelve Days of Christmas is an old English Christmas carol dating back to 1780.  The song is sung as a cumulative song which means that each of the twelves verses describes a special gift and is sung as a progressive addition to the previous verses.  The twelve gifts are:

A partridge in a pear tree,
Two turtle doves,
Three French hens,
Four calling birds,
Five golden rings,
Six geese a-laying,
Seven swans a-swimming,
Eight maids a-milking,
Nine ladies dancing,
Ten lords a-leaping,
Eleven pipers piping,
and
Twelve drummers drumming.

Special Note: The time period referred to in to the classic holiday song, “The Twelve Days of Christmas”, begins on Christmas Day and running through to the day before the Epiphany or January 5th.

Twelve Days of Christmas Shadowbox supplies

  • Wooden shadowbox with twelve divided spaces
  • “Twelve days of Christmas” illustrations, copies printed on a computer
  • One sheet of 12”x12” scrapbook paper, used for the shadowbox background
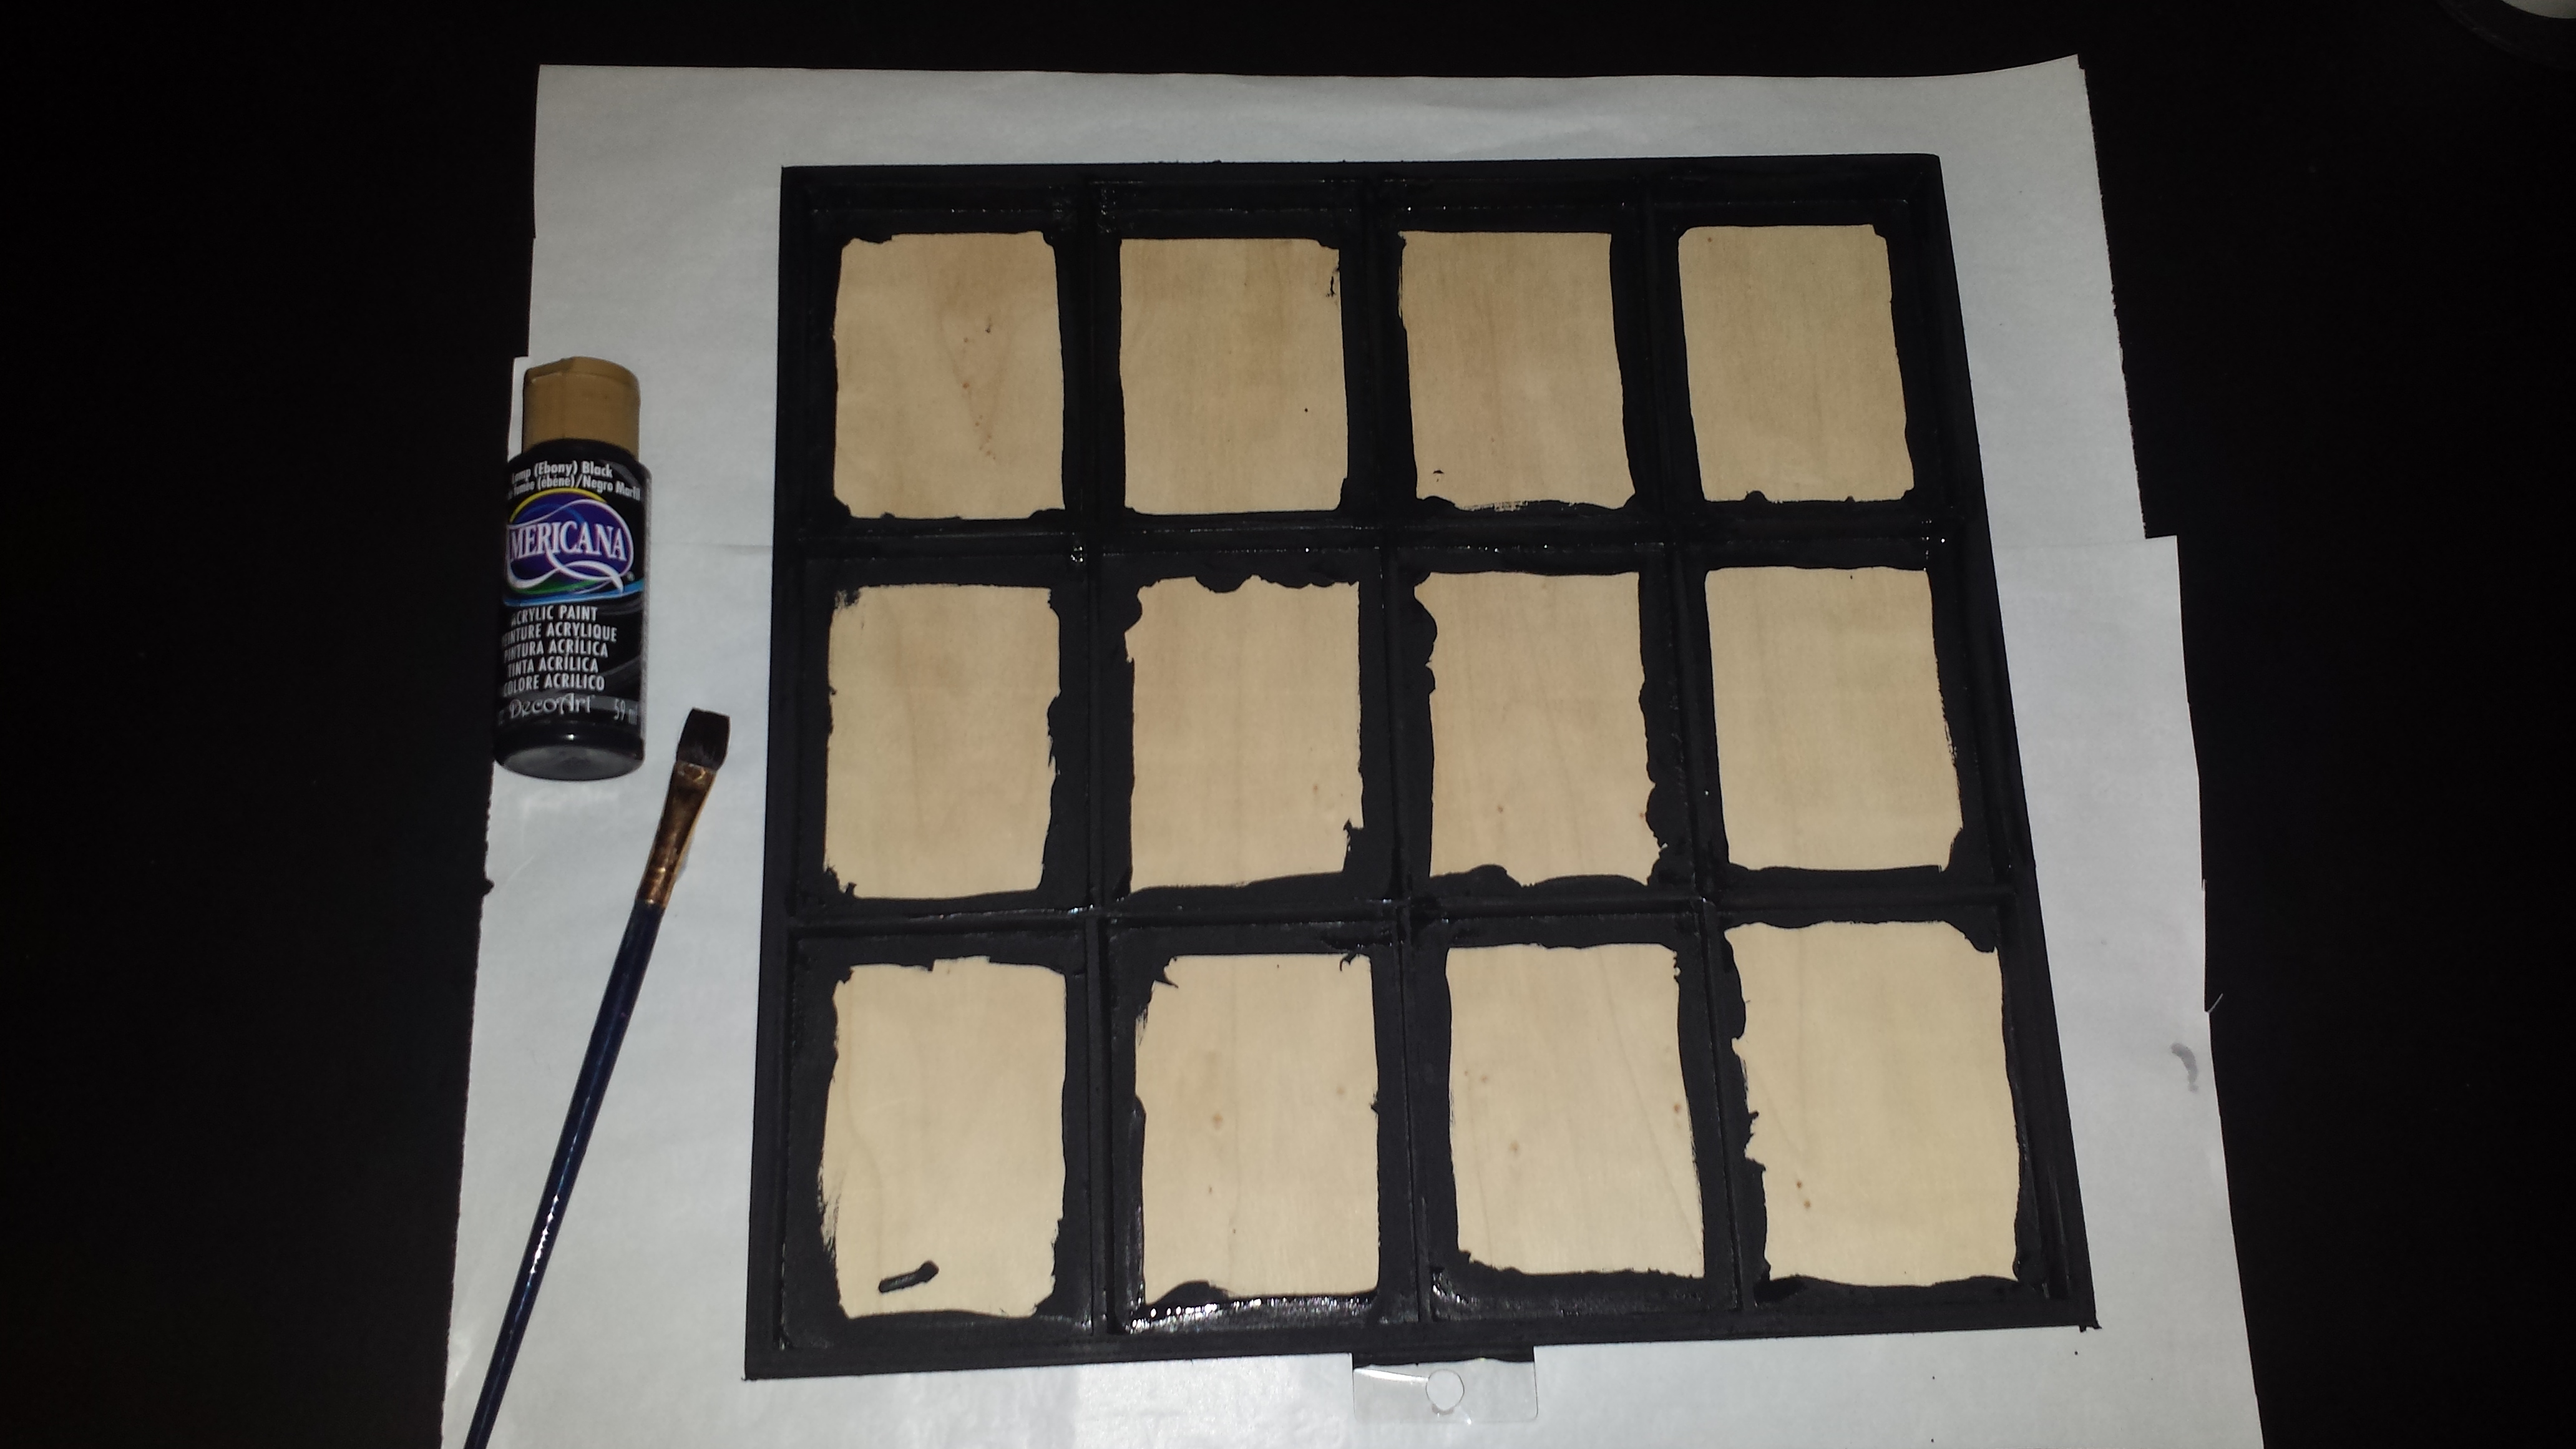
  • Black paint and paintbrush
  • Glue stick
  • Scissors
  • Sandpaper (optional)
  • Wooden or plastic numbers ranging from 1 to 12 (optional)

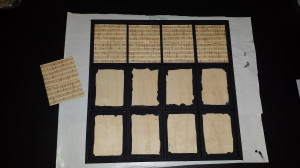
Twelve Days of Christmas Shadowbox instructions

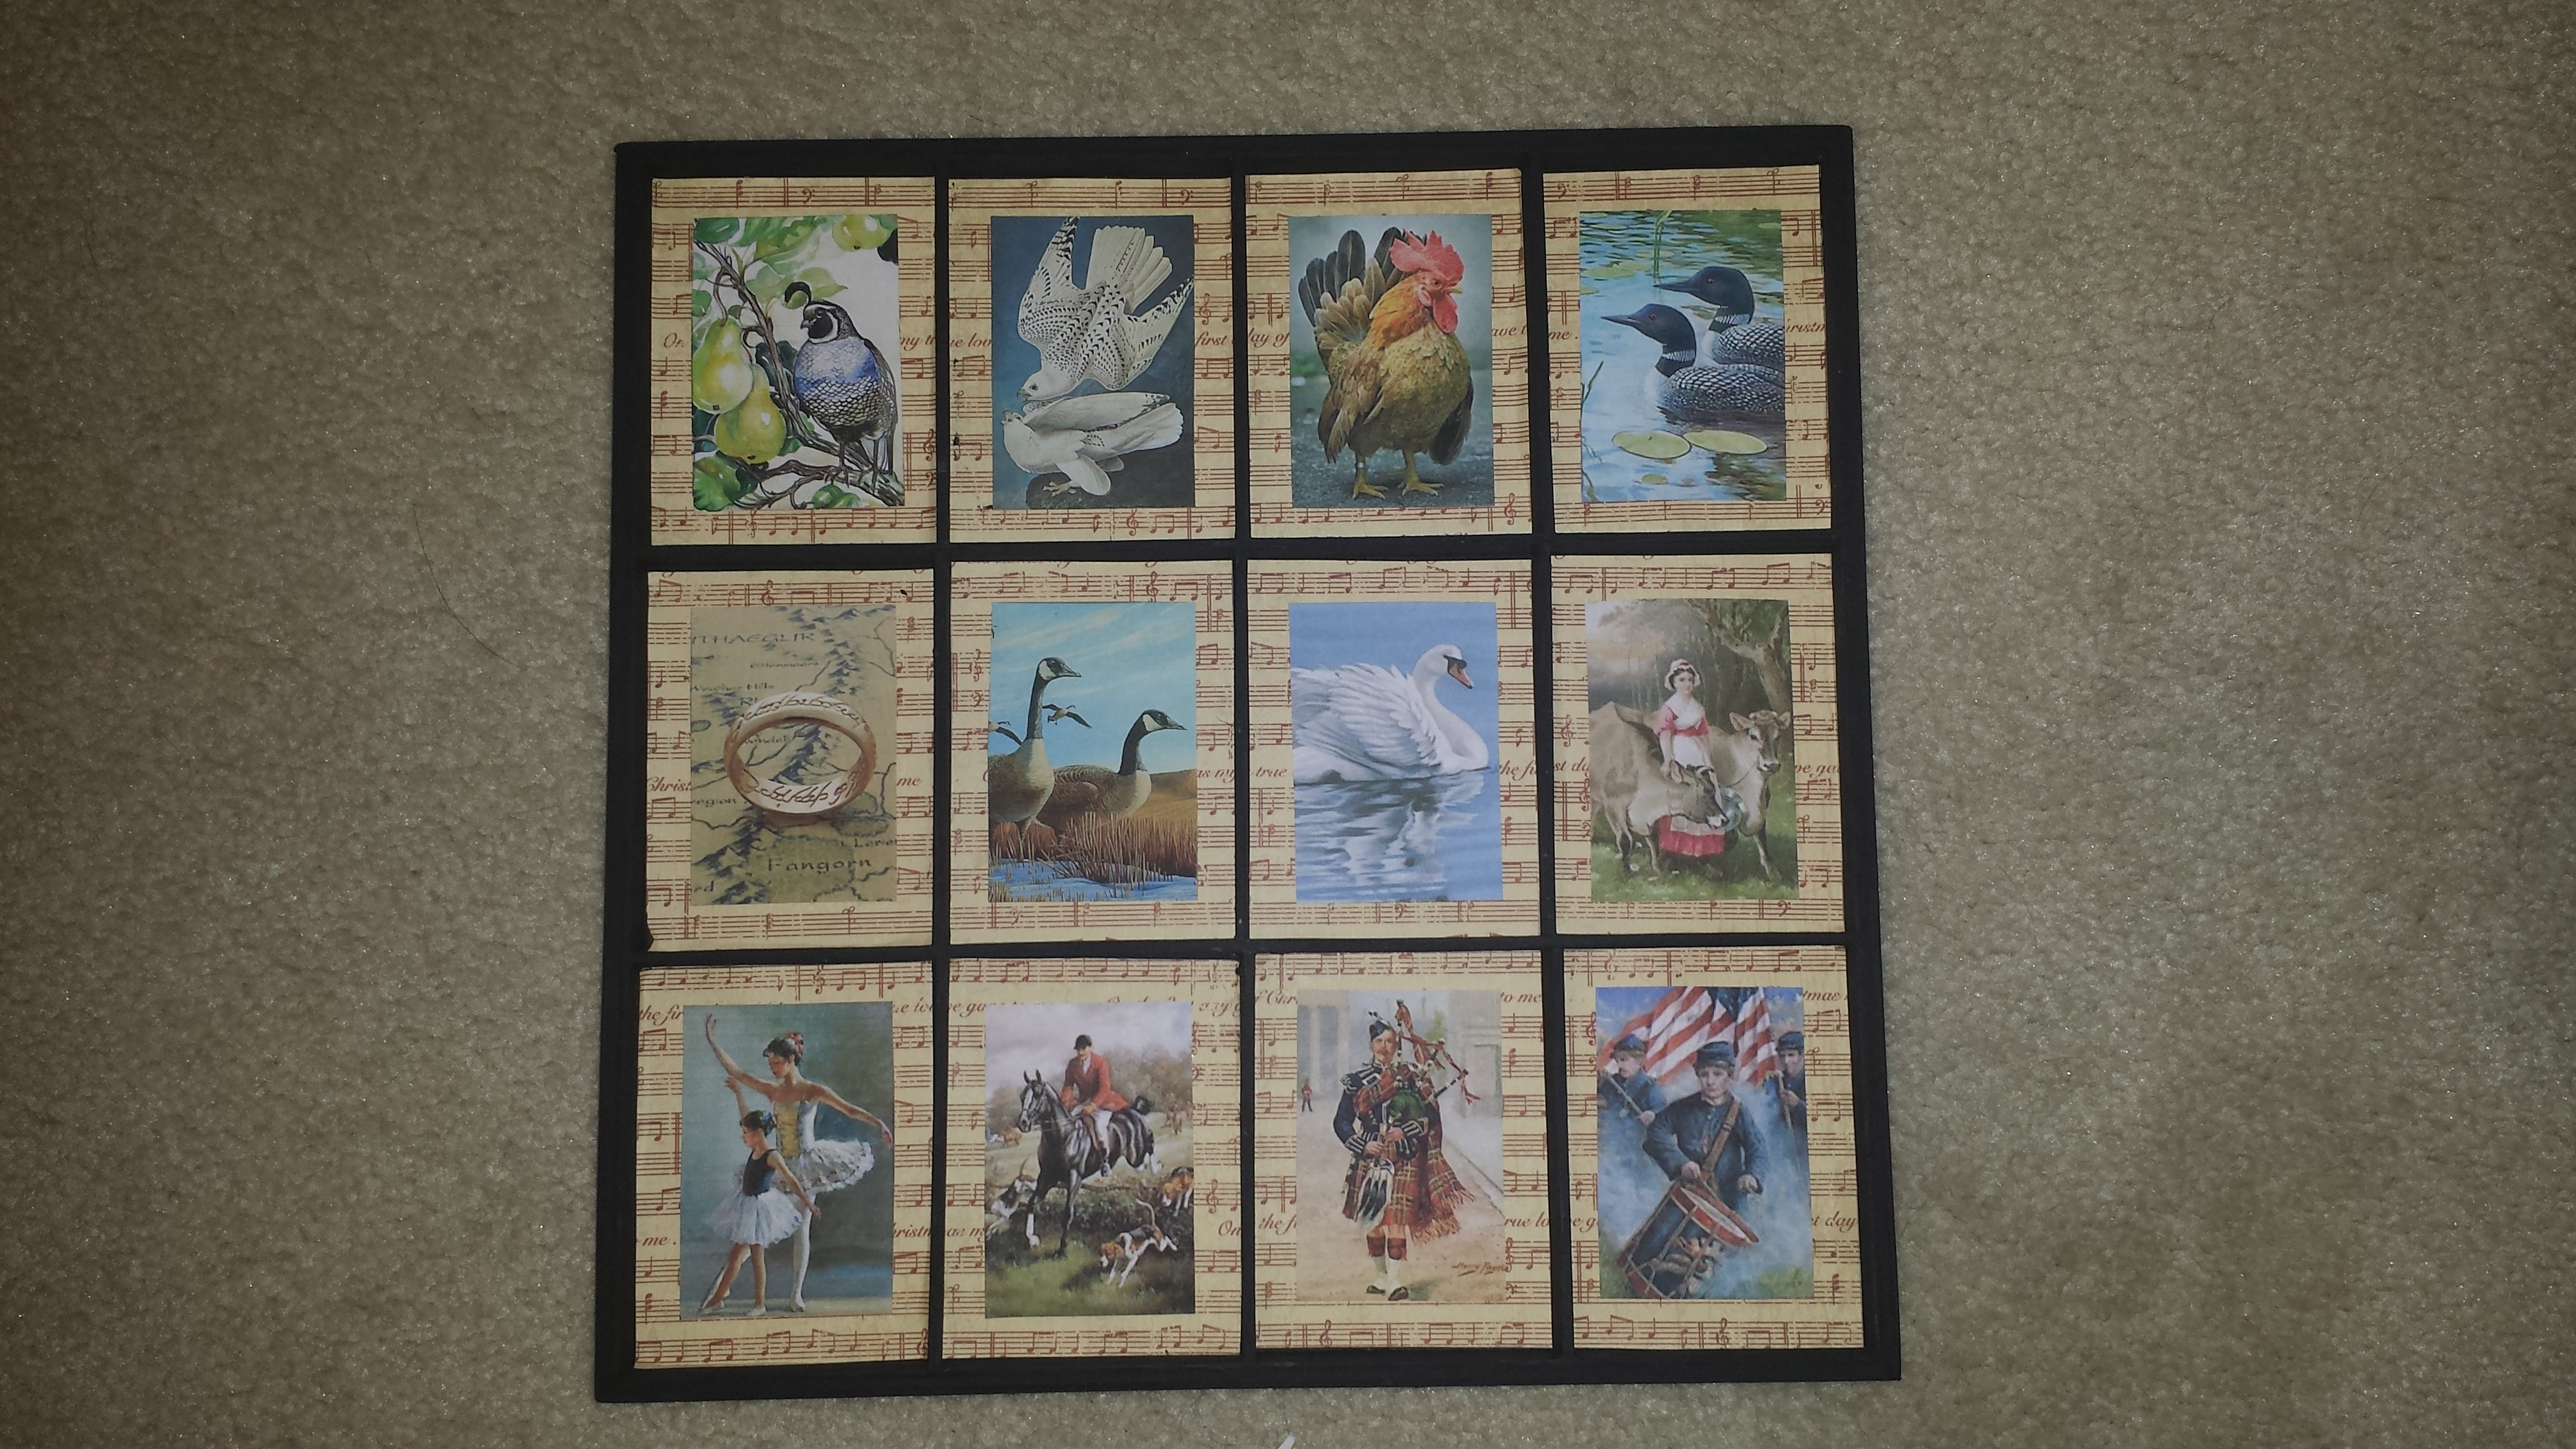
Prior to starting the assembly of the shadowbox you need to find illustrations or photos to represent each of the “twelve days of Christmas”, so I highly recommend doing this a few days in advance.  Using my computer, I did a search on the internet for images for each of the “twelve days of Christmas”.  Here is a list of what is needed: a partridge in a pear tree, turtle doves, French hens, calling birds, golden rings, geese, swans, maids milking, ladies dancing, lords a leaping, piper and a drummer.

  1. Use sandpaper to smooth any rough edges of the wooden shadowbox.
  2. Paint the shadowbox using black paint, be sure to cover the surface of the outer and interior edges of the shadowbox and the twelve individual spaces.  (Craft Tip: Do not paint the center area of each divided space; leave the space clear for glue to attach the scrapbook paper)
    20141224_101805
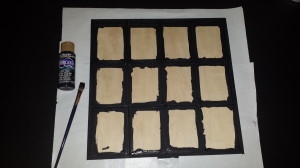
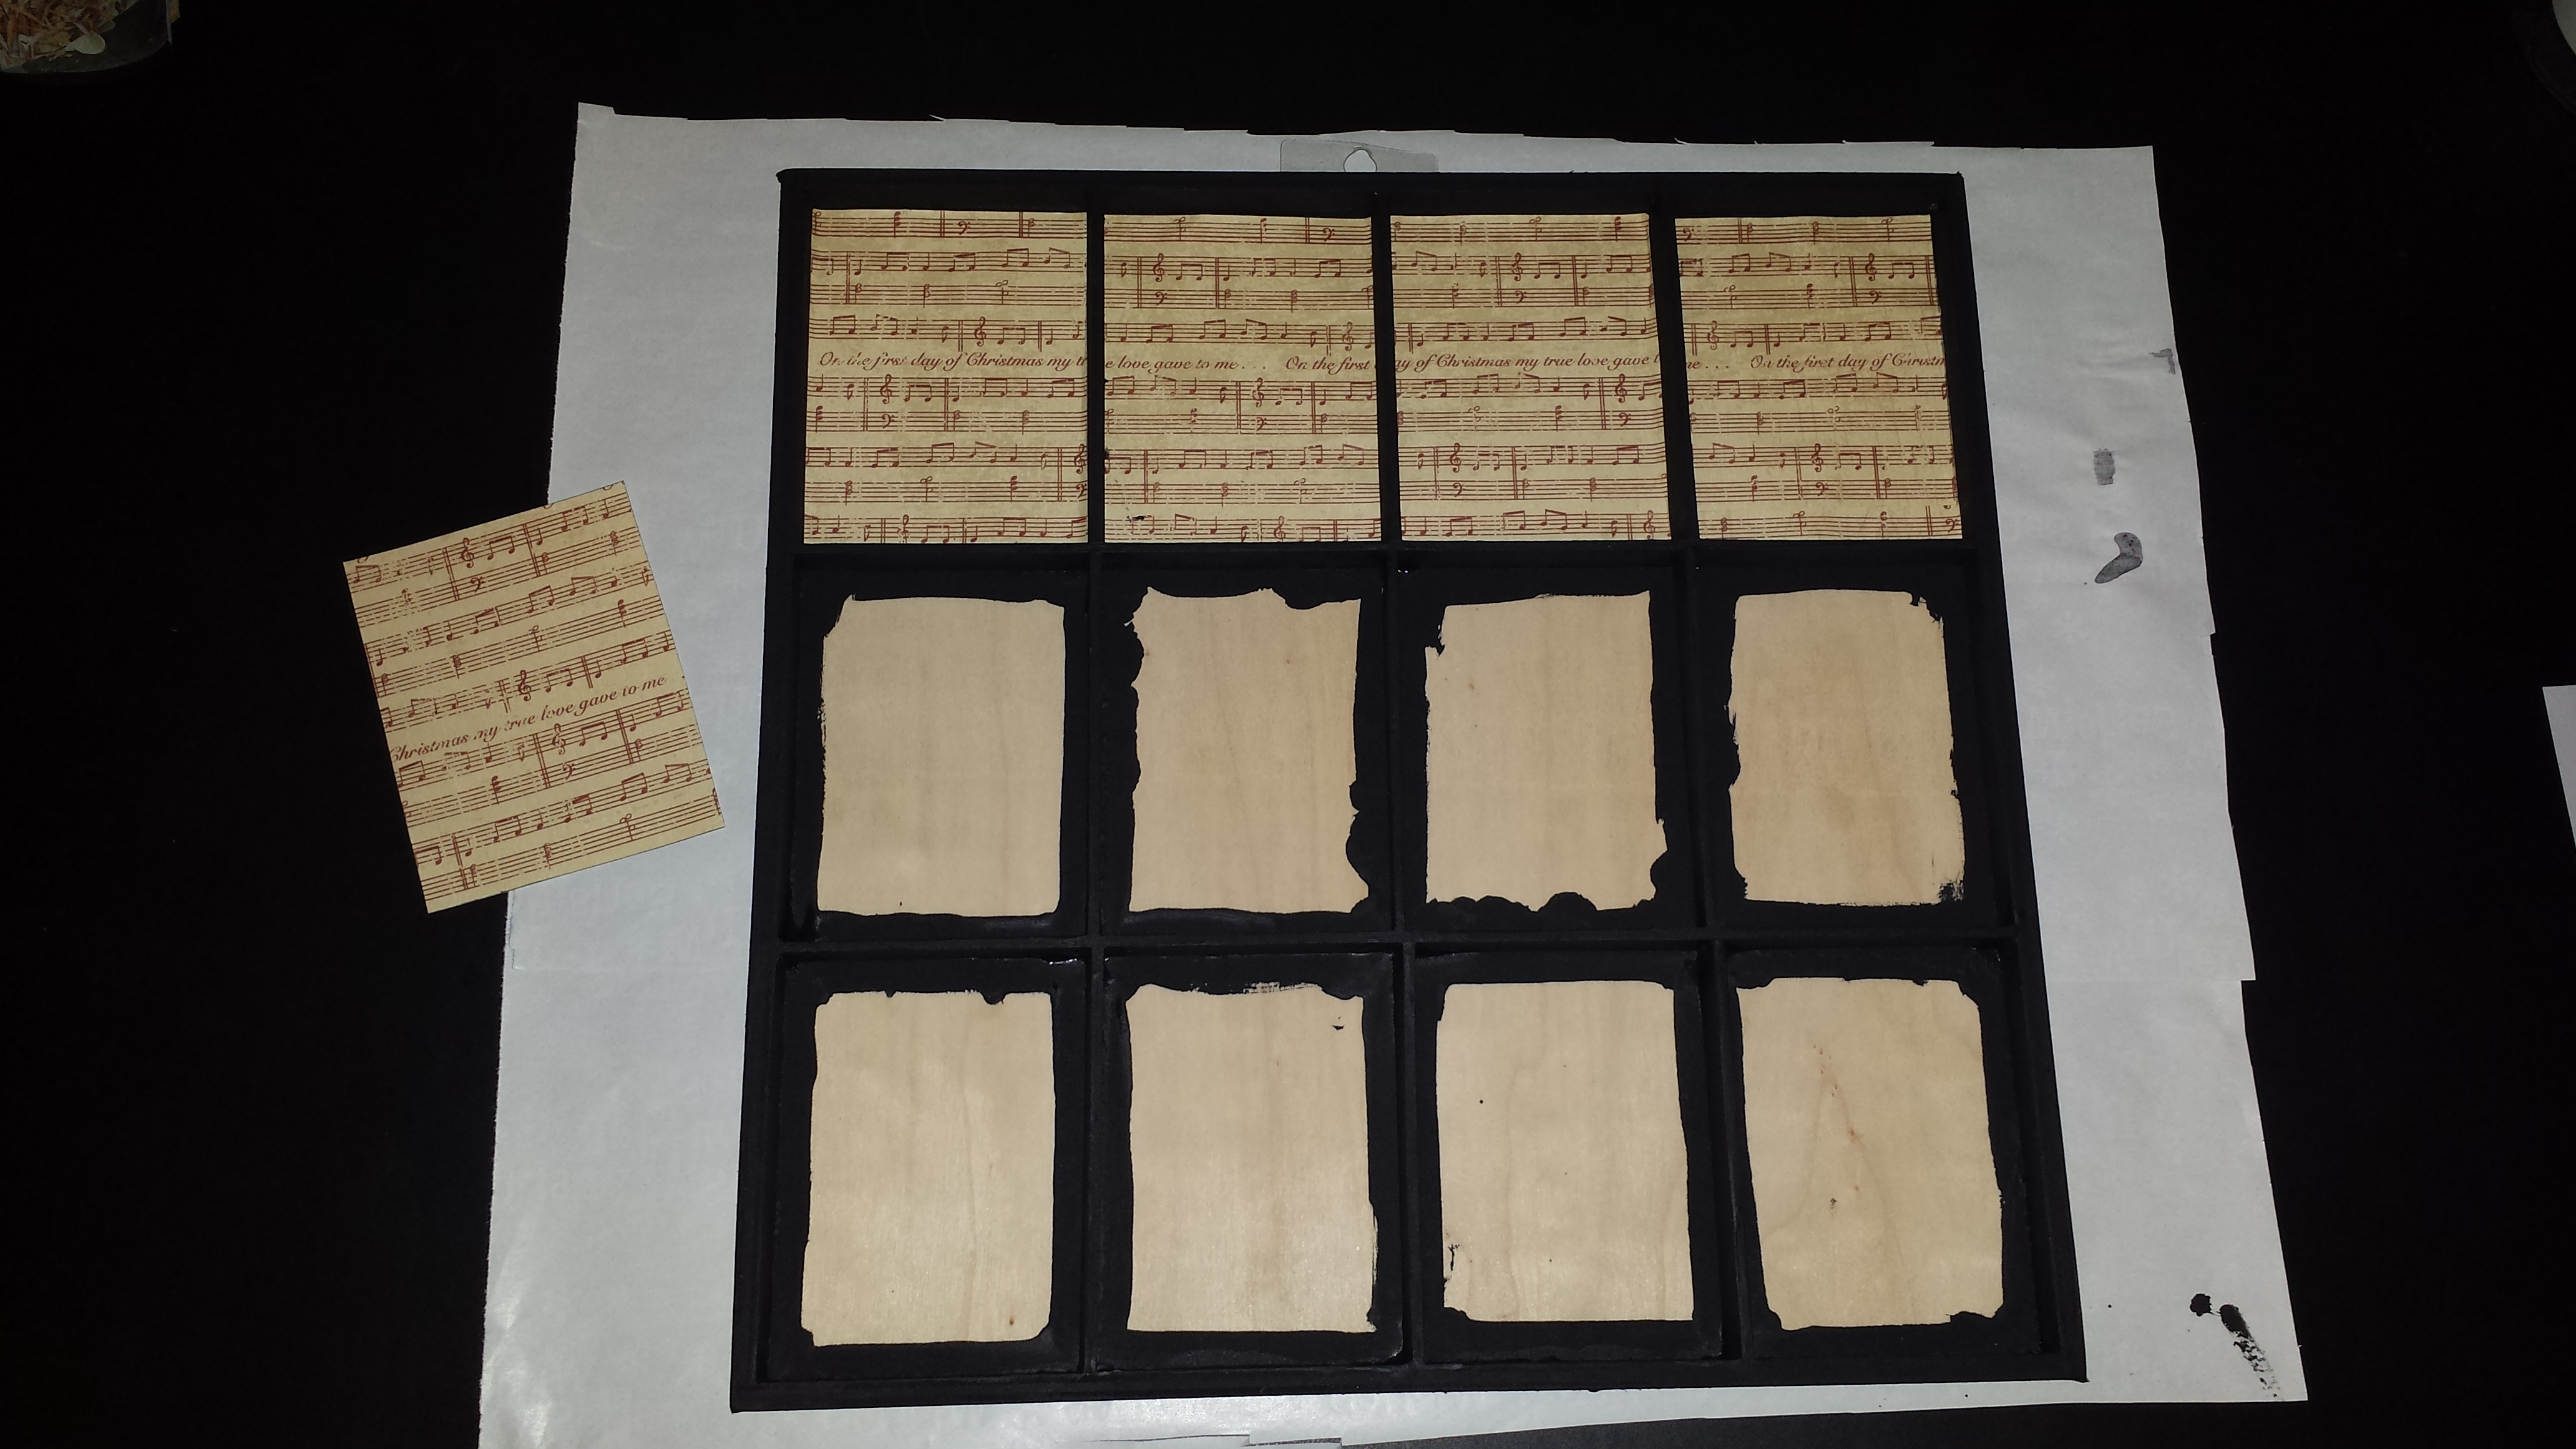
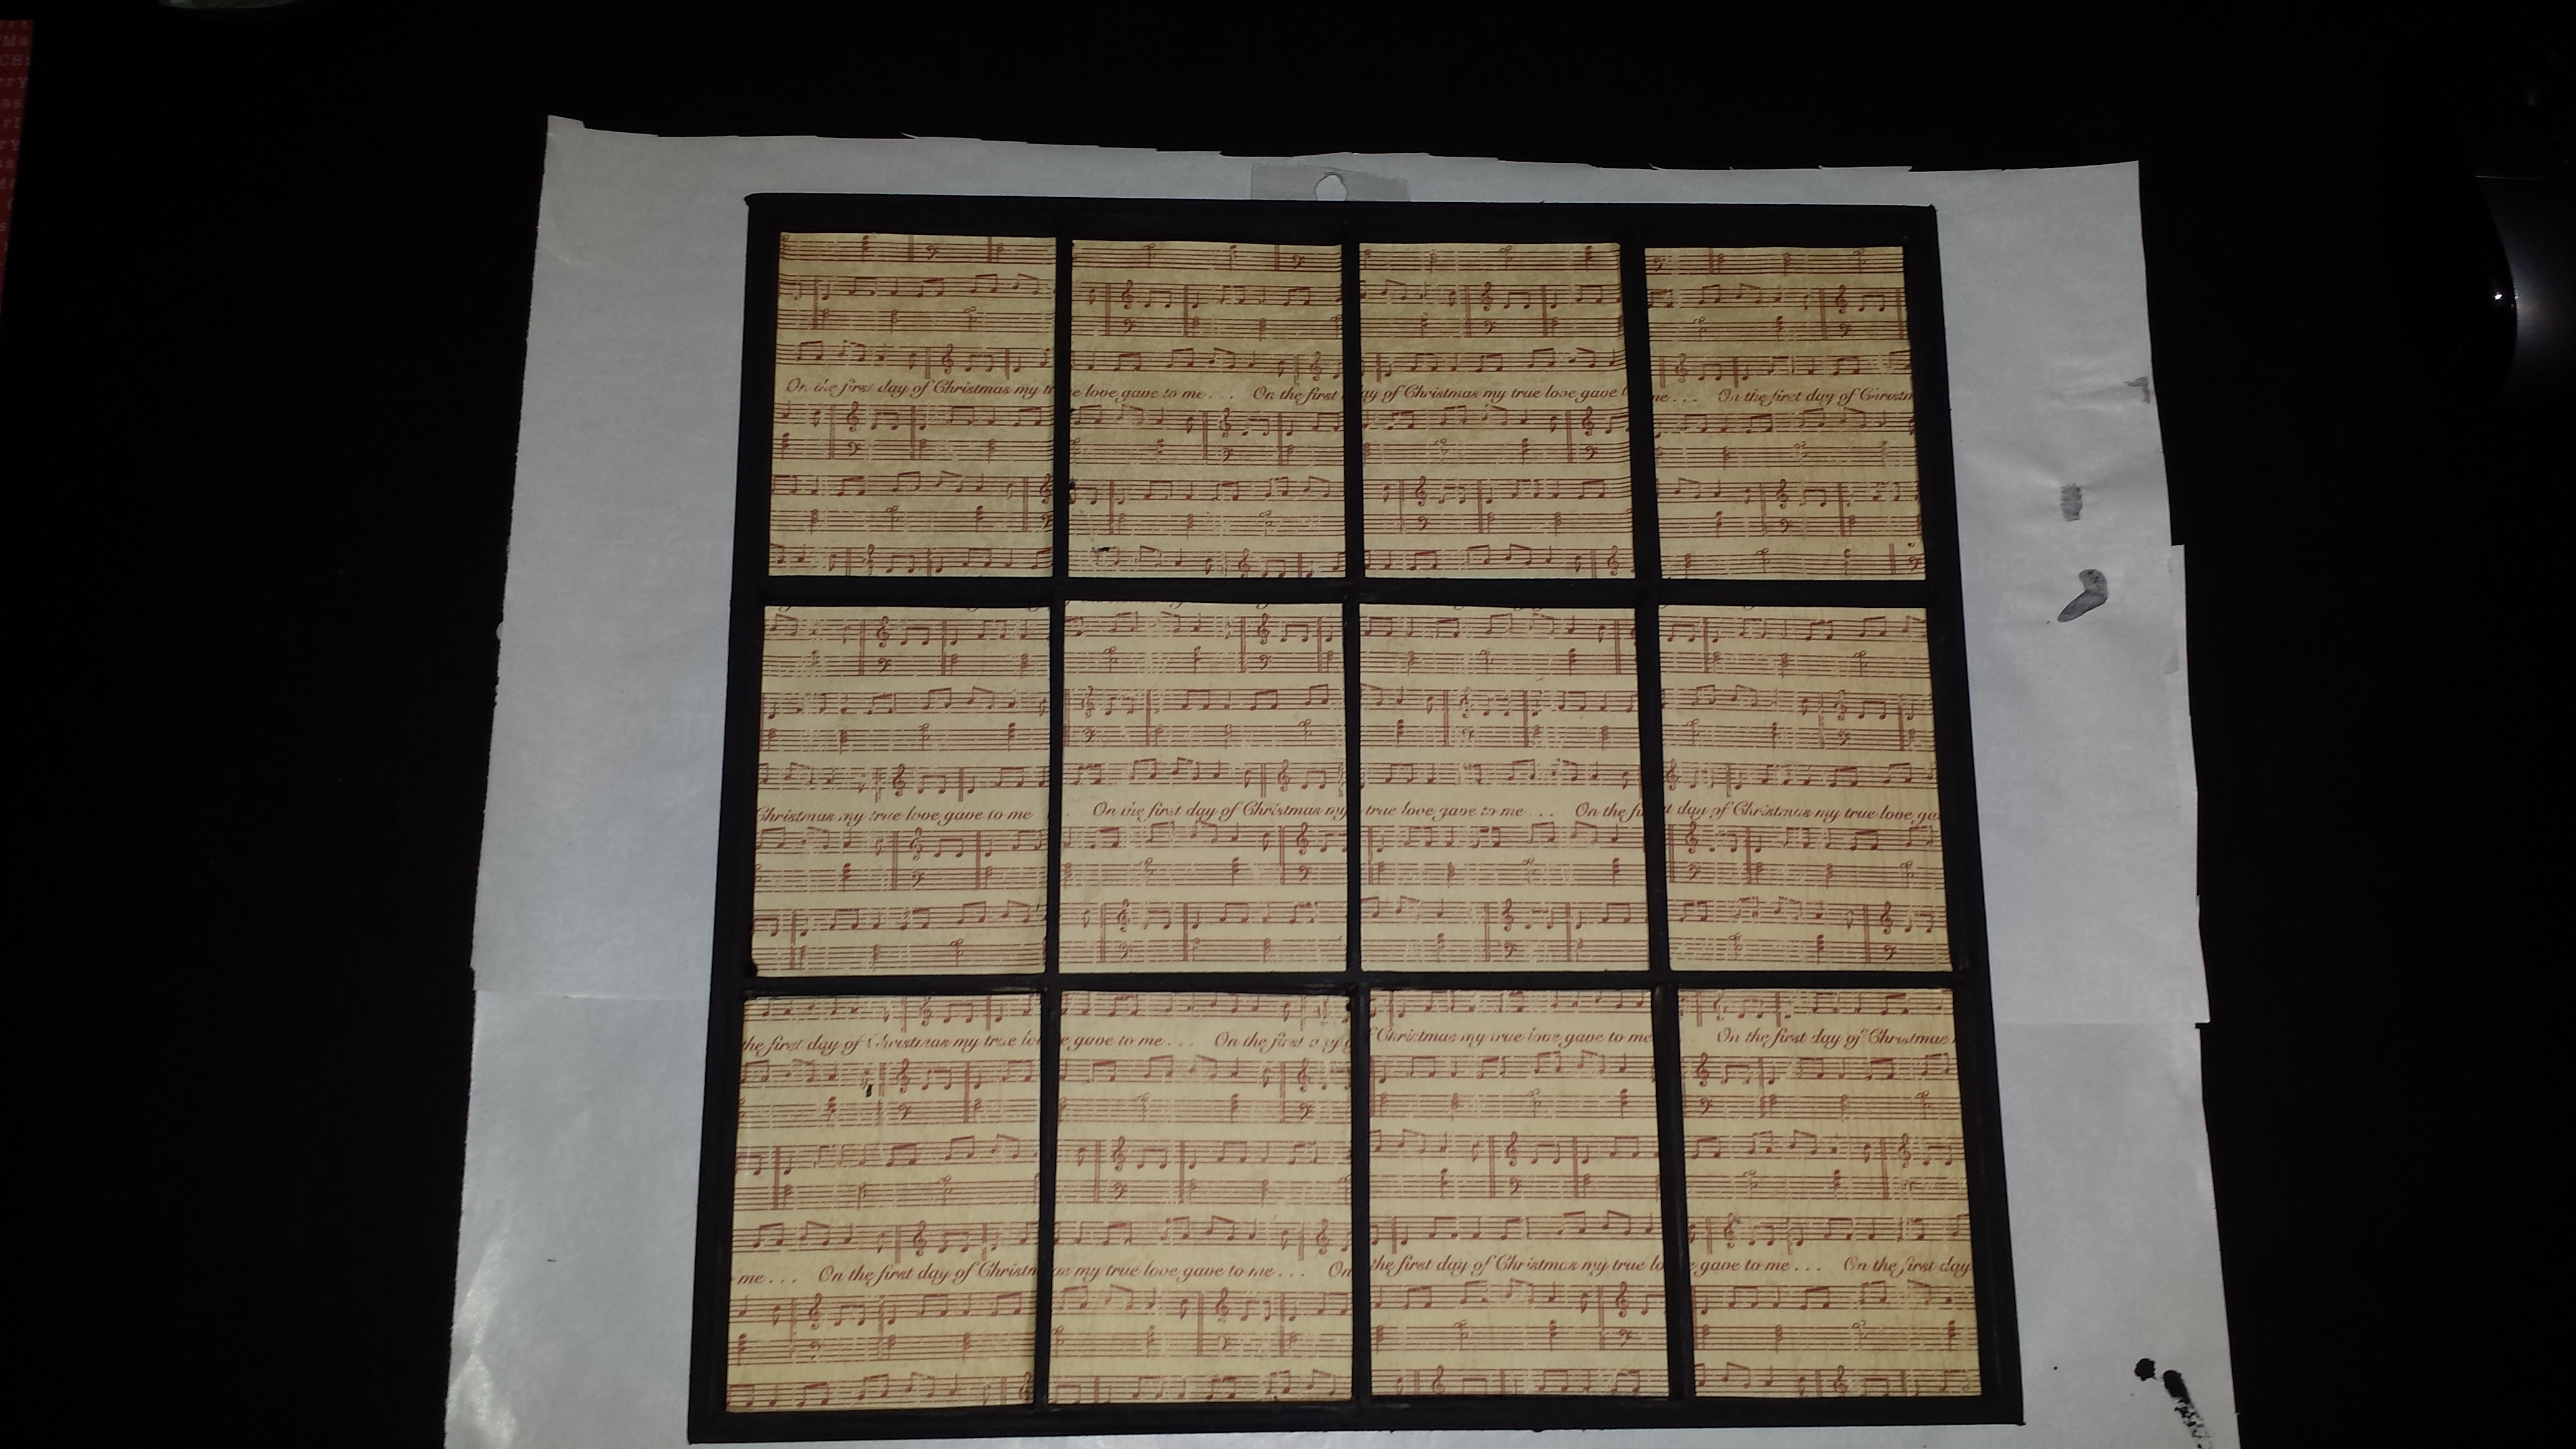
  3. Measure and cut scrapbook paper to fit into the divided spaces of the shadowbox, cut twelve pieces.  Glue each scrapbook piece into the twelve divided spaces of the shadowbox.  (Craft Tip: The first piece of scrapbook paper will become the “template” to cut the additional eleven pieces required for the project)
    20141224_110032    20141224_111143
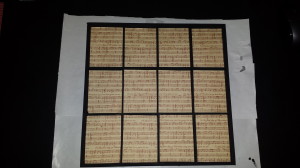
  4. After finding each image to represent the “twelve days of Christmas” copy to a file.  Then, print a copy of each image in a size that would fit into each of the twelve individual spaces of the shadowbox. (Craft Tip:  I used a wallet size print, then trimmed the copy so that there would be space all around the four sides to show the scrapbook paper.
  5. Optional step – Paint the wooden numbers, 1 to 12, with black paint.  Glue each to right corner of each of the twelve divided spaces.

20141226_124206


Craft – Grandparent’s Day photo frames

In honor of Grandparent’s Day, which is celebrated on the first Sunday in September, here is a simple craft idea for a sentimental way to remember and display photographs of those grandparents that are no longer with us.  My parents have been gone now for several years and this year I wanted to display their photos in our home in a special way for my children to remember their maternal grandparents.

Shown below are two different ways that I could display each of the photos of my parents which are framed using ivory mats and simple wooden frames.  Each version features items that hold special meaning –

Father/Grandfather photo frame

The first version uses items that were once used by my father.  I used four wrenches from my father’s tool box and arranged them around a simple wooden 5×7 frame holding the photo of my father.  Other ideas which could be attached to the frame are car keys, fishing hooks or golf tees.  Another idea for a bigger 8×10 frame would be to use a large single wretch, screwdriver, hammer or other tools.

The second version uses a personal item of my father, his stripped bowtie.  Other ideas for items that could be attached to the frame are cuff links, military id tags or maybe a special tie wrapped around the frame.

Grandparents photo frame 5    Grandparents photo frame 3

Mother/Grandmother photo frame

The first version uses items that were once used by my mother.  I used a string of my mother’s pearls and a cameo that my mother gave to me as a gift.  I arranged the pearls in soft curves and attached the cameo at the top to cover the necklace clasp.  Both these items, one from my mother’s personal jewelry and the other a special gift from her, have important meaning to me.  The second version features a pair of rhinestone fur clips which are attached to the bottom of the frame.

Grandparents photo frame 2    Grandparents photo frame 1

I hope these photo frames inspire the idea of creating and decorating Grandparent’s Day photo frame to honor and remember those grandparent’s that are no longer with us.

For more information about the history of Grandparent’s Day and for additional gift ideas, please click on the link.

Craft – “Breakfast at Tiffany’s” frame

Breakfast at Tiffany frame - final 2

In honor of Audrey Hepburn (born: Audrey Kathleen Ruston May 4, 1929 died: January 20, 1993) I was inspired to create this picture frame using a simple silver frame that I decorated with “Tiffany” blue Swarovski pearls.  Audrey Hepburn was the famous actress that starred in the classic 1960 romantic comedy film, “Breakfast at Tiffany’s”.  (Please see the end of this post for more information about the movie)

“Breakfast at Tiffany’s” frame supplies 

  • A simple silver frame (select one that has a space between the frame’s interior and exterior edges)
  • Several dozen “Tiffany” blue Swarovski pearls, the color has been associated with the famous jewelry store and is used for their sales boxes and bags.  (Craft Tip: the trick to this project is to measure the frame and calculate the amount of pearls needed to avoid running out and coming up short!)
  • Glue stick
  • Pliers

Breakfast at Tiffany frame - supplies

“Breakfast at Tiffany’s” frame instructions –

  1. Pick up each individual pearl with the pliers, be sure the prongs are placed over the pearls holes.  Then put a small amount of glue on the bottom of the pearl.
  2. While the pearl is still within the grasp of the pliers, place the pearl onto the frame in the space between the frame’s interior and exterior edges.  (Craft Tip:  Be sure to position the pearl so that the holes are lined up and hidden by each of the other pearls when placed on the frame)
    Breakfast at Tiffany frame - step 2    Breakfast at Tiffany frame - final 1
  3. In keeping with the “Breakfast at Tiffany’s” theme, to finish the project I used a photo from the movie of Audrey Hepburn as Holly Golightly.

“Breakfast at Tiffany’s” movie information and trivia

Breakfast at Tiffanys movie posterThe classic 1961 Paramount movie  which stars Audrey Hepburn and George Peppard and also features a supporting cast of Patricia Neal, Buddy Ebsen and Mickey Rooney, the movie is based on the novel written by Truman Capote.  “Breakfast at Tiffany’s” was nominated for several Academy Awards and won for Best Original Score and Best Original Song, “Moon River” with music by Henry Mancini and lyrics by Johnny Mercer.

The character of Holly Golightly was one of Audrey Hepburn’s most memorable roles.  Hepburn’s portrayal of the naive but eccentric society girl living in New York City was regarded by her to be one of her most challenging roles because she was a normally quiet and introverted person and she needed to play the character in the film as a delightfully extroverted woman.

Movie Trivia –

    • “Breakfast at Tiffany’s” premiered at Radio City Music Hall on October 5, 1961 and received wonderful reviews and became an instant hit.  Despite the movie’s success, Truman Capote was uphappy with the director, the casting and his altered storyline; he thought Marilyn Monroe should have played the lead role.  Others actresses considered for the part were Shirley MacLaine, Kim Novak and a very young Jane Fonda
    • The film was set in New York City but very little of the movie was actually filmed on location, the production company only filmed for 8 days in Manhattan.  Most of the movie was shot on the Paramount soundstages in Hollywood.
    • The world famous Tiffany & Co. store at the corner of Fifth Avenue and 57th Street located in the heart of Manhattan made an unprecedented decision to open their flagship store on a Sunday for the filming of the movie, at the time the store was normally closed on that day of the week.  On the day of filming there were over 40 armed guards and several Tiffany sales clerks in the store to prevent any thief of the expensive jewelry.
    • In regards to the famous opening scene of the movie, when the character of Holly emerges from a taxi in the early morning hours to stand in front of the Tiffany store windows while eating her breakfast Danish, people always question how the iconic scene seem to be have been filmed on a deserted Fifth Avenue.  In reality, not visible on camera, were several hundreds of onlookers watching the filming and according to Blake Edwards, the director of the film, the scene was shot in one take.
    • The film established Hepburn as a fashion icon and she looked amazingly svelte especially given that fact that at the time of filming it had been only three months since the birth of her son.  Hepburn worked closely with the designer Hubert de Givenchy to create the wardrobe for the film.  The version of the “little black dress” Hepburn wore in the film became one of the most influential fashion choices ever in movie history.  The concept of the “little black dress” proved so popular because of the movie that since that time most modern women have a similar one in their closets!
    • In 2006, Christie’s auctioned the original “little black dress” that Hepburn wore in the film and it sold for $923.000.

Craft – Spring Mantel Decoration

Spring Mantel Decoration - final with bunniesThis year for the upcoming spring season I decided to make a special arrangement for the mantel in our family room.  Every year I usually set out two large “Bunnies by the Bay” stuffed white rabbits on the mantel, one on either side of the picture hanging over the fireplace.  This year, taking inspiration from the painting of the English countryside, I knew that whatever floral arrangement I made I wanted it to blend with the style and colors of the painting.  Instead of using a vase or basket for the container for the arrangement I used a log, the look is similar to the craft project from November – Rustic Table Centerpiece.  I think the natural element of the log and the pale colors of the flowers look wonderful displayed on our family room fireplace mantel!

Spring Mantel Decoration

Supplies –

  • Several bunches of small flowers (I used a mixture of white and yellow flowers)
  • A log
  • A drill and small bit for drilling holes in the log
  • Wire cutter
  • Work gloves, safety glasses (optional but highly advised)

Spring Mantel Decoration - supplies

Instructions –

1.  Start by selecting a log, the length will be determined by where the floral arrangement is being displayed.  Be sure the log is completely dried and “bug-free”.

2.  Determine the desired height of the floral stems; use the wire cutters to cut the floral stems to the proper length.

3.  Prepare a sturdy flat surface by covering it with newspaper.

4.  When selecting a drill, be sure to use one that is equal to the size of the floral stems that are being used.  (the holes should be large enough for the floral stems but small enough for the stems to remain upright without tipping over.

Spring Mantel Decoration - close-up of log5.  Place the log on the work surface, using the drill make several holes into the top surface of the log.  When drilling the holes vary the placement so that the floral stems are staggered throughout the top of the log.

6.  Once the holes are drilled, insert one floral stem into each hole.  (optional step – floral stems can be hot glued to secure)

Spring Mantel Decoration - final

Craft – Spring Door Decoration

Spring Door Decoration - finalNow that milder weather is finally here in the Midwest it is time to start thinking about decorating for the spring season.  As I mentioned in previous posts, I always start my seasonal and holiday decorations by decorating the exterior of our house.  This year I decided to make a new Spring Door Decoration.  I really loved the artificial tulips that I used last year for a floral arrangement in our kitchen and decided I wanted to use those flowers again for a front door decoration.  I choose an easy design that needed just a few supplies, there was no hot glue or flower foam used, and it took under half an hour to make.

Spring Door Decoration – supplies

  • Triangle shaped hanging wall container
  • 5 white artificial tulips
  • 5 purple artificial tulips
  • Several bunches of small white flowers
  • Several bunches of small purple flowers

Spring Door Decoration - supplies

Spring Door Decoration – instructions

  1. Remove all pricing and labels from container and flowers.
  2. Arrange the small white and purple flower bunches in the container.  (The flowers that I used were the perfect length for the container so no stem cutting was required and no floral foam was needed to keep them in place)
  3. Cut each individual white and purple tulip stem to a length that is several inches longer than the length of the container, when the tulips are placed in the container they should gracefully arch into a pleasing arrangement.  (When I arranged the tulips in the container I tried to alternate the colors of white and purple)
  4. When you are satisfied with the arrangement, hang the container from a hook or nail on a door.  (The container I used had a decorative loop at the top, so it was very easy to hang on the existing nail on our front door)

Spring Door Decoration

The Spring Door Decoration was so easy to make and I really like the way it turned out!  I think it looks beautiful hanging on our front door, the color of the container and the flowers are a wonderful contrast to the dark wood of the door and it sets a very festive Spring touch for our visitors to see when they come for our Easter celebration.