Decor – My Christmas Decorations from Past Years (Part One)

When we lived in California, I decorated our house for Christmas in a very different way from our Midwest home.  I used artificial pine garland in several of the rooms, including the living room, family room, dining room and kitchen.  Pine garland is a wonderful Christmas decorating accessory to use and it can be very versatile with the use of different items added from one room to another to get a wonderful variety of looks.

As I discussed in last month’s Décor post, Fall decorations, in our previous home in California I used several lengths of pine garland set up in both the living room and dining room decorations with golden roses, berries and oak leaves with pre-strung with lights because the intent was to leave the garland in place until Christmas.  This was meant to save time during the holiday decorating process and the accessories in the garland would be changed from the Fall to the Christmas seasons.  In both rooms there were large oak pieces of furniture, an oak entertainment center in the living room and an oak china cabinet in the dining room, and the garland was secured into place at the top of each.

For the 2002 Christmas season, I removed the Fall decorations and added red poinsettias with red berries and holly leaves.  The inspiration for this was a trip had recently made down to Encinitas, California to the Ecke farm that grows poinsettias which are marketed and shipped throughout the United States during the holiday season.  I started the arrangement by inserting several artificial poinsettias into the existing garland and in between the flowers I added holly leaves and red berries.  The contrast of the green pine garland and the red poinsettias was very festive for Christmas.  Both arrangements in the living room and the dining room used the same decorations.

OLYMPUS DIGITAL CAMERA

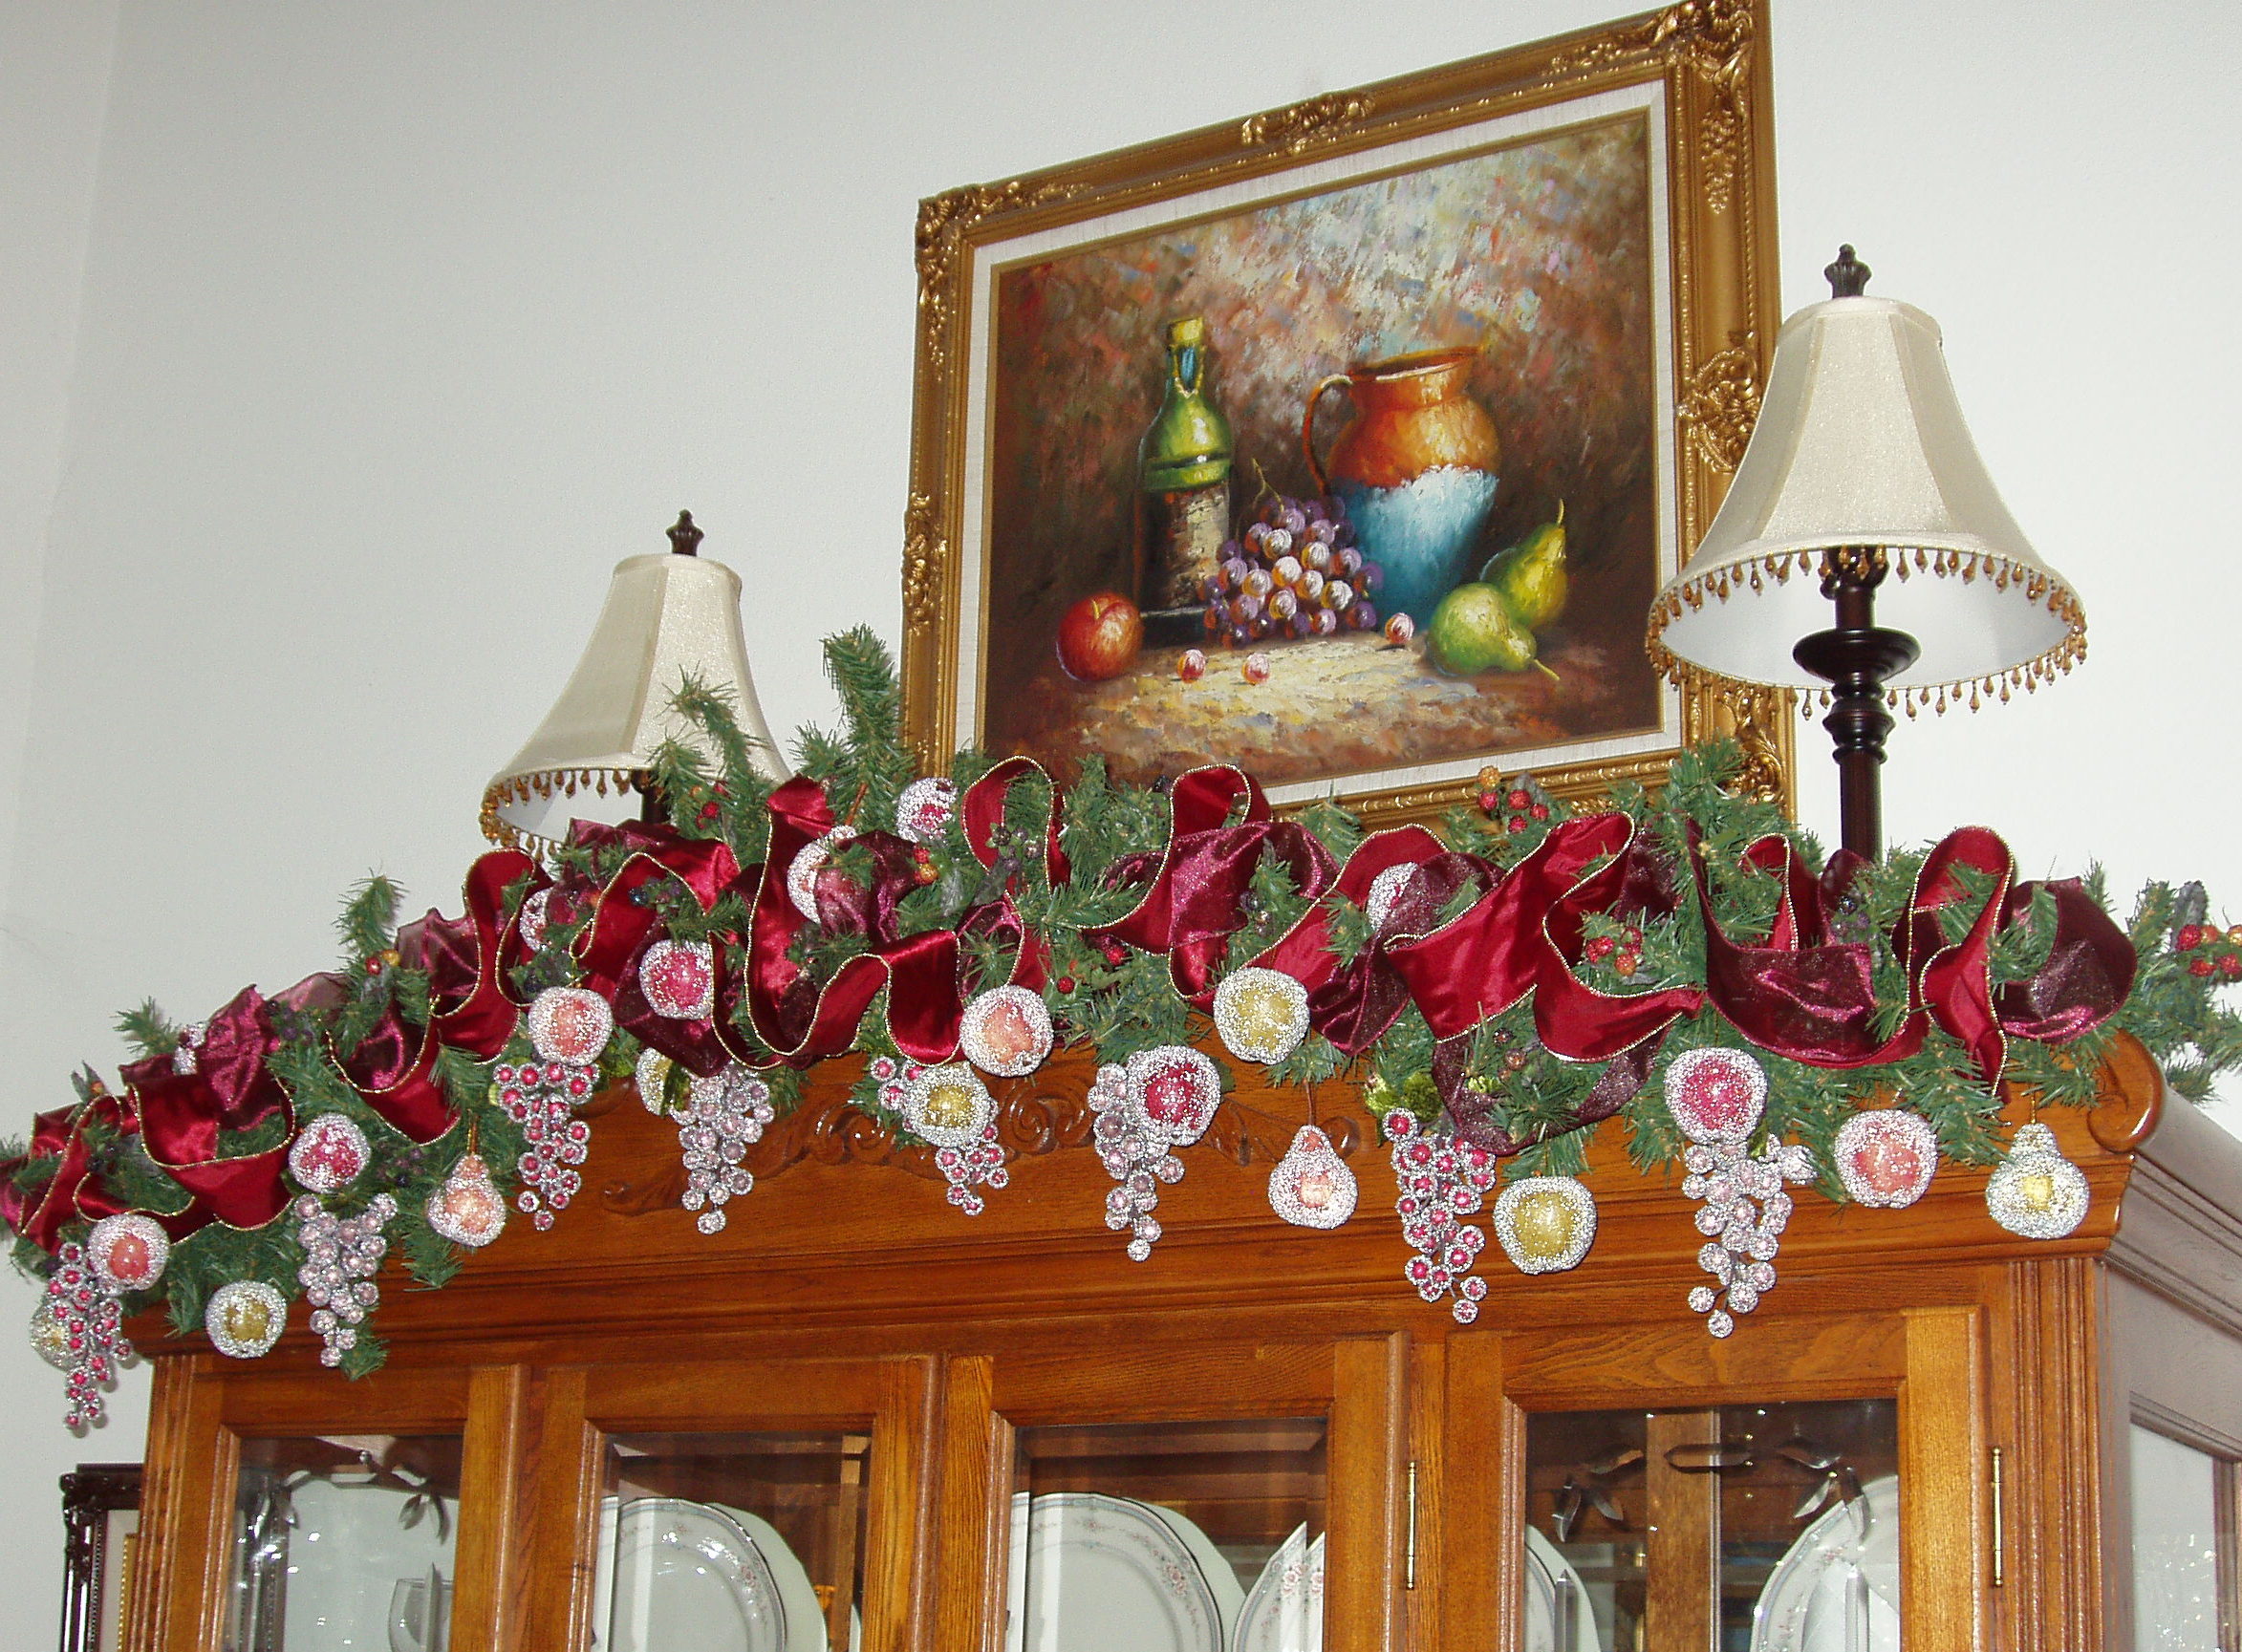
For the 2003 holiday season, I decided to do a different arrangement in the dining room.  I thought it would be appropriate to incorporate artificial fruit into the garland for a food themed arrangement that was reflected in the still life painting over the china cabinet.  I started by lacing red burgundy colored ribbon throughout the artificial pine garland. Next, I secured artificial “sugared” fruit onto the garland; I used grapes, apples and pears.  I think it made a wonderful display and looked very elegant in the dining room and the arrangement was used for both the Fall and Christmas seasons.  (Please check out the craft post, Victorian centerpiece, to see how I repurposed the “sugared” fruit into a lovey arrangement that I used last year in our Midwest home for the holiday season)

OLYMPUS DIGITAL CAMERA

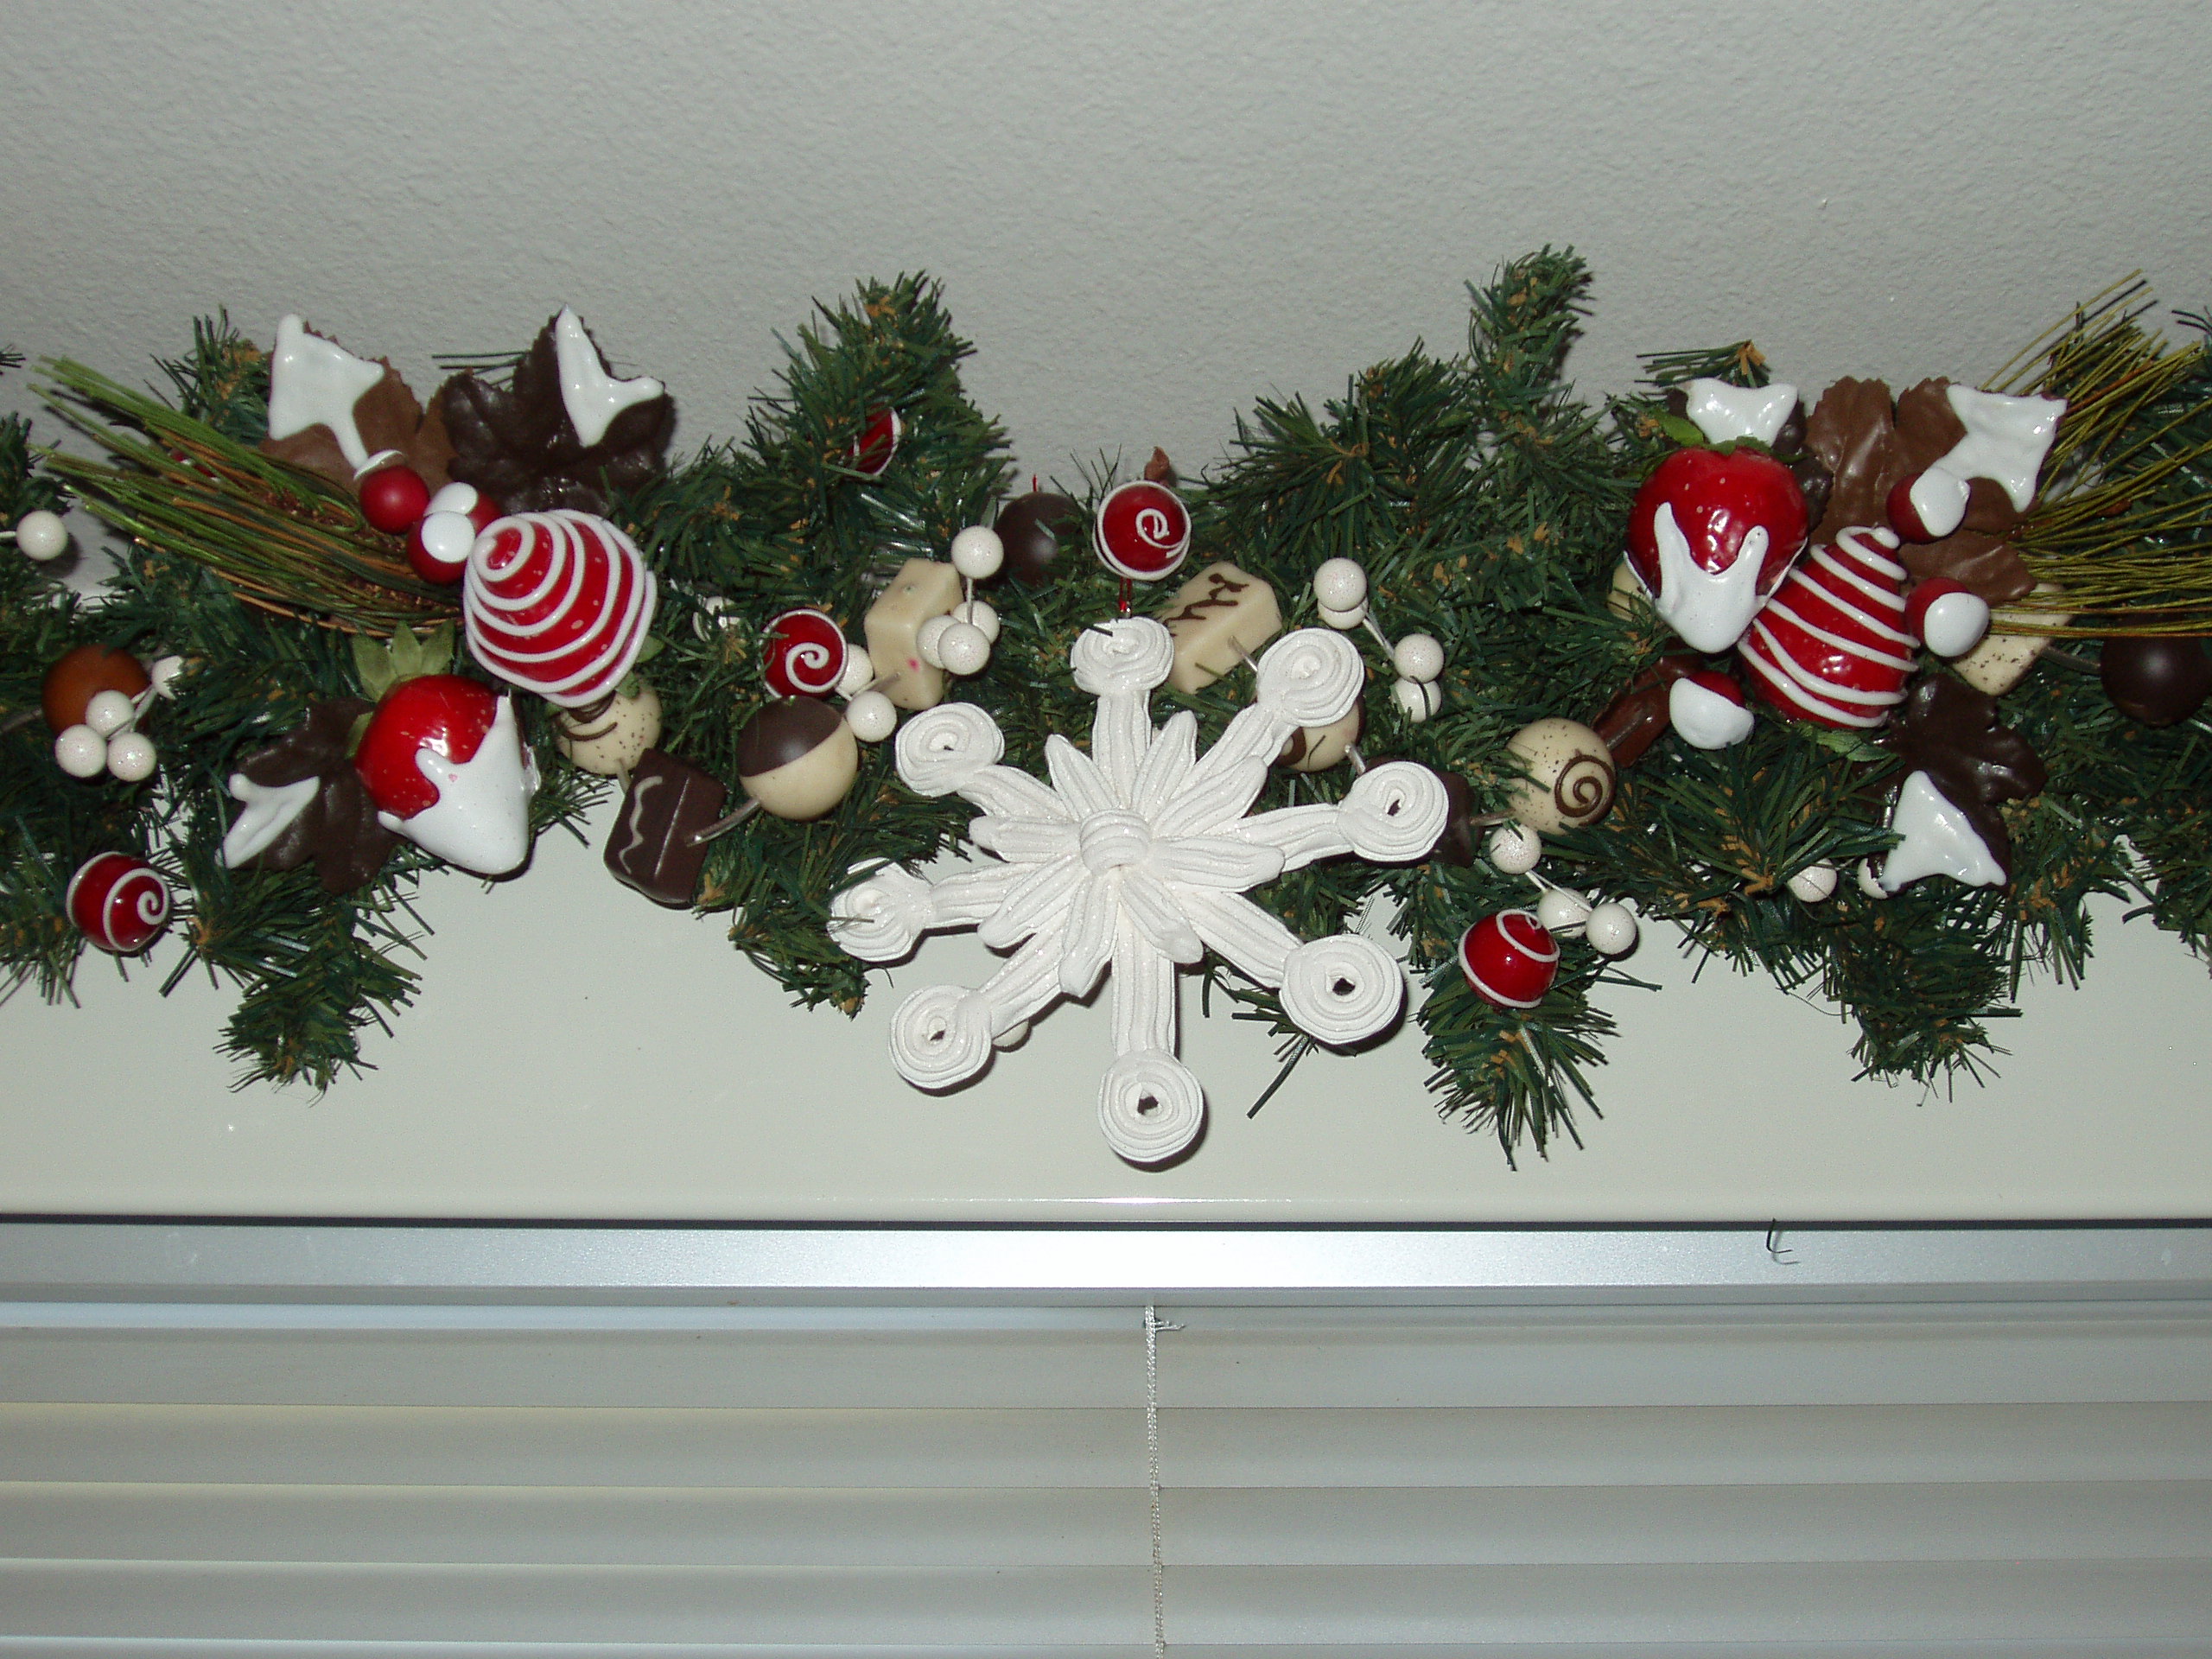
In our California home, I always decorated our kitchen with a gingerbread and candy theme for the Christmas season.  To start the 2002 decorations, I hung an artificial pine garland over the window.  I had found various candy themed items in the local craft stores, such as artificial chocolate candies, white chocolate covered strawberries and white “Icing” snowflakes.  These items were secured to the garland and the decorations looked perfect for the kitchen.

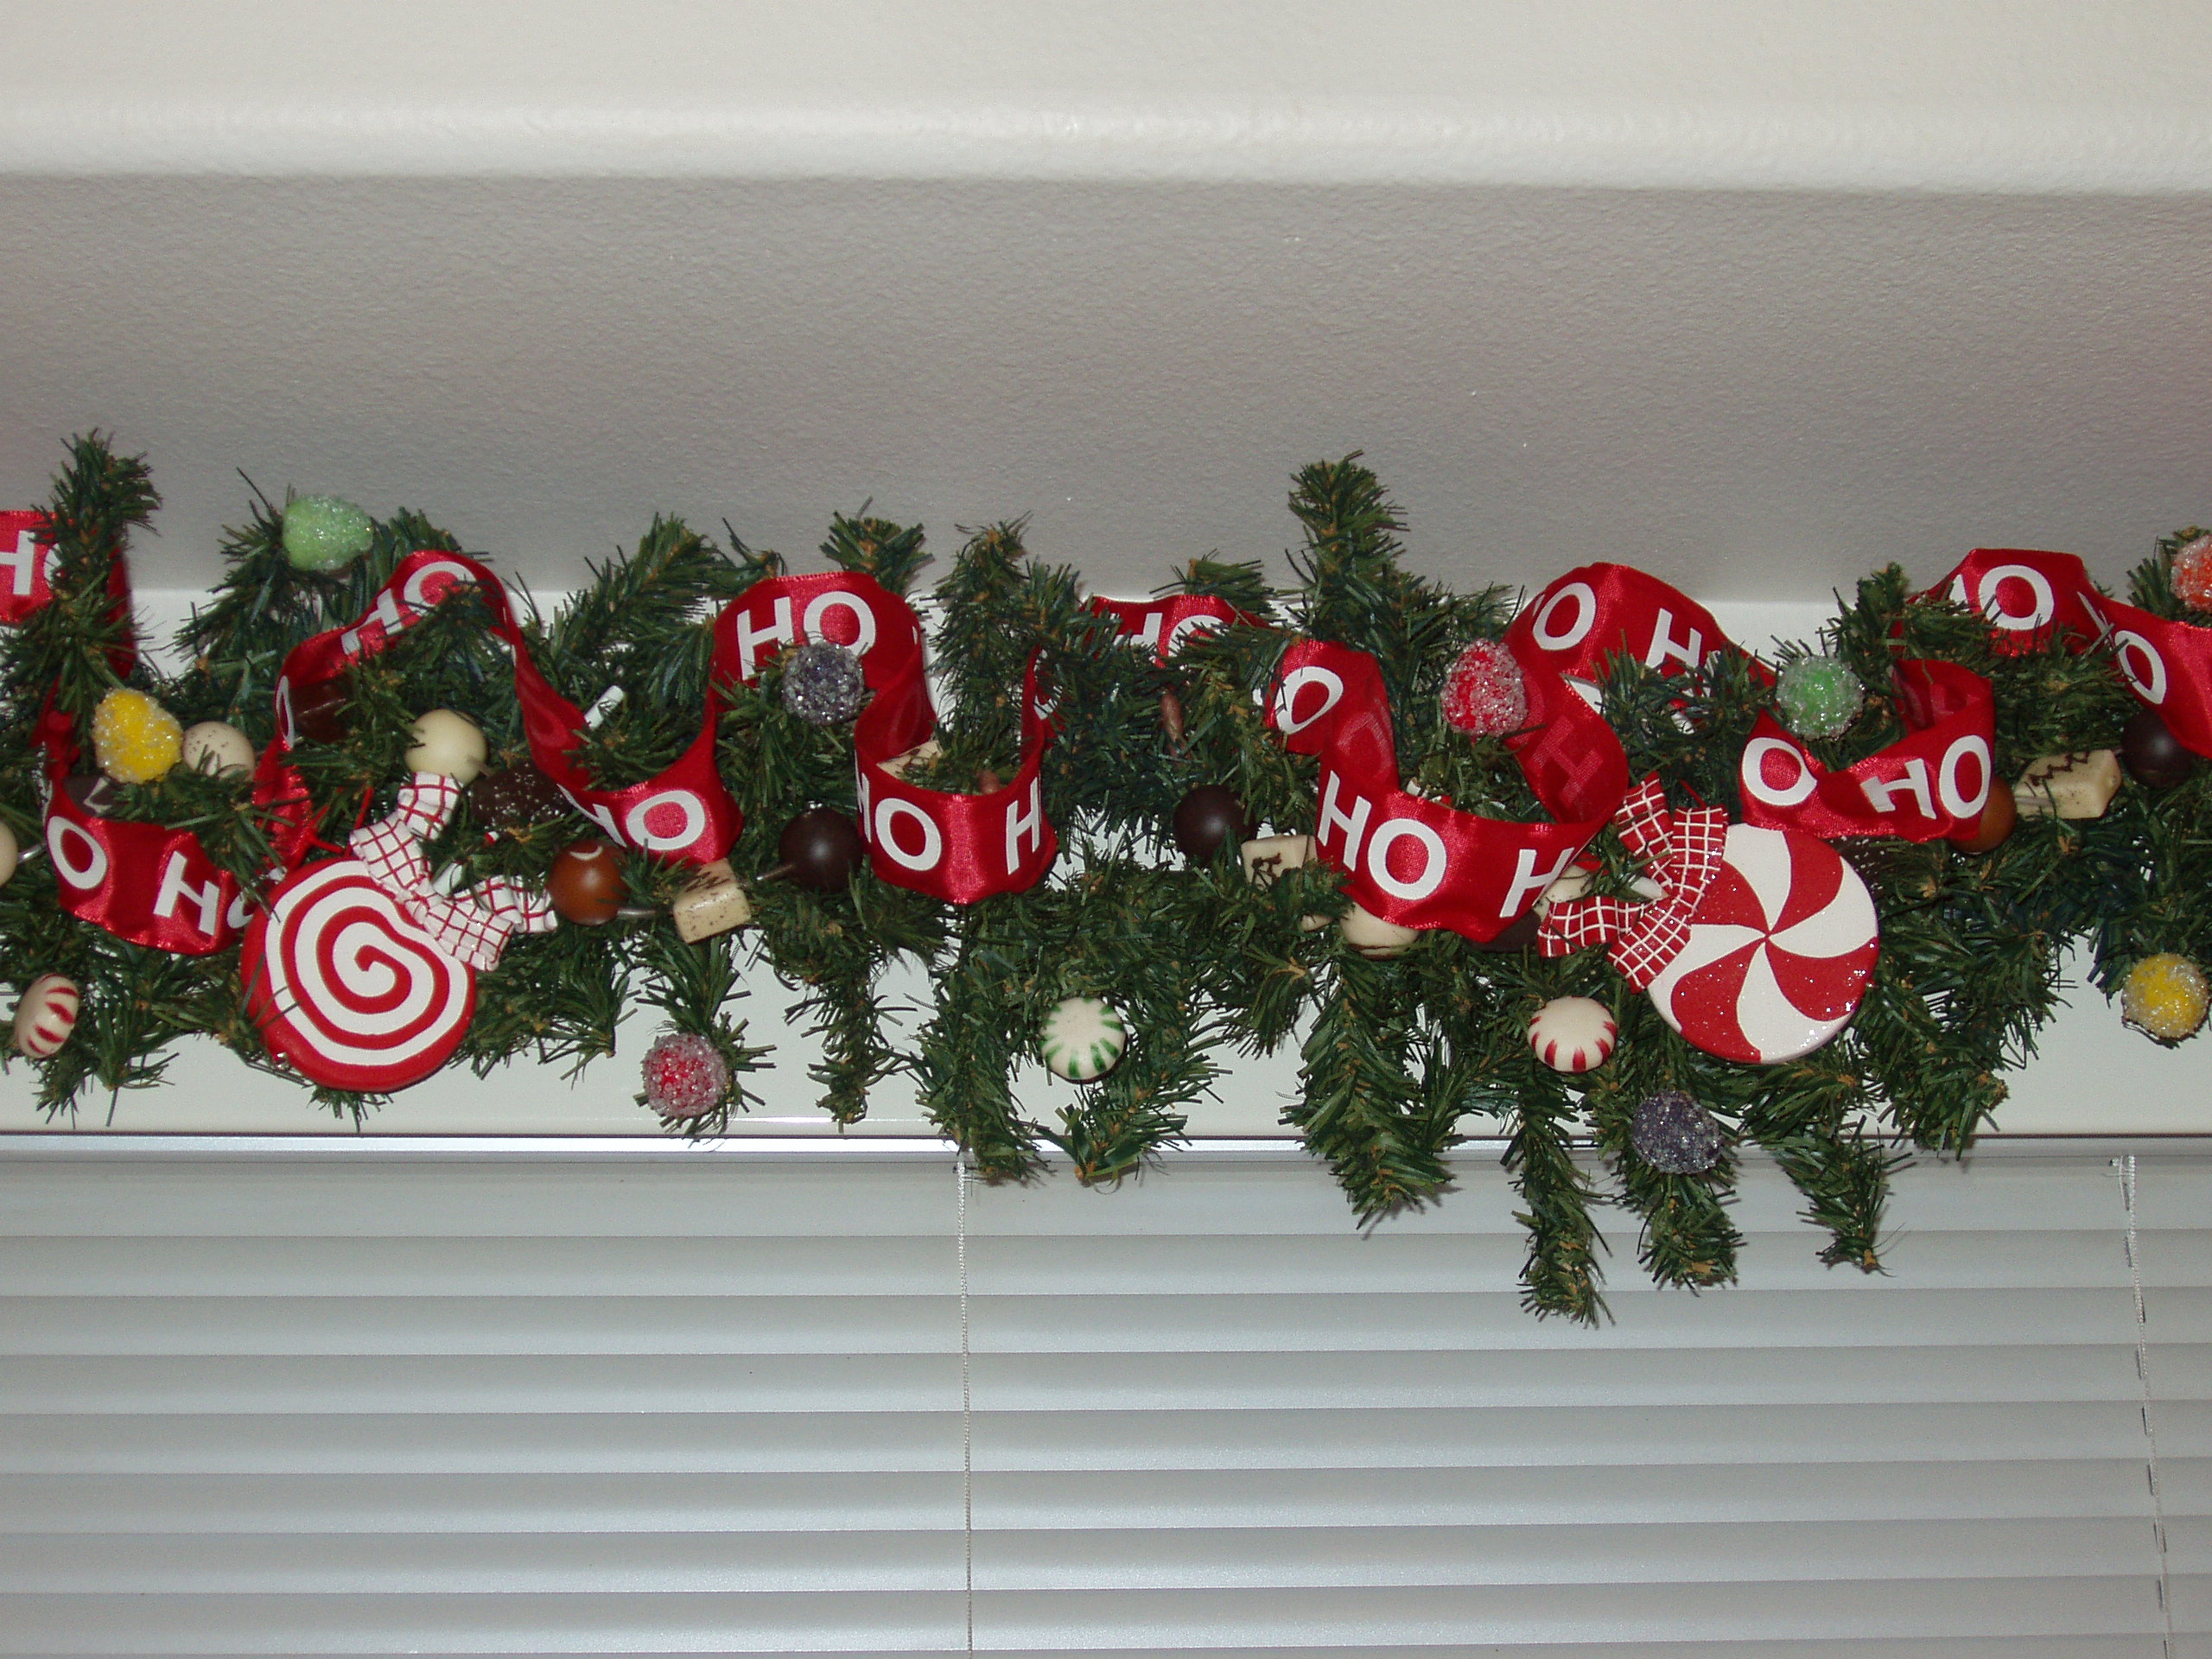
In keeping with my decorating style of constantly changing my holiday displays, for the 2003 Christmas I again used an artificial pine garland and laced a cute “Ho,Ho,Ho” red and white ribbon through the garland.  I still used the artificial chocolate candies but that year I added artificial gumdops, peppermint candies and red and white lollipops.  All these items were secured to the garland and once again the contrast of red and green colors looked great for the Christmas season.  As you can see for the photos of the kitchen garland for one year to the next, the same candy theme was used but with different accessories the garlands had to distinct and different looks.

OLYMPUS DIGITAL CAMERA    OLYMPUS DIGITAL CAMERA

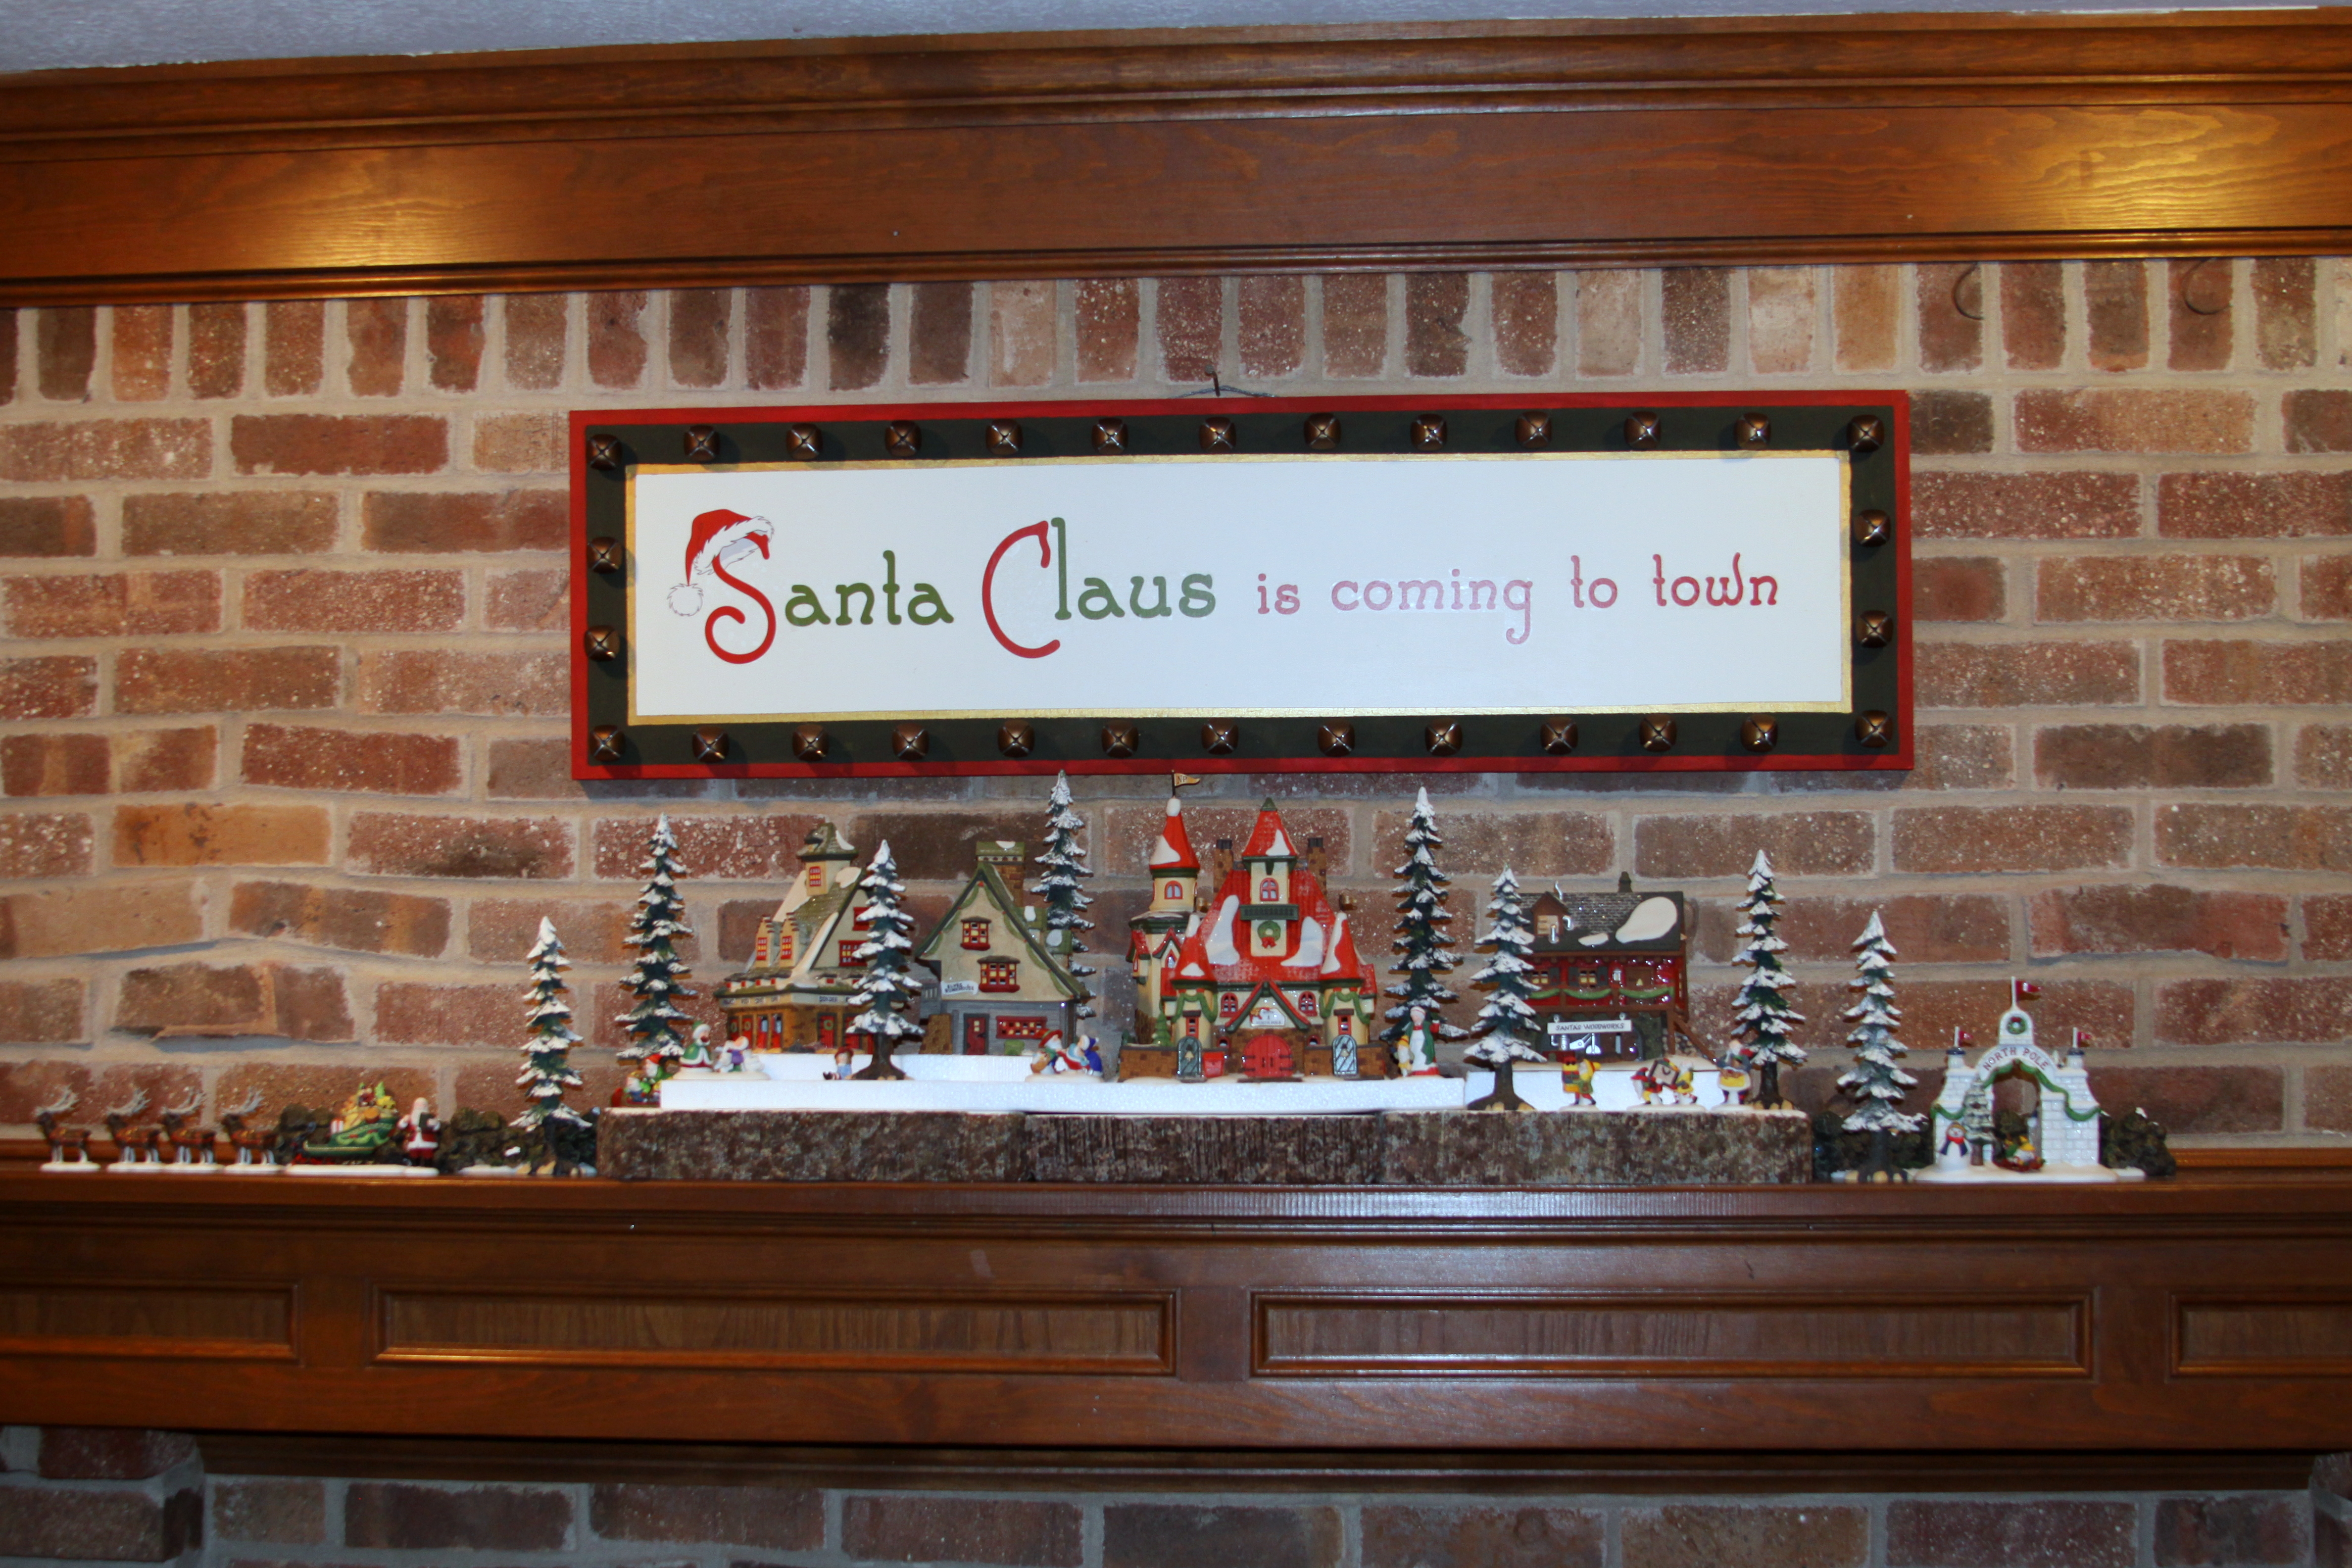
For the last garland arrangement in our California house, I used another artificial pine garland for the fireplace mantel, this Christmas decoration was featured in the Décor post, Displaying a Boyd’s Bear Collection – Part Two.  I had found a string of amber pinecone lights in a local store and strung them through the garland.  Next, I evenly spaced my collection of Boyd’s Bear ornament nestled among the pine boughs.  To finish the display I added several real pinecones and red berries scattered throughout the garland.

As you can see by moving from one house to another I adapted by Christmas decorations and used the items in new and different ways.  I hope this inspires you to take a look as your Christmas decorations as you unpack them from their storage boxes and think about displaying those items in fun and different ways in the rooms of your home.

Craft – Christmas Ornament Displays

As I mentioned in this month’s Décor post, Ornaments Used in Unusual Ways, ornaments are not just for the Christmas tree and they can be used in many different ways throughout the house during the holiday season.  In this post I will show three examples on how ornaments can be displayed in some fun and creative ways.

Ornament Snowglobe

The idea for the Ornament Snowglobe is to use an ornament that can create a winter scene and then be able to turn the jar upside down for the artificial snow to create a falling snow effect.  The gingerbread house is a great example to use for this craft project, other ornament suggestions are: a Santa Claus ornament, a Snowman ornament or a single Christmas tree.

For this display I used a small glass container with a lid, a gingerbread house ornament, some artificial snow, and a glue gun/glue sticks.  Craft NoteWhen purchasing an ornament for this craft project, be sure that the ornament is small enough to fit inside the jar with the lid closed, also check the width of the ornament so it can fit through the jar’s opening.

Snowglobe ornament display - supplies

To start, be sure the inside of the jar is clean and remove any price tags or metal display loop from the top of the ornament.  To remove the display loop, grab hold of the loop with a plier and then twist with an upward movement.

Secure the gingerbread house ornament to the bottom of the jar with glue.  Optional step: For a permanent “snow base”, lay some cotton balls or batting onto the bottom of the jar after attaching the ornament OR paint the bottom of the jar with white paint and let it completely dry before attaching the ornament.

Next, add a small layer of artificial snow to the bottom of the jar.  Then, to finish the ornament snowglobe, securely glue the lid onto the top of the jar so that the jar can be turned for the “snow effect”.

Snowglobe ornament display - final

Framed ornament

For this display it is important to use ornaments with flat backs, such as the deer or gingerbread ornaments seen below.  I used a wallpaper remnant (but scrapbook paper can also be used) for the background, a frame that matches the ornament and a hot glue gun/glue sticks.

Framed deer ornament - supplies

Disassemble the picture frame, separating the glass and back from the frame.  Cut the wallpaper remnant (or scrapbook paper) to fit the size of the frame.  Then, glue the paper to the glass.  Re-assemble the glass and the frame backing inside the frame.  To finish the display, center and attach the ornament to the paper.

Framed deer ornament - final

Craft Note: The theme of this Framed Ornament is not specific to any holiday and would look wonderful on a side table or bookcase and can be displayed year-round.

Ornaments Under Glass

This project is similar to the ornament snowglobe but the difference is that this larger display can only remain stationary and uses multiple ornaments or accessories.

For this ornament display I used a large glass container with a lid, a boy and girl skater ornaments, four small artificial pine trees, artificial snow and a glue gun/glue sticks.  The idea for this craft project is to have one or two ornaments and use accessories like trees and artificial snow to set a winter scene in soft pastels or whimsical with primary colors.

Ornaments under glass - supplies

To start, be sure the inside of the glass container  is clean and remove any price tags or metal display loop from the top of the ornament.

Next, position the accessories, such as the pine trees, and secure into place at the bottom of the glass container with the hot glue gun/glue.  Be sure to leave room for the ornaments by positioning the accessories to the sides of the container and leave the area in the front clear to view the scene inside.

Then, secure the ornaments into place at the bottom of the glass container.  To finish the Ornaments Under Glass display, add a small layer of artificial snow to the bottom of the container to look like fresh fallen snow.

Ornaments under glass - final

So, next time you are shopping in the local retail or craft stores during the holiday season check out the Christmas ornaments and think about a different way of displaying them in fun and creative ways!

Celebration – The White House Christmas

Decorating the White House can be a very challenging project.  It has 132 rooms, 28 fireplace mantels, 412 doors and 147 windows which all need to be decorated.  For example, in 2000 the White House was decorated with 1,120 feet of garland, 50,000 lights, 220 poinsettias and 34 Christmas trees.  This is the reason that planning for the White House Christmas decorations can start as early as July.  At that time, the First Lady will pick the theme for the upcoming Christmas.

Jackie Kennedy is considered to be the first person to decide on a specific theme to decorate the White House for the holiday season.  That theme was the “Nutcracker” and it has been used two additional times over the last 30 years – in 1990 by Nancy Reagan and 1996 by Hilary Clinton. For more details of the White House Christmas themes from 1961 to present, visit the White House Historical Association website at www.whitehousehistory.org

The main focus of the decorations is the official White House Christmas tree and it holds a prominent place in the center of the Blue Room.  The tree usually stands nearly 20 feet tall and the crystal chandelier has to be removed.  The Chief Usher usually selects the tree and it is donated every year since 1966 by the National Christmas Tree Association.  Once the tree is delivered to the White House, the National Park service members will bring the tree into the Blue Room.  The White House Floral Department staff and season volunteers decorate the tree and the various rooms on the first floor of the White House.


Those other rooms include:  The East Colonnade which has a distinctive set of windows that are usually decorated with several wreaths or poinsettias.  The Grand Foyer and adjacent the Cross Hall are such a large space that it can be sometimes difficult to decorate because this area needs to remain open to accommodate the many holiday festivities.  This area usually has several Christmas trees and garlands decorated in the style to fit the theme for the year.  The Green Room’s color scheme is perfect for the holiday season.  It is usually decorated with topiaries, floral arrangements and pine garlands draped across the mantel and fall all the way to the floor.  The Red Room’s bold color makes it one of the easiest rooms to decorate for the holidays.  Traditionally this room will have a cranberry topiary.  The State Dining Room is used for various holiday special events such as elaborate luncheons and dinner parties.  It can hold any number of tables beautifully decorated with floral centerpieces, place cards and menu cards for the honored guests.

One of the things I like to do every year is watch the HGTV White House Christmas Special.  I love to see how the staff and volunteers decorate the various rooms.  There are always great ideas which inspire me to create something on a much smaller scale for my home.  This year I finally made the cranberry topiary for our dining room.  (Please see this week’s Craft post for photos and directions on how I made my own cranberry topiary – it’s so easy!)

Watch for the White House Christmas Special on HGTV –
check the HGTV website for your local television listing for the channel, date and time it will be on in your area. www.HGTV.com

Decor – Department 56 North Pole Village

North Pole Village 2012

The Department 56 North Pole Village is one of the highlights of our Christmas decorations.  It brings me great joy to create something whimsical for the family during the holiday season.  Even with the same main buildings displayed every year; such as Santa’s Workshop, Elves’ Bunkhouse, Reindeer Barn and Santa and Mrs. Clause’s Home and the North Pole Gate – the display can look different from one year to the next.

When I unpack the boxes from storage every year, I will try to arrange the various buildings and accessories in different ways.  Some years I will even display the Department 56 North Pole in a different room of the house.  Last year I added a mountain platform and a blue sky background.  Please, take a look at the photos below and see how the display has changed over the years.

So, if you have one of the Department 56 villages, think about displaying it in a new way or perhaps even in a different room.  Maybe purchase another building or accessory to add to the collection.  Suddenly, with a little creativity or spending just a little money, a Christmas village can look fresh and new.


History of the Department 56 Villages

Over 25 years ago Department 56 began as a part of the premiere retail florist, Bachman’s, in Minneapolis, MN.  Bachman’s used a numbering system to identify each of their departments and the number assigned to the wholesale gift department was 56.  Department 56 has been a leader in the collectible, home and holiday decorative products and is now a division of the Enesco Company.

Known for their Christmas Village and Snowbabies collections, the brand began with the Snow Village six ceramic houses in 1976.  Some of the names of the original houses were the Mountain Lodge, Gabled Cottage and Inn.  Currently the collection consists of over 225 pieces and accessories.

The Heritage Village Collection started with the porcelain Dickens Village in 1984.  The charming houses depict the time of Charles Dickens and are named for places or characters relating to the stories he wrote.  Some of the pieces are The Old Curiosity Shop, Scrooge and Marley Counting House and the Cottage of Bob Cratchit and Tiny Tim.

The New England Village was introduced in 1986 and includes churches, such as the Old North Church in Boston, lighthouses and other buildings and places in the New England area.

The Alpine Village collection started in 1986 and some of the pieces have very European names, such as Josef Engel Farmhouse, Bessor Bierkeller and St. Nicholas Kirche Church.

The Christmas in the City collection was introduced in 1987 and depicts American life from 1930 to1940.  Pieces include the Palace Theatre, Ritz Hotel, Dorothy’s Dress Shop and St. Mark’s Church.

The North Pole Series started in 1990 and the first pieces introduced were Santa’s Workshop, Elf Bunkhouse and Reindeer Barn.

The Little Town of Bethlehem collection was issued in 1987 and there were only twelve pieces.

For further information on Department 56 Villages or to see what houses and accessories are currently available or to get additional ideas see their website.  www.department56.com

Decor – Christmas Wreaths

At Christmas time, I decorate with several different wreaths throughout the house; some are traditional in design while others are more whimsical.  There is always a wreath on the front door to greet our holiday guests in a festive way along with the other front porch decorations.   Every year it is a different one and I have a couple of wreaths that I rotate from year to year.  One it is a large pine wreath decorated with pinecones and red berry sprays, another one is a wreath covered completely with velvet holly leaves and then another is a pinecone wreath with holly leaves and red berries.

Christmas wreaths are not just for the front door – try using them in other rooms of the house.  We have a fairly large size kitchen that is open to the family room and there are several areas that I decorate for Christmas.  One area had a long counter work space with two chairs (this is where my daughter does her homework while I am cooking dinner).  I have a Department 56 gingerbread train that is displayed in the space above the cabinets with two large pine boughs and red “sugared” berries.  To complete this area, I hang two holly leaves and berry wreaths from the doors of the cabinets.  The decorations are out of the way so they don’t take up any counter space and the wreaths are hung from long hooks so the cabinet doors can still be opened.


Other ideas for wreaths:

  • Use several baby themed ornaments on a wreath to hang from the door to the baby’s room.
  • Use several Barbie ornaments on a wreath to hang from the door to a little girl’s room.
  • Use several Matchbox cars attached to a wreath to hang from the door to a little boy’s room.
  • Use seashells and starfish for a beach themed wreath in the bathroom.
  • Use screwdrivers and wrenches (check before using!) for a tool themed wreath in the garage.

Last month I posted a Craft project for a special Memory Wreath decorated with small photo frame ornaments.  For Thanksgiving I used family photos but for the Christmas season you can use photos from your children’s visits to Santa or maybe use your children’s school photos taken over the years.  It is a wonderful way to remember special times and to see how much your children have grown and changed!

For more wreath projects, please look for this week’s Craft post.  I will show you how to create three unique wreaths using a collection of themed ornaments – two different Department 56 wreaths using small ornament houses from the Dickens and North Pole collections and also a Disney character wreath.

So, please let me know what you think of these wreath ideas or send me a photo of ones that you have made – I would love to see them!