A few years ago my mother gave me a bag of old pennies that my father had saved. Now that both my parents have passed away I wanted to do something special with them. So, I searched the internet and came up with a few ideas and in this post I will show the four different craft projects that I made using the pennies.
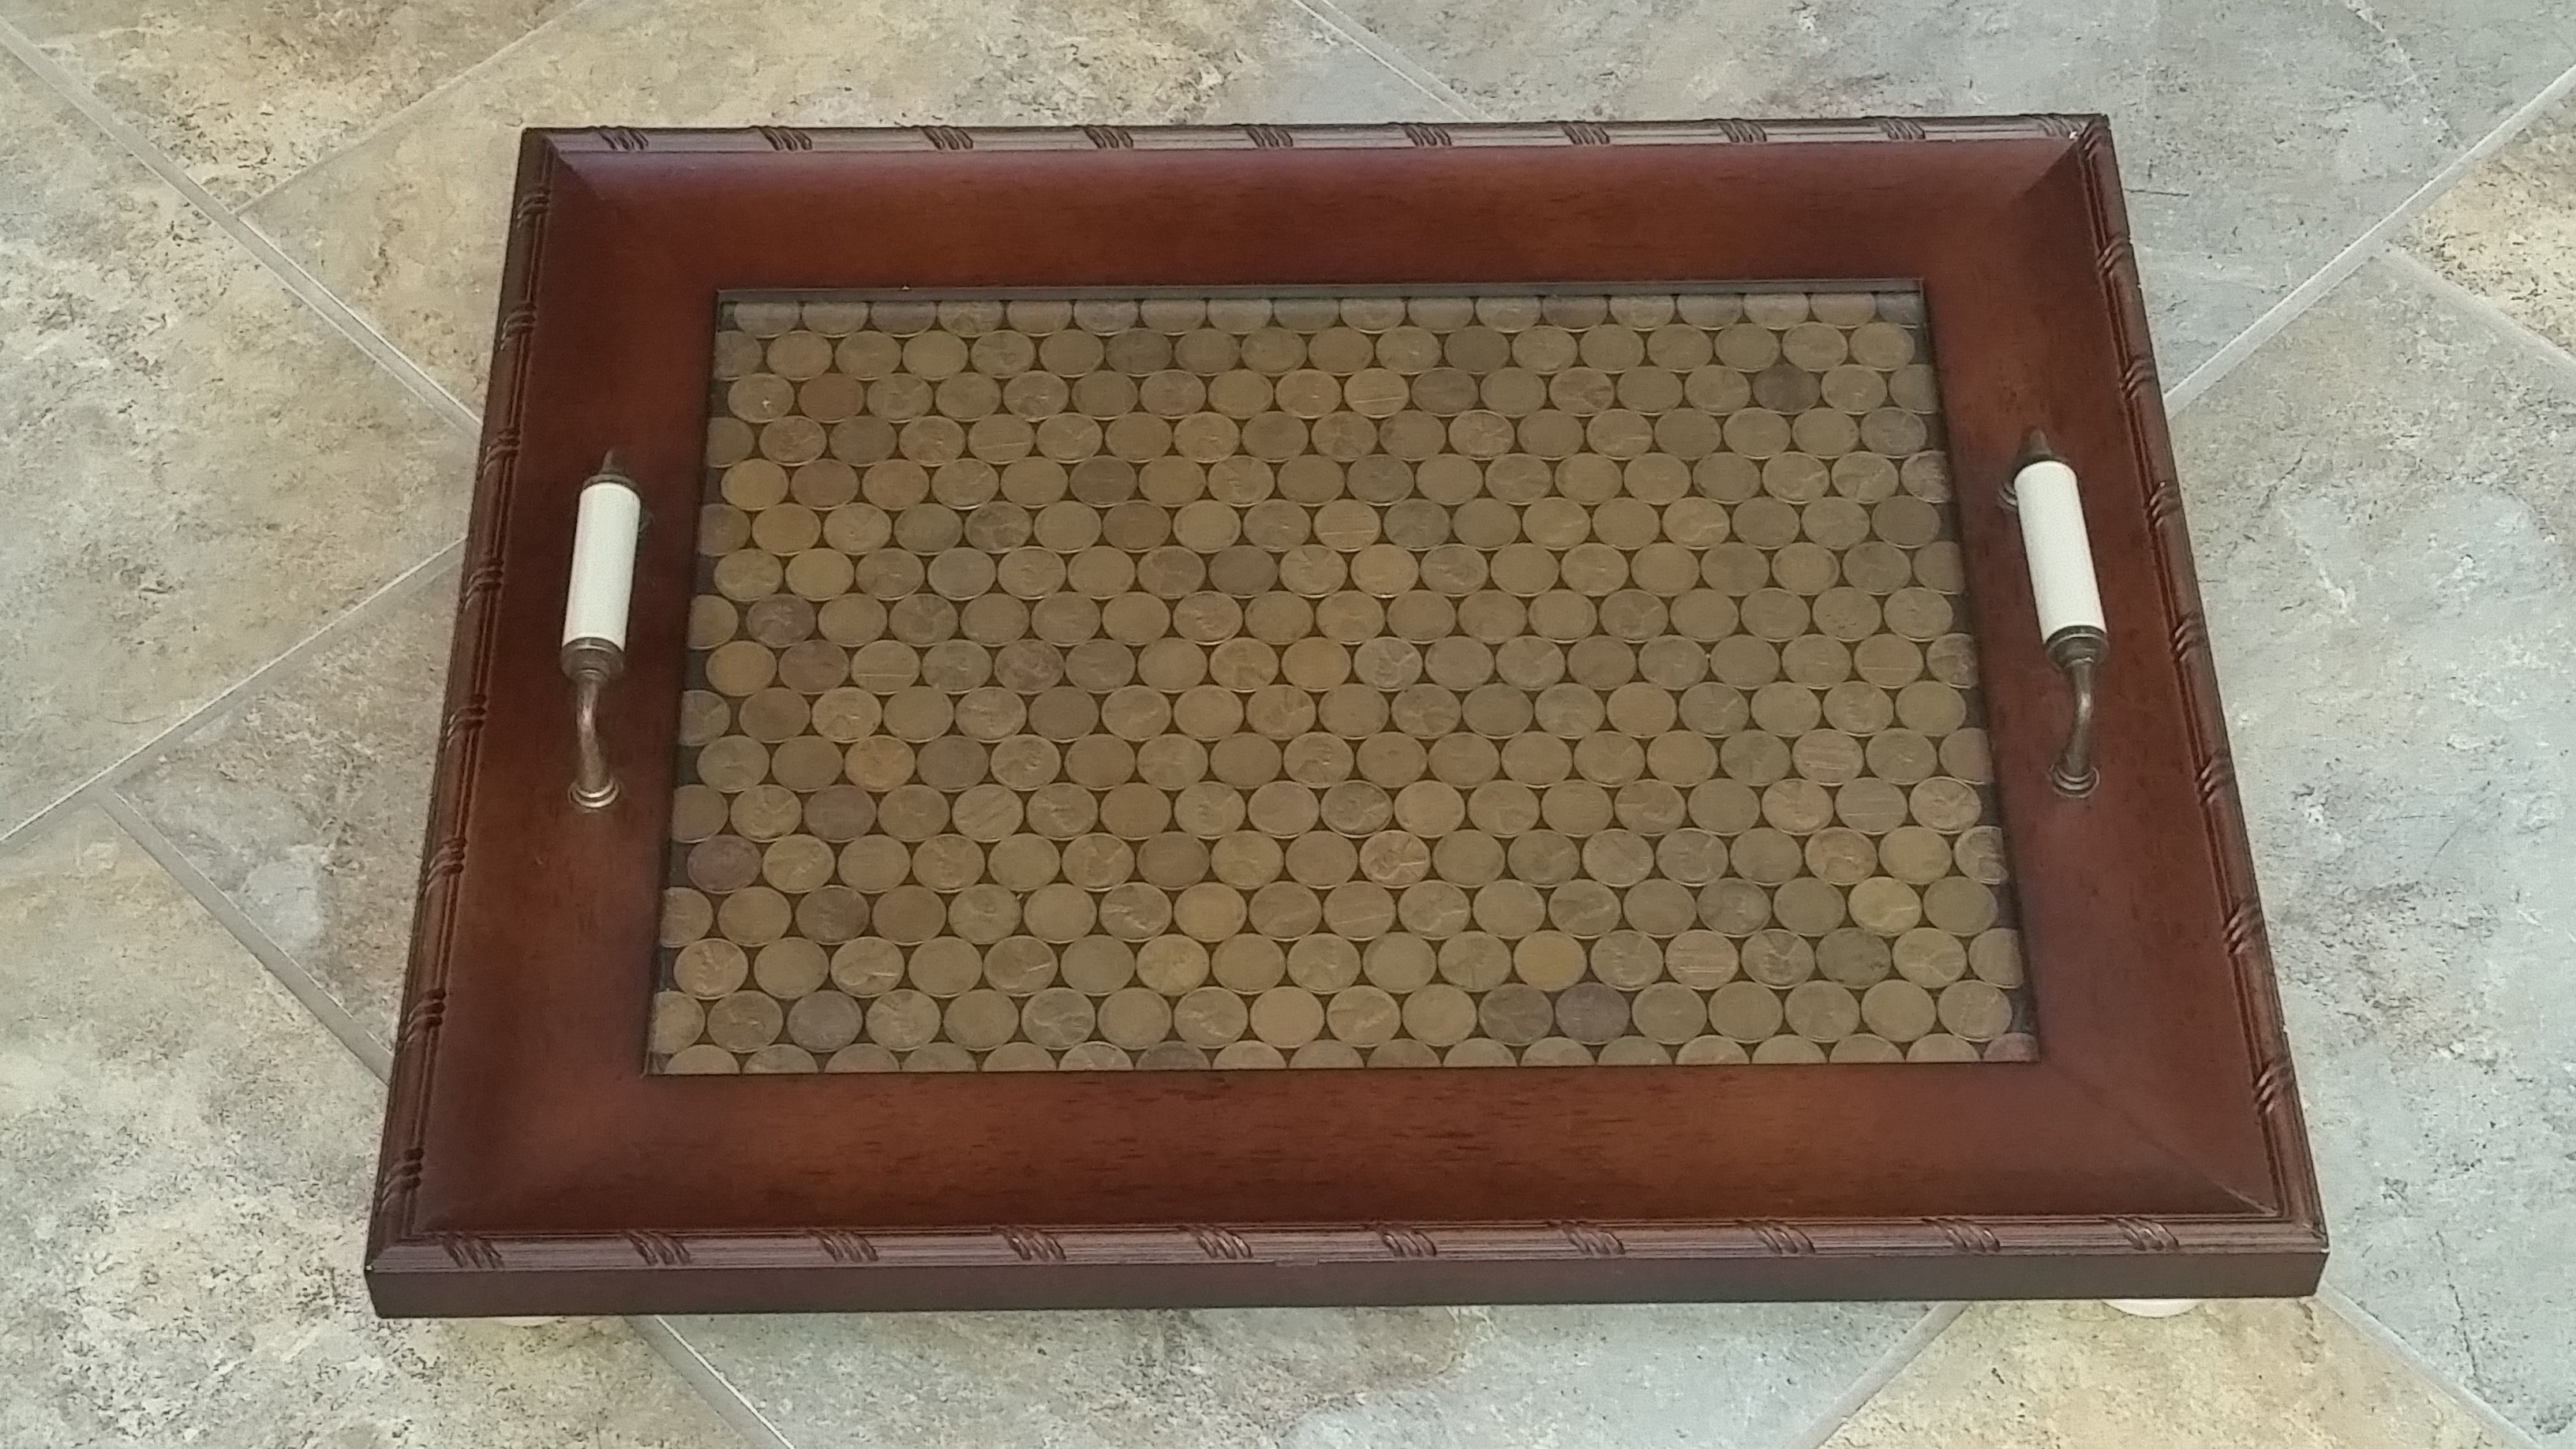
Serving tray embellished with pennies
The first project uses a tray that I had previously made which was detailed in another post on this blog a few years ago. Making the tray was a very simple craft project using a picture frame, decorative drawer pulls and knobs. Now, I decided to embellish the tray with the pennies from my dad.
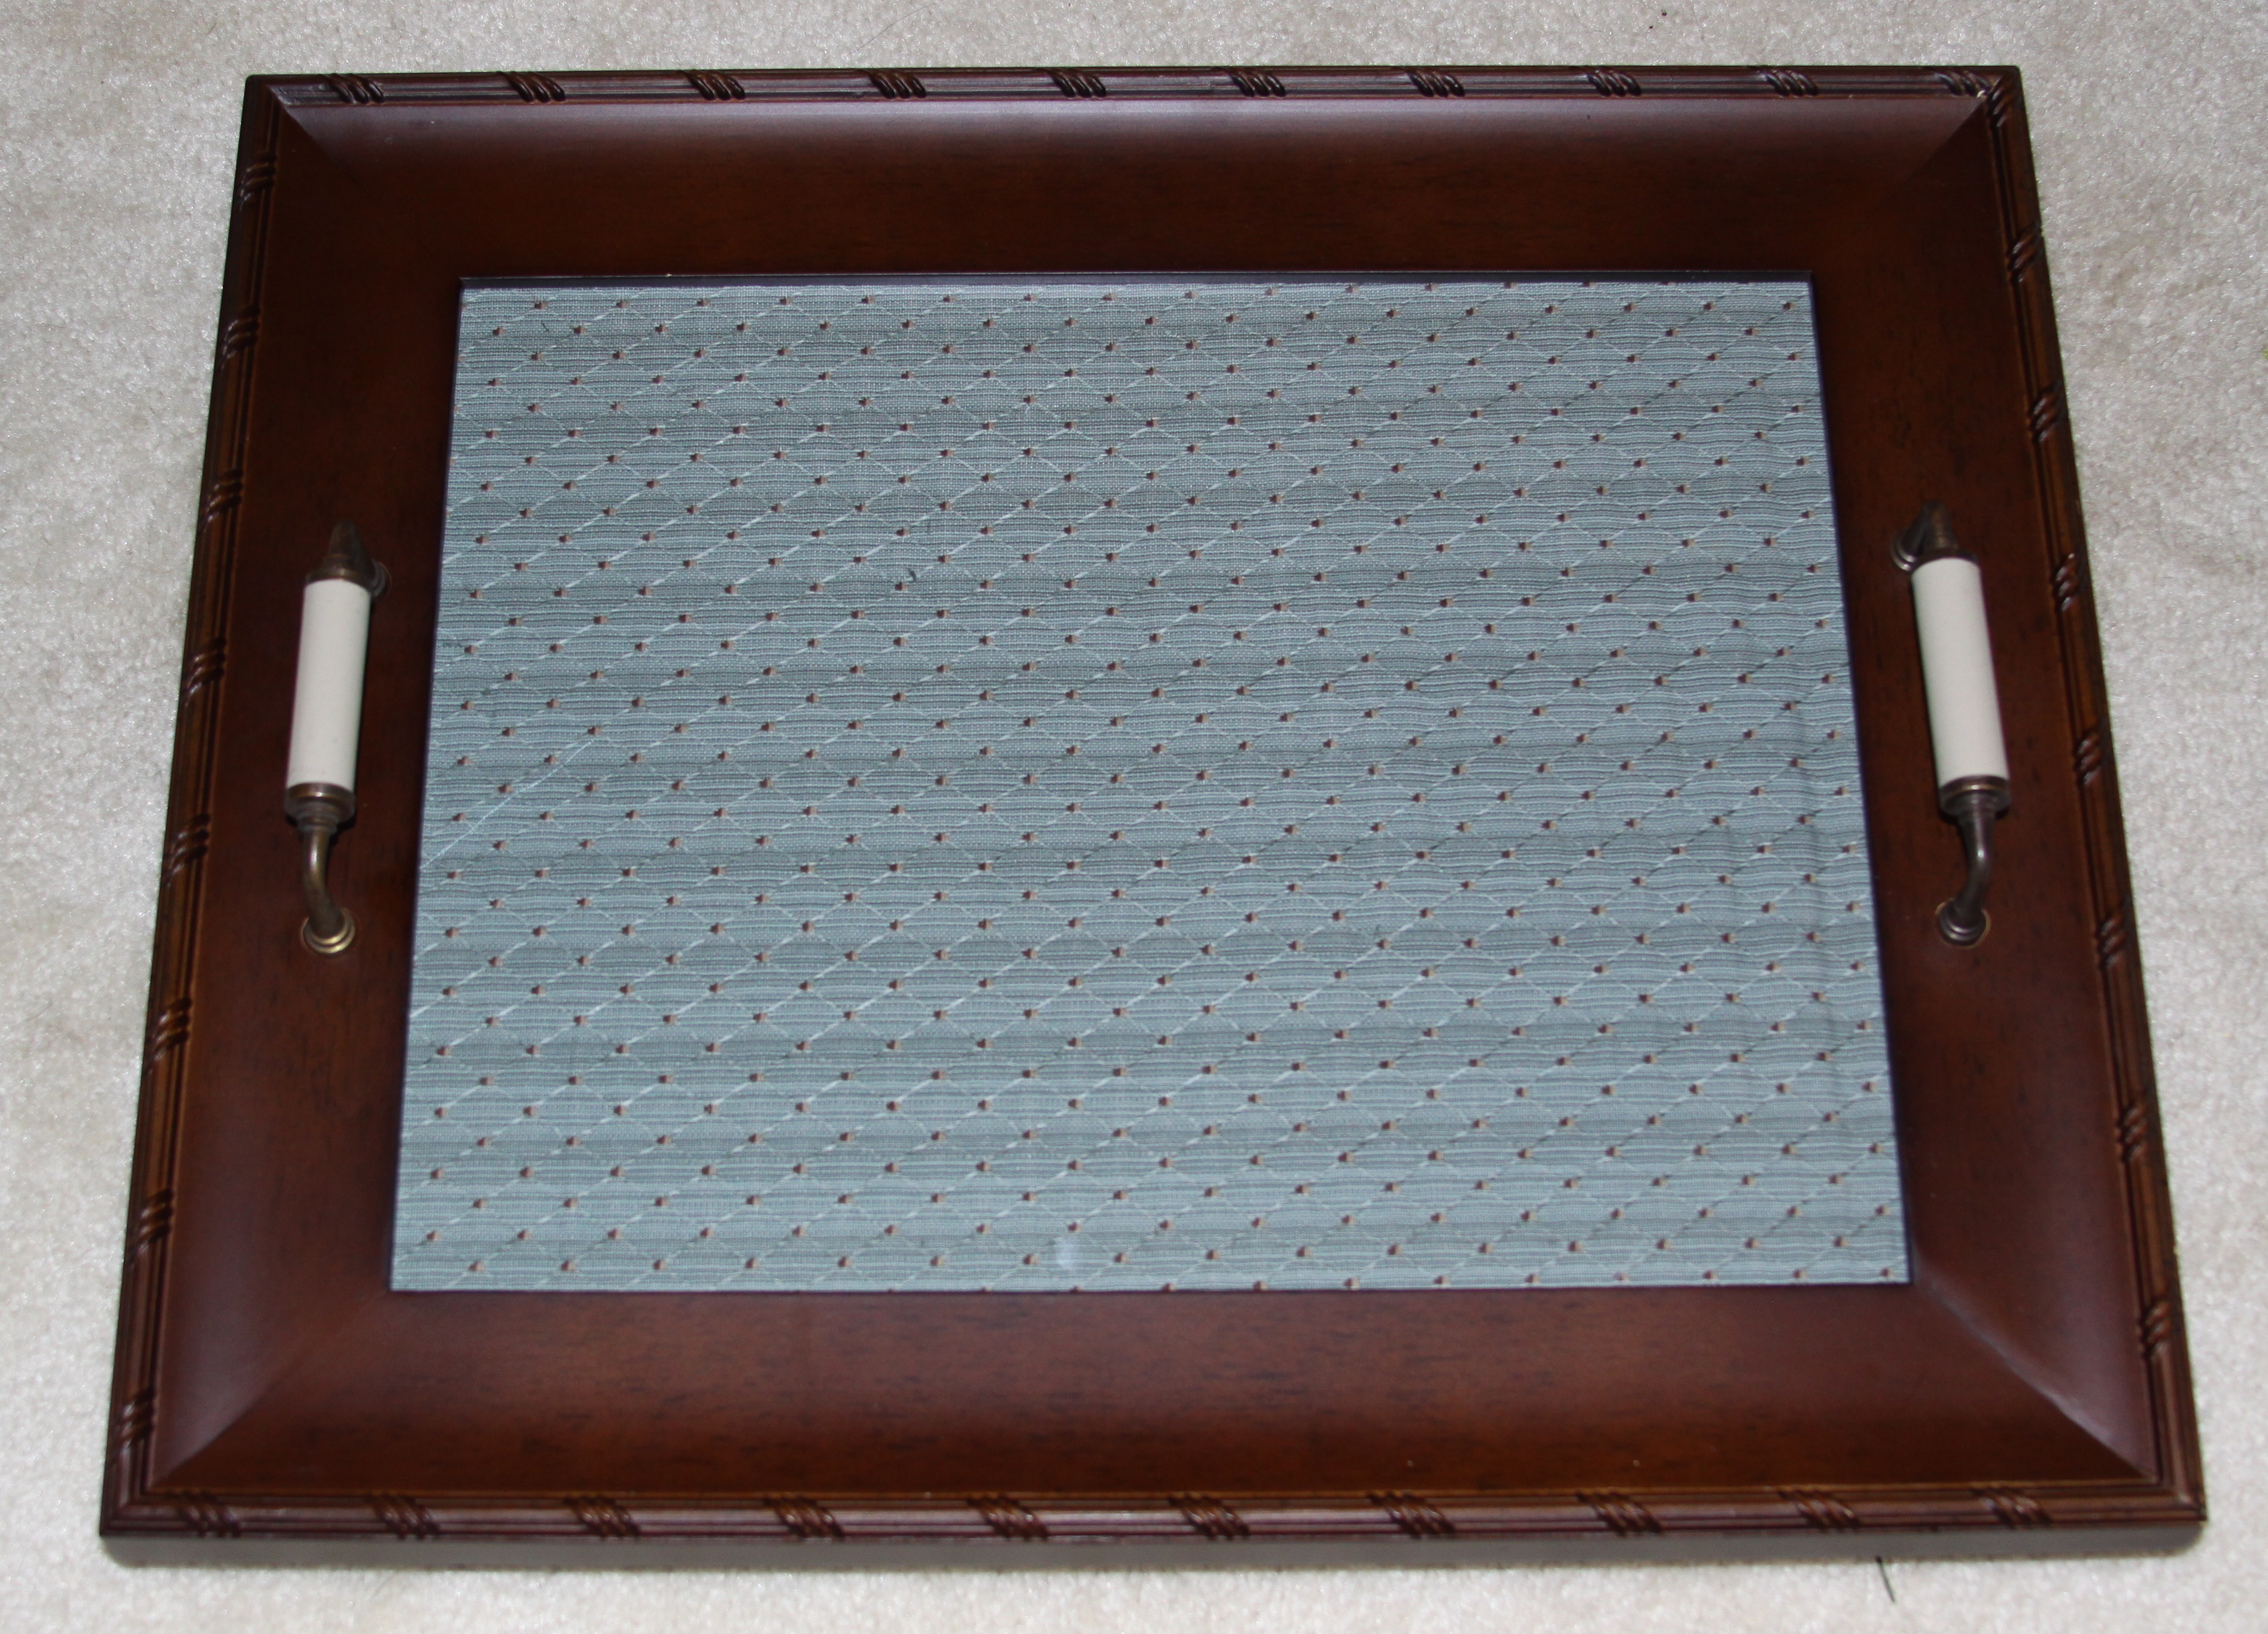
Serving tray embellished with pennies supply list –
- Picture frame tray (Please click on the link for a supply list and directions on how to make the picture frame tray)
- Pennies, the amount will be determined by the size of the tray used
- Hot glue gun and glue sticks
Serving tray embellished with pennies instructions –
- Remove the cardboard backing and material from the picture frame tray, leave the glass in place.
- Glue the material to another piece of cardboard, this will provide additional support to carry the weight of the pennies.
- Glue the pennies directly on to the material. Line the pennies with all of them facing the same direction for a more uniformed look.
- After the pennies are arranged, carefully flip the material/cardboard piece with the attached pennies and place into the picture frame tray.
- Replace the cardboard backing and secure.
The next three craft projects involve items that, when they are completed, can be used as decorations for a home.
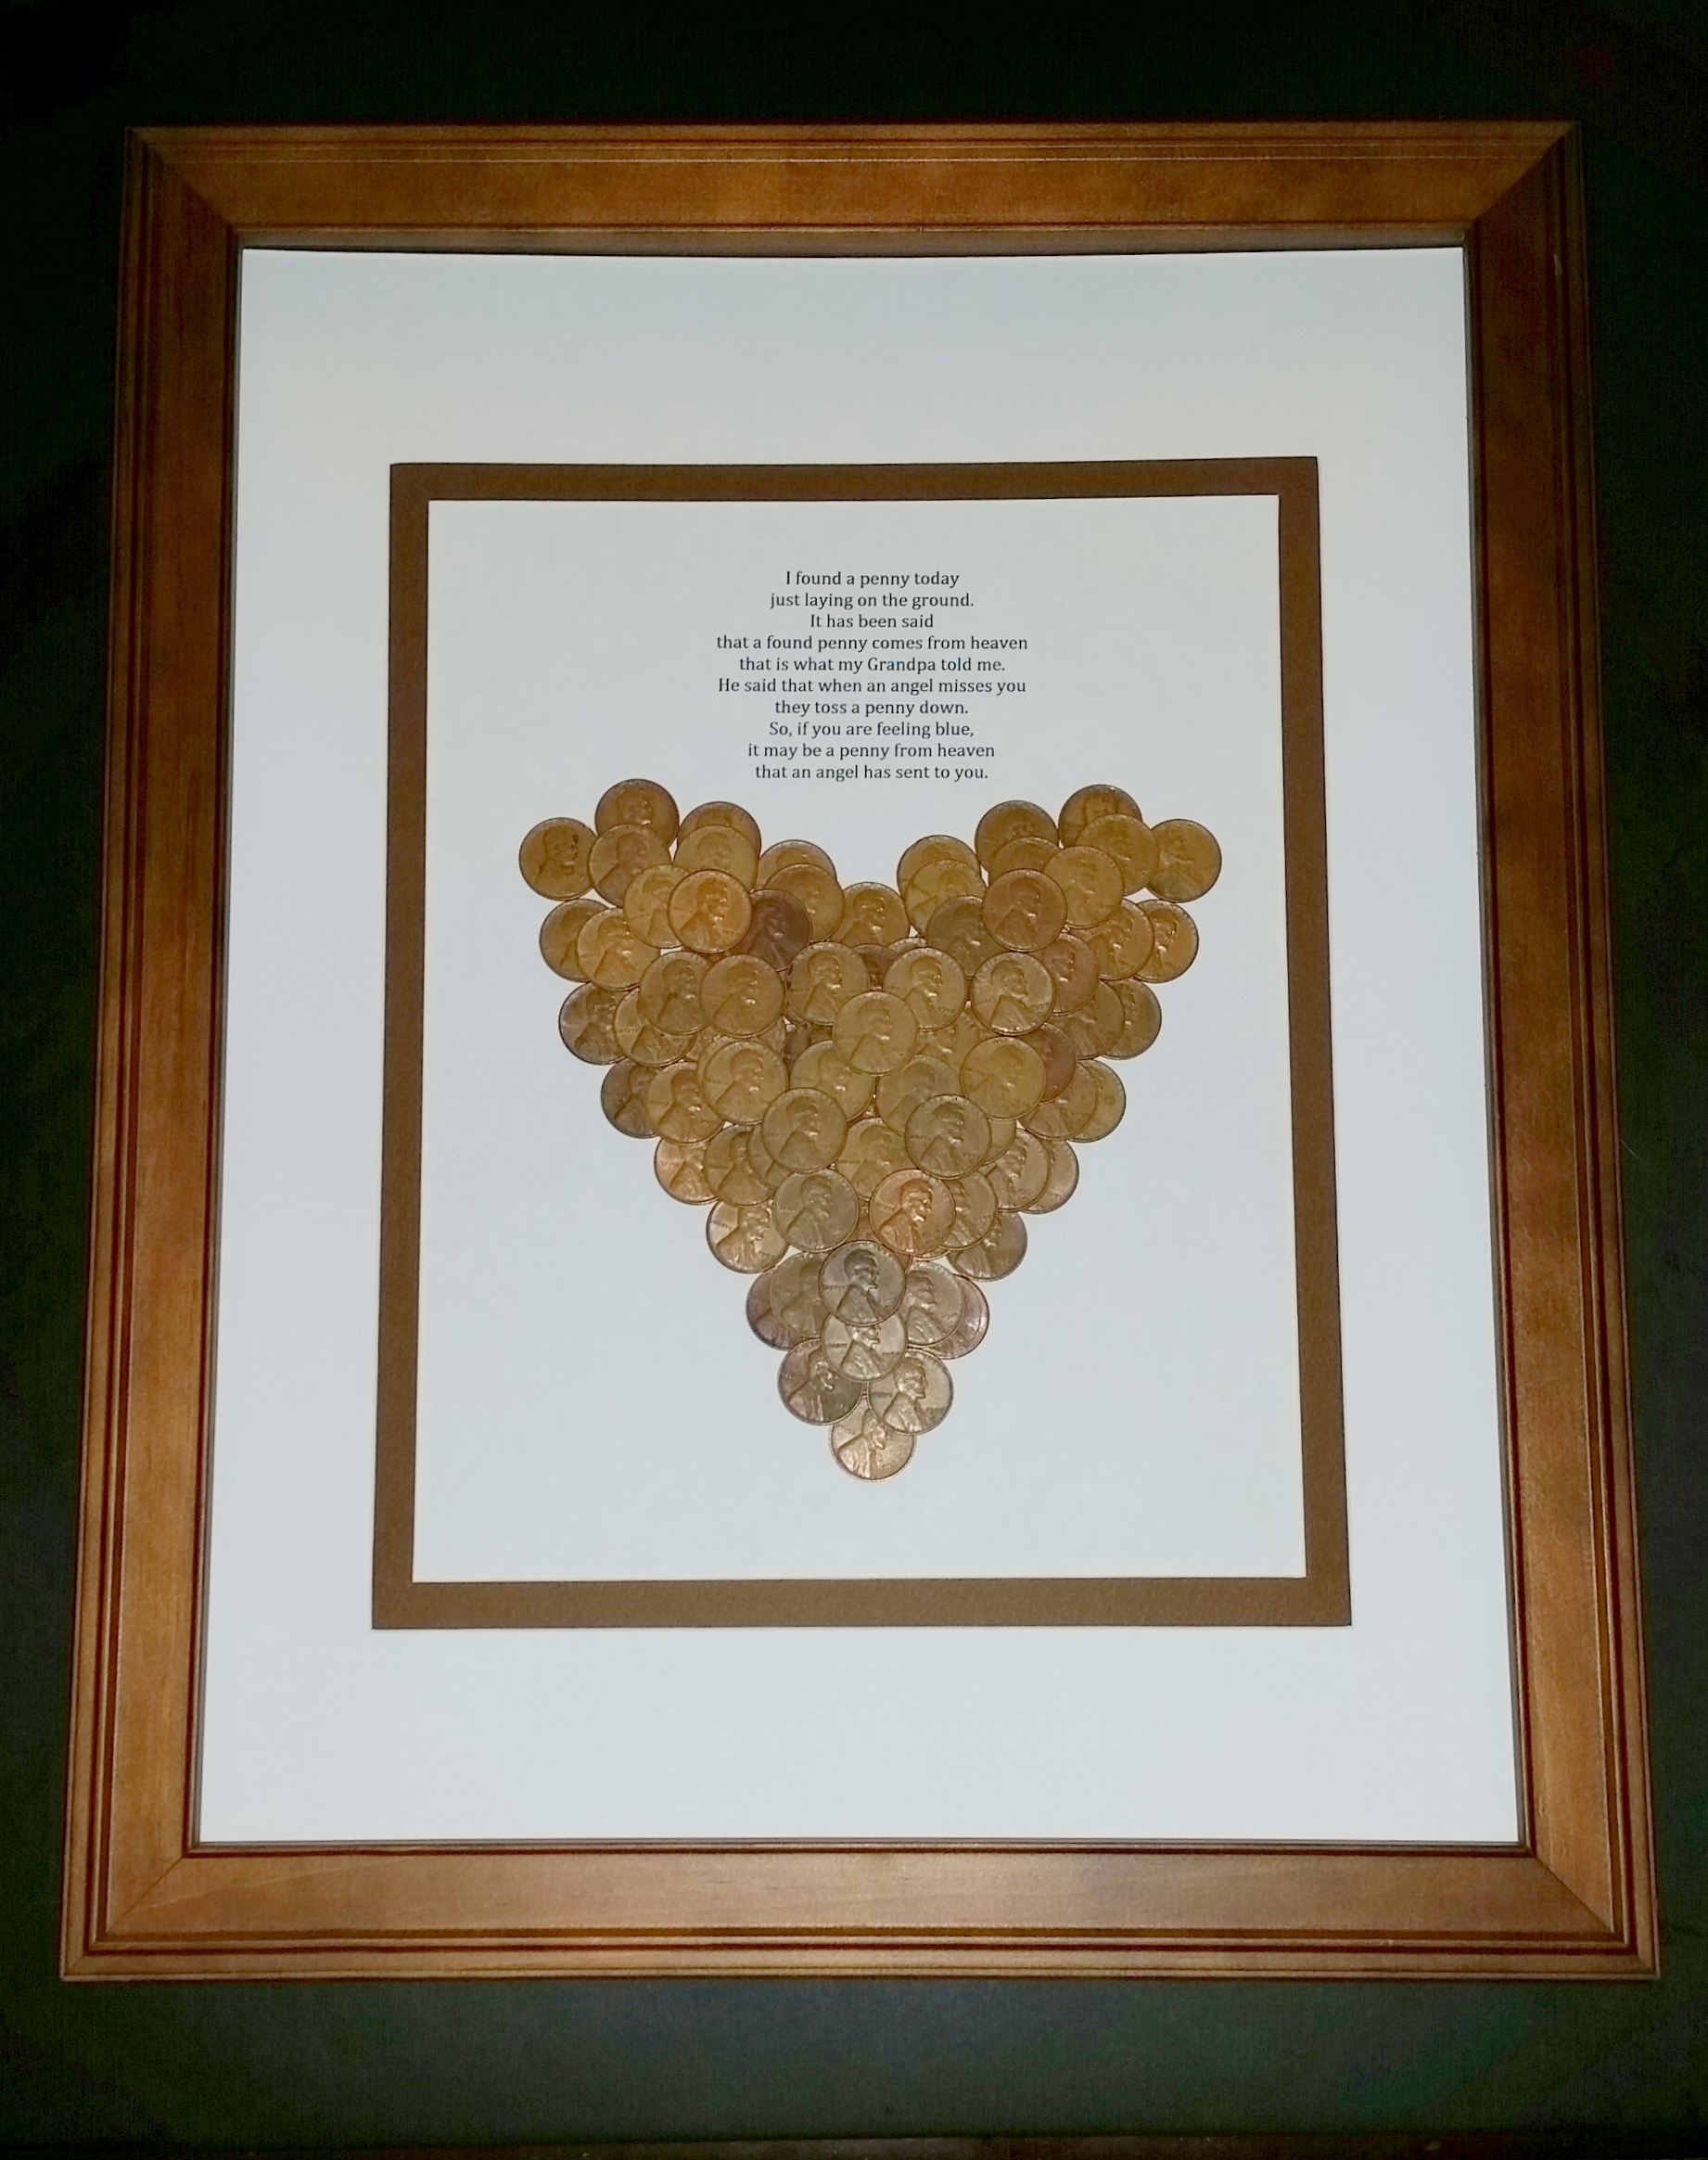
Framed Penny heart with special poem
For this next craft project I found a special poem on the internet. I printed it out using my home computer, notice the poem is positioned in the upper portion of the paper to allow space. In the lower portion the paper I arranged the pennies into a heart shape. This piece would look wonderful hung on the wall of a home or set in a bookcase or on a table.
Framed penny heart/special poem instructions –
- Print a special poem on the computer (I suggest a short poem printed in the upper portion of the paper) For additional support to hold the weight of the pennies glue the paper with the poem onto a piece of heavy cardboard.
- In the lower portion of the paper glue the pennies to form the outline of a heart shape. Then, continue to fill the space within the heart outline and overlay several layers of pennies. I placed the pennies with all of them facing the same direction for a more uniformed look.
- Remove the cardboard backing from the frame; insert the special poem/penny heart and center within the photo mat. Craft Tip: In order to avoid flipping over the paper weighed down with the heavy pennies instead lay the paper flat on a hard surface and then place the frame over it. Then flip the entire frame over, by doing this it will allow the heavy paper some much needed support.
- Replace the cardboard backing to complete the craft project.
Framed penny initial
This craft project was created with the remaining pennies that my dad had saved. In my local craft I found a fabric covered board which I used for this project, this board would prove to be an excellent item to support the heavy pennies.
Framed penny initial supply list –
- Frame
- Photo mat
- Fabric covered board (this ready-made board was purchased at a local craft store but if unavailable one can easily be made)
- Pennies, the amount will be determined by the size of the frame used
- Hot glue gun, glue sticks
Framed penny initial instructions –
- On the fabric covered board glue the pennies to form an initial. Then, continue to overlay several layers of pennies. I placed the pennies with all of them facing the same direction for a more uniformed look.
- Remove the cardboard backing from the frame; insert the fabric board/penny initial and center within the photo mat.
- Replace the cardboard backing to complete the craft project.

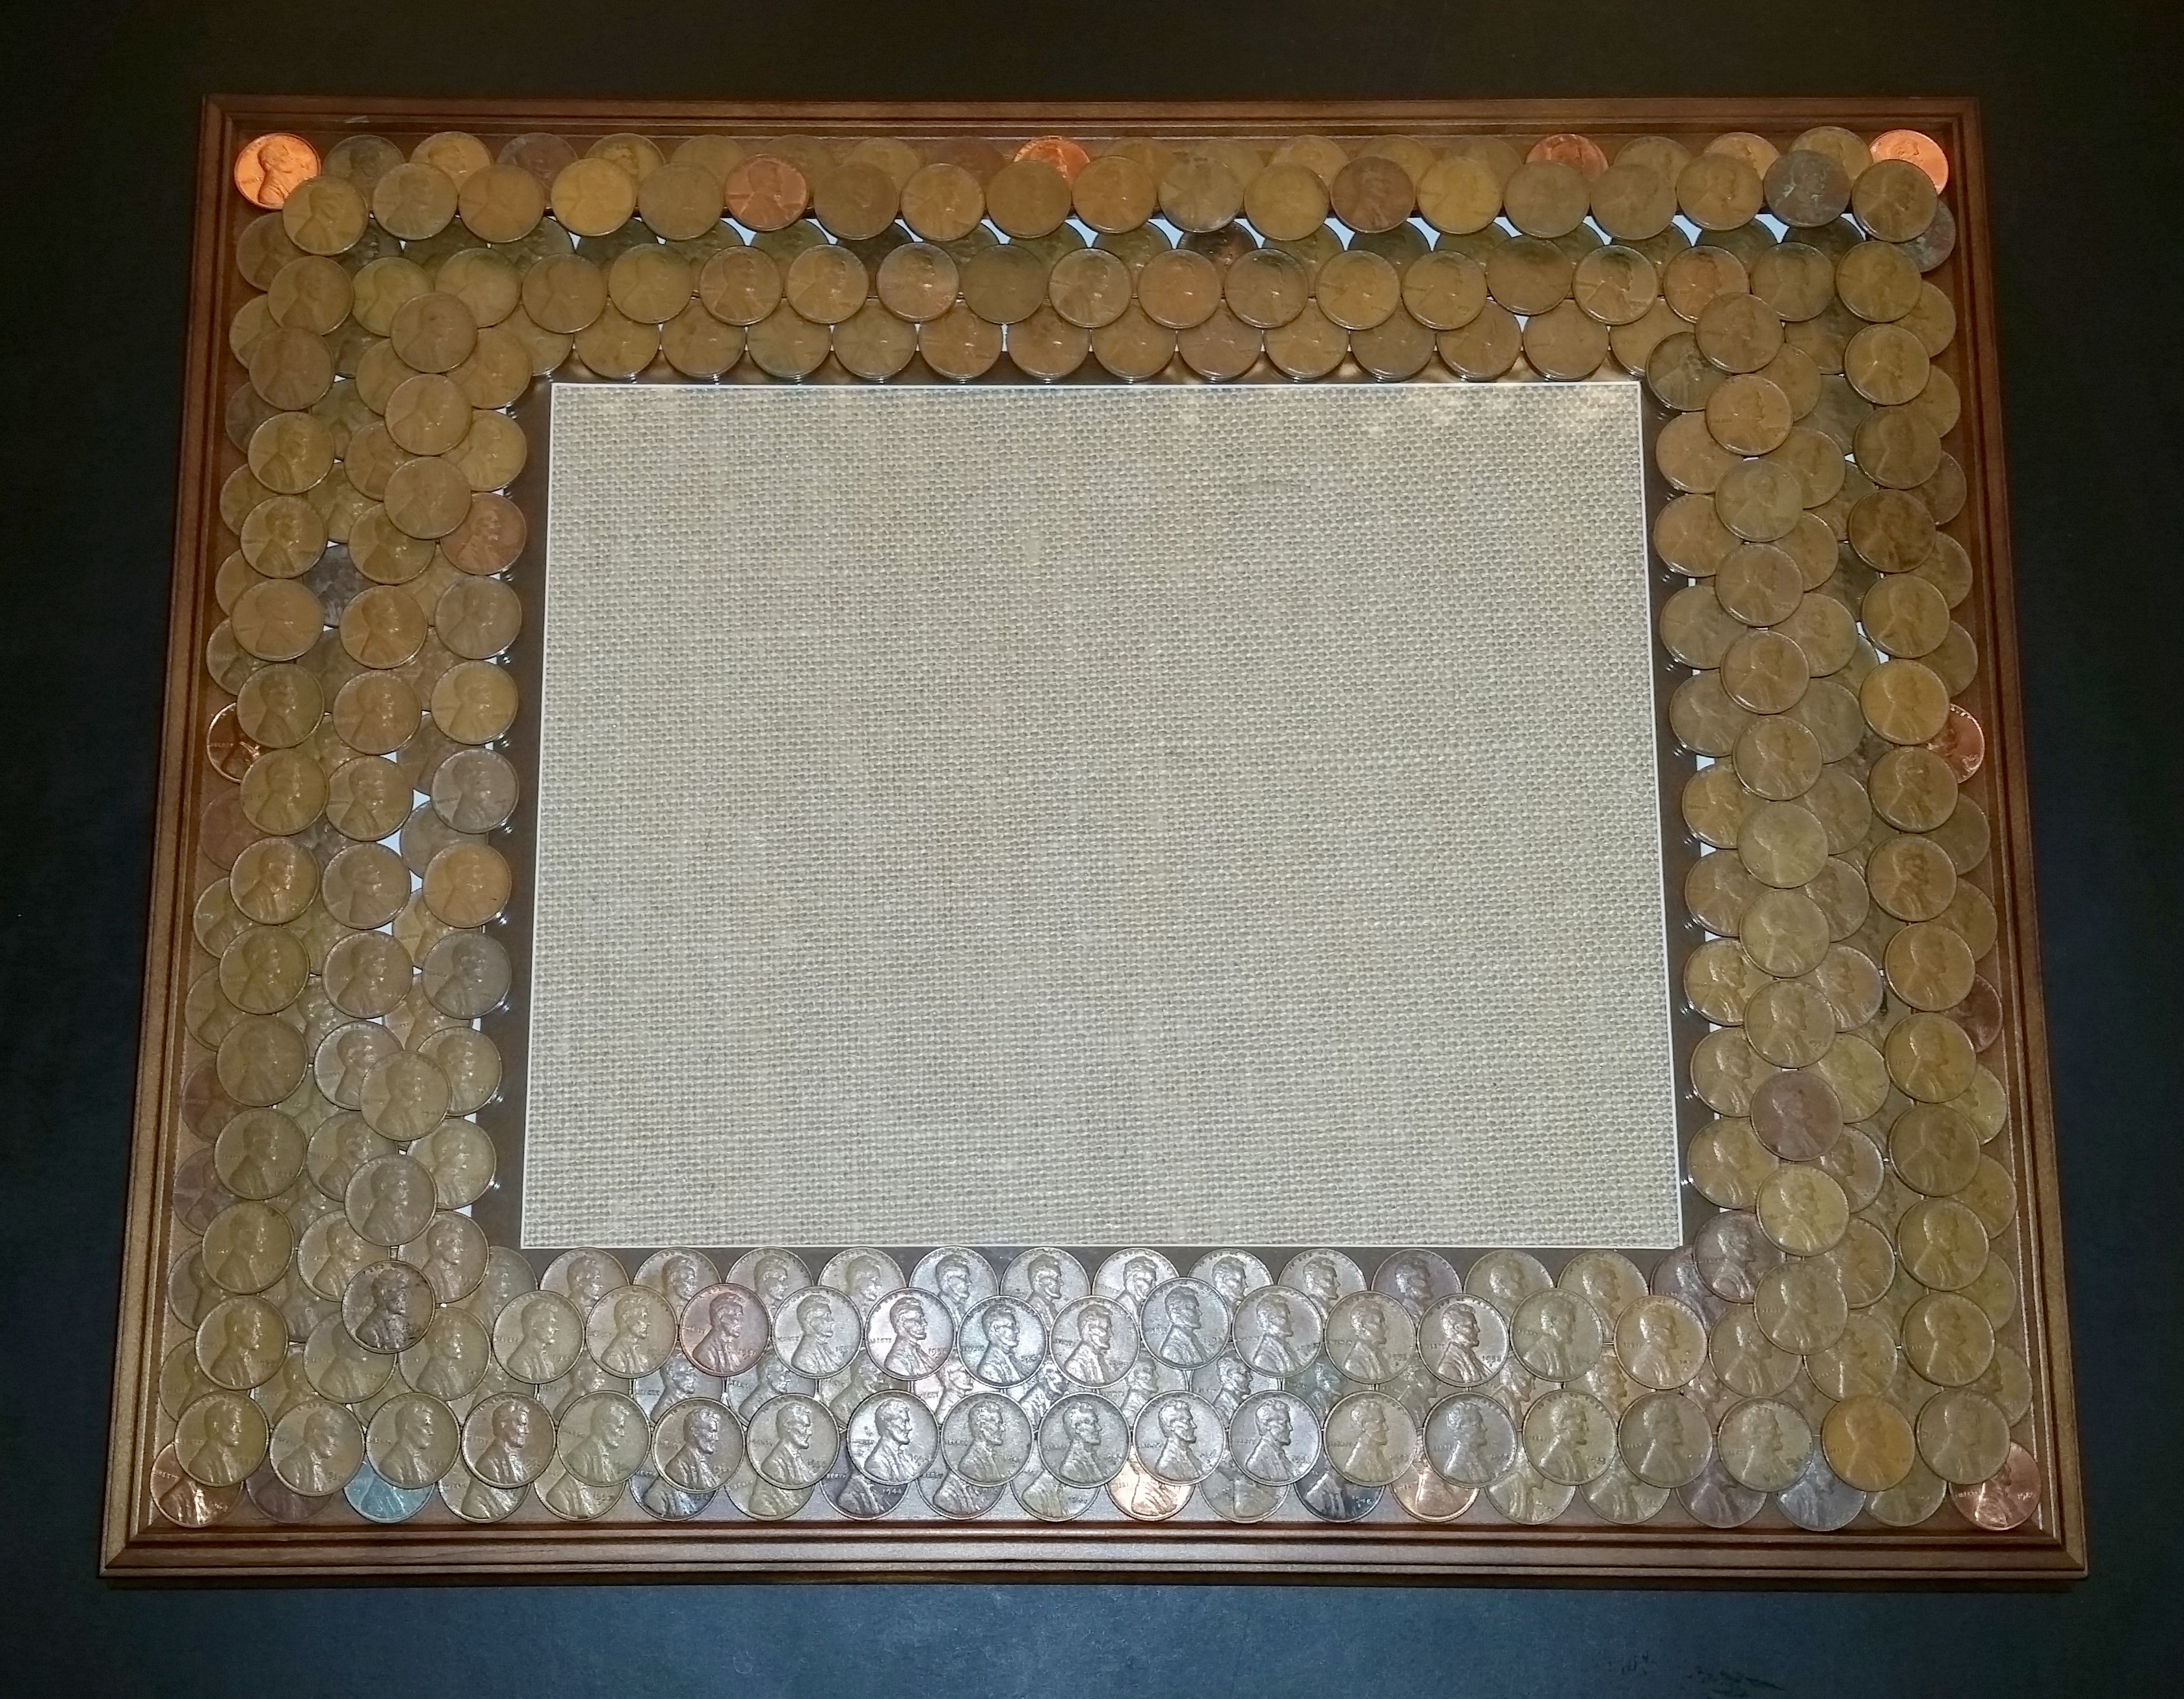
Picture frame embellished with pennies
For the final craft project I wanted to incorporate a photo into the design to create a unique decorative item to remember my dad. I decided to use a simple picture frame which I embellished with the pennies that my dad had saved.
Picture frame embellished with pennies supply list –
- A simple picture frame (I used one with a frame that was an inch wide which gave adequate space to arrange the pennies)
- Photo mat
- Special photo
- Pennies, the amount will be determined by the size of the frame used
- Hot glue gun, glue sticks
Picture frame embellished with pennies instructions –
- Remove the cardboard backing, insert the selected photo and position into the photo mat, then reassemble the frame.
- Start by gluing the pennies around the edge of the frame (I placed two layers on the frame overlapping the layers) I placed the pennies with all of them facing the same direction for a more uniformed look.
- Next, glue the pennies directly to the glass starting at the edge of the frame and working toward the edge of the photo mat covering the entire area while overlapping the different layers.