Craft – Framed Floral Decoration for Spring

20160801_093934

A few years ago I made a Framed Floral Decoration for Autumn which I displayed in our dining room for Thanksgiving.  (Please click on the link to view photos of this craft project)  Now, for spring I wanted to make another seasonal framed floral decoration and I decided to recycle the old display.  I re-used the golden frames that I had originally found in the clearance section at a local craft store that I had previously used for the autumn craft project and added some different flowers, greenery and a cloth-covered backing.

Listed below are the complete supply list and full instructions for the Framed Floral Decoration For Spring.

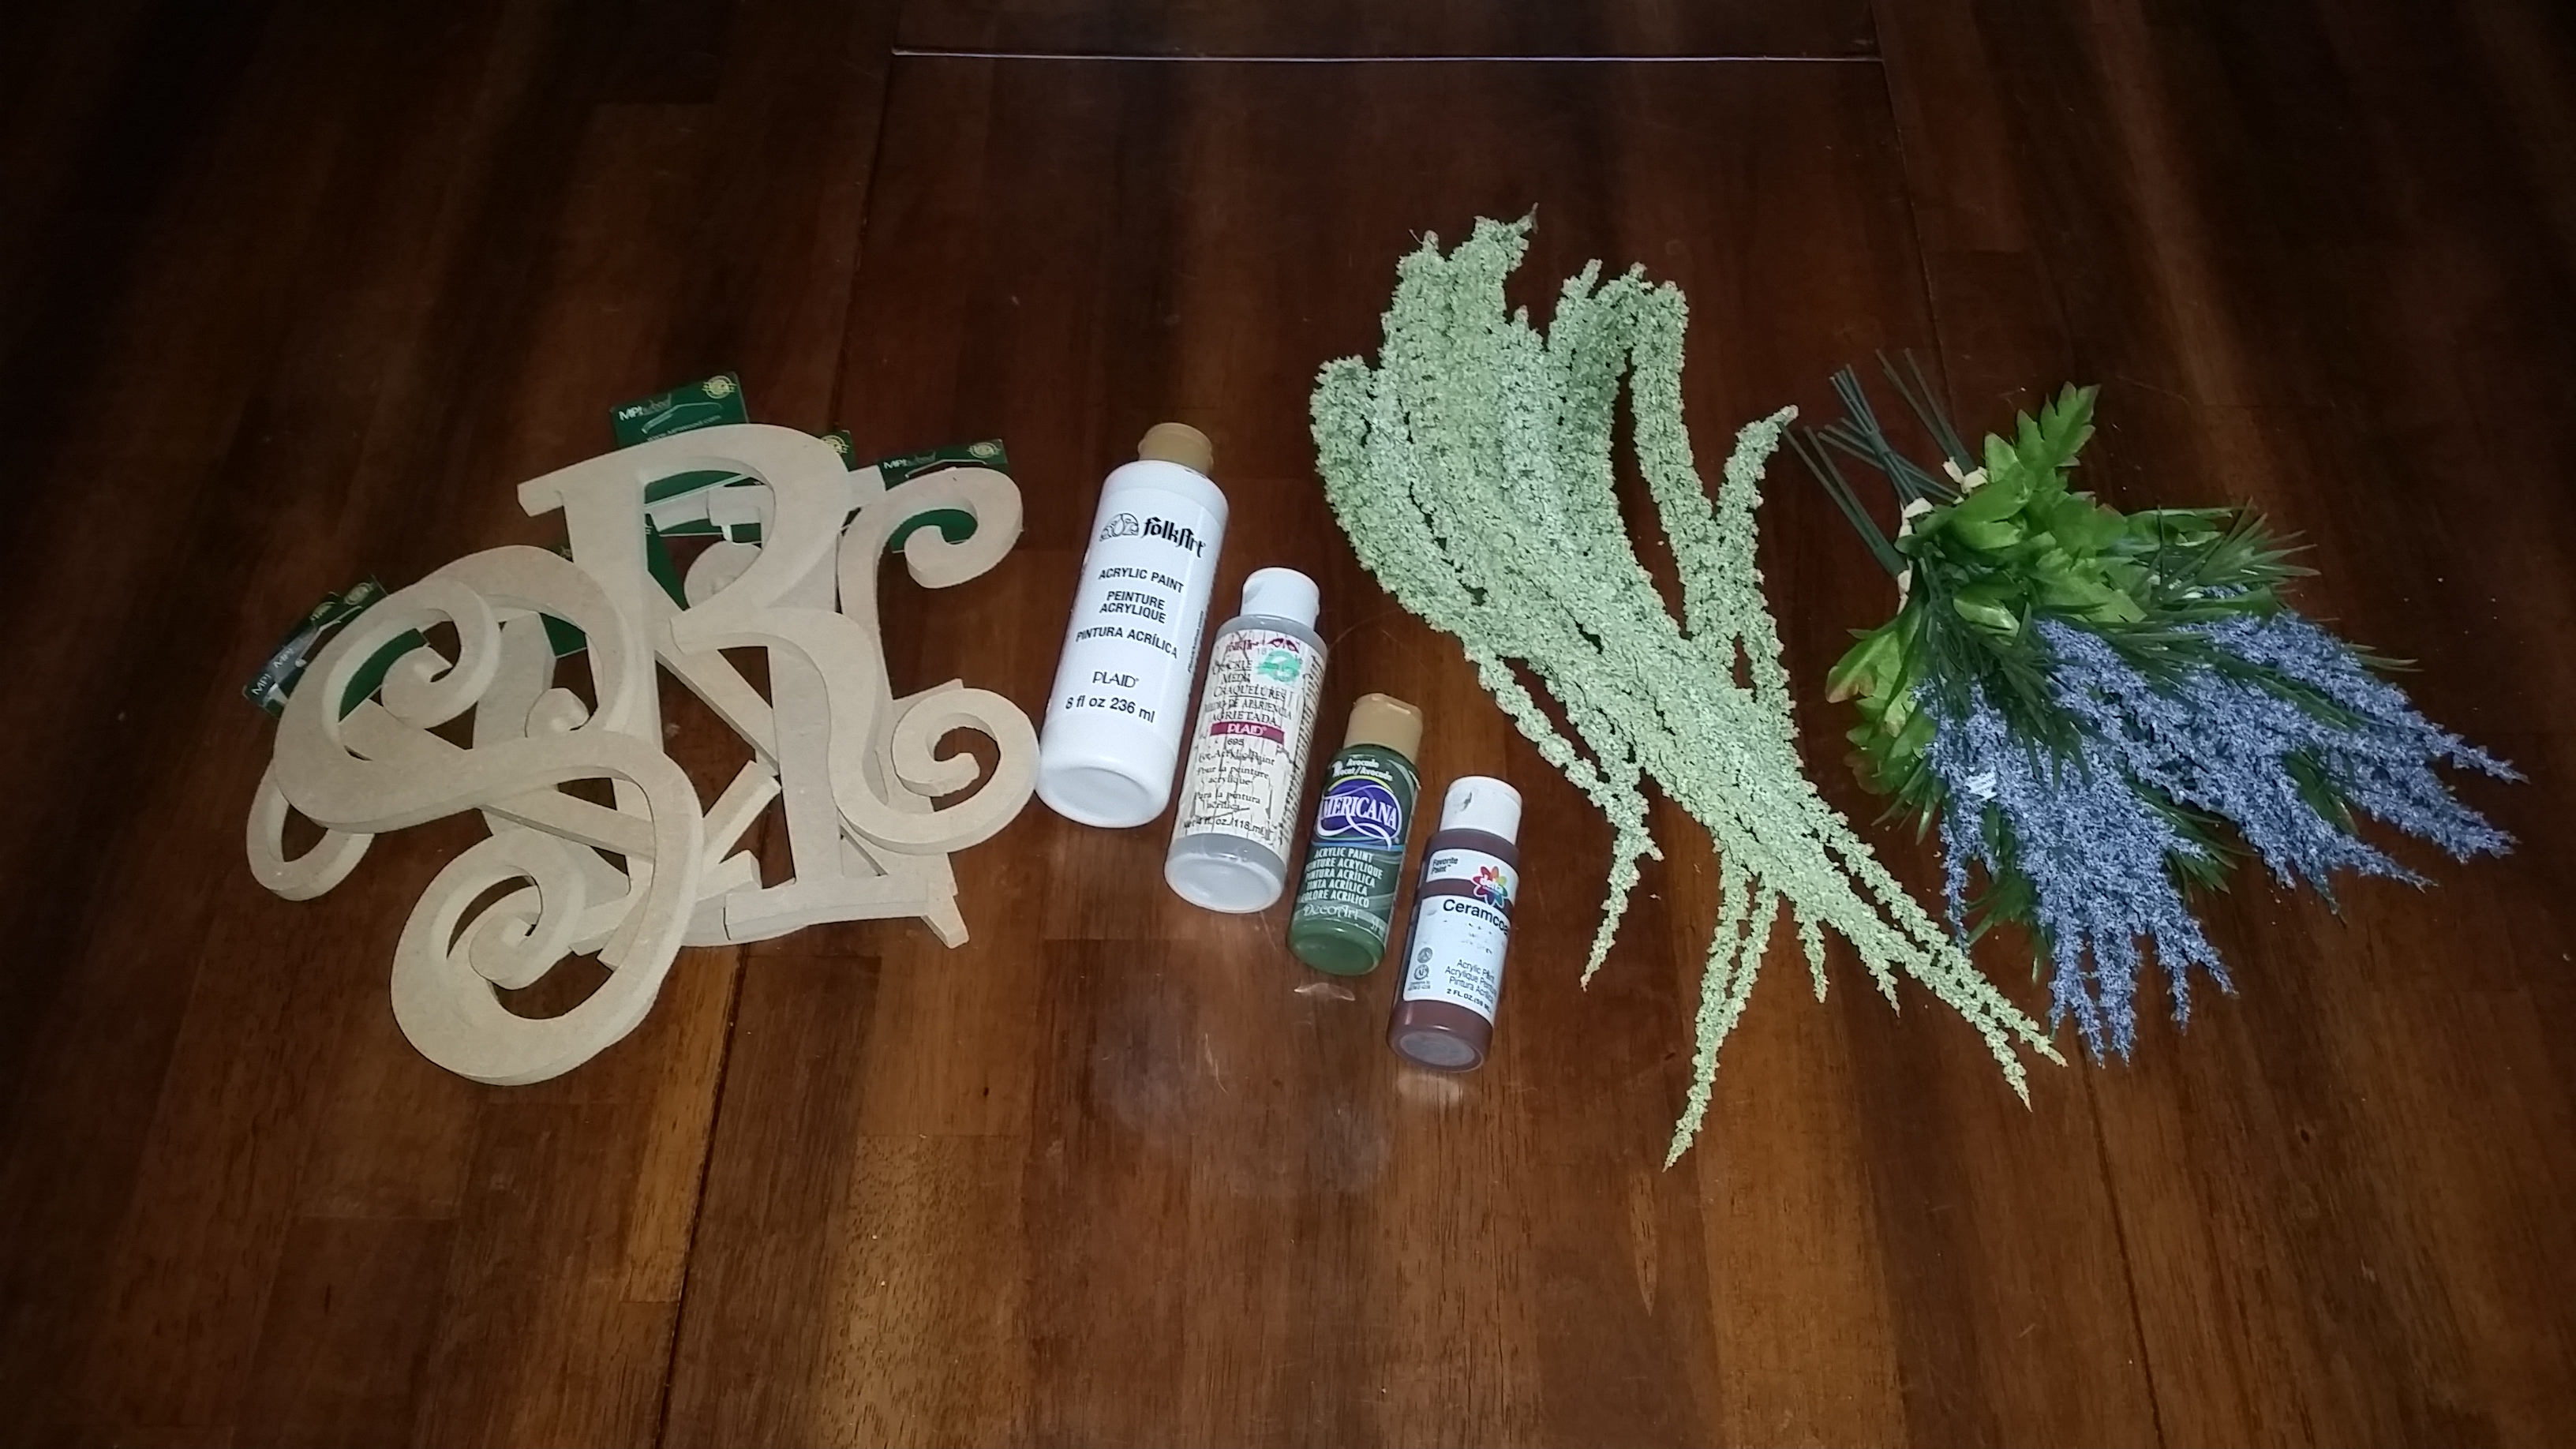
Supplies for one framed floral decoration

  • 1 frame, any size (the frame’s glass and backing are not used for this craft project)
  • 1 cloth covered backing
  • Flowers, number of flowers needed is determined by the size of the frame
  • Hot glue gun and hot glue sticks
  • Optional – Painter’s tape

20160801_093516

Instructions for one framed floral decoration

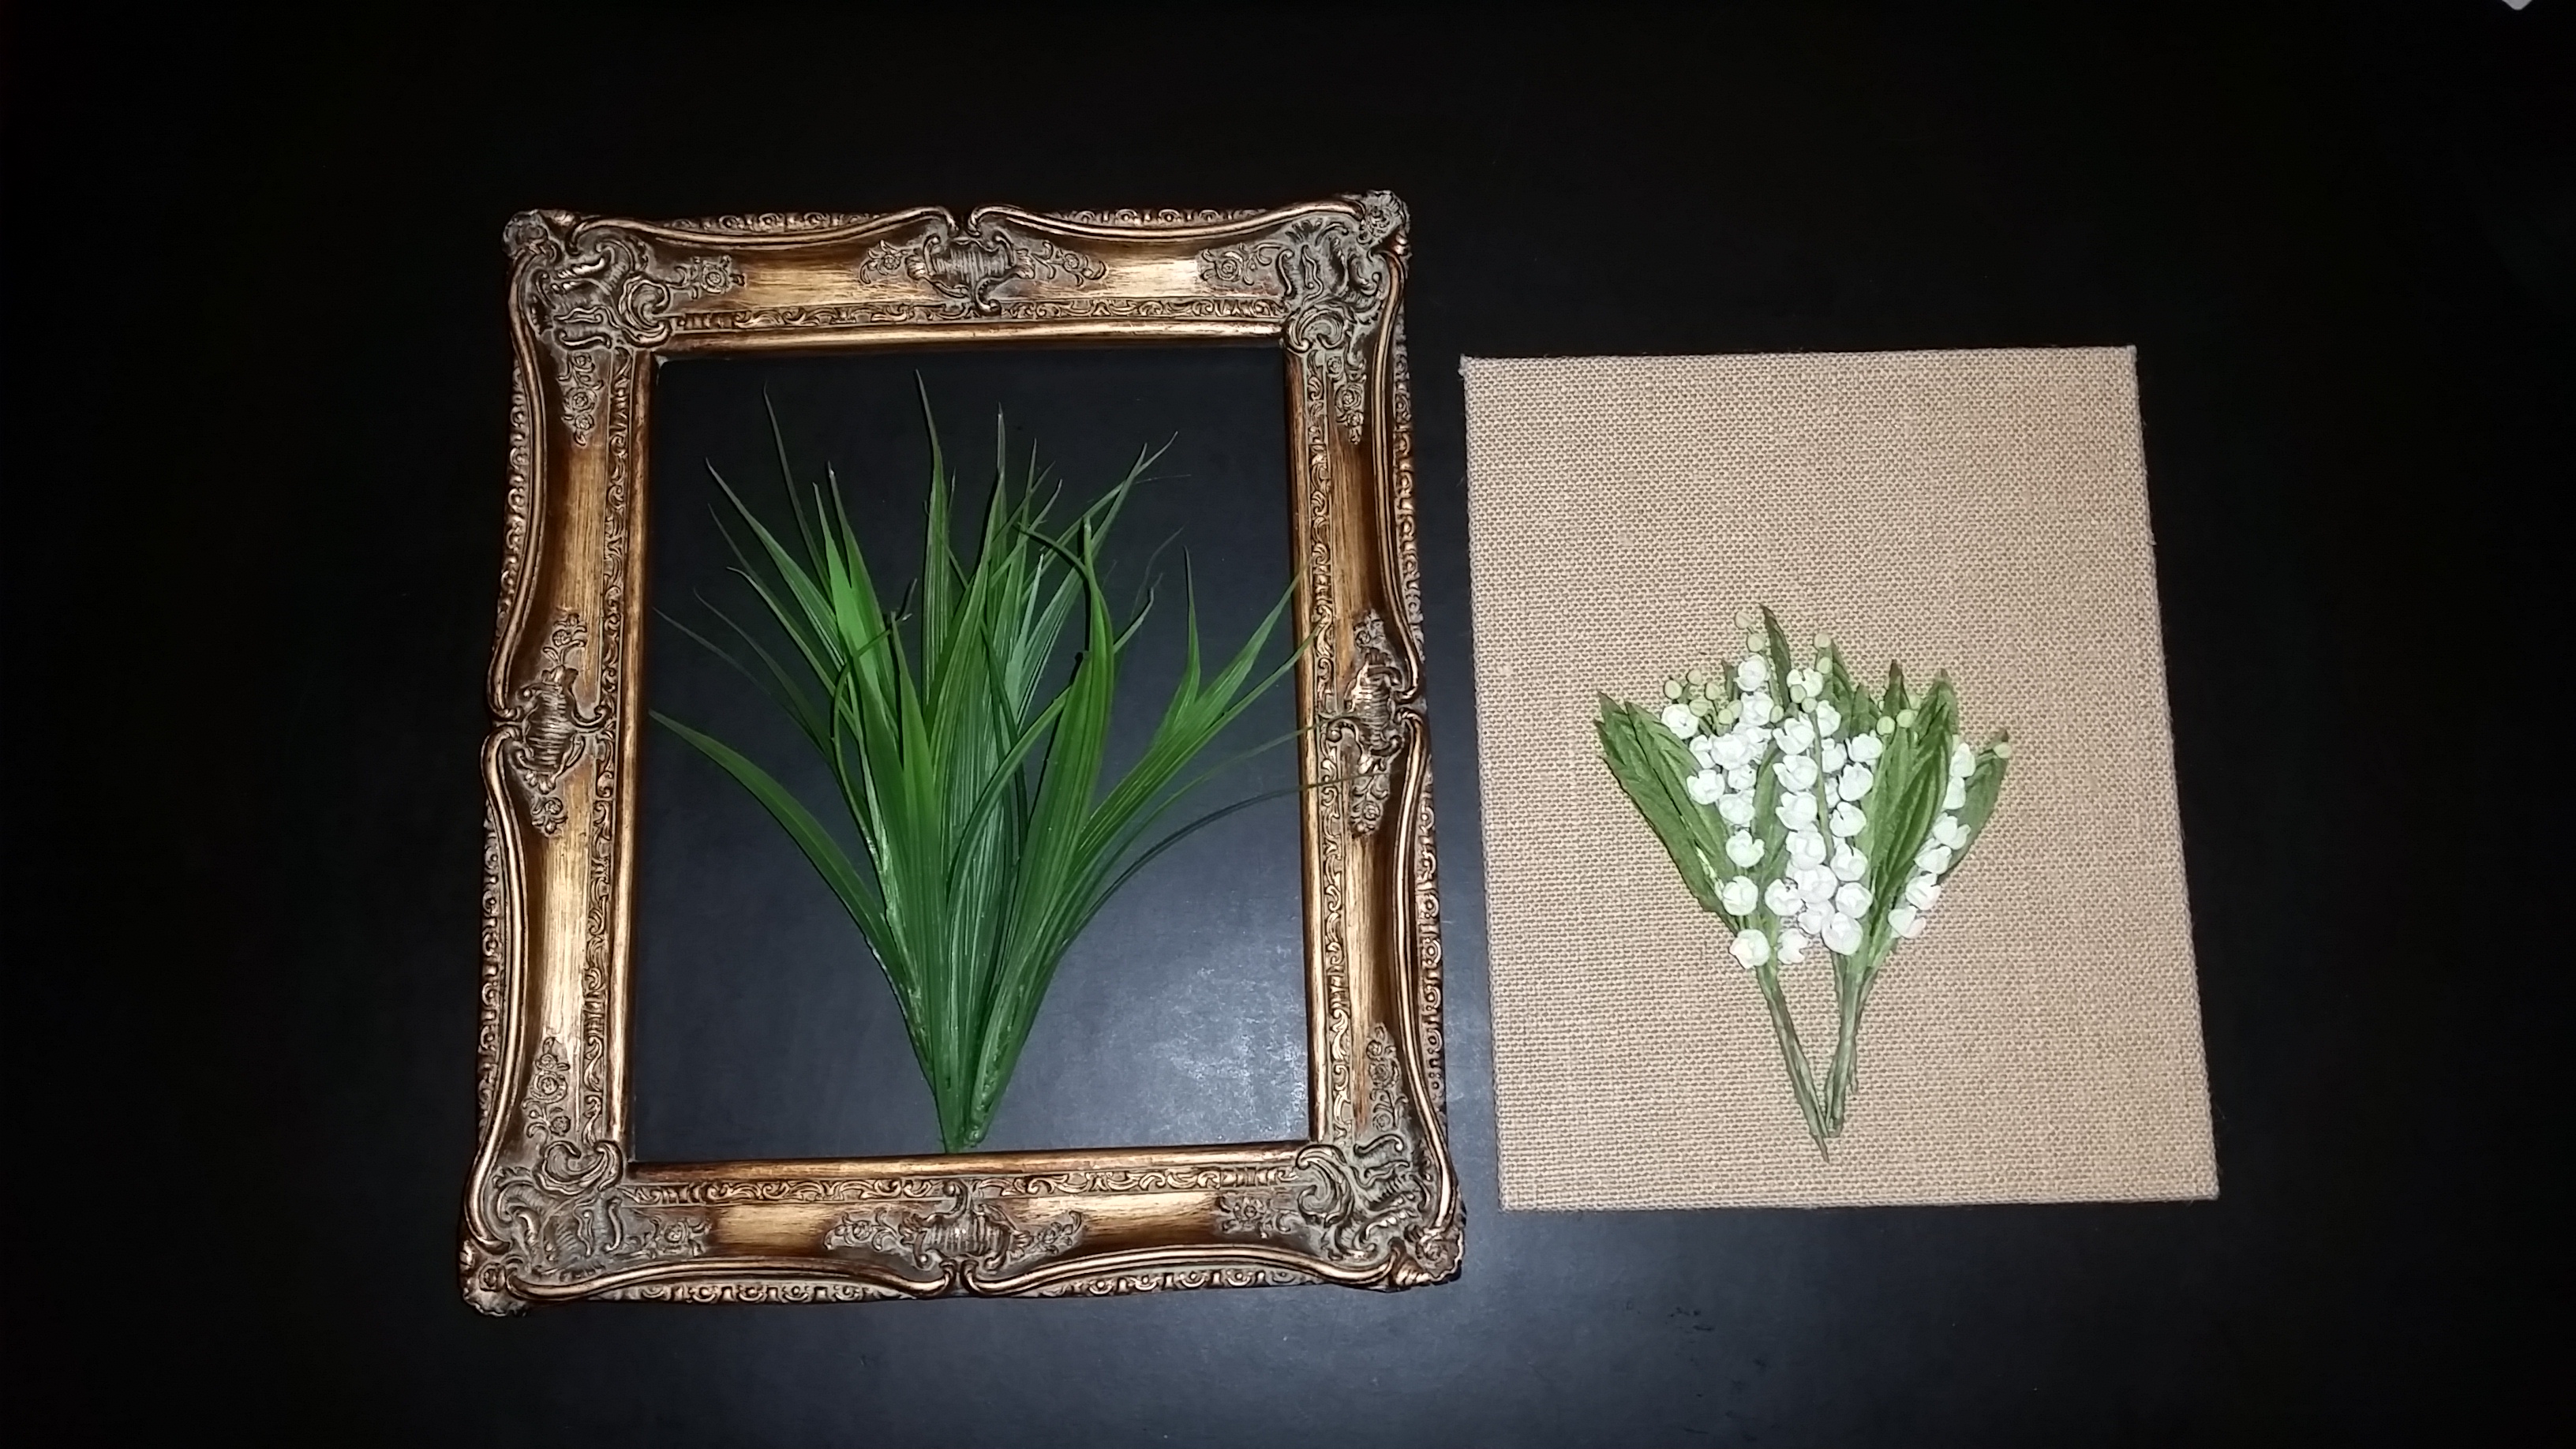
1.  Select a frame to use, remove the frame’s glass or picture backing, you will not need them for this craft project.  Frames can be any size with an opening from a smaller size of 5 X 7” to a larger 10 X 13”.  (I am using frames with a 5 X 7” opening)

2.  I used a pre-cut cloth covered backing  to fit the frame opening, but one could easily be made with a sturdy board with a piece of cloth stapled or taped to the backside

3.  Backing can either be taped into place with painter’s tape or hot glue

20160801_0940454.  Place flowers and other decorations into a pleasing arrangement and hot glue to the backing

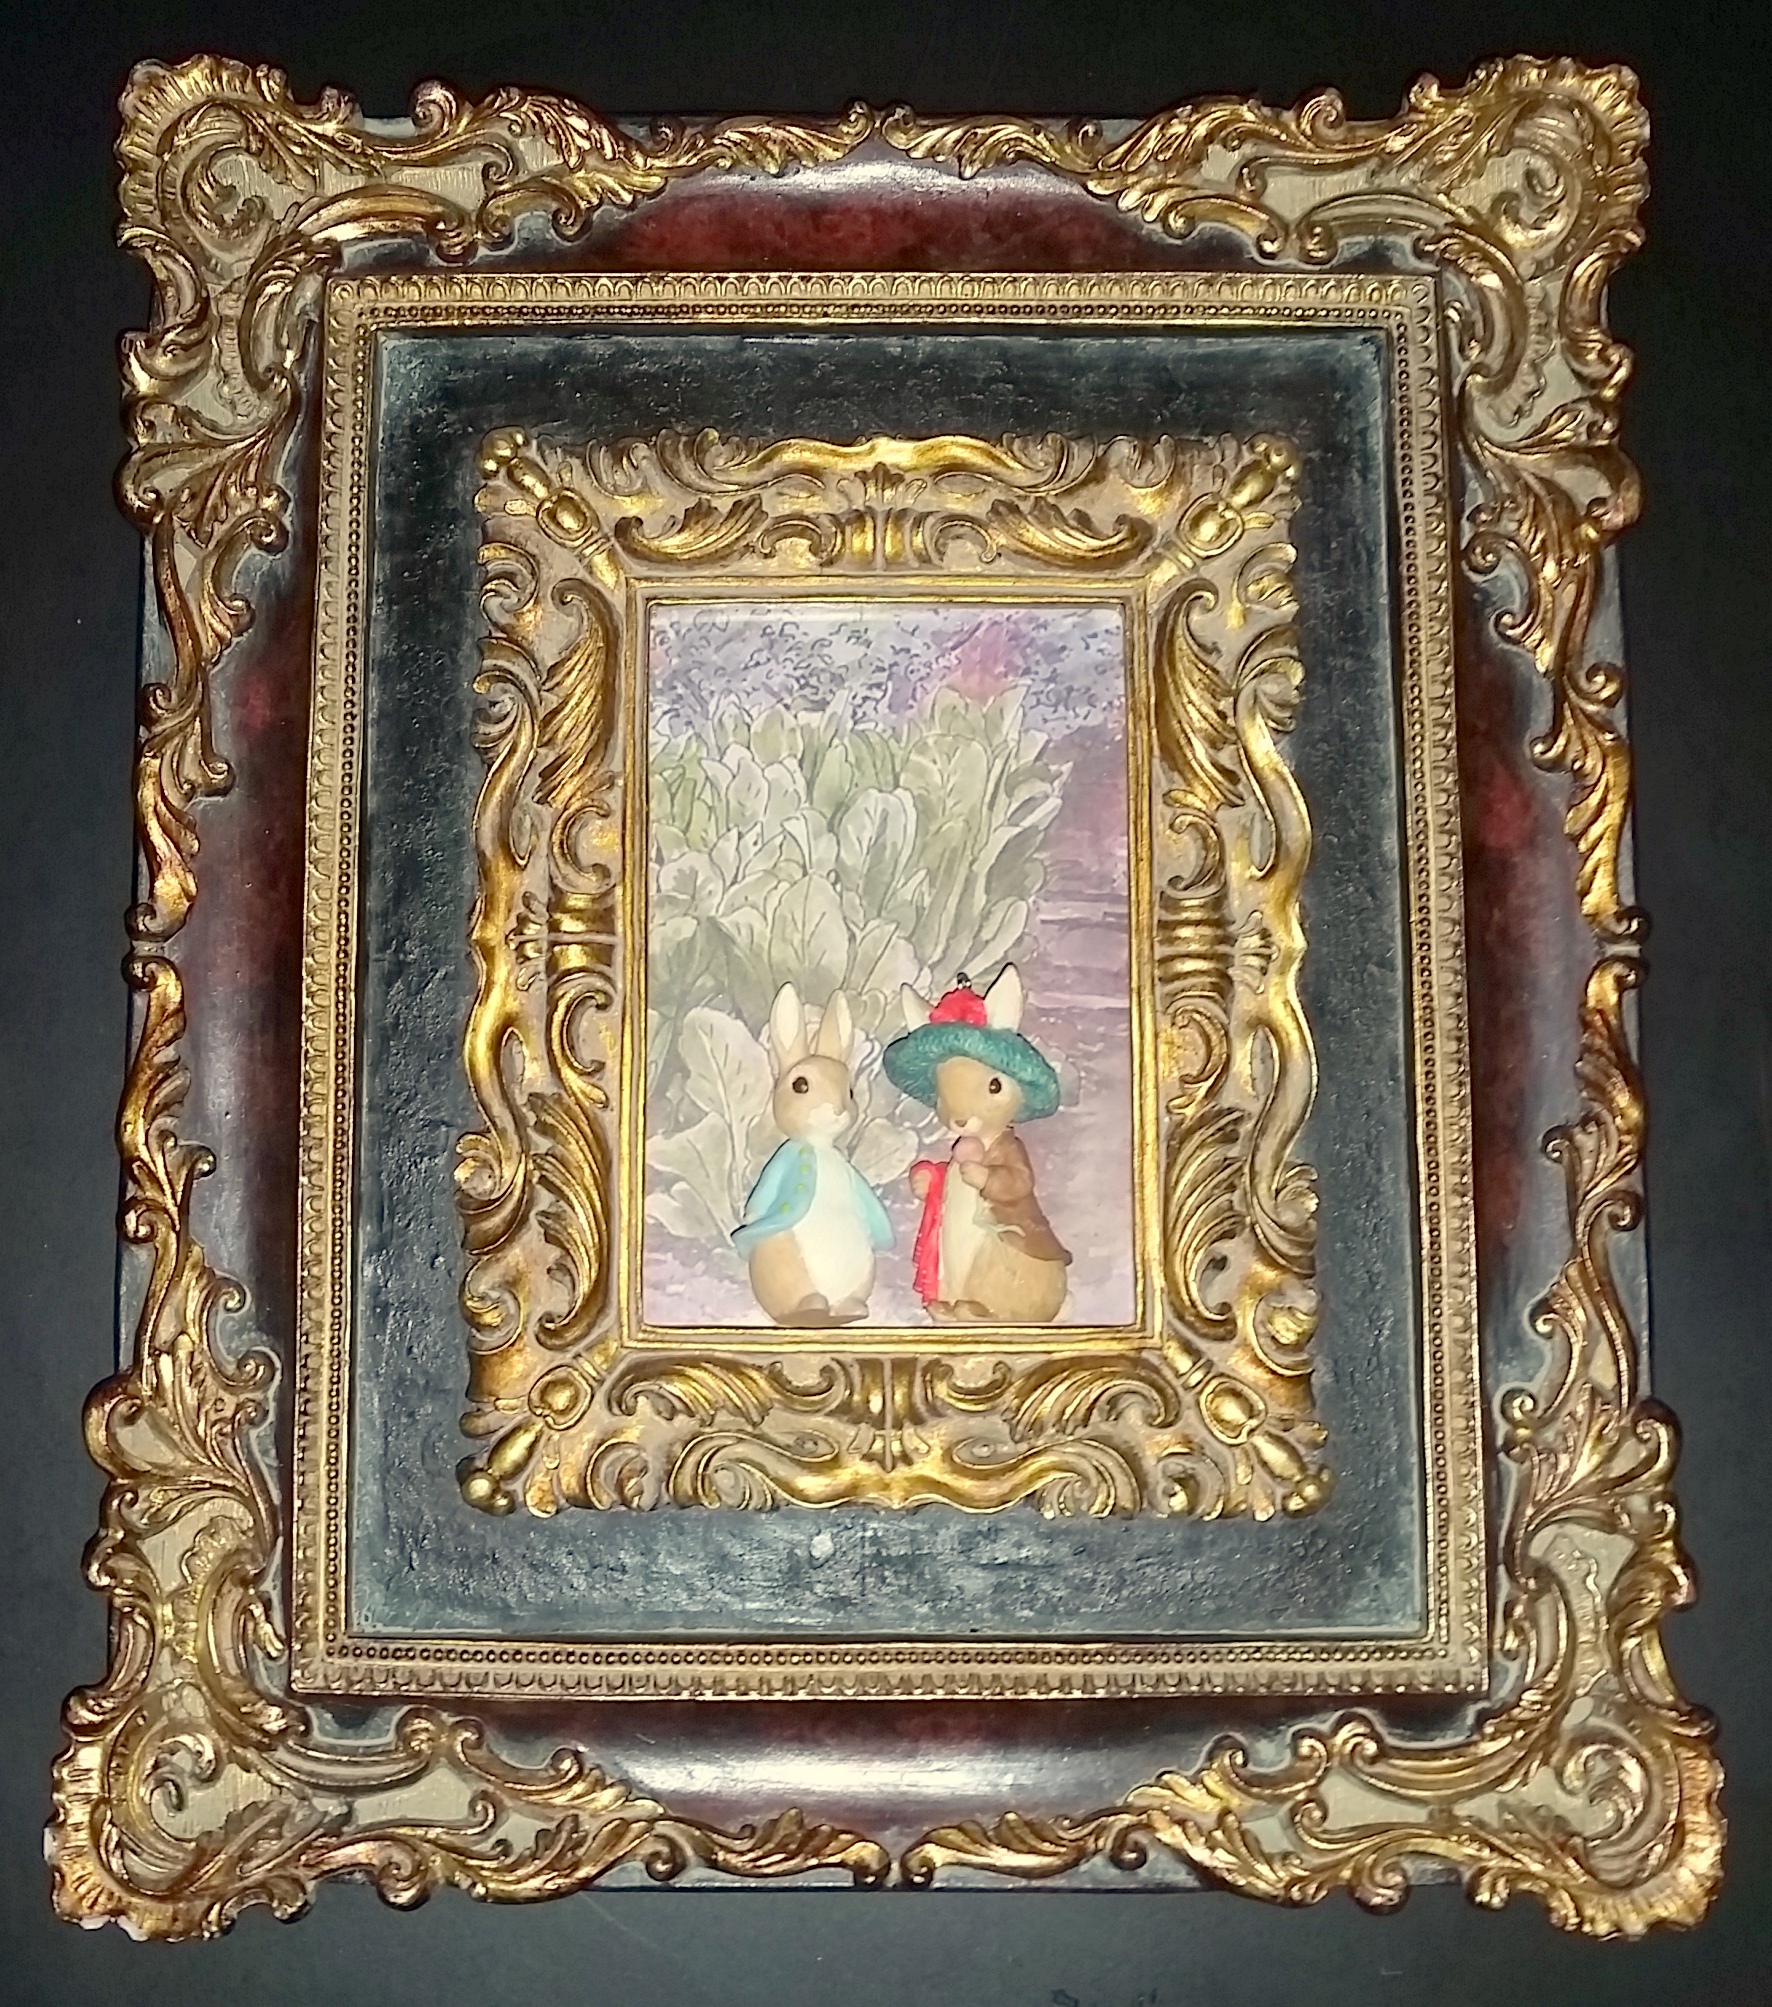
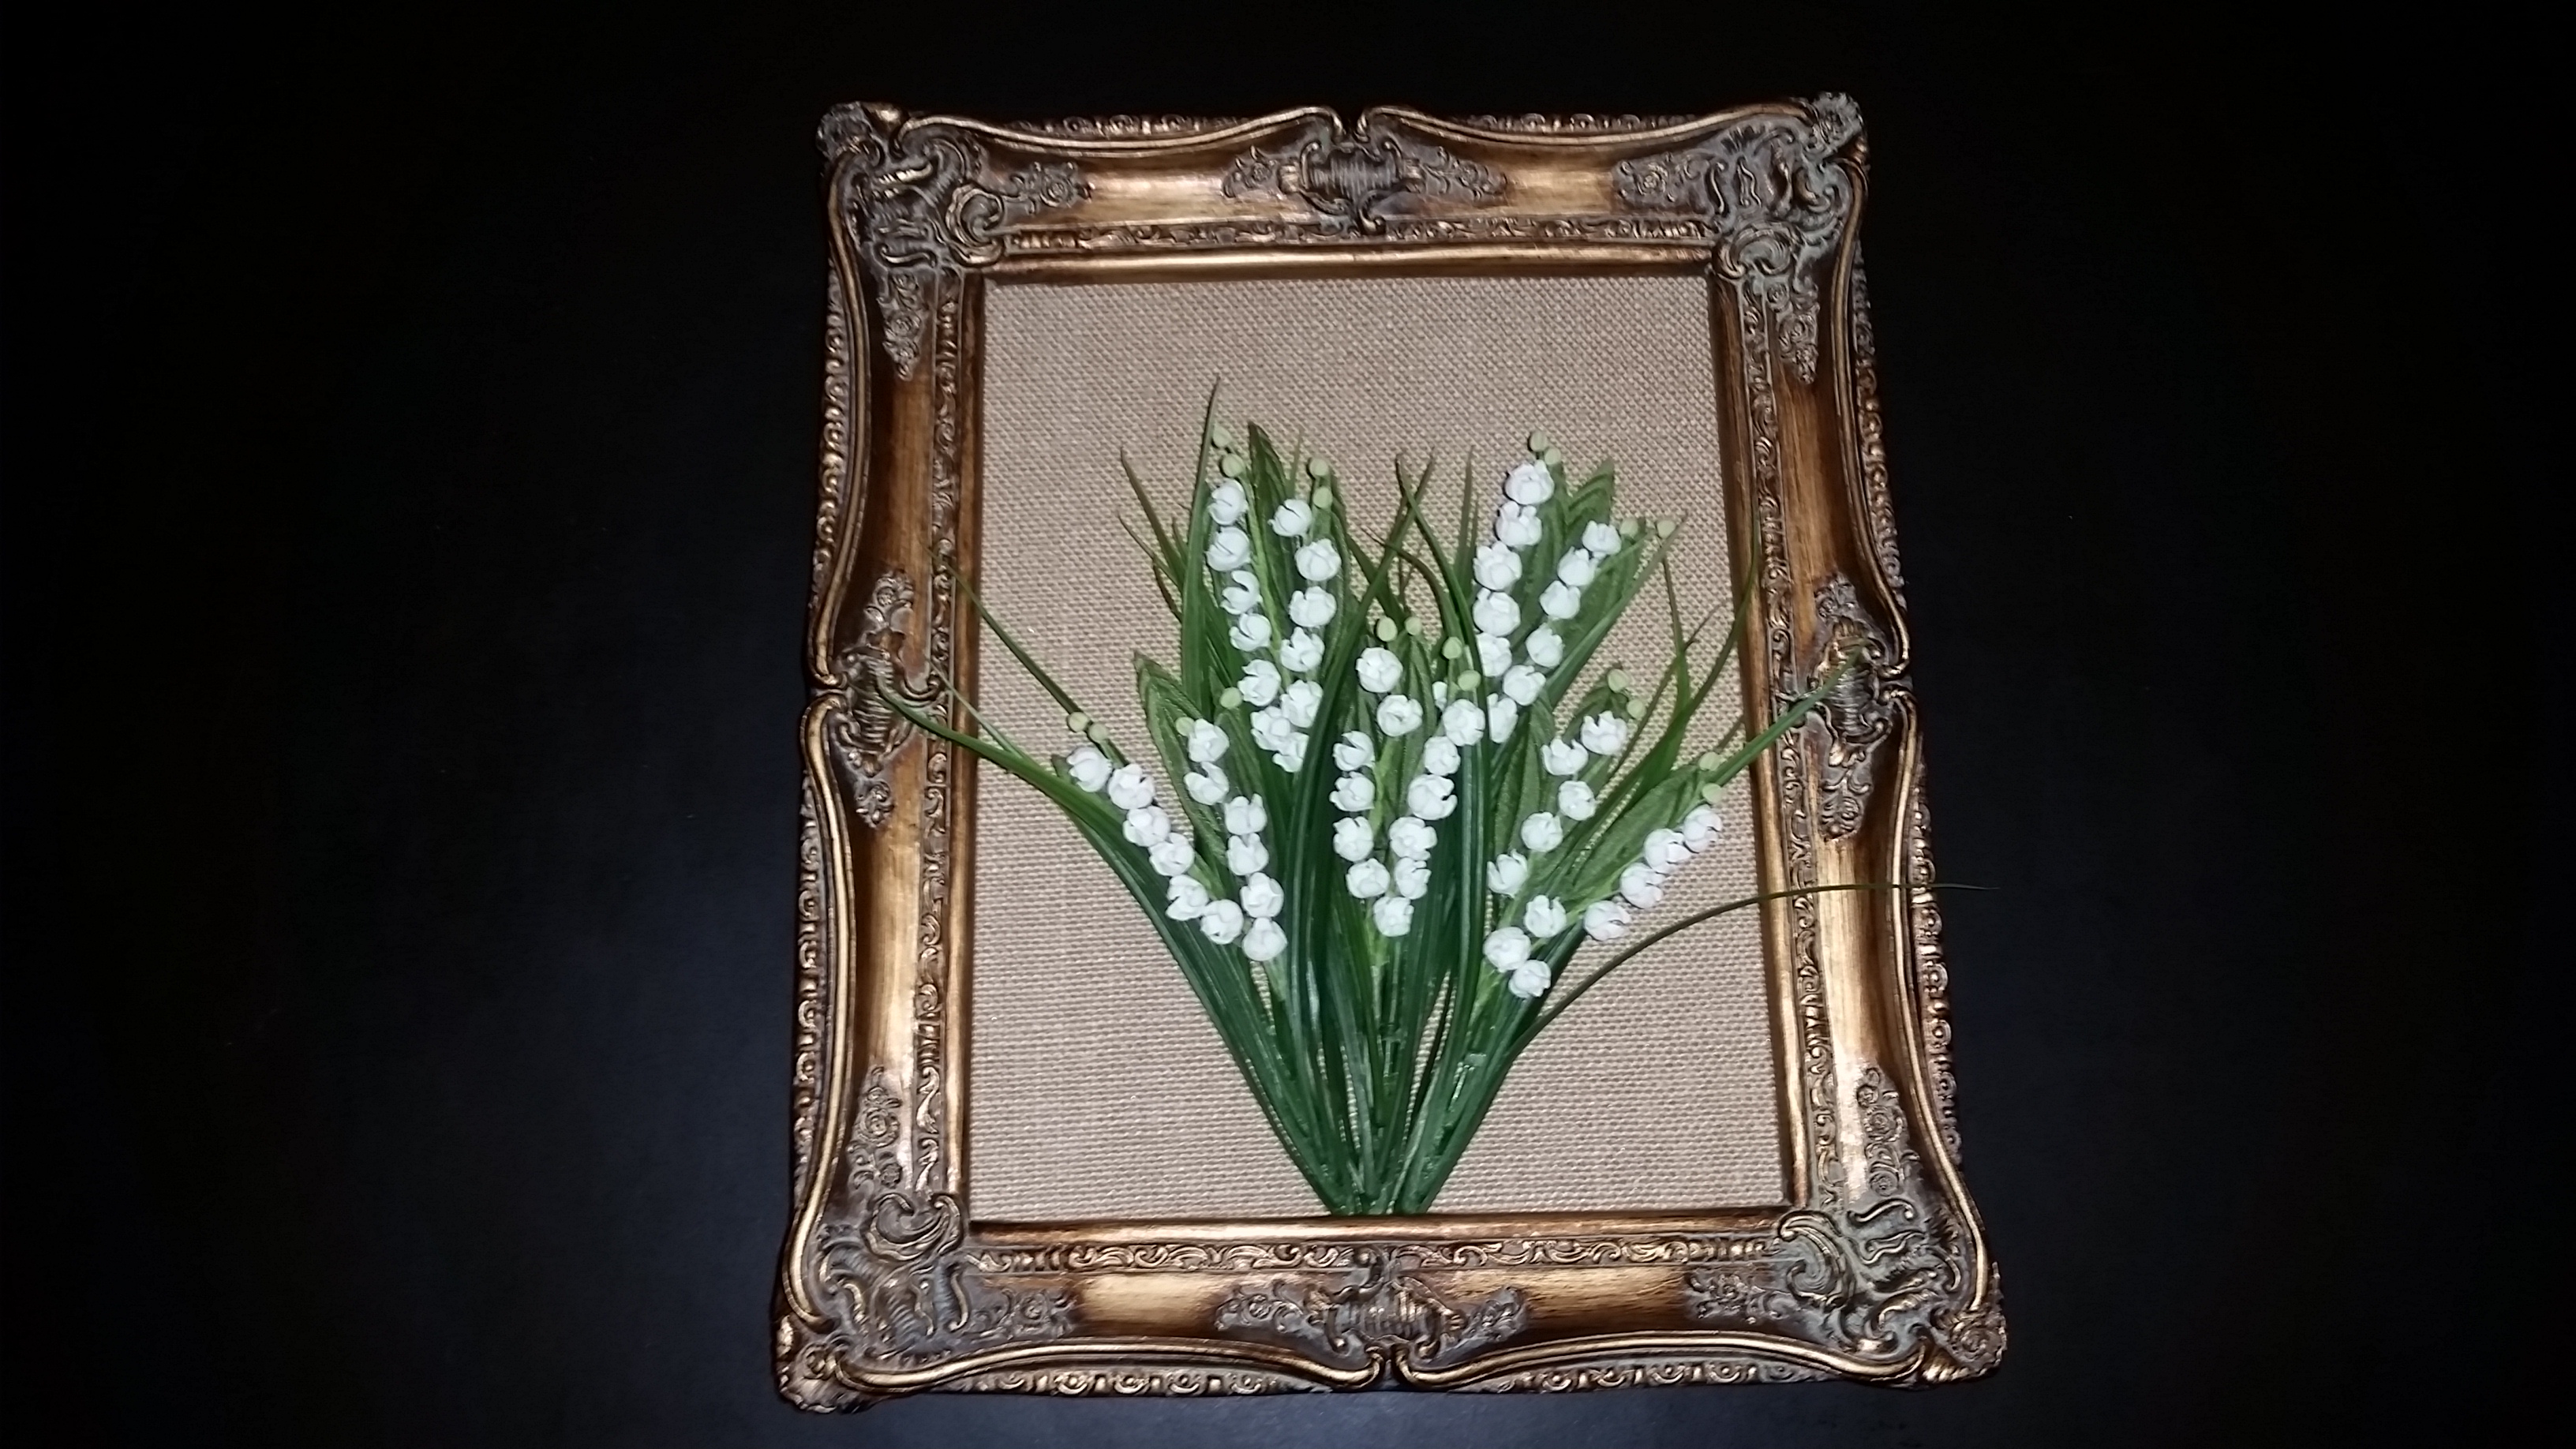
Shown below in the photo is the finished framed floral decoration.  I think it looks wonderful in the dining room of our home.  I have used the same frames for both this Spring Framed Floral and also for the previous Autumn Framed Floral for two very different styles. Framed Floral decorations can be created for any season throughout the year, just use flowers or decorations that are appropriate for the particular holiday.

20160801_093934


Craft – Beatrix Potter-inspired Decoration

Beatrix Potter - finished 1 exterior

This Spring I decided to make a special Beatrix Potter-inspired Decoration to display in our home for the Easter holiday.  Over a hundred years ago, an English author and illustrator named Helen Beatrix Potter (Born: July 28, 1866 Died: December 22, 1943) published her first book “The Tale of Peter Rabbit” in 1902.  Eventually she would write a wonderful series of charming children’s books featuring not only Peter Rabbit but Benjamin Bunny, Jemima Puddle Duck and also Flopsy, Mopsy and Cottontail to name just a few of the delightful characters.  (For more information about Beatrix Potter and the history of the Peter Rabbit books, please click on the link)

Several years ago I started to collect a series of Hallmark Peter Rabbit themed ornaments and I decided to use these to create several Beatrix Potter-inspired decorations.  These charming ornaments are beautifully detailed and readers might recognize them from photos of my annual Spring/Easter display in our china cabinet in our dining room.  (click on the link to see the photos)  Inspired by the beautiful illustrations that are featured in the books, I printed copies of lovely English countryside paintings done by Beatrix Potter and I used these as backgrounds for the craft projects.  

Special Note:  For this craft project, I had a unique Beatrix Potter “book” that I had found in a local retail store several years ago which I thought would be perfect.  I know this type of item was very unusual and probably could not be found again, so I have a solution! Purchase a paper mache “book”, these are generally available in craft stores.  Copy the cover of a Peter Rabbit book and paste it to the front to create a similar Beatrix Potter “book”.

Beatrix Potter - supplies 1 exterior

Beatrix Potter-inspired Decoration supply list

  • Beatrix Potter “book”
  • Beatrix Potter Hallmark ornaments (ceramic figurines could also be used)
  • Printed copy of a Beatrix Potter illustrations (to use for the background)
  • (Optional) Moss
  • (Optional) Floral stems
  • Hot glue gun and glue sticks

Beatrix Potter - finished 1 interior

Beatrix Potter-inspired Decoration instructions

  1. Search the internet to find a background picture for the shadowbox, print a copy in the appropriate size to fit.  (I found a Beatrix Potter illustration and printed a copy on our home printer)
  2. Arrange the Hallmark Peter Rabbit themed ornament.  When pleased with the placement, hot glue the ornaments in position.
  3. Option: To create an additional dimension to the shadowboxes for these enchanting characters to “live”, floral stems and moss can be used.  Add the moss to the shadowbox to simulate grass, this will also cover the bottom of the ornaments

Shown below are two “shadowboxes” that I improvised using two beautiful frames:

Beatrix Potter - finished 2b  Beatrix Potter - finished 2a

The Beatrix Potter-inspired shadowbox will make a great seasonal decoration for any home and can be hung on the wall, placed on a side table or set on a bookshelf.  

Craft – Spring Mantel Artwork

20160331_125730

This Spring I wanted to create a special mantel decoration.  I decided to recycle an old seasonal sign that I had previously made.  The MDF board had several layers of paint and even though I had removed the previous decorations the surface still had a very rough surface and I sanded the board to try and remove most of the paint.  Also to solve the problem of the uneven surface I decided to use a crackle medium paint.

List below is a list of the craft project supplies I used and also complete instructions.

20160329_104728

Spring Mantel Artwork supply list

  • MDF board, cut to size
  • Wooden letters which spell out “Spring”
  • Crackle medium “paint”
  • Dark brown paint for the base and whitepaint for the topcoat
  • Dark green paint for the letters
  • Paint brushes
  • Sandpaper
  • Hot glue gun and glue sticks
  • Flowers to use as decoration
  • Hooks and wire to hang the Spring Mantel Artwork

Spring Mantel Artwork instructions

  1. Cut the MDF board to size, this is determined by the size and spacing of the wooden letters and the space in which it will be hung.
  2. Sandpaper the MDF board to smooth any rough surfaces
  3. Paint the board with dark brown paint, let dry completely
  4. Cover the entire board with the crackle medium “paint”, let dry completely
  5. Paint the board with white paint, let dry completely
  6. Sandpaper the wooden letters to smooth any rough surfaces
  7. Paint the letters with dark green paint, let dry completely20160330_080549
  8. Hot glue the letters to the board  (Craft Tip: Before starting the project, work out the placement and spacing of the letters)
  9. Hot glue the flowers to the letters/board20160330_145805
  10. On the back of the board, attach the picture hanging hook/wire

20160331_125700

For more information about the Spring floral arrangement seen on the mantel in the photos, please click on the link to the Spring Mantel Decoration Craft Post.

Craft – More Fabergé-inspired Eggs

Silver Egg  - display

This month I posted a craft project on a Fabergé-inspired Egg.  Peter Carl Fabergé was the famous designer of these beautiful jeweled Russian Imperial Eggs which were specially created for the Russian Tsar Alexander III and later his son Tsar Nicholas II between 1885 and 1917. (For readers interested in more detailed information about the House of Fabergé or the Fabergé Eggs, please click on the link to the previous blog posts)

The previous Fabergé-inspired Egg craft post featured a lovely golden eagle pendant with a large blue gem which seemed to copy the style of the Russian Imperial crest.  Then, recently when in the jewelry/accessory store Charming Charlie looking through the clearance section, I found two inexpensive necklaces, a bracelet and earrings that I decided would be perfect for two more Fabergé-inspired egg craft projects.       

Fabergé-inspired Egg supply list

  • Large wooden egg
  • “Inspiration pieces” of jewelry (necklace and bracelet)
  • Self-stick pearls (select a color to coordinate)
  • Metallic paint – for one egg I used gold and for the other I used silver
  • Paint, paint brush
  • Sally Hansen Miracle Gel – Top Coat nail polish
  • Sandpaper
  • Hot glue and glue sticks
  • Wire cutter

Fabergé-inspired Egg  instructions

  1. Use sandpaper to smooth any rough surfaces to prepare the wooden egg for painting.
  2. Begin painting the bottom portion of the wooden egg, let dry completely.  Then paint the upper portion and let it dry completely.  (I selected a metallic paint color to coordinate with the metal of the “inspiration pieces”)
  3. After the paints dries, to give the egg a beautiful finish to resemble the enamel technique that was often used in the creation of the original Fabergé Eggs I used the Sally Hansen Miracle Gel – Top Coat nail polish to achieved this effect.  Apply the nail polish covering the entire egg; let it dry completely before proceeding to the next step.  (I think that the nail polish worked much better than a gloss paint to create an enamel look)
    Gold Egg - supplies
  4. Prepare the necklace and bracelet by clipping the links to create separate pieces, use sandpaper to smooth any rough or sharp edges.  
  5. Hot glue the individual pieces to the painted egg, work out the placement before gluing by marking with a small dot to indicate the position.
    Gold Egg - jewlery poistion
  6. Attach the self-stick pearls to the egg.   (If desired, the pearls can be additionally made secure with the use of glue)

Gold Egg - finished    Silver Egg - finished

Please check out the two previous craft posts also inspired by the Fabergé Eggs.  The first craft project is an elegant Fabergé-inspired oval box that is painted and decorated with crystal and pearl stickers.  This box is still displayed in our family room bookshelf during the Easter season.  The second craft project, as previously mentioned, is a Fabergé-inspired Egg which features a lovely golden eagle pendant with a large blue gem which resembles the style of the Russian Imperial crest.  (For more information regarding the supply list and instructions for these two craft projects, please click on the links)

Craft – Faberge-inspired Egg

Faberge egg - final

Last year I published a post on the House of Fabergé which gave a brief history of the company.  Peter Carl Fabergé was famous for designing the beautiful jeweled Russian Imperial Eggs which were specially created between 1885 to 1917 for the Russian Tsar Alexander III and later his son Tsar Nicholas II.  In 2013 I published a separate post regarding the 54 Imperial Eggs that Fabergé had created during that time.  (For readers interested in more detailed information about the House of Fabergé or on the Fabergé Eggs, please click on the link to the previous blog posts)

Inspired by the Fabergé Eggs, I decided to create a Fabergé Egg craft project.  This idea started when I found the double eagle pendant in my local craft store.  The golden eagle pendant has a large blue gem set in the center and accented with diamond-like crystals.  I thought this pendant was a perfect inspiration for an Imperial Fabergé-style Egg.

Faberege Egg - inspiration piece

Fabergé-inspired Egg supply list

  • Large wooden egg
  • Large “inspiration piece” of jewelry (possibly a pendant or brooch)
  • Self-stick crystals (select a color to coordinate)
  • Paint – I used a deep blue to match the gemstone in the inspiration piece
  • Paint, paint brush
  • Sally Hansen Miracle Gel – Top Coat nail polish
  • Hot glue gun, hot glue sticks (option white glue stick to attach crystals)
  • Sandpaper

Fabergé-inspired Egg instructions

  1. Start by using sandpaper to smooth any rough edges to prepare the wooden egg for painting.
  2. Begin painting the bottom portion of the wooden egg, let dry completely.  Then paint the upper portion and let it dry completely.  (I selected a Royal Navy Blue paint color to coordinate with the blue gem of the “inspiration piece”Faberege Egg - paint
  3. To give the egg a beautiful finish to resemble the enamel technique that was often used in the creation of the original Fabergé Eggs I used the Sally Hansen Miracle Gel – Top Coat nail polish to achieved this effect.  Apply the nail polish directly to the entire egg; let it dry completely before proceeding to the next step.  (I think that the nail polish worked much better than a gloss paint to create an enamel look)Faberege Egg - top coat nail polish
  4. Prior to attaching the self-sticking crystals, work out the placement of the “inspiration piece” and then the final pattern and position of the crystals.  Once this is determined, attach the crystals to the egg leaving a space for the “inspiration piece”.  (If desired, the crystals can be additionally made secured with the use of glue)
  5. To complete the craft project, hot glue the “inspiration piece” to the egg.    

Faberge inspired egg - final