Just like this month’s other Décor post, Setting up a Fontanini Nativity, another one of the highlights of our Christmas home decorations is our Department 56 North Pole Village. When I worked in a retail store during the 1990s, we carried the collection of Department 56 villages and the North Pole one was my favorite … and of course, I began collecting pieces for our home. Soon after, my husband and I were blessed with a beautiful daughter. I enjoyed setting up the North Pole Village every year for her to imagine Santa and his elves getting ready for Christmas Eve when Santa would get into his sleigh pulled by eight tiny reindeer to deliver presents to the good little boys and girls. (somehow, my husband always seems to end up with a lump of coal in his Christmas stocking!)
Usually, months before Christmas, I search the internet for ideas for my Department 56 display but most of the websites only show finished displays and never go into much detail and only have very limited instructions on how to make those displays. For this post, I thought it would be interesting to show step by step how I set up this year’s North Pole Village Display.
The North Pole display base
The first step to setting up the North Pole Village is always the base or foundation for the display. As you can see in the photos at the end of this post, over the years in our different houses in California and the Midwest, the display location and layout of the North Pole Village has changed several times.
For this year’s display, I used a base with three interlocking sections that can be used as one long flat surface or can be stacked in a variety of positions to achieve different looks for the display. I like the flexibility of the sections because I’m always changing the location of the display into different rooms of our home or adding more accessories. A few years ago, I had purchased the base at a local craft store at an after Christmas clearance sale for a greatly reduced price. (This one is very similar to the other one that I used for this year’s Fontanini Nativity Display)
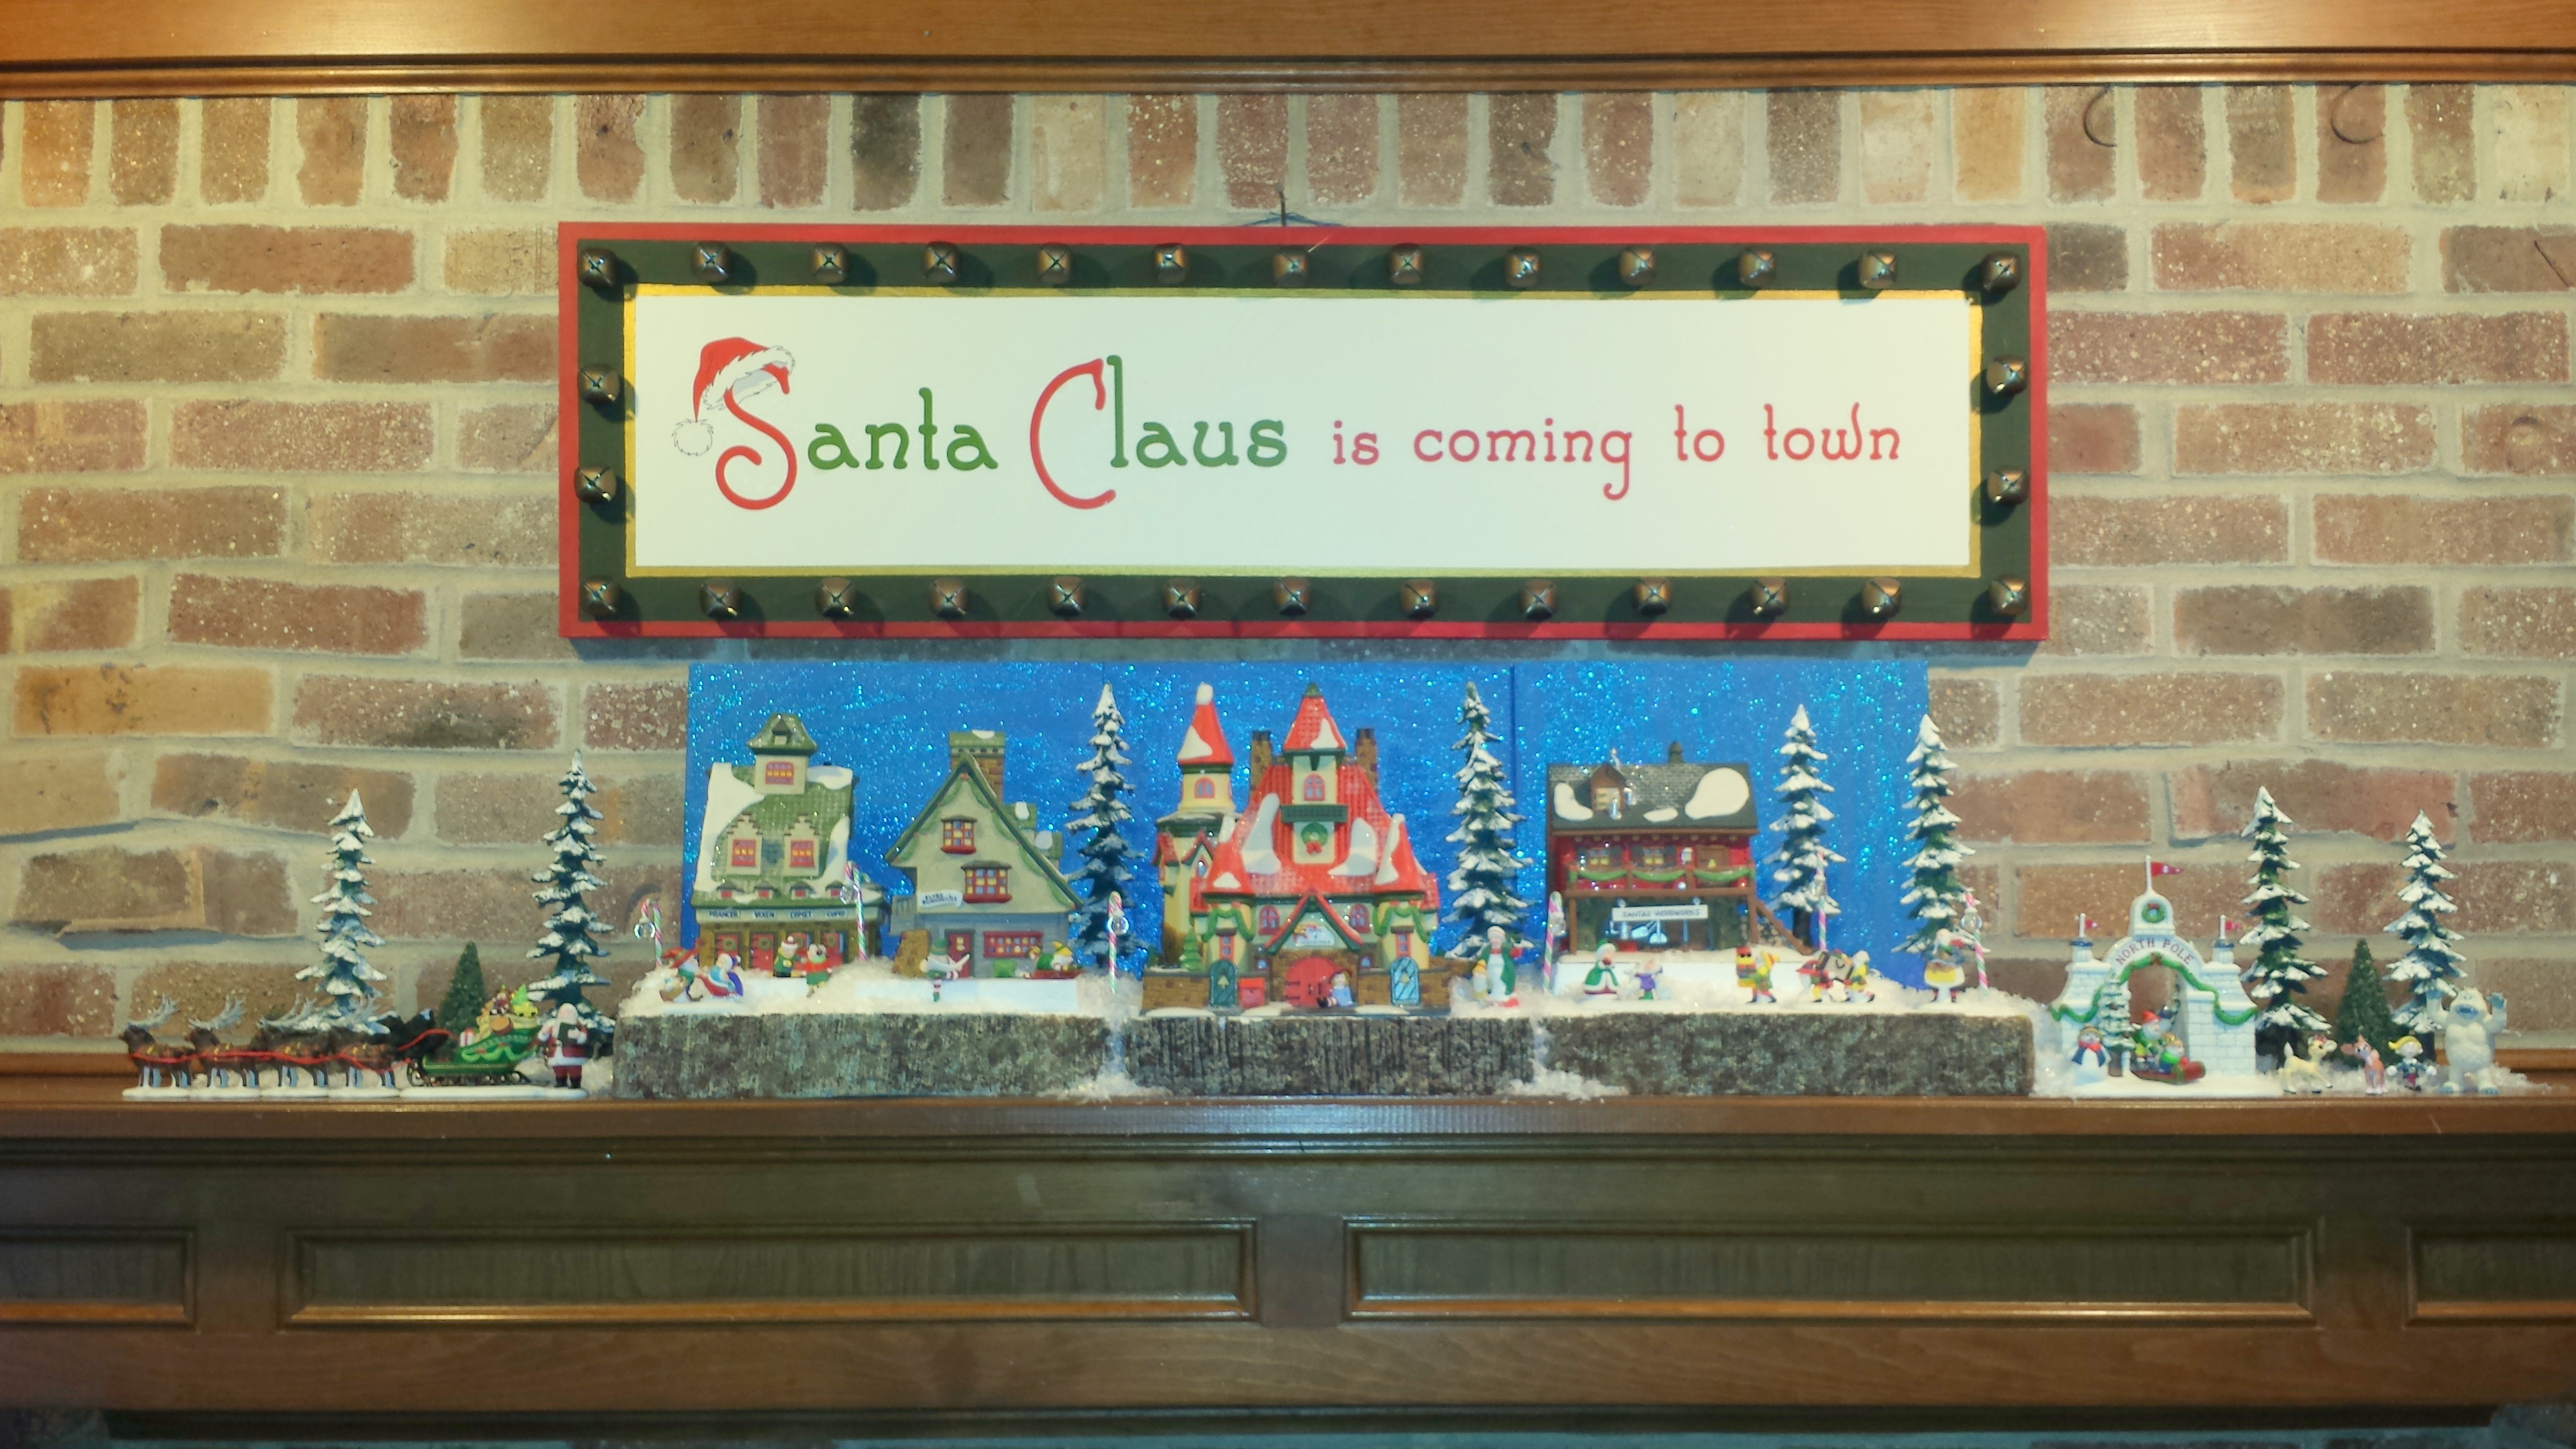
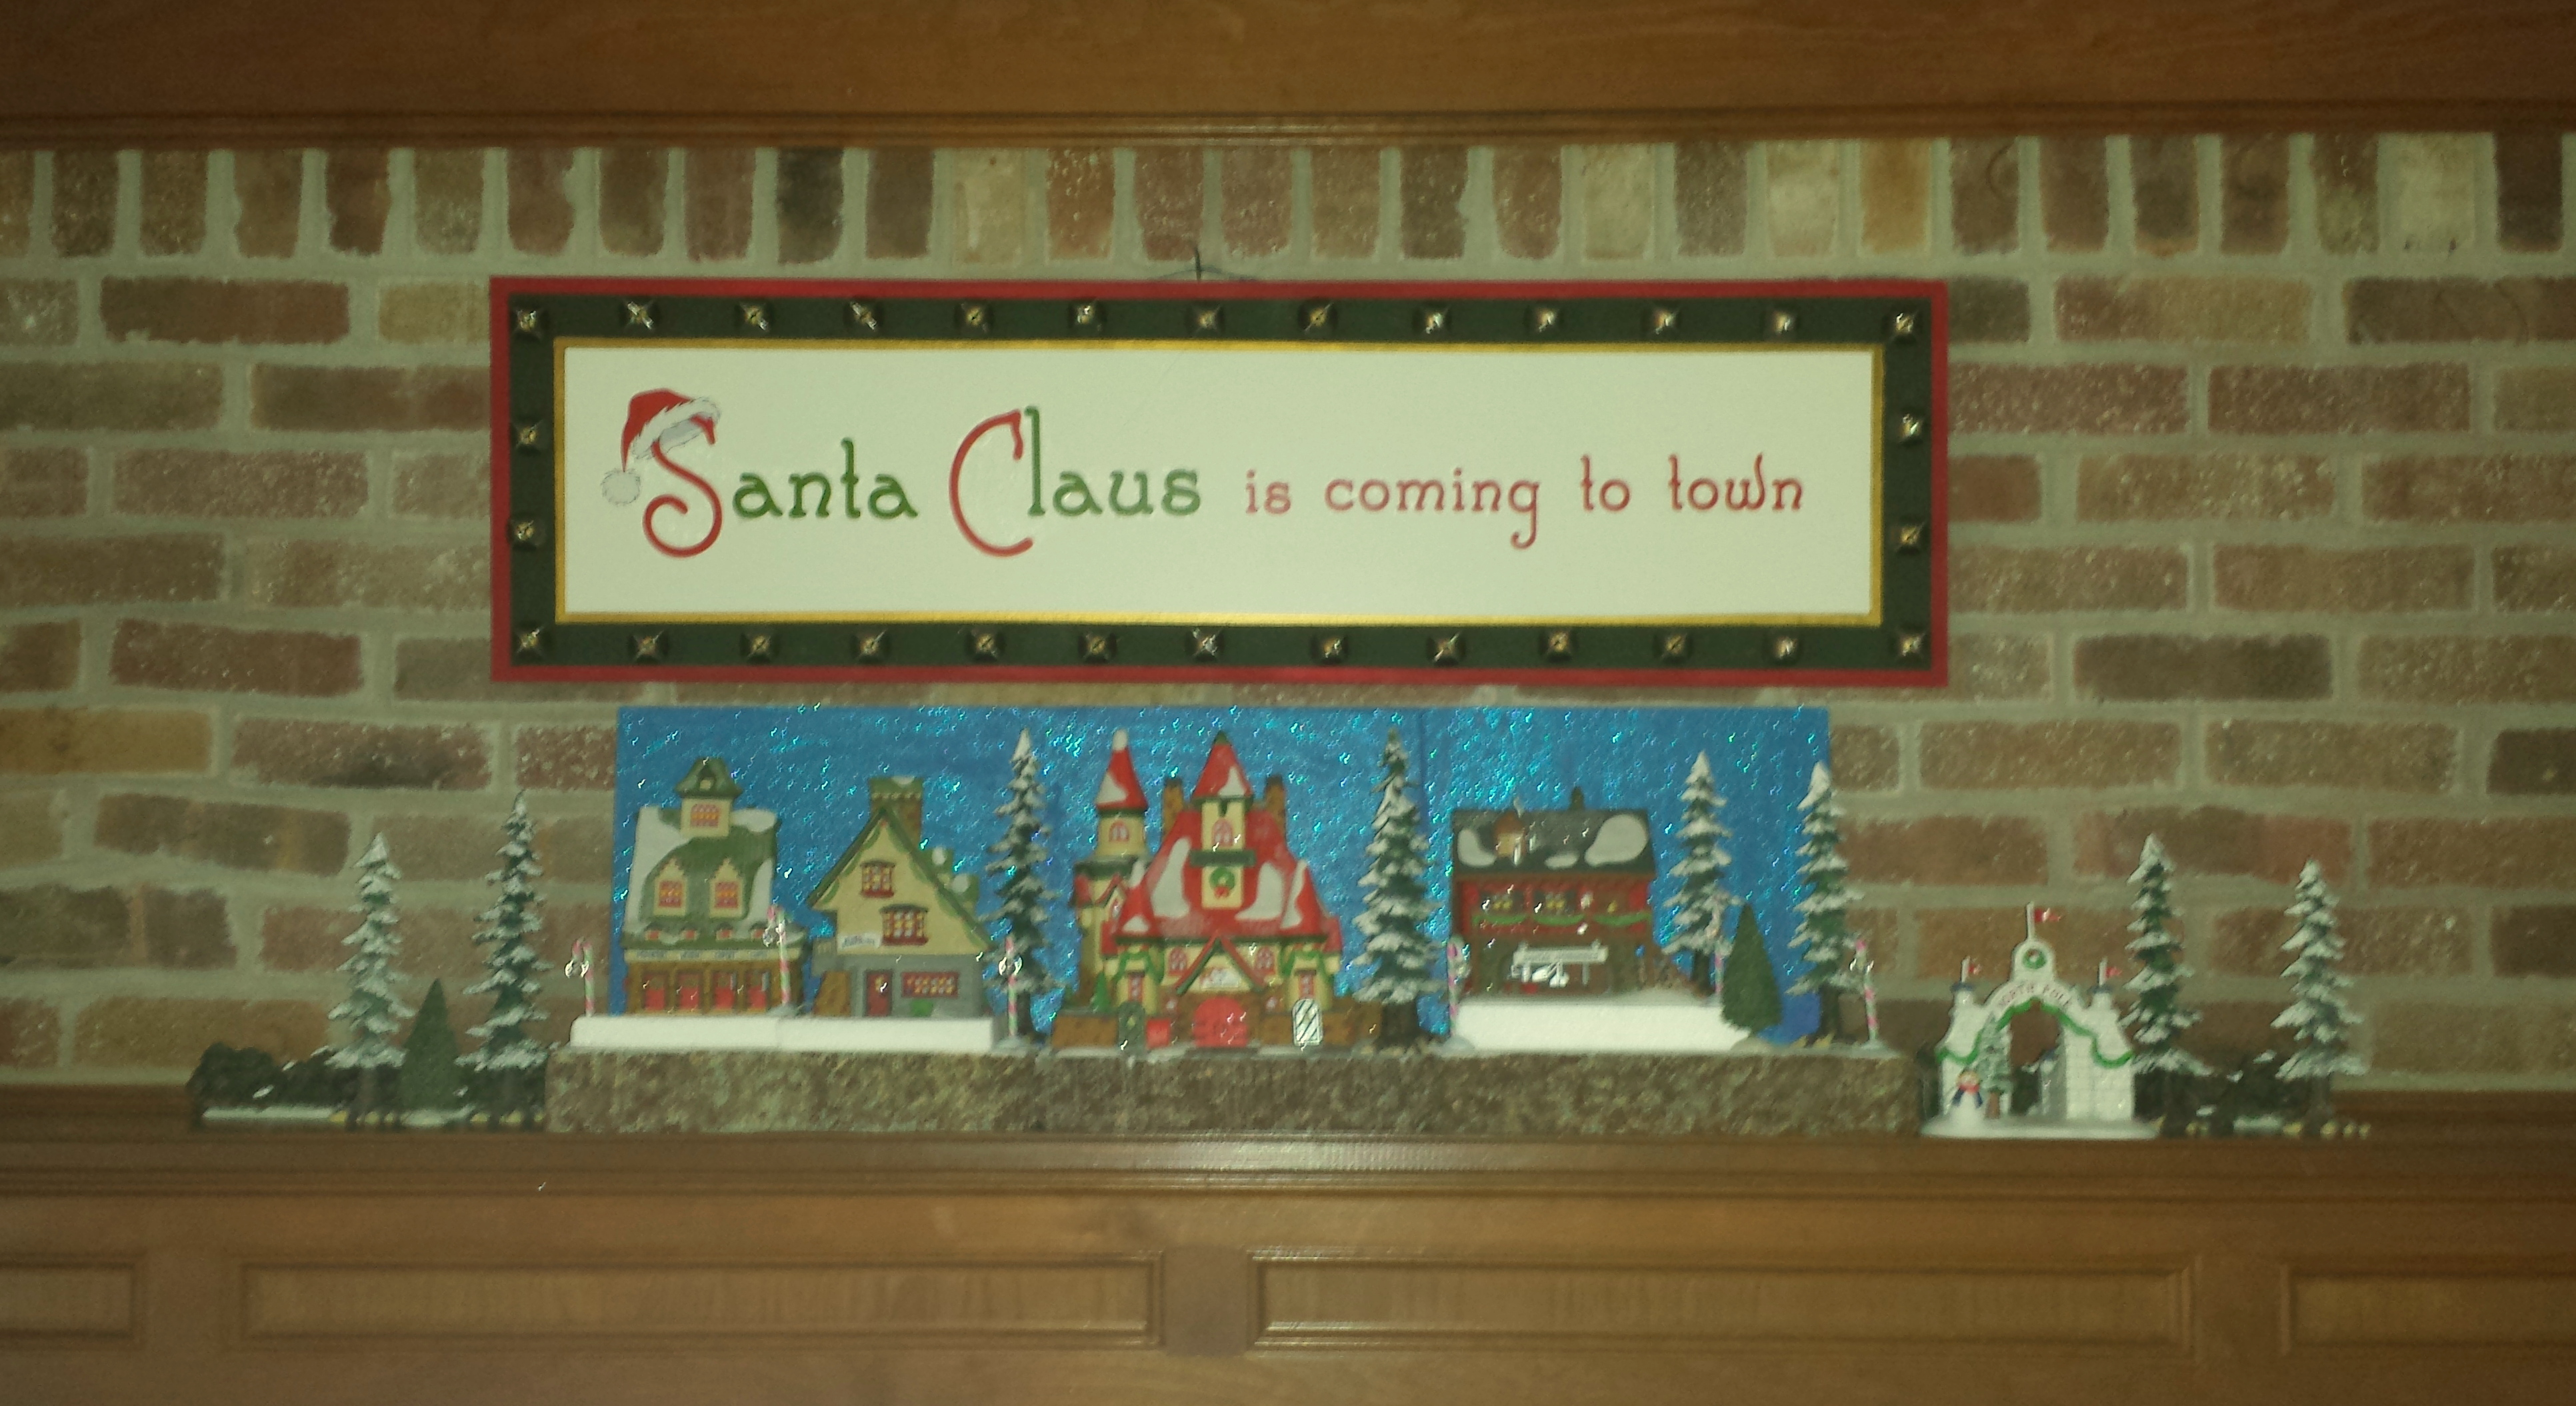
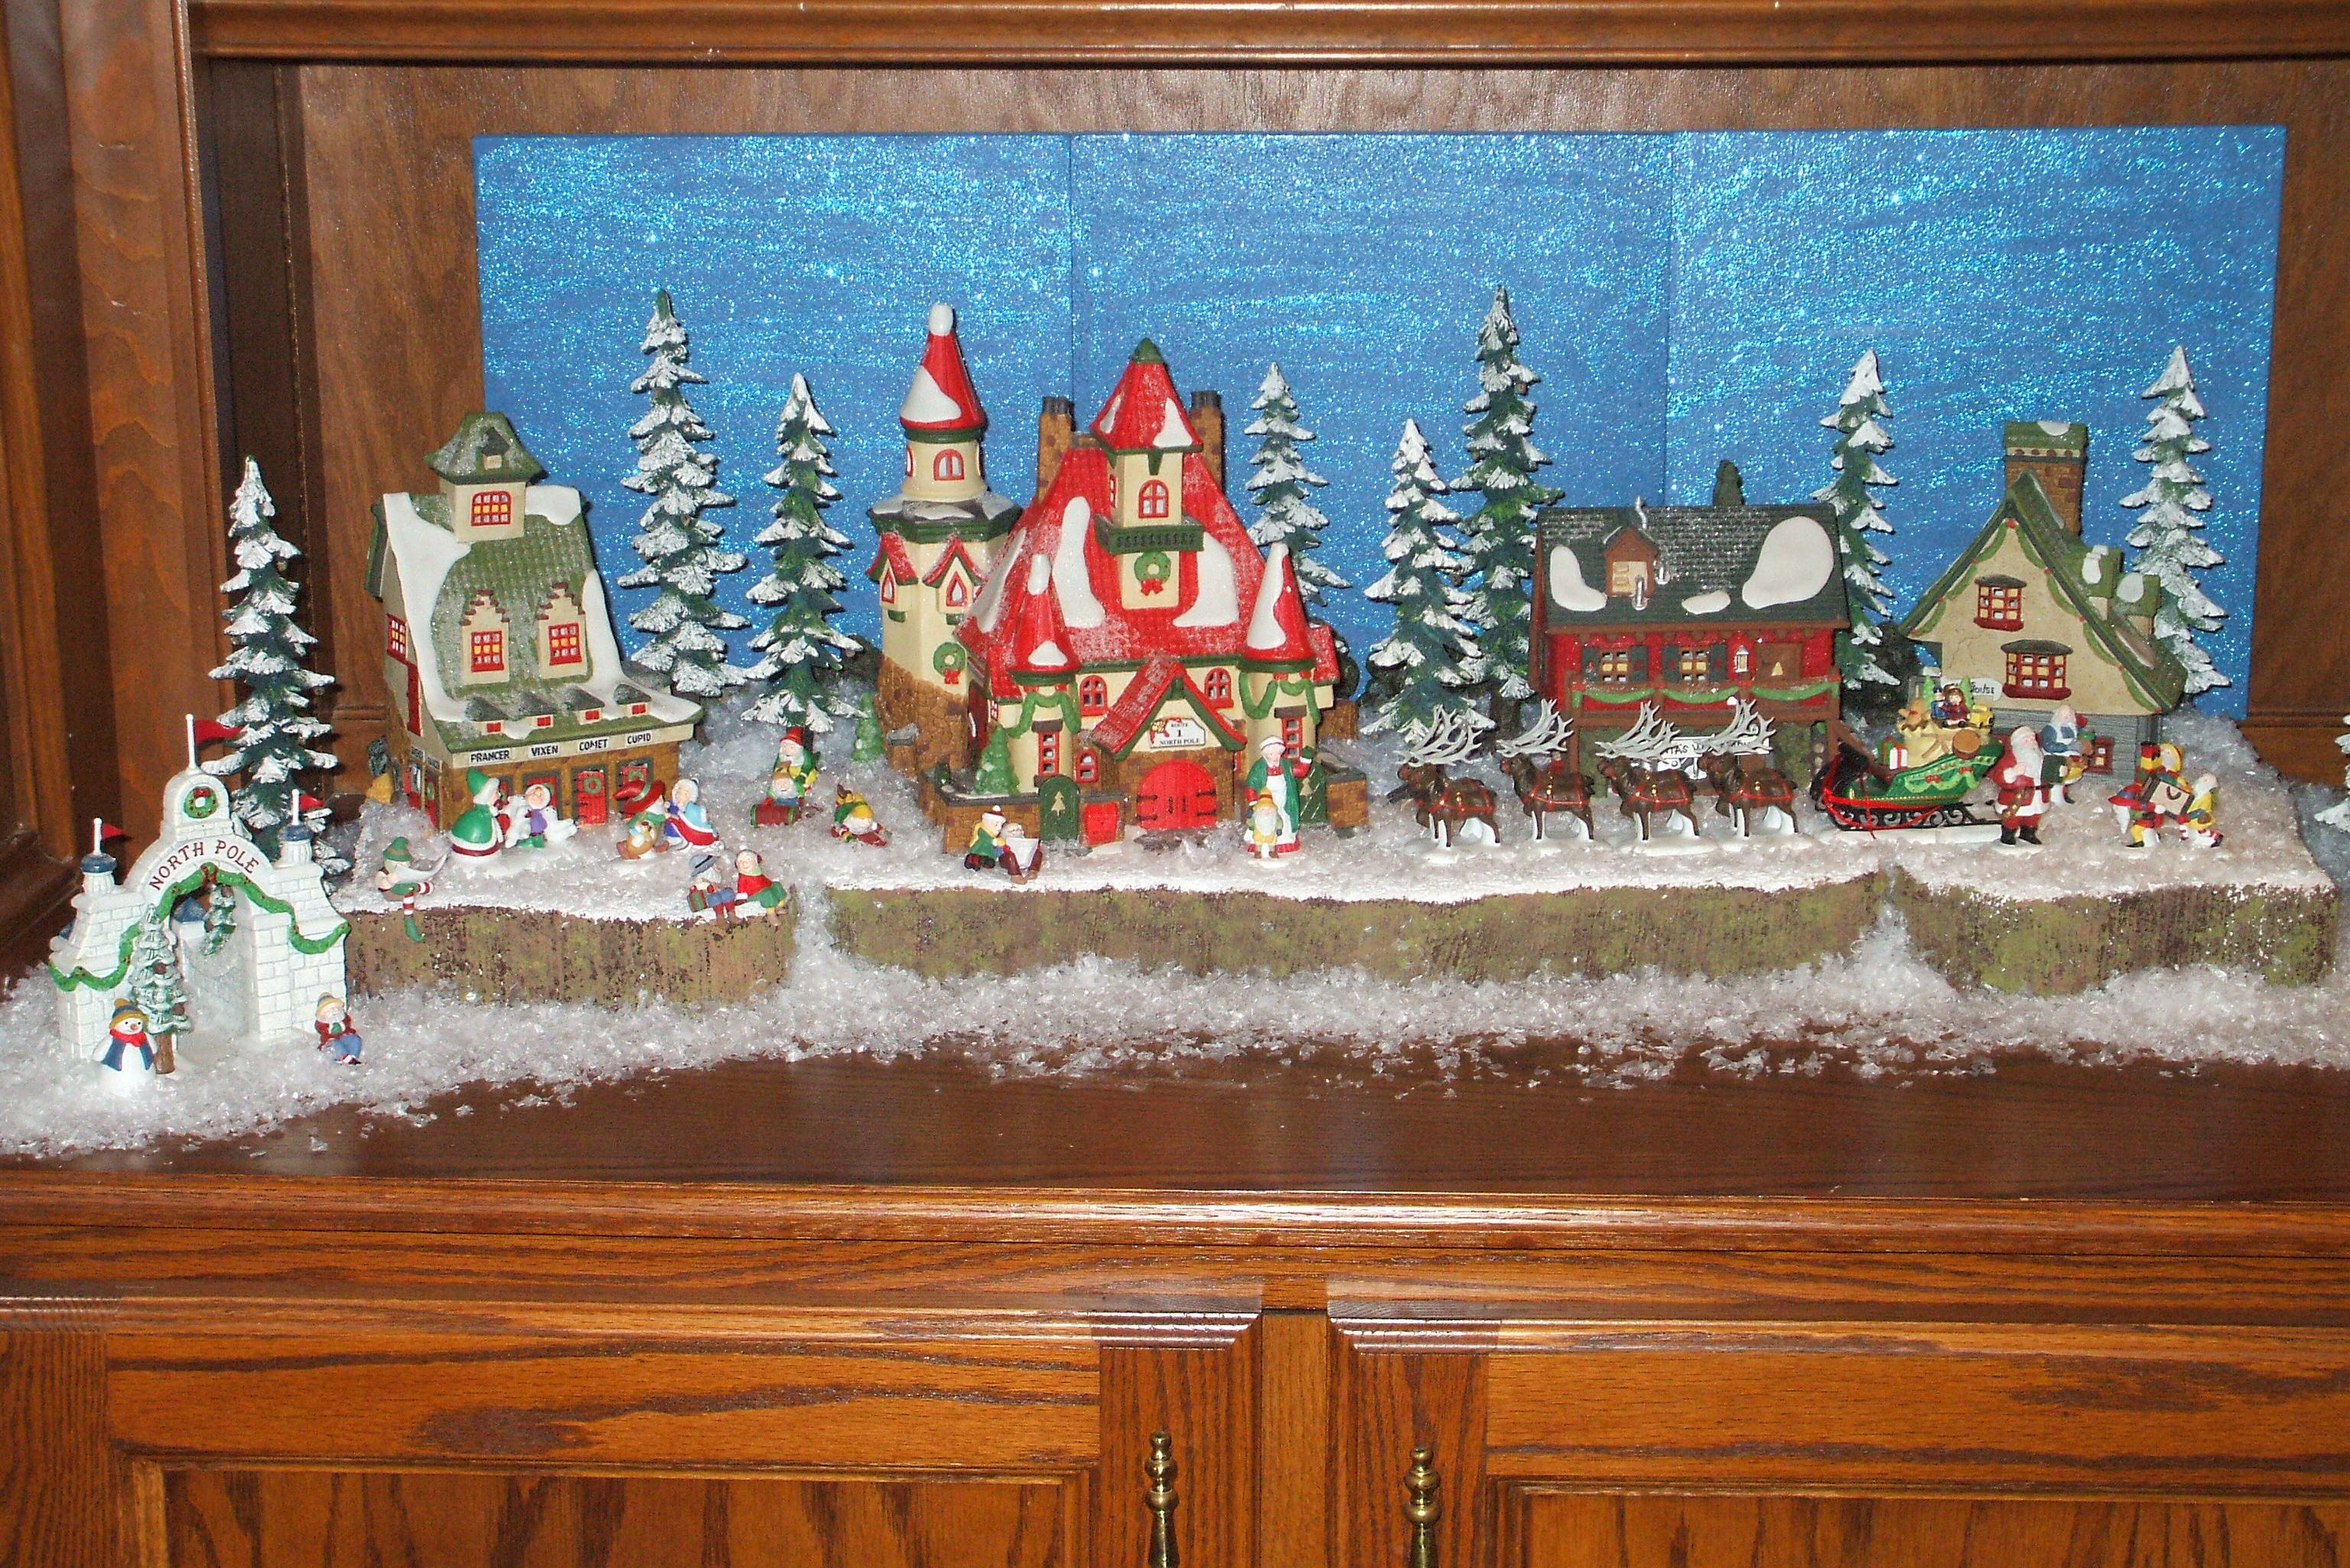
The display base that I am using has a white top surface so it is great for the North Pole Village; it gives the illusion of snow. I set all three of the sections flat on the fireplace mantel and it fits perfectly with the depth of the space. Next, I position three “sky panels behind the base, I used three sections of Styrofoam painted a beautiful blue with an overcoat of clear sparkle paint to add a wonderful twinkle when the overhead lights shine on the display. Later I will attach our Christmas Stockings on hidden hooks under the fireplace mantel. As I mentioned before, I sometimes change my home seasonal decorations from year to year, and as an example, if I were to display the North Pole Village in our family room bookshelves instead of the fireplace mantel I would stack one section on top of the other to fit the narrower space of the shelf.
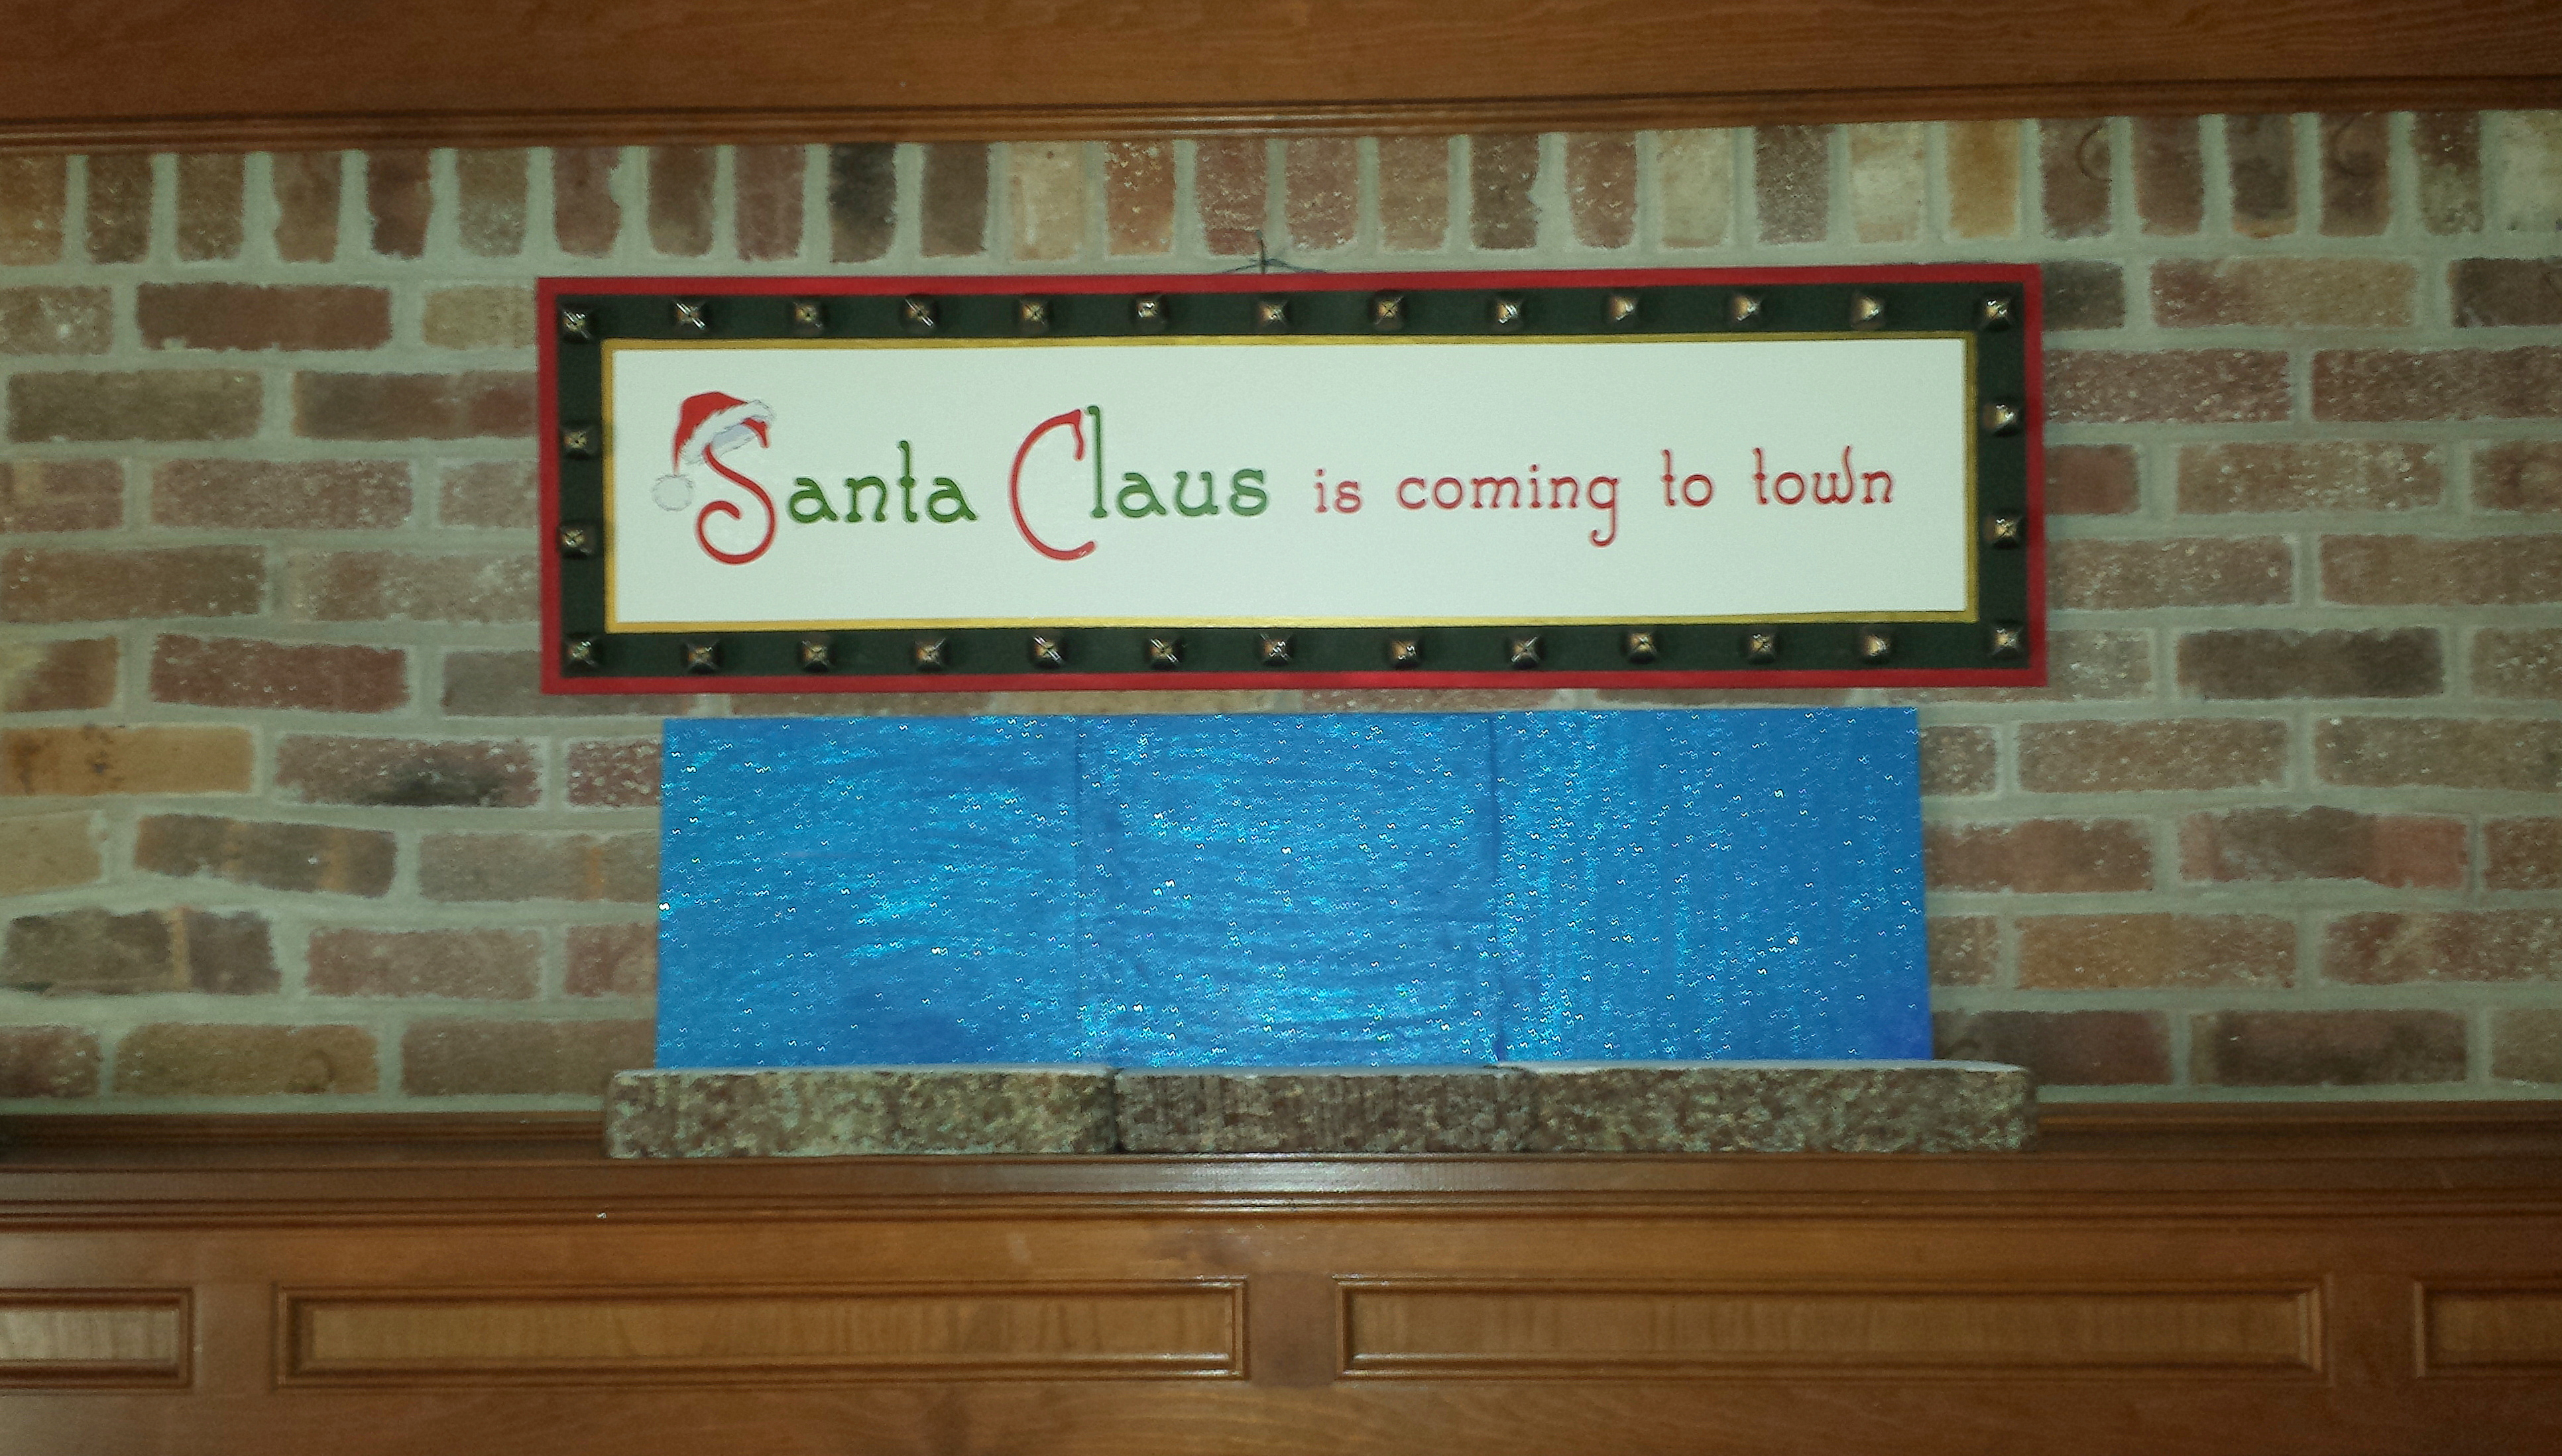
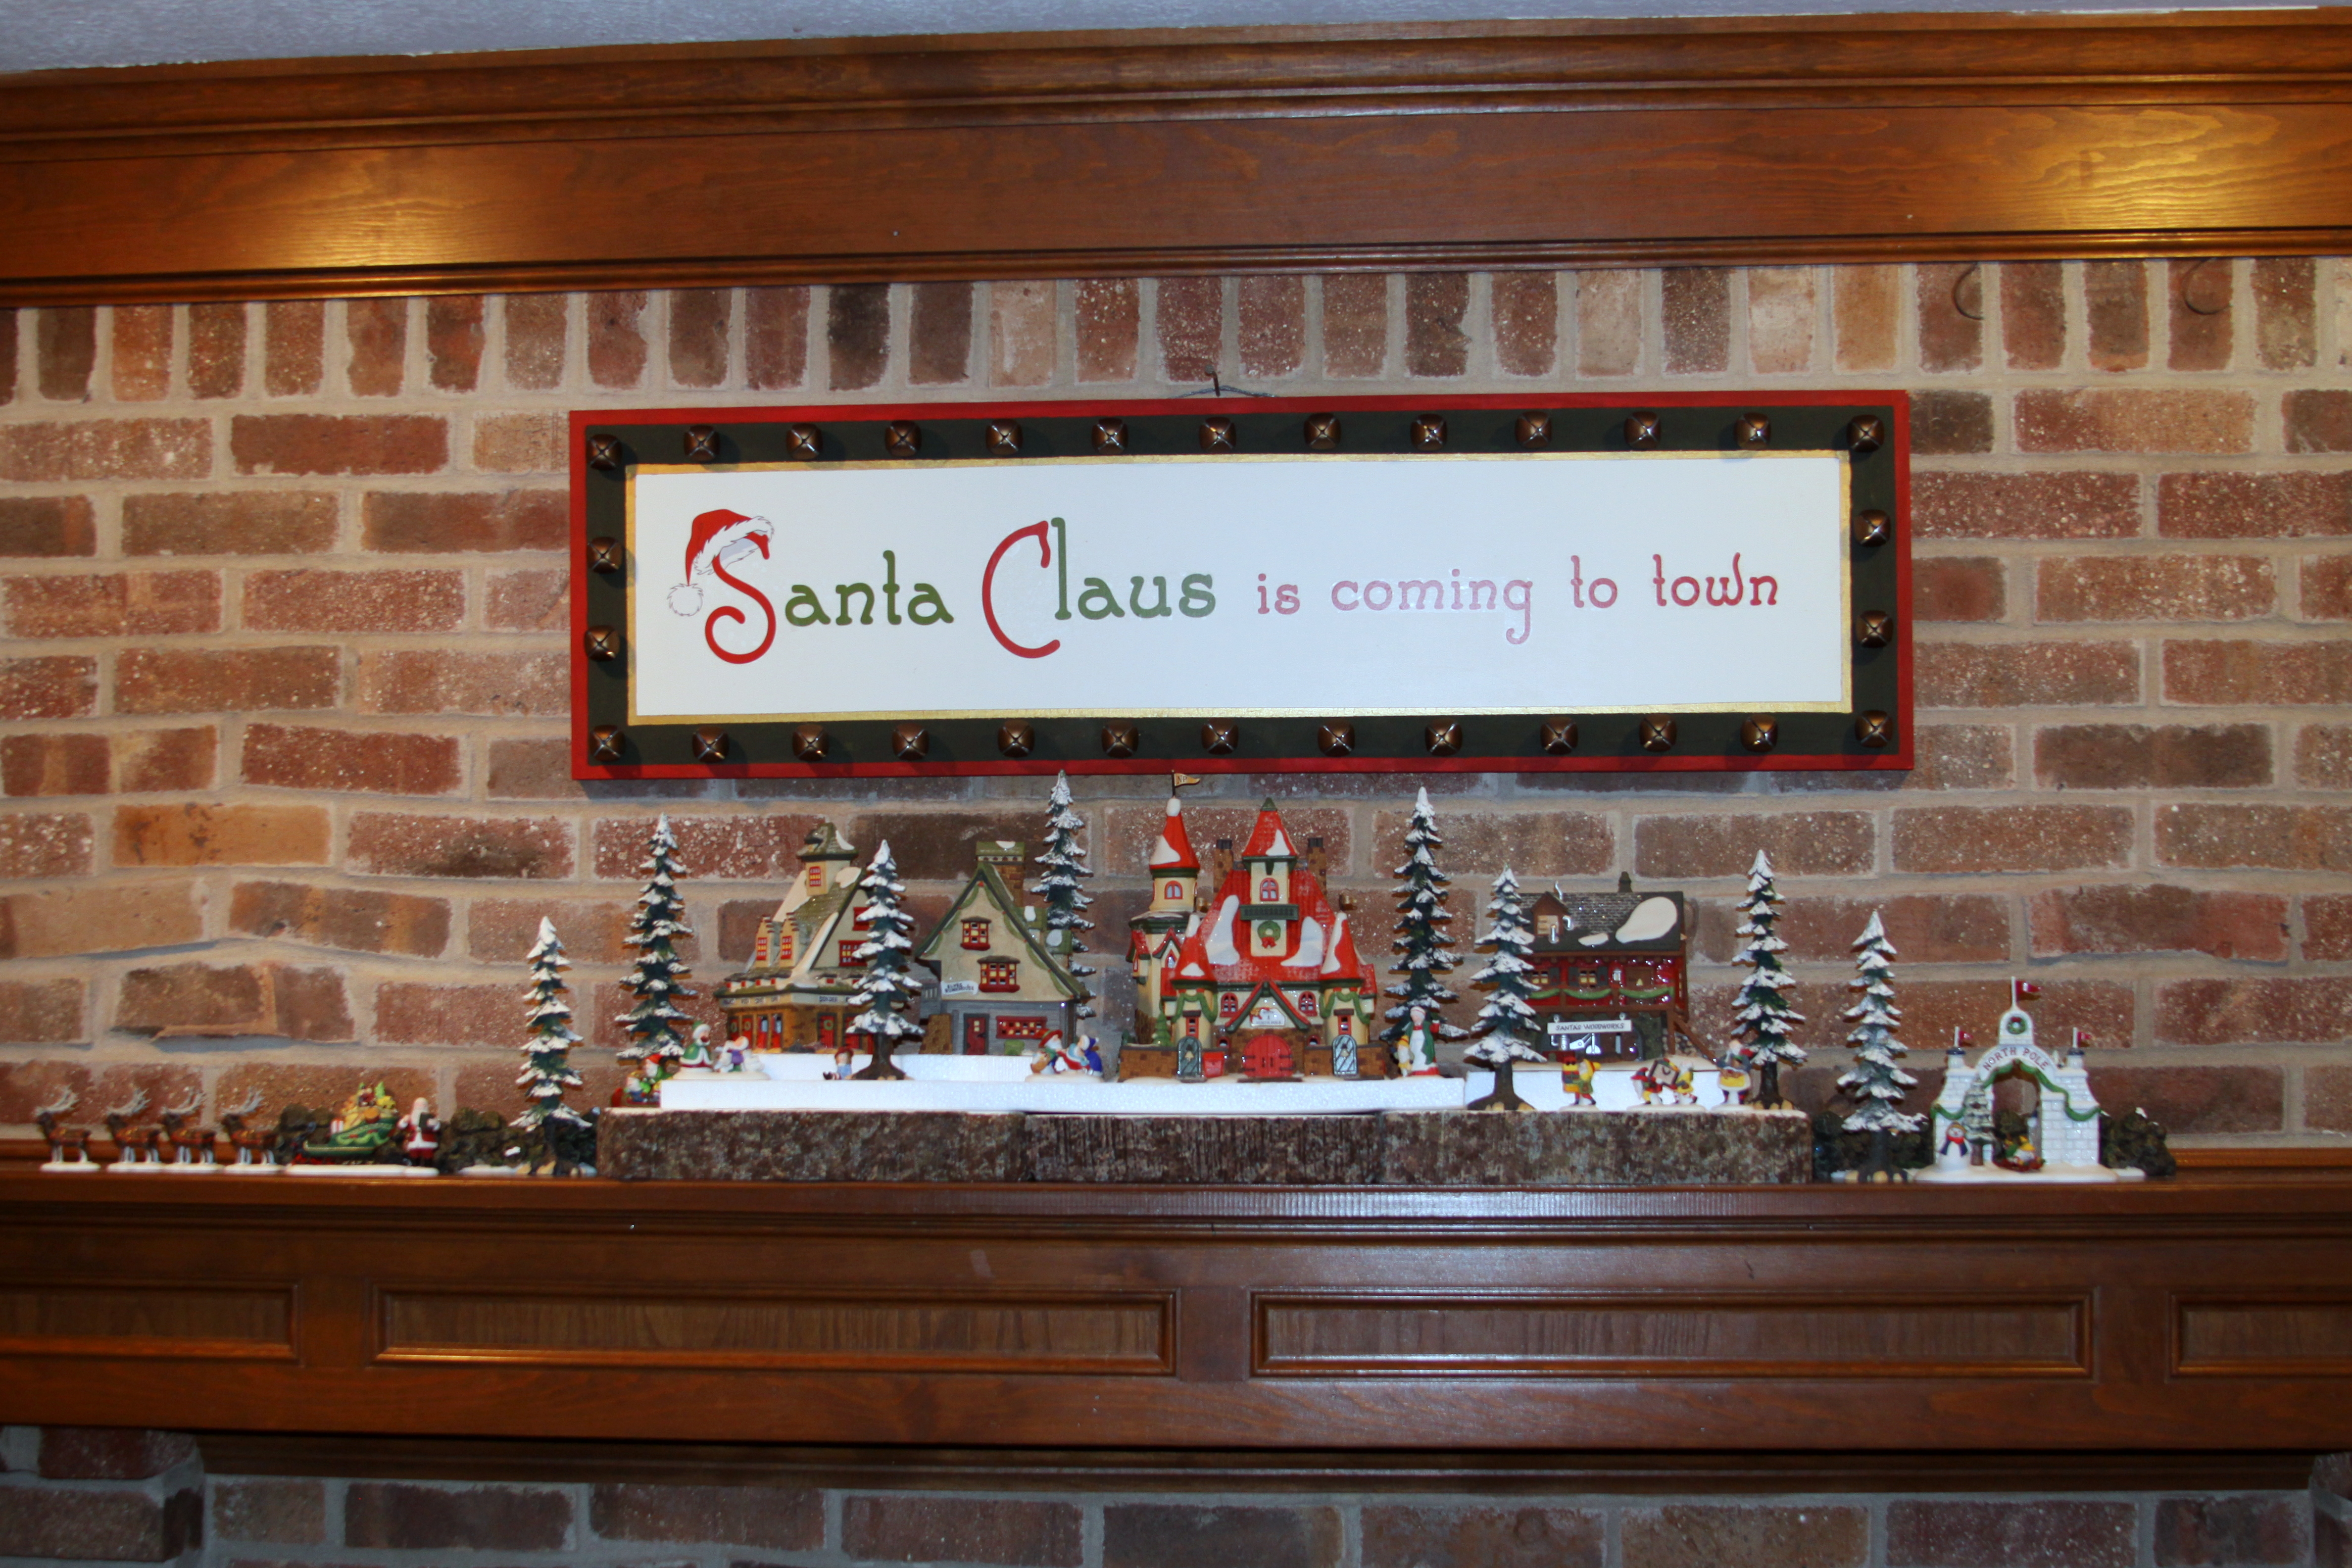
A SPECIAL CRAFT NOTE: One of the reason’s that I displayed the North Pole Village on the fireplace mantel was because I had made a special Christmas sign last year to hang over the fireplace instead of the English landscape painting that is normally hung there during most of the year. The seasonal sign uses a Christmas window/wall decal and the wording, “Santa Claus is coming to town”, is perfect to hang above the North Pole Village. The sign is made from a painted wood board cut specifically to fit the space requirements of the decal with a margin of a couple of inches for me to add about 30 bronze jingle bells for just the right decorative touch, I was very happy with the results of this Craft project! (The sign was very easy to make, please see the instructions for similar seasonal signs in the Craft post – Halloween signs. The steps are almost the same as the ones I used to create the Christmas sign but with different window/wall decals and accessories)
The North Pole main display pieces – the buildings
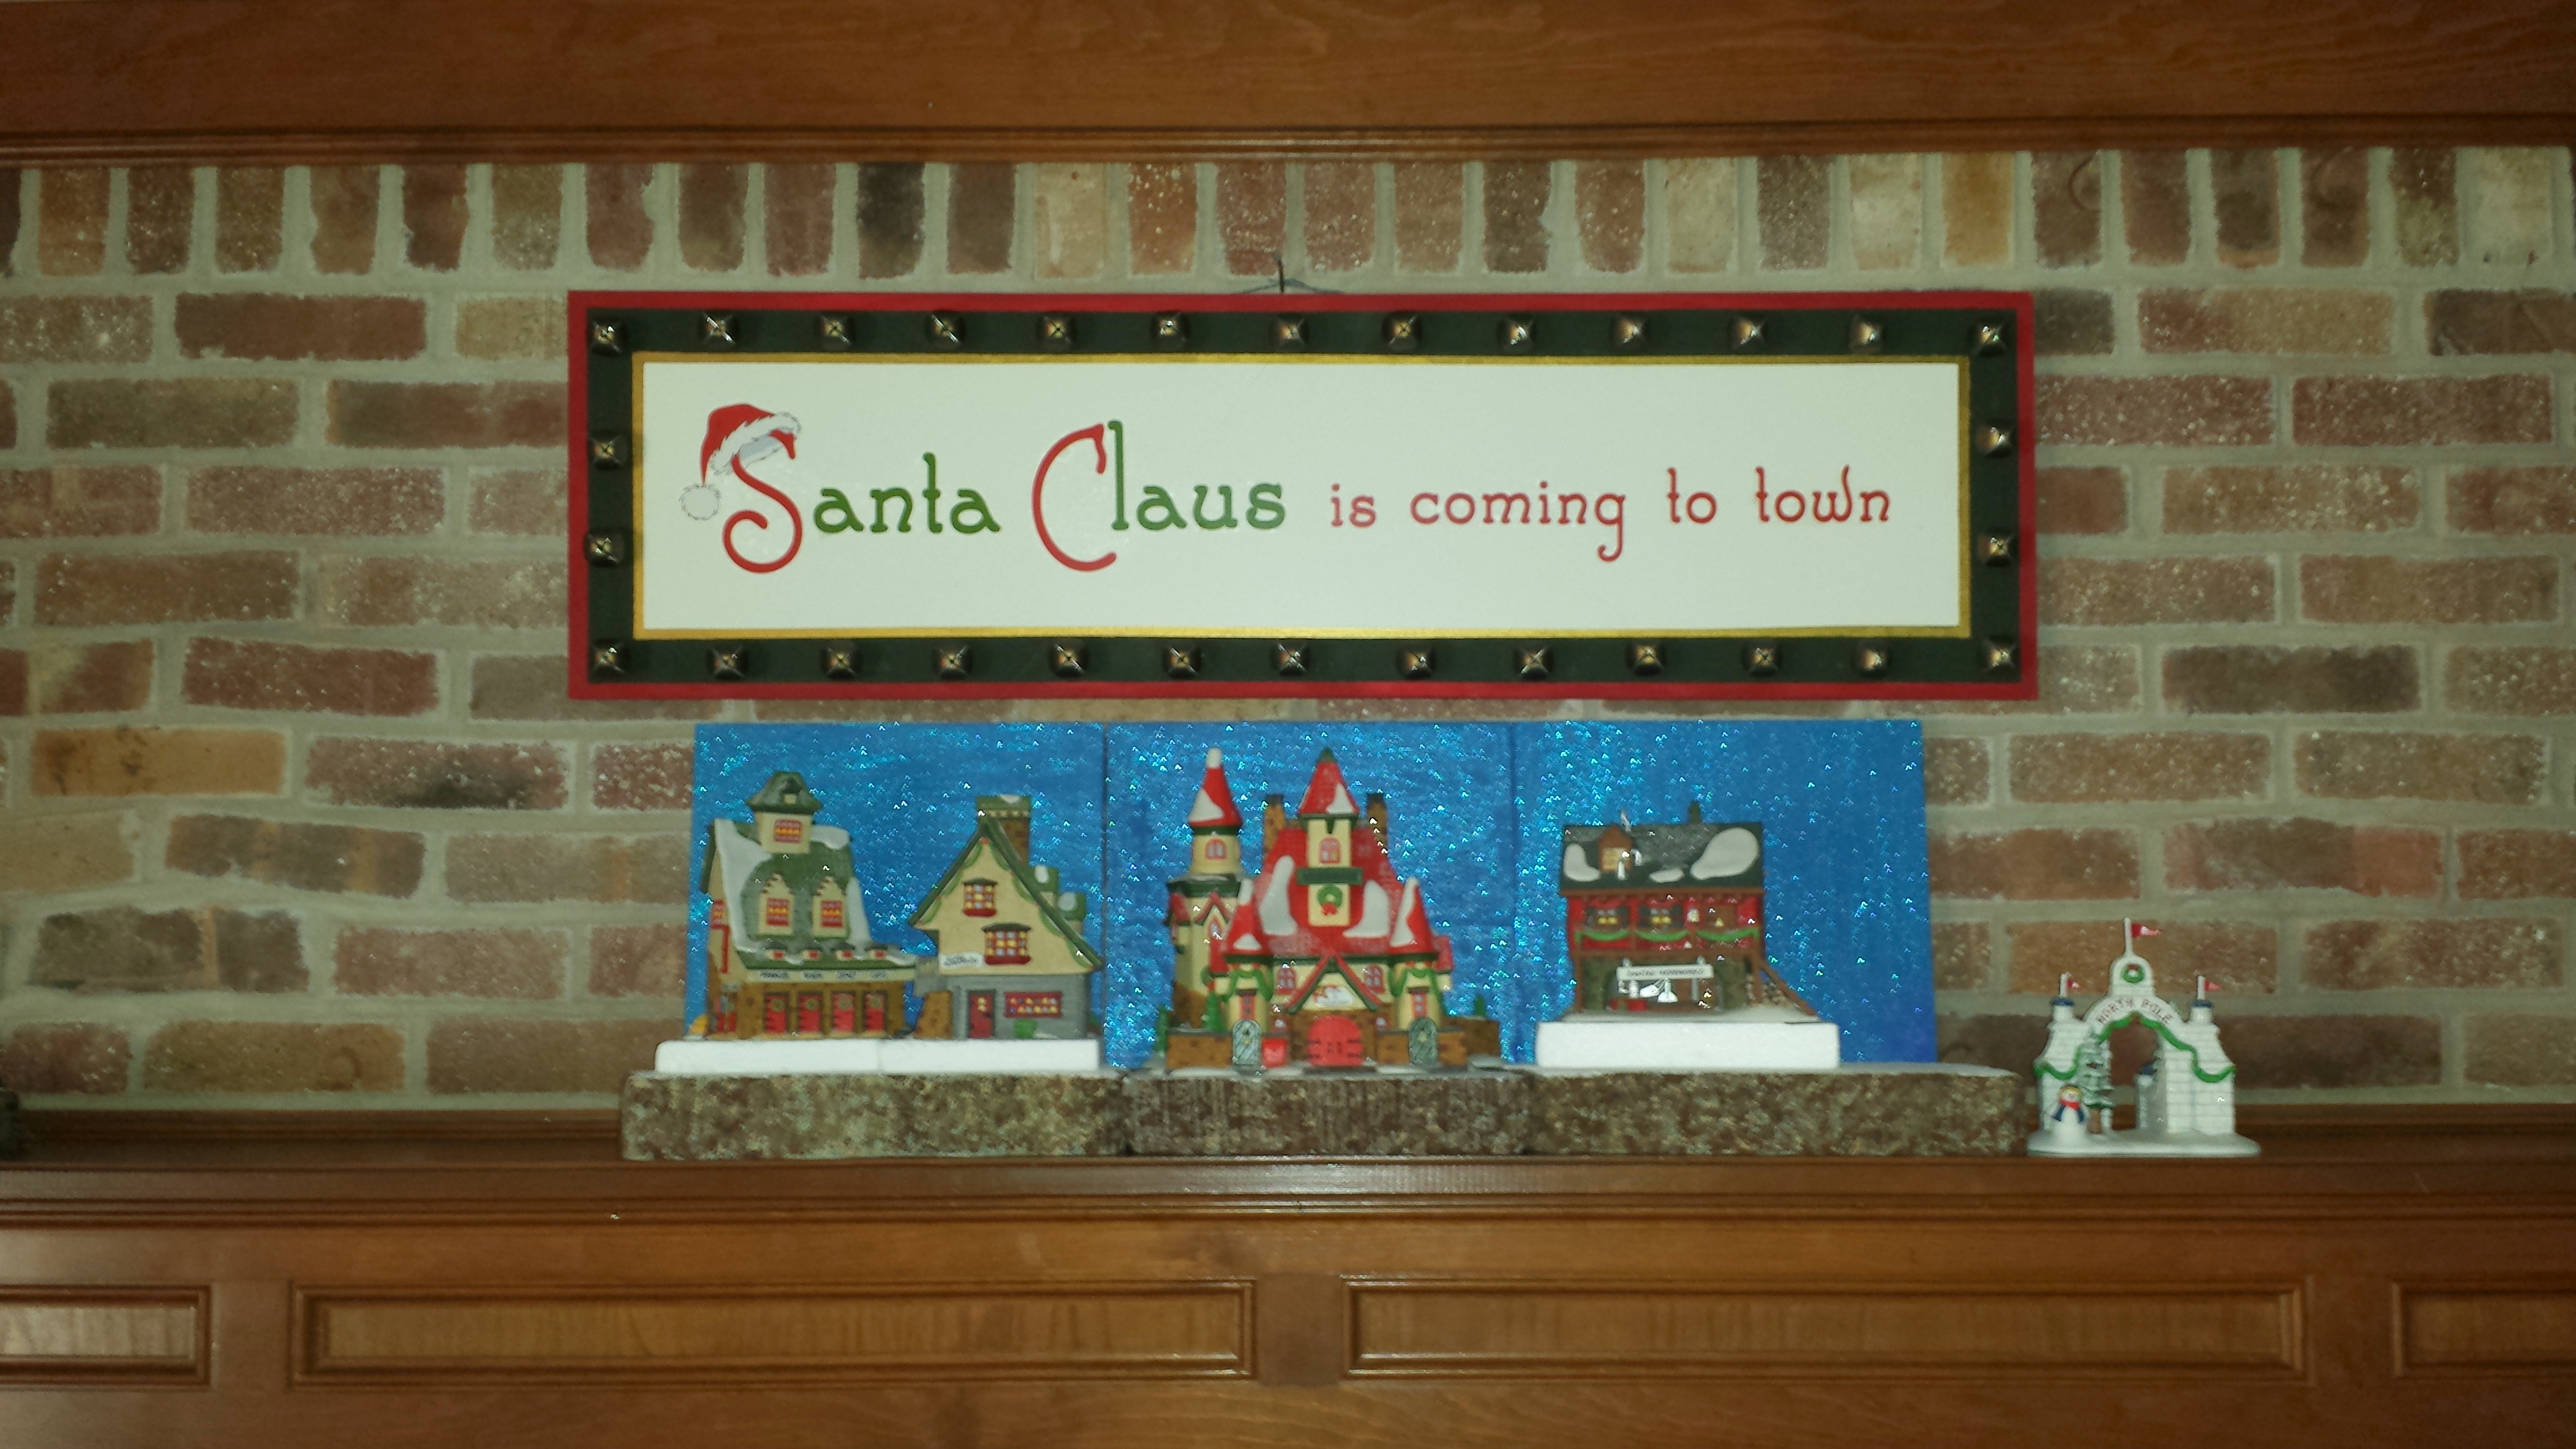
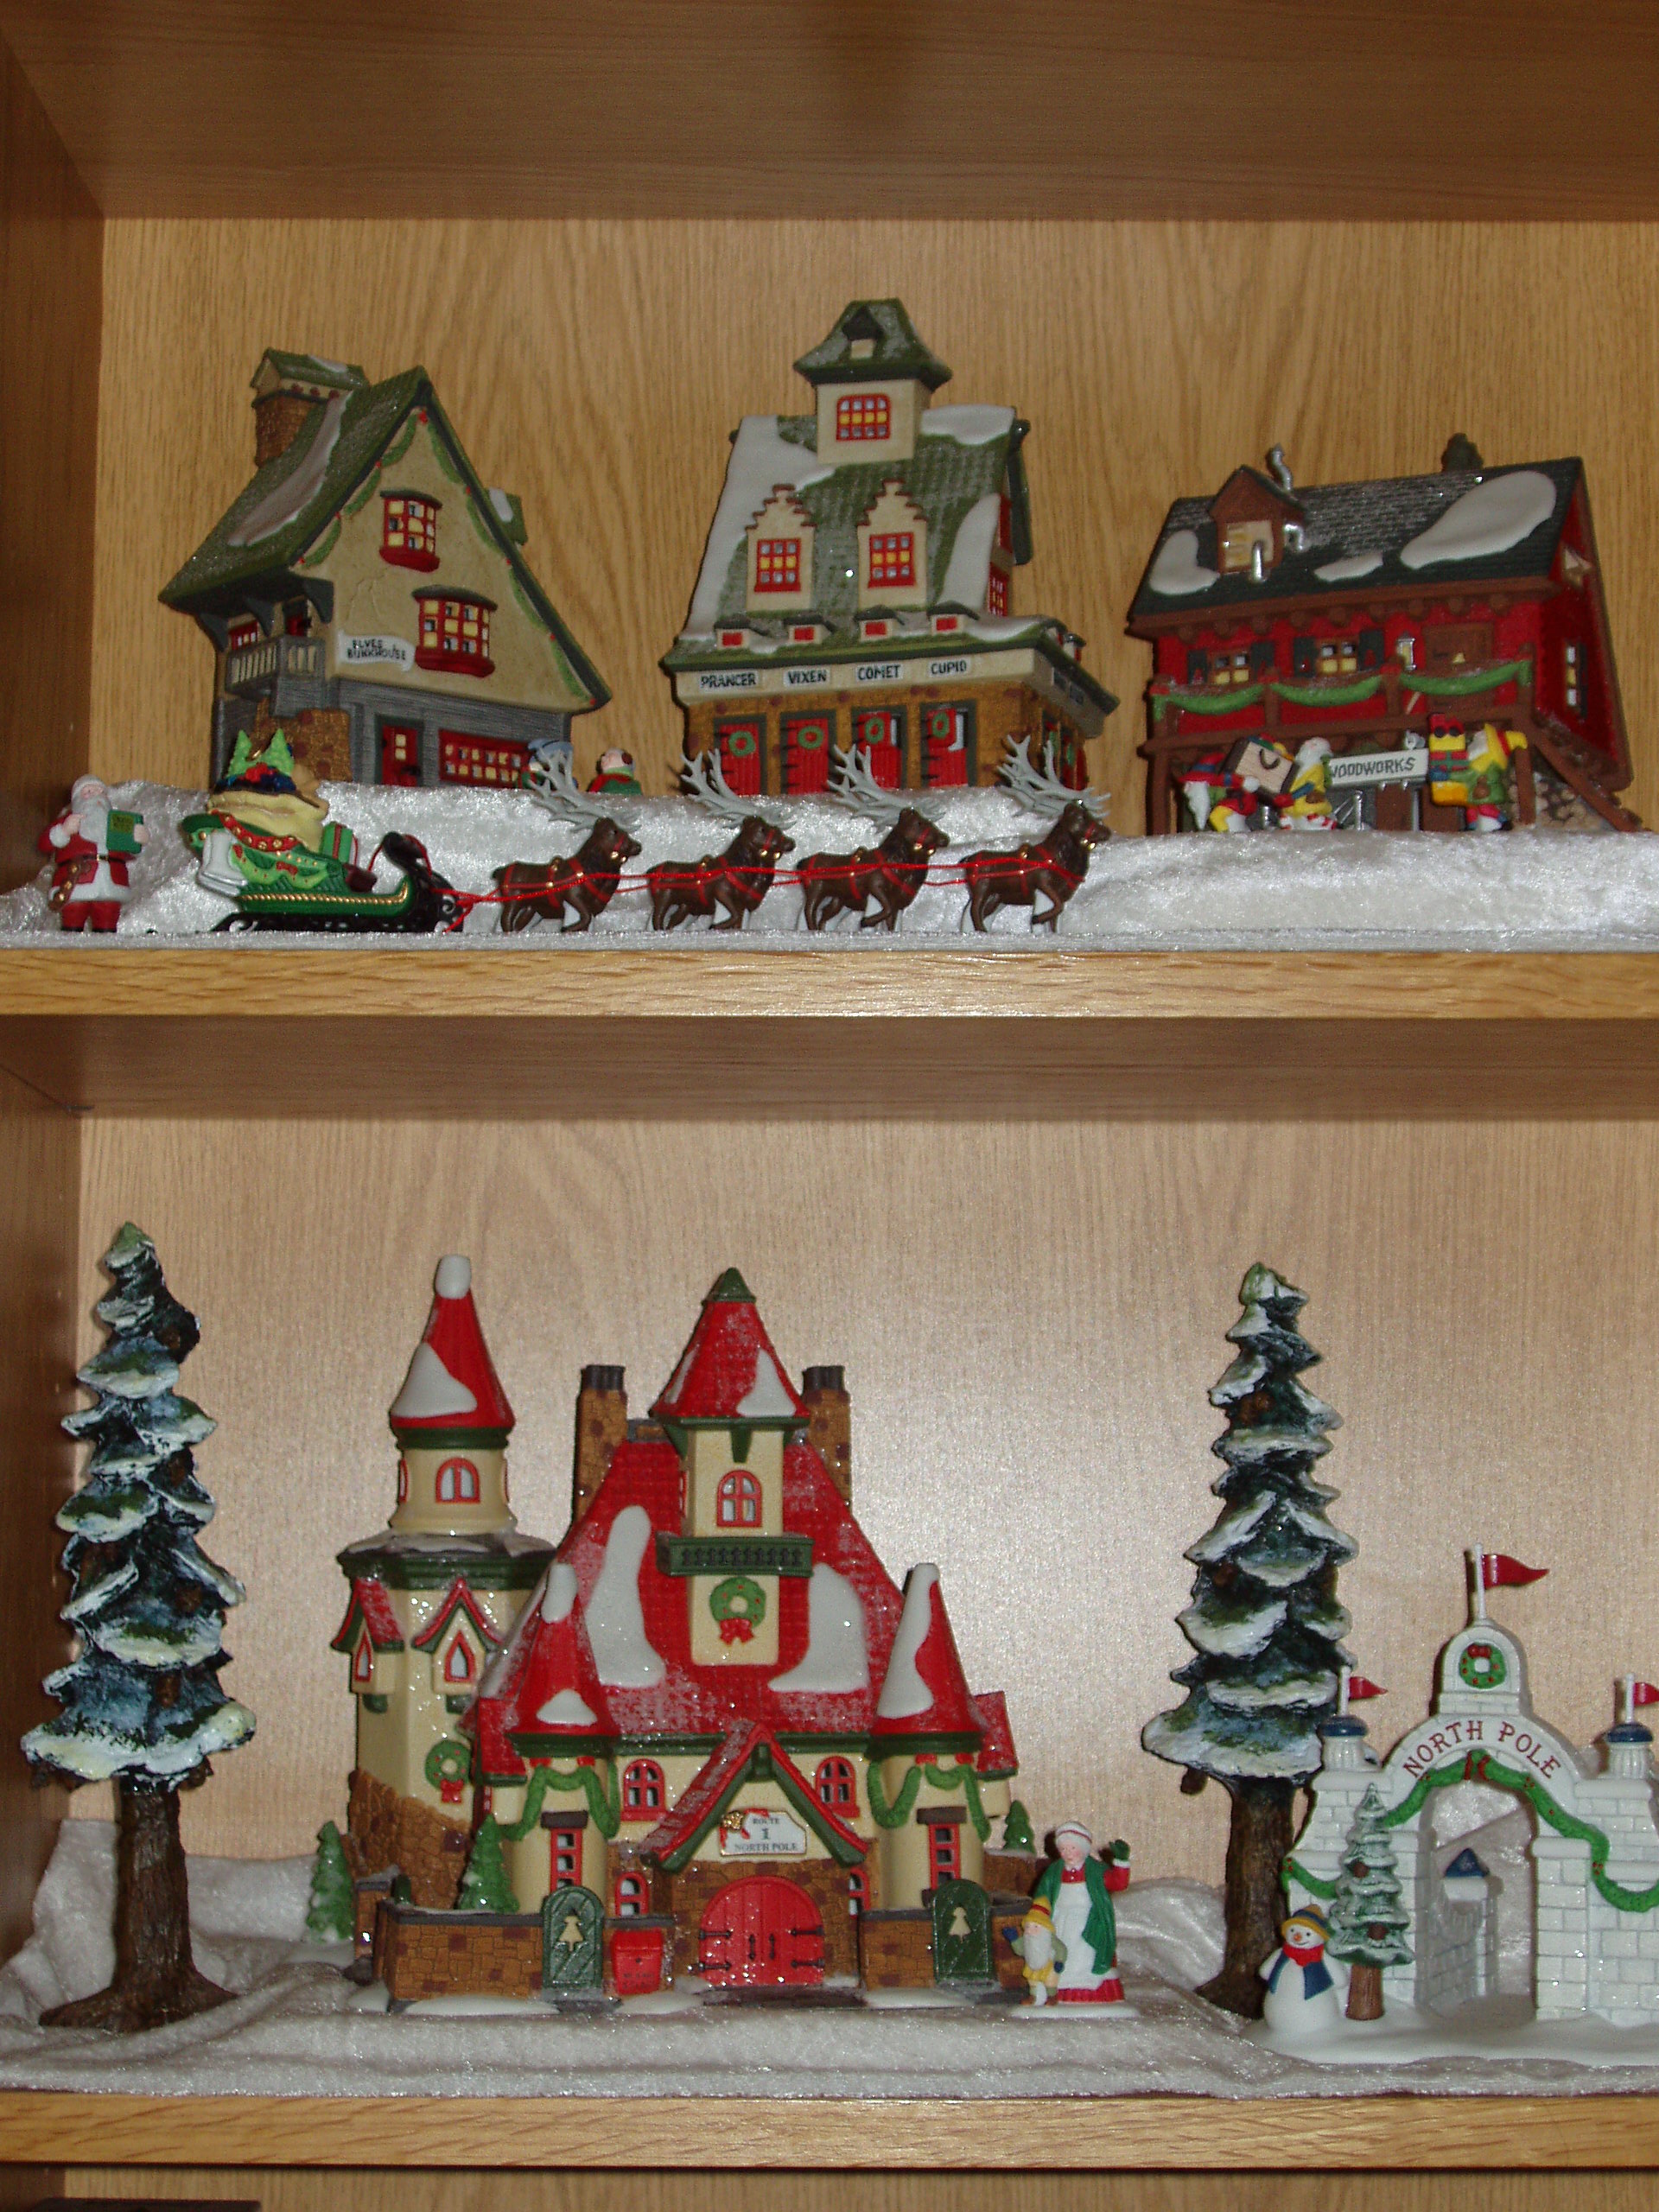
25 years ago I purchased three Department 56 North Pole Village buildings; they were the “Route 1 North Pole” the home of Santa & Mrs. Claus, the “Elf Bunkhouse” and the “Reindeer Barn”. Later I added “Santa’s Woodworks” and the “North Pole Gate”. These are the only buildings in my collection so, compared with other Department 45 collectors, my display is very small. I like the idea of a smaller display for several reasons, the first is that there is relatively less money spent and the second reason is that the display has more flexibility to set up in any room or location in our house. I appreciate the idea of the more elaborate displays but I prefer my set up time to be only a few hours as opposed to a process of long hours sometimes over a period of several days.
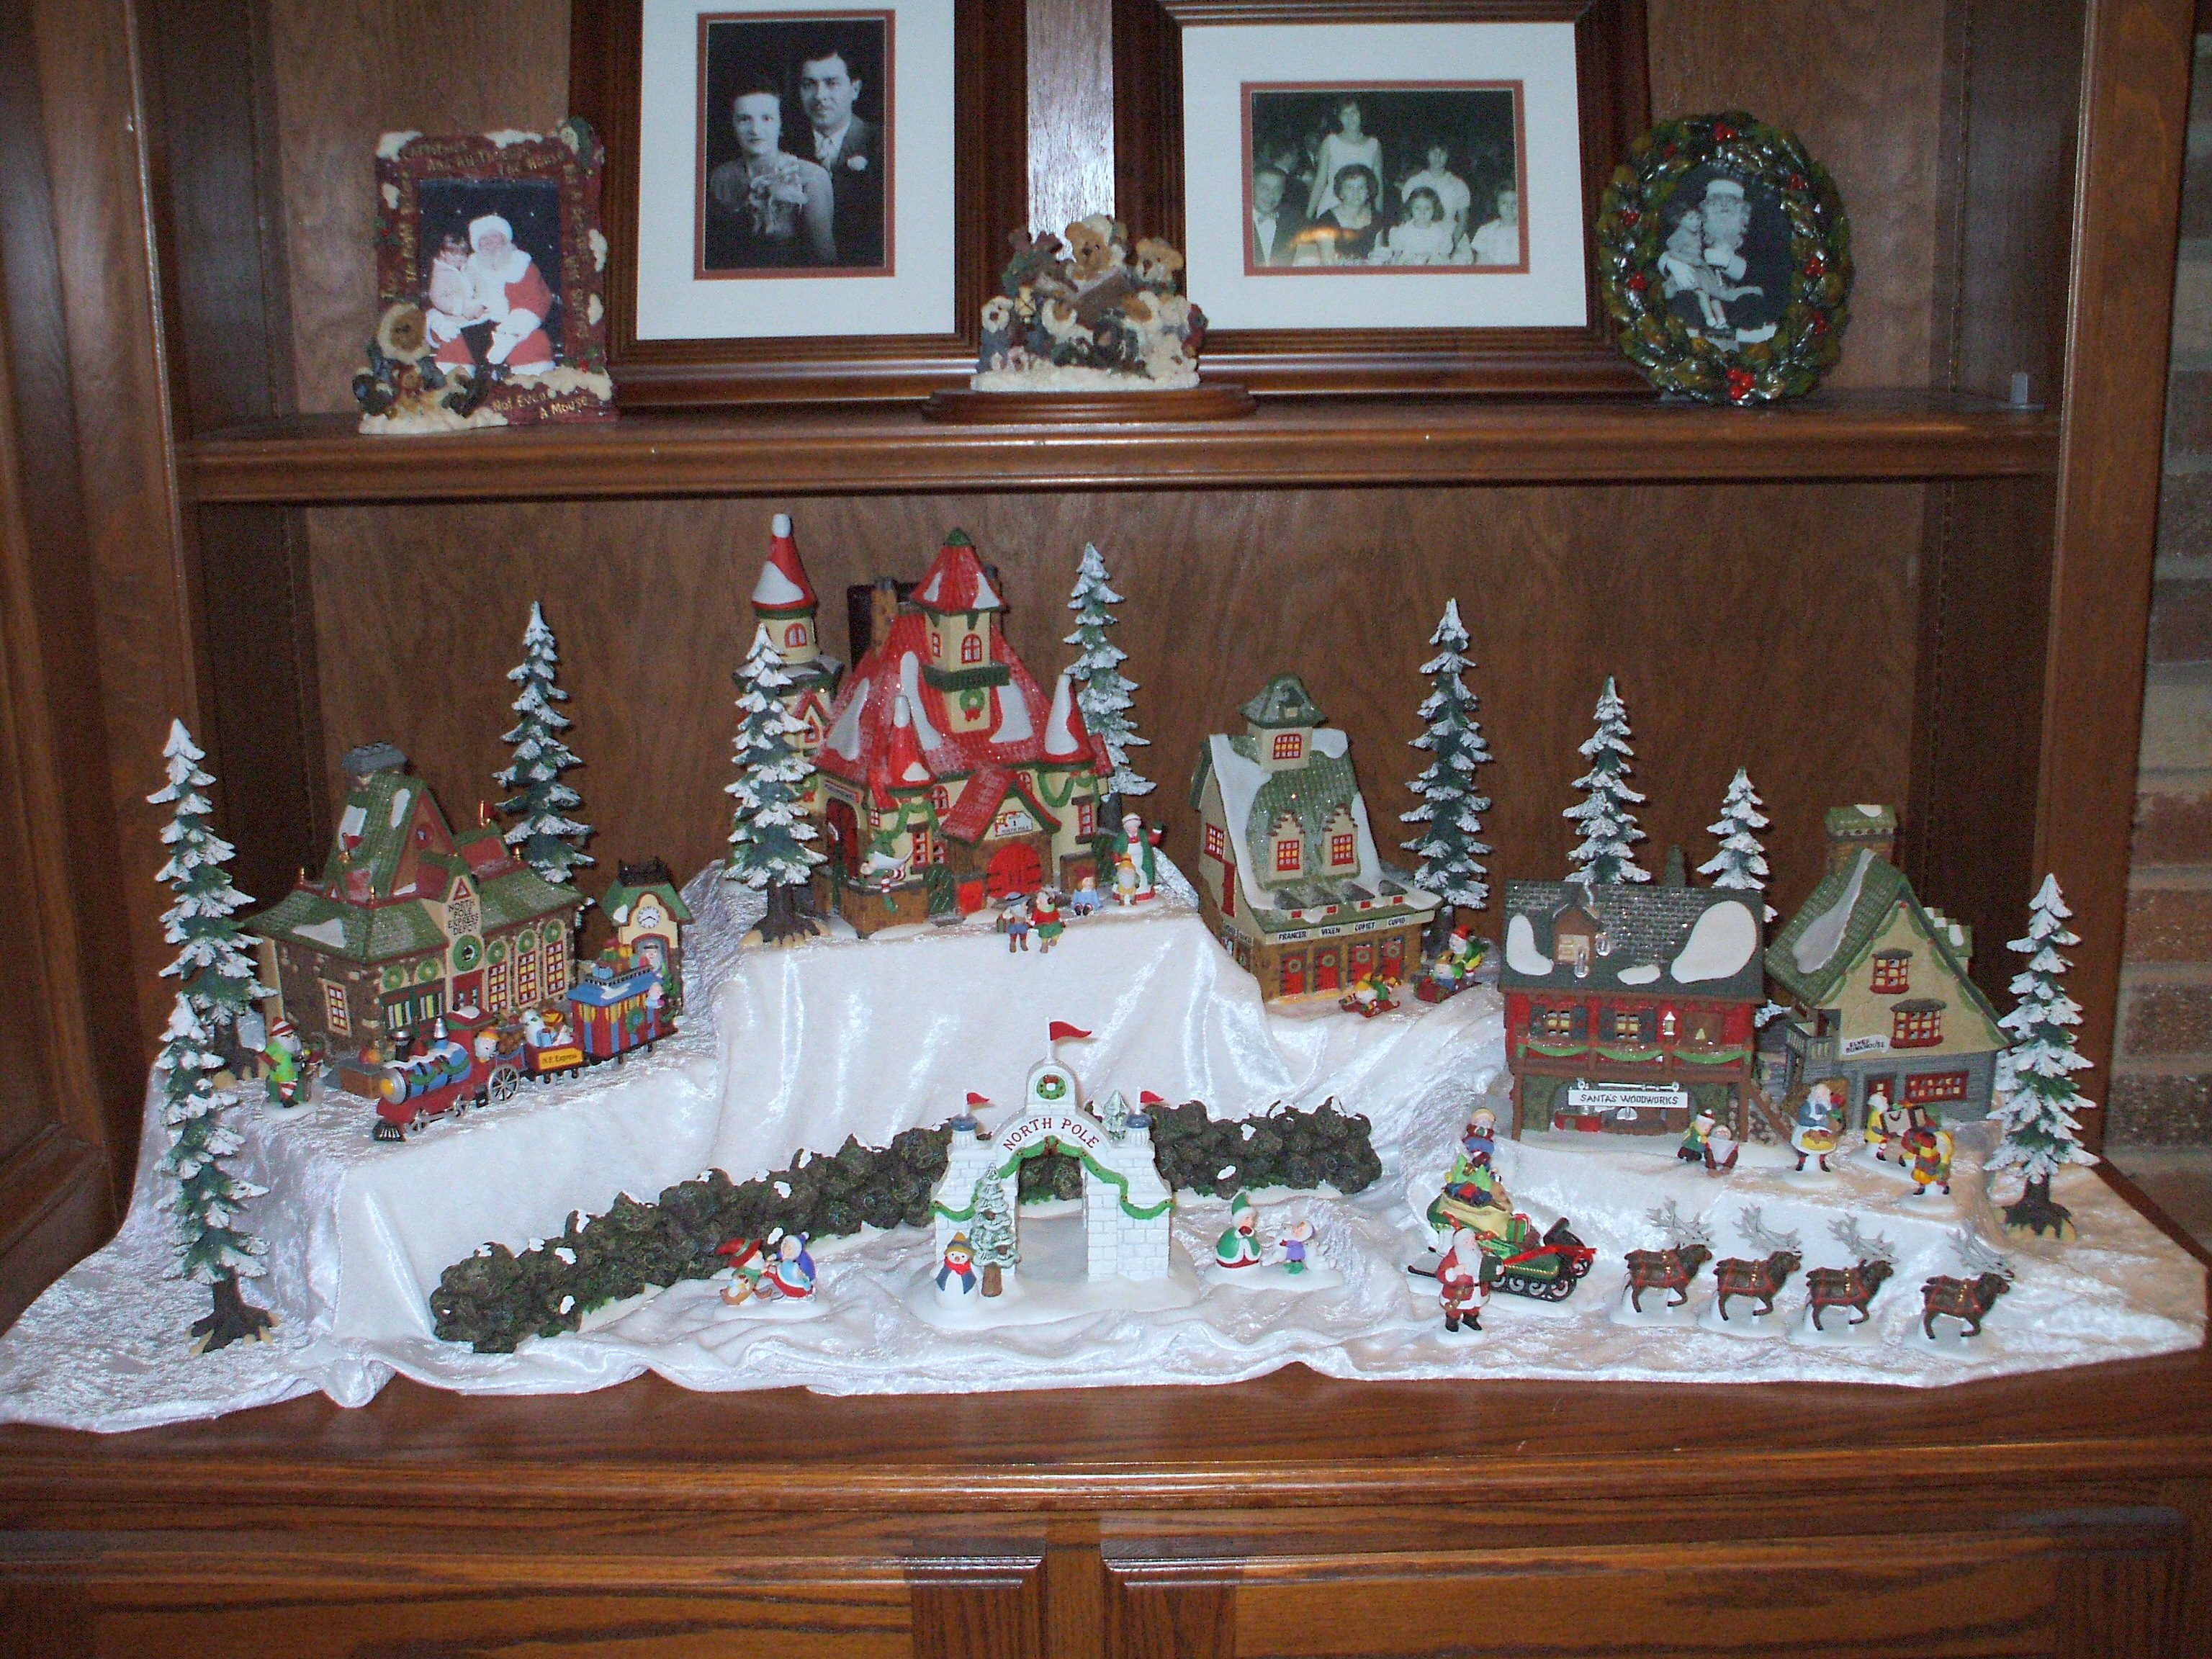
Almost every time I set up the North Pole Village, I always position “Route 1” near the center of the display because it is the largest piece and also because I think it should be the focal point. To the left, I placed the “Elf Bunkhouse” and the “Reindeer Barn”. To the right, I placed the “Santa’s Woodworks” building and further to the right, off the display base, I place the “North Pole Gate”. (These building positions are almost identical to the previous year’s display)
When I am placing the buildings in the display, I will sometimes position them at different angles because I think it adds more interest to the display instead of having everything perfectly lined up in a straight row. I will also raise the height of the different buildings to also create levels that will give additional interest to the display. I use white Styrofoam about one inch thick and cut it to fit the dimension of the buildings with an extra one or two inches around the base allowing space to set the display’s figurines or accessories, if I want a higher platform I will stack two pieces of Styrofoam. The white color of the Styrofoam matches the white surface of the base for an uninterrupted look that doesn’t break the illusion of a snow covered ground.
The North Pole display landscape
The next items that I add to the North Pole display are three sets of 7”, 8” and 9” pine trees for a total of nine trees that I scatter across the display. I usually position the taller trees to the back and the shorter trees to the front of the display. These trees were purchased at Walmart several years ago for a great price, they were less expensive than the Department 56 trees and I was able to purchase almost twice as many trees for about half the price of the name brand ones. Buying from other sources assures I am not limited to the selection only available through Department 56 and my display accessories will be unique.
On either side of the display base I set up several sections of rock wall, this is another example of buying from another source. If you keep your eyes open while shopping in the stores right after the Christmas items go on sale it is a great opportunity to add to the items for your display. By positioning the rock walls off the base and onto the fireplace mantel it helps to continue the display with additional items that did not fit onto the base. One example is the North Pole Gate is positioned off to the right of the base but becomes an extension of the scene with the rock wall behind.
Also added to the North Pole display are several Department 56 “Candy Cane Lamposts” that are positioned between the buildings. To complete the landscape, and even though the top of the base is white to give the illusion of snow, I add more artificial snow to the display to make it even more of a winter wonderland!
The North Pole display accessories – people and animals
The last items that I add to the North Pole display are Santa and Mrs. Claus, the elves and set of reindeer with the sleigh loaded with presents. Santa is positioned near the sleigh checking his list of naughty or nice boys and girls. It is set to the left of the base and on the fireplace mantel in front of the rock wall. Mrs. Claus is standing in front of the Claus home waving to goodbye to Santa. Scattered throughout the display are several elves, some are carrying packages of toys, having fun on sleds, sitting around the North Pole and some are training the reindeer. One special group of elves, “Proud Papa and Mamma”, represents our little family.
Finally, as previously mentioned, I don’t have any problem incorporating non- Department 56 items to our North Pole display. Sometimes these pieces and unusual elements can add interest to a display. An example of non-Department 56 figurines are several miniature ornaments that I found in a local retail store of the characters from the classic animated 1964 Christmas special, “Rudolph the Rednosed Reindeer”. Of course, there are Rudolph and Clarice the reindeers, Hermey the elf that would rather be a dentist than make toys, Yukon Cornelius the boisterous prospector and the gigantic Abominable Snow Monster. The scale of these miniature ornaments is perfect and using them is a wonderful way to incorporate the characters from one of my favorite childhood Christmas specials into our North Pole display!
Shown below are photos from past Christmas North Pole displays, as you can see items have been added or changed over the years and the display has been set up in various rooms of our home.
Pingback: Decor – English Christmas Decorations and Traditions | The Enchanted Manor